Facial Slimming
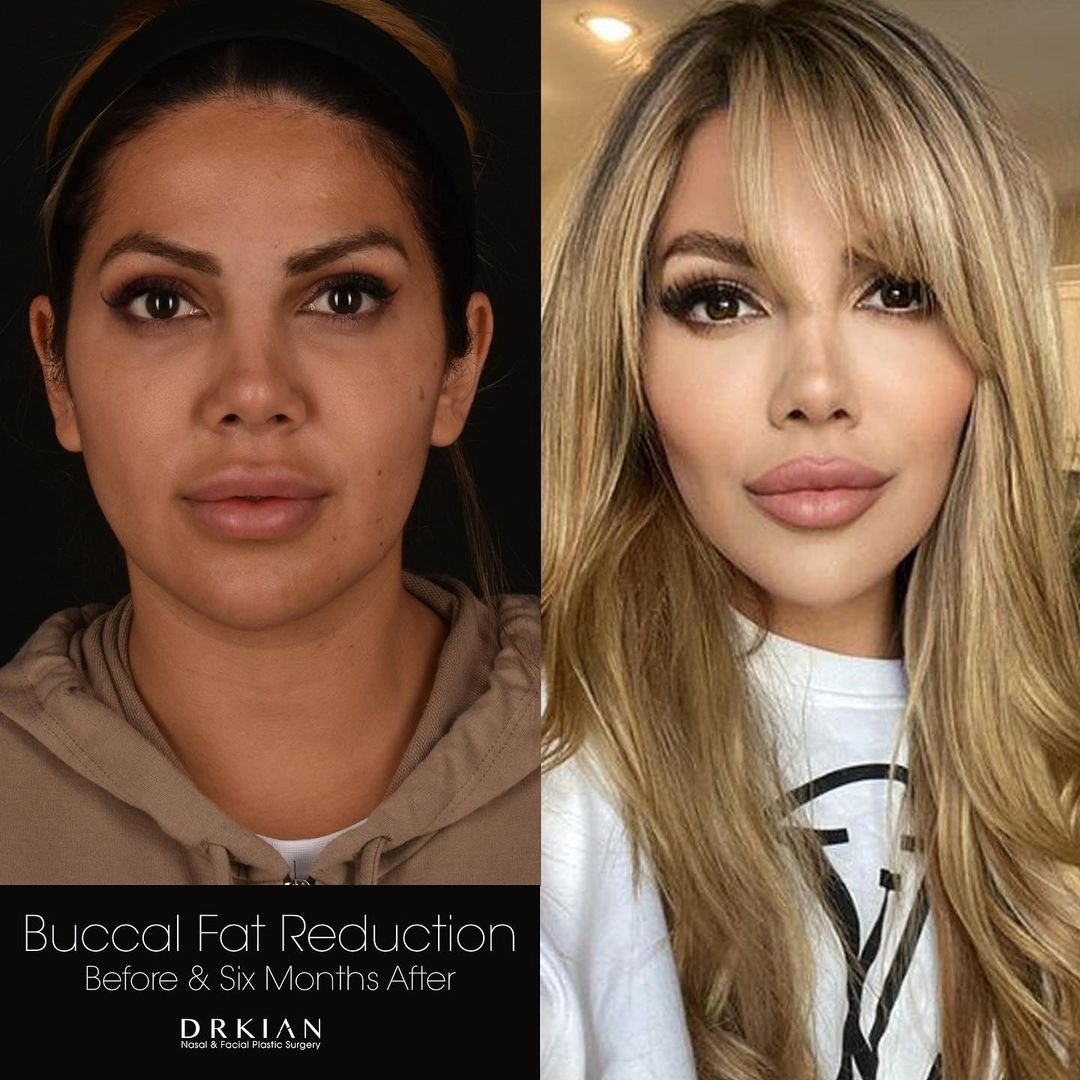
Buccal Fat Reduction: Before & After Six Months

Buccal Fat Reduction: Before & After Six Months

Buccal Fat Reduction: Before & After Six Months
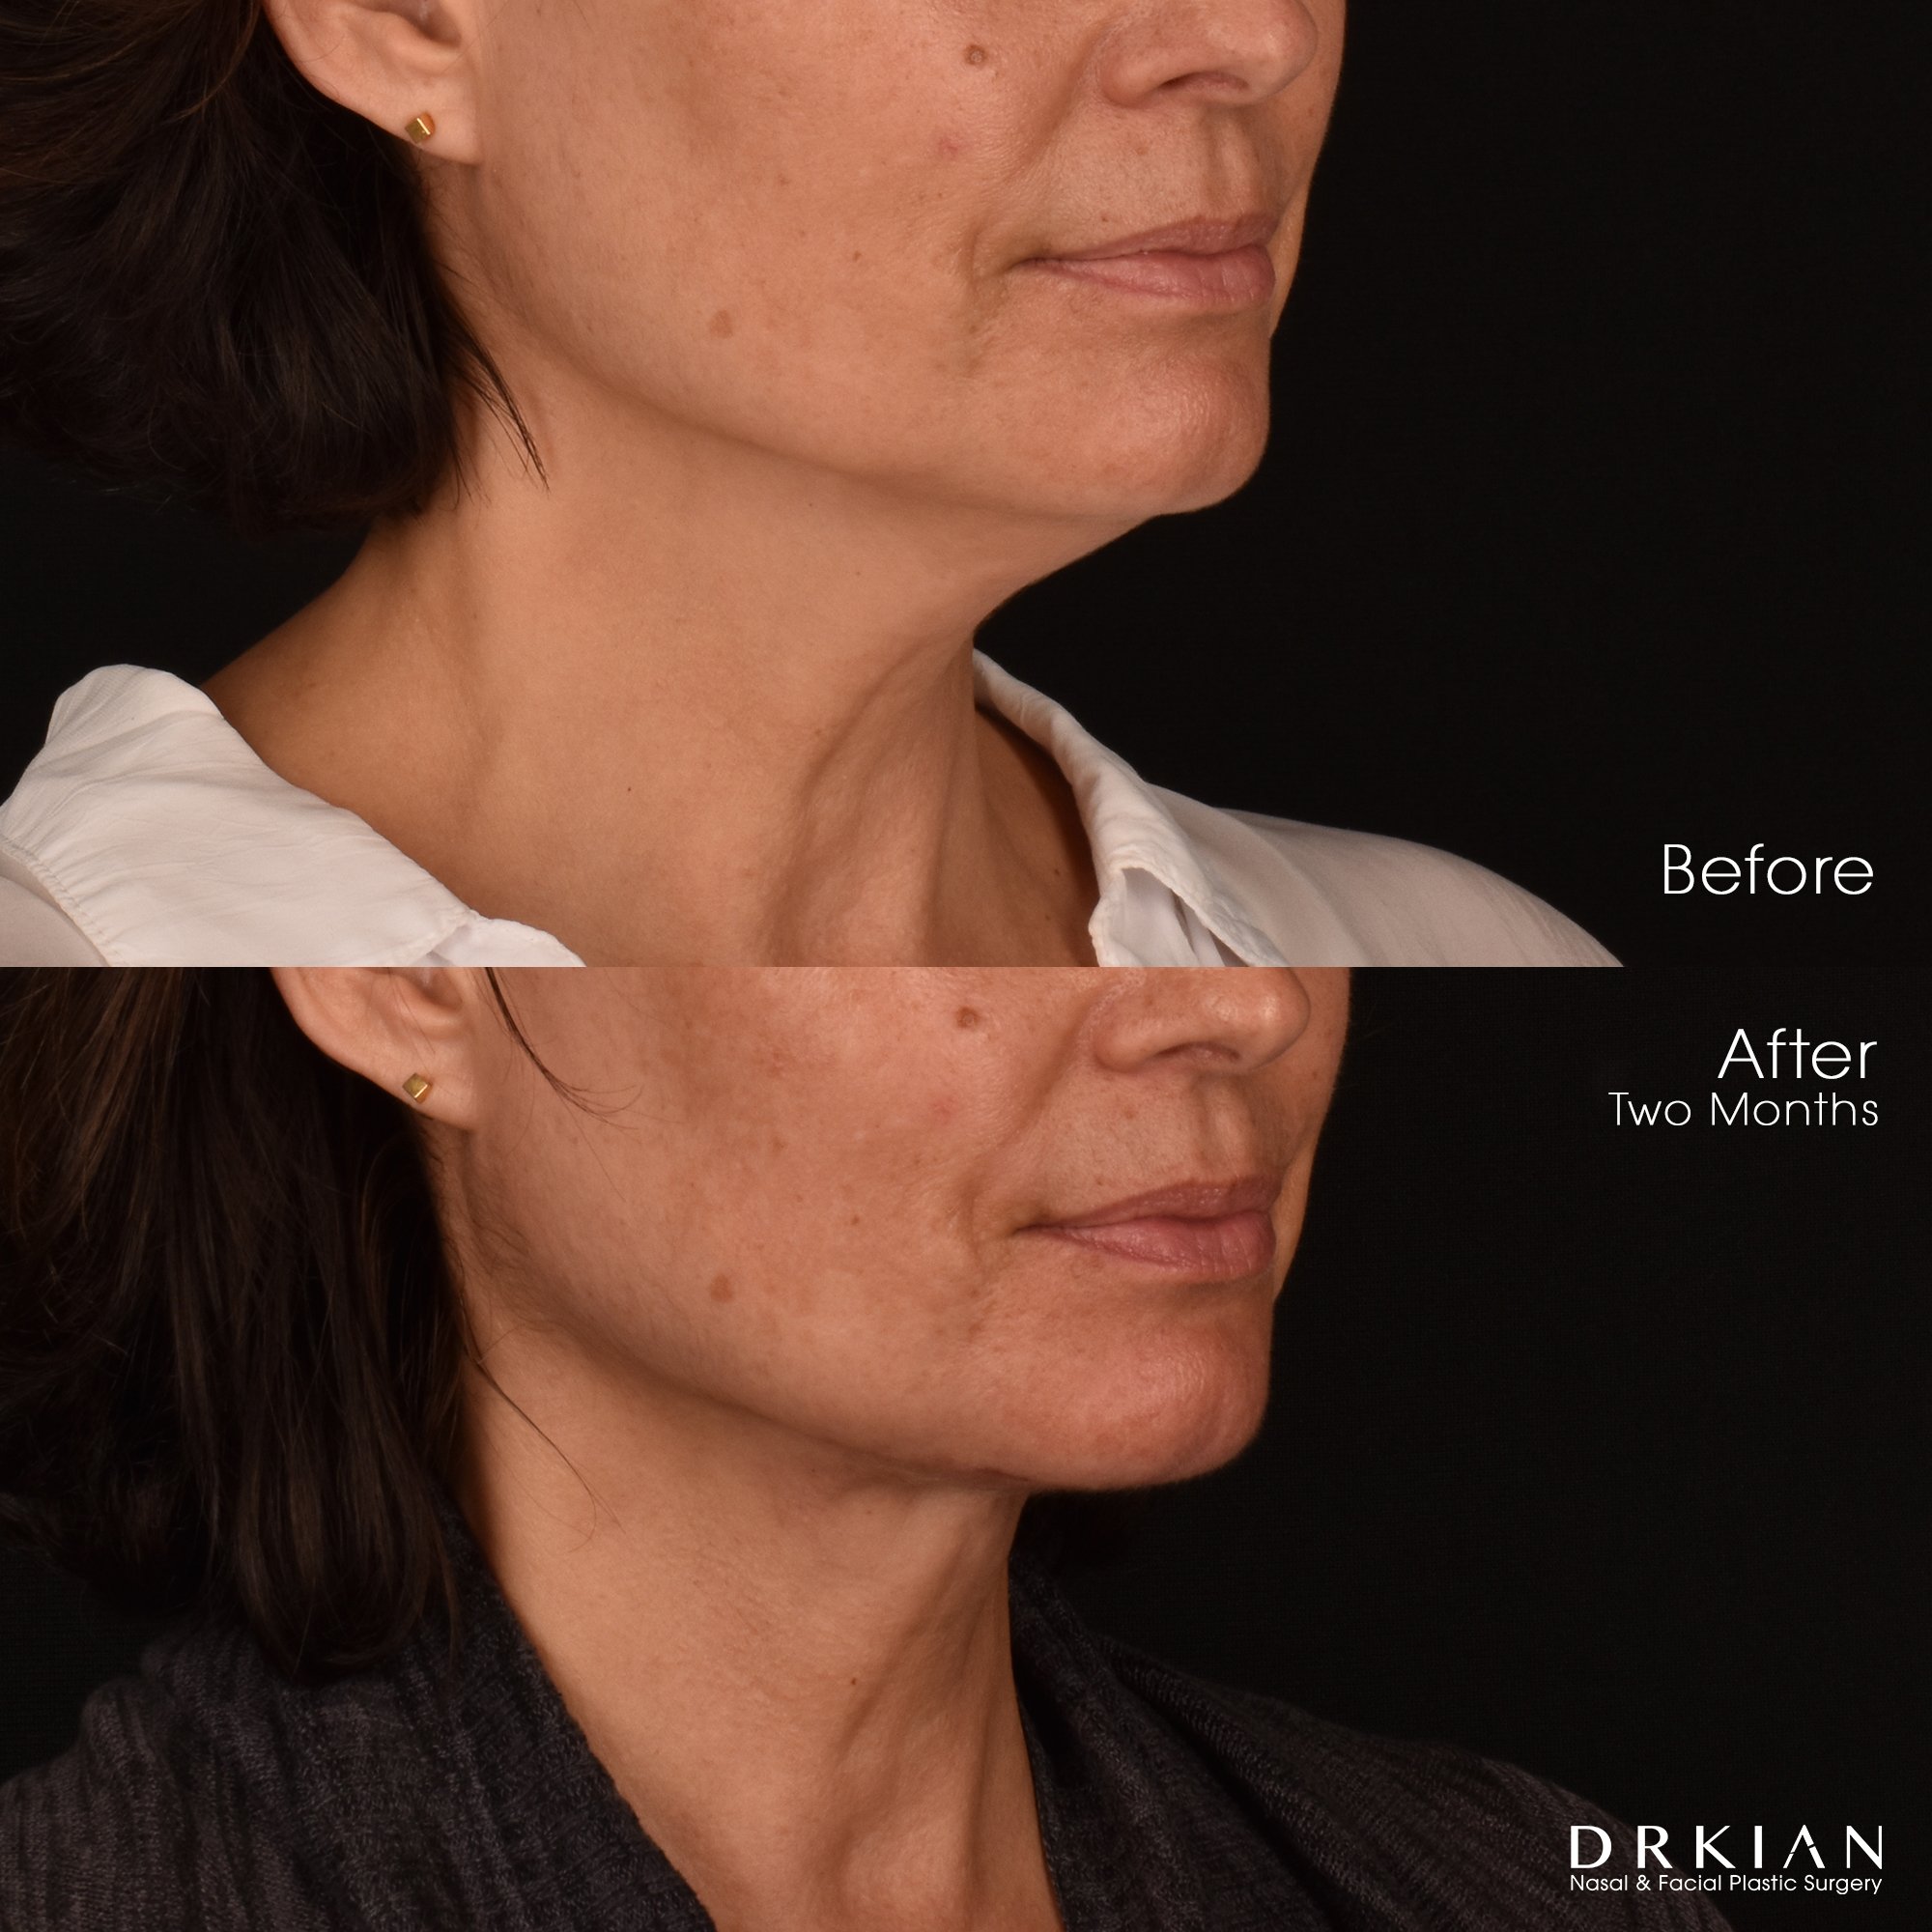
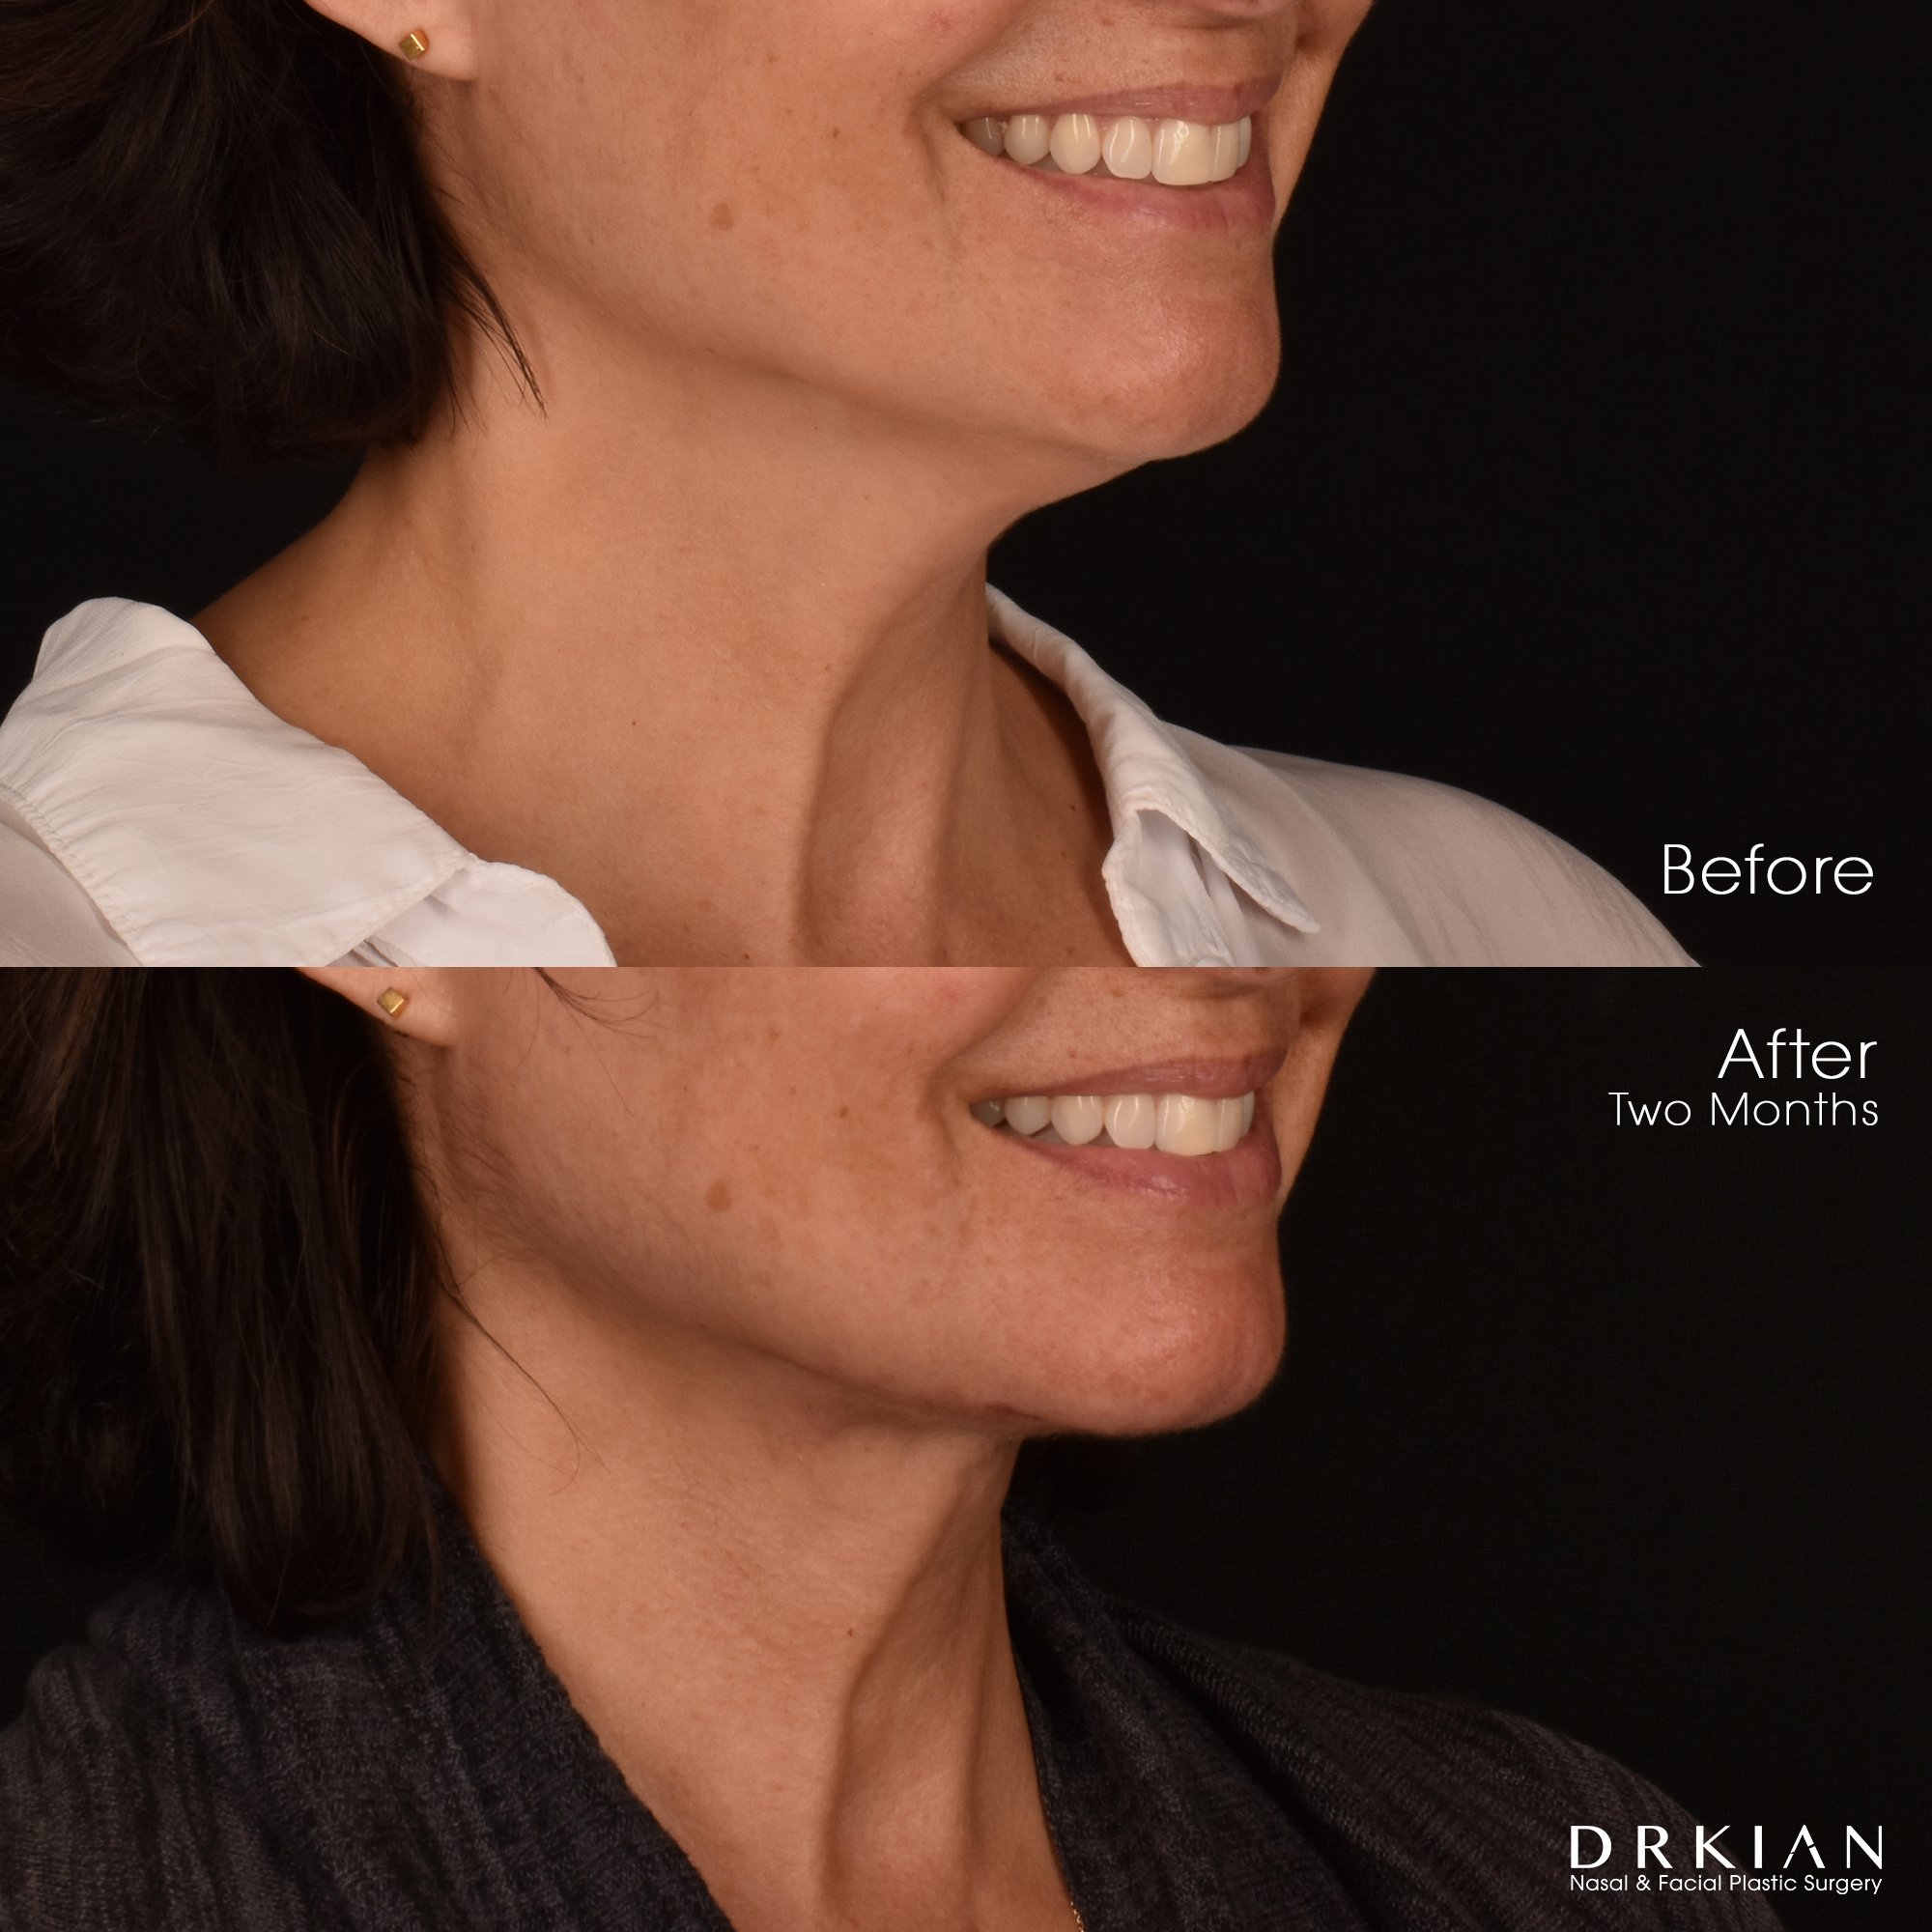
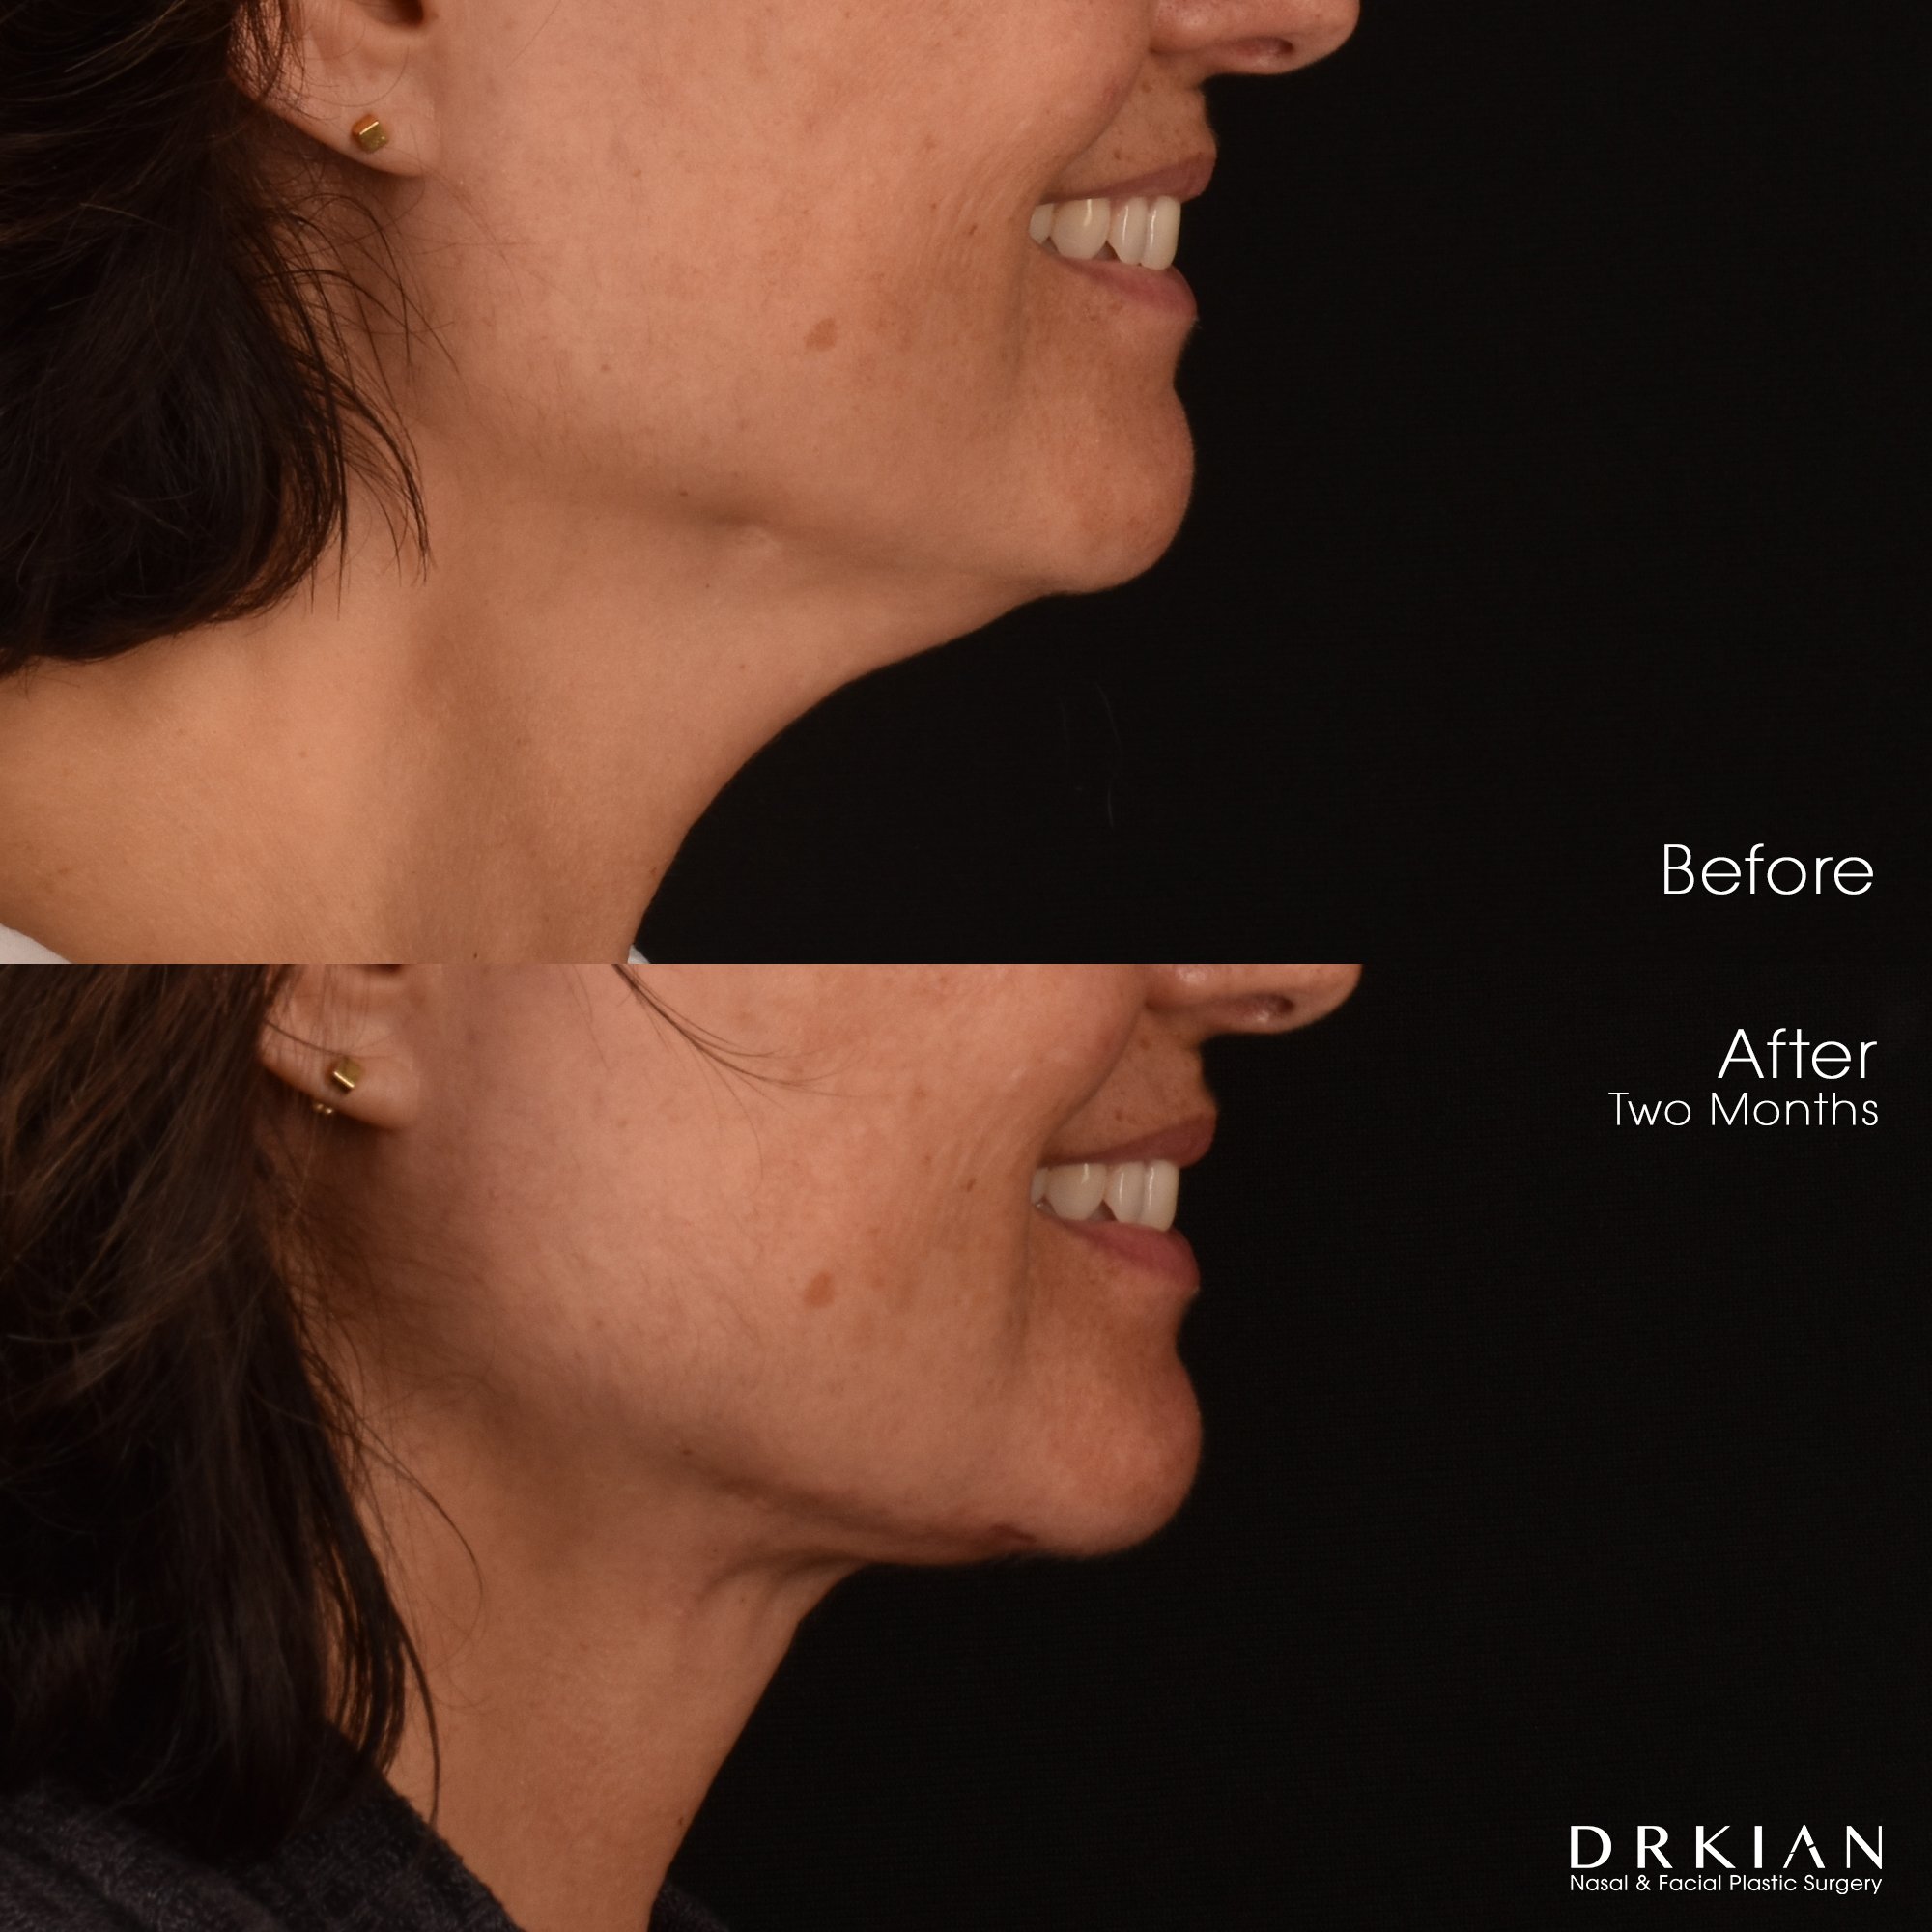
Deep Neck Lift with Limited Platysmaplasty + Embrace RF (FaceTite & Morpheus8 to Submentum & Lower 1/3 of Face): Before & After Six Months

Deep Neck Lift with Limited Platysmaplasty + Embrace RF (FaceTite & Morpheus8 to Submentum & Lower 1/3 of Face): Before & After Six Months
Deep Neck Lift with Limited Platysmaplasty + Embrace RF (FaceTite & Morpheus8 to Submentum & Lower 1/3 of Face): Before & After Six Months
Deep Neck Lift with Limited Platysmaplasty + Embrace RF (FaceTite & Morpheus8 to Submentum & Lower 1/3 of Face): Before & After Six Months
Deep Neck Lift with Limited Platysmaplasty + Embrace RF (FaceTite & Morpheus8 to Submentum & Lower 1/3 of Face): Before & After Six Months
Deep Neck Lift with Limited Platysmaplasty + Embrace RF (FaceTite & Morpheus8 to Submentum & Lower 1/3 of Face): Before & After Six Months
Deep Neck Lift with Limited Platysmaplasty + Embrace RF (FaceTite & Morpheus8 to Submentum & Lower 1/3 of Face): Before & After Six Months
Deep Neck Lift with Limited Platysmaplasty + Embrace RF (FaceTite & Morpheus8 to Submentum & Lower 1/3 of Face): Before & After Six Months
Deep Neck Lift with Limited Platysmaplasty + Embrace RF (FaceTite & Morpheus8 to Submentum & Lower 1/3 of Face): Before & After Six Months
Deep Neck Lift with Limited Platysmaplasty + Embrace RF (FaceTite & Morpheus8 to Submentum & Lower 1/3 of Face): Before & After Six Months

Deep Neck Lift with Limited Platysmaplasty + Embrace RF (FaceTite & Morpheus8 to Submentum & Lower 1/3 of Face): Before & After Six Months
Deep Neck Lift with Limited Platysmaplasty + Embrace RF (FaceTite & Morpheus8 to Submentum & Lower 1/3 of Face): Before & After Six Months

Deep Neck Lift with Limited Platysmaplasty + Embrace RF (FaceTite & Morpheus8 to Submentum & Lower 1/3 of Face): Before & After Six Months
Deep Neck Lift with Limited Platysmaplasty + Embrace RF (FaceTite & Morpheus8 to Submentum & Lower 1/3 of Face): Before & After Six Months

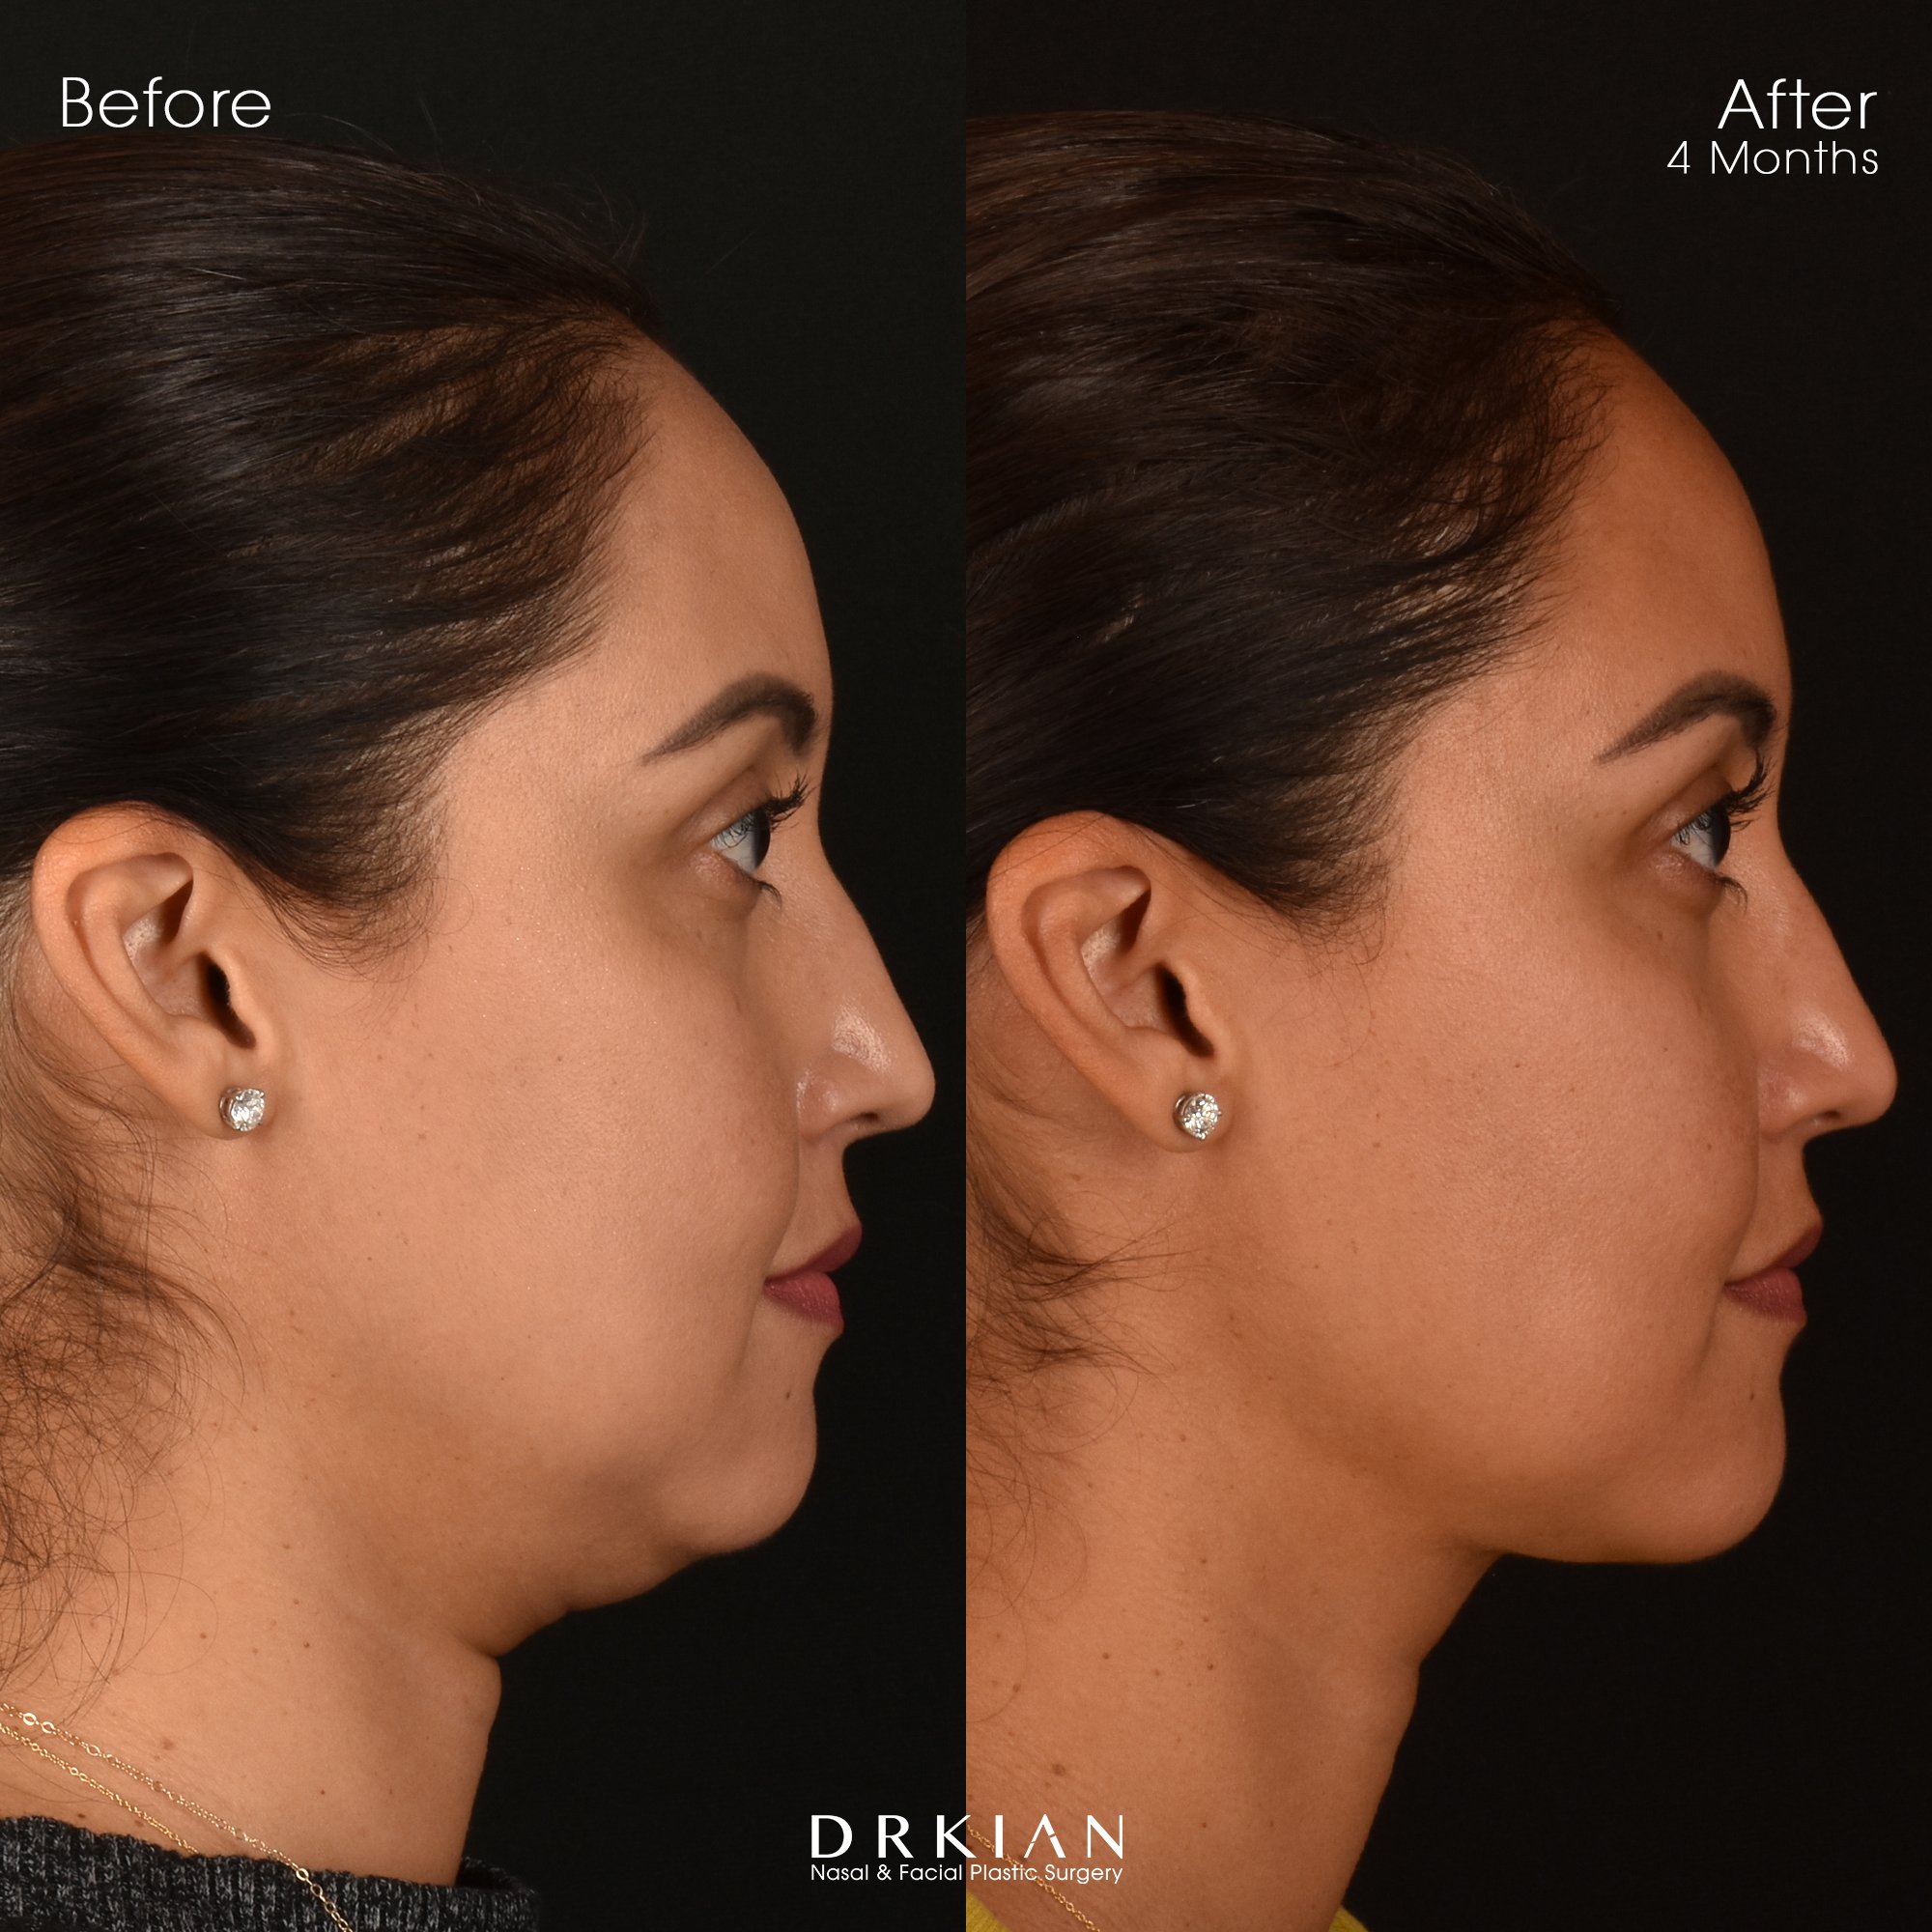
Rhinoplasty with Alar Base Reduction, Bilateral Turbinoplasty, Chin Implant, Deep Neck Lift and Buccal Fat Reduction: Before & After Nine Months
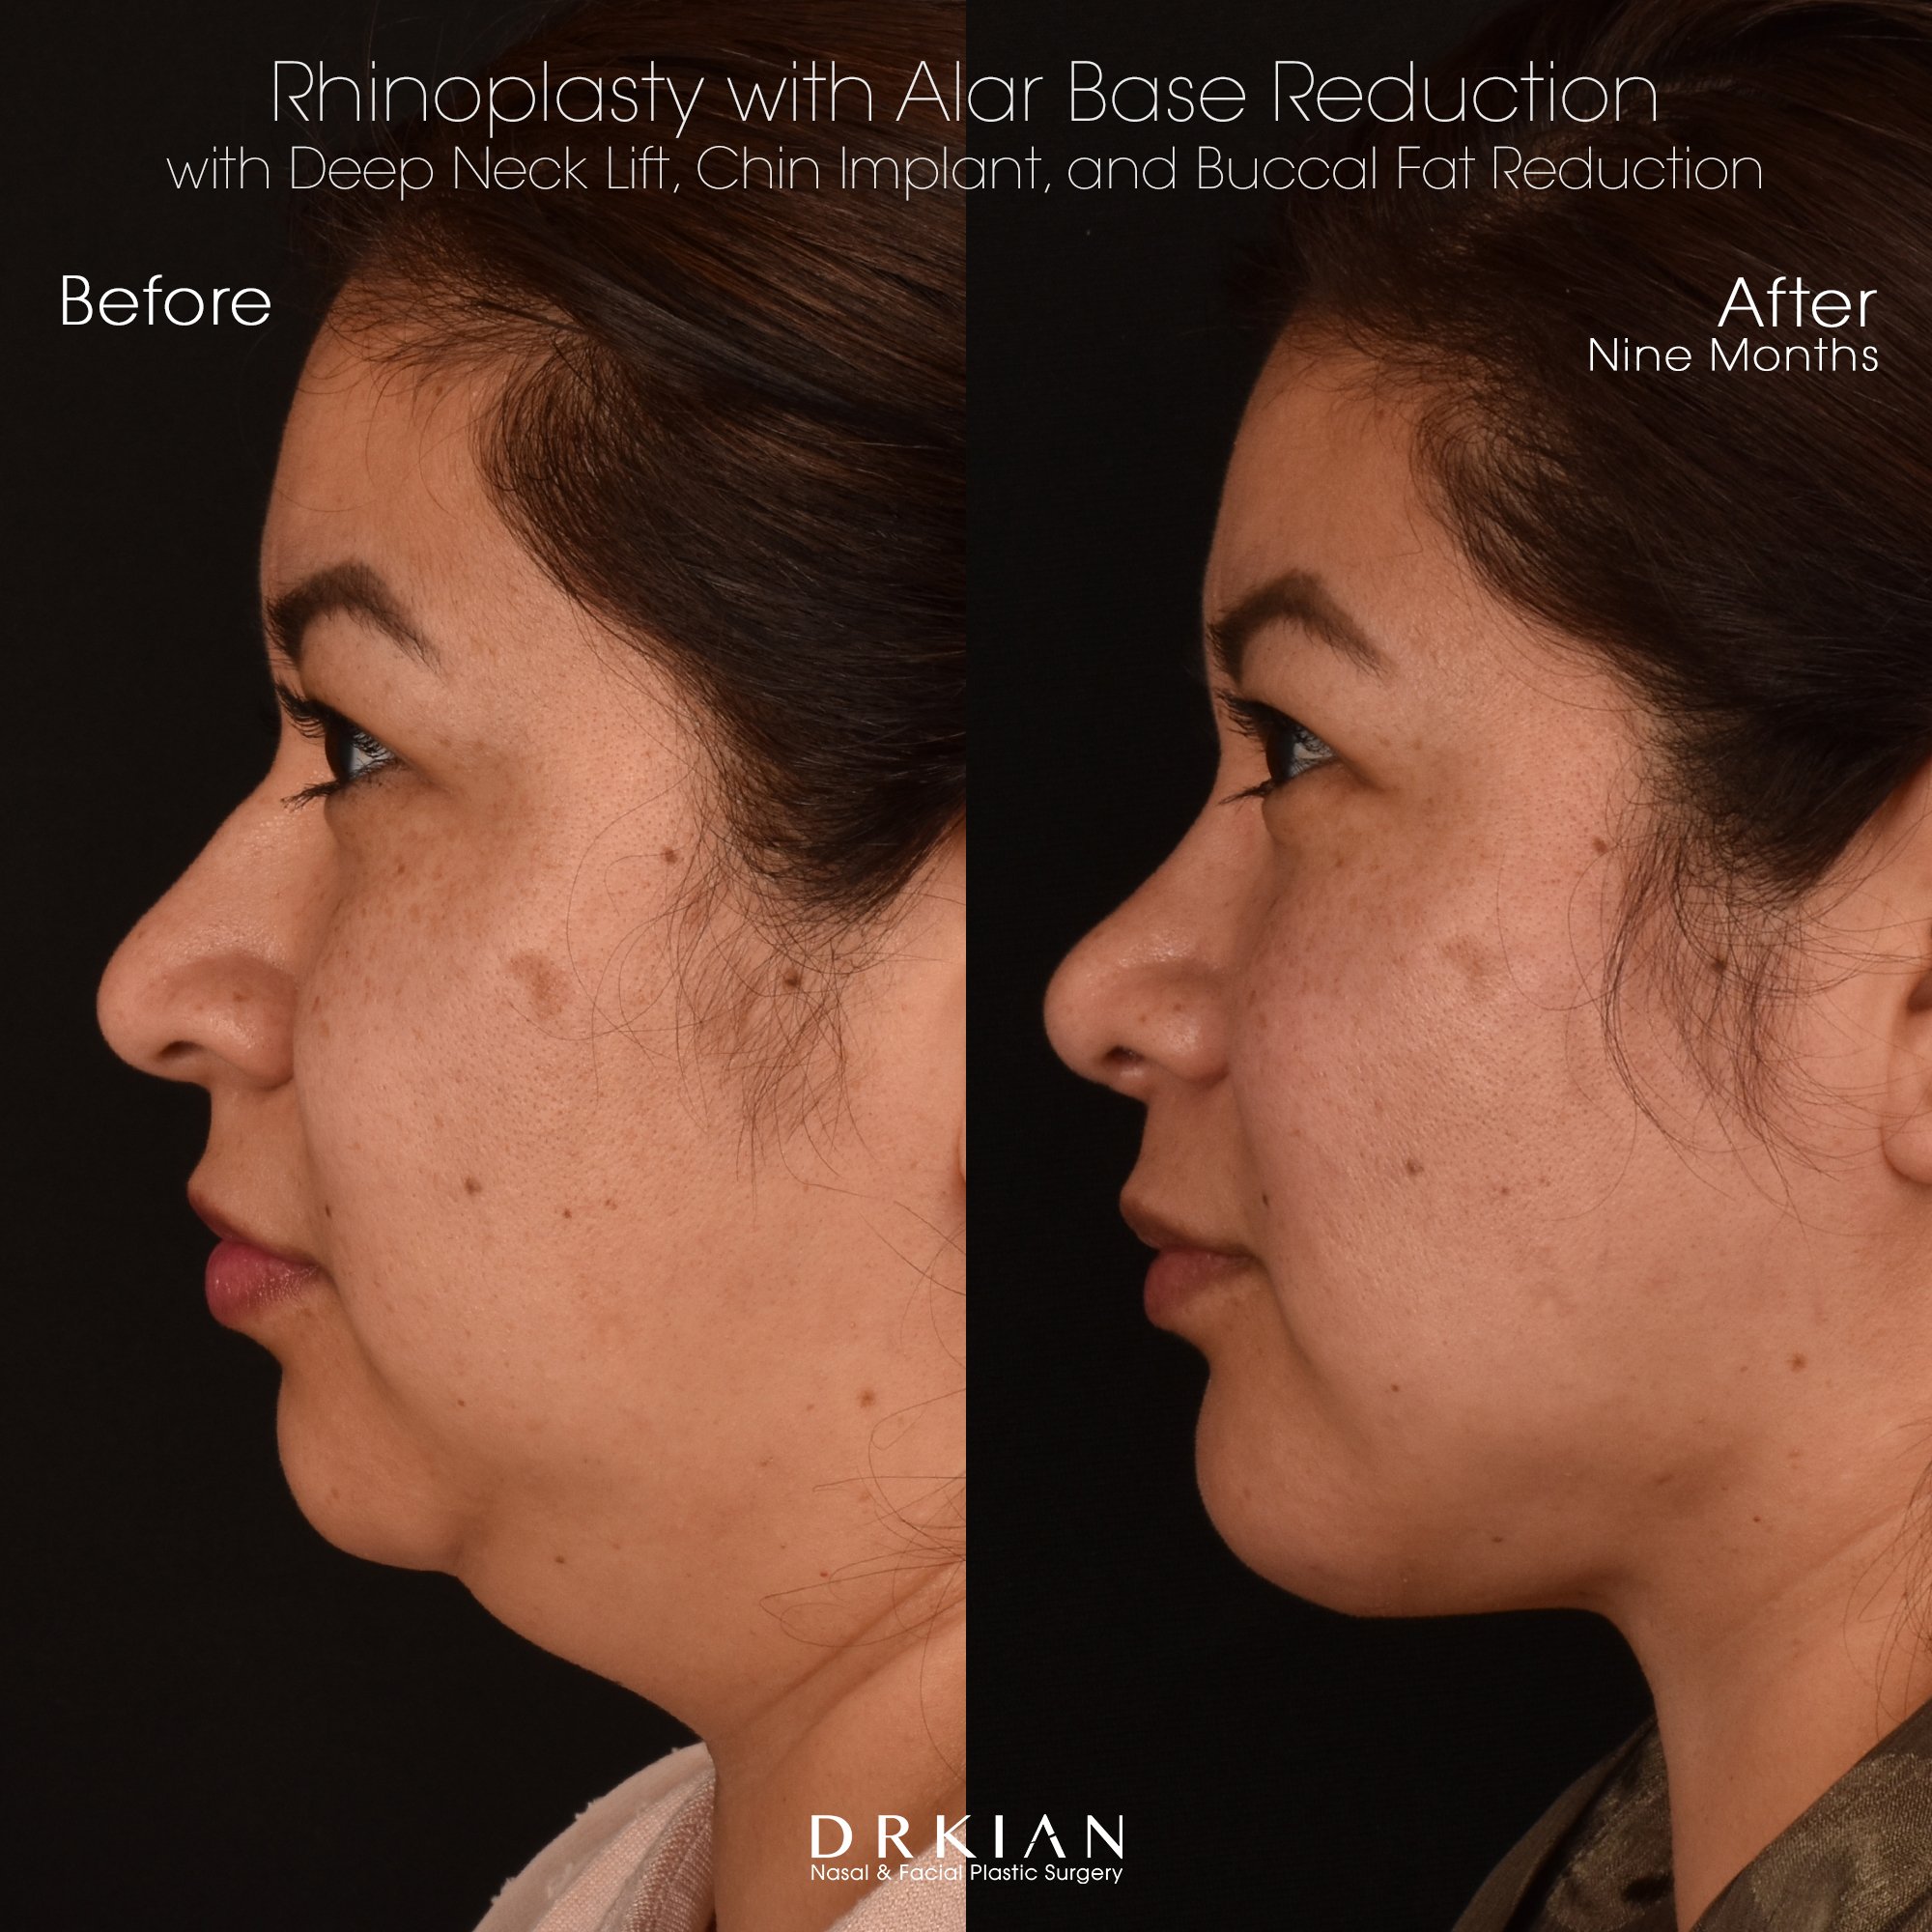
Rhinoplasty with Alar Base Reduction, Bilateral Turbinoplasty, Chin Implant, Deep Neck Lift and Buccal Fat Reduction: Before & After Nine Months

Rhinoplasty with Alar Base Reduction, Bilateral Turbinoplasty, Chin Implant, Deep Neck Lift and Buccal Fat Reduction: Before & After Nine Months

Rhinoplasty with Alar Base Reduction, Bilateral Turbinoplasty, Chin Implant, Deep Neck Lift and Buccal Fat Reduction: Before & After Nine Months

Rhinoplasty with Alar Base Reduction, Bilateral Turbinoplasty, Chin Implant, Deep Neck Lift and Buccal Fat Reduction: Before & After Nine Months

Rhinoplasty with Alar Base Reduction, Bilateral Turbinoplasty, Chin Implant, Deep Neck Lift and Buccal Fat Reduction: Before & After Nine Months

Rhinoplasty with Alar Base Reduction, Bilateral Turbinoplasty, Chin Implant, Deep Neck Lift and Buccal Fat Reduction: Before & After Nine Months

Rhinoplasty with Alar Base Reduction, Bilateral Turbinoplasty, Chin Implant, Deep Neck Lift and Buccal Fat Reduction: Before & After Nine Months
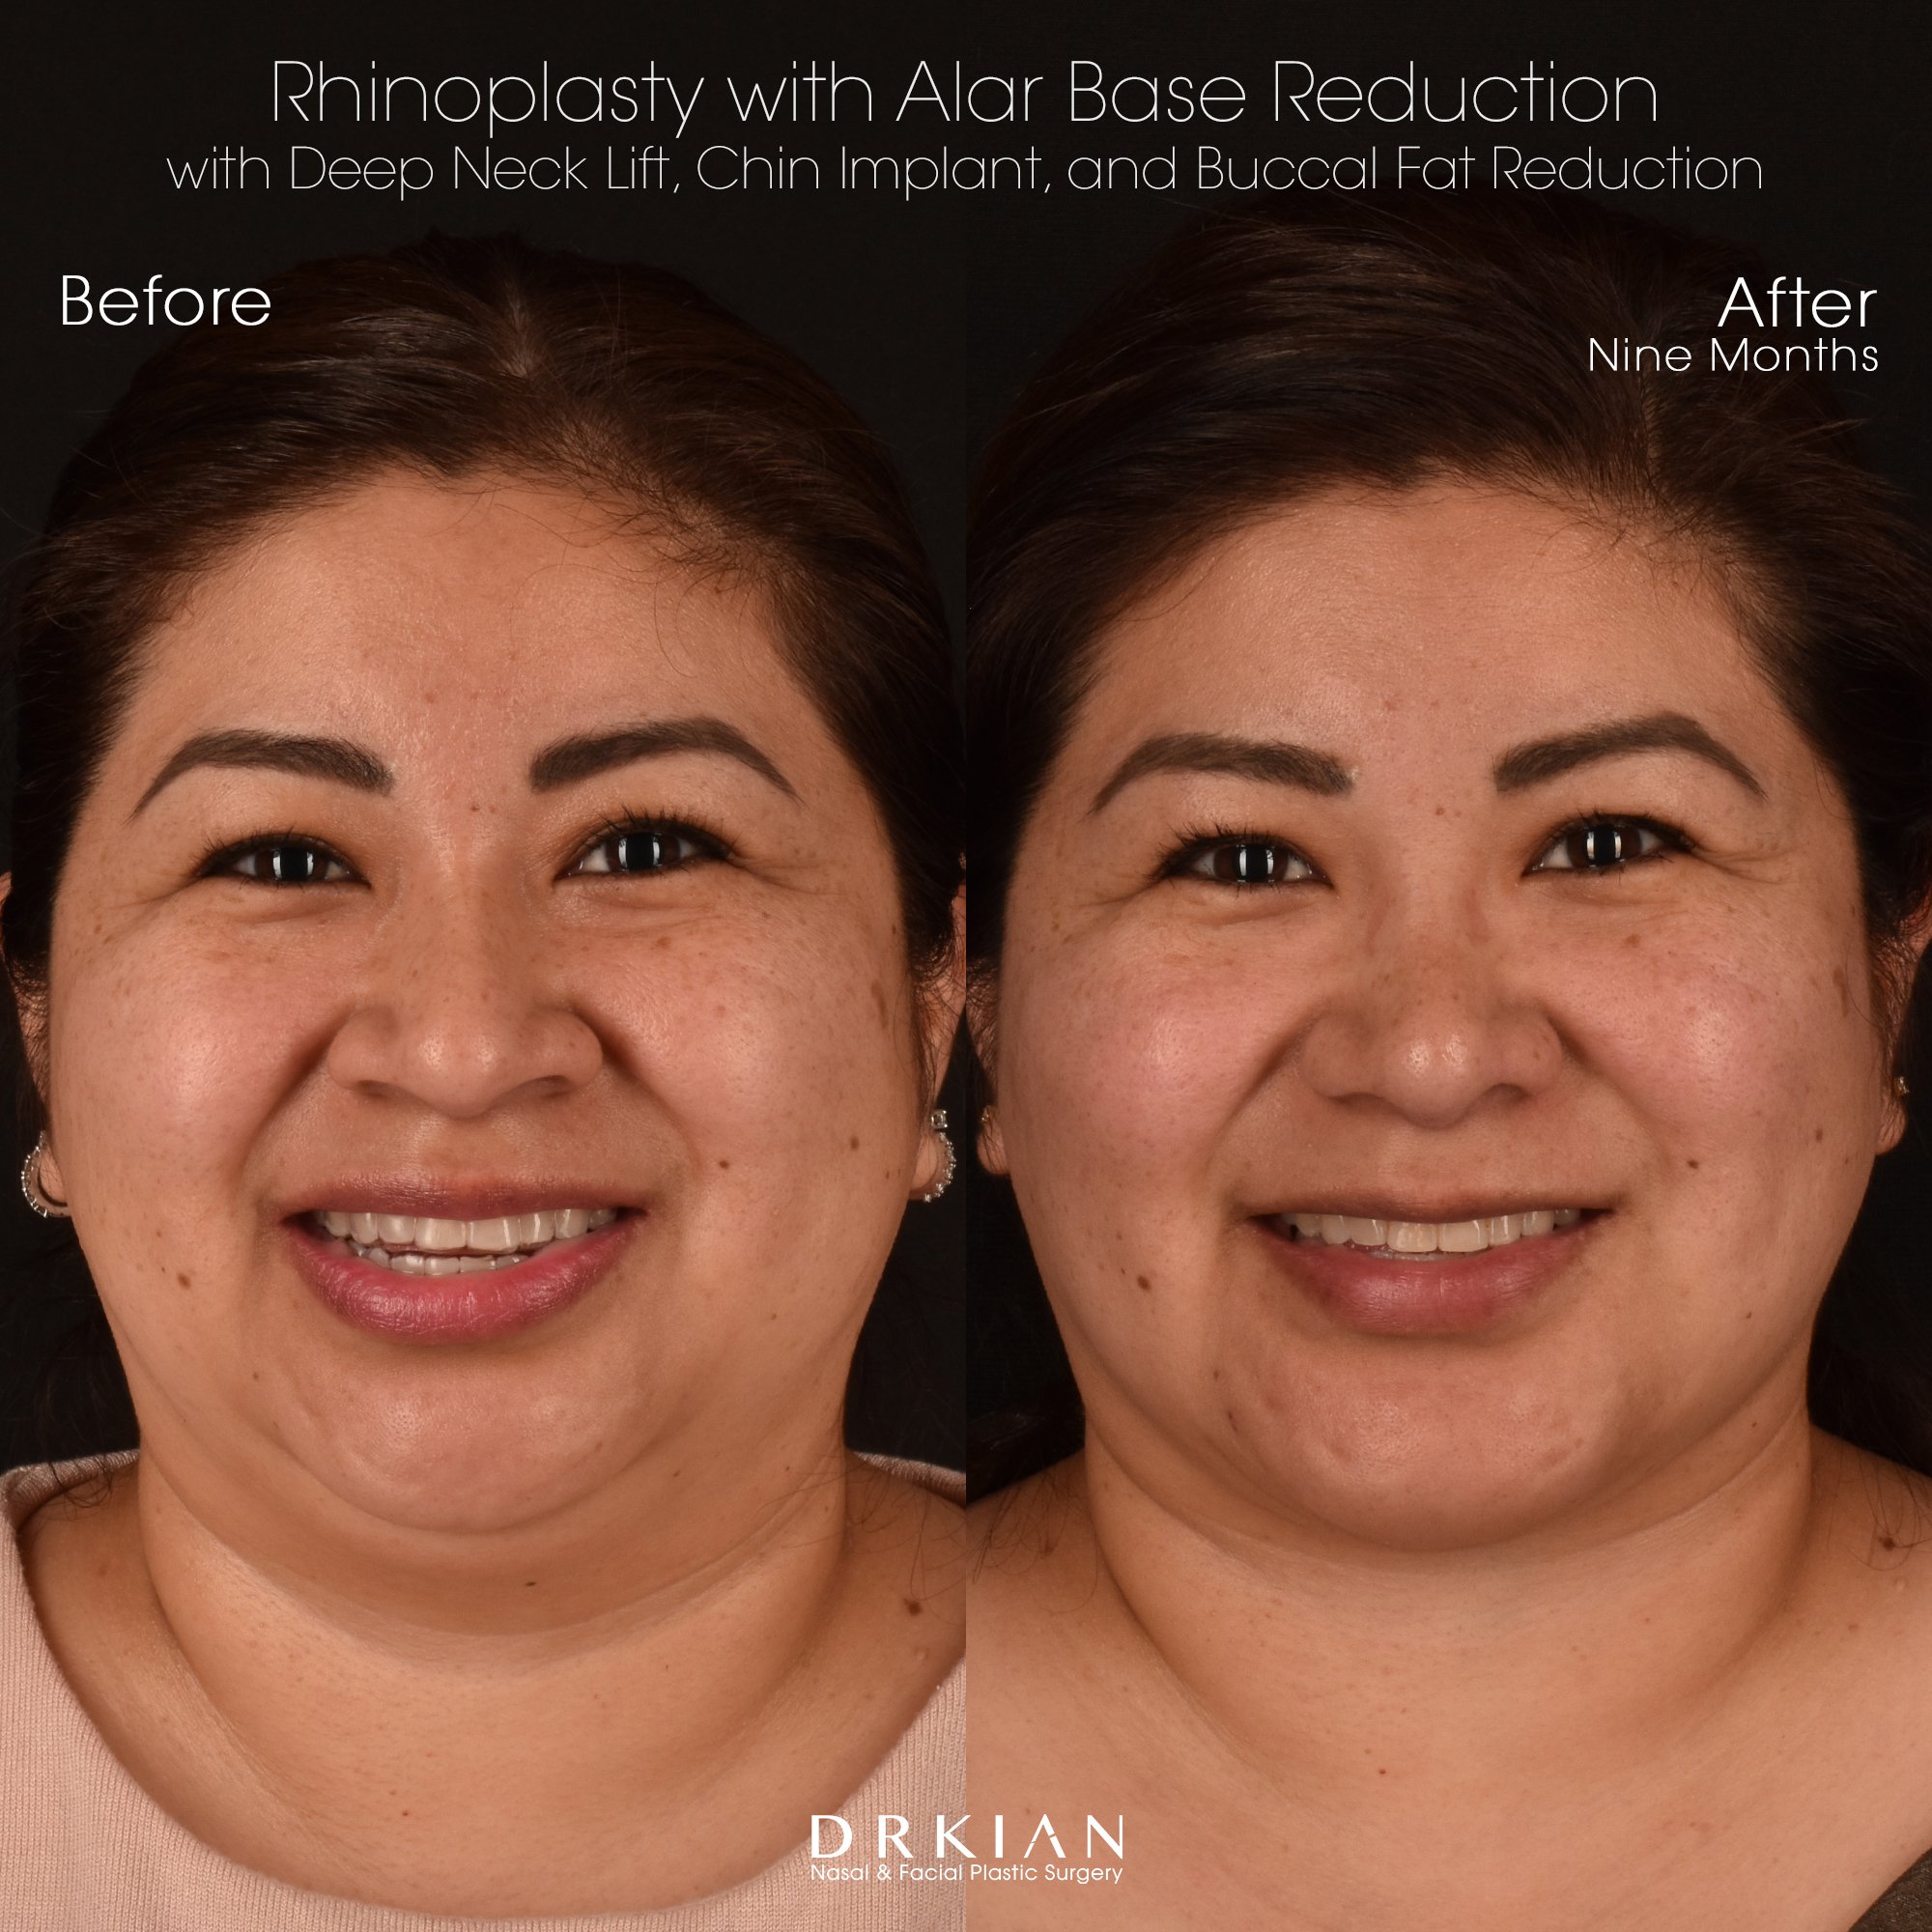
Rhinoplasty with Alar Base Reduction, Bilateral Turbinoplasty, Chin Implant, Deep Neck Lift and Buccal Fat Reduction: Before & After Nine Months

Rhinoplasty with Alar Base Reduction, Bilateral Turbinoplasty, Chin Implant, Deep Neck Lift and Buccal Fat Reduction: Before & After Nine Months

Rhinoplasty with Alar Base Reduction, Bilateral Turbinoplasty, Chin Implant, Deep Neck Lift and Buccal Fat Reduction: Before & After Nine Months

Rhinoplasty with Alar Base Reduction, Bilateral Turbinoplasty, Chin Implant, Deep Neck Lift and Buccal Fat Reduction: Before & After Nine Months

Rhinoplasty with Alar Base Reduction, Bilateral Turbinoplasty, Chin Implant, Deep Neck Lift and Buccal Fat Reduction: Before & After Nine Months

Rhinoplasty with Alar Base Reduction, Bilateral Turbinoplasty, Chin Implant, Deep Neck Lift and Buccal Fat Reduction: Before & After Nine Months

Open Cosmetic Rhinoplasty, Buccal Fat Reduction, Customized Chin Implant, Submental Liposuction: Before & After One Year
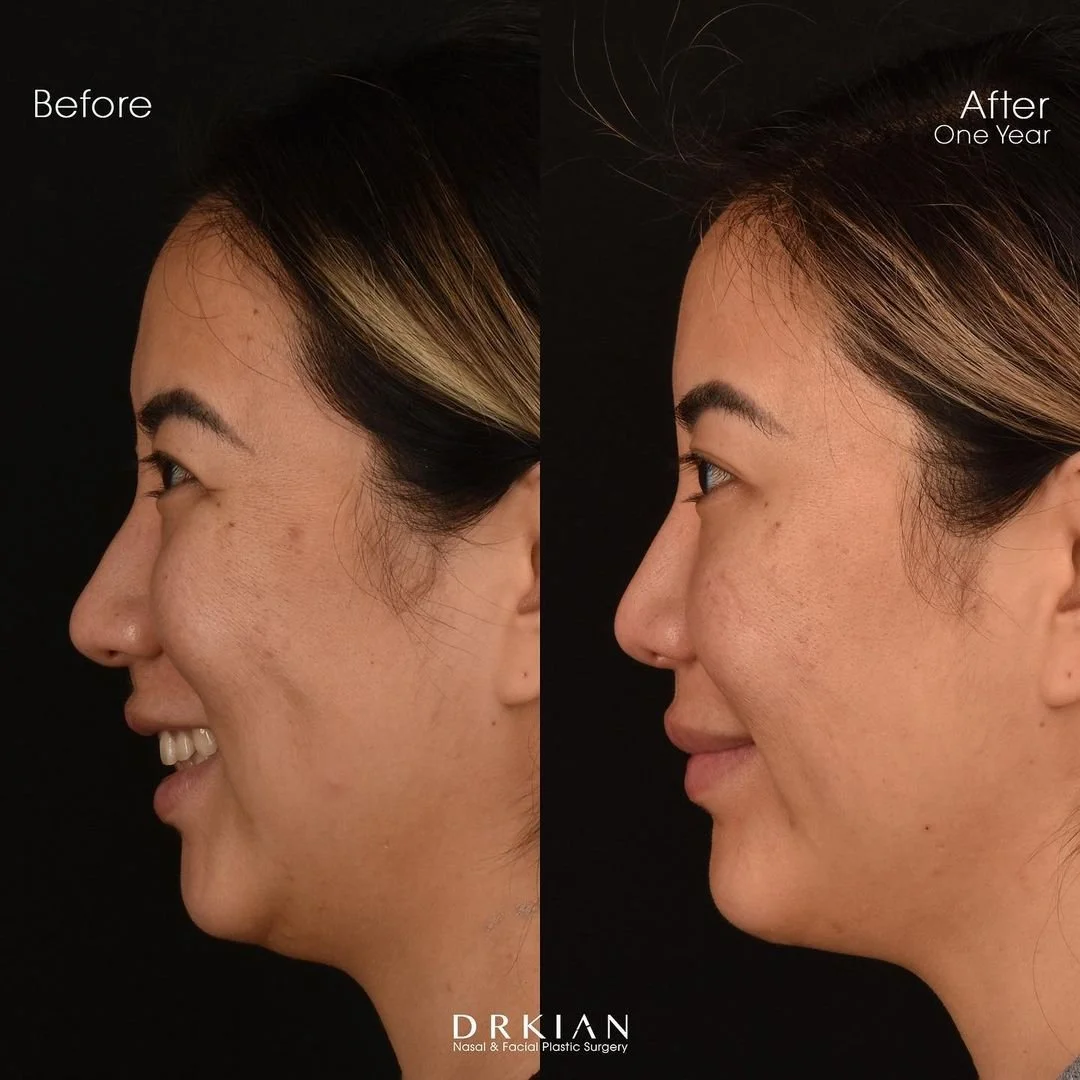
Open Cosmetic Rhinoplasty, Buccal Fat Reduction, Customized Chin Implant, Submental Liposuction: Before & After One Year

Open Cosmetic Rhinoplasty, Buccal Fat Reduction, Customized Chin Implant, Submental Liposuction: Before & After One Year

Open Cosmetic Rhinoplasty, Buccal Fat Reduction, Customized Chin Implant, Submental Liposuction: Before & After One Year

Open Cosmetic Rhinoplasty, Buccal Fat Reduction, Customized Chin Implant, Submental Liposuction: Before & After One Year

Open Cosmetic Rhinoplasty, Buccal Fat Reduction, Customized Chin Implant, Submental Liposuction: Before & After One Year

Open Cosmetic Rhinoplasty, Buccal Fat Reduction, Customized Chin Implant, Submental Liposuction: Before & After One Year
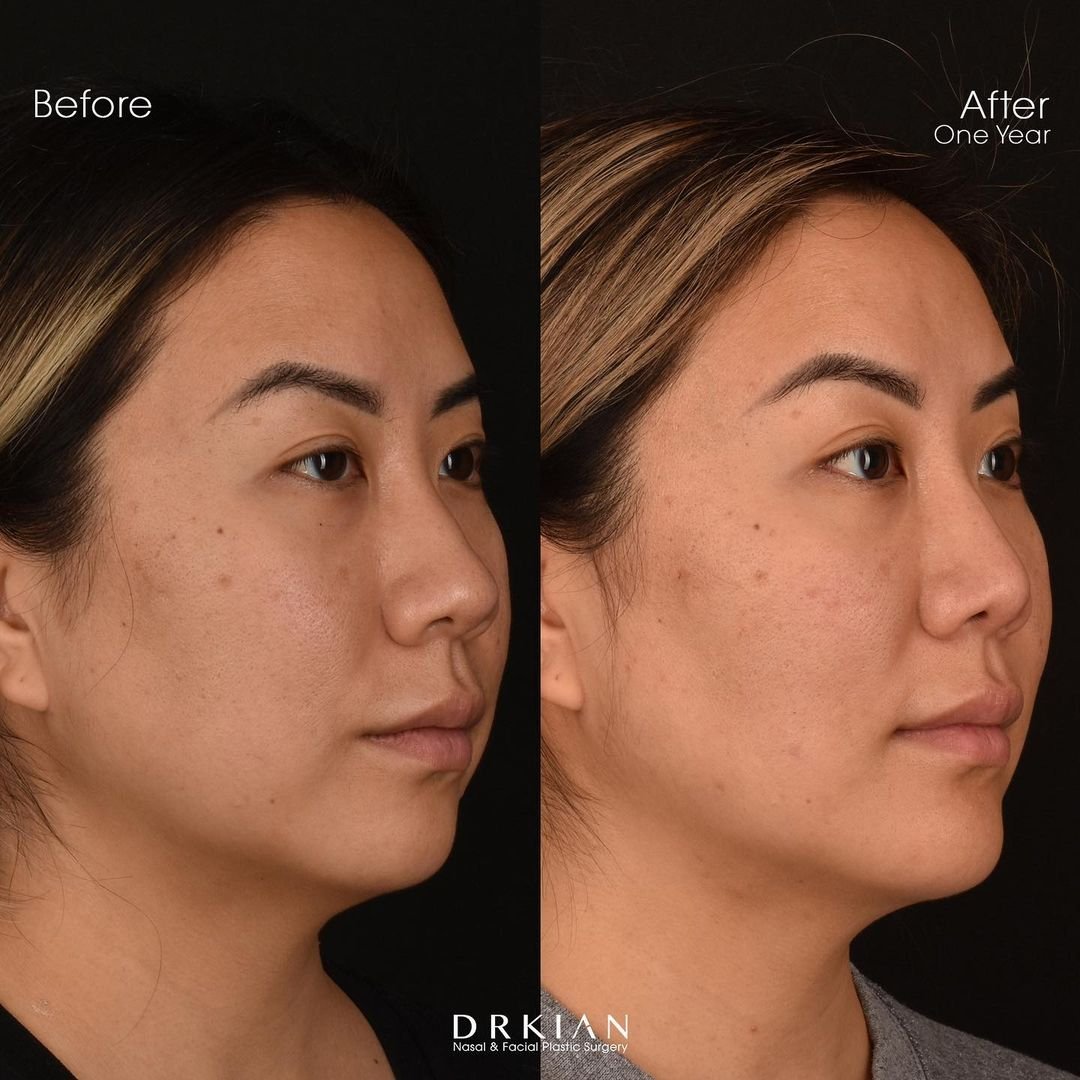
Open Cosmetic Rhinoplasty, Buccal Fat Reduction, Customized Chin Implant, Submental Liposuction: Before & After One Year

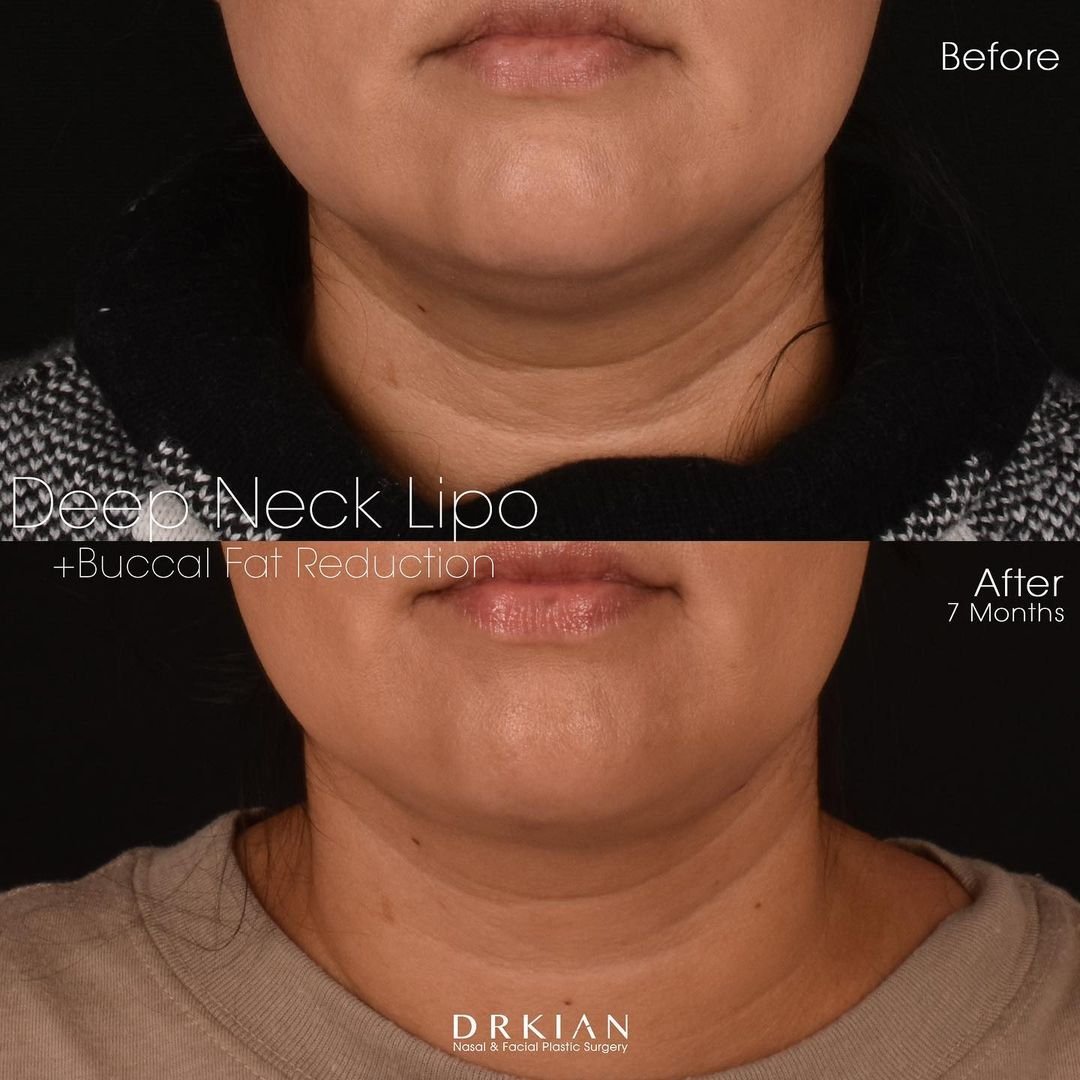
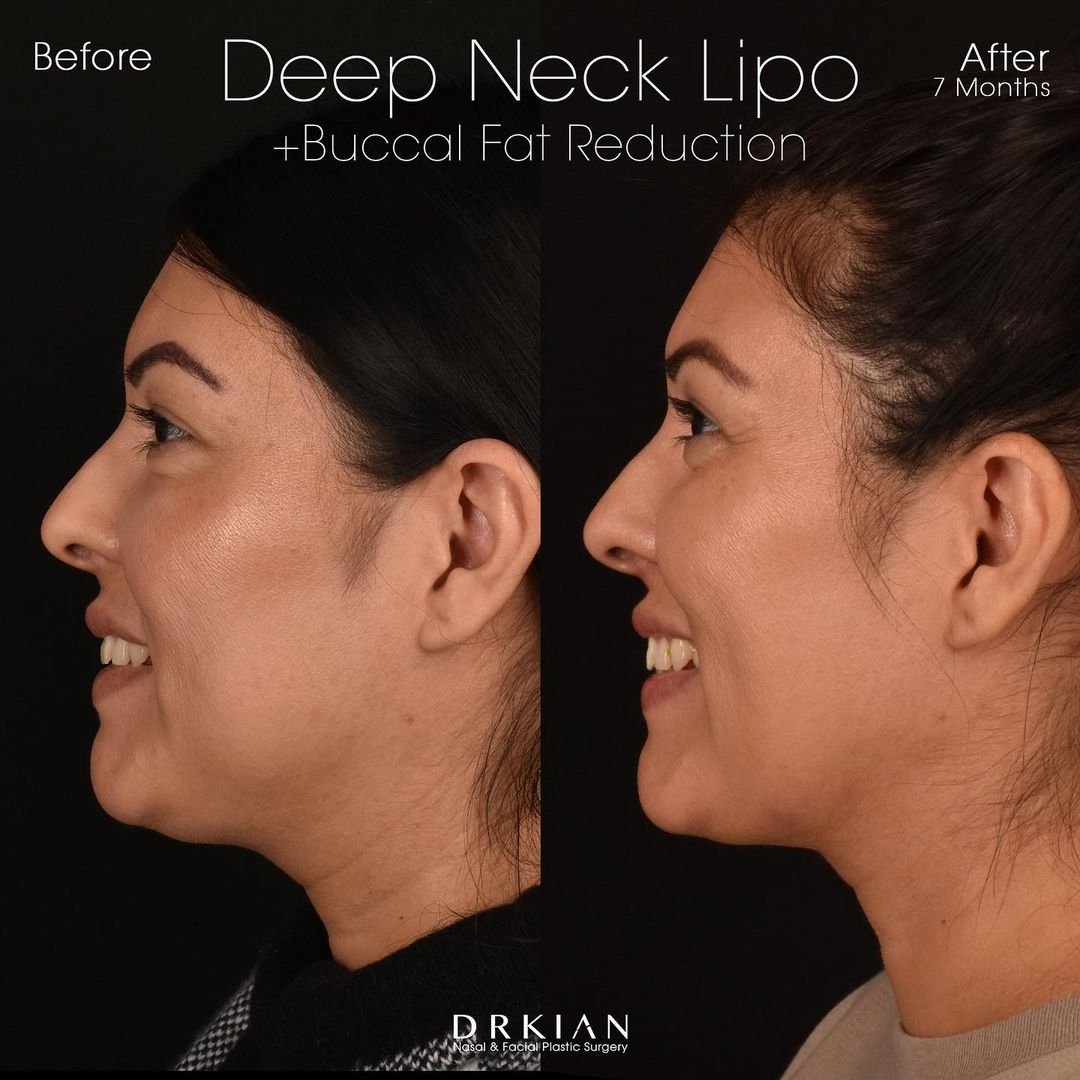
Facial Slimming & Contouring with Deep Neck Liposuction + Buccal Fat Reduction: Before & After Seven Months

Facial Slimming & Contouring with Deep Neck Liposuction + Buccal Fat Reduction: Before & After Seven Months

Facial Slimming & Contouring with Deep Neck Liposuction + Buccal Fat Reduction: Before & After Seven Months

Facial Slimming & Contouring with Deep Neck Liposuction + Buccal Fat Reduction: Before & After Seven Months

Facial Slimming & Contouring with Deep Neck Liposuction + Buccal Fat Reduction: Before & After Seven Months
Facial Slimming & Contouring with Deep Neck Liposuction + Buccal Fat Reduction: Before & After Seven Months

Facial Slimming & Contouring with Deep Neck Liposuction + Buccal Fat Reduction: Before & After Seven Months

Facial Slimming & Contouring with Deep Neck Liposuction + Buccal Fat Reduction: Before & After Seven Months

Facial Slimming & Contouring with Deep Neck Liposuction + Buccal Fat Reduction: Before & After Seven Months
Facial Slimming & Contouring with Deep Neck Liposuction + Buccal Fat Reduction: Before & After Seven Months

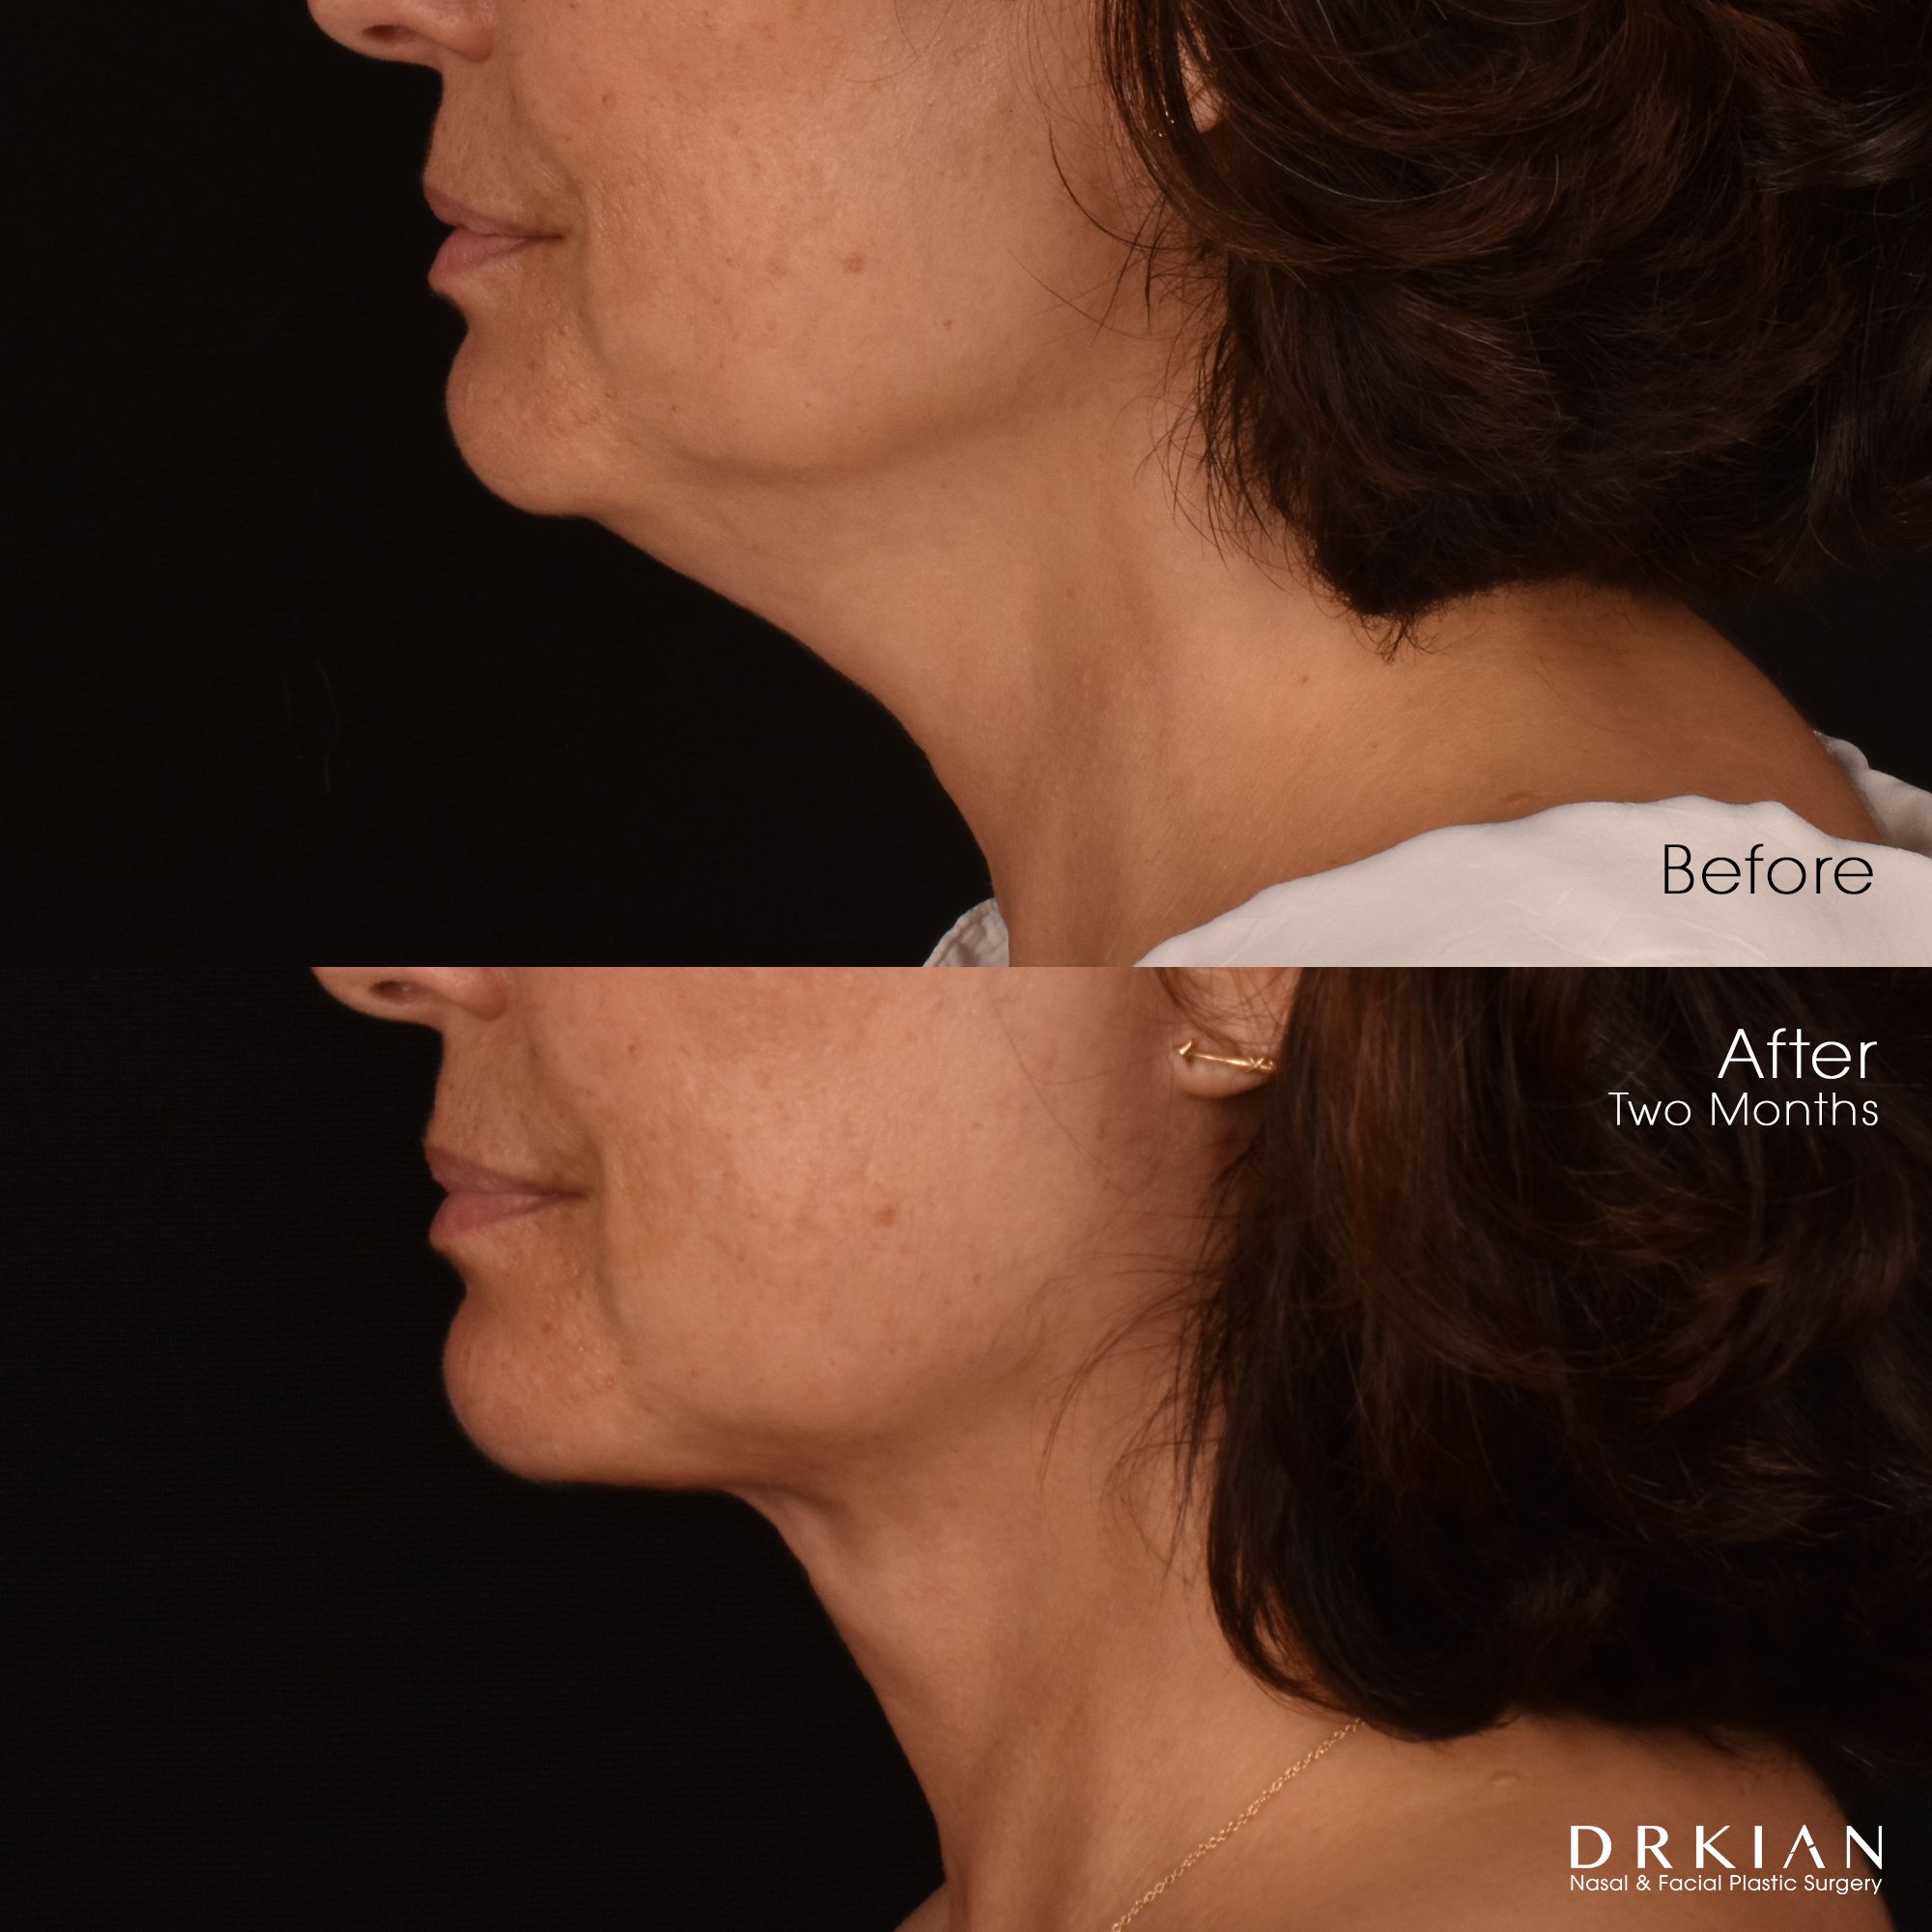
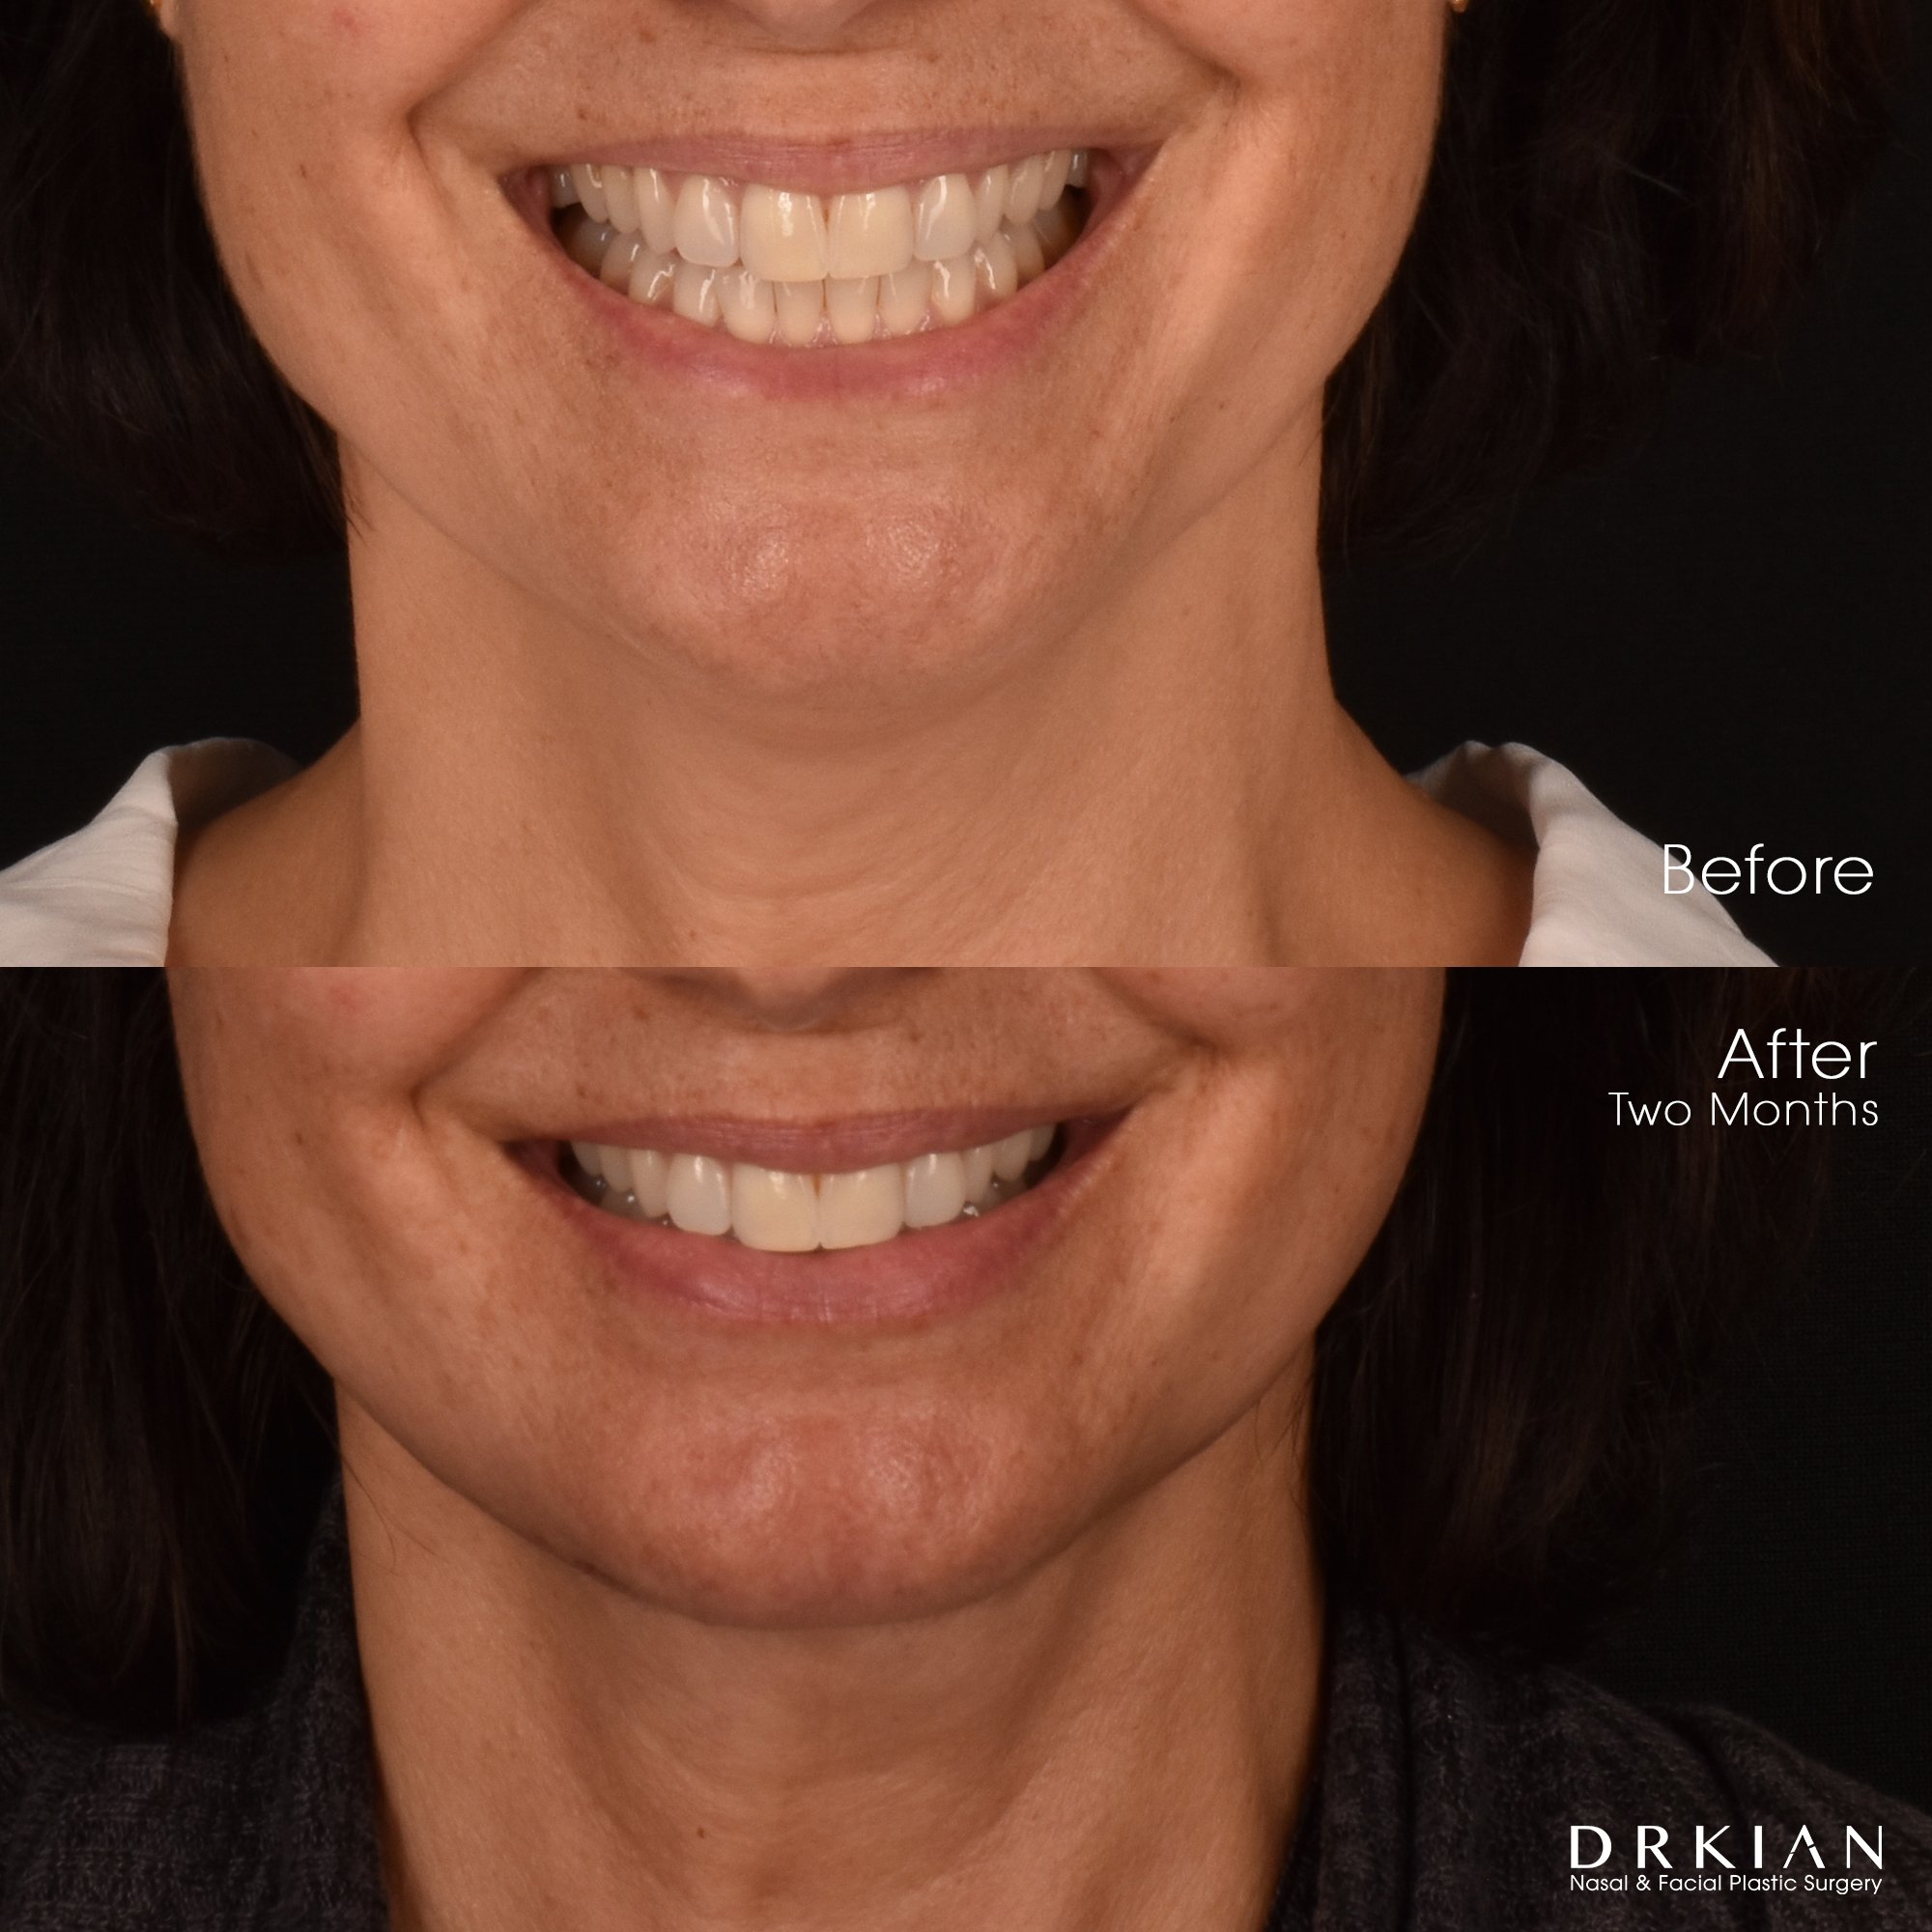
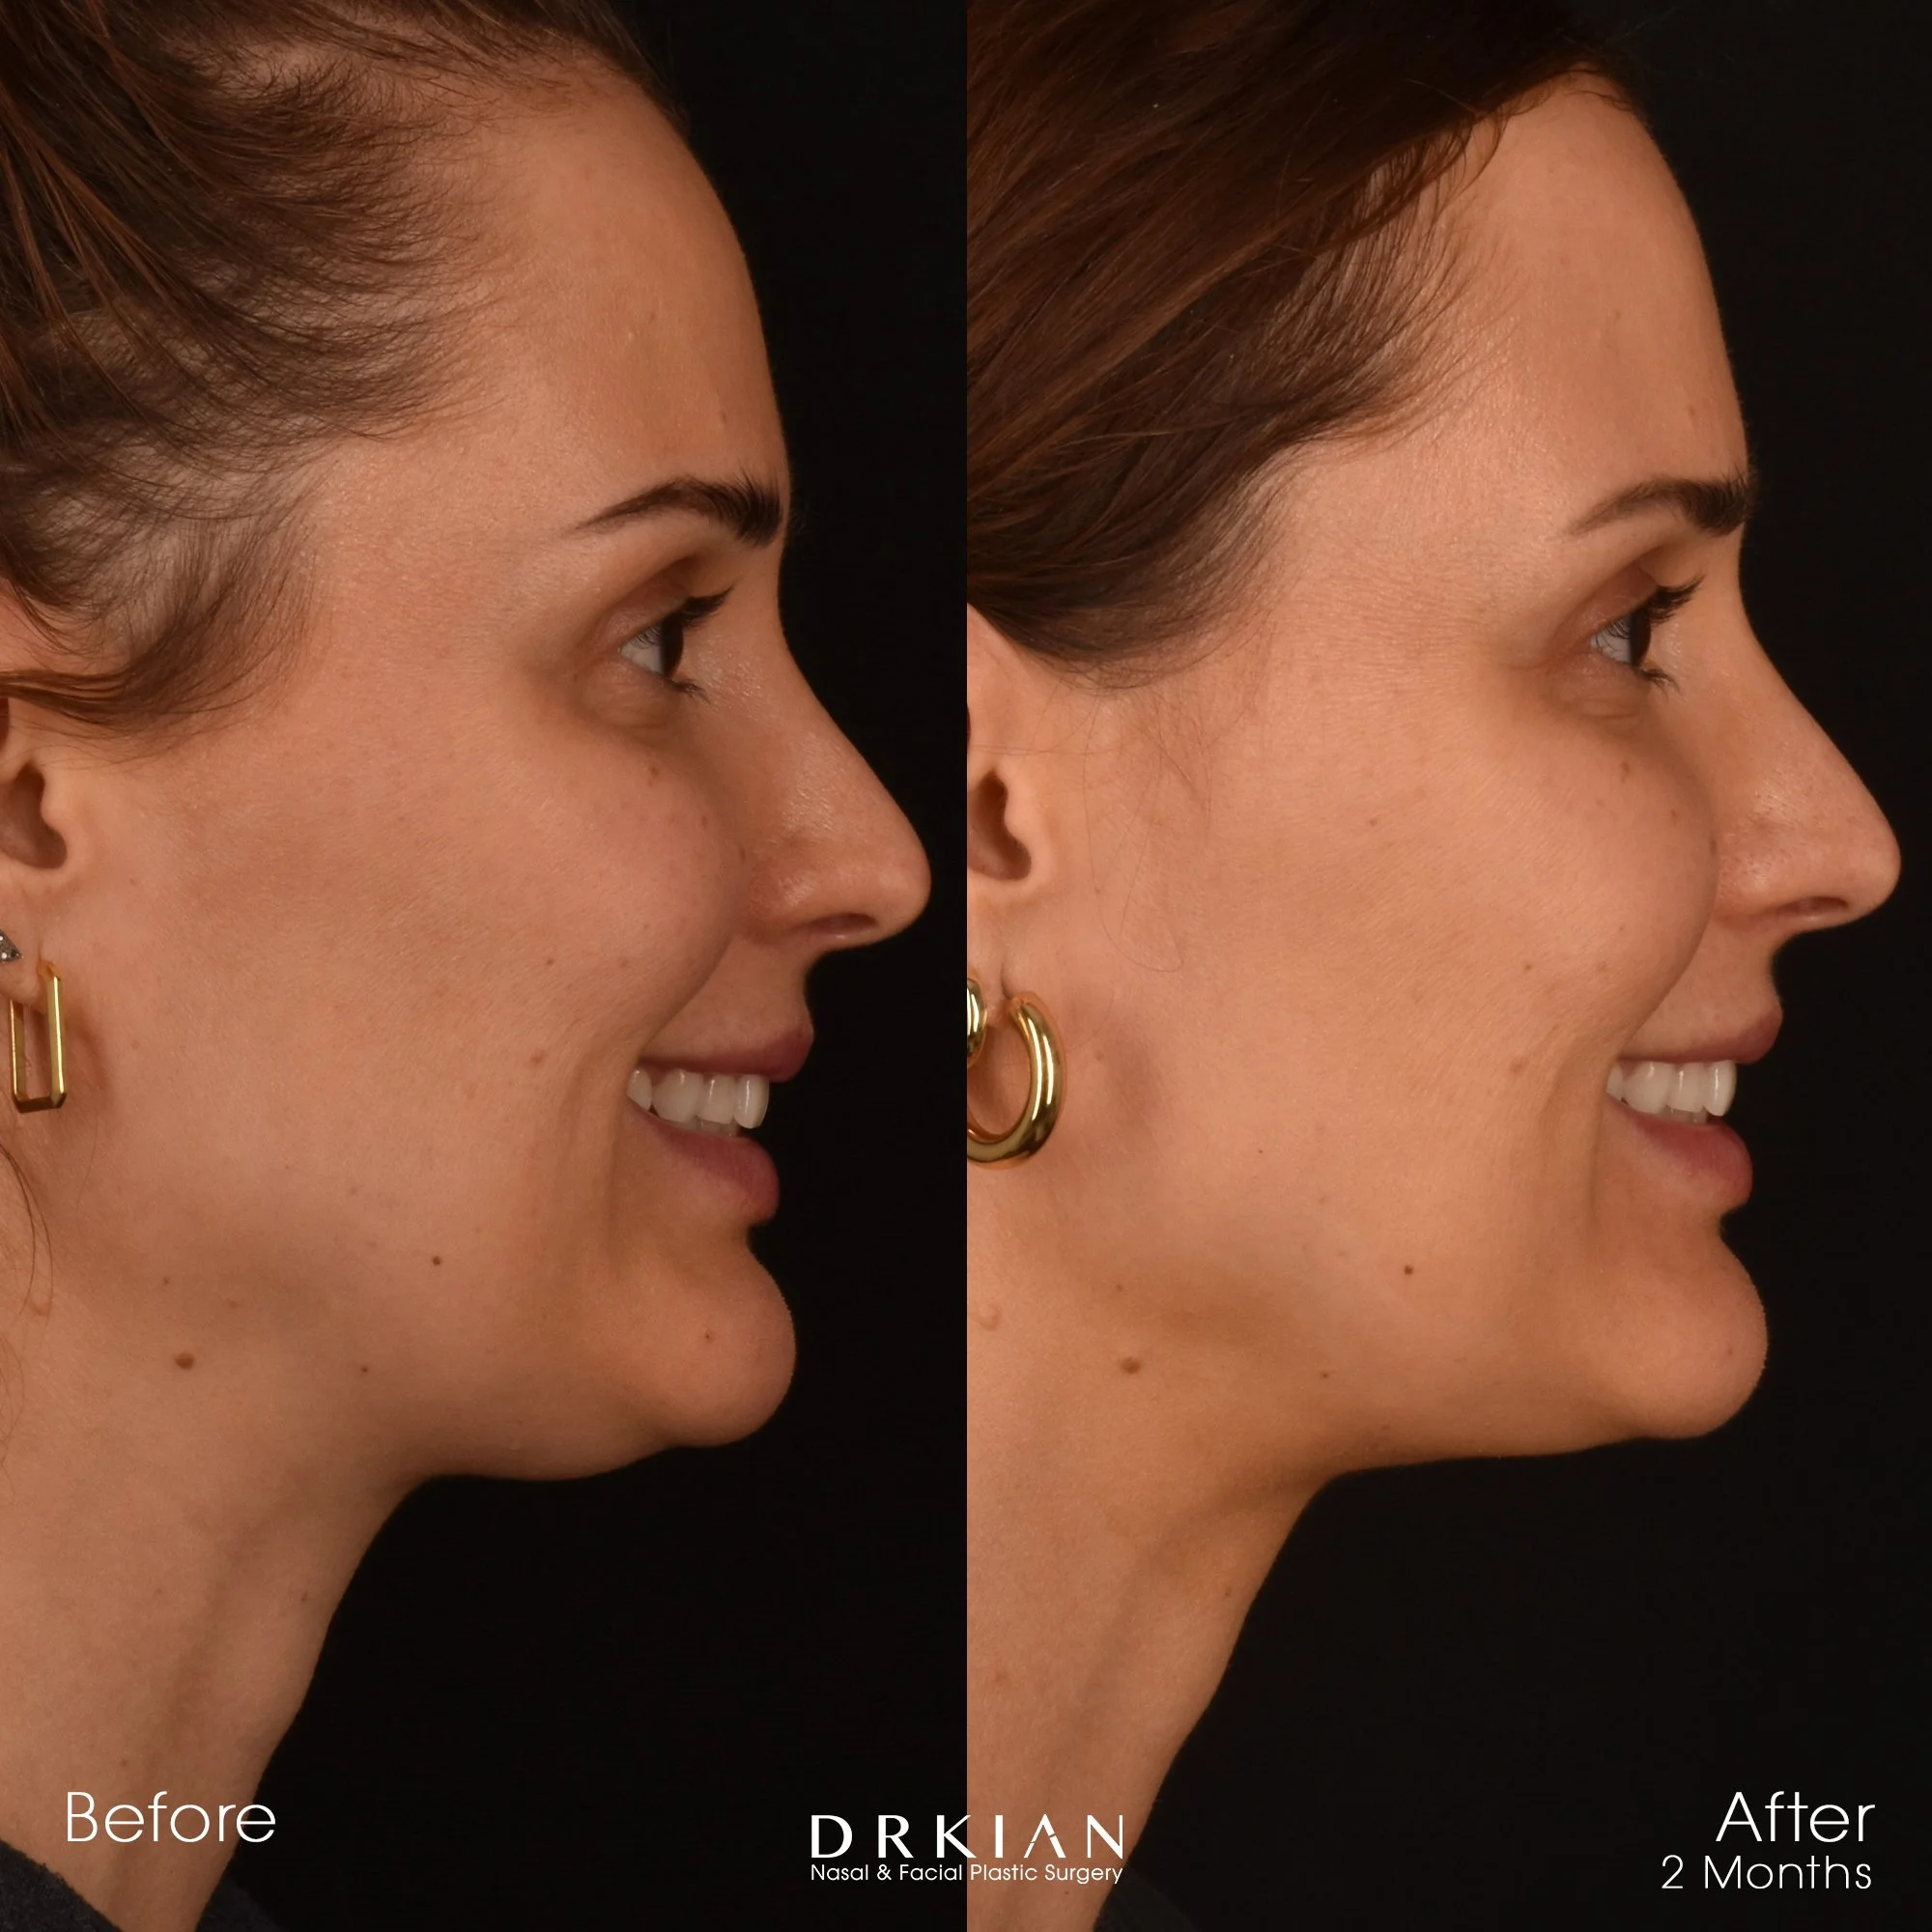
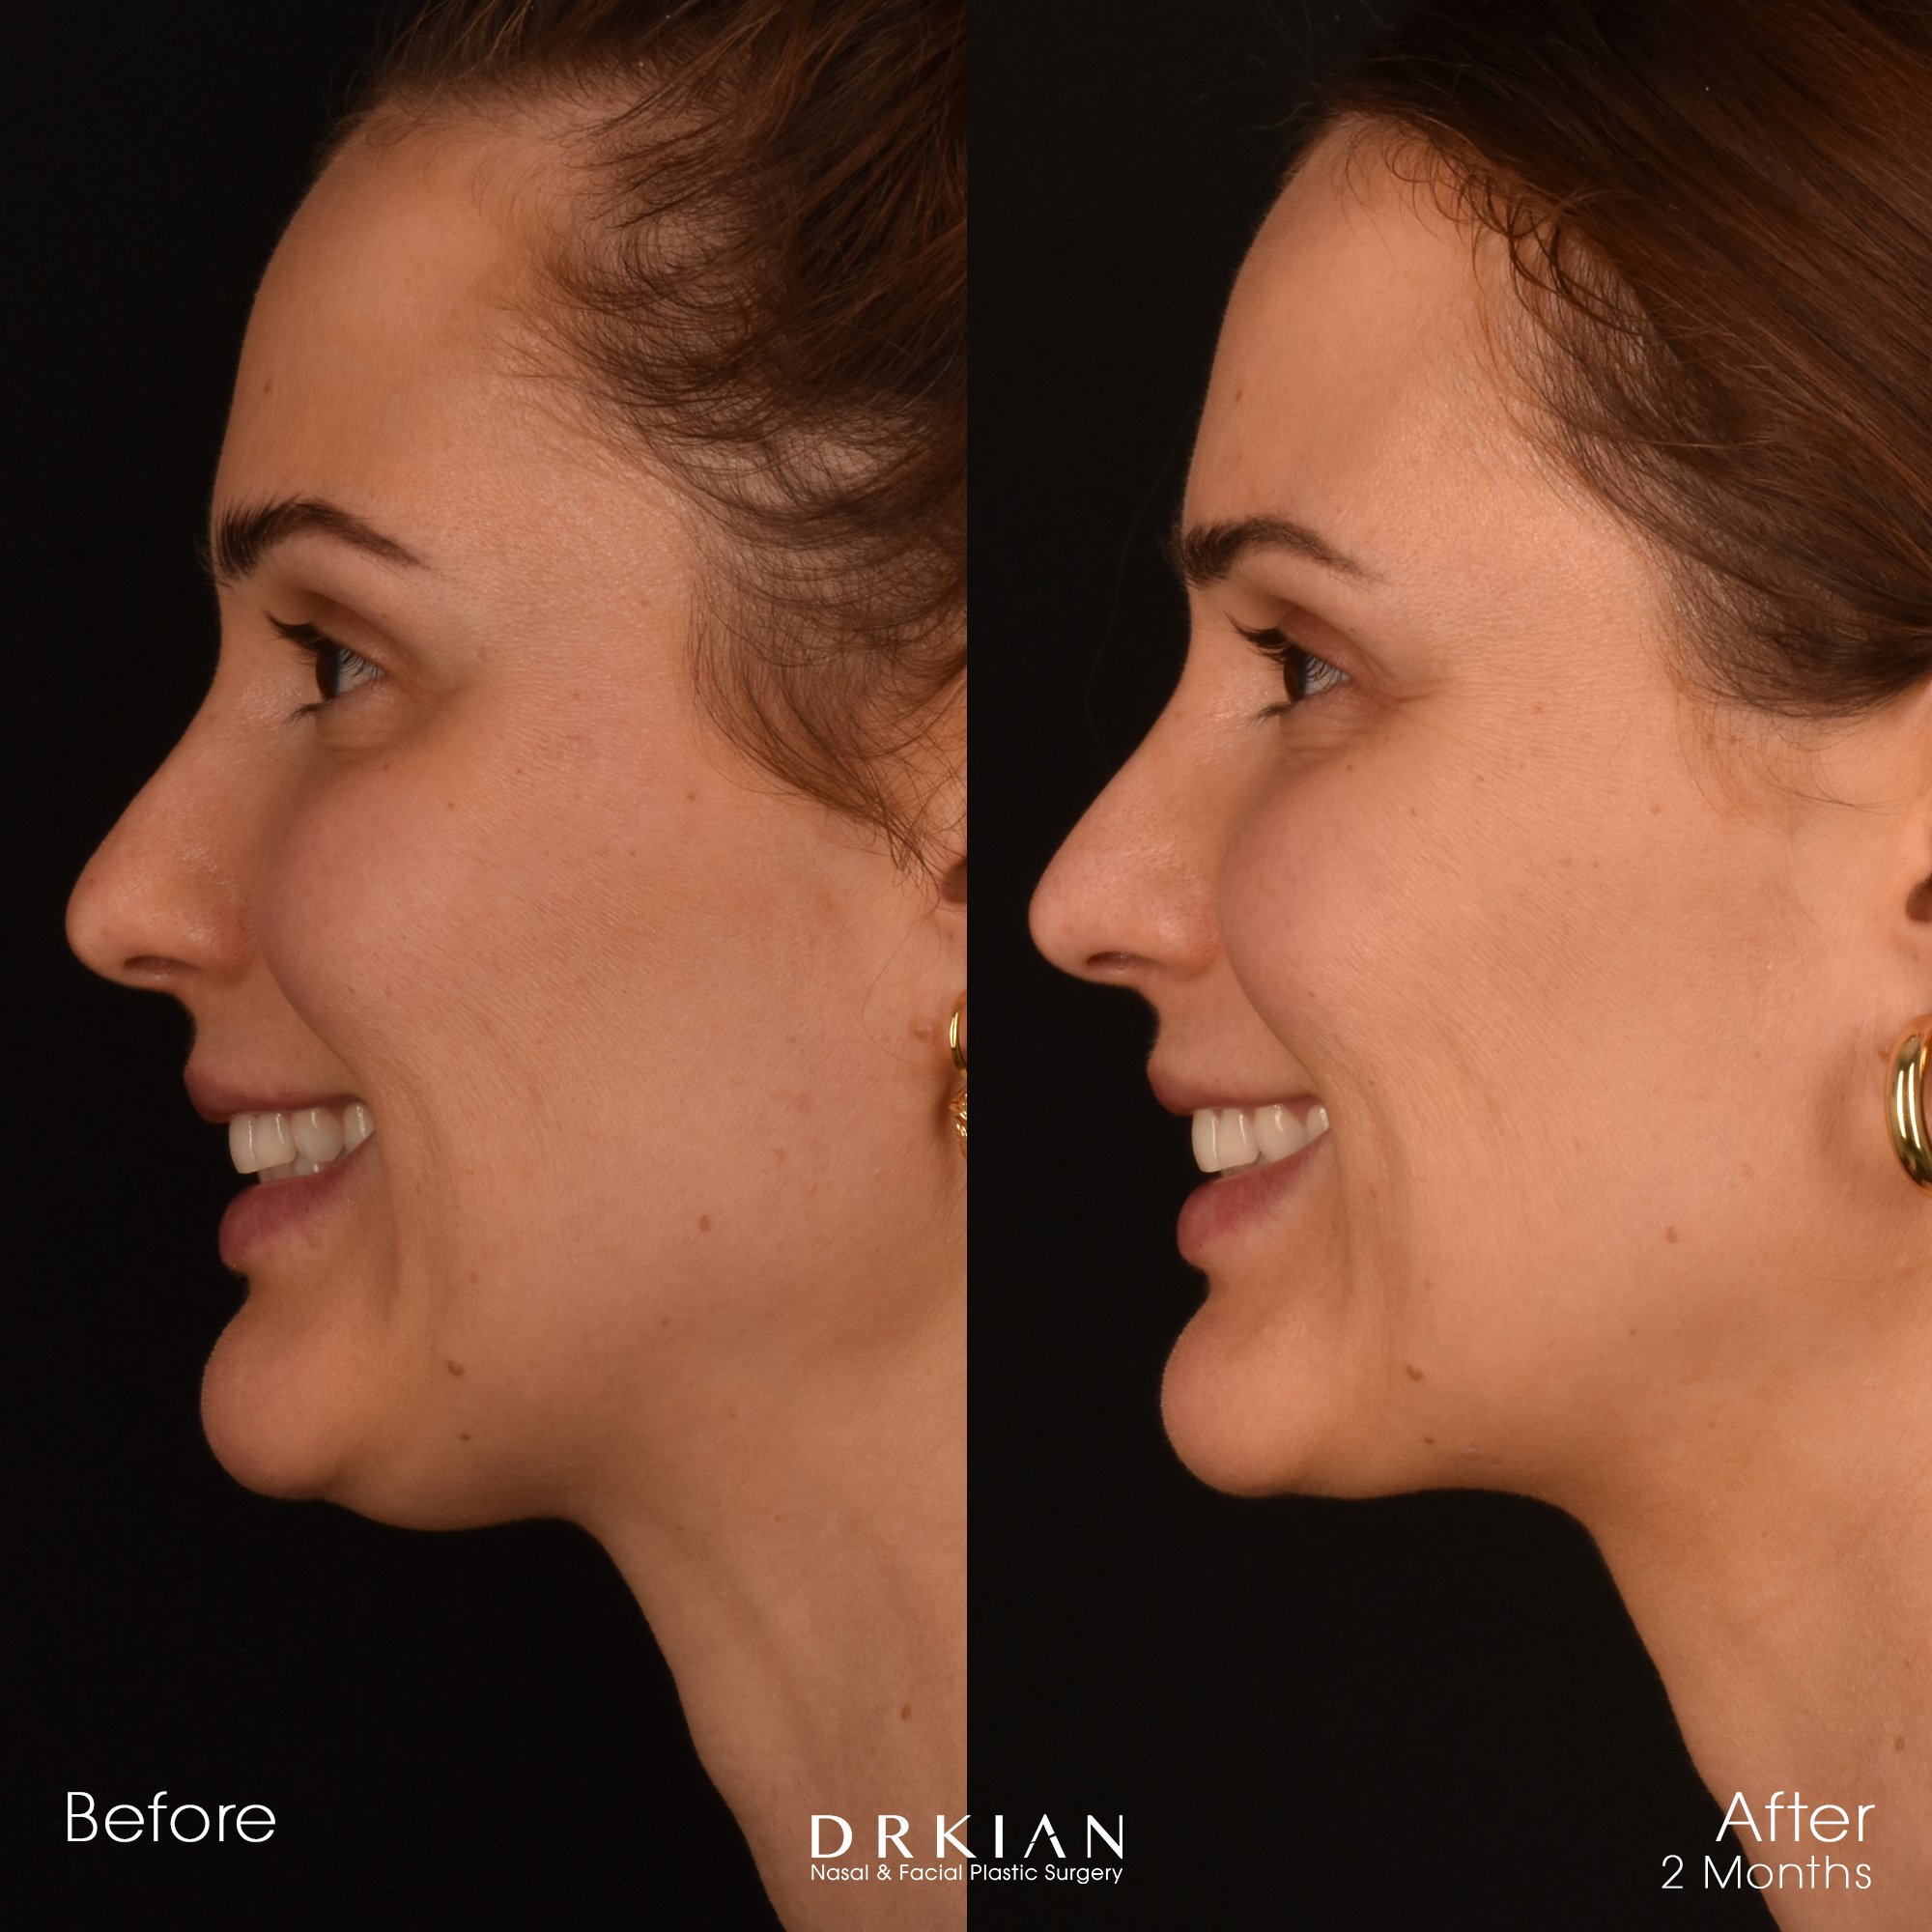
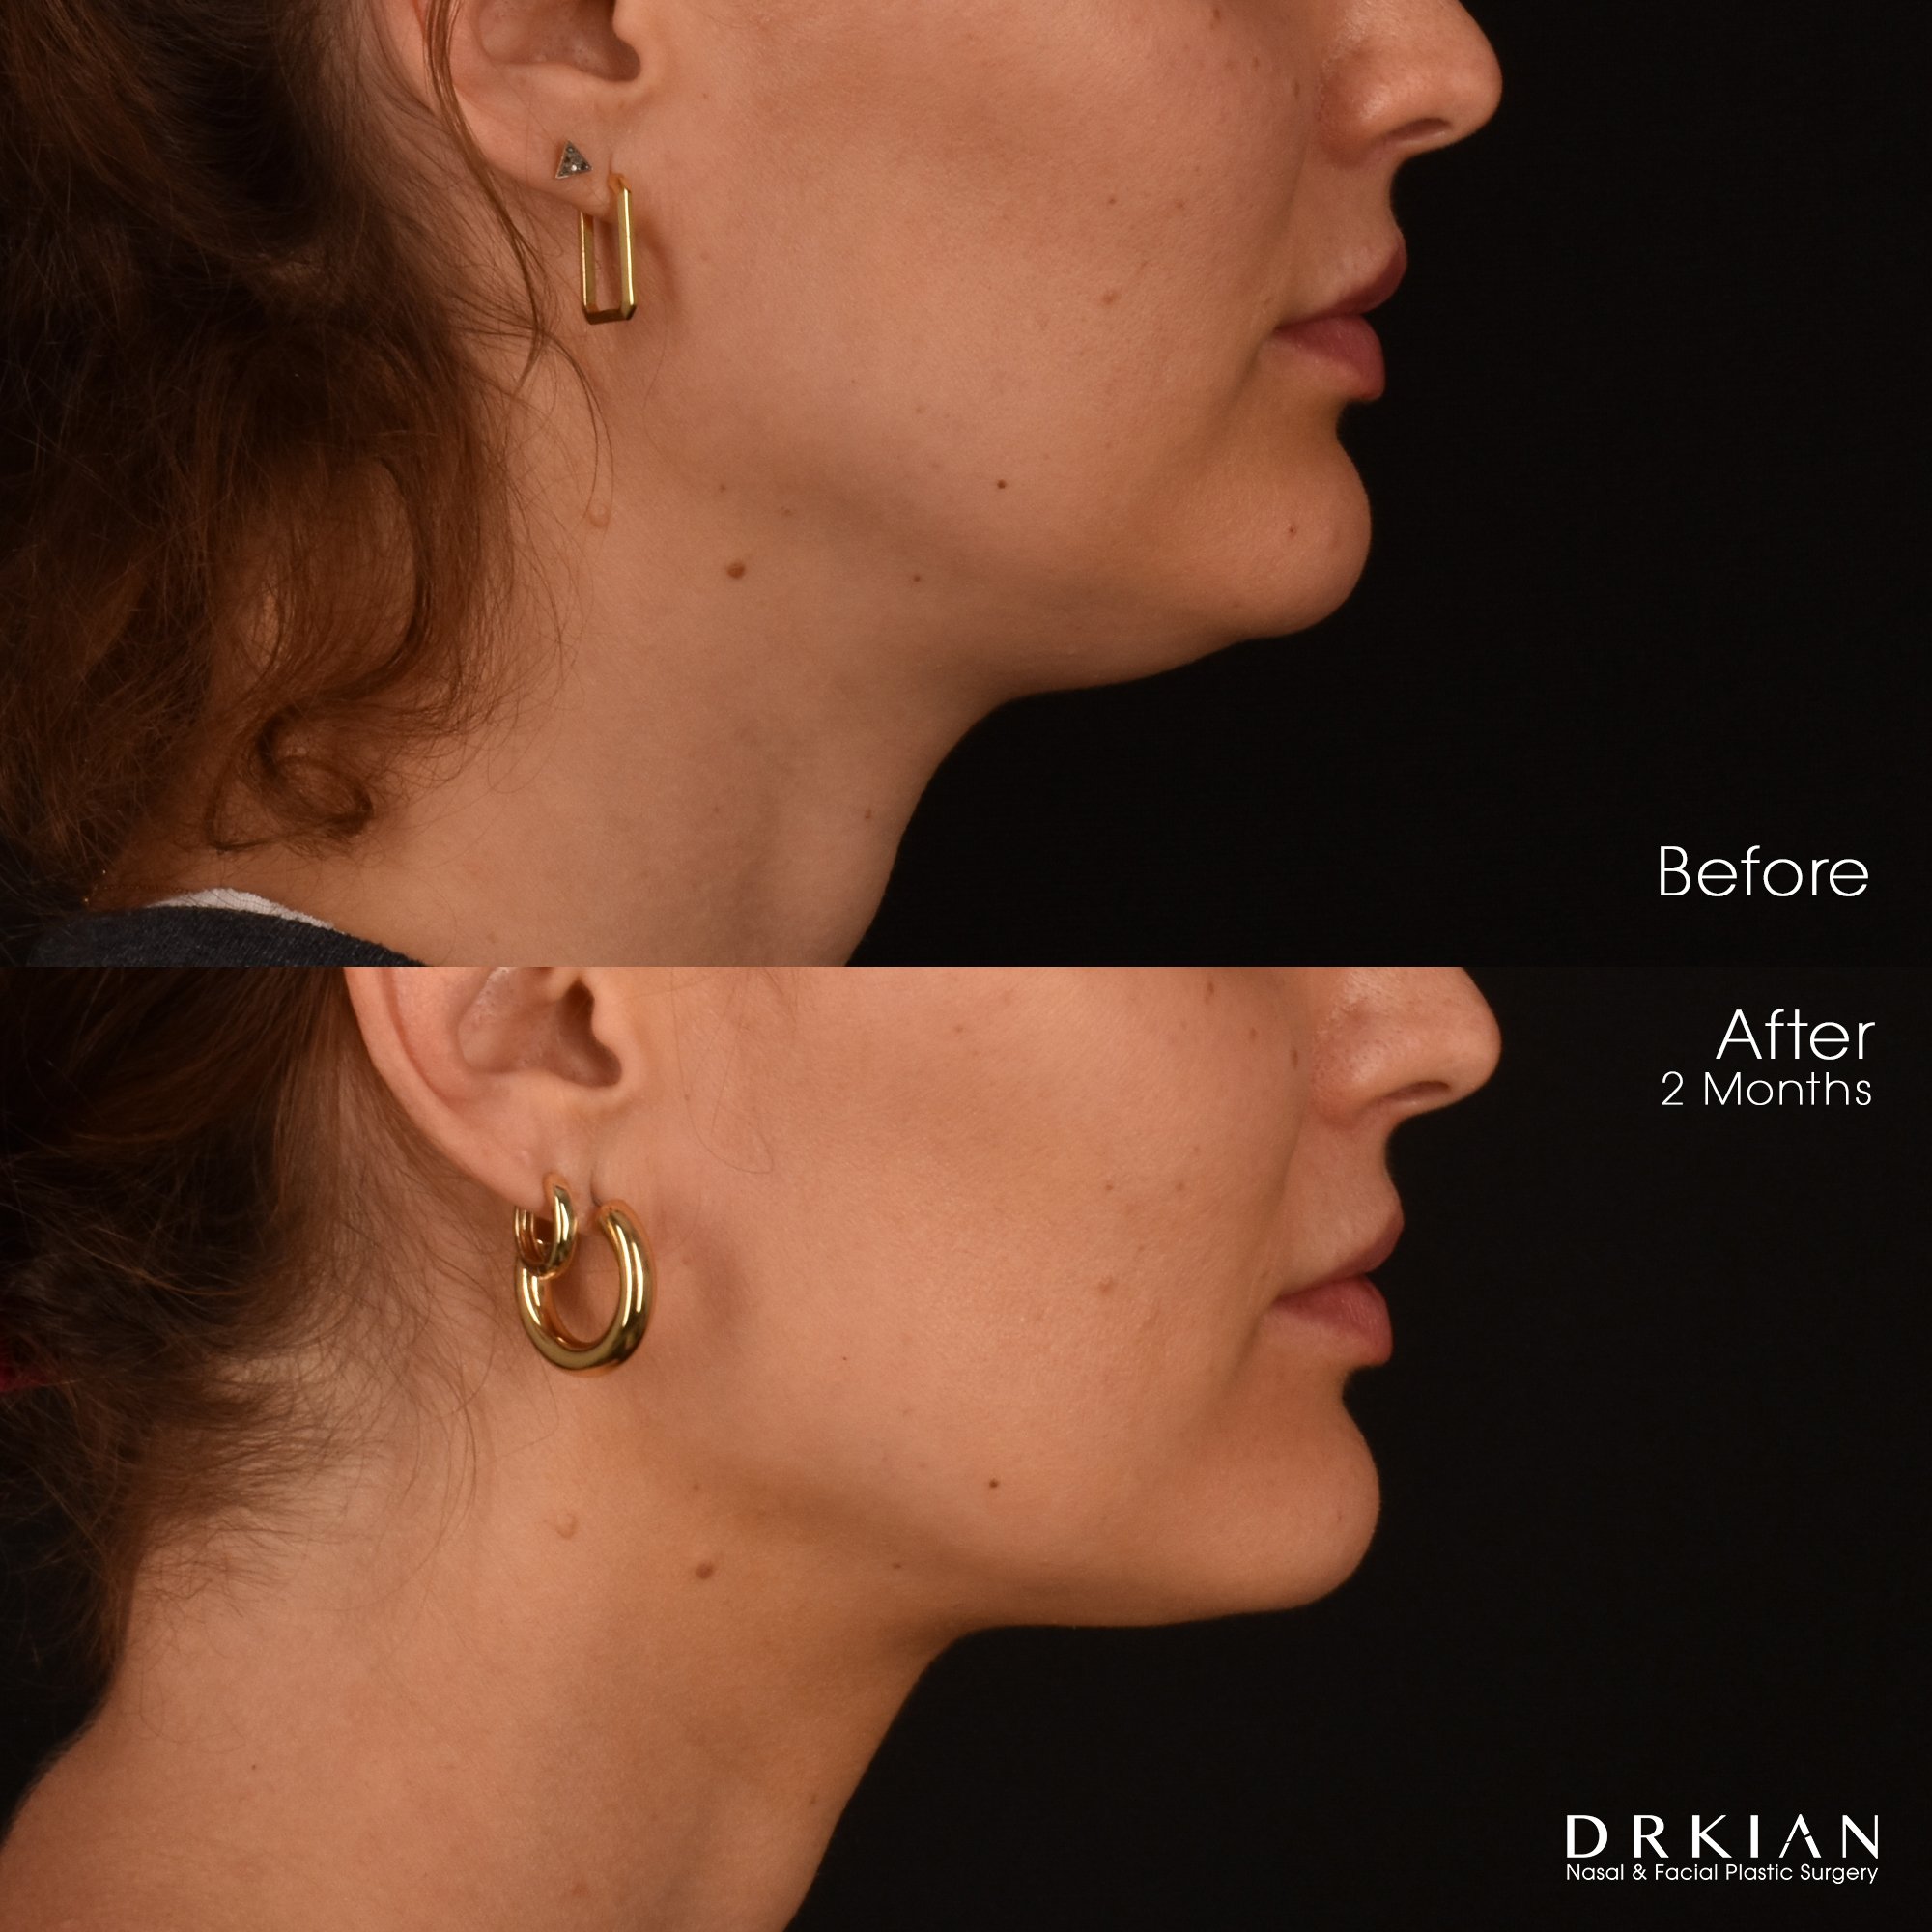
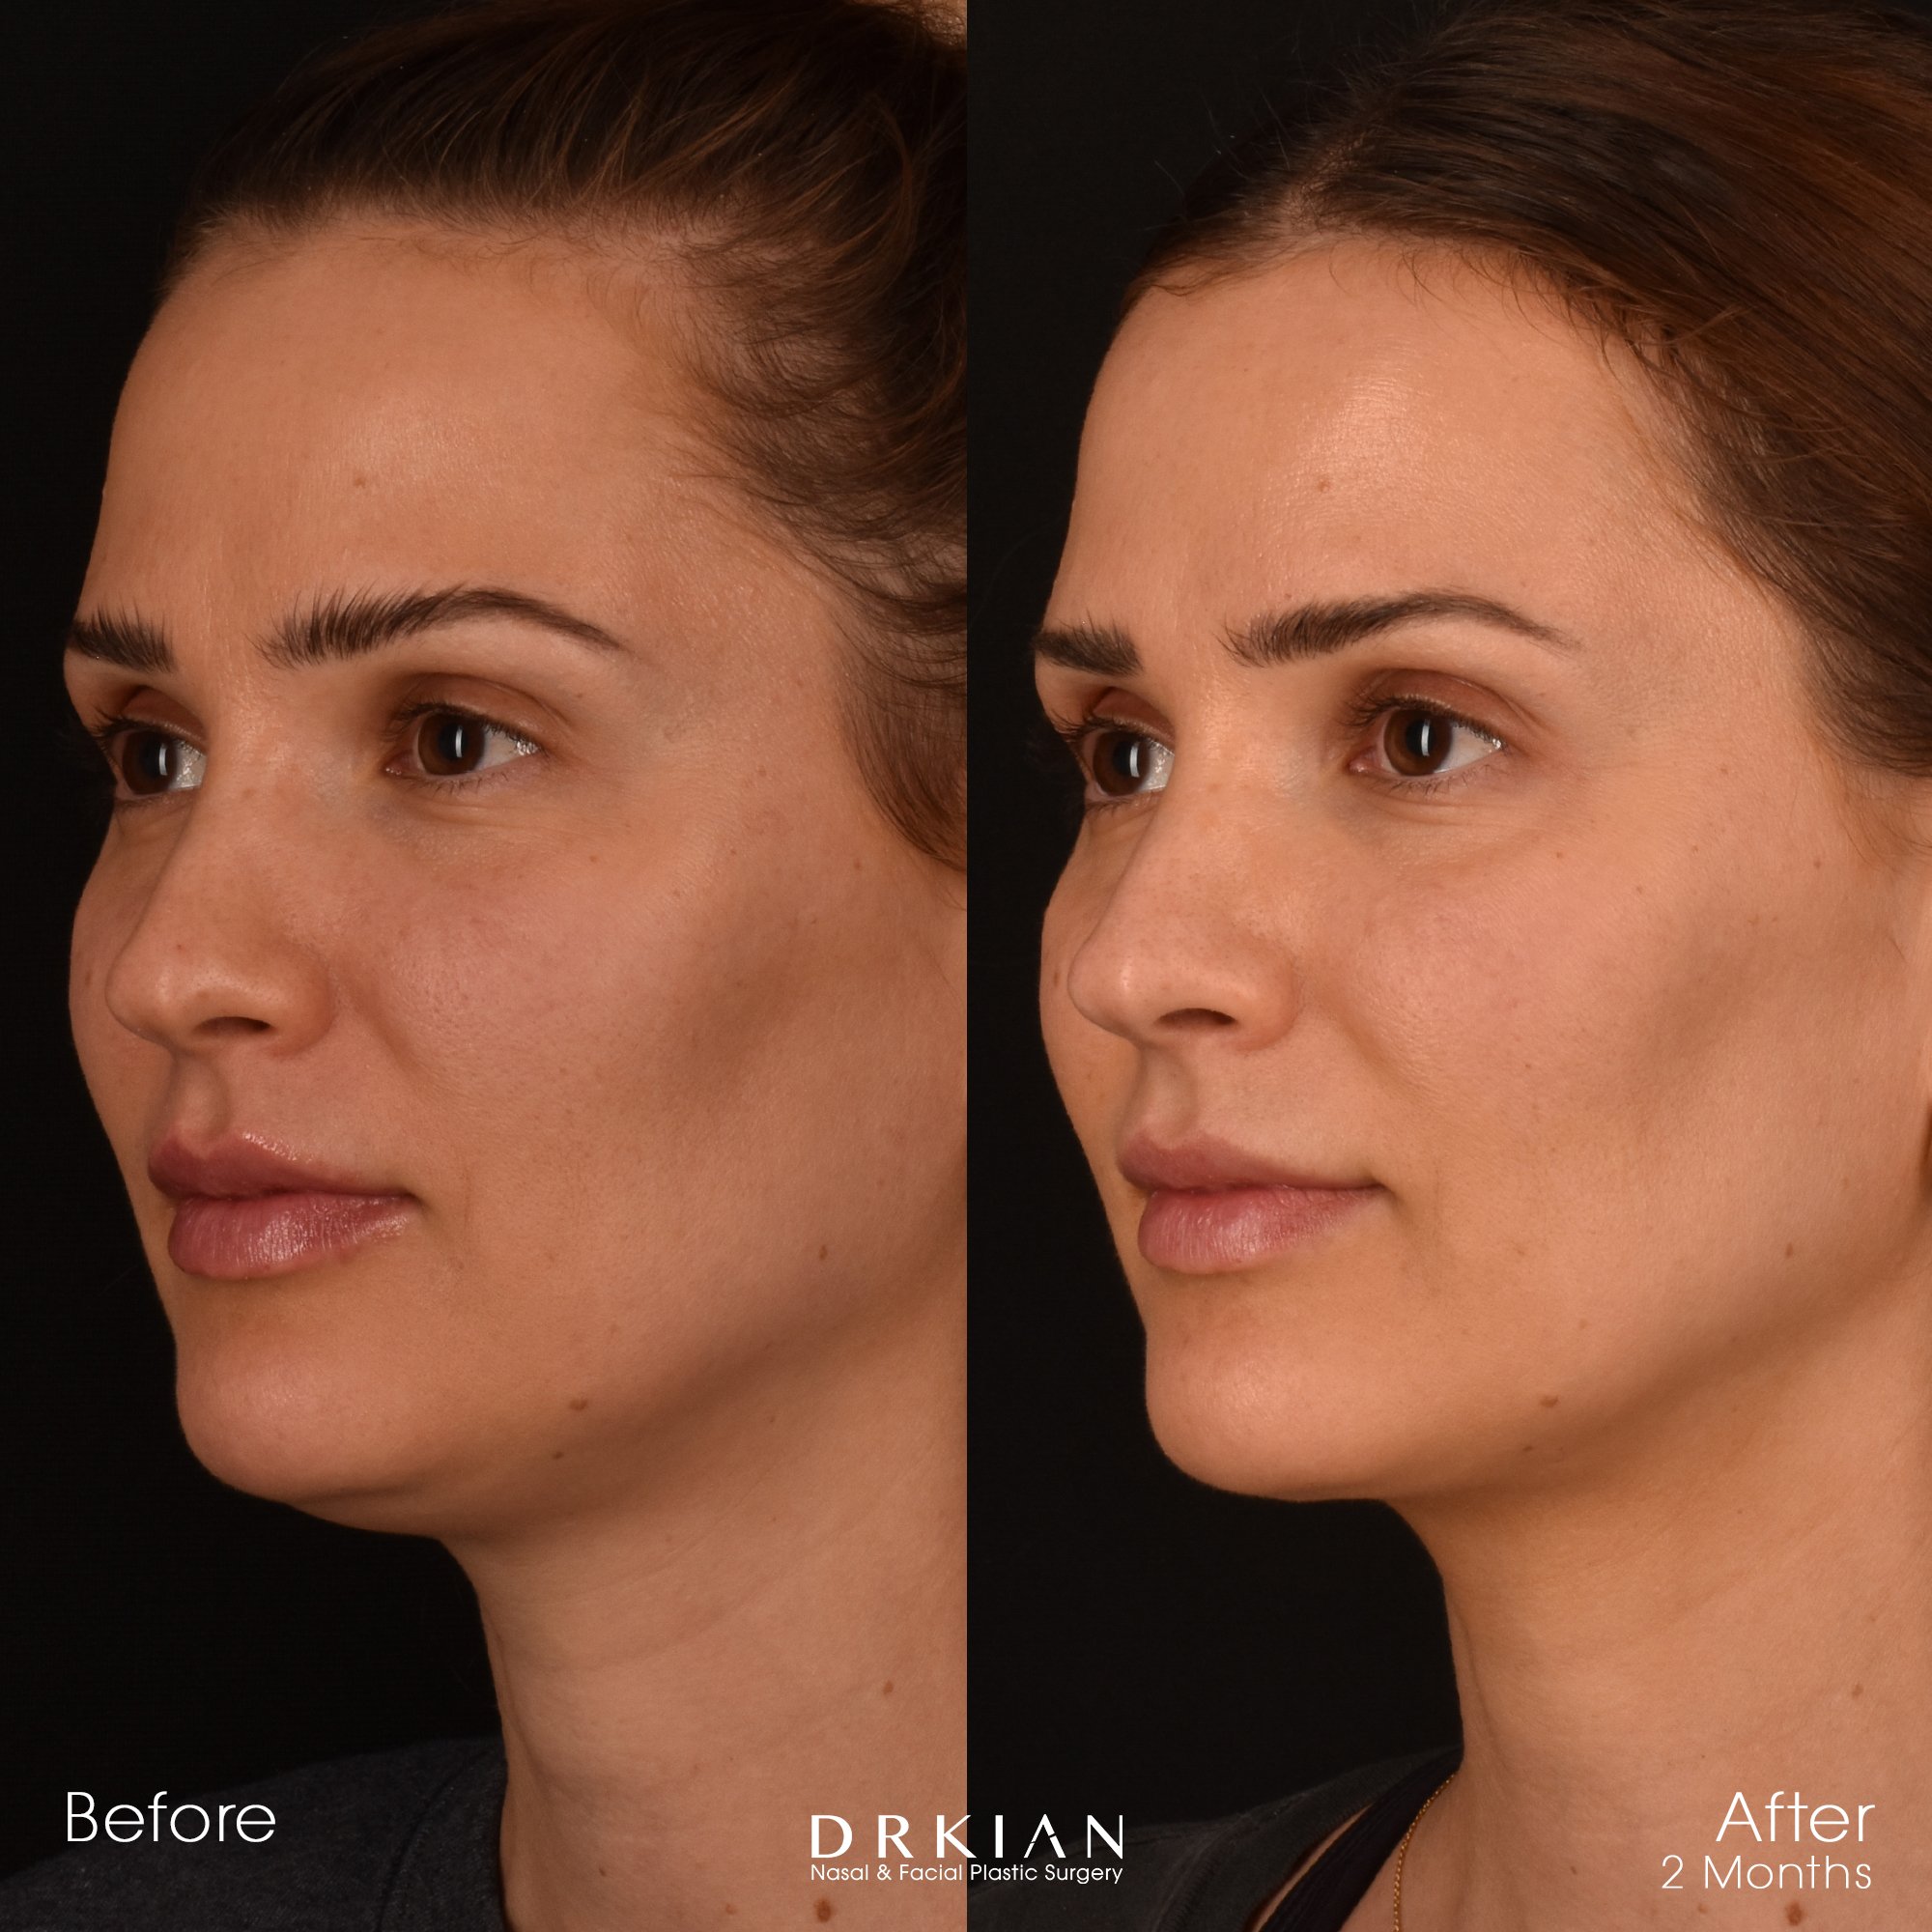
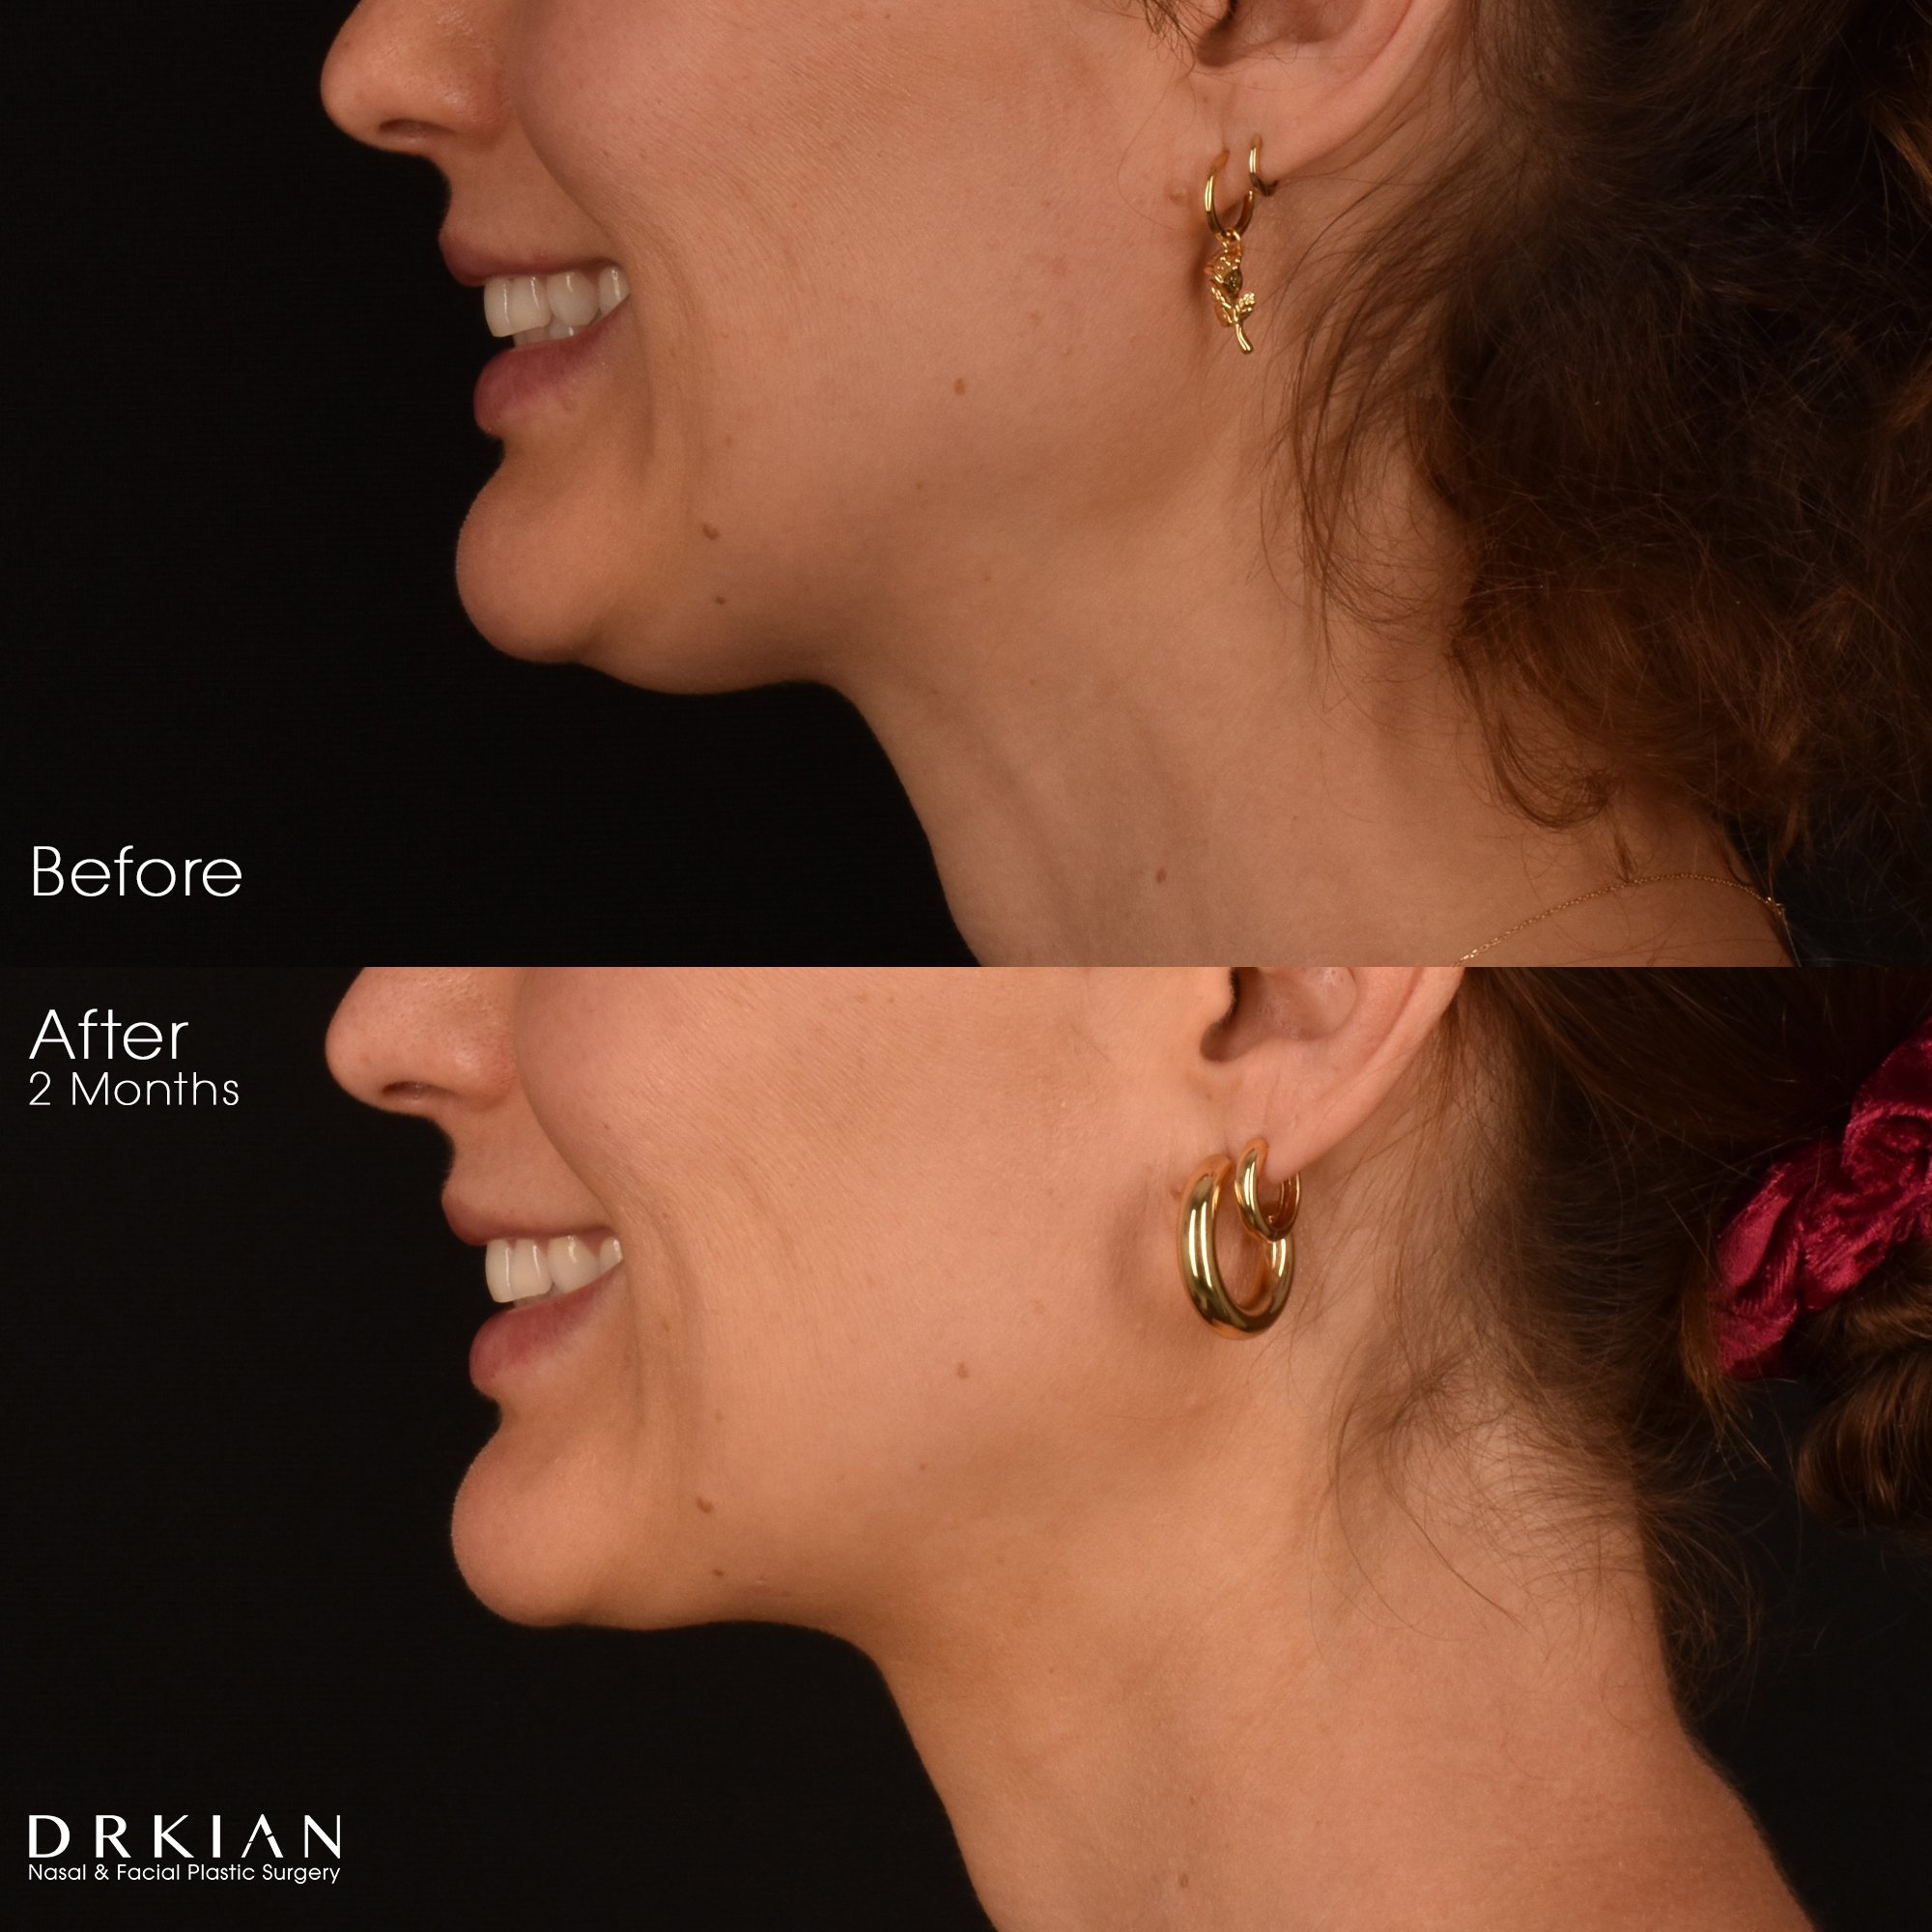
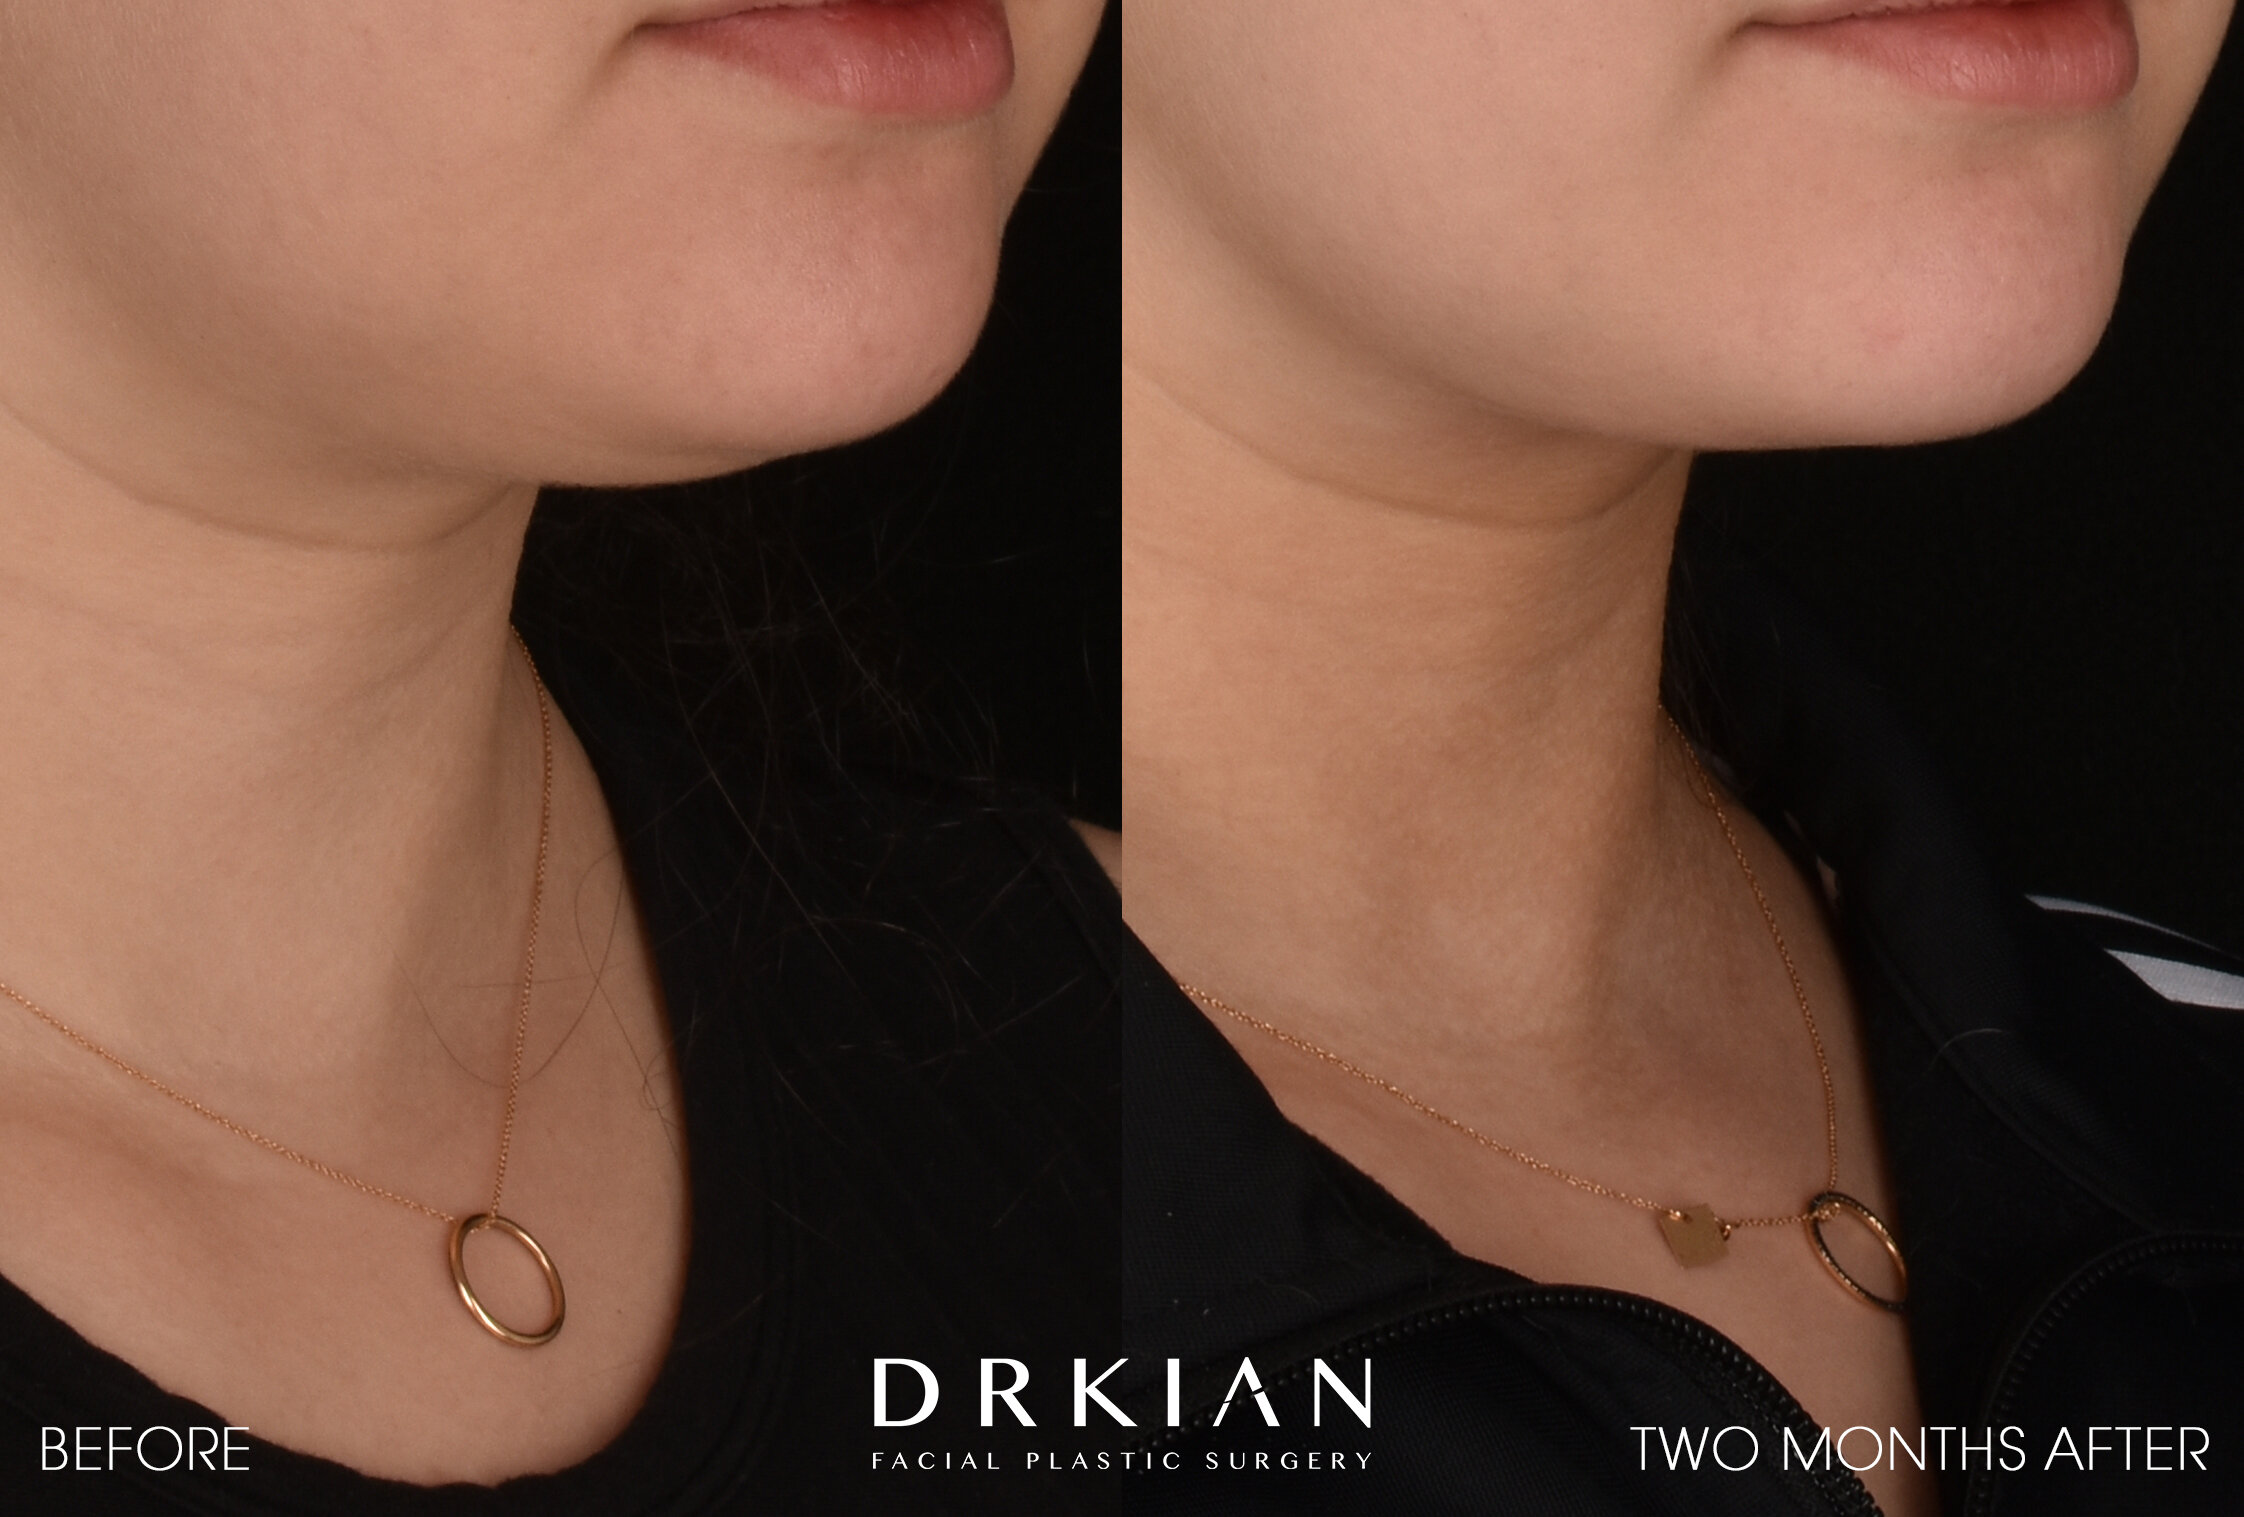
Embrace RF (FaceTite & Morpheus8 to Submentum & Lower 1/3 of Face): Before & After Two Months
Embrace RF (FaceTite & Morpheus8 to Submentum & Lower 1/3 of Face): Before & After Two Months
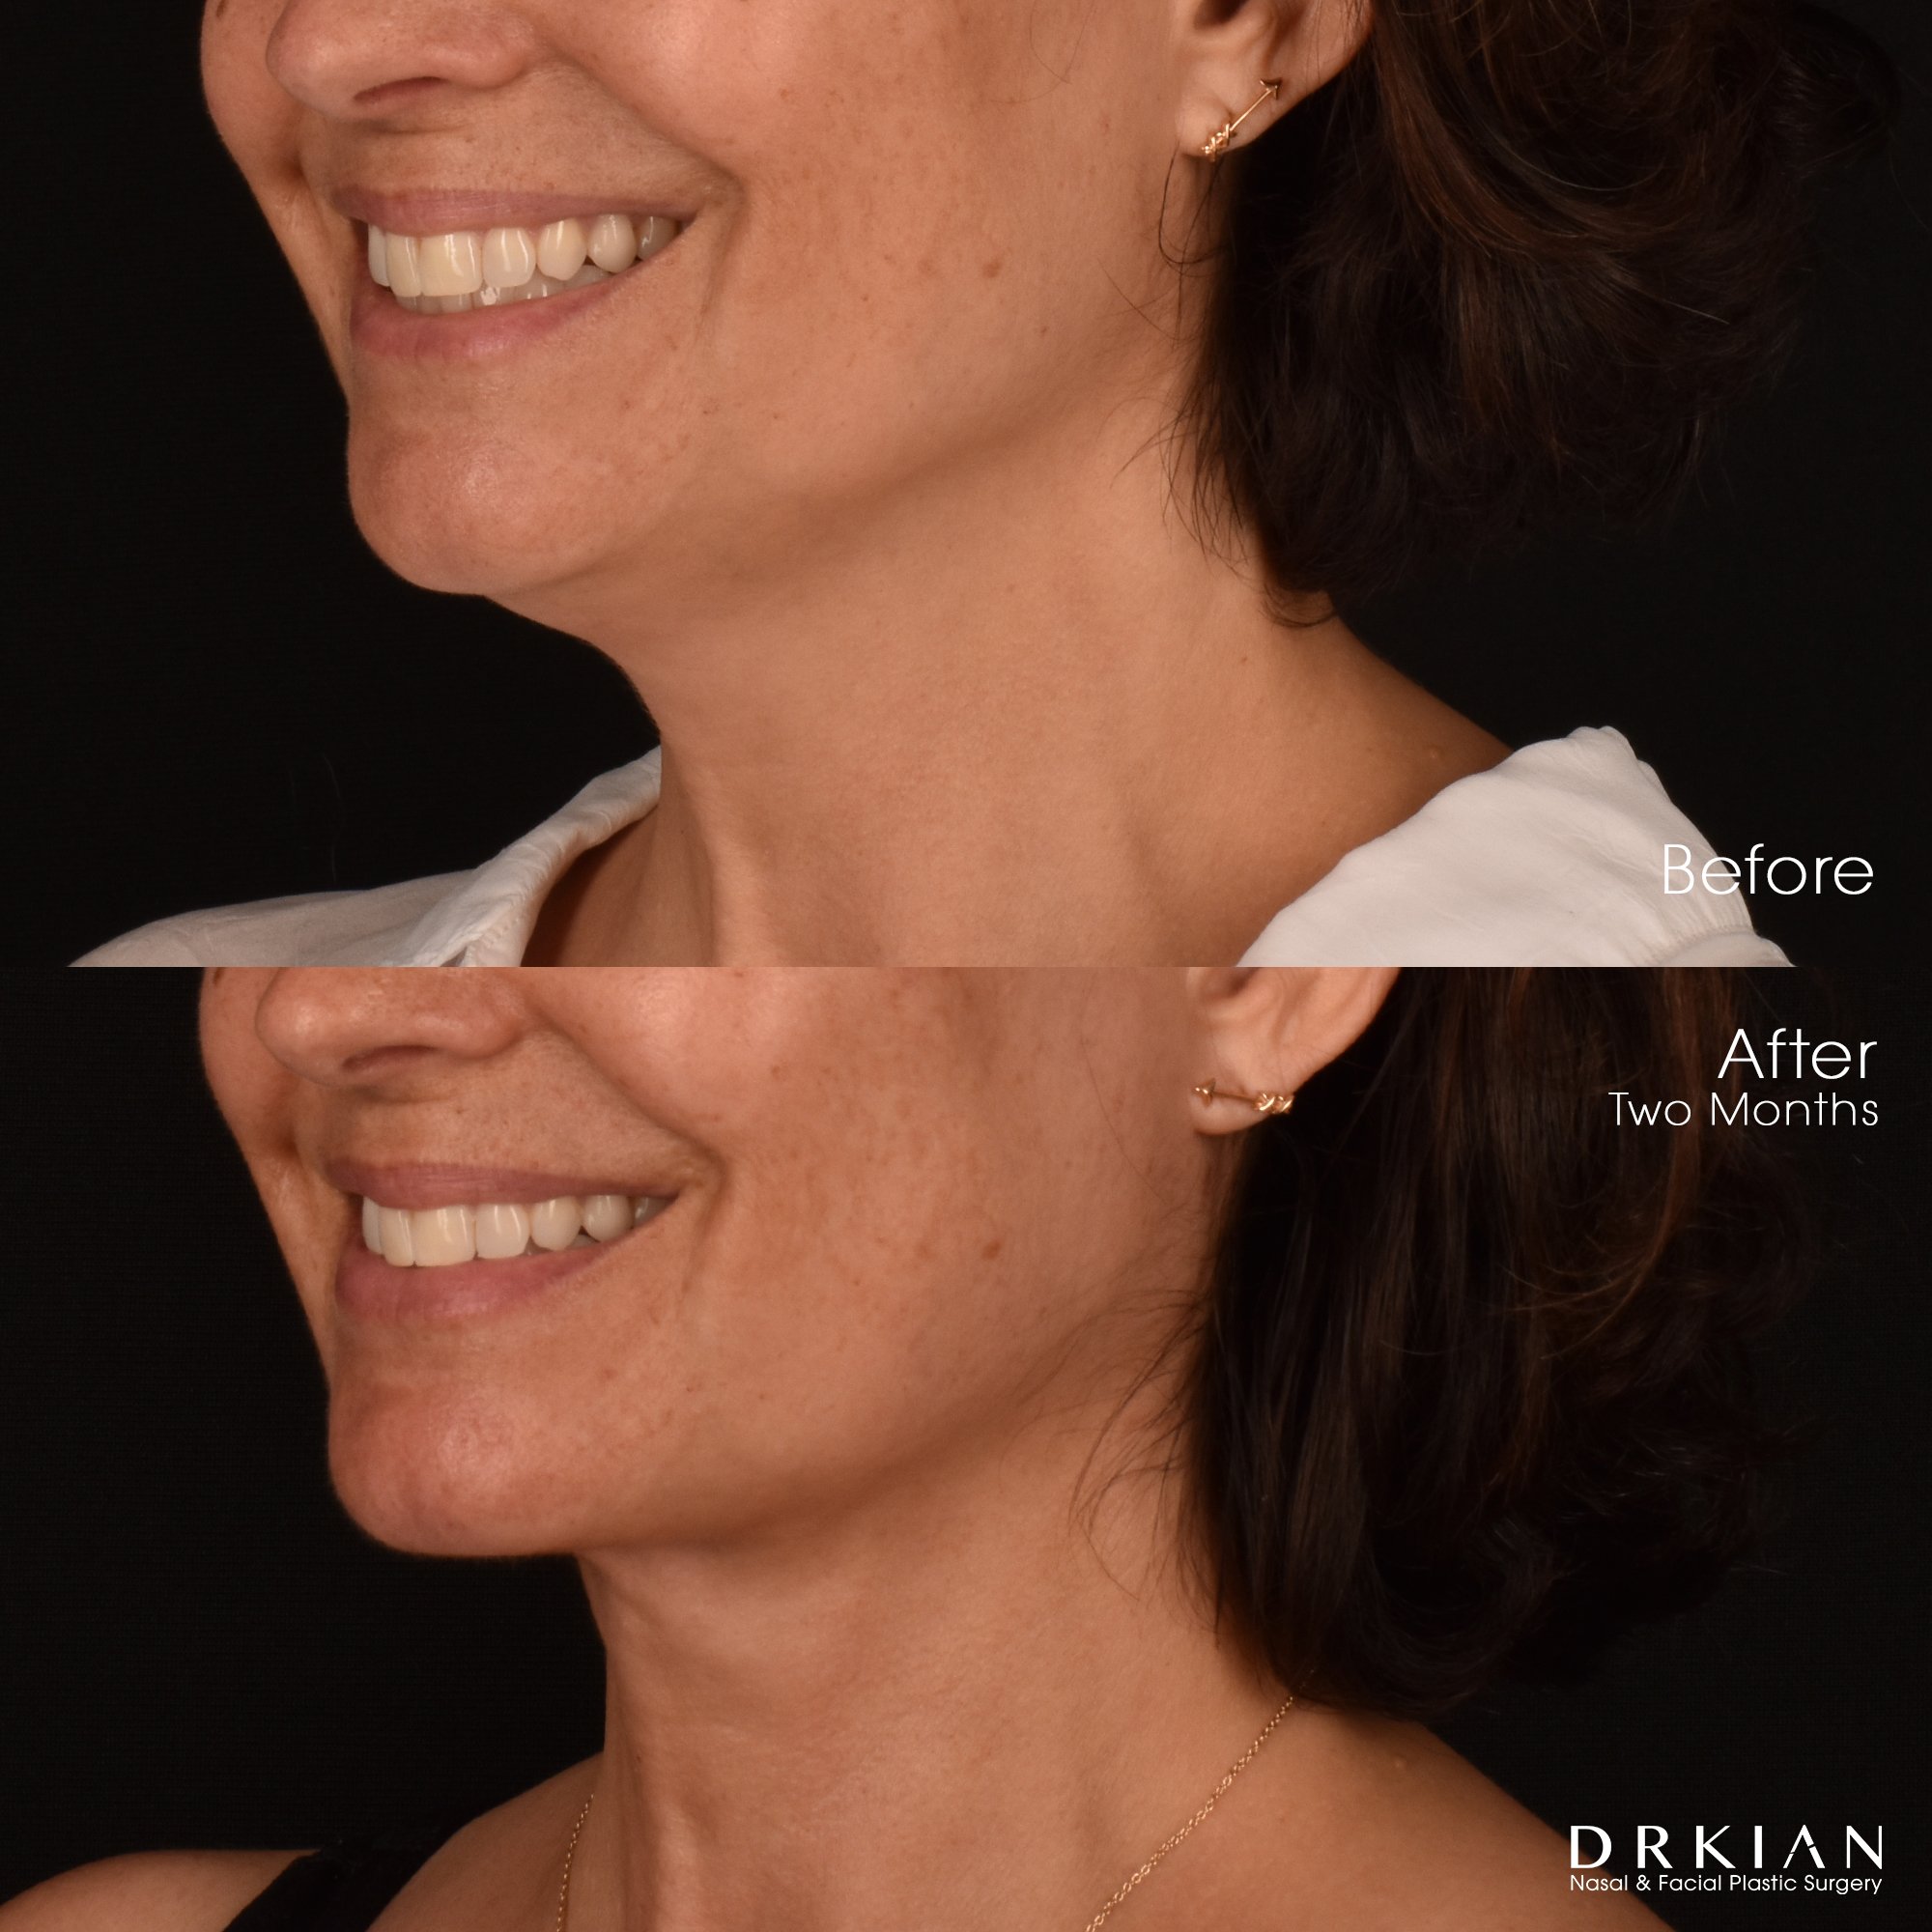
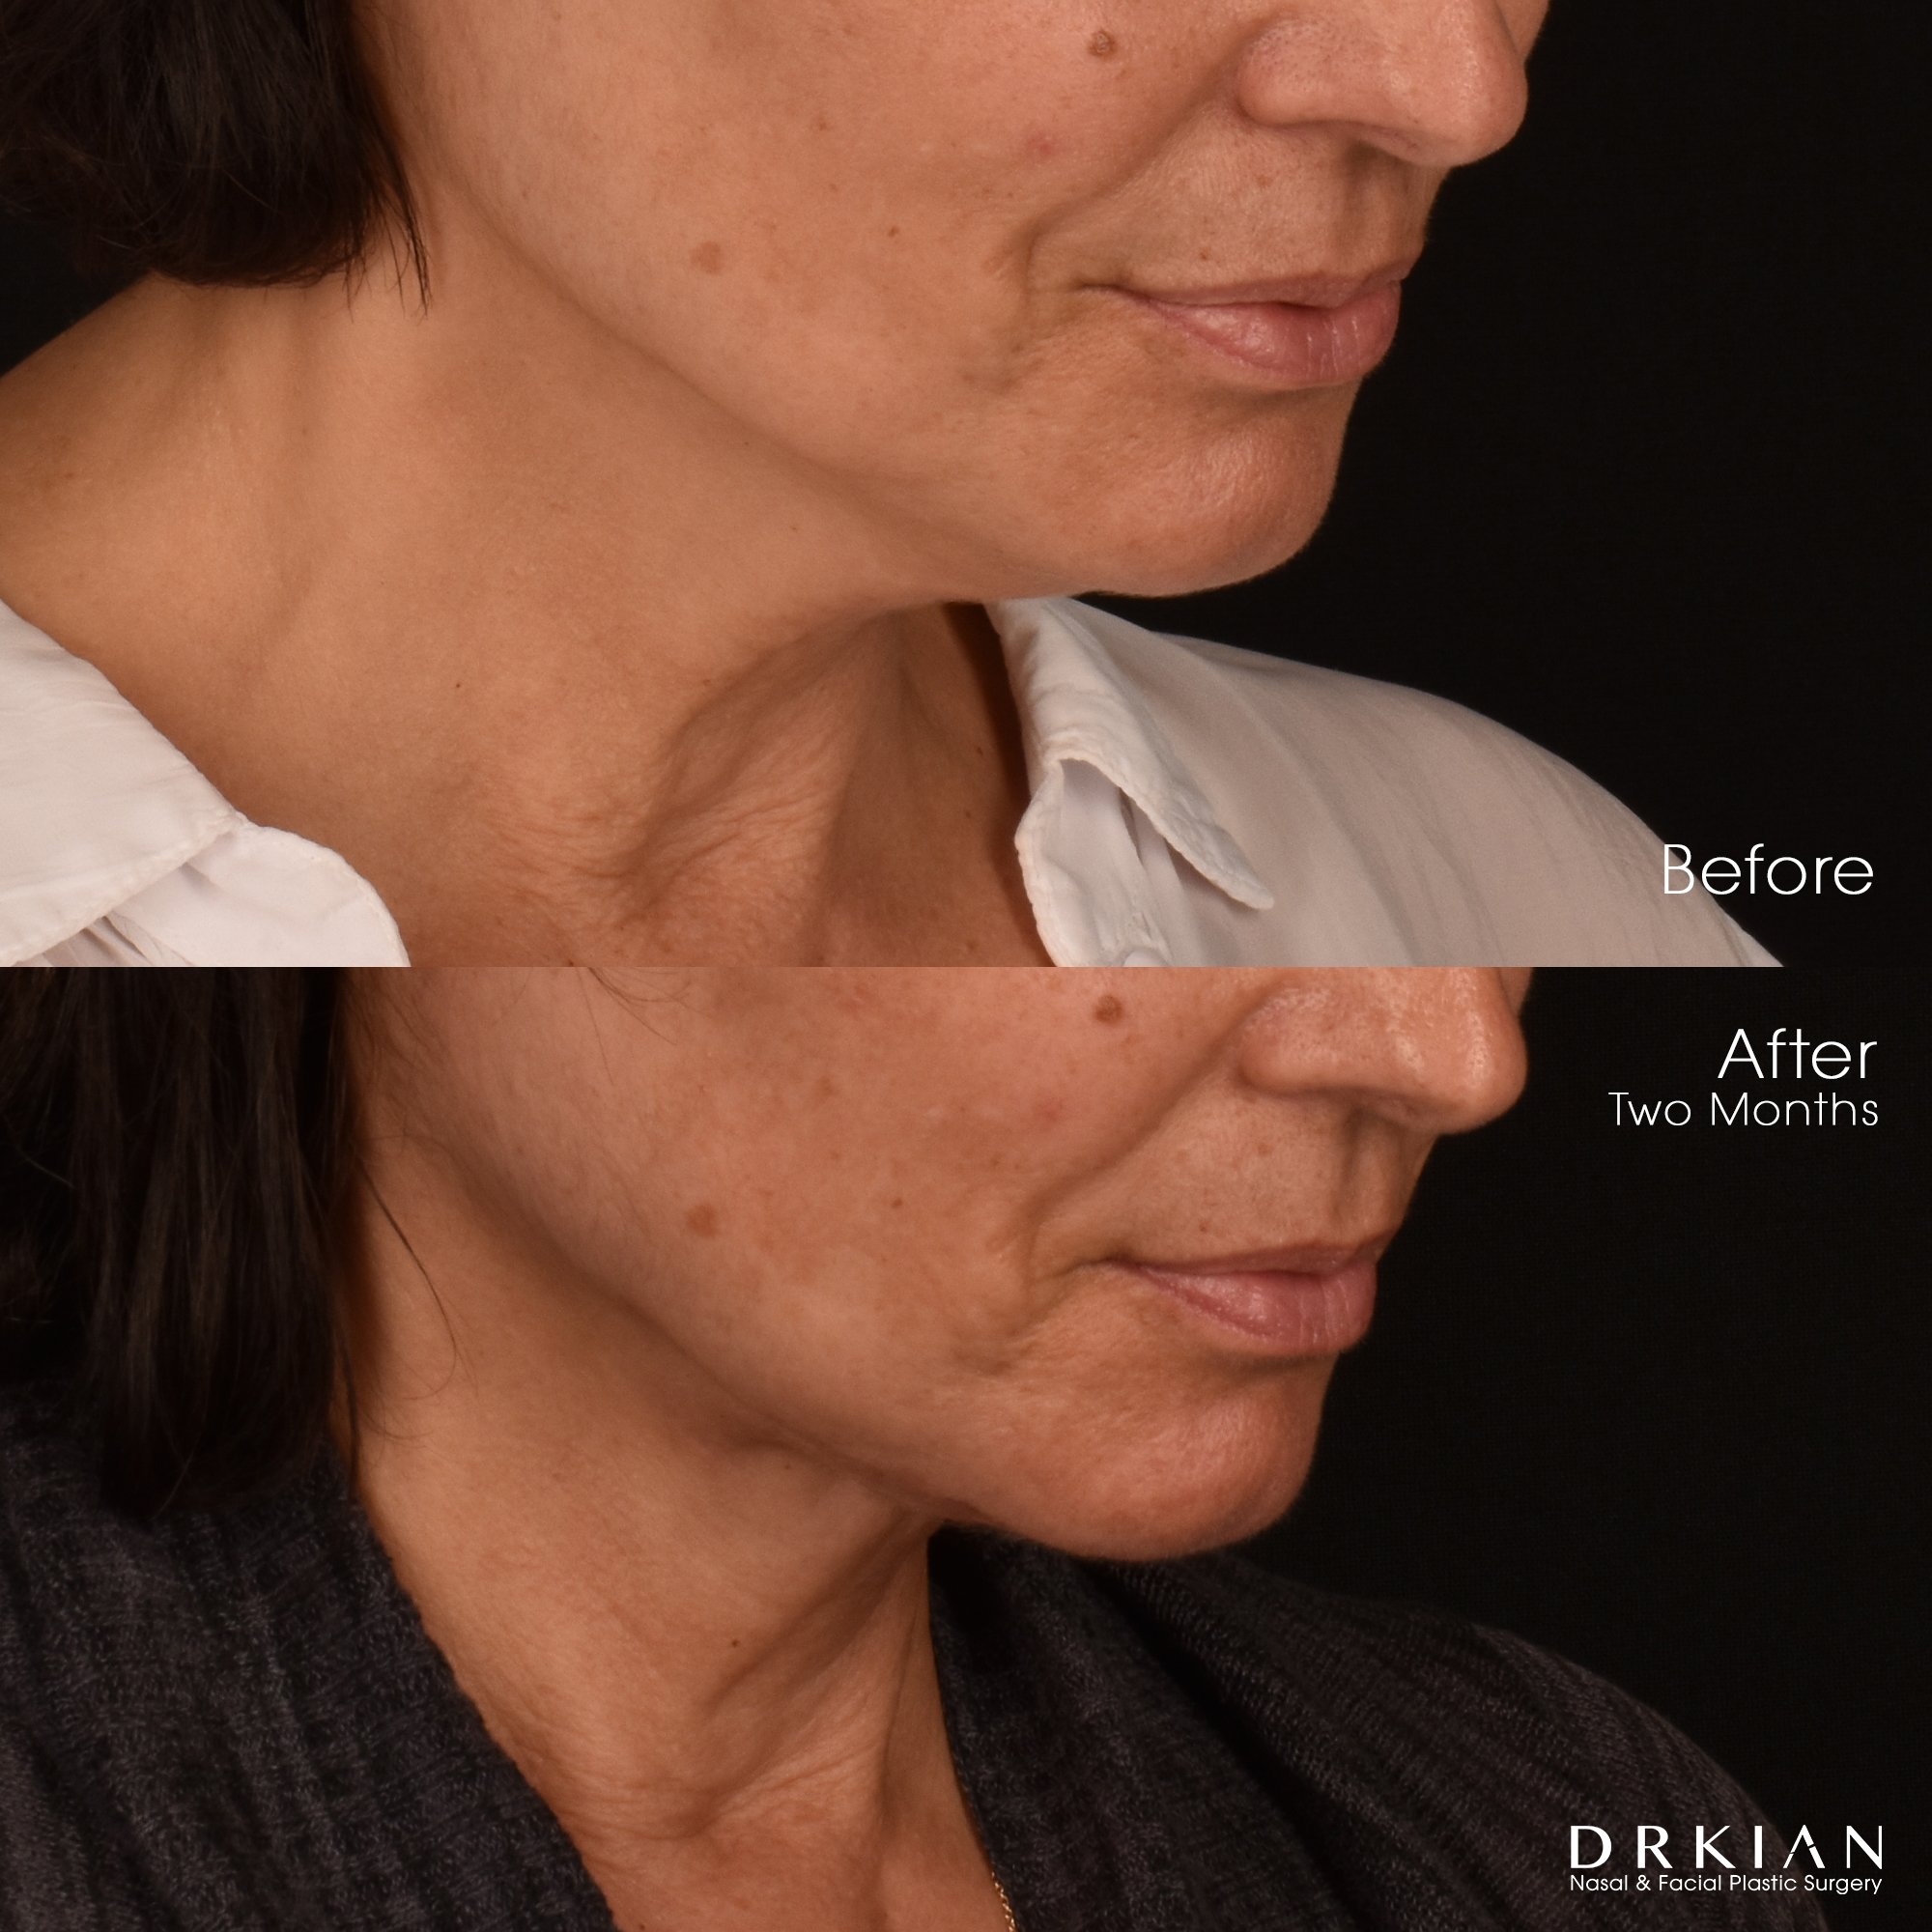
Embrace RF (FaceTite & Morpheus8 to Submentum & Lower 1/3 of Face): Before & After Two Months
Embrace RF (FaceTite & Morpheus8 to Submentum & Lower 1/3 of Face): Before & After Two Months

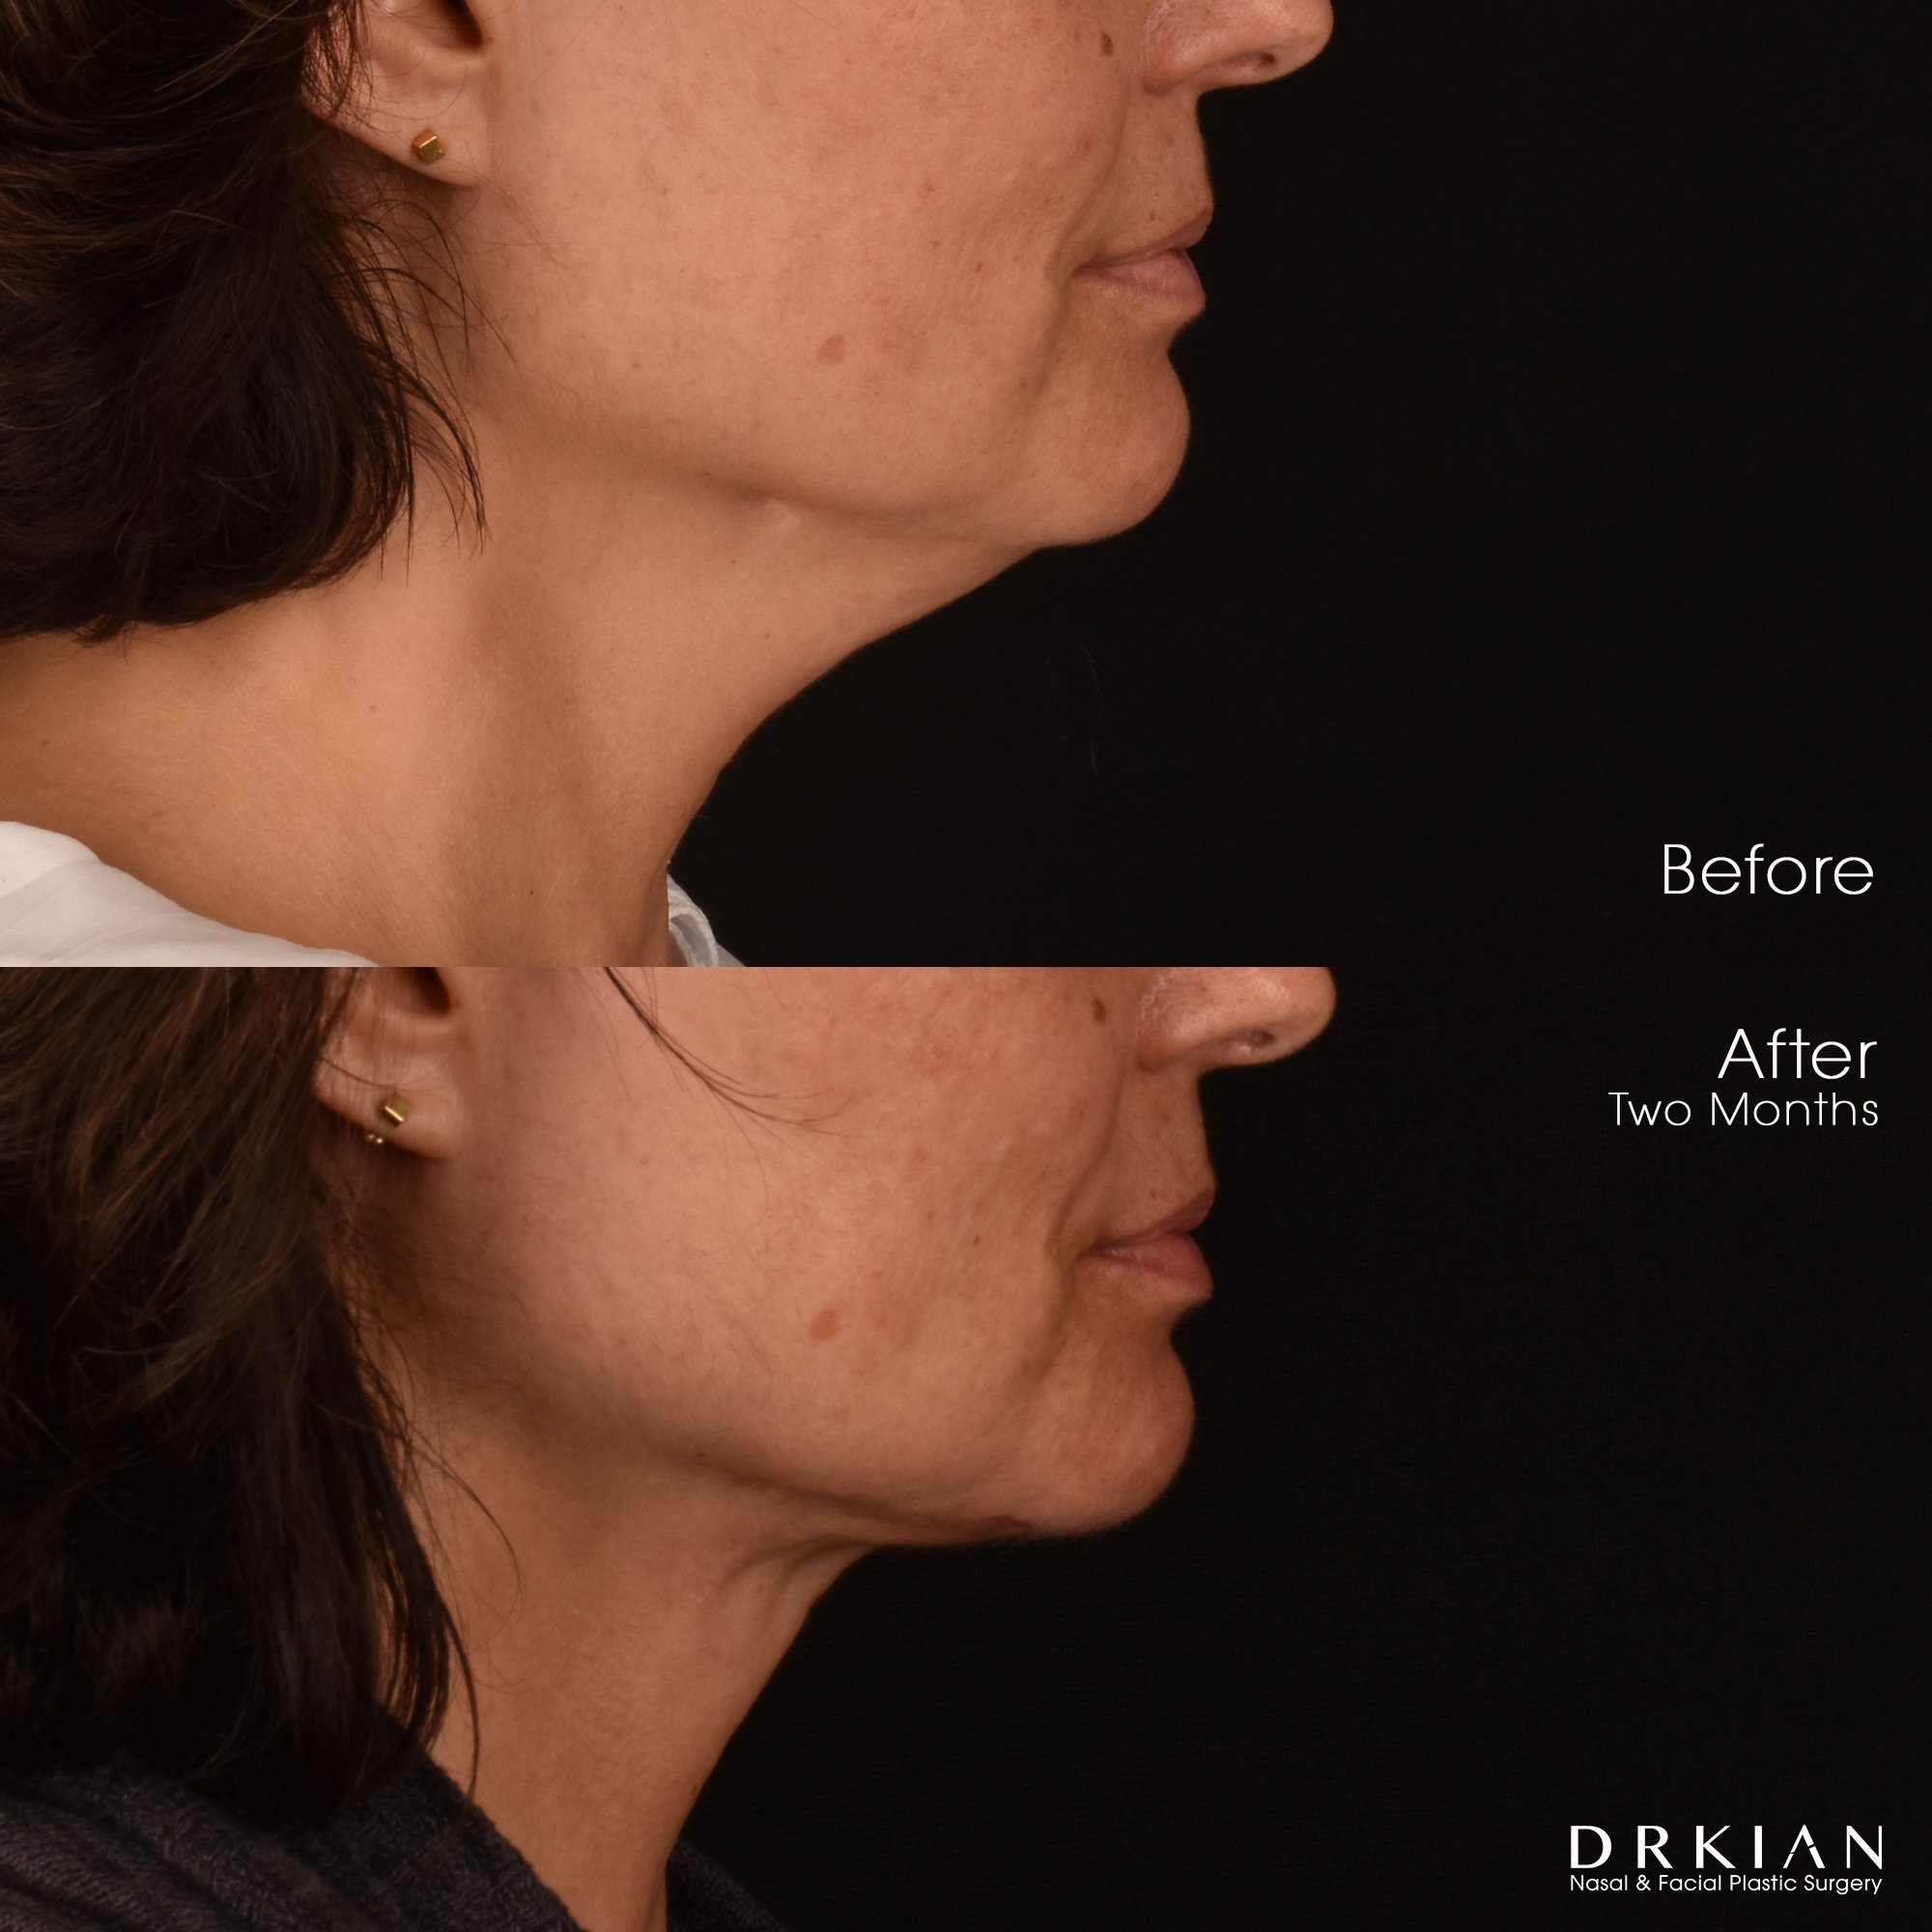
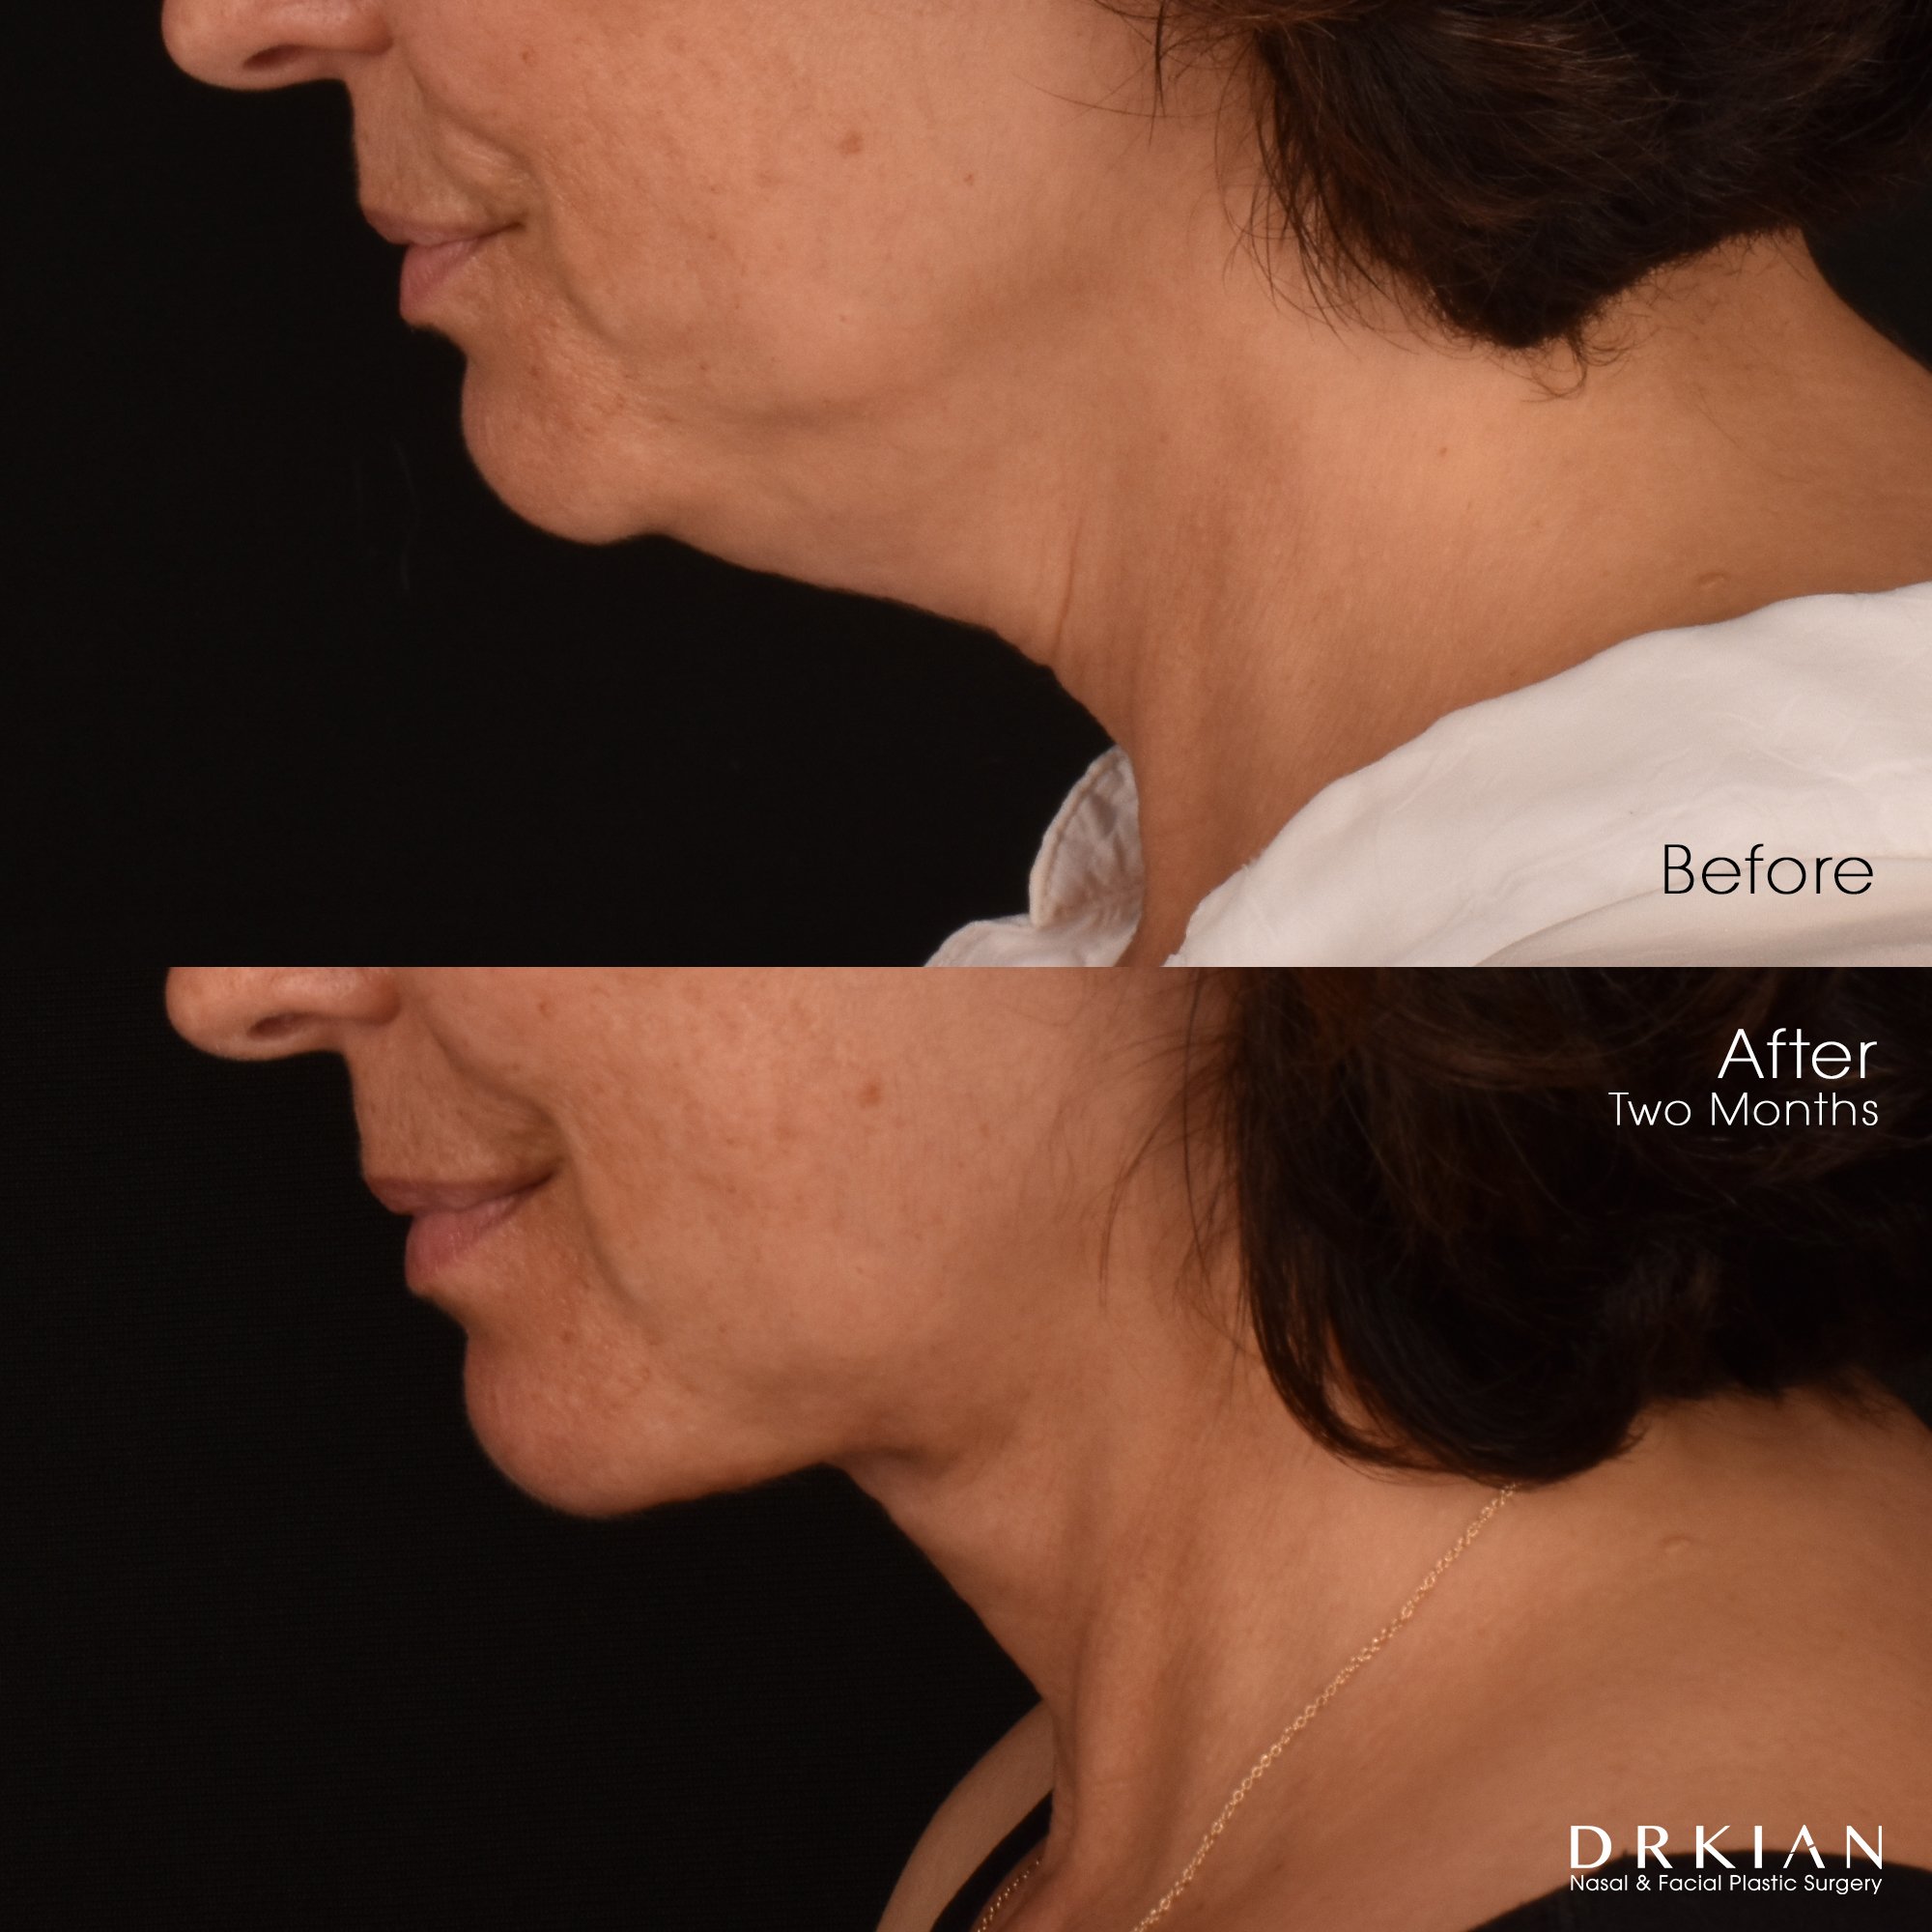
Embrace RF (FaceTite & Morpheus8 to Submentum & Lower 1/3 of Face): Before & After Two Months
Embrace RF (FaceTite & Morpheus8 to Submentum & Lower 1/3 of Face): Before & After Two Months
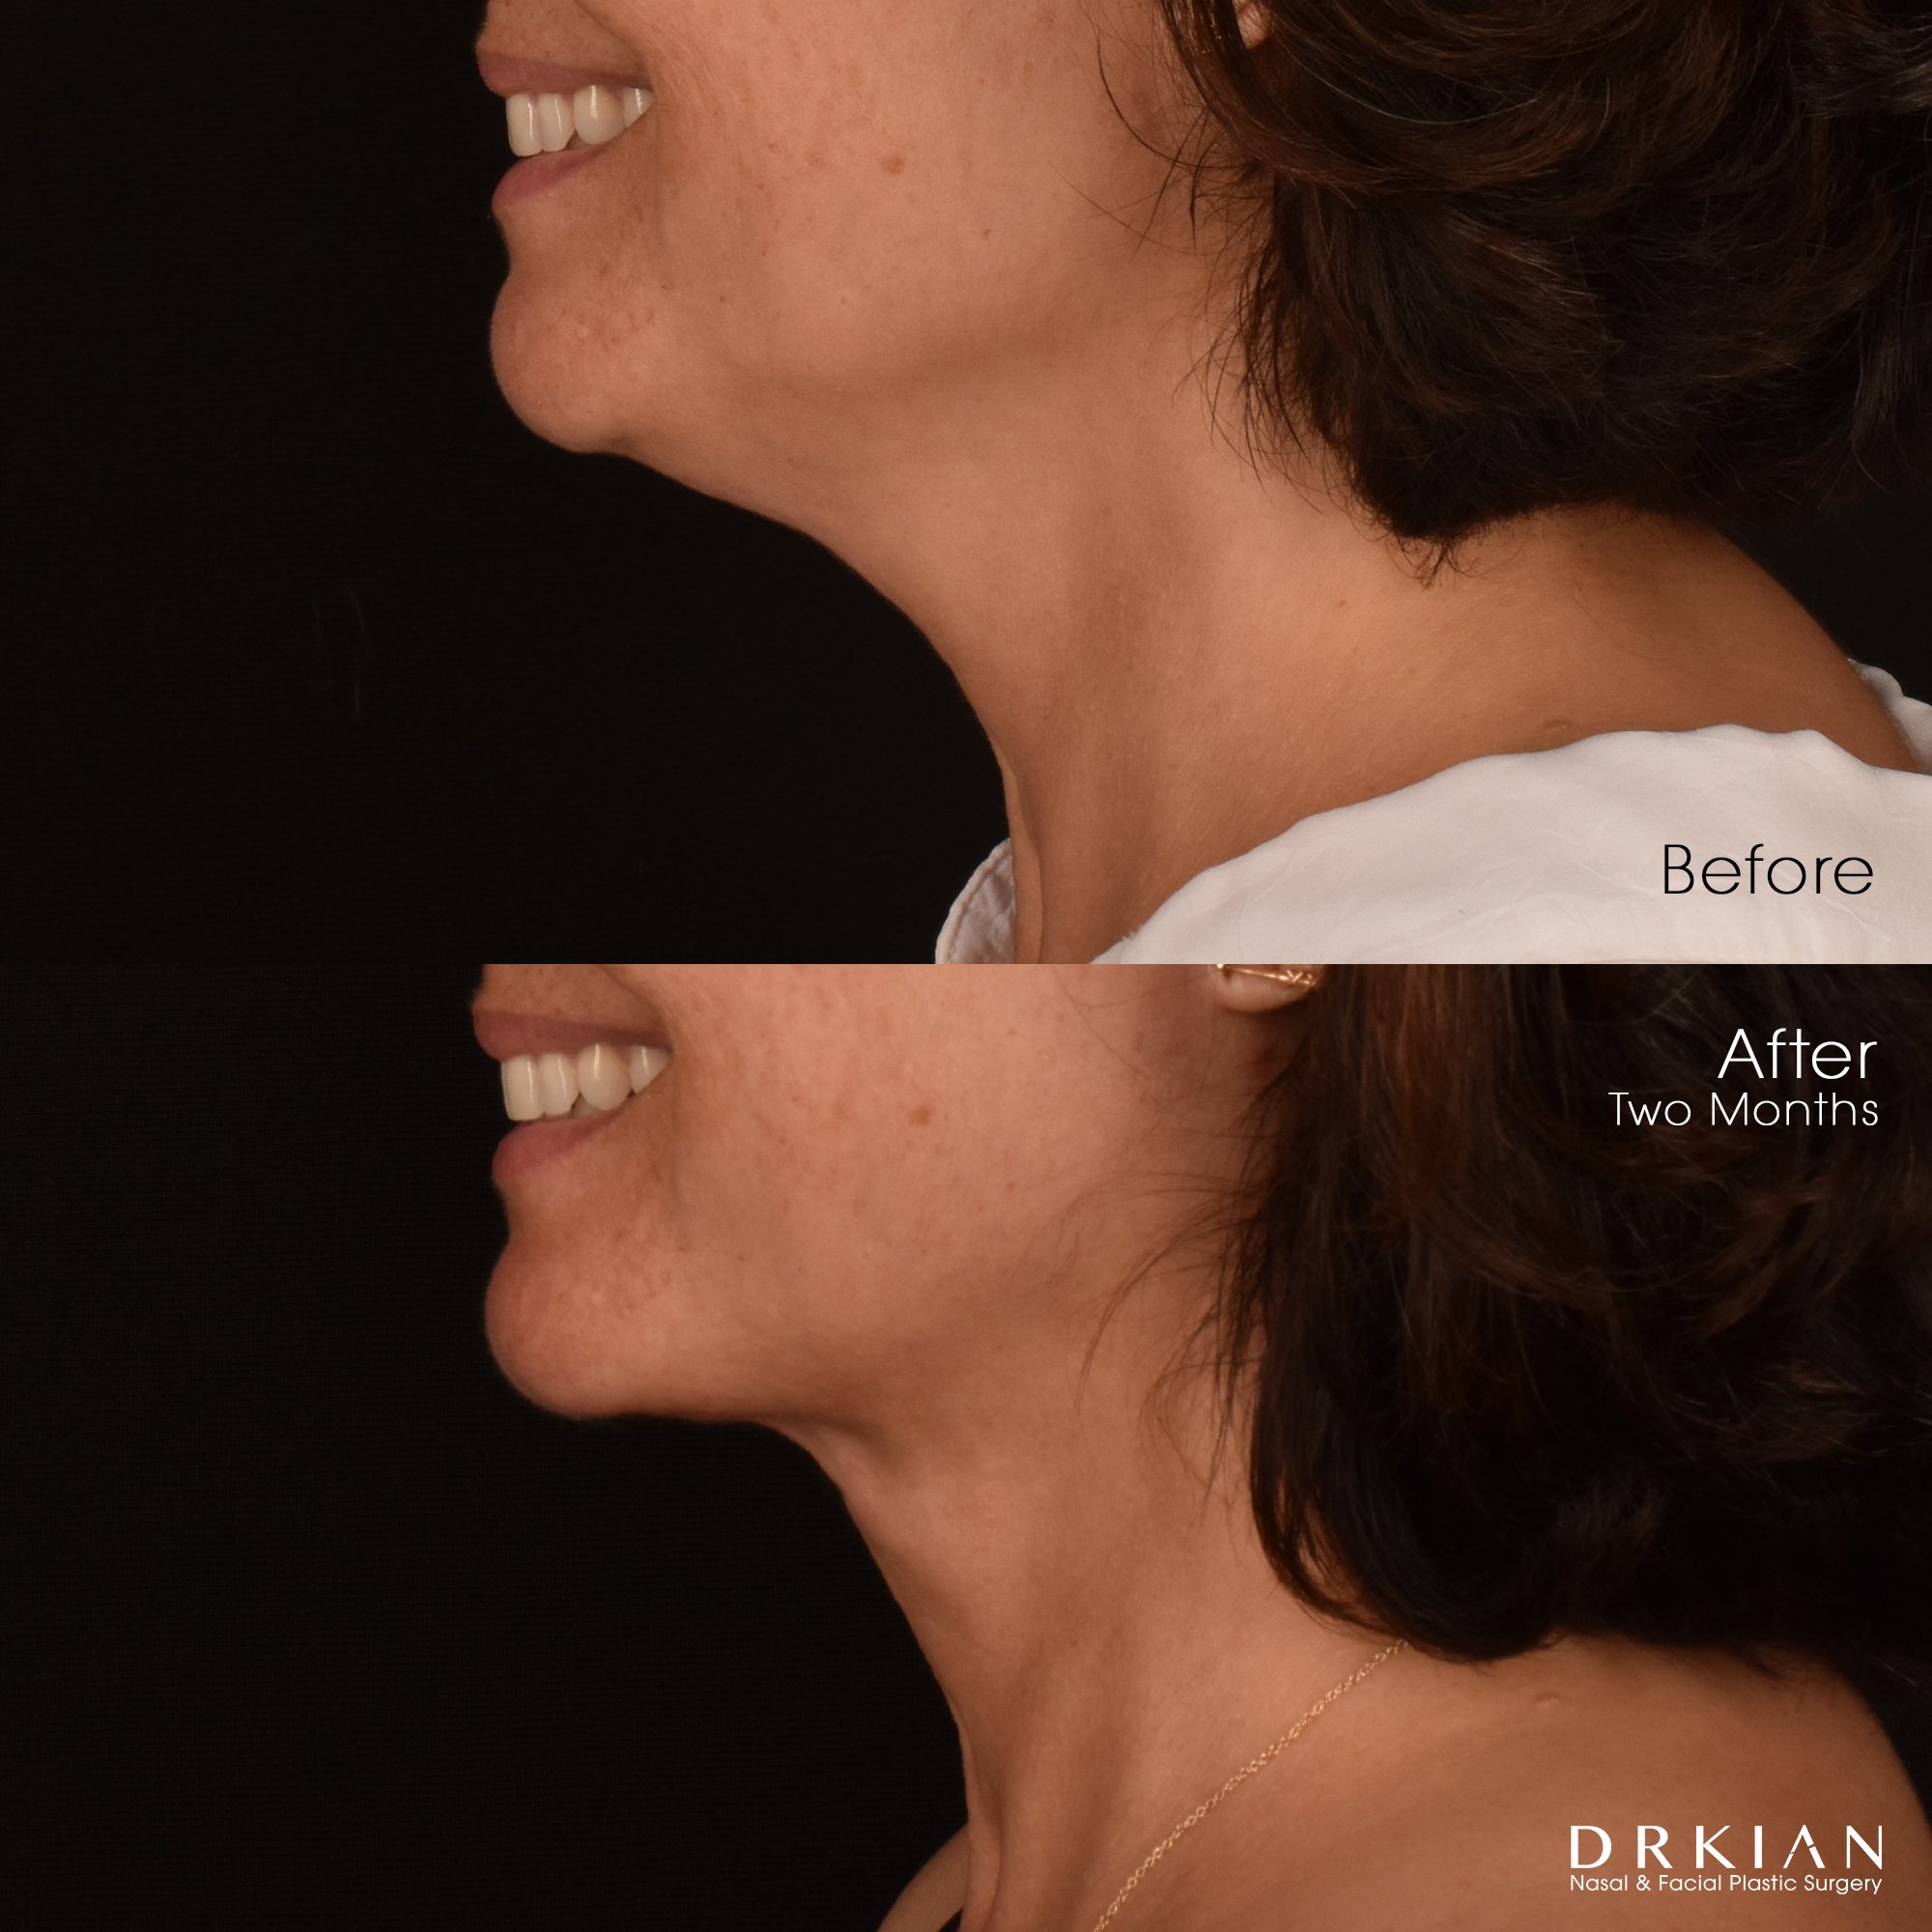
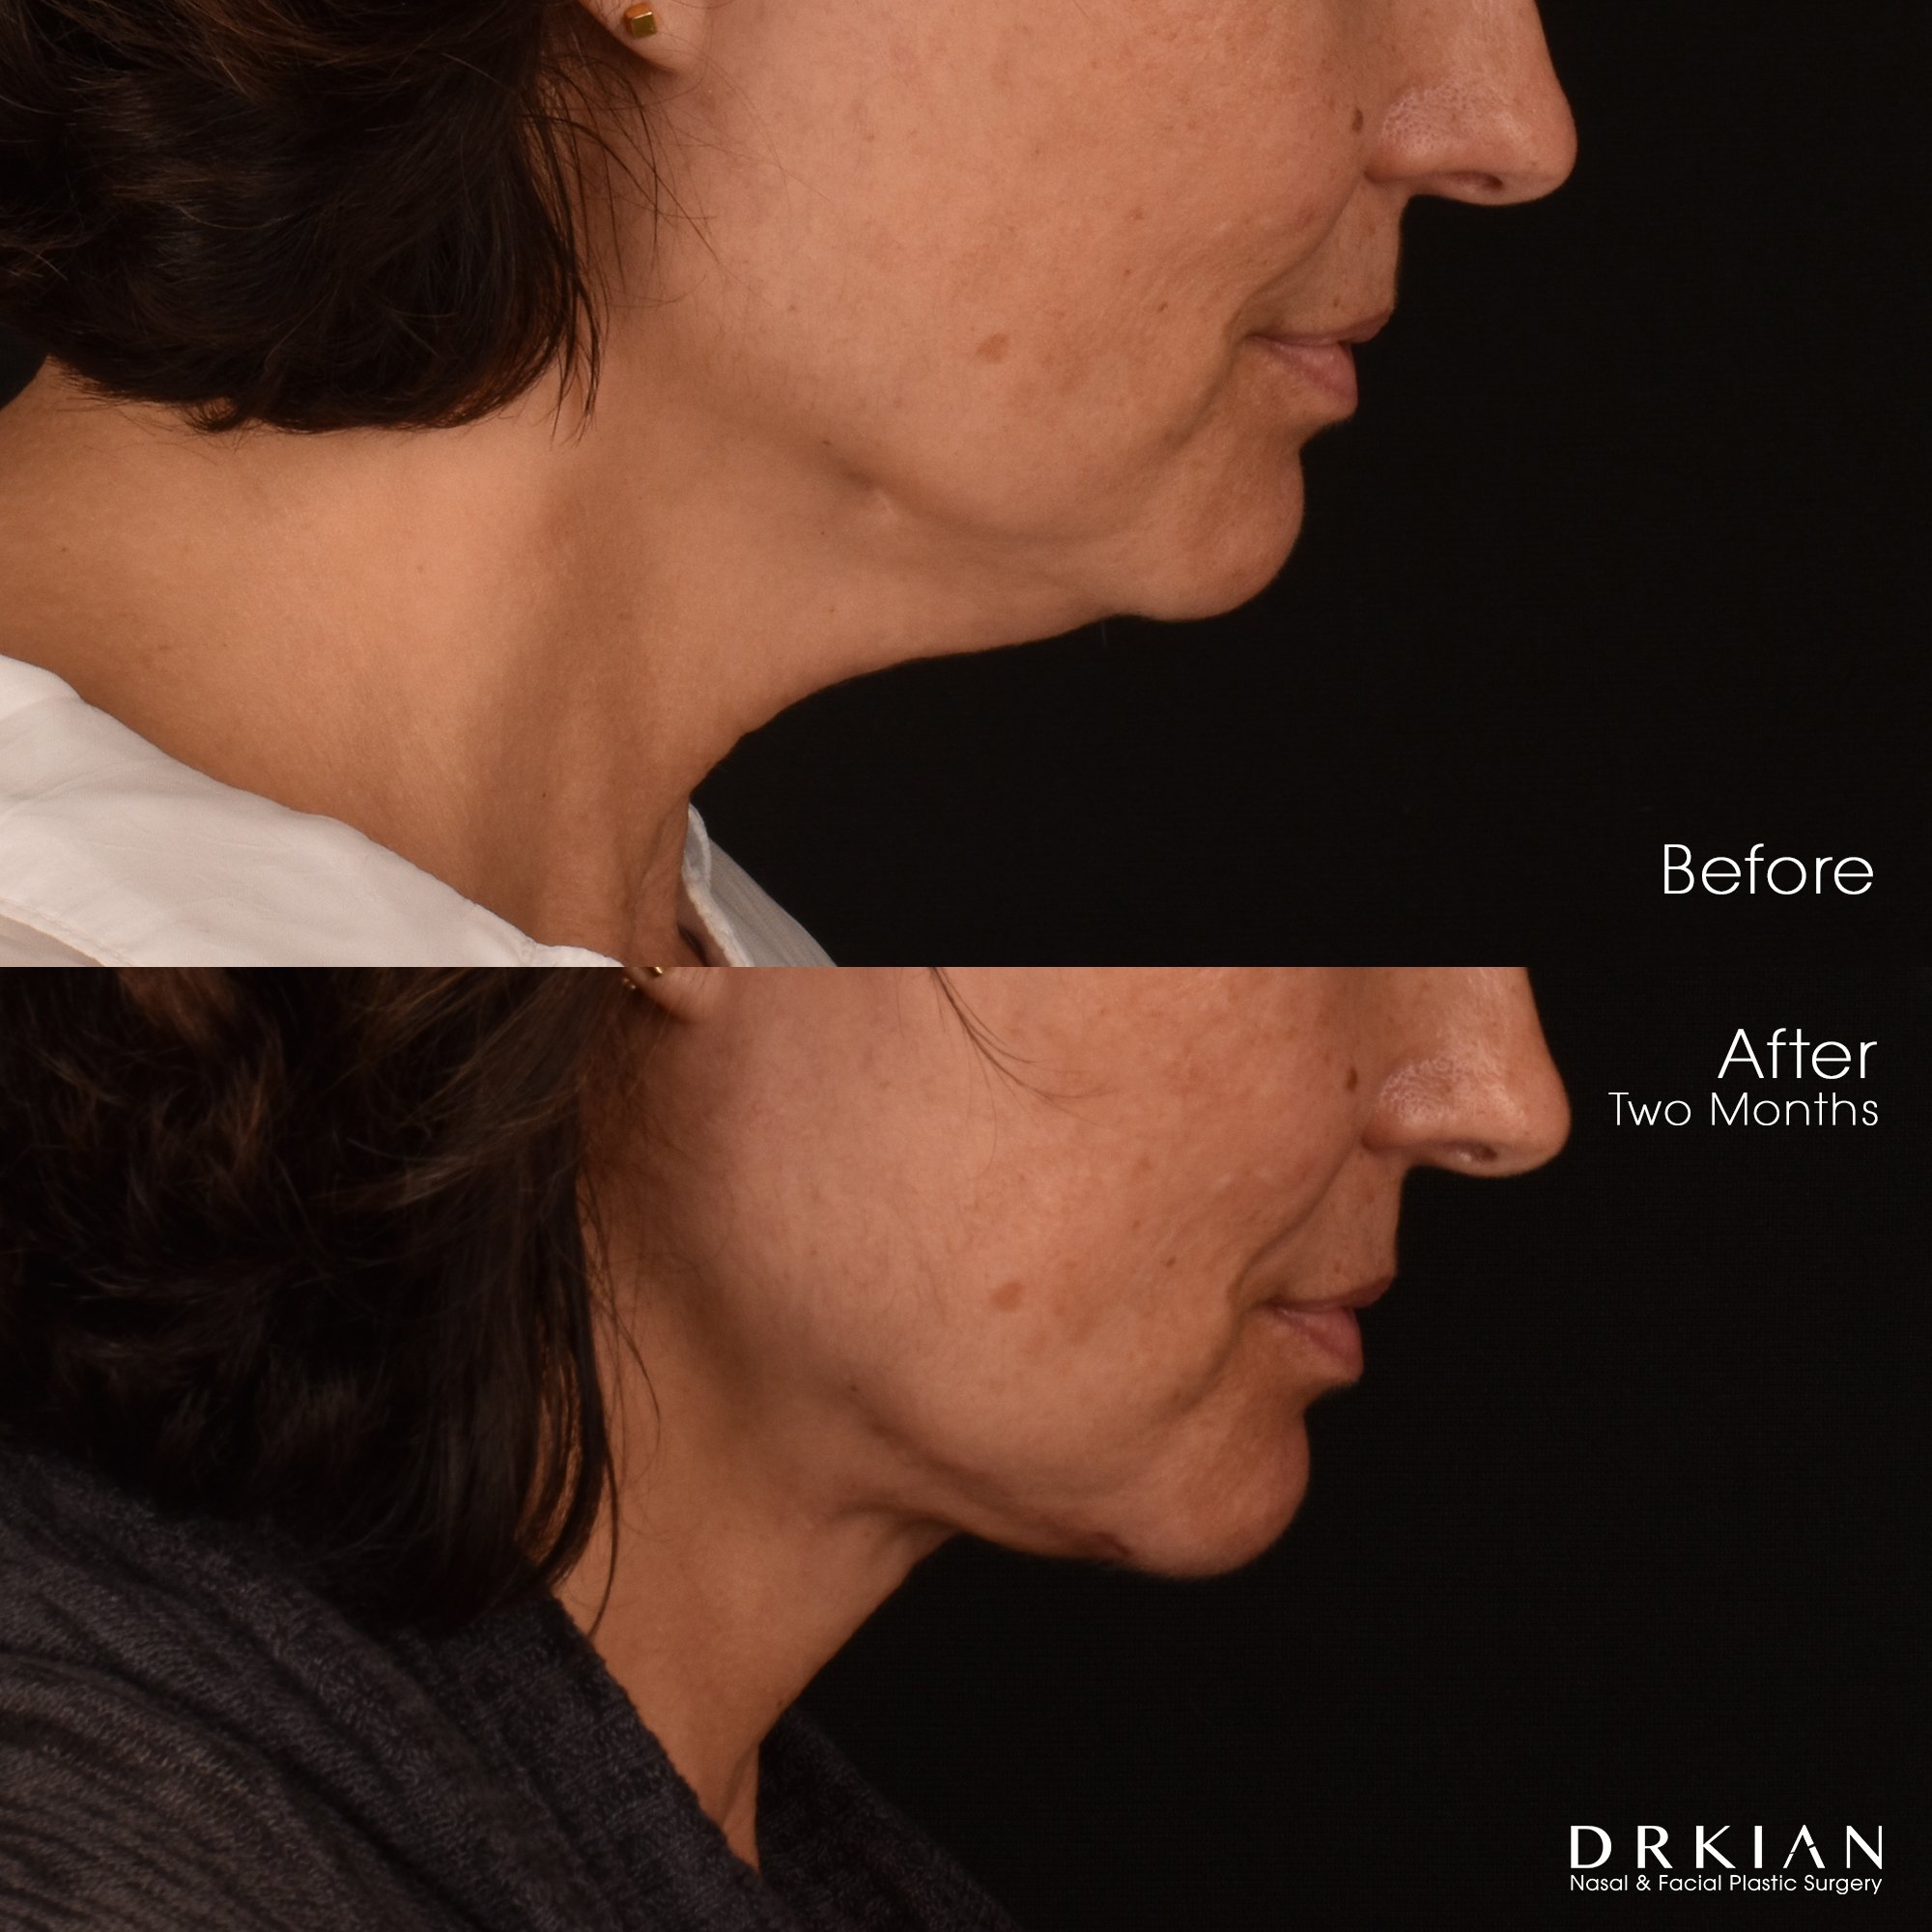
Embrace RF (FaceTite & Morpheus8 to Submentum & Lower 1/3 of Face): Before & After Two Months

Embrace RF (FaceTite & Morpheus8 to Submentum & Lower 1/3 of Face): Before & After Two Months
Embrace RF (FaceTite & Morpheus8 to Submentum & Lower 1/3 of Face): Before & After Two Months

Embrace RF (FaceTite & Morpheus8 to Submentum & Lower 1/3 of Face): Before & After Two Months
Embrace RF (FaceTite & Morpheus8 to Submentum & Lower 1/3 of Face): Before & After Two Months

Deep Neck Liposuction and Lift, Buccal Fat Removal and Fat Harvest and Transfer to Chin, Mid-Face, Under-Eyes & Temples: Before & After Four Months
Deep Neck Liposuction and Lift, Buccal Fat Removal and Fat Harvest and Transfer to Chin, Mid-Face, Under-Eyes & Temples: Before & After Four Months

Deep Neck Liposuction and Lift, Buccal Fat Removal and Fat Harvest and Transfer to Chin, Mid-Face, Under-Eyes & Temples: Before & After Four Months
Deep Neck Liposuction and Lift, Buccal Fat Removal and Fat Harvest and Transfer to Chin, Mid-Face, Under-Eyes & Temples: Before & After Four Months
Deep Neck Liposuction and Lift, Buccal Fat Removal and Fat Harvest and Transfer to Chin, Mid-Face, Under-Eyes & Temples: Before & After Four Months

Deep Neck Liposuction and Lift, Buccal Fat Removal and Fat Harvest and Transfer to Chin, Mid-Face, Under-Eyes & Temples: Before & After Four Months
Deep Neck Liposuction and Lift, Buccal Fat Removal and Fat Harvest and Transfer to Chin, Mid-Face, Under-Eyes & Temples: Before & After Four Months

Deep Neck Liposuction and Lift, Buccal Fat Removal and Fat Harvest and Transfer to Chin, Mid-Face, Under-Eyes & Temples: Before & After Four Months

Deep Neck Liposuction and Lift, Buccal Fat Removal and Fat Harvest and Transfer to Chin, Mid-Face, Under-Eyes & Temples: Before & After Four Months

Deep Neck Liposuction and Lift, Buccal Fat Removal and Fat Harvest and Transfer to Chin, Mid-Face, Under-Eyes & Temples: Before & After Four Months

Deep Neck Liposuction and Lift, Buccal Fat Removal and Fat Harvest and Transfer to Chin, Mid-Face, Under-Eyes & Temples: Before & After Four Months

Deep Neck Liposuction and Lift, Buccal Fat Removal and Fat Harvest and Transfer to Chin, Mid-Face, Under-Eyes & Temples: Before & After Four Months

Deep Neck Liposuction and Lift, Buccal Fat Removal and Fat Harvest and Transfer to Chin, Mid-Face, Under-Eyes & Temples: Before & After Four Months

Deep Neck Liposuction and Lift, Buccal Fat Removal and Fat Harvest and Transfer to Chin, Mid-Face, Under-Eyes & Temples: Before & After Four Months

Deep Neck Liposuction and Lift, Buccal Fat Removal and Fat Harvest and Transfer to Chin, Mid-Face, Under-Eyes & Temples: Before & After Four Months
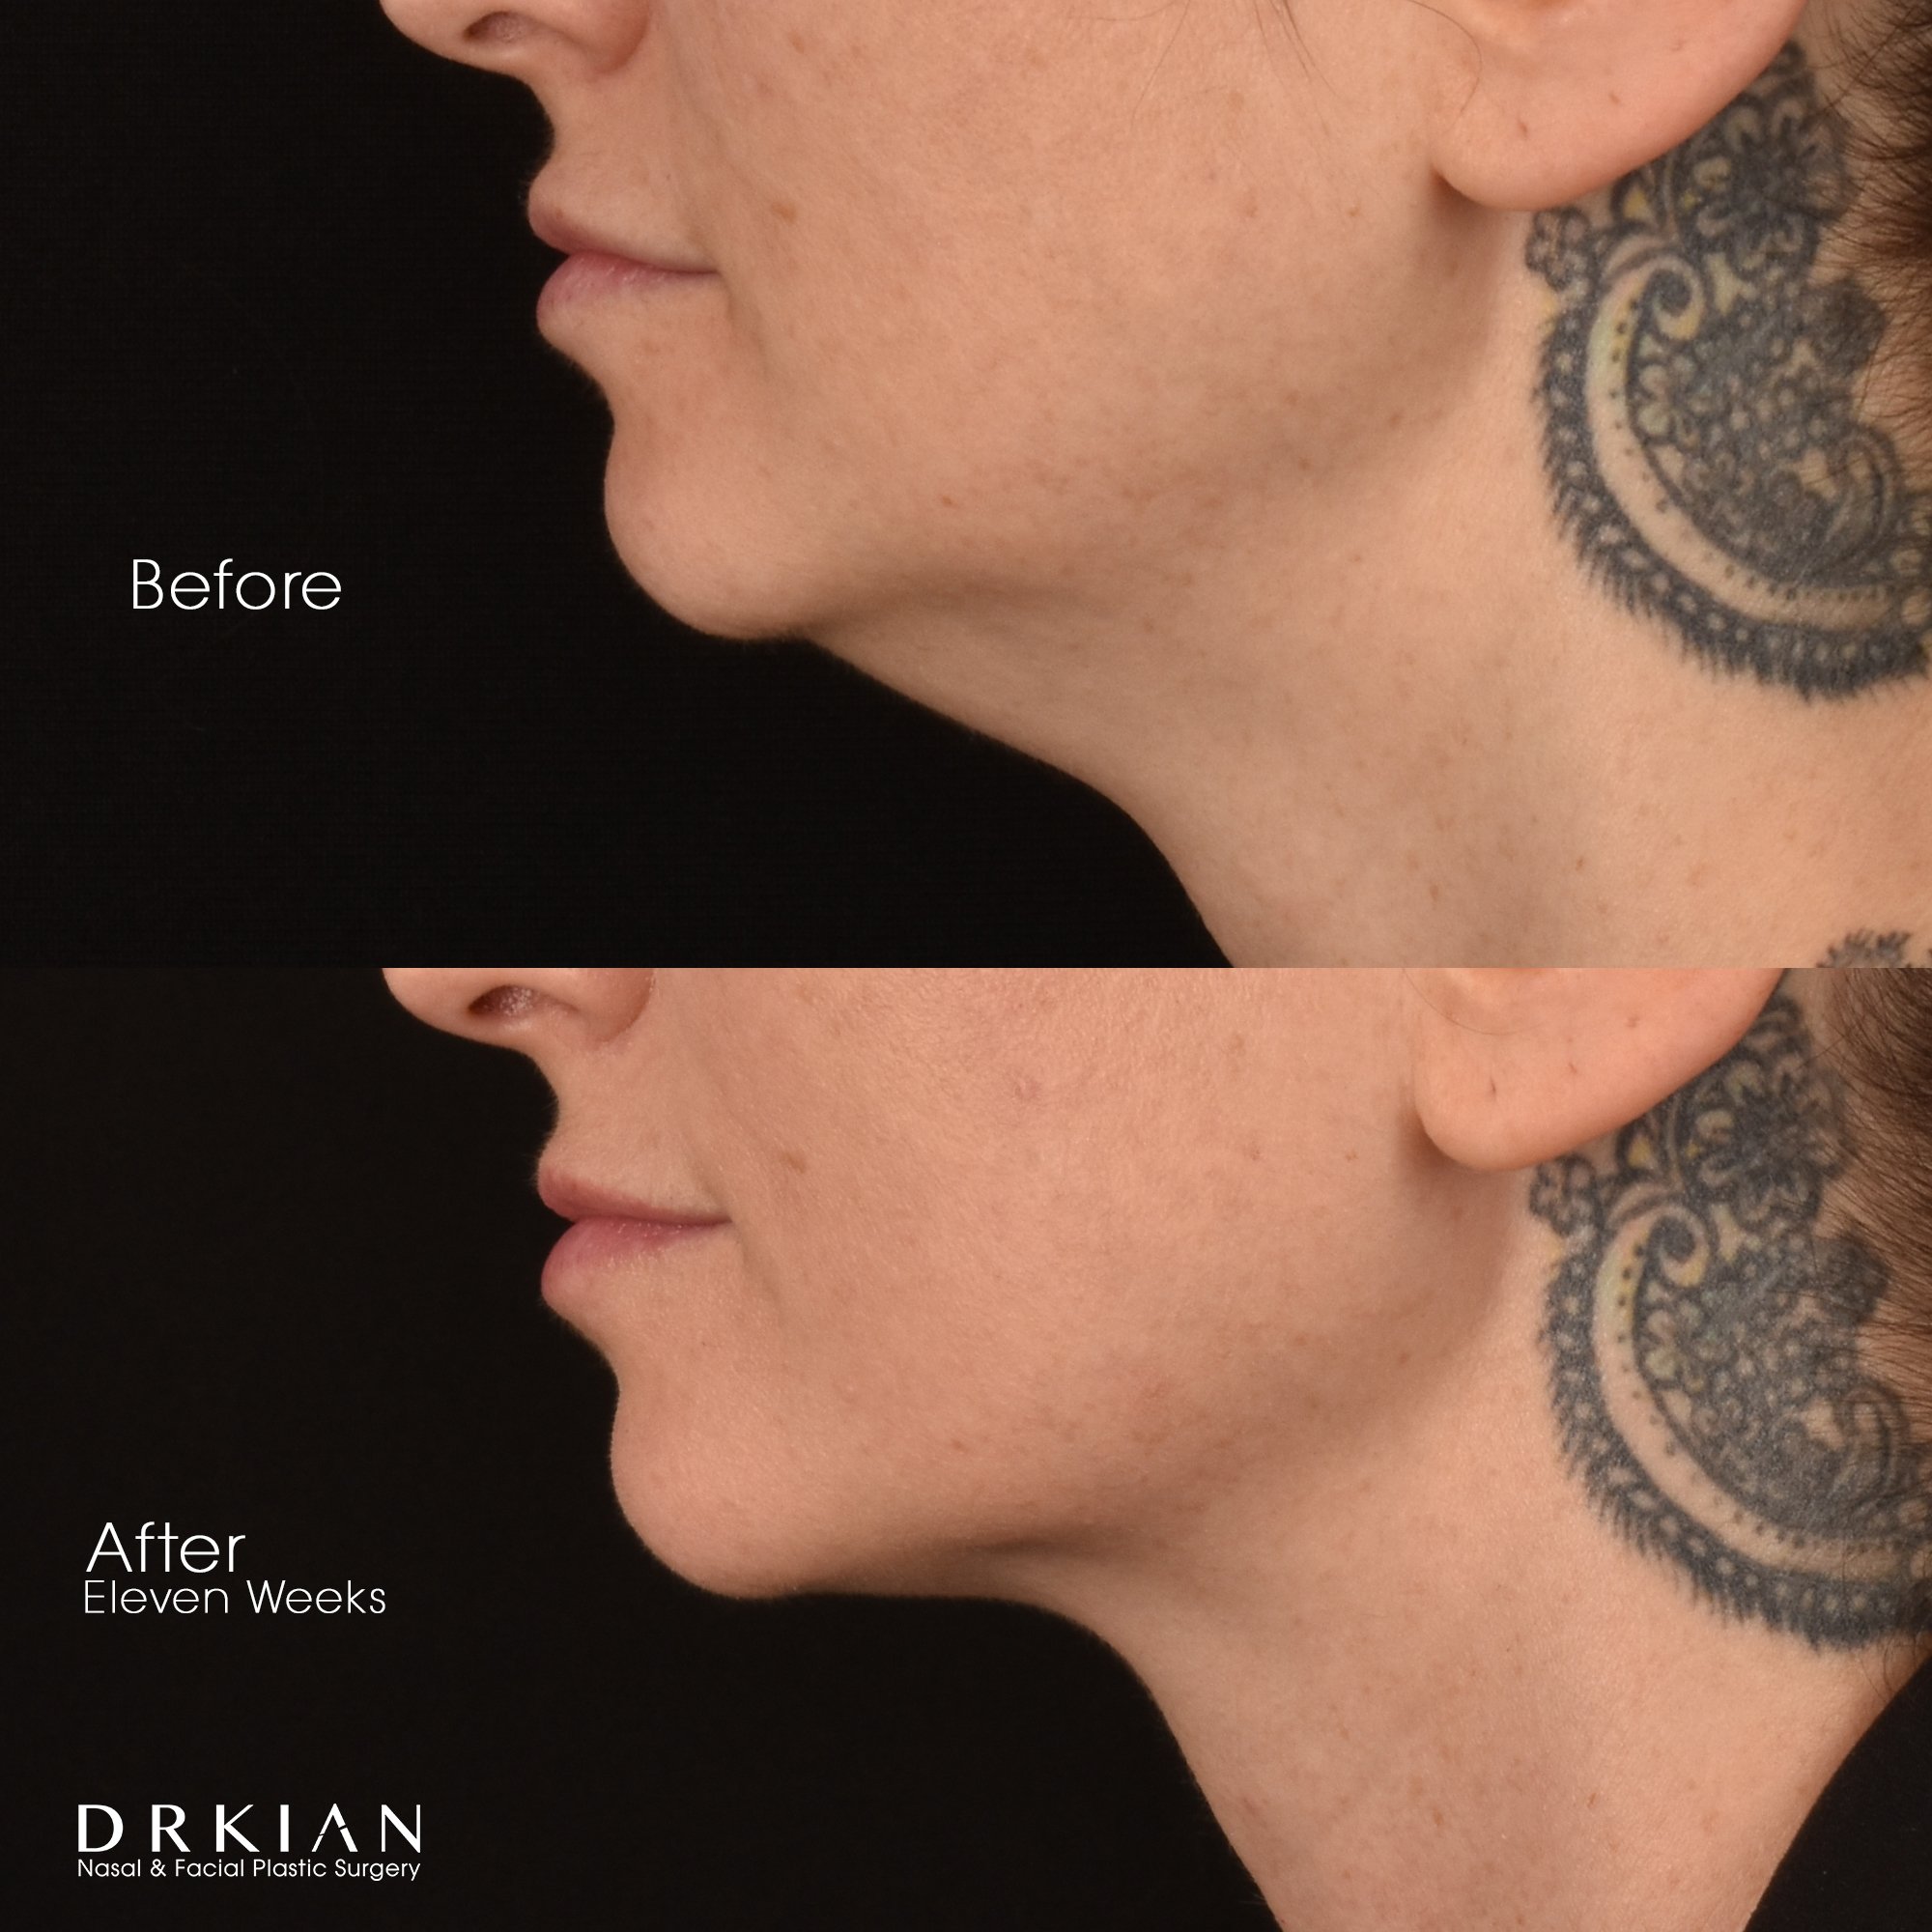
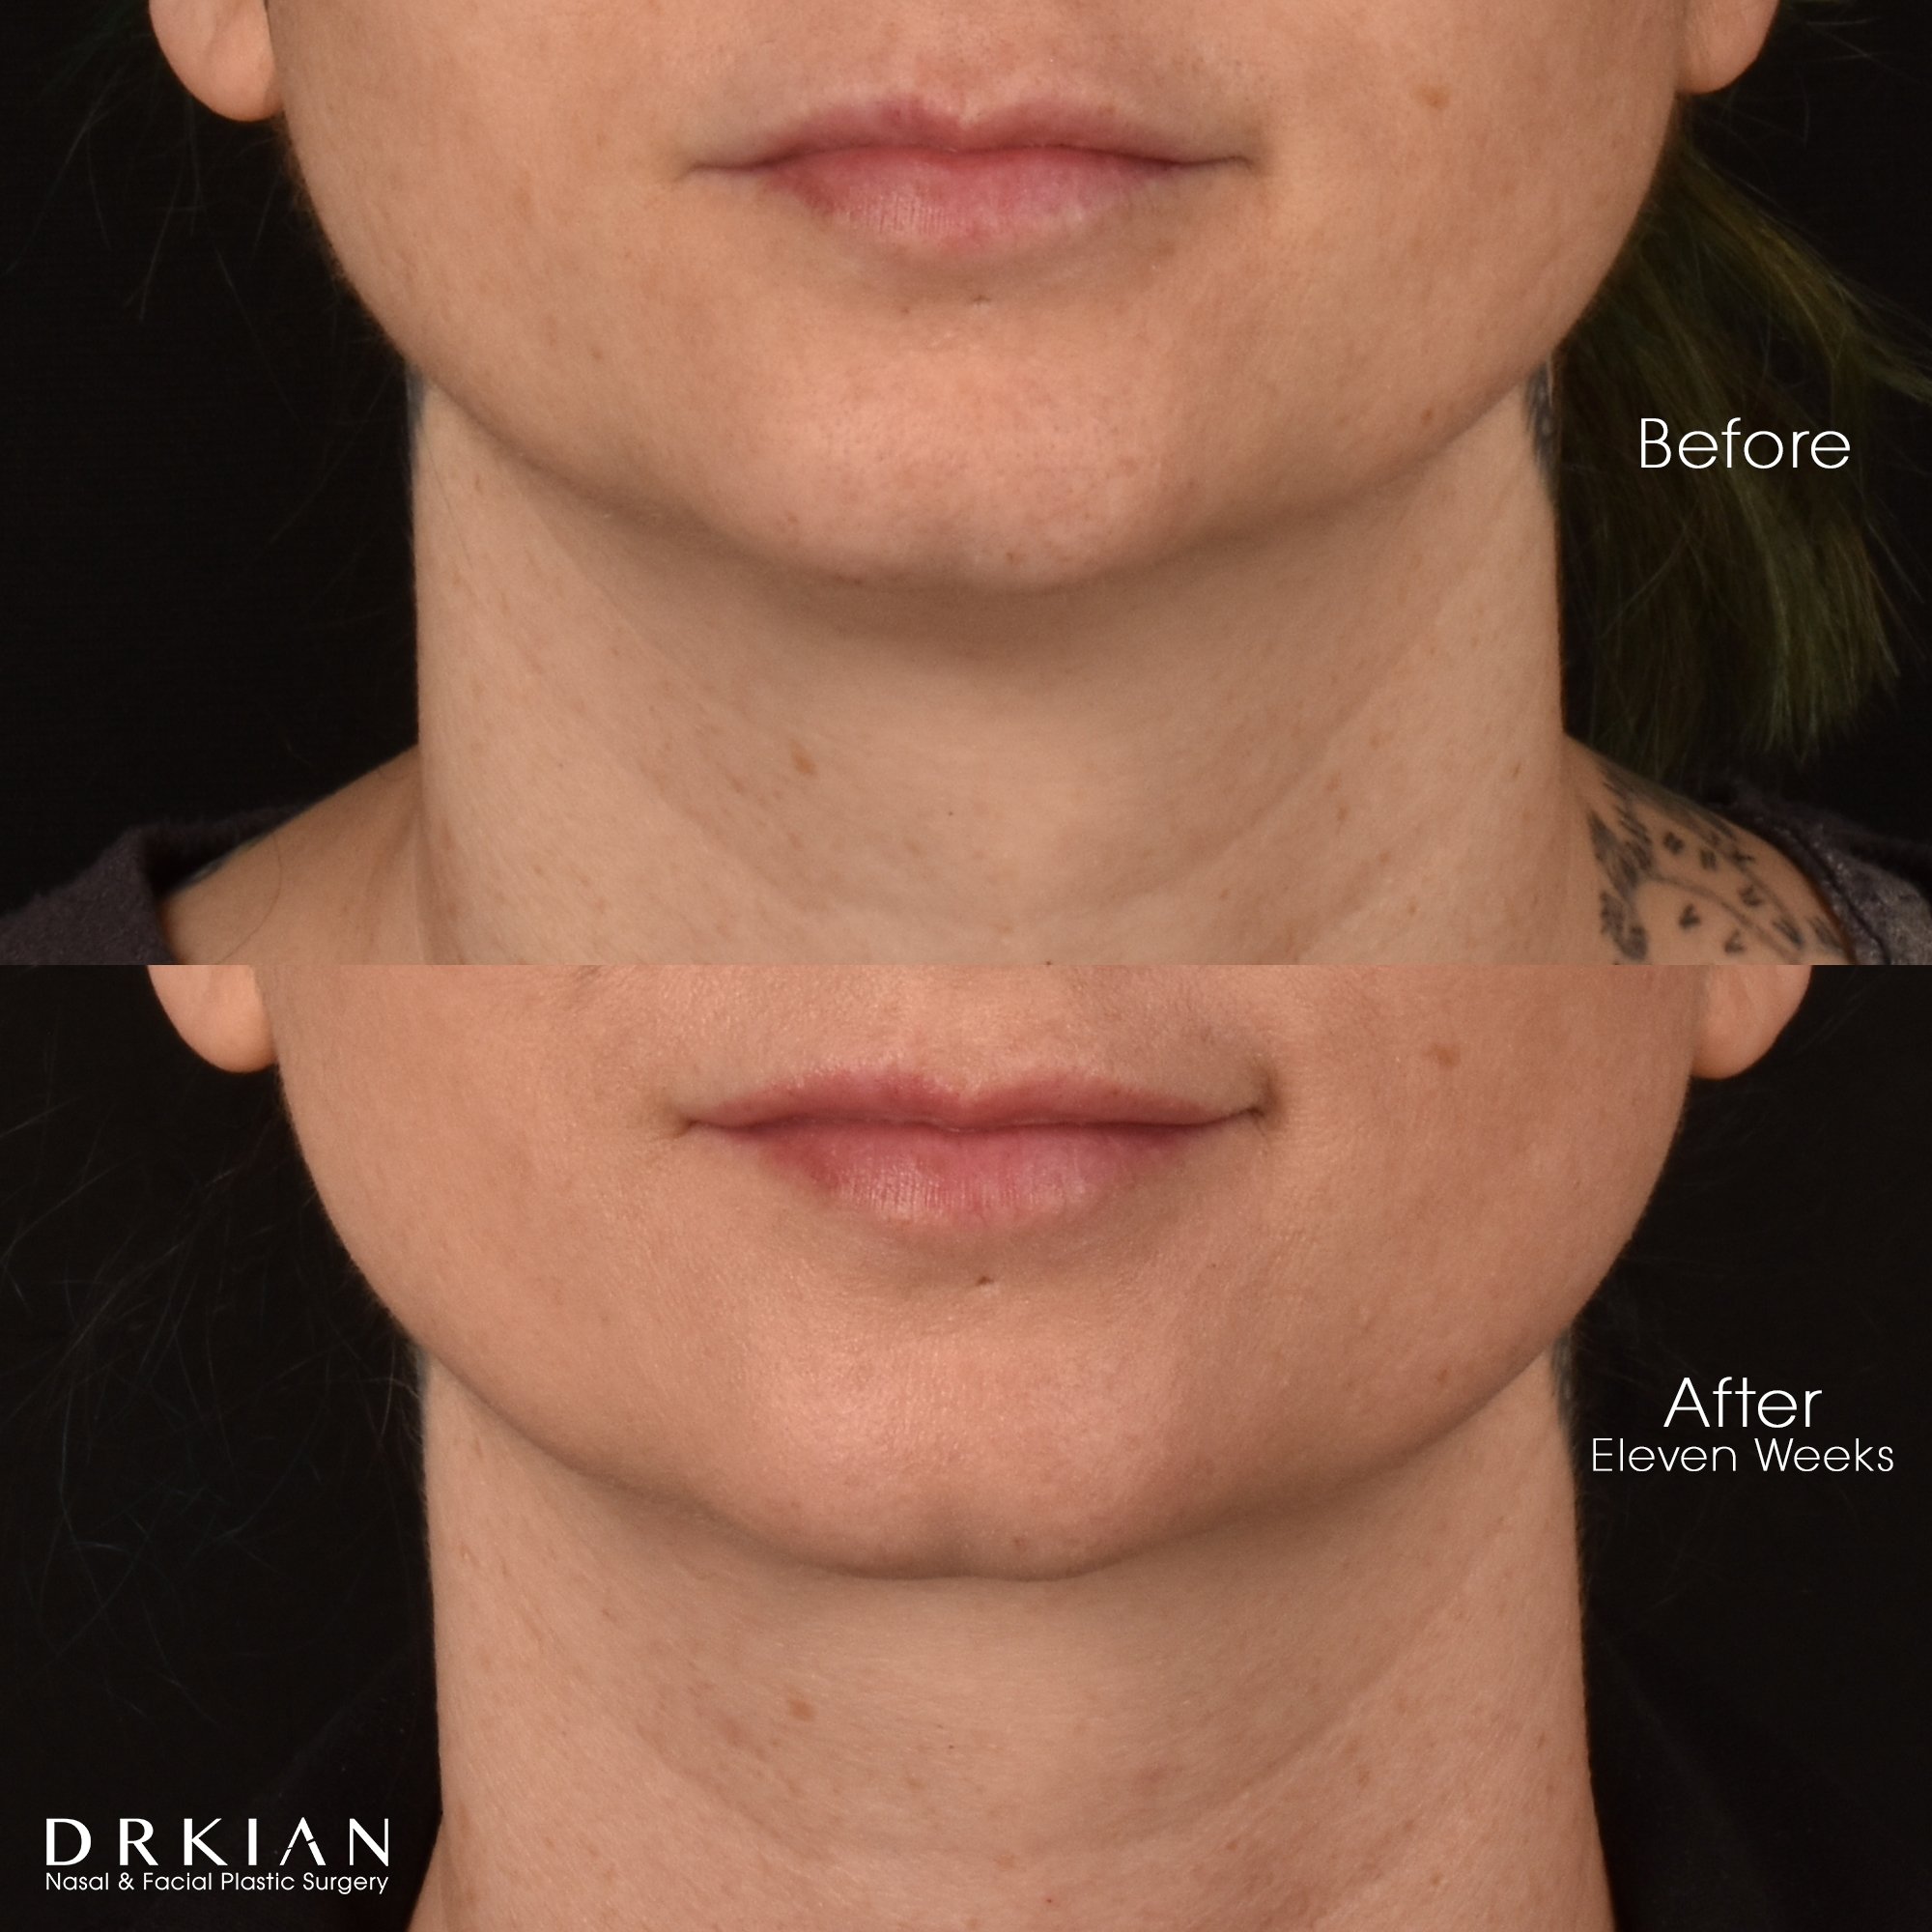
Embrace RF (FaceTite & Morpheus8 to Submentum & Lower 1/3 of Face): Before & After Eleven Weeks

Embrace RF (FaceTite & Morpheus8 to Submentum & Lower 1/3 of Face): Before & After Eleven Weeks

Embrace RF (FaceTite & Morpheus8 to Submentum & Lower 1/3 of Face): Before & After Eleven Weeks
Embrace RF (FaceTite & Morpheus8 to Submentum & Lower 1/3 of Face): Before & After Eleven Weeks

Embrace RF (FaceTite & Morpheus8 to Submentum & Lower 1/3 of Face): Before & After Eleven Weeks
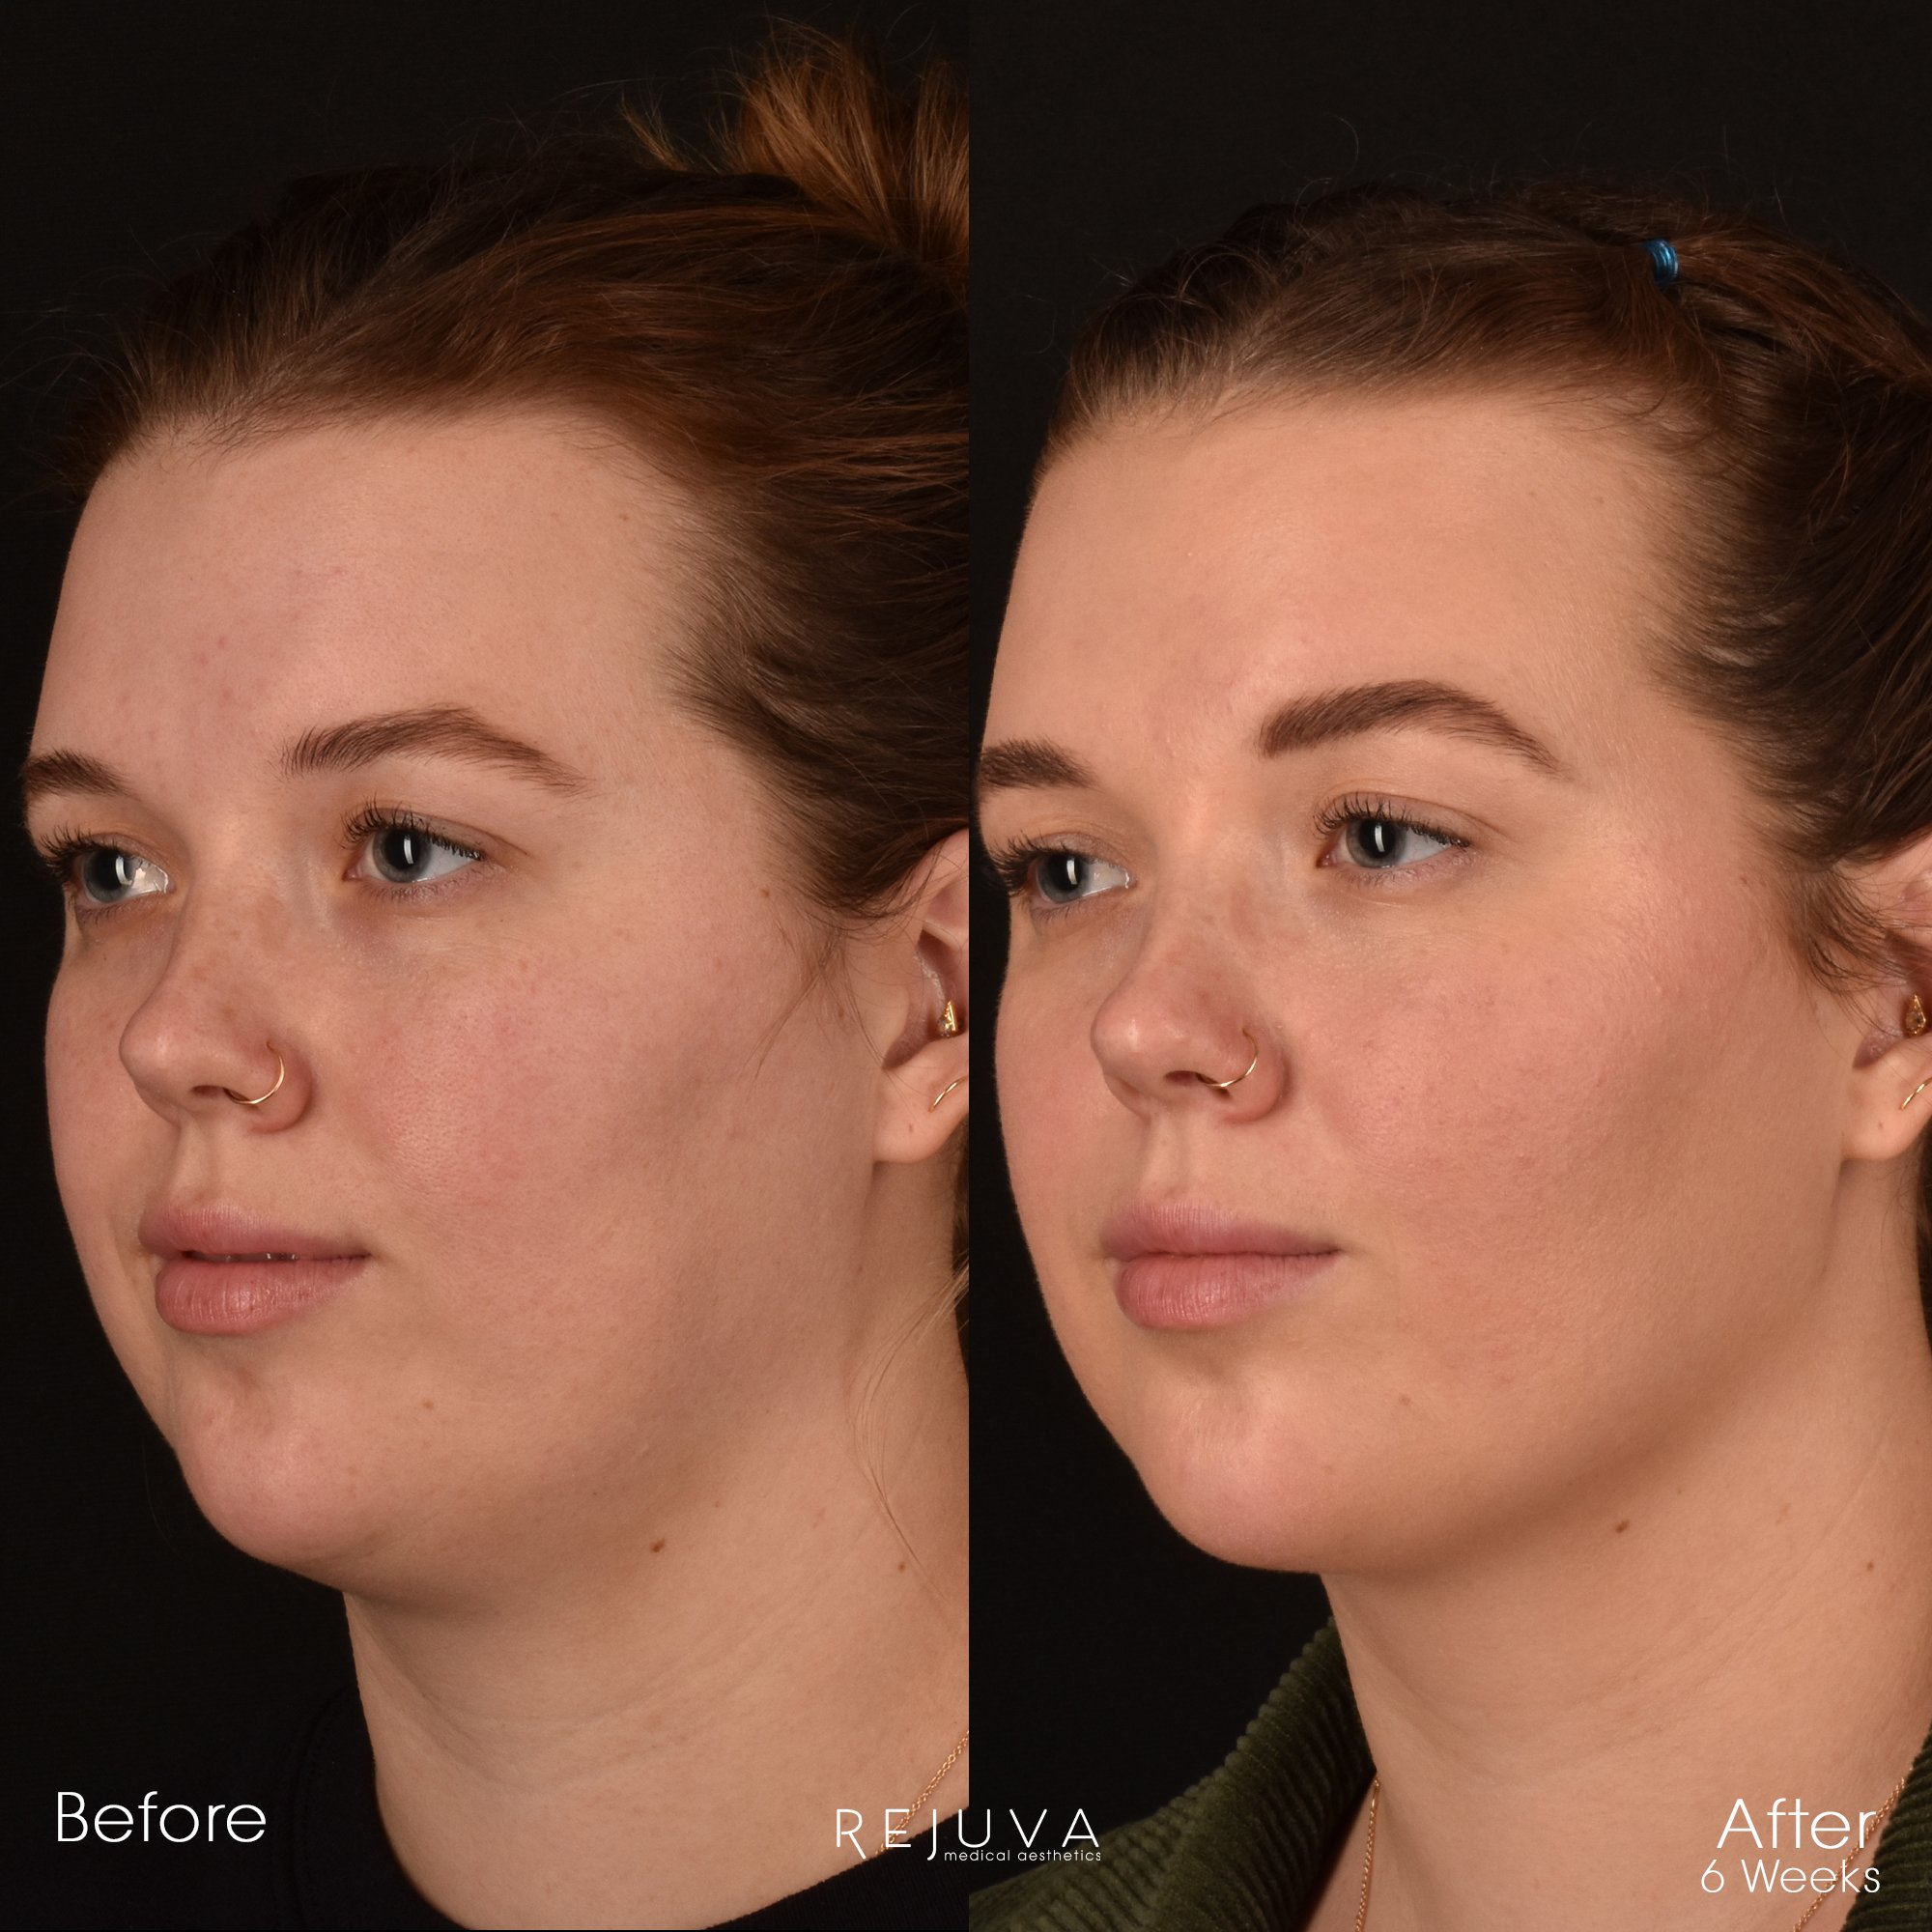
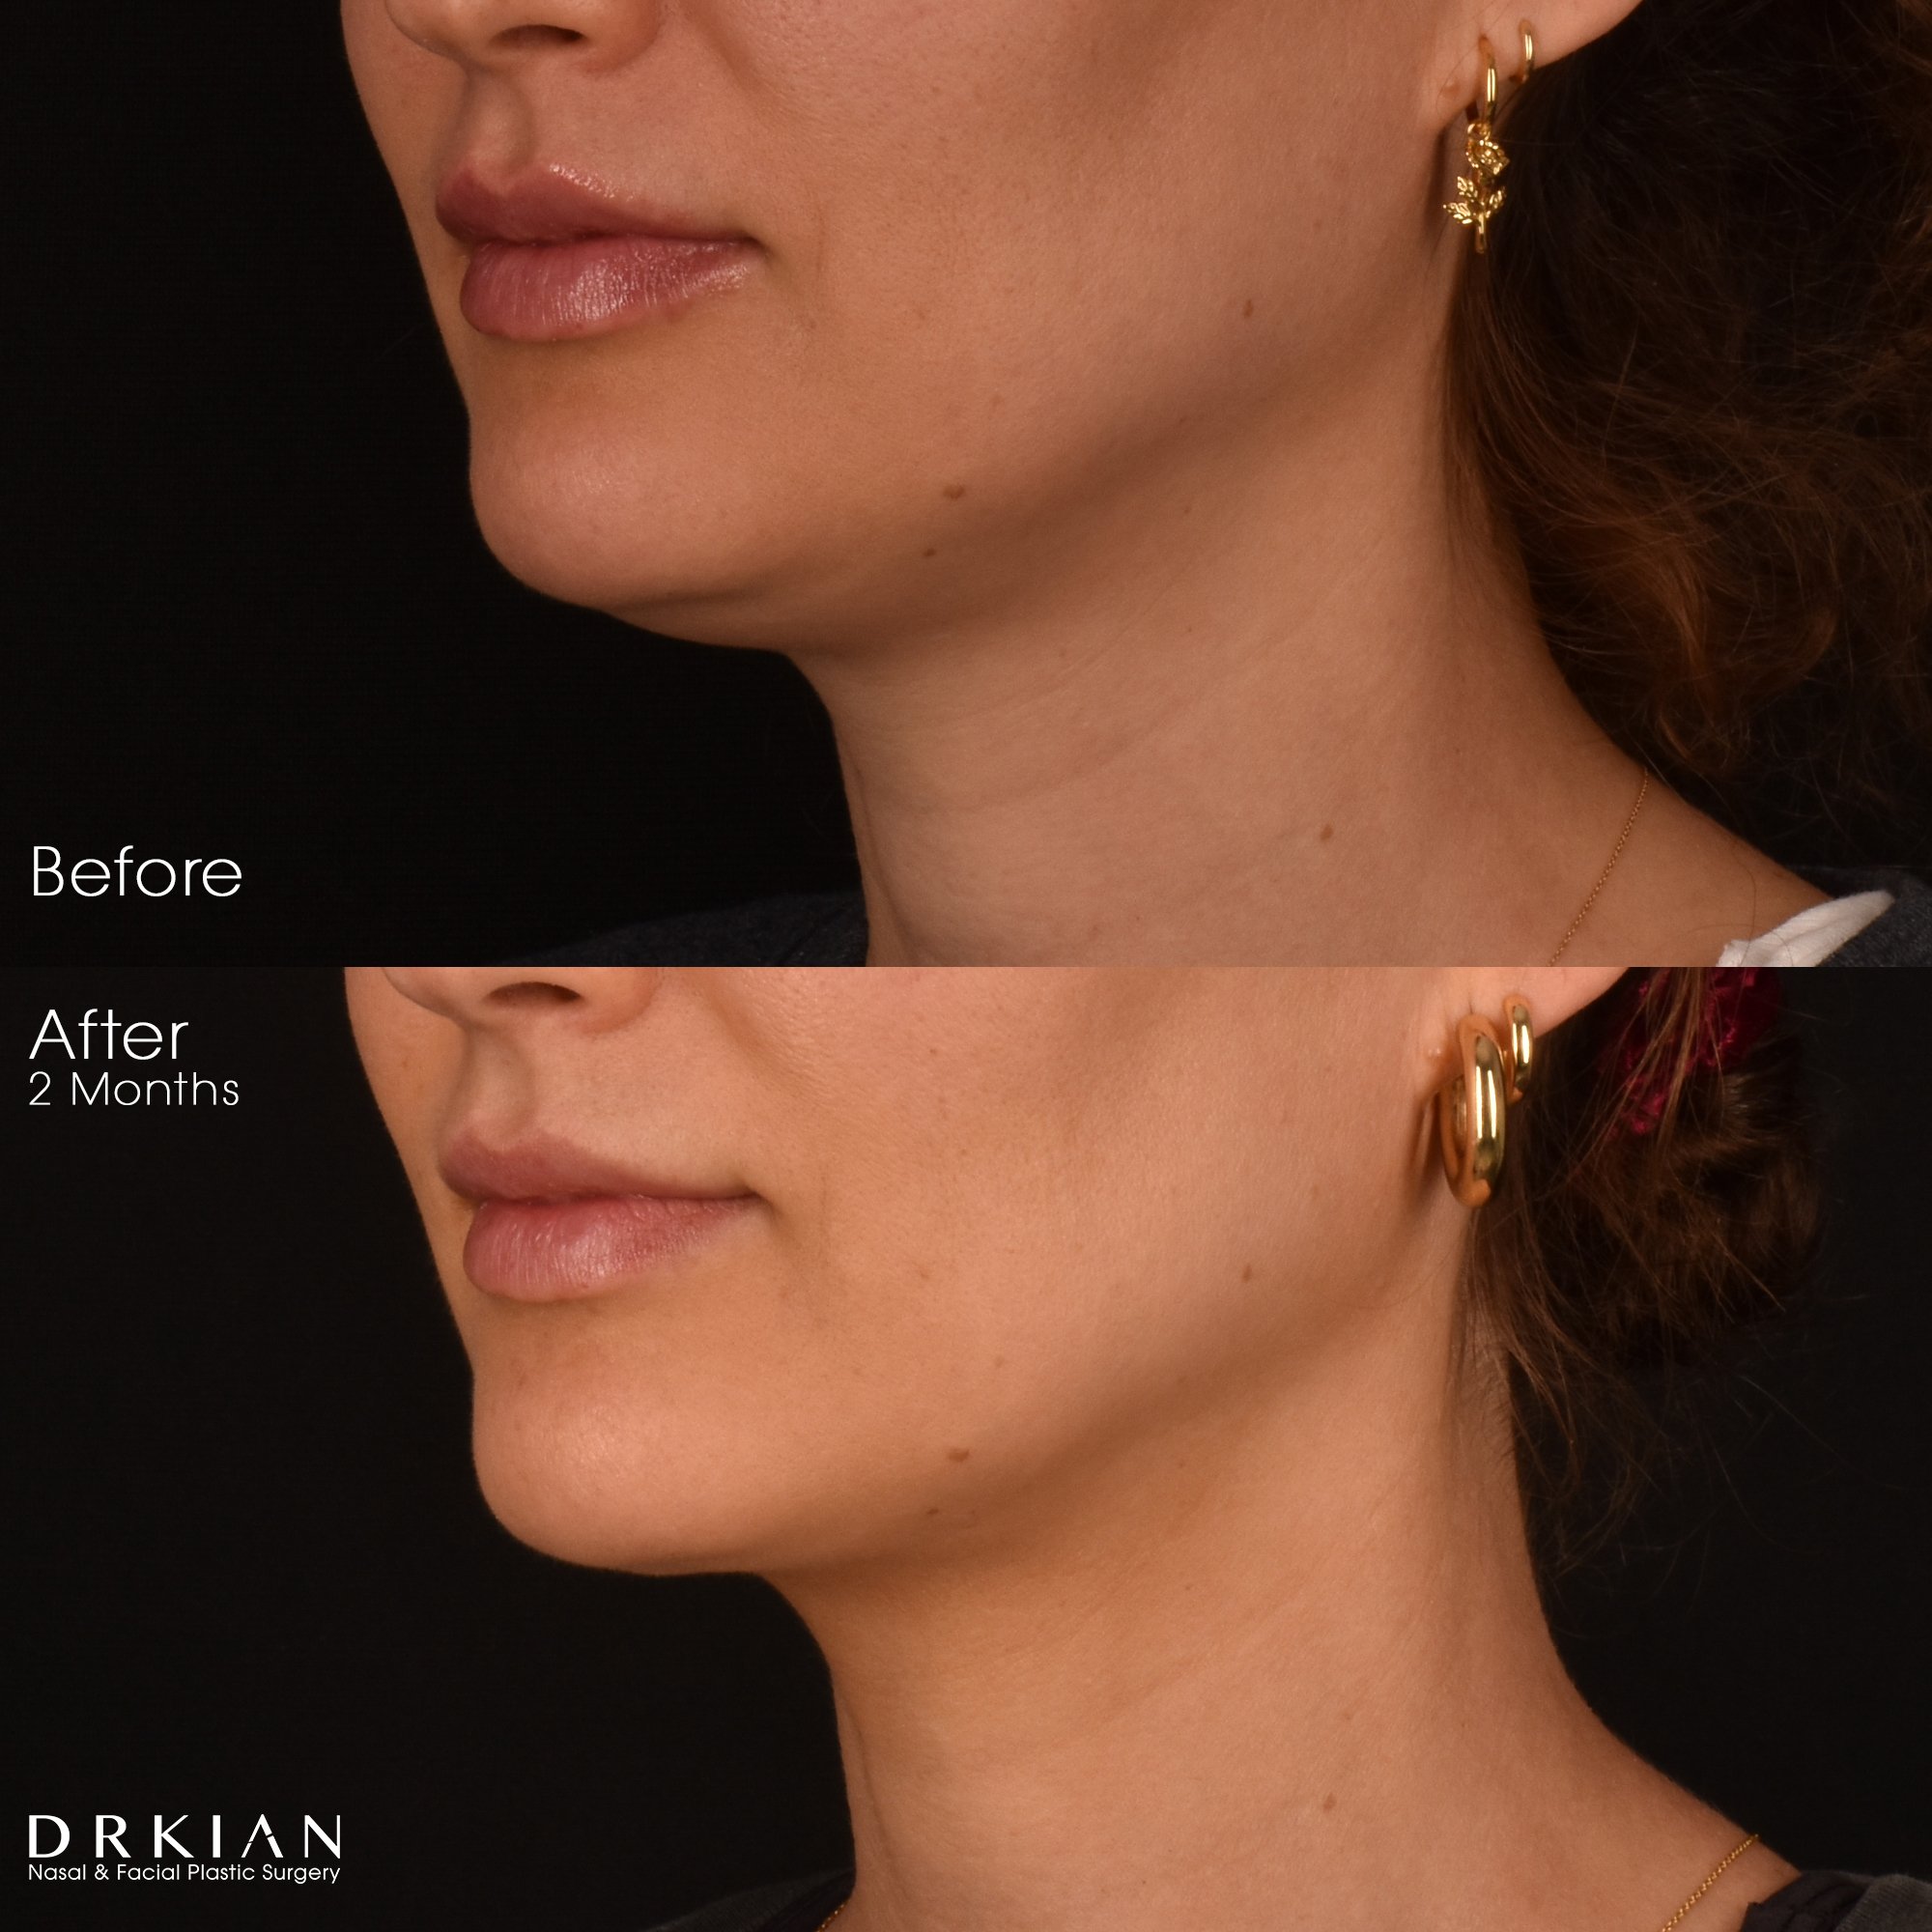
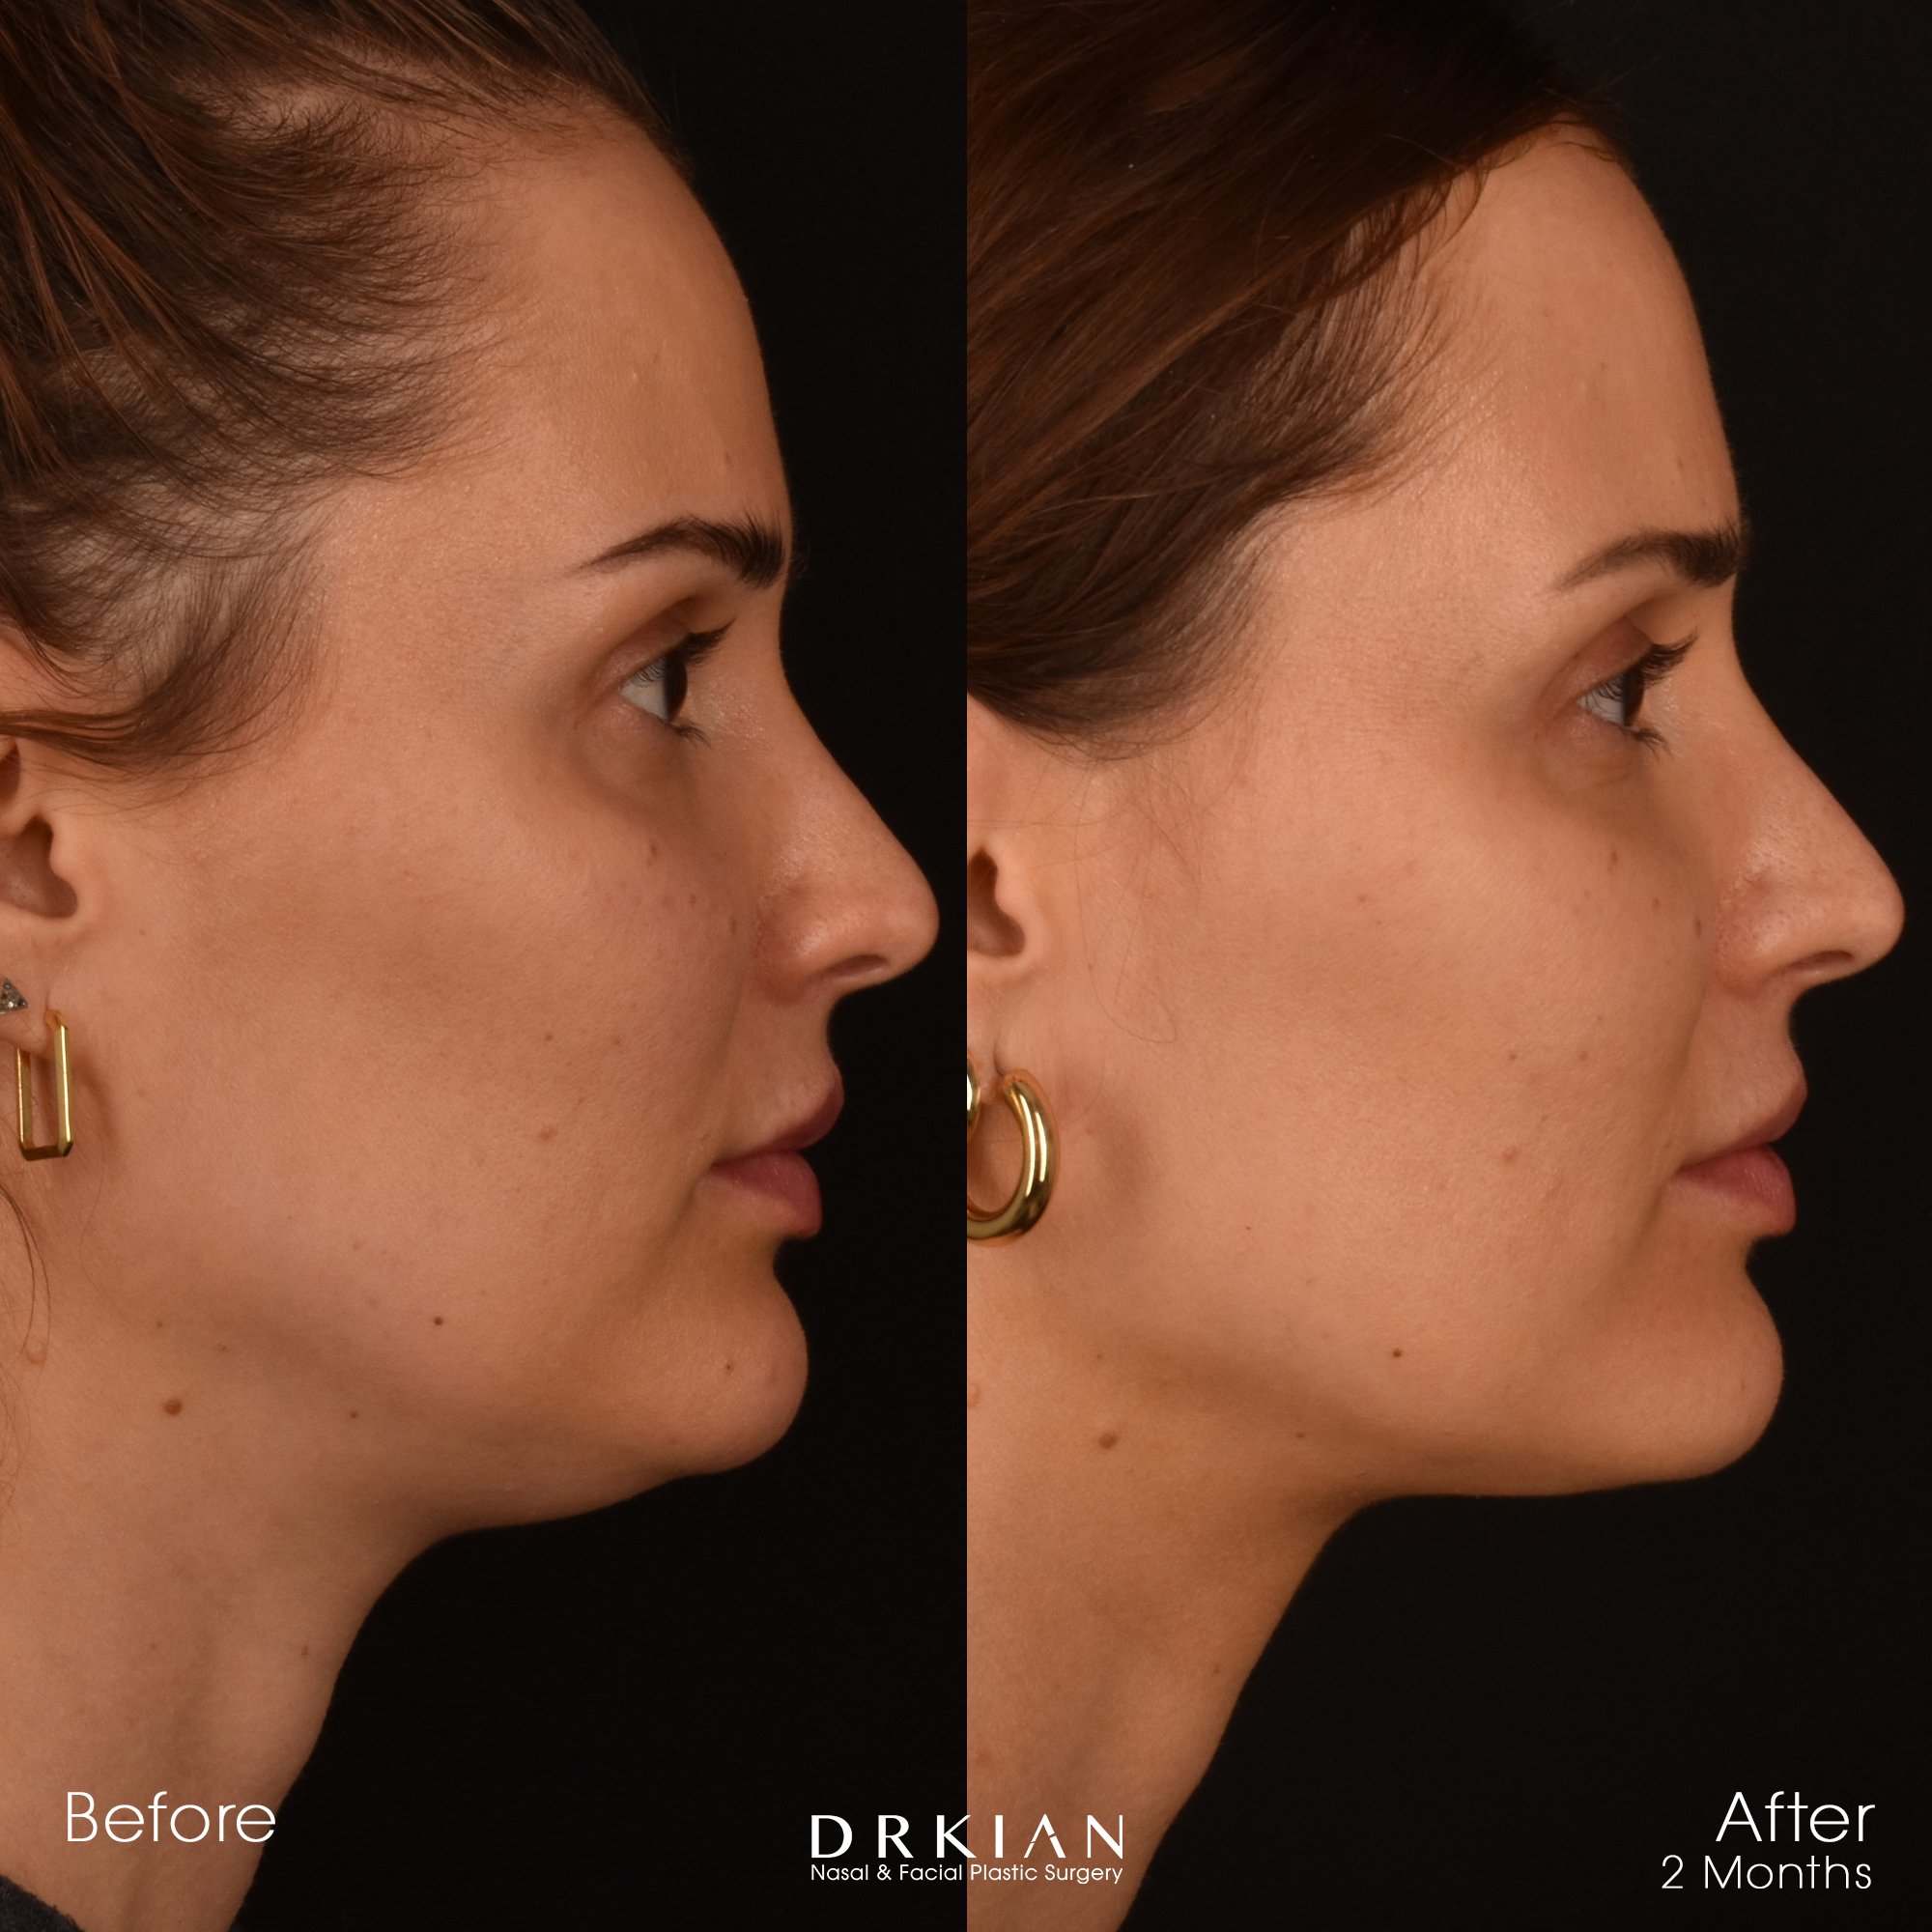
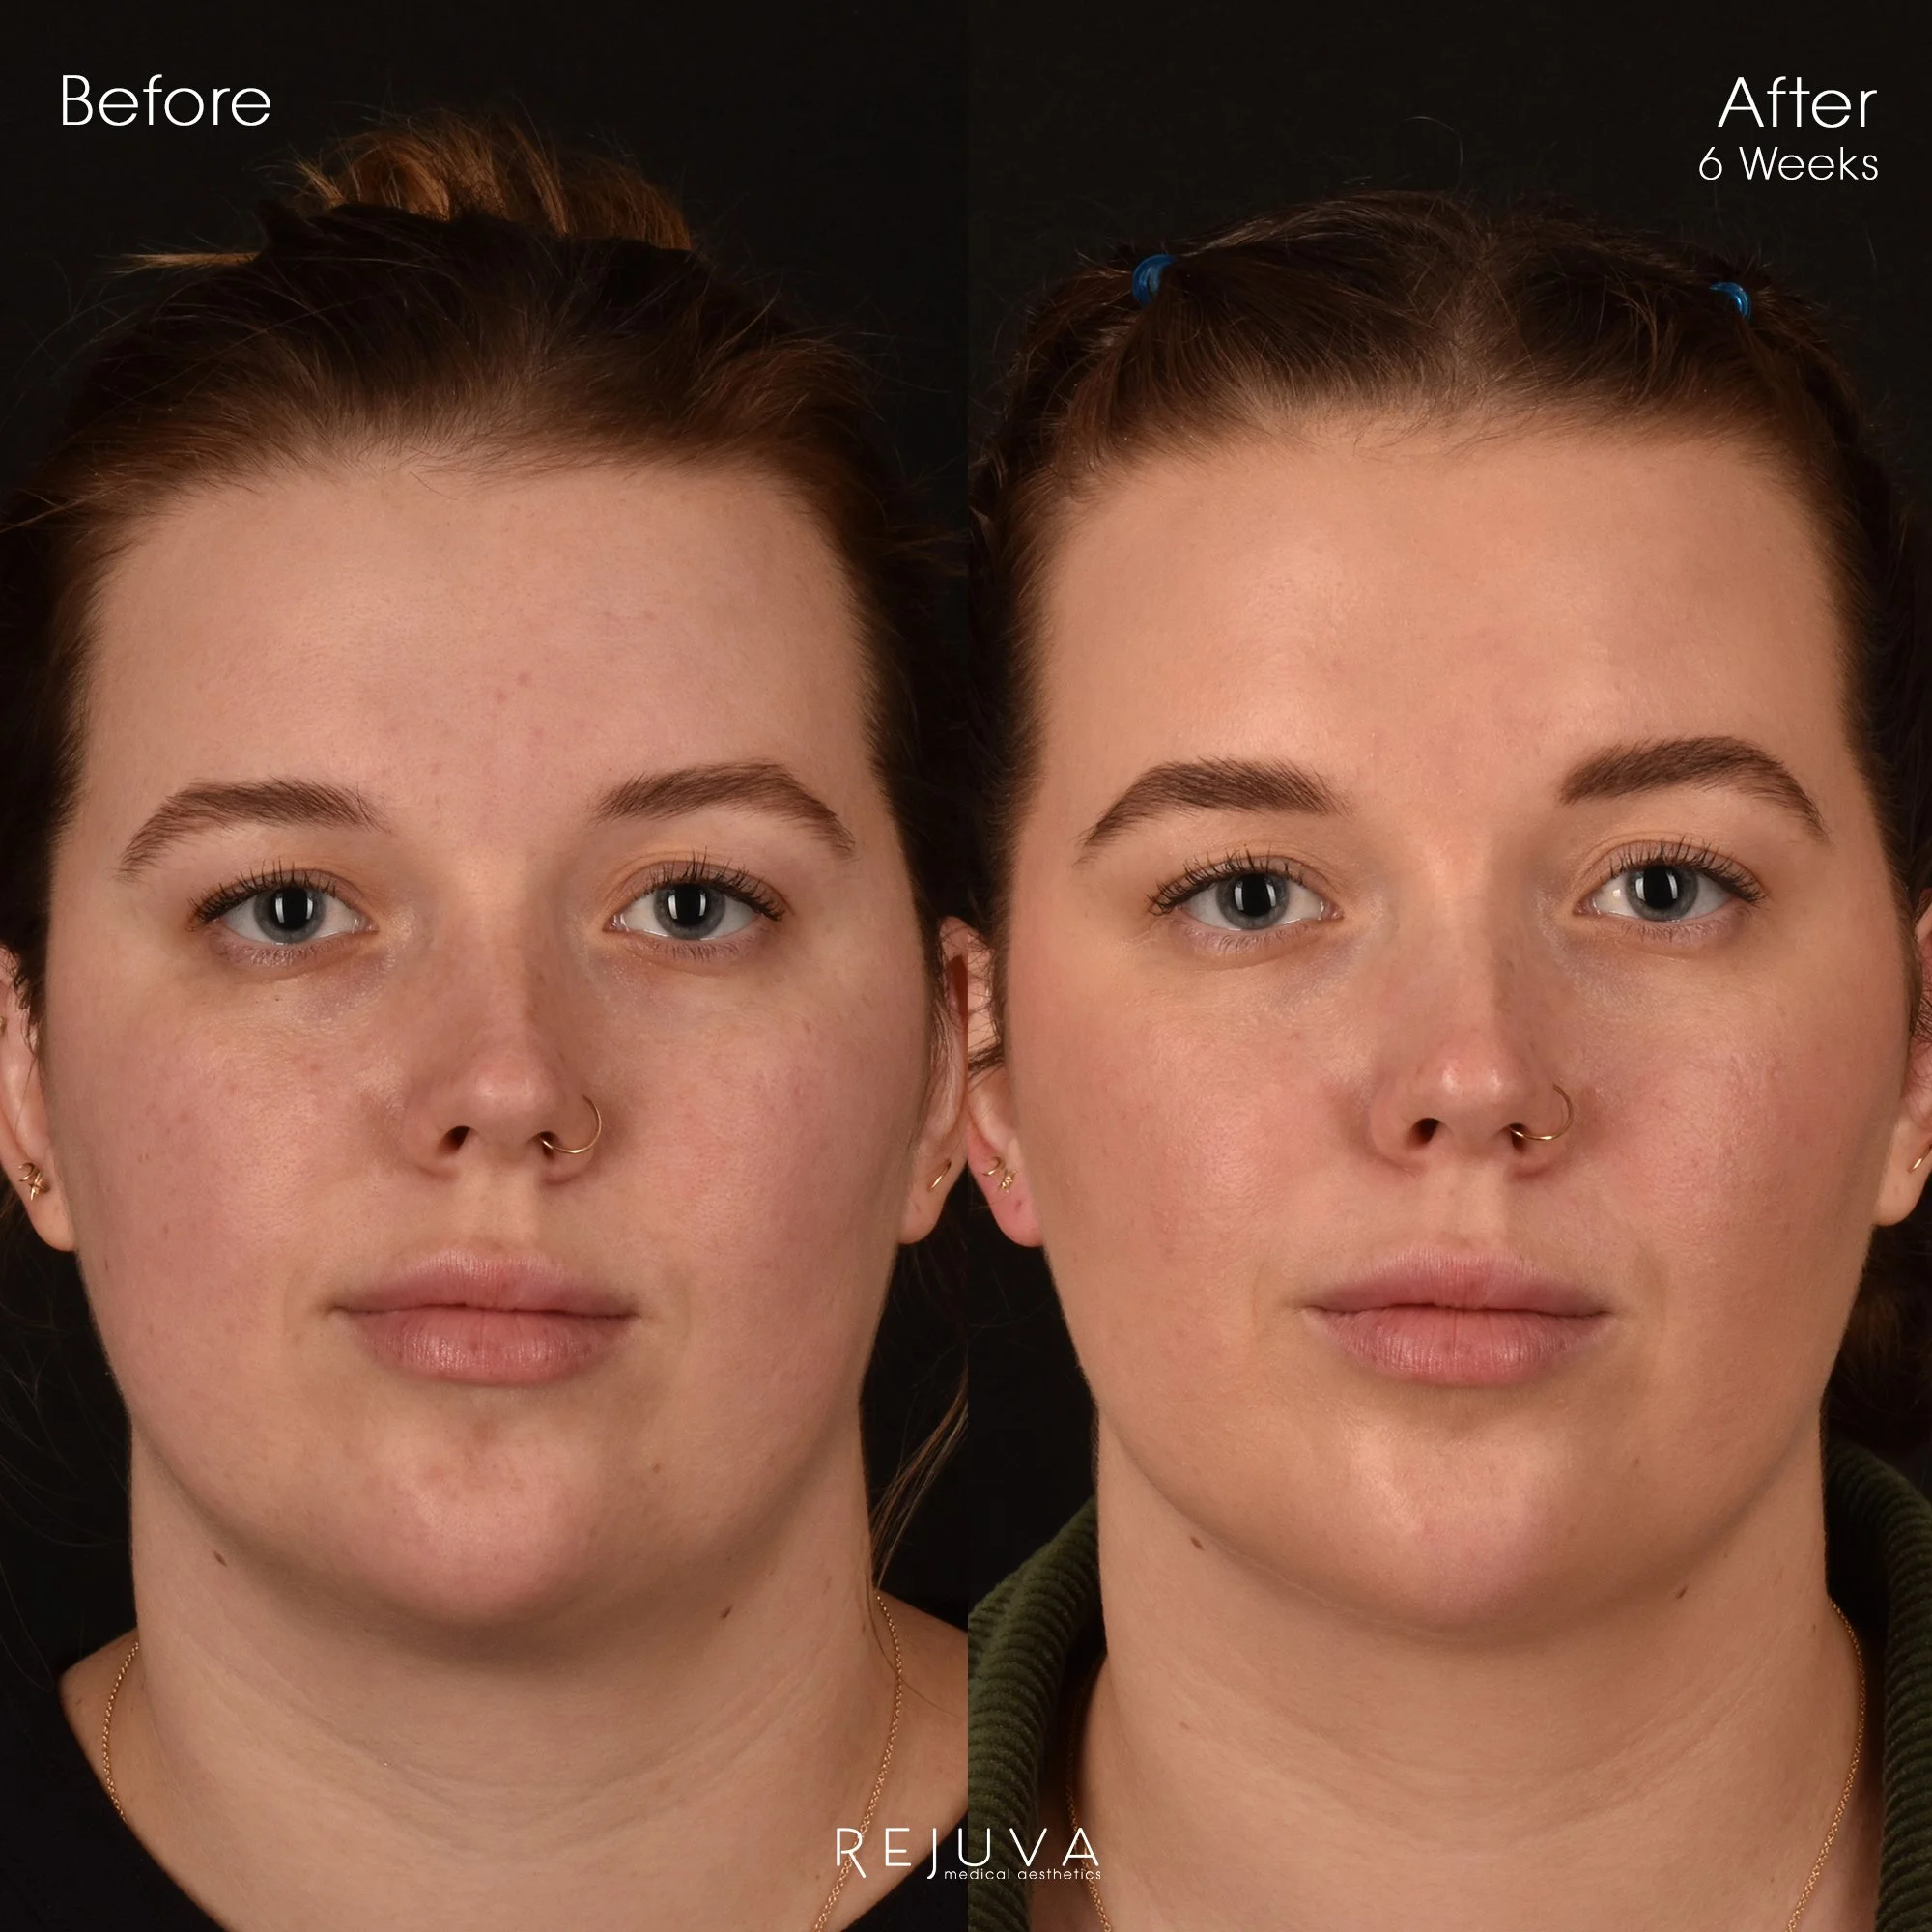
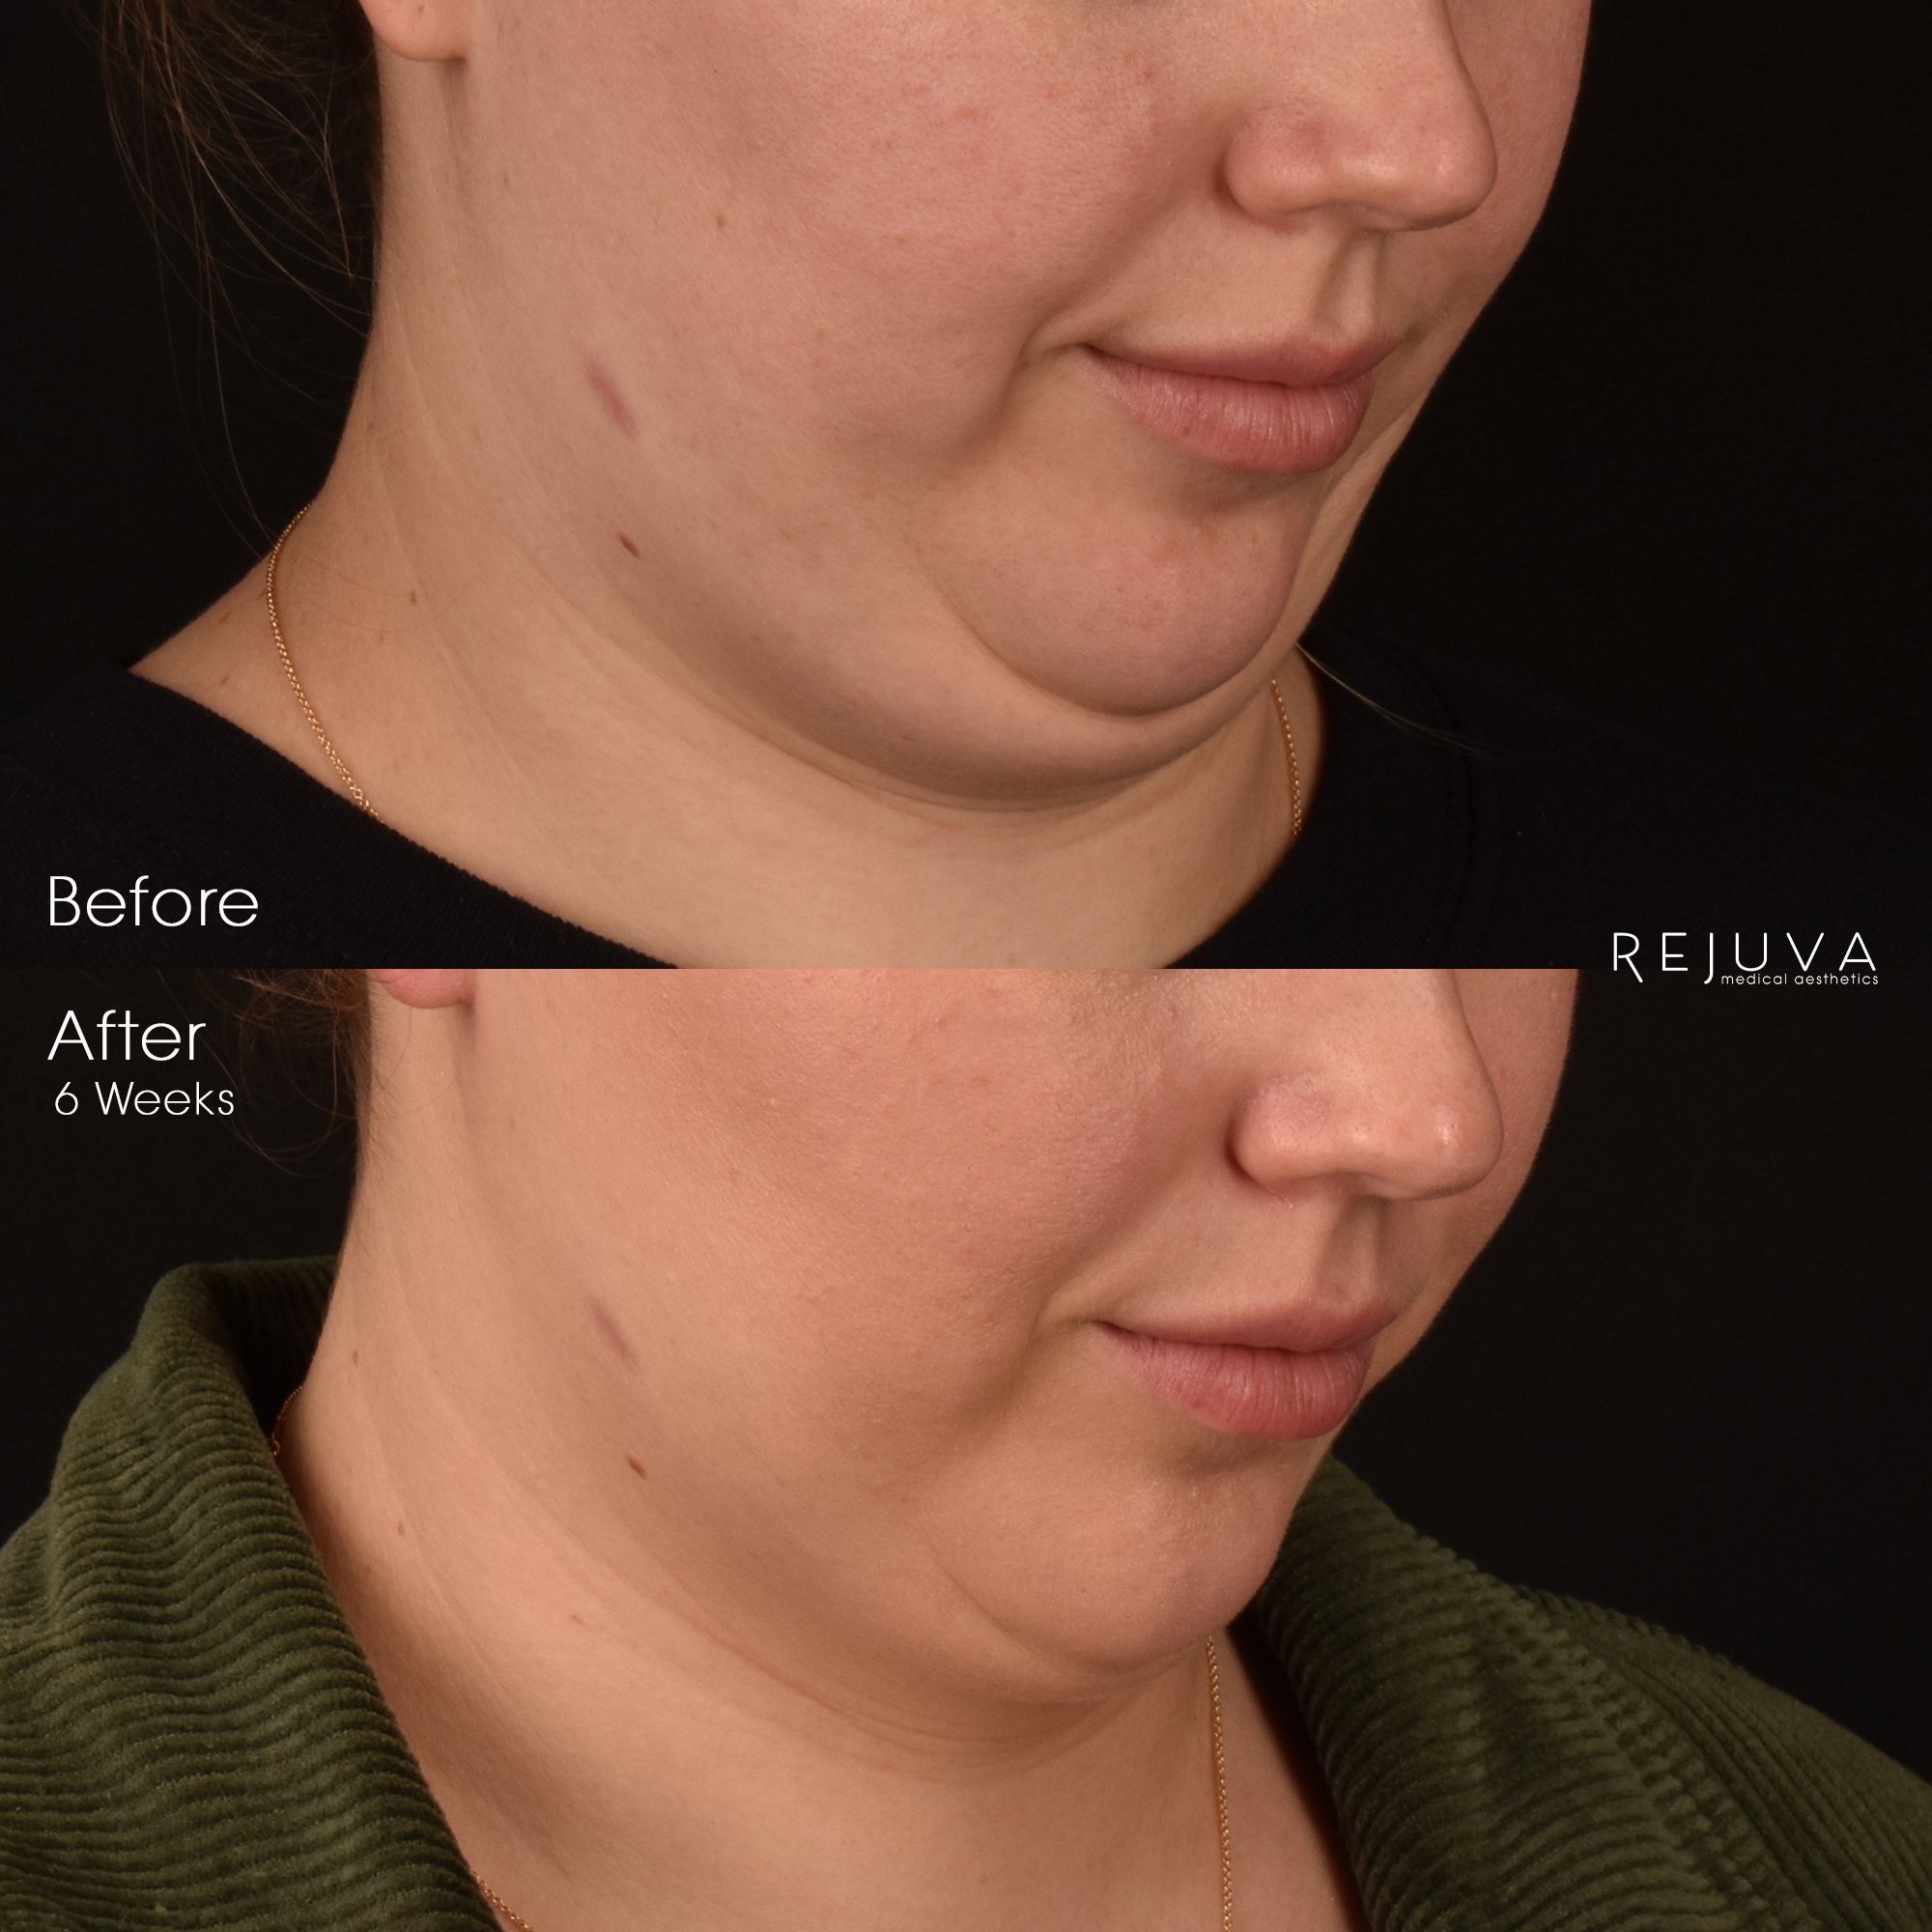
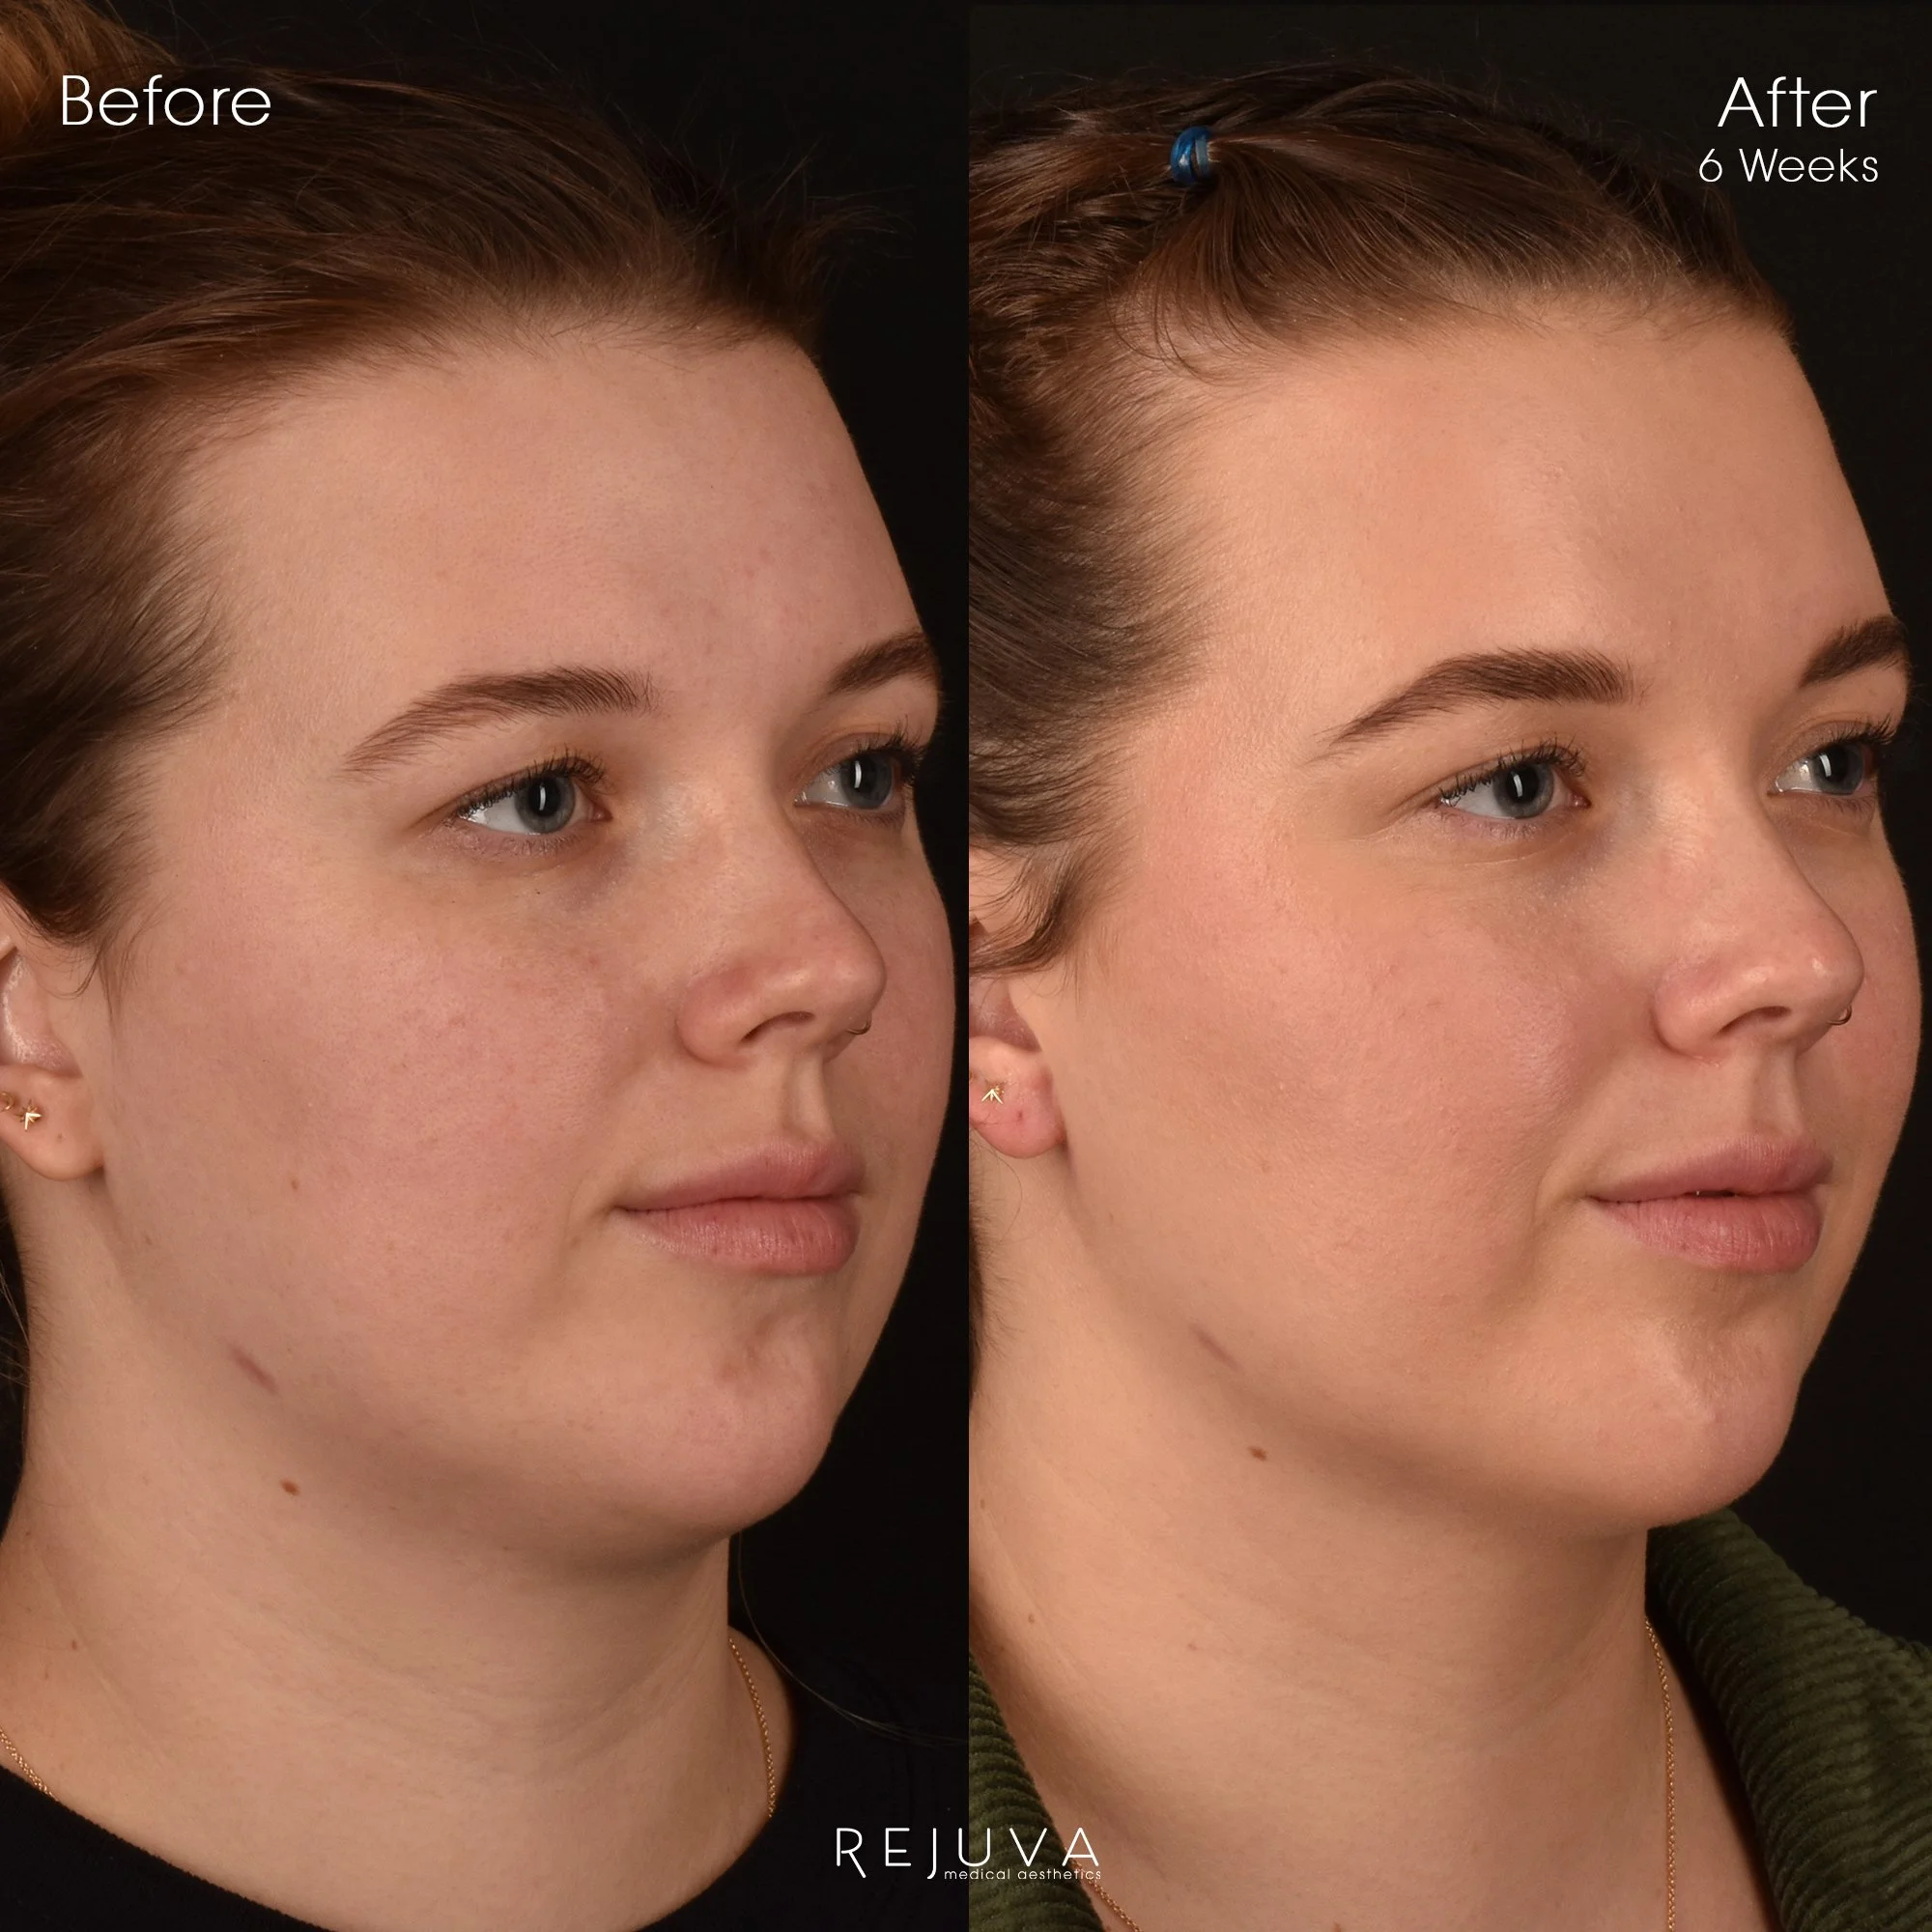
Facial Slimming (Buccal Fat Reduction with Submental Liposuction): Before & After Six Weeks
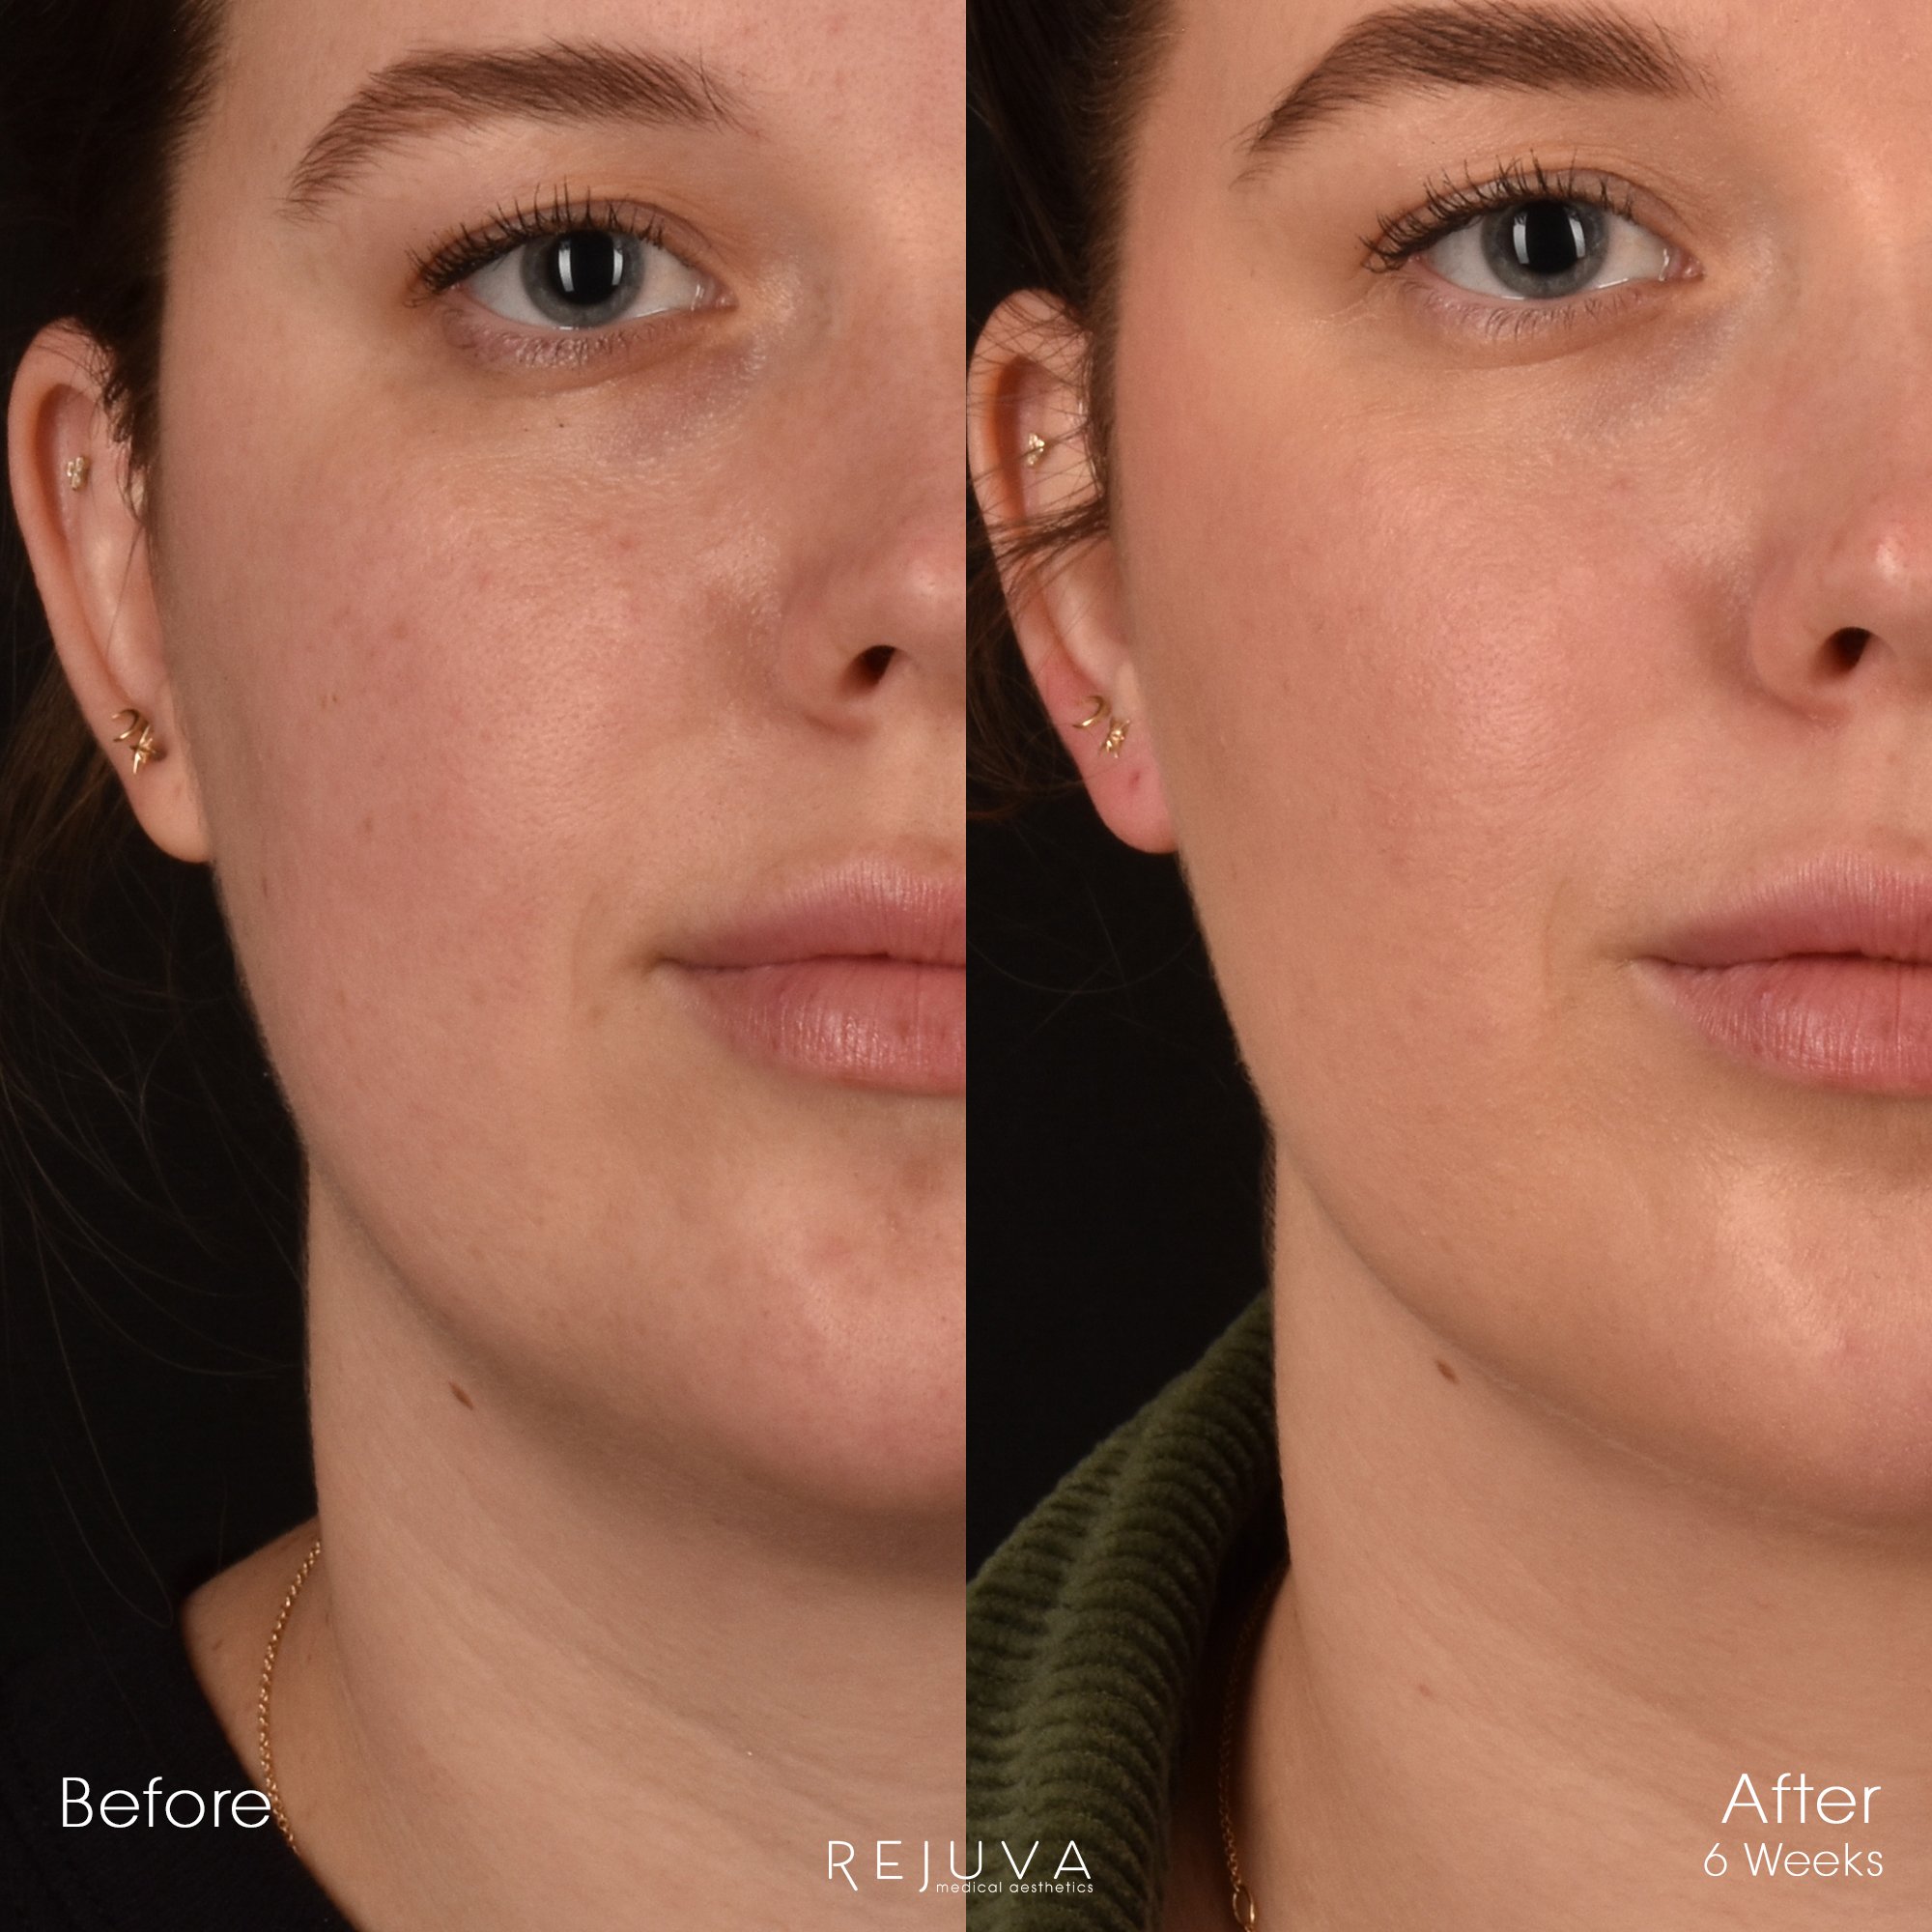
Facial Slimming (Buccal Fat Reduction with Submental Liposuction): Before & After Six Weeks
Facial Slimming (Buccal Fat Reduction with Submental Liposuction): Before & After Six Weeks
Facial Slimming (Buccal Fat Reduction with Submental Liposuction): Before & After Six Weeks
Facial Slimming (Buccal Fat Reduction with Submental Liposuction): Before & After Six Weeks
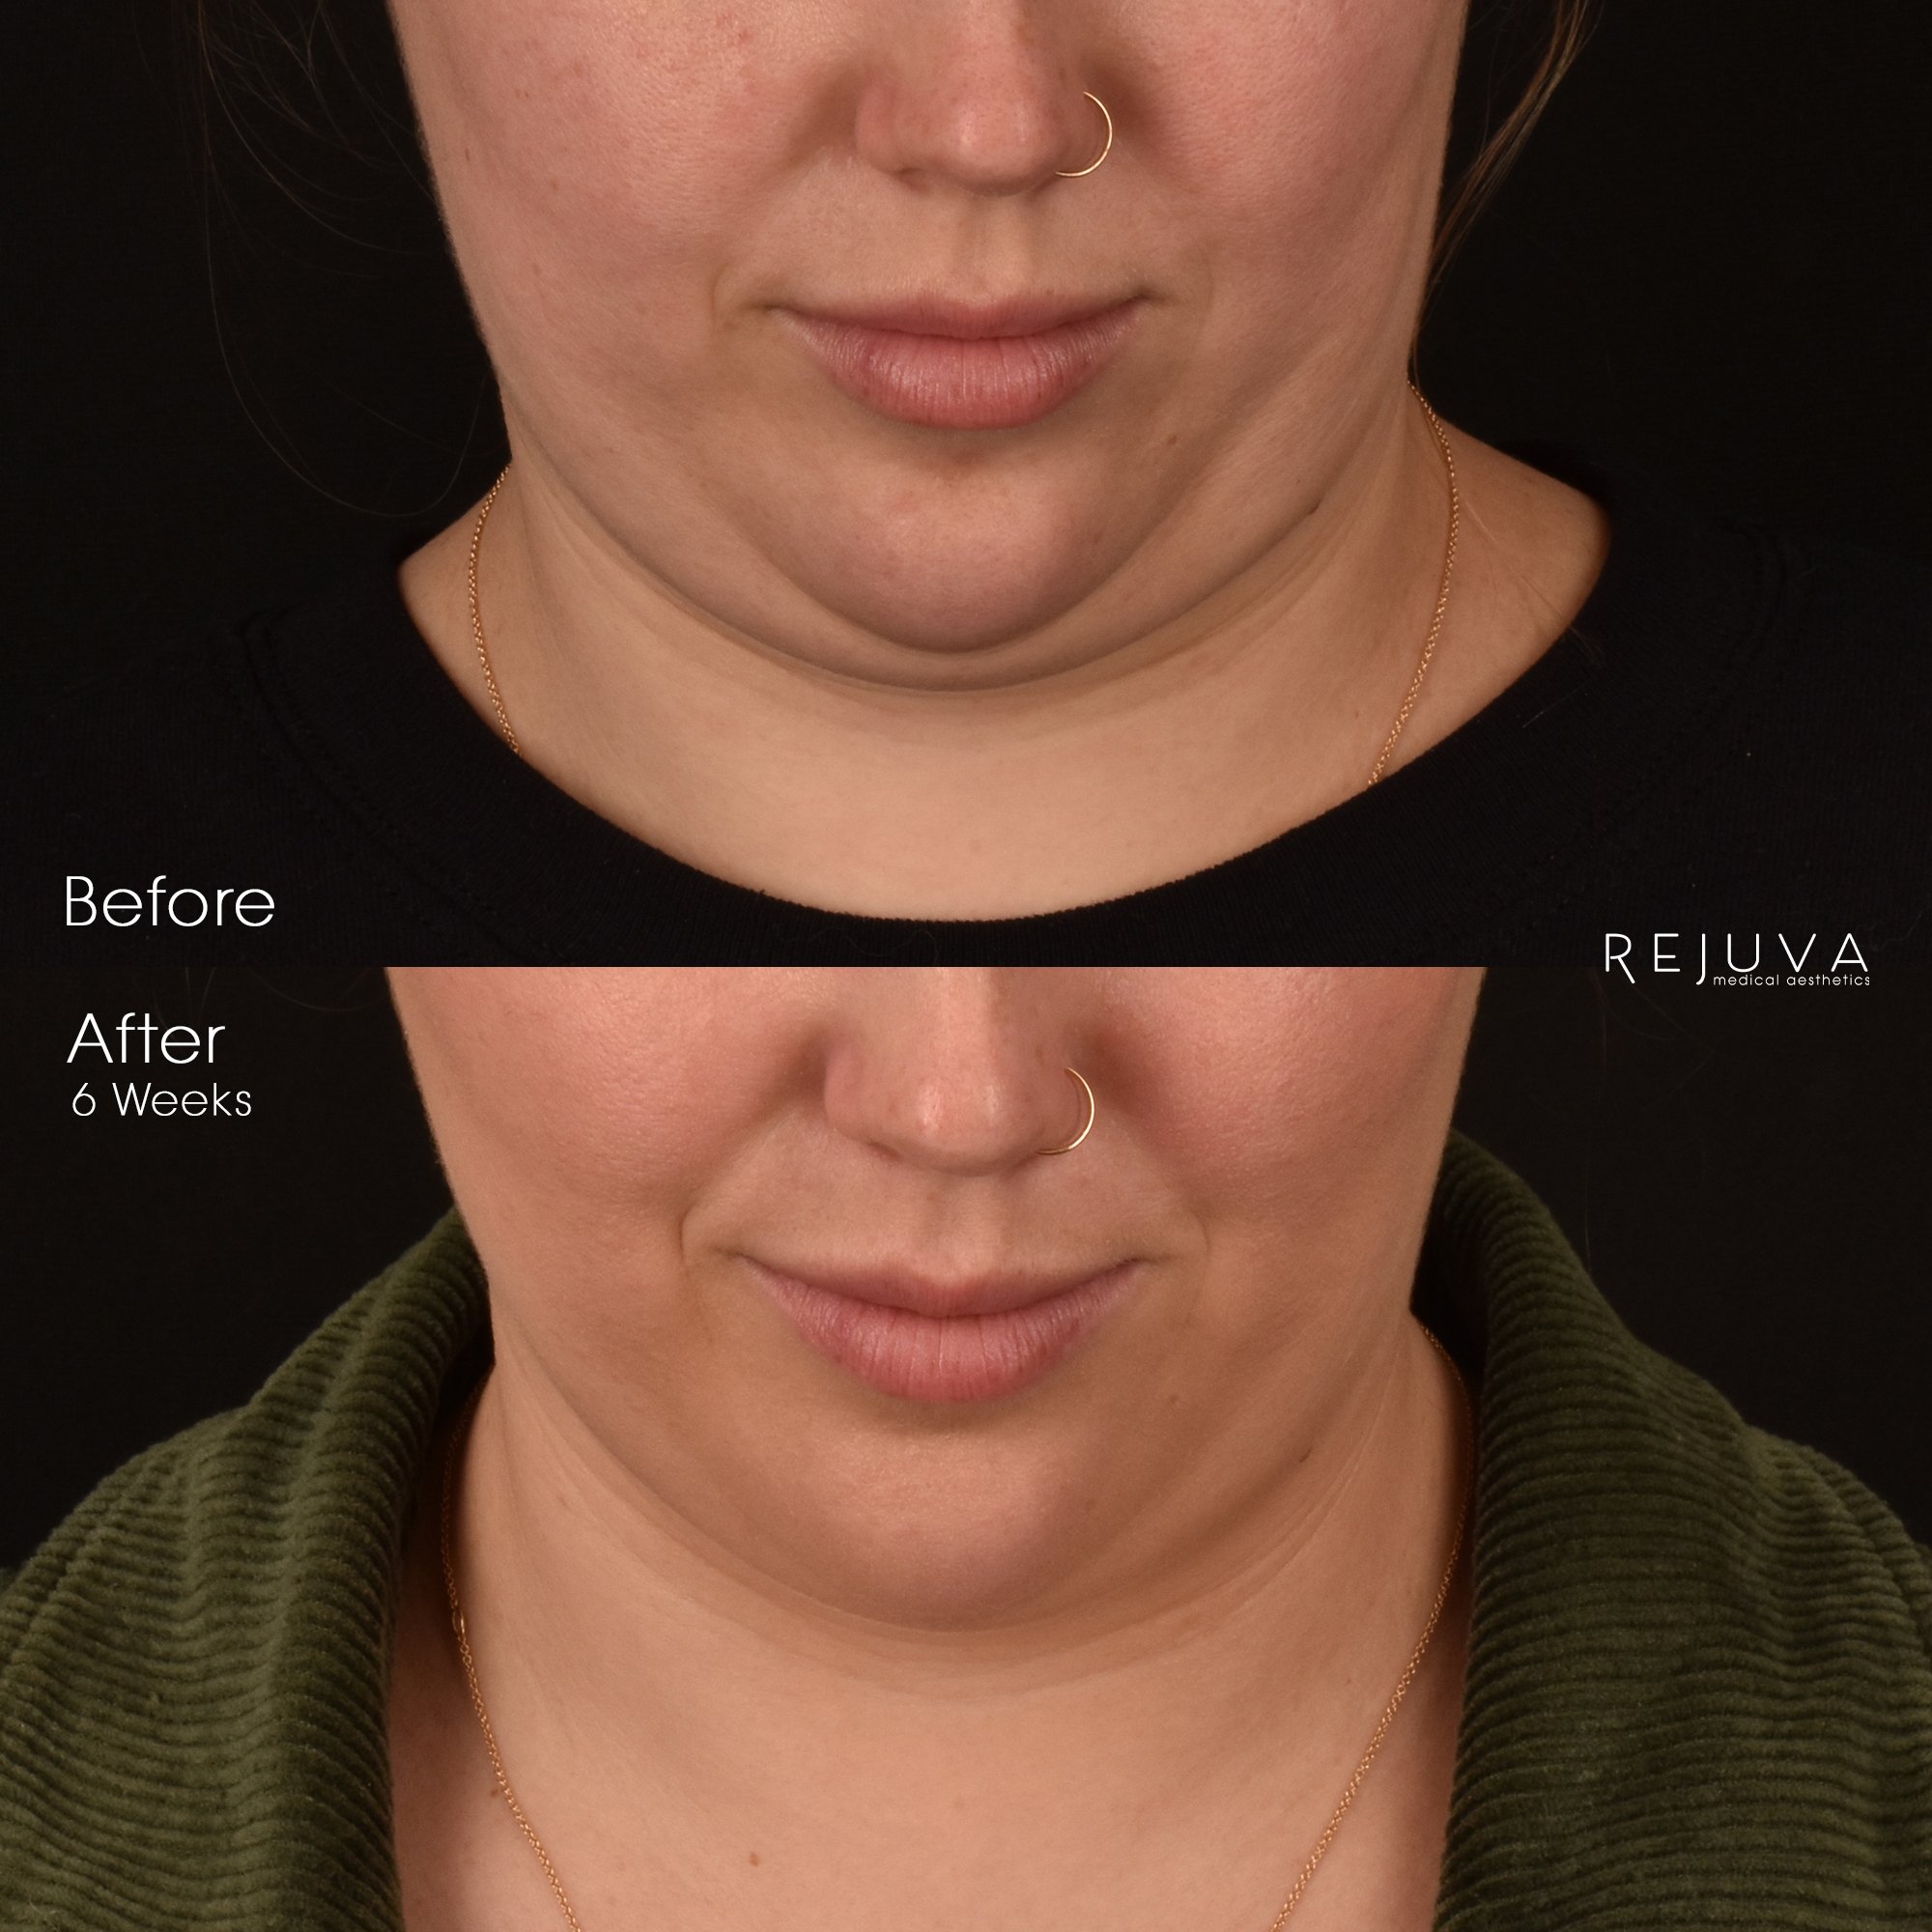
Facial Slimming (Buccal Fat Reduction with Submental Liposuction): Before & After Six Weeks
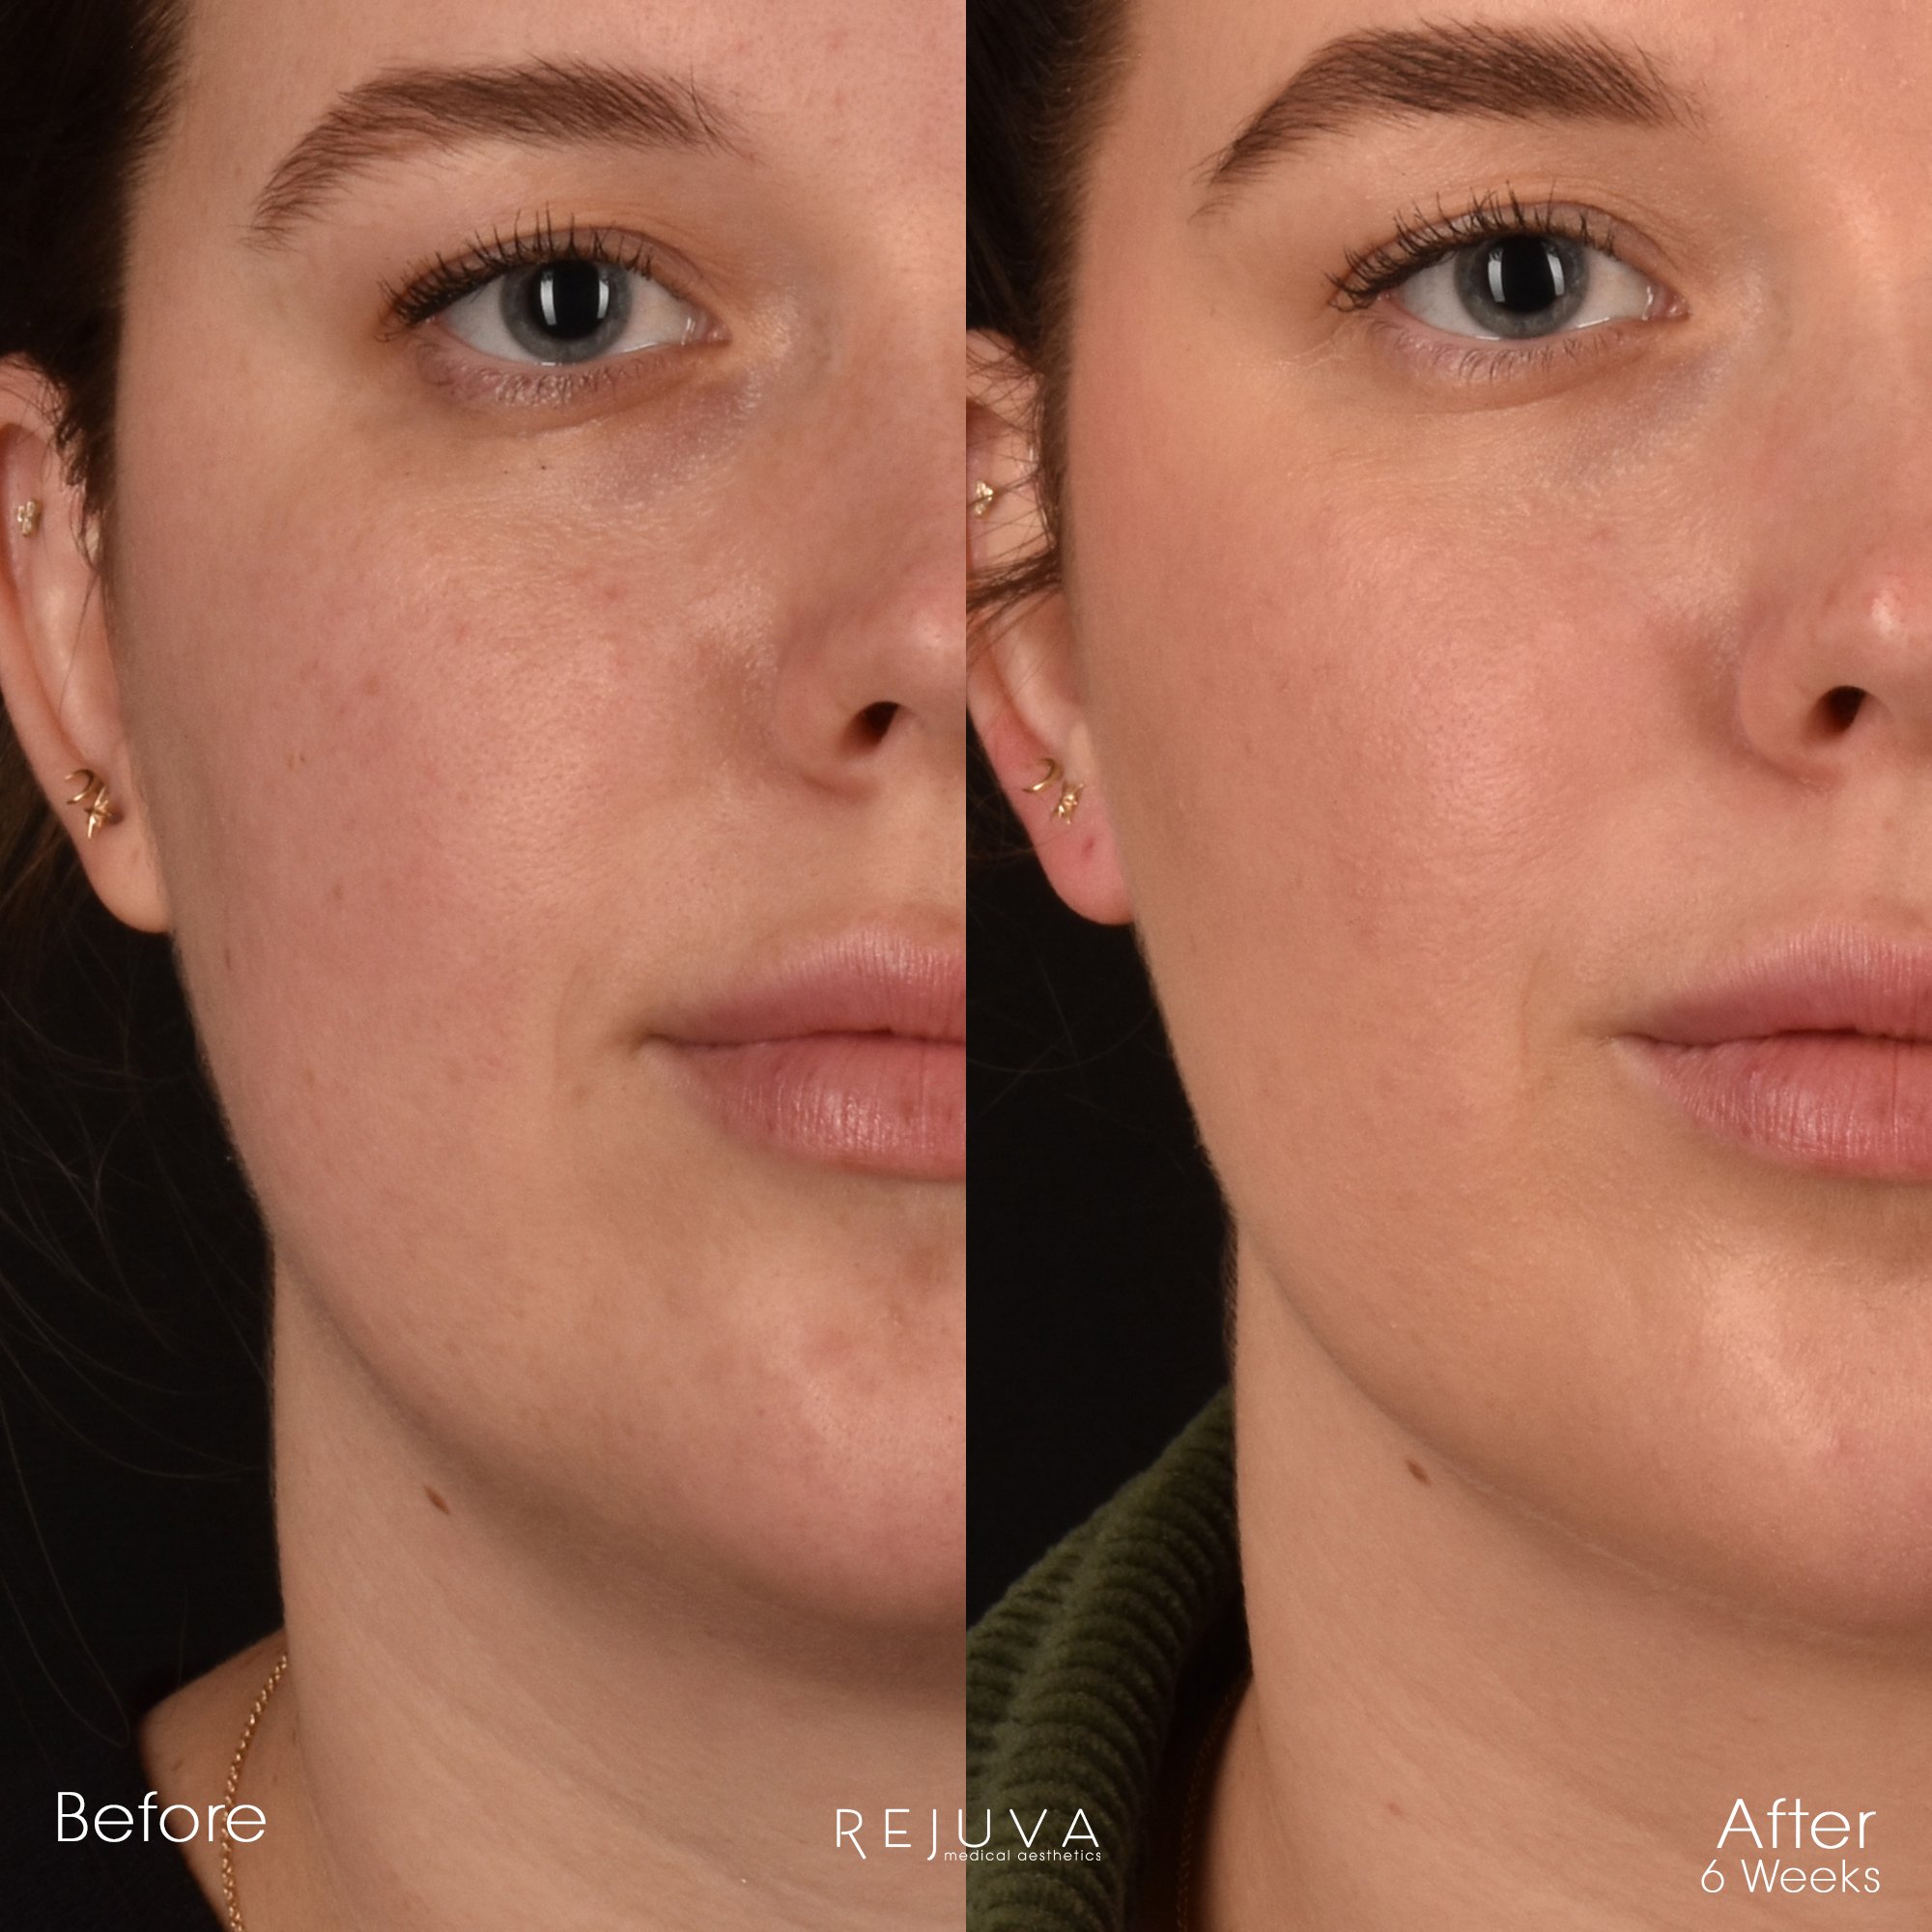
Facial Slimming (Buccal Fat Reduction with Submental Liposuction): Before & After Six Weeks

Facial Slimming (Buccal Fat Reduction with Submental Liposuction): Before & After Six Weeks
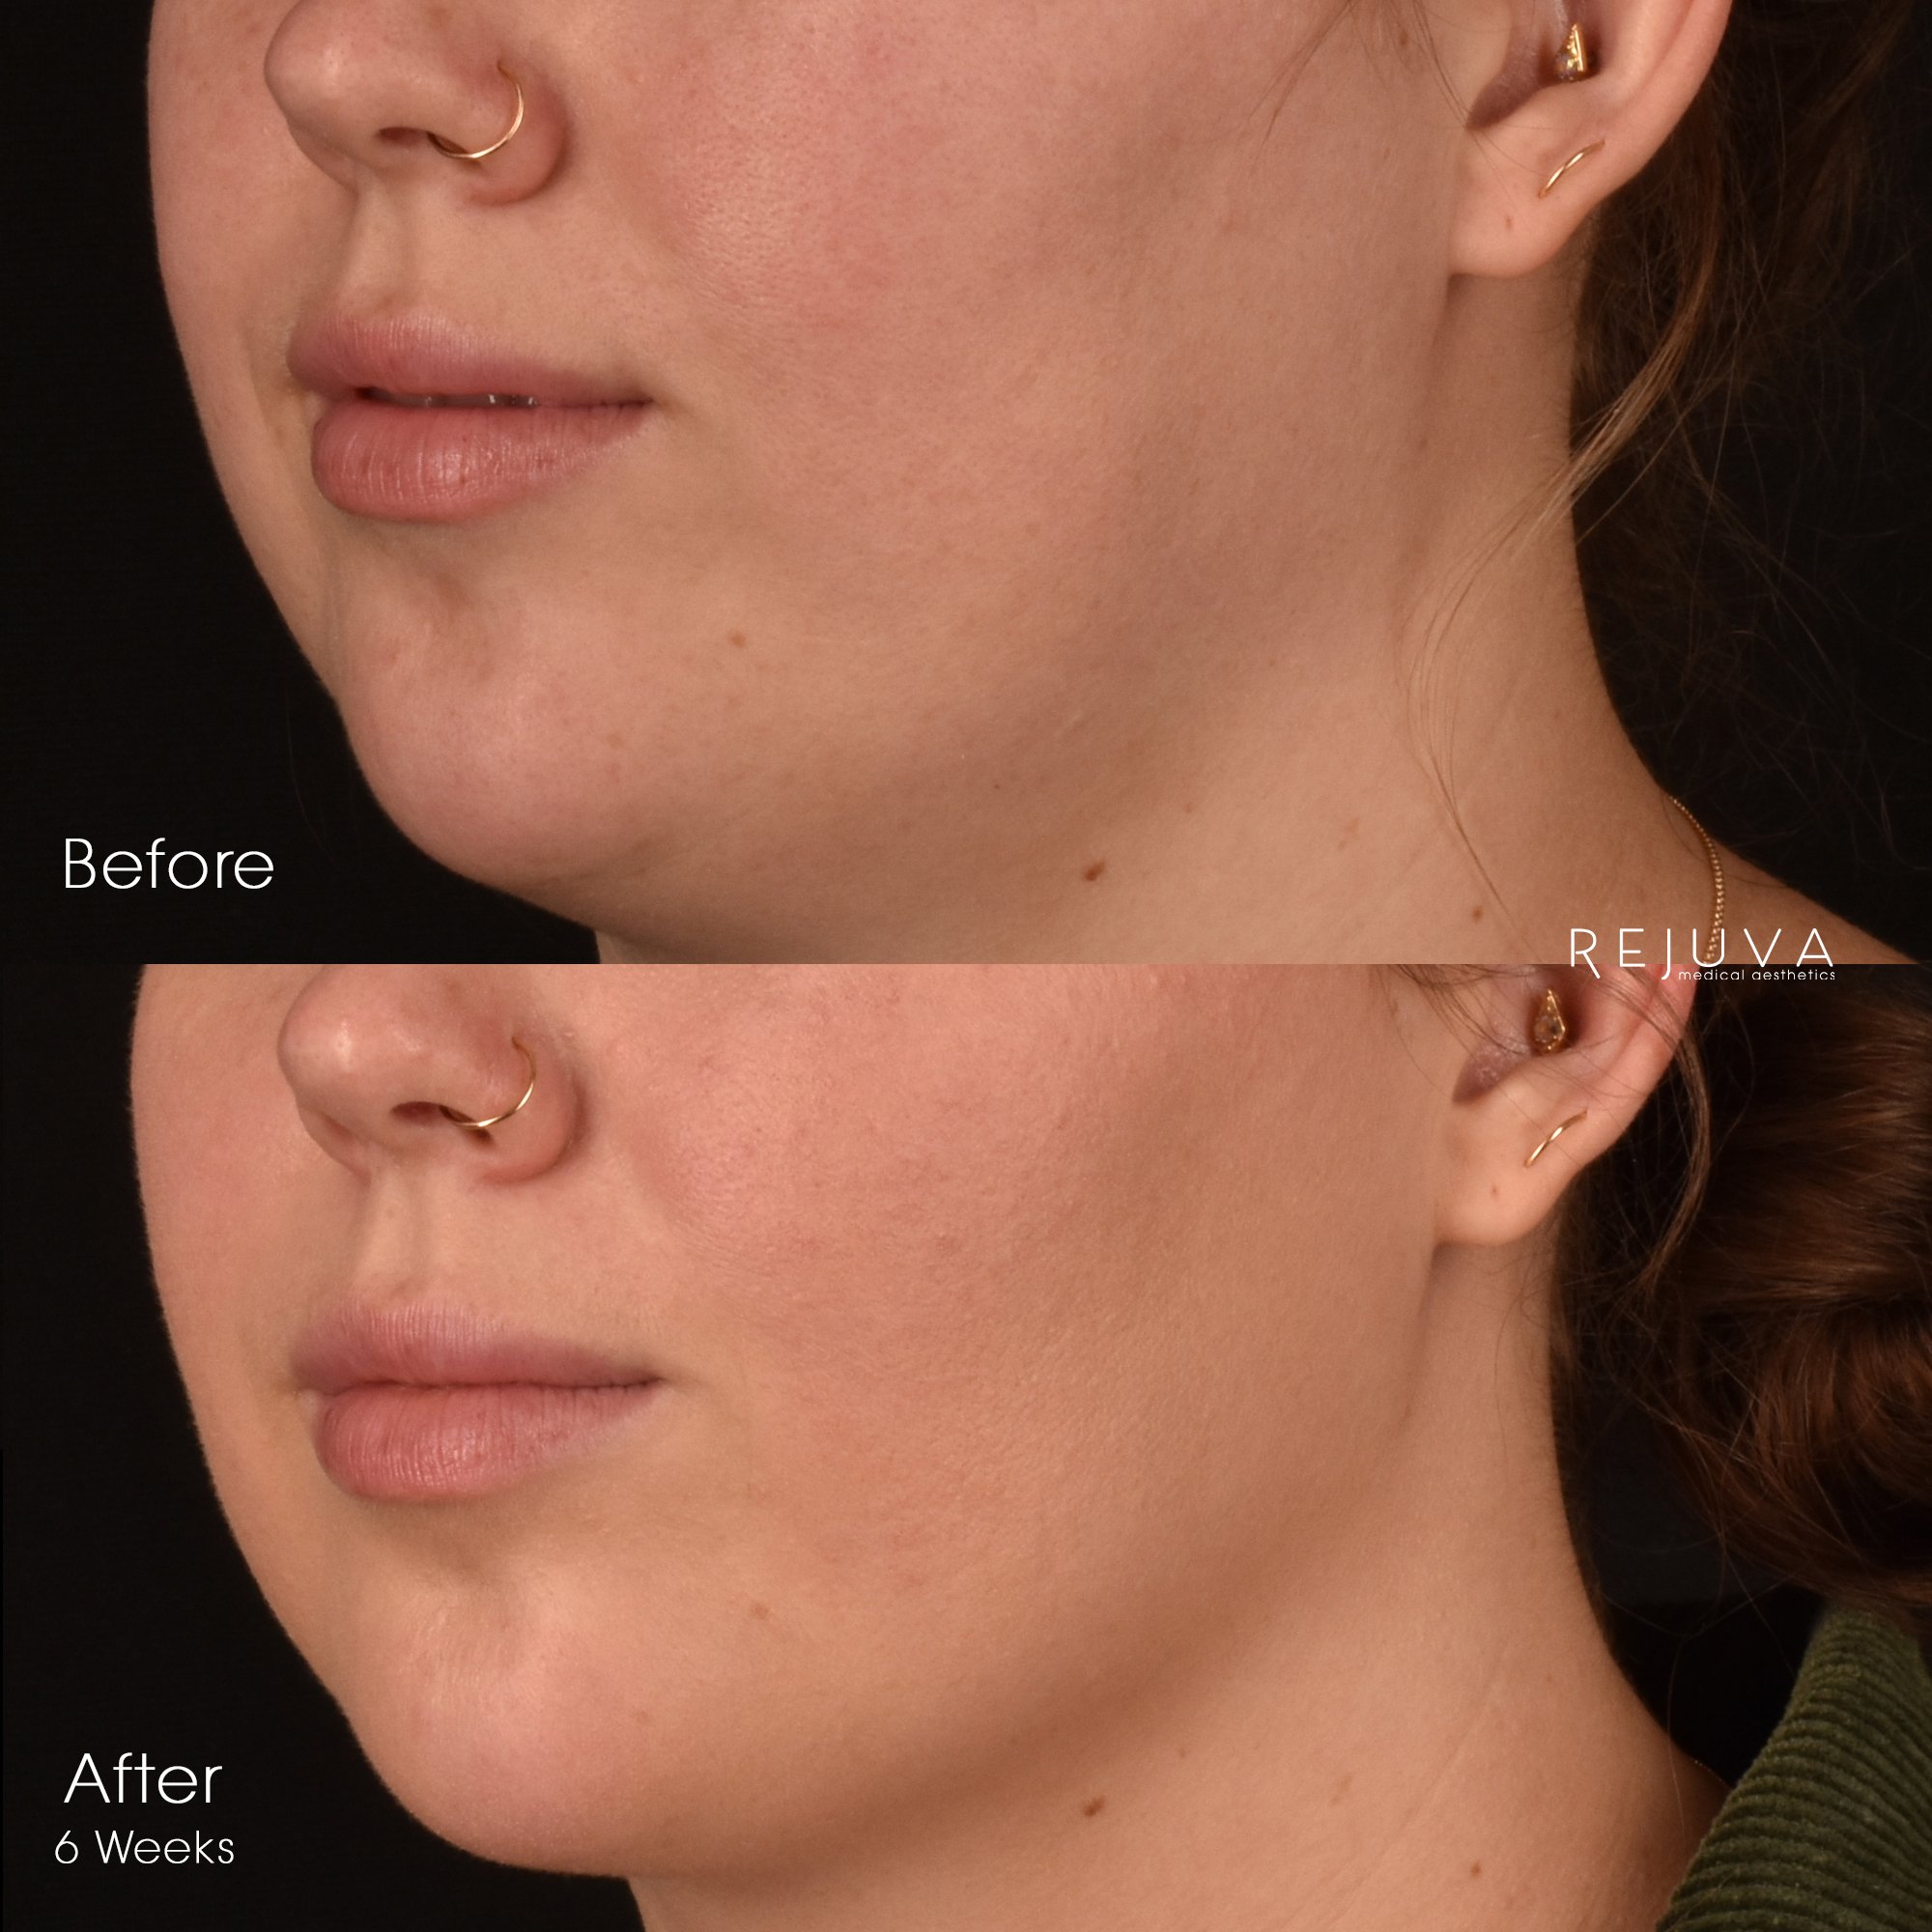
Facial Slimming (Buccal Fat Reduction with Submental Liposuction): Before & After Six Weeks

Facial Slimming (Buccal Fat Reduction with Submental Liposuction): Before & After Six Weeks
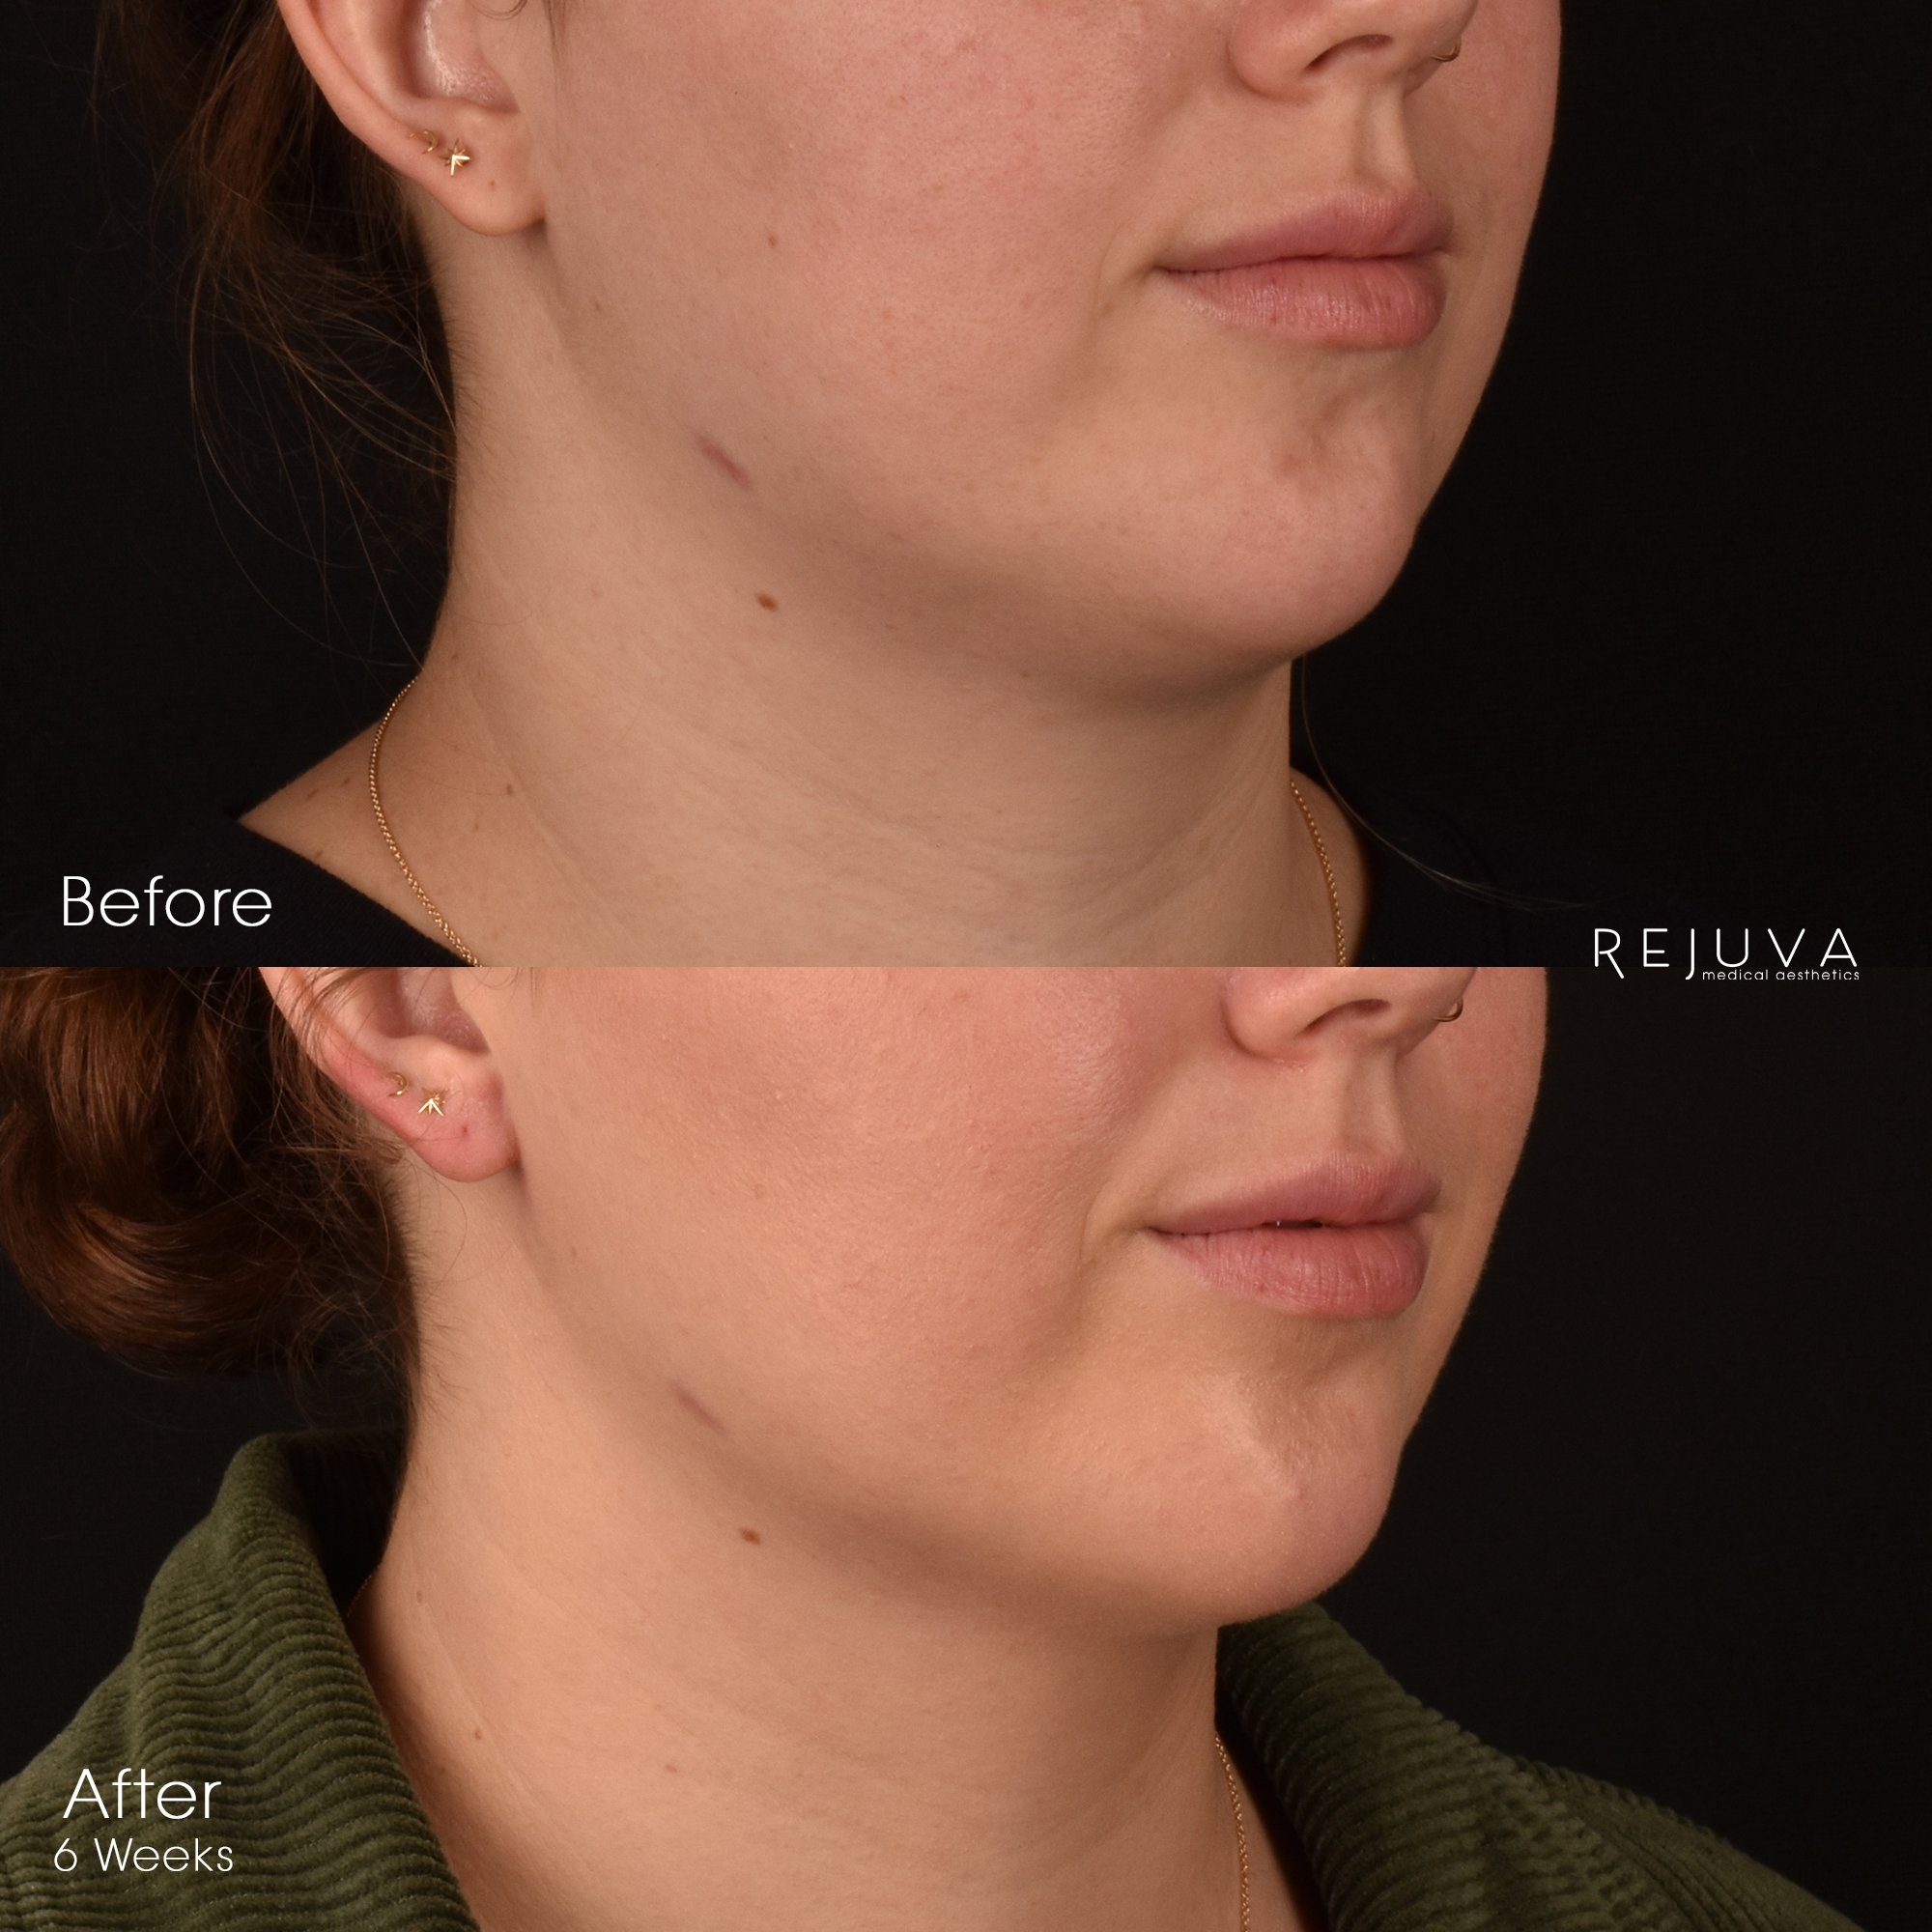
Facial Slimming (Buccal Fat Reduction with Submental Liposuction): Before & After Six Weeks
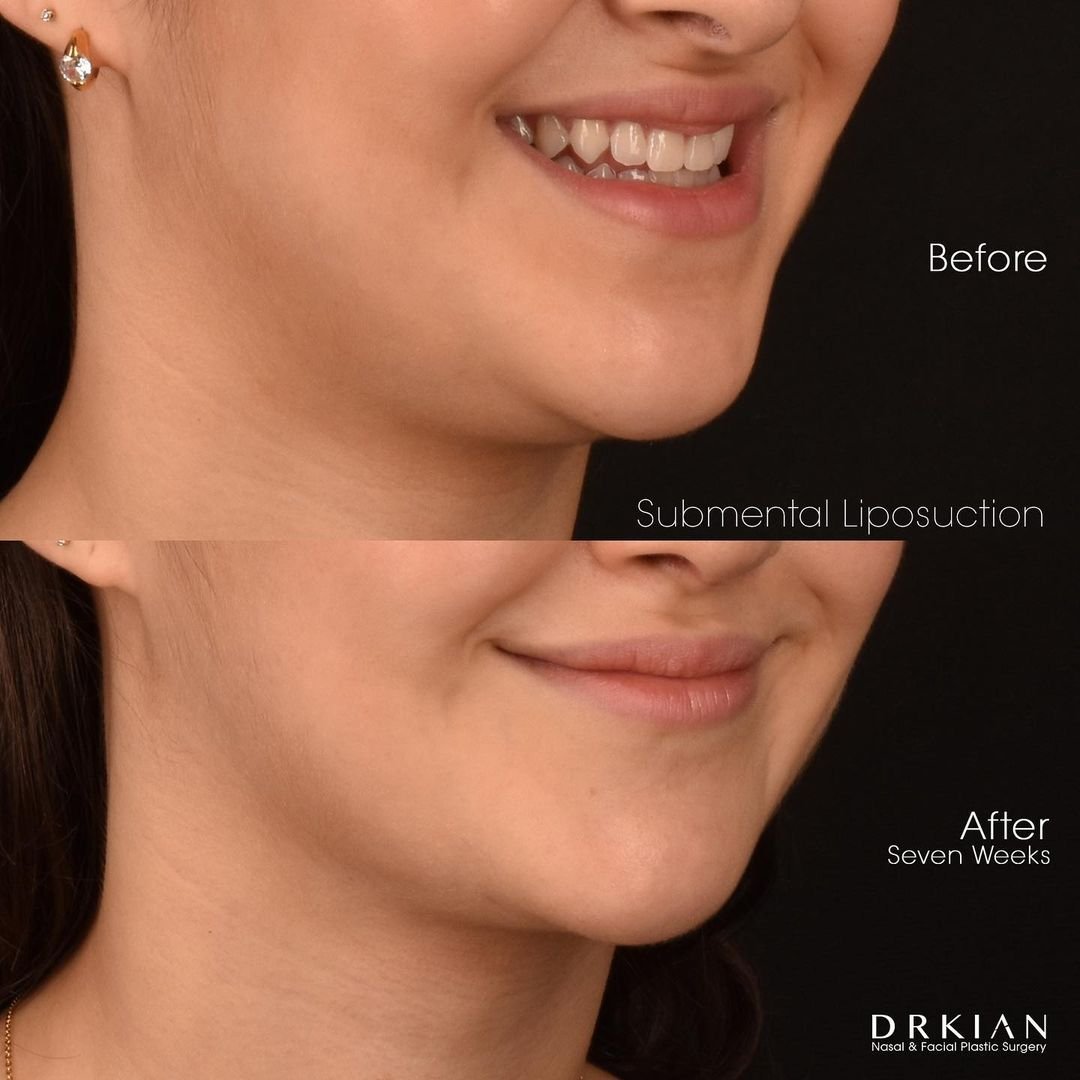
Submental Liposuction: Before & After Seven Weeks

Submental Liposuction: Before & After Seven Weeks

Submental Liposuction: Before & After Seven Weeks
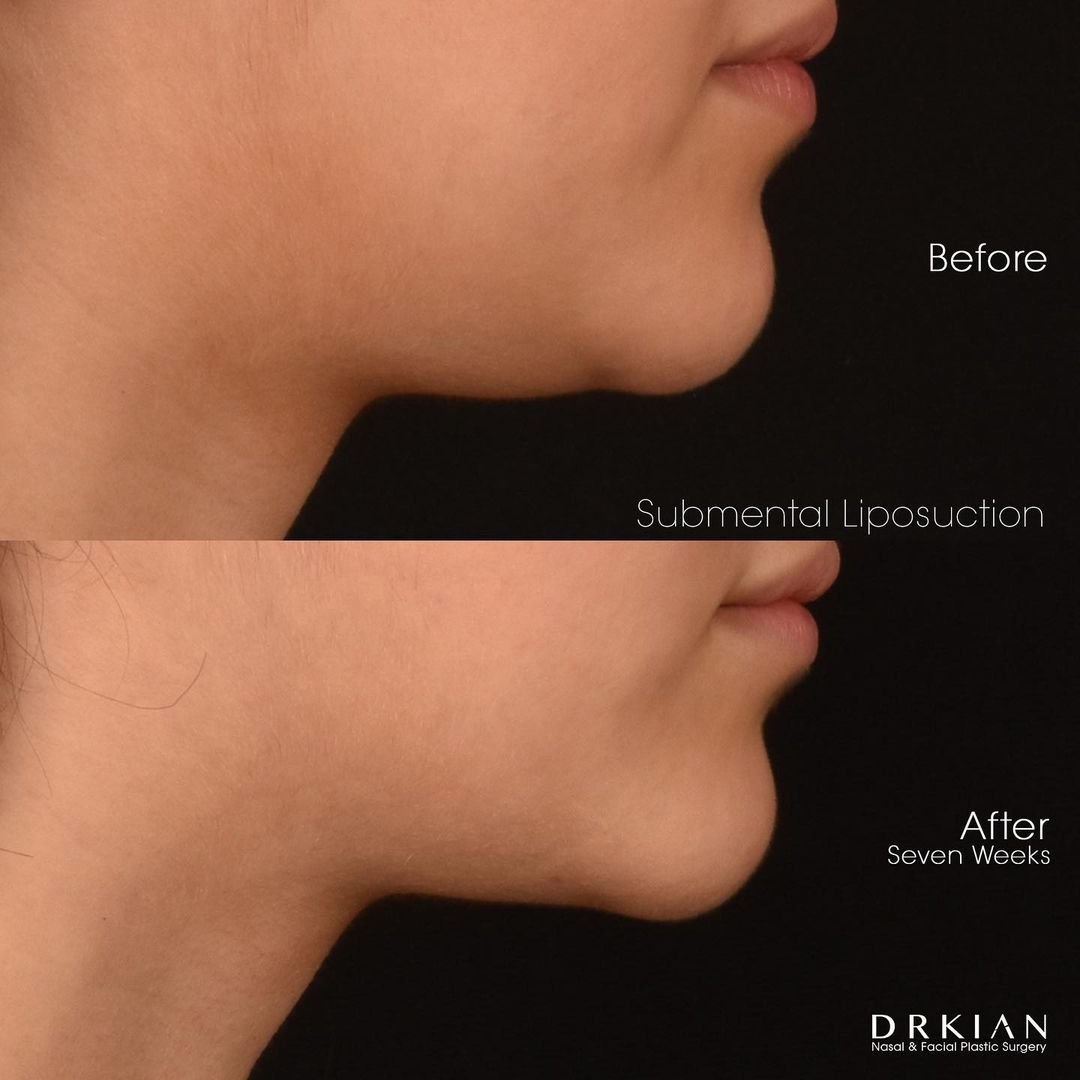
Submental Liposuction: Before & After Seven Weeks
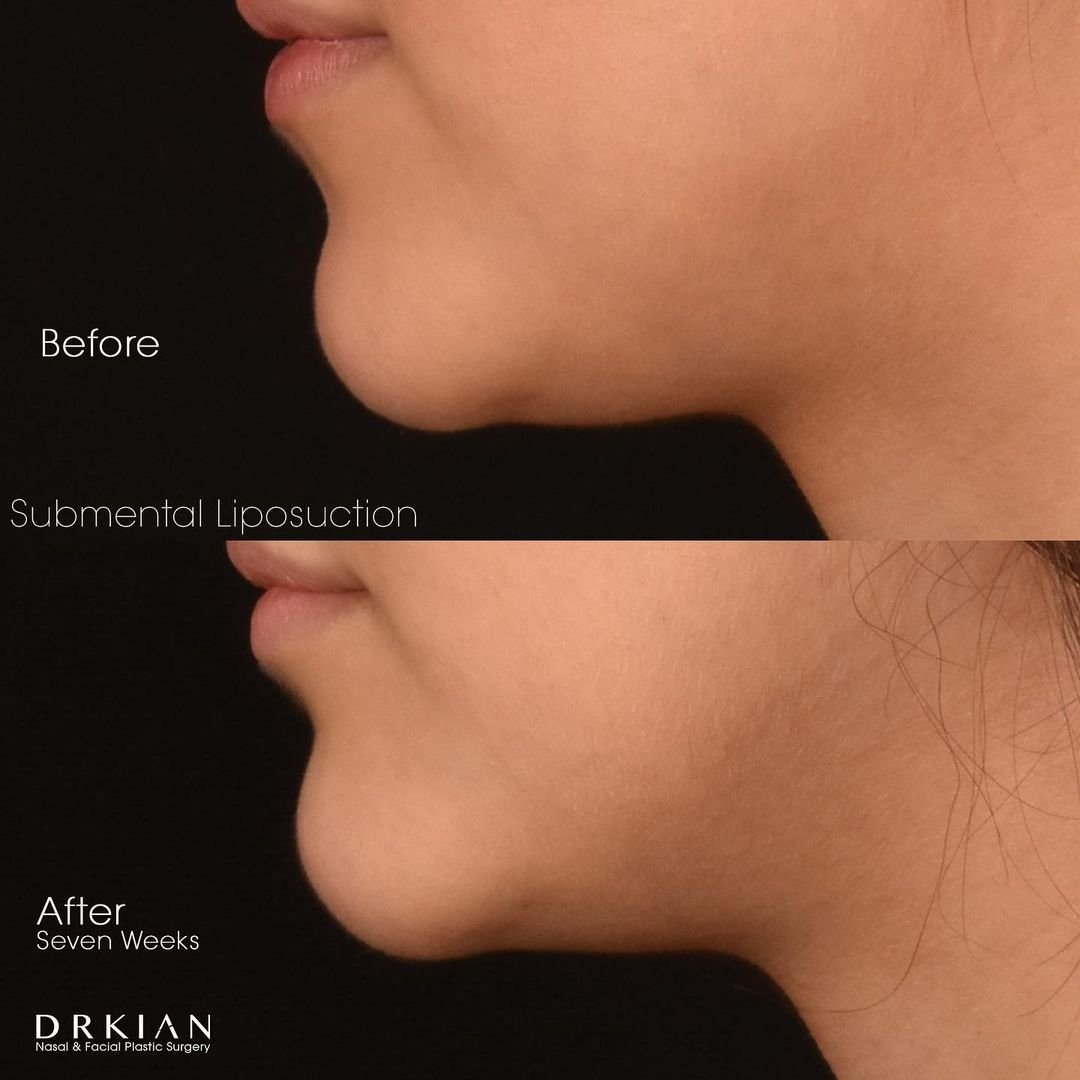
Submental Liposuction: Before & After Seven Weeks

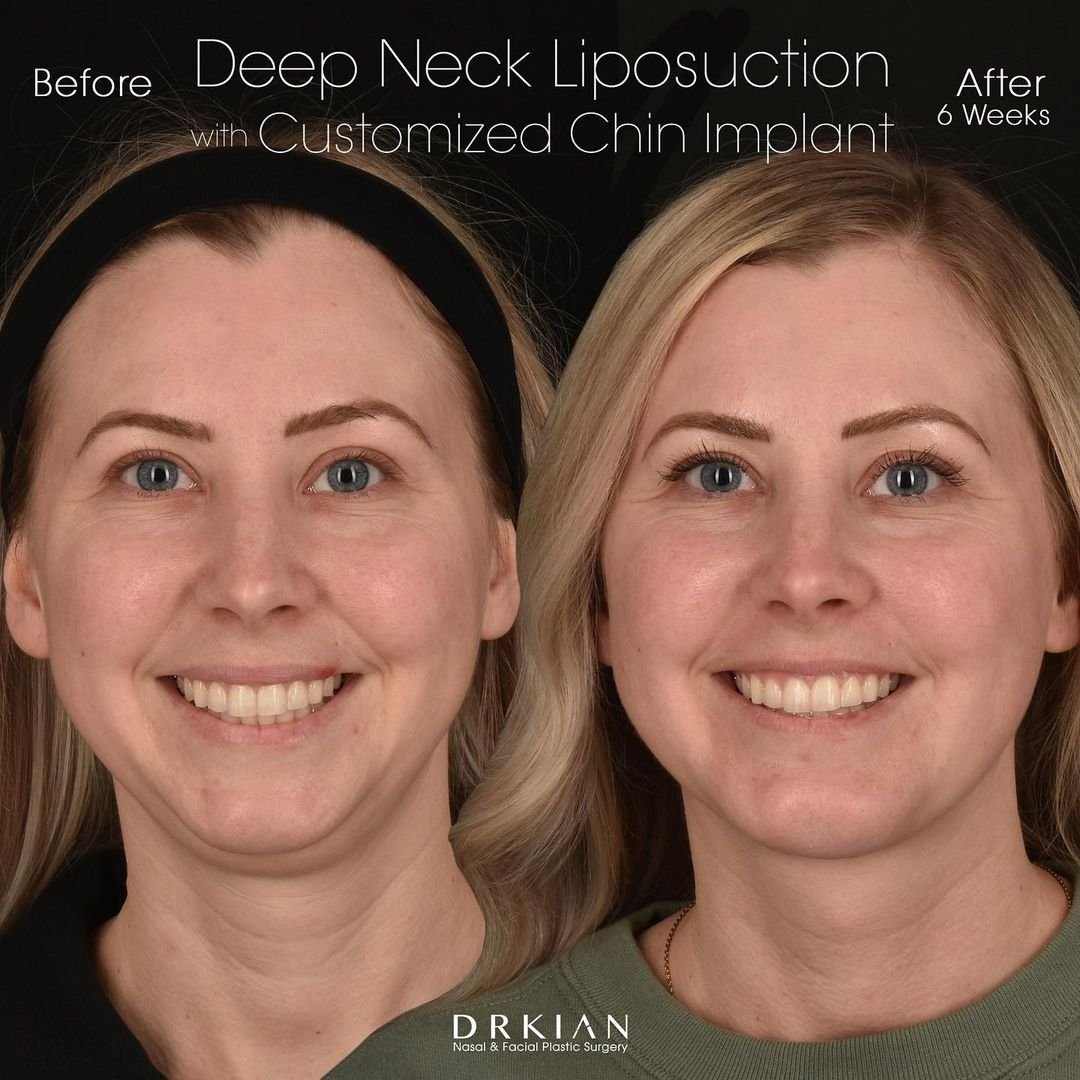
Deep Neck Liposuction with Customized Chin Implant: Before & After Six Weeks

Deep Neck Liposuction with Customized Chin Implant: Before & After Six Weeks

Deep Neck Liposuction with Customized Chin Implant: Before & After Six Weeks
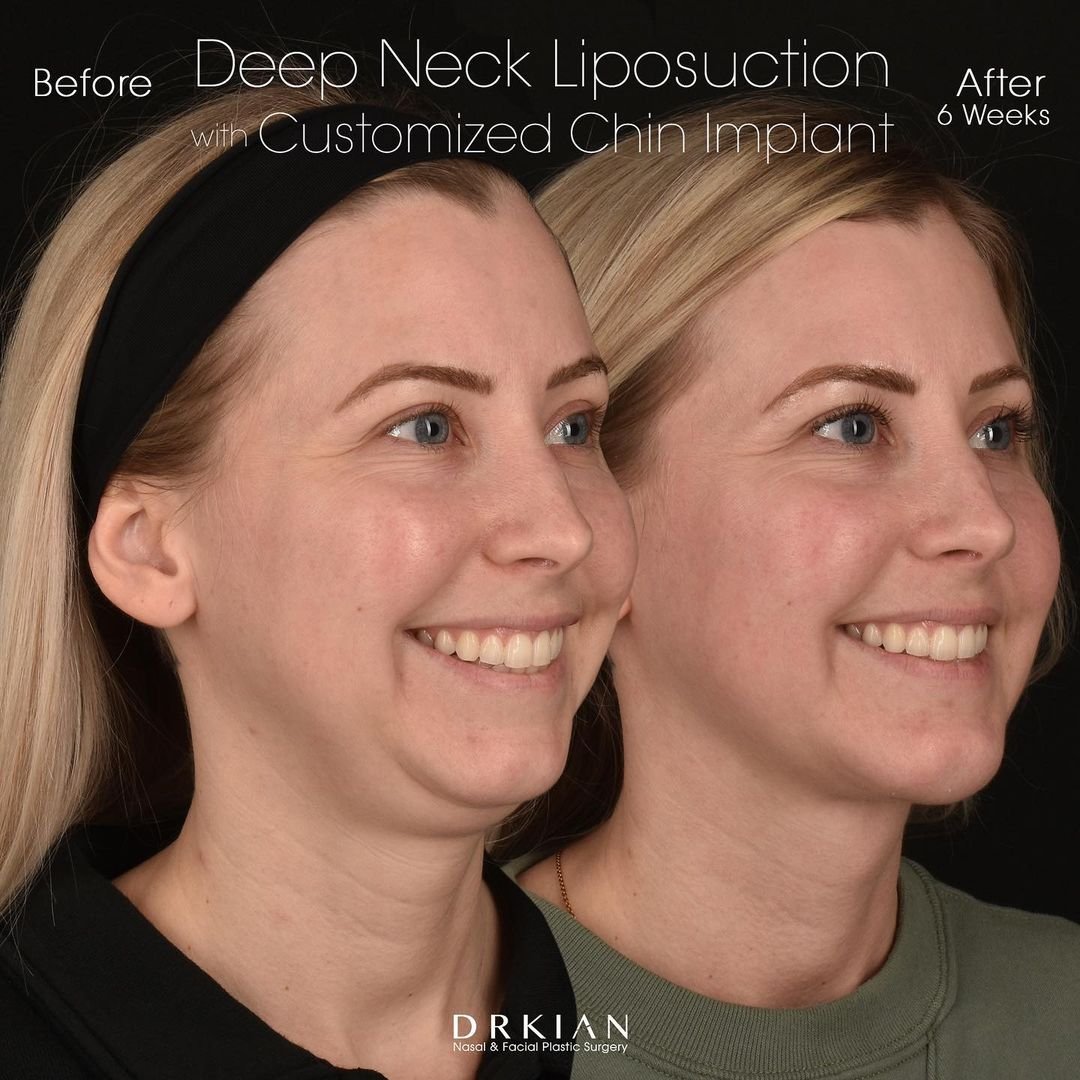
Deep Neck Liposuction with Customized Chin Implant: Before & After Six Weeks

Deep Neck Liposuction with Customized Chin Implant: Before & After Six Weeks

Deep Neck Liposuction with Customized Chin Implant: Before & After Six Weeks

Deep Neck Liposuction with Customized Chin Implant: Before & After Six Weeks
Deep Neck Liposuction with Customized Chin Implant: Before & After Six Weeks

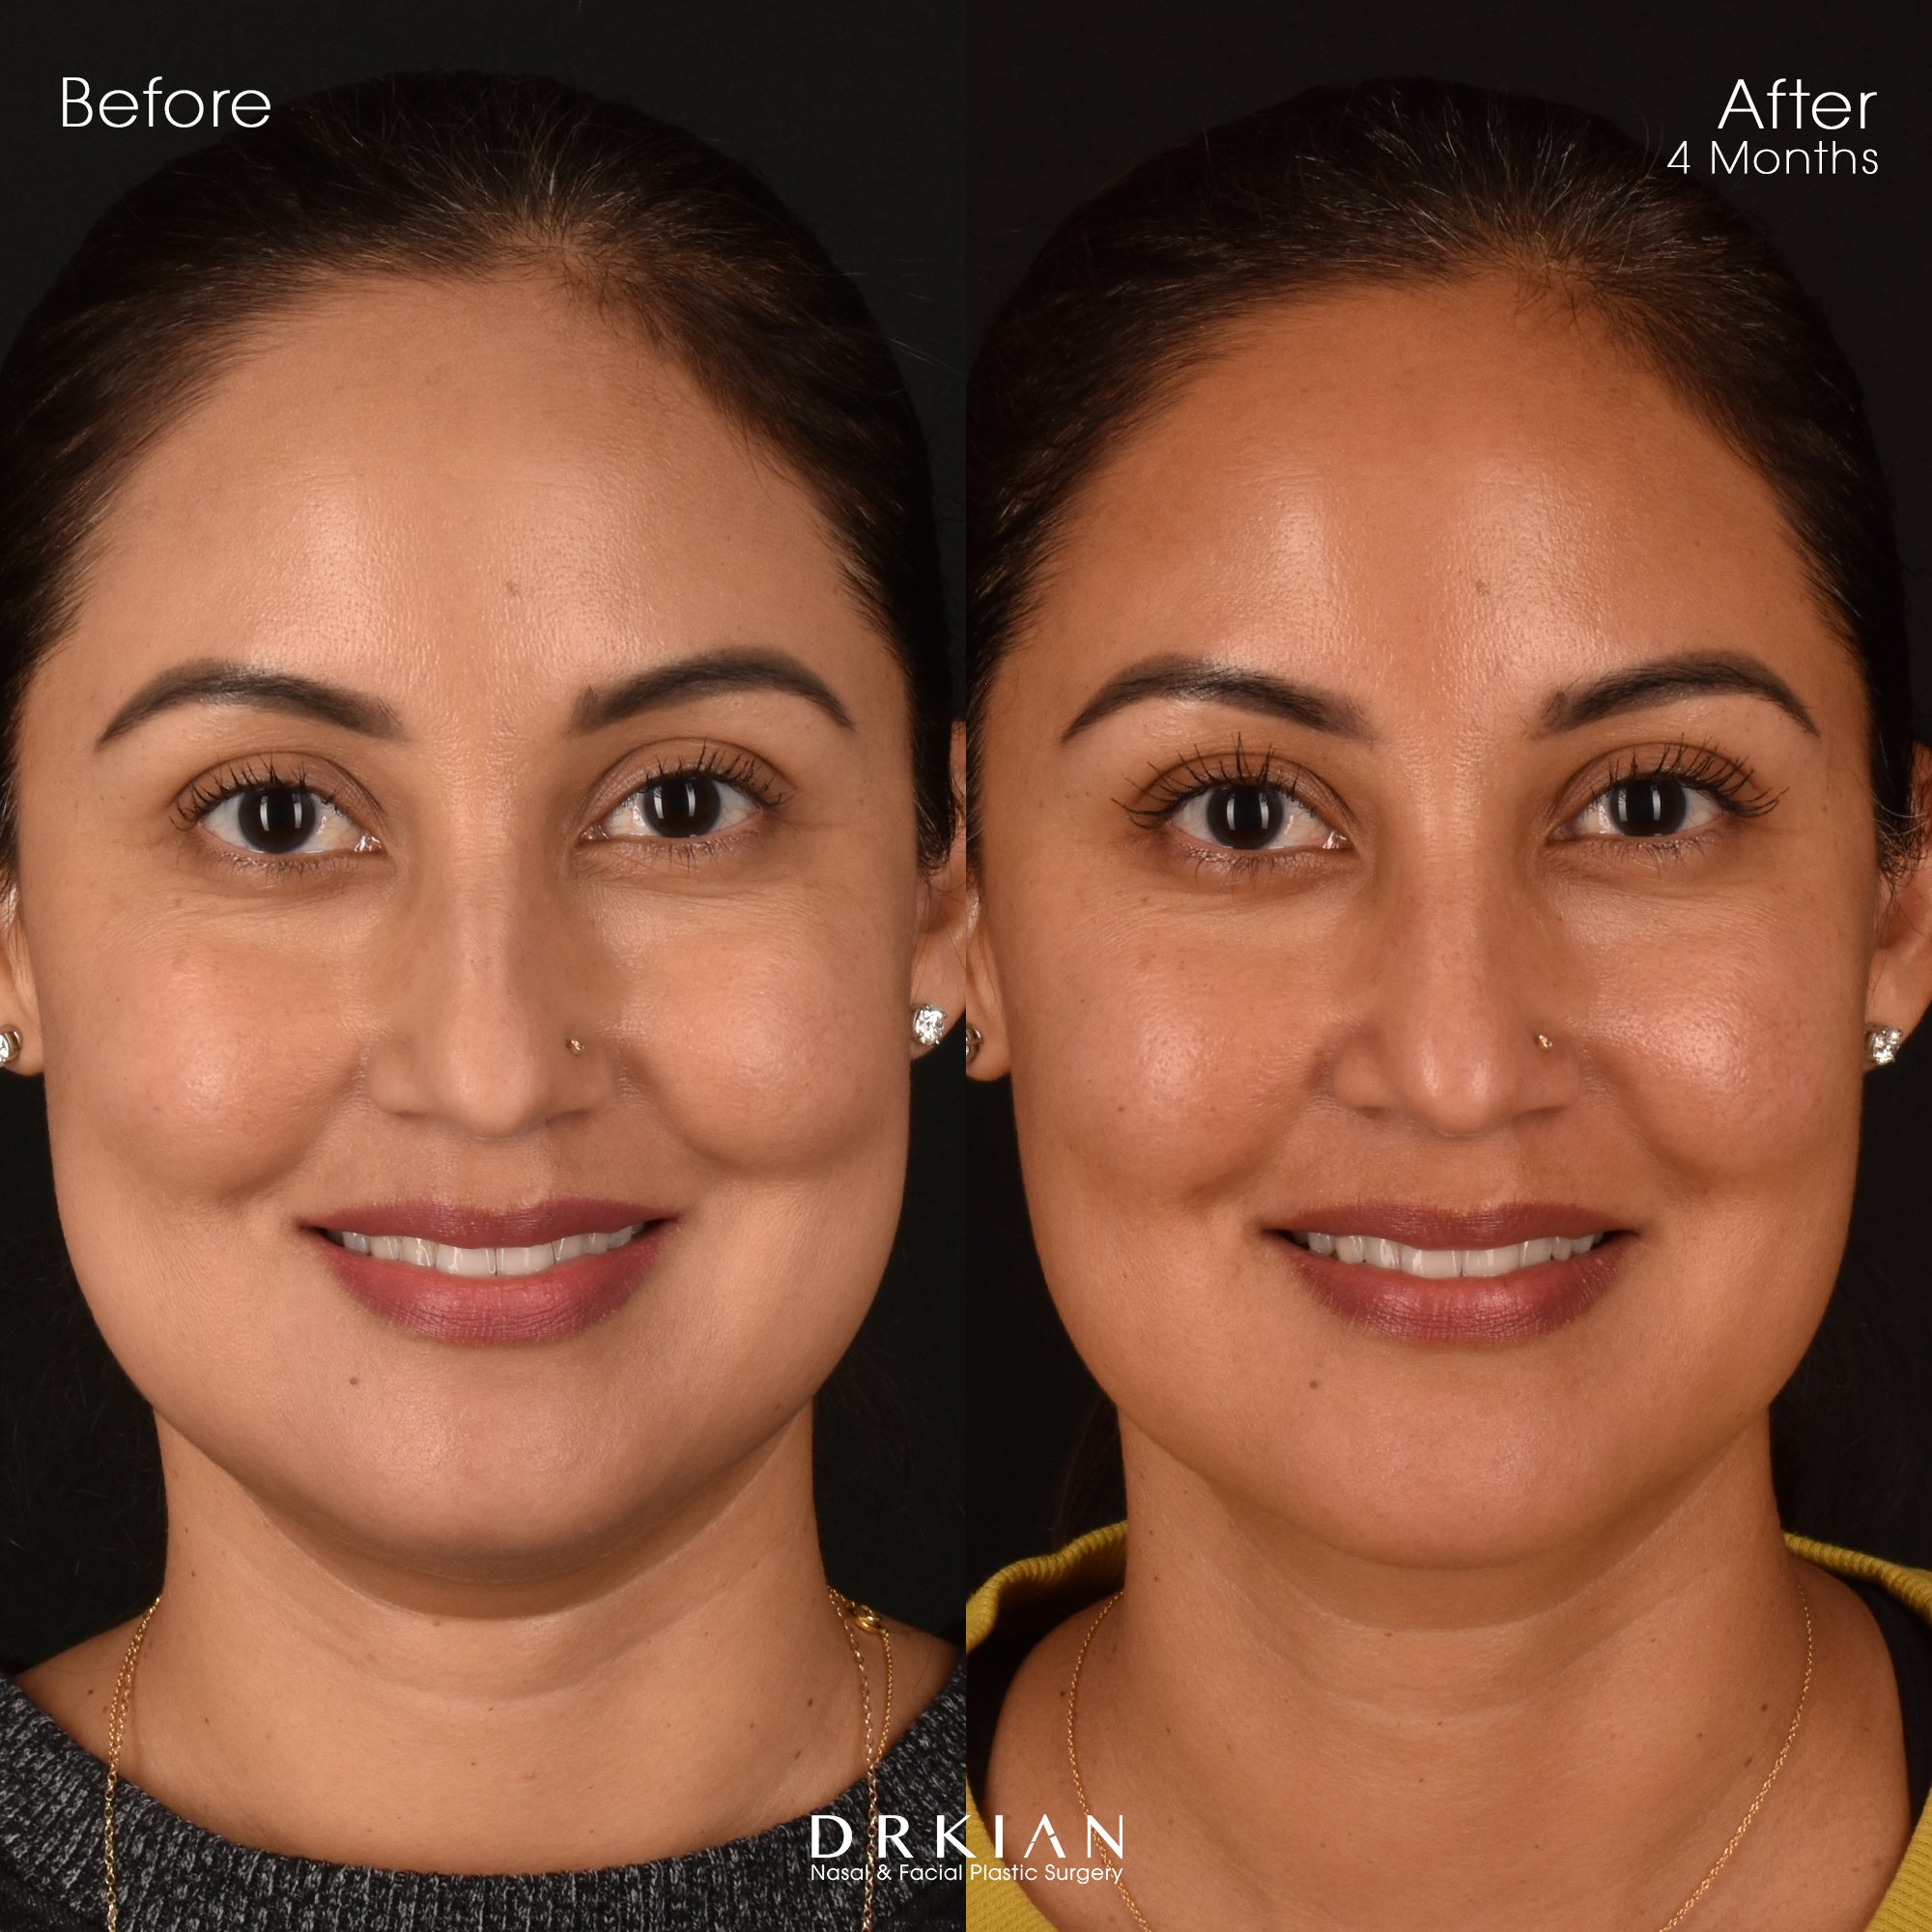
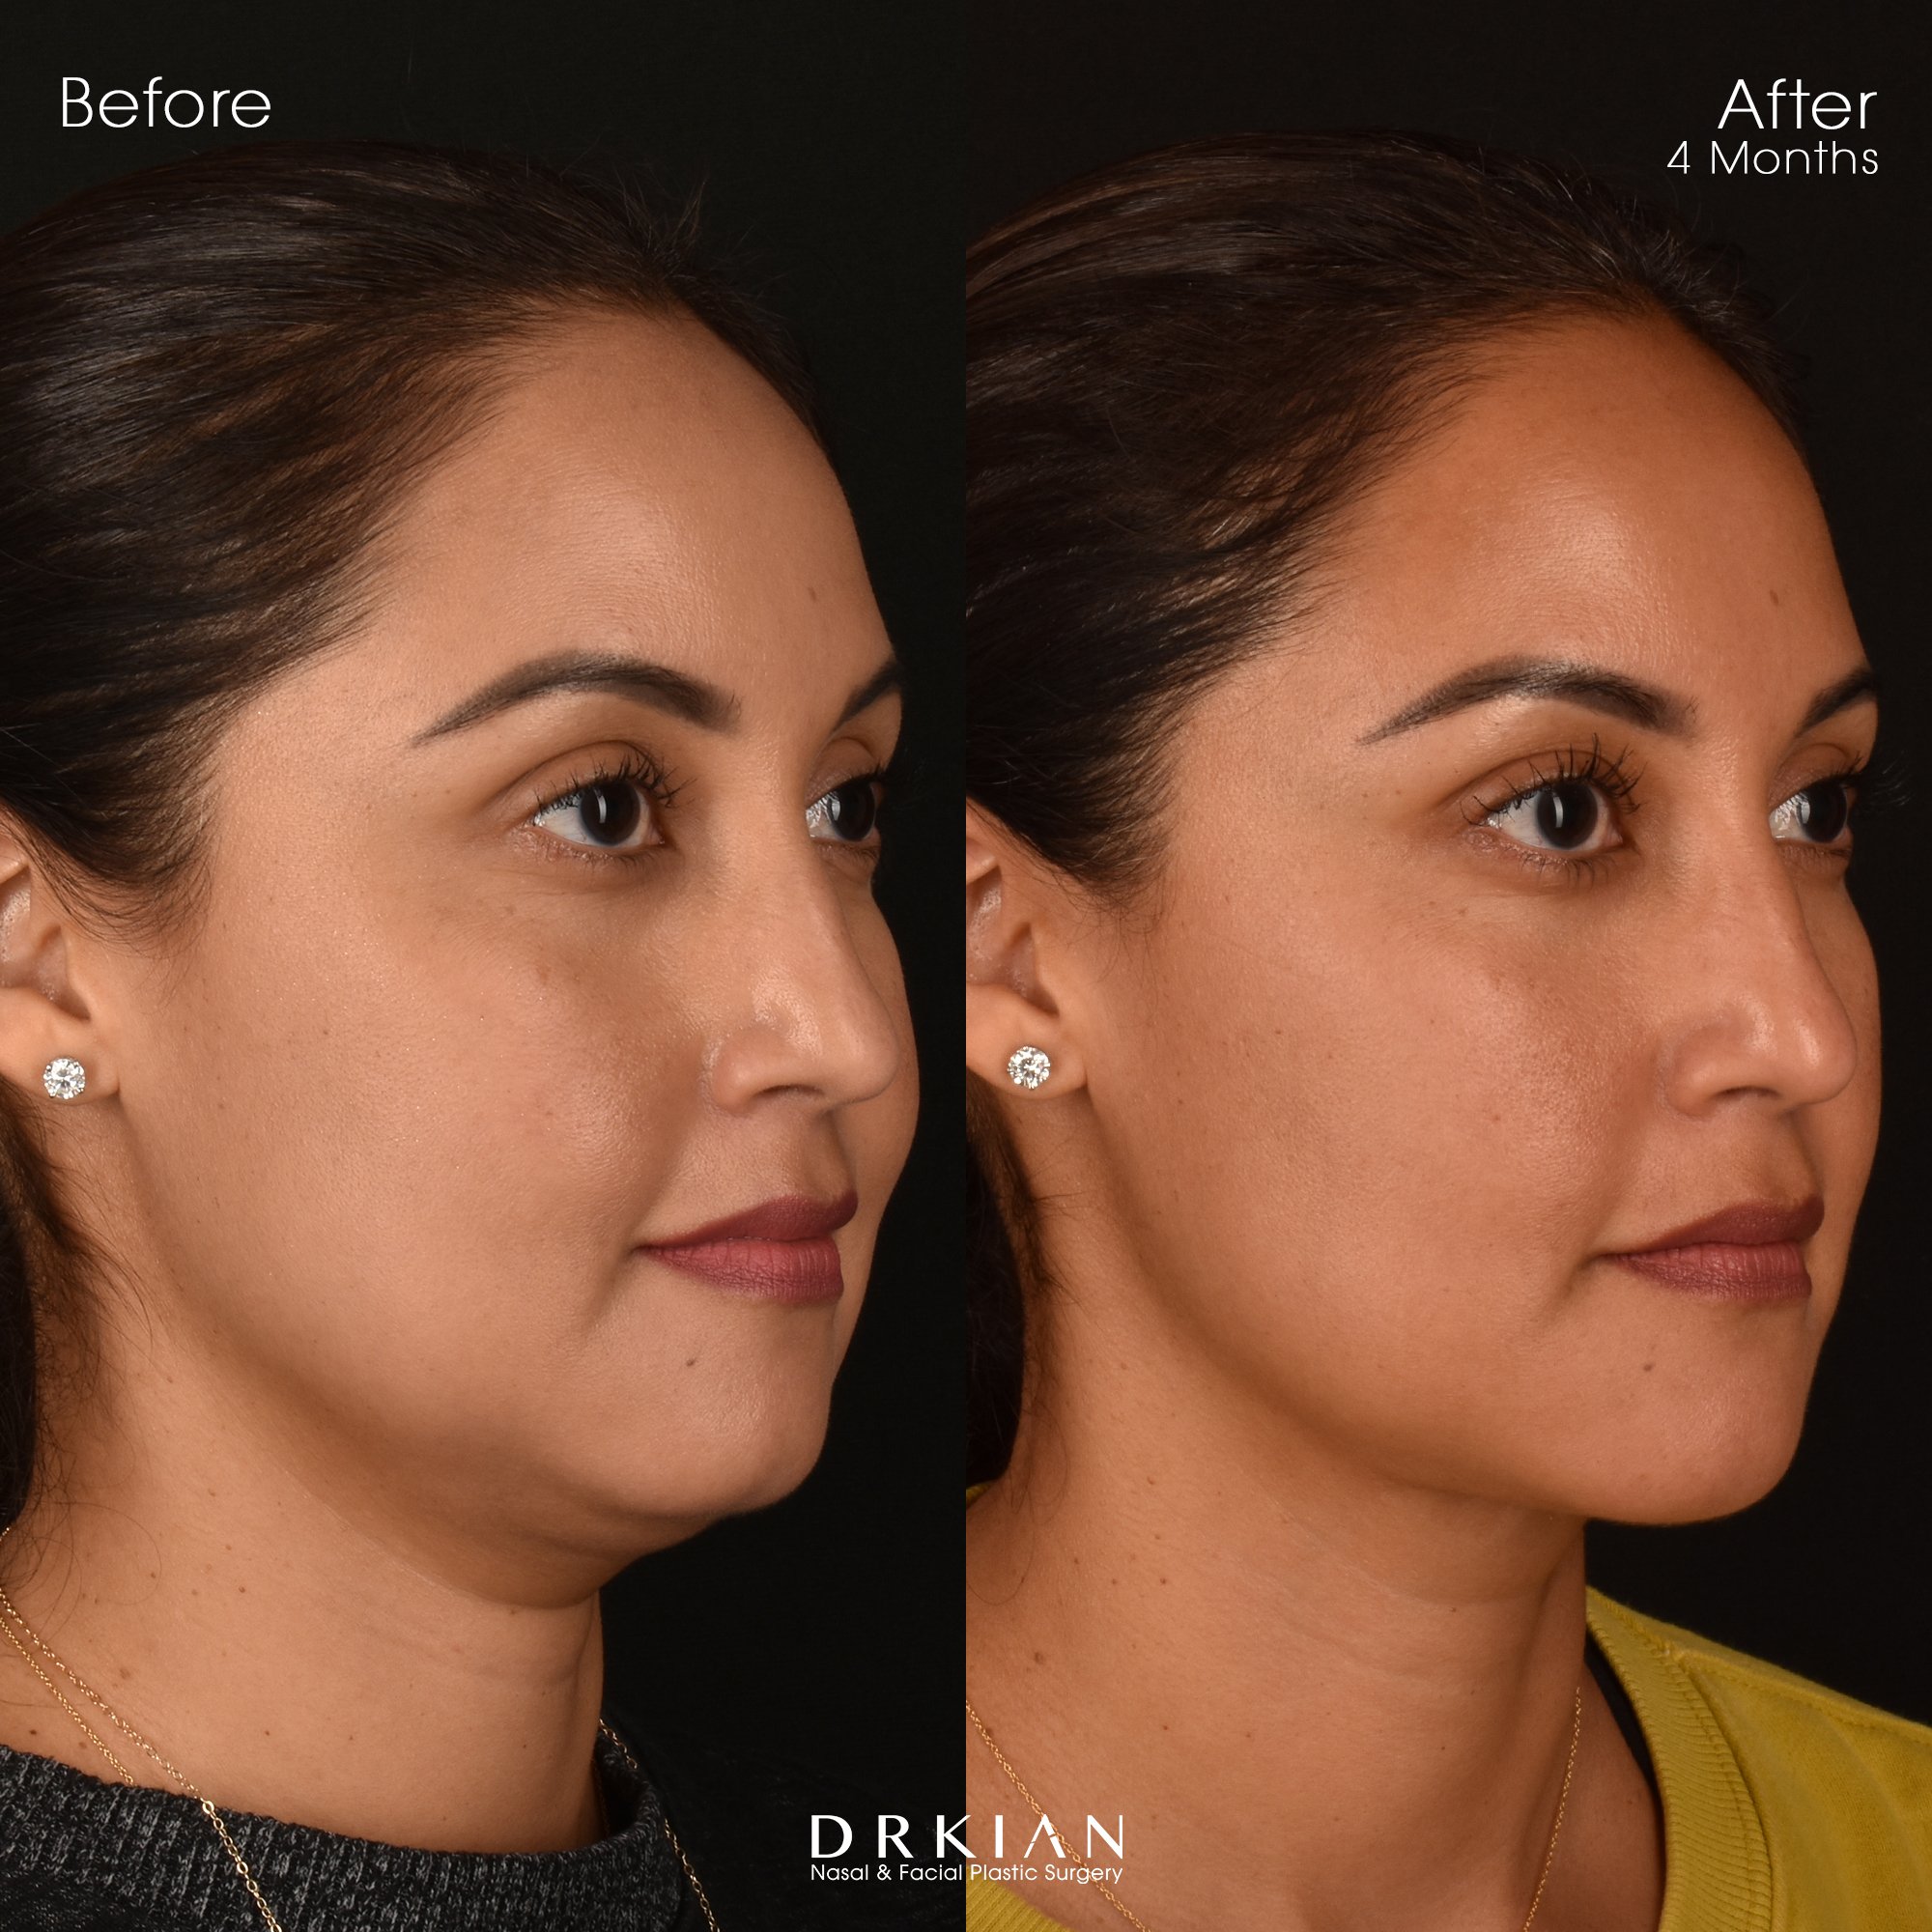
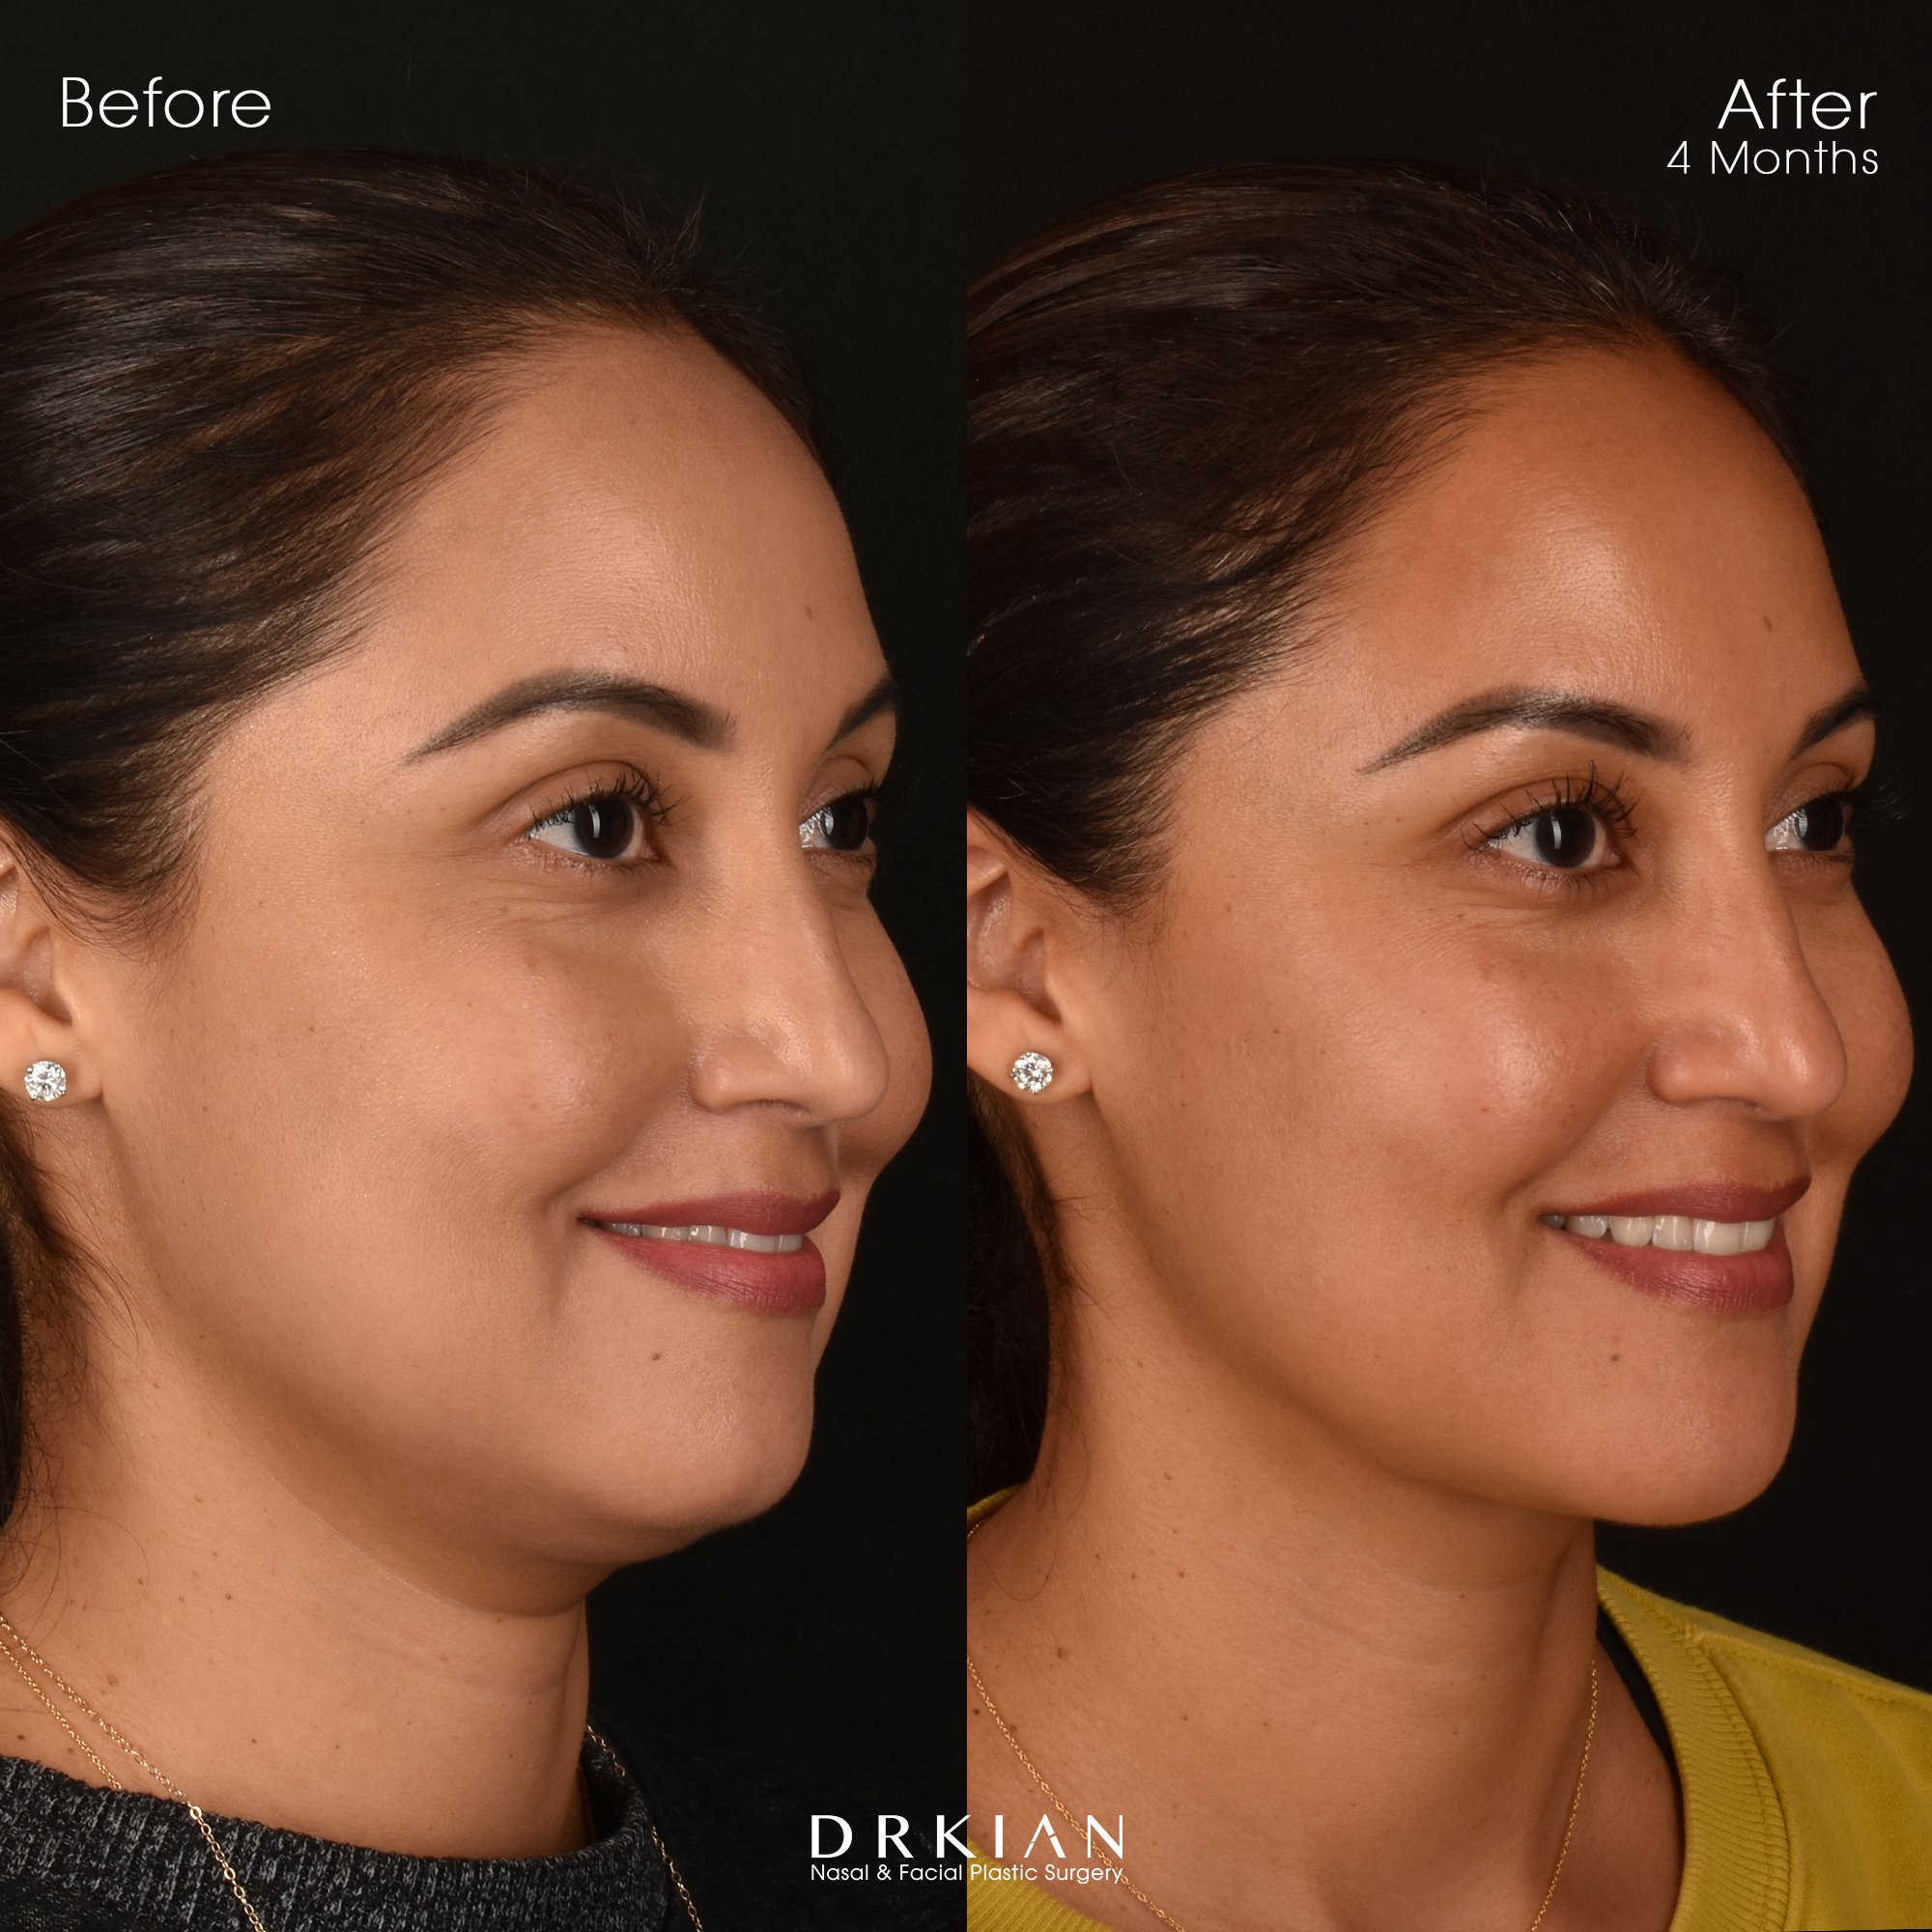
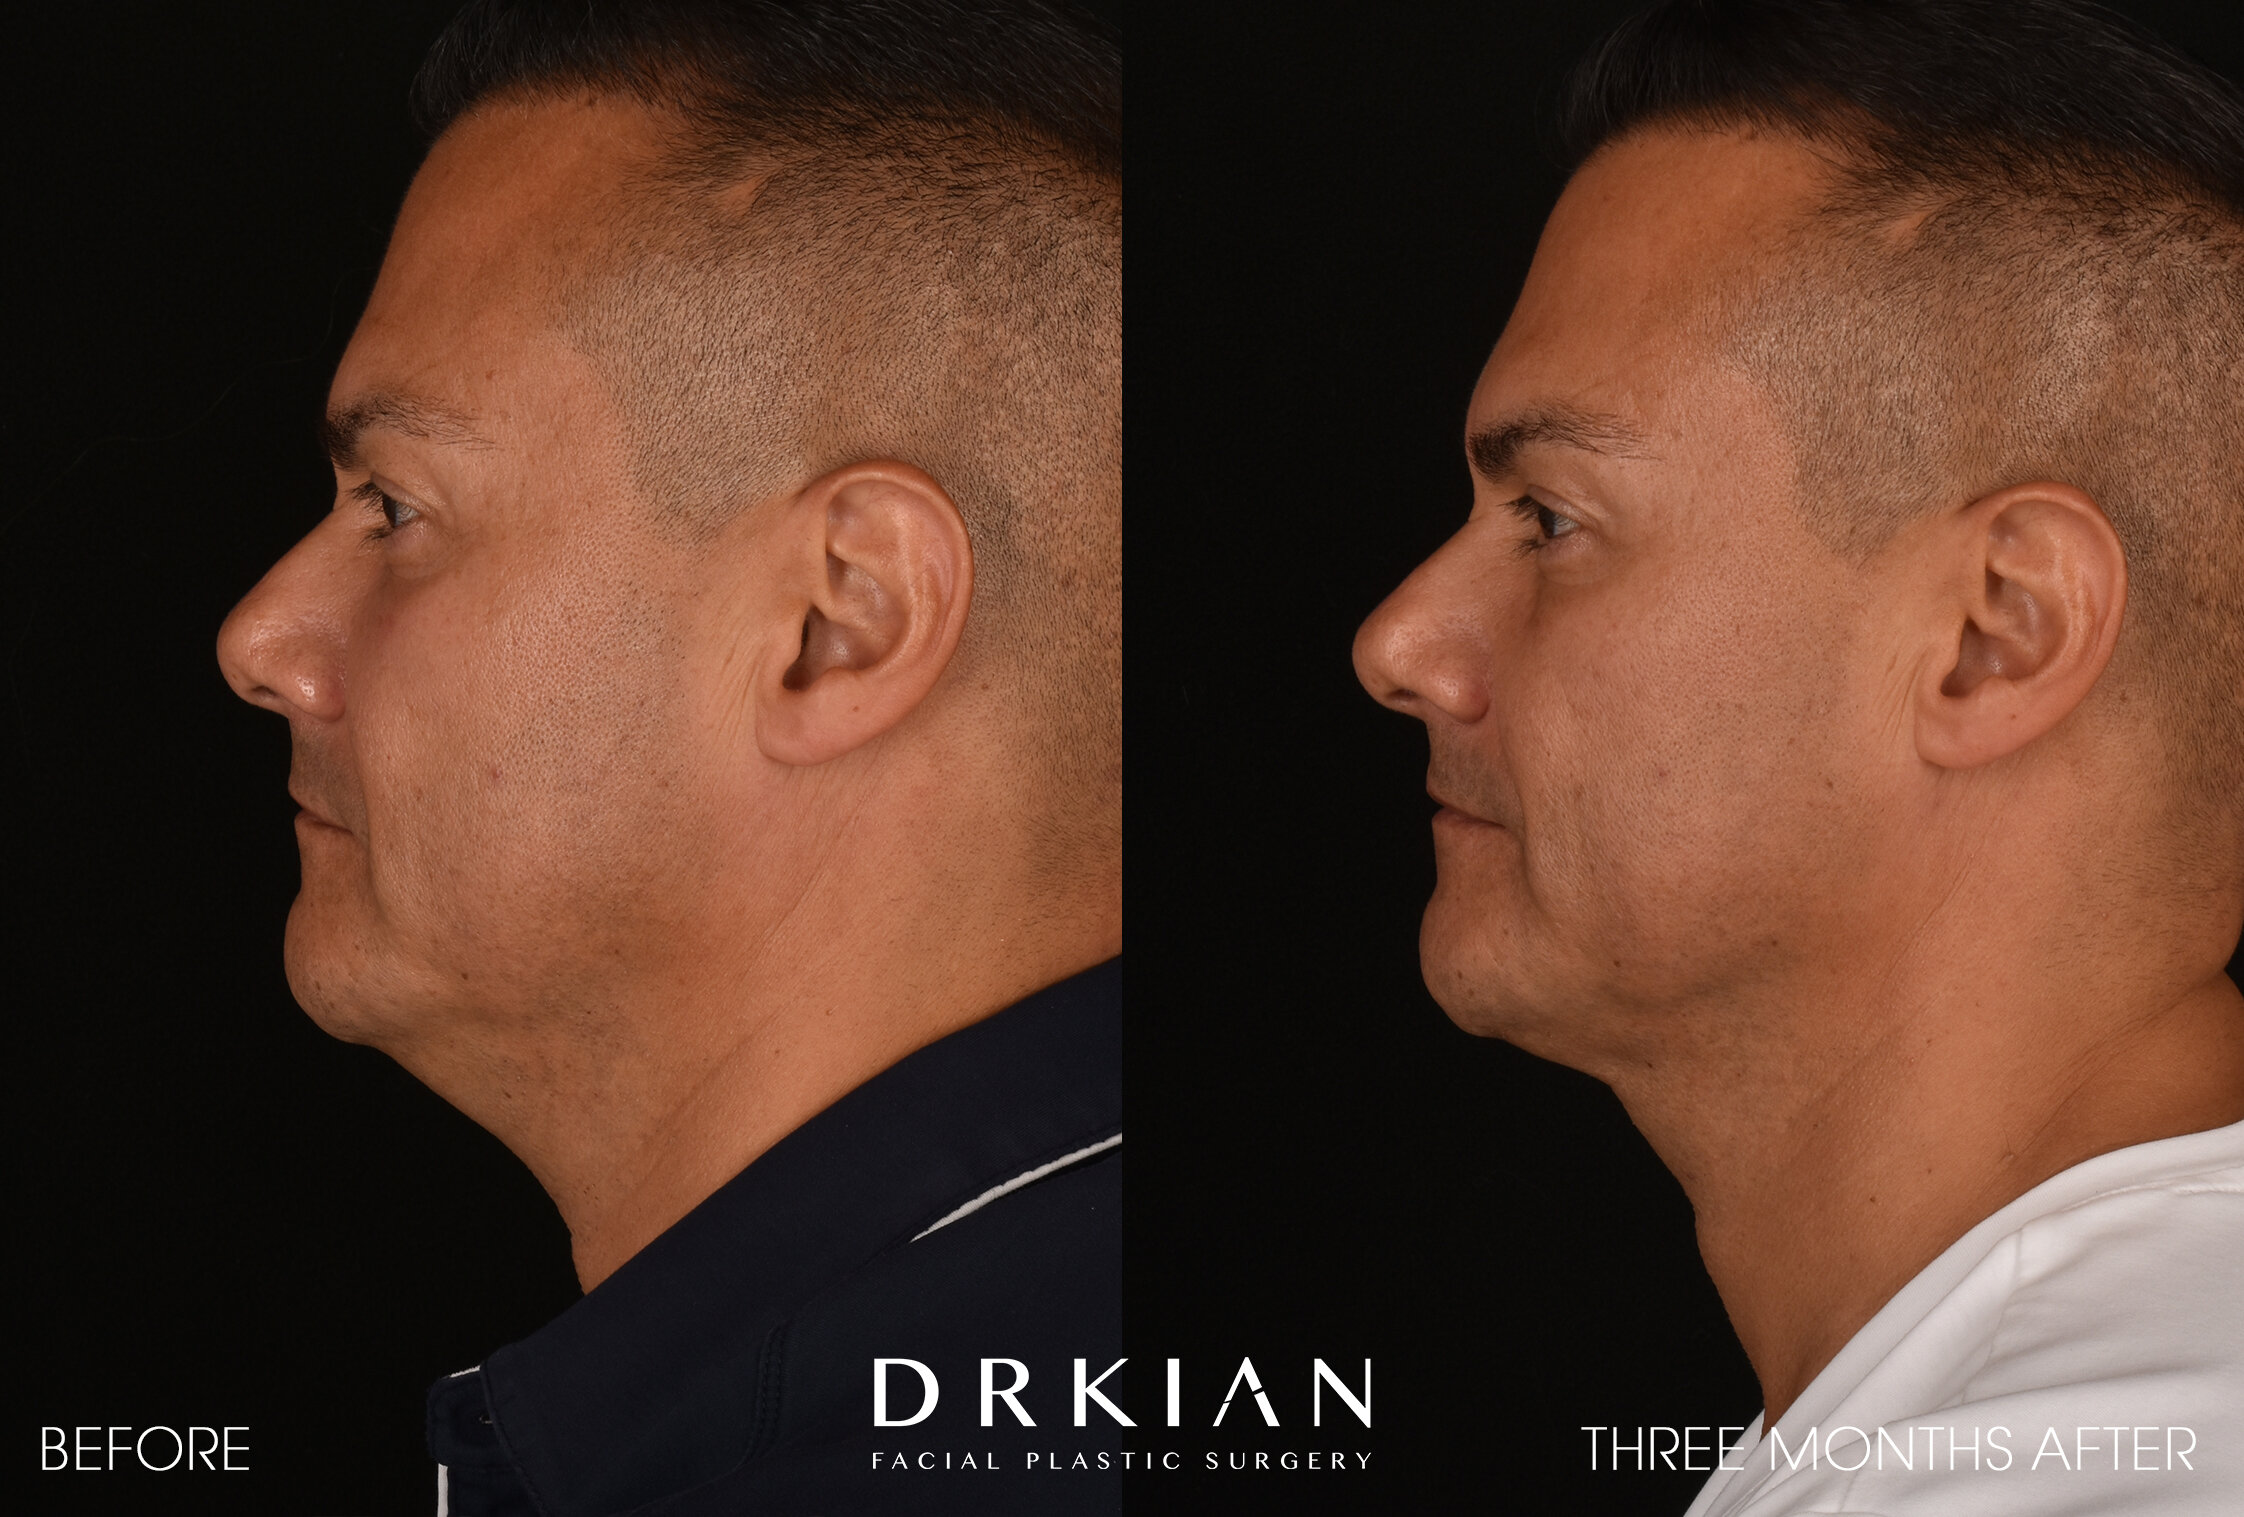
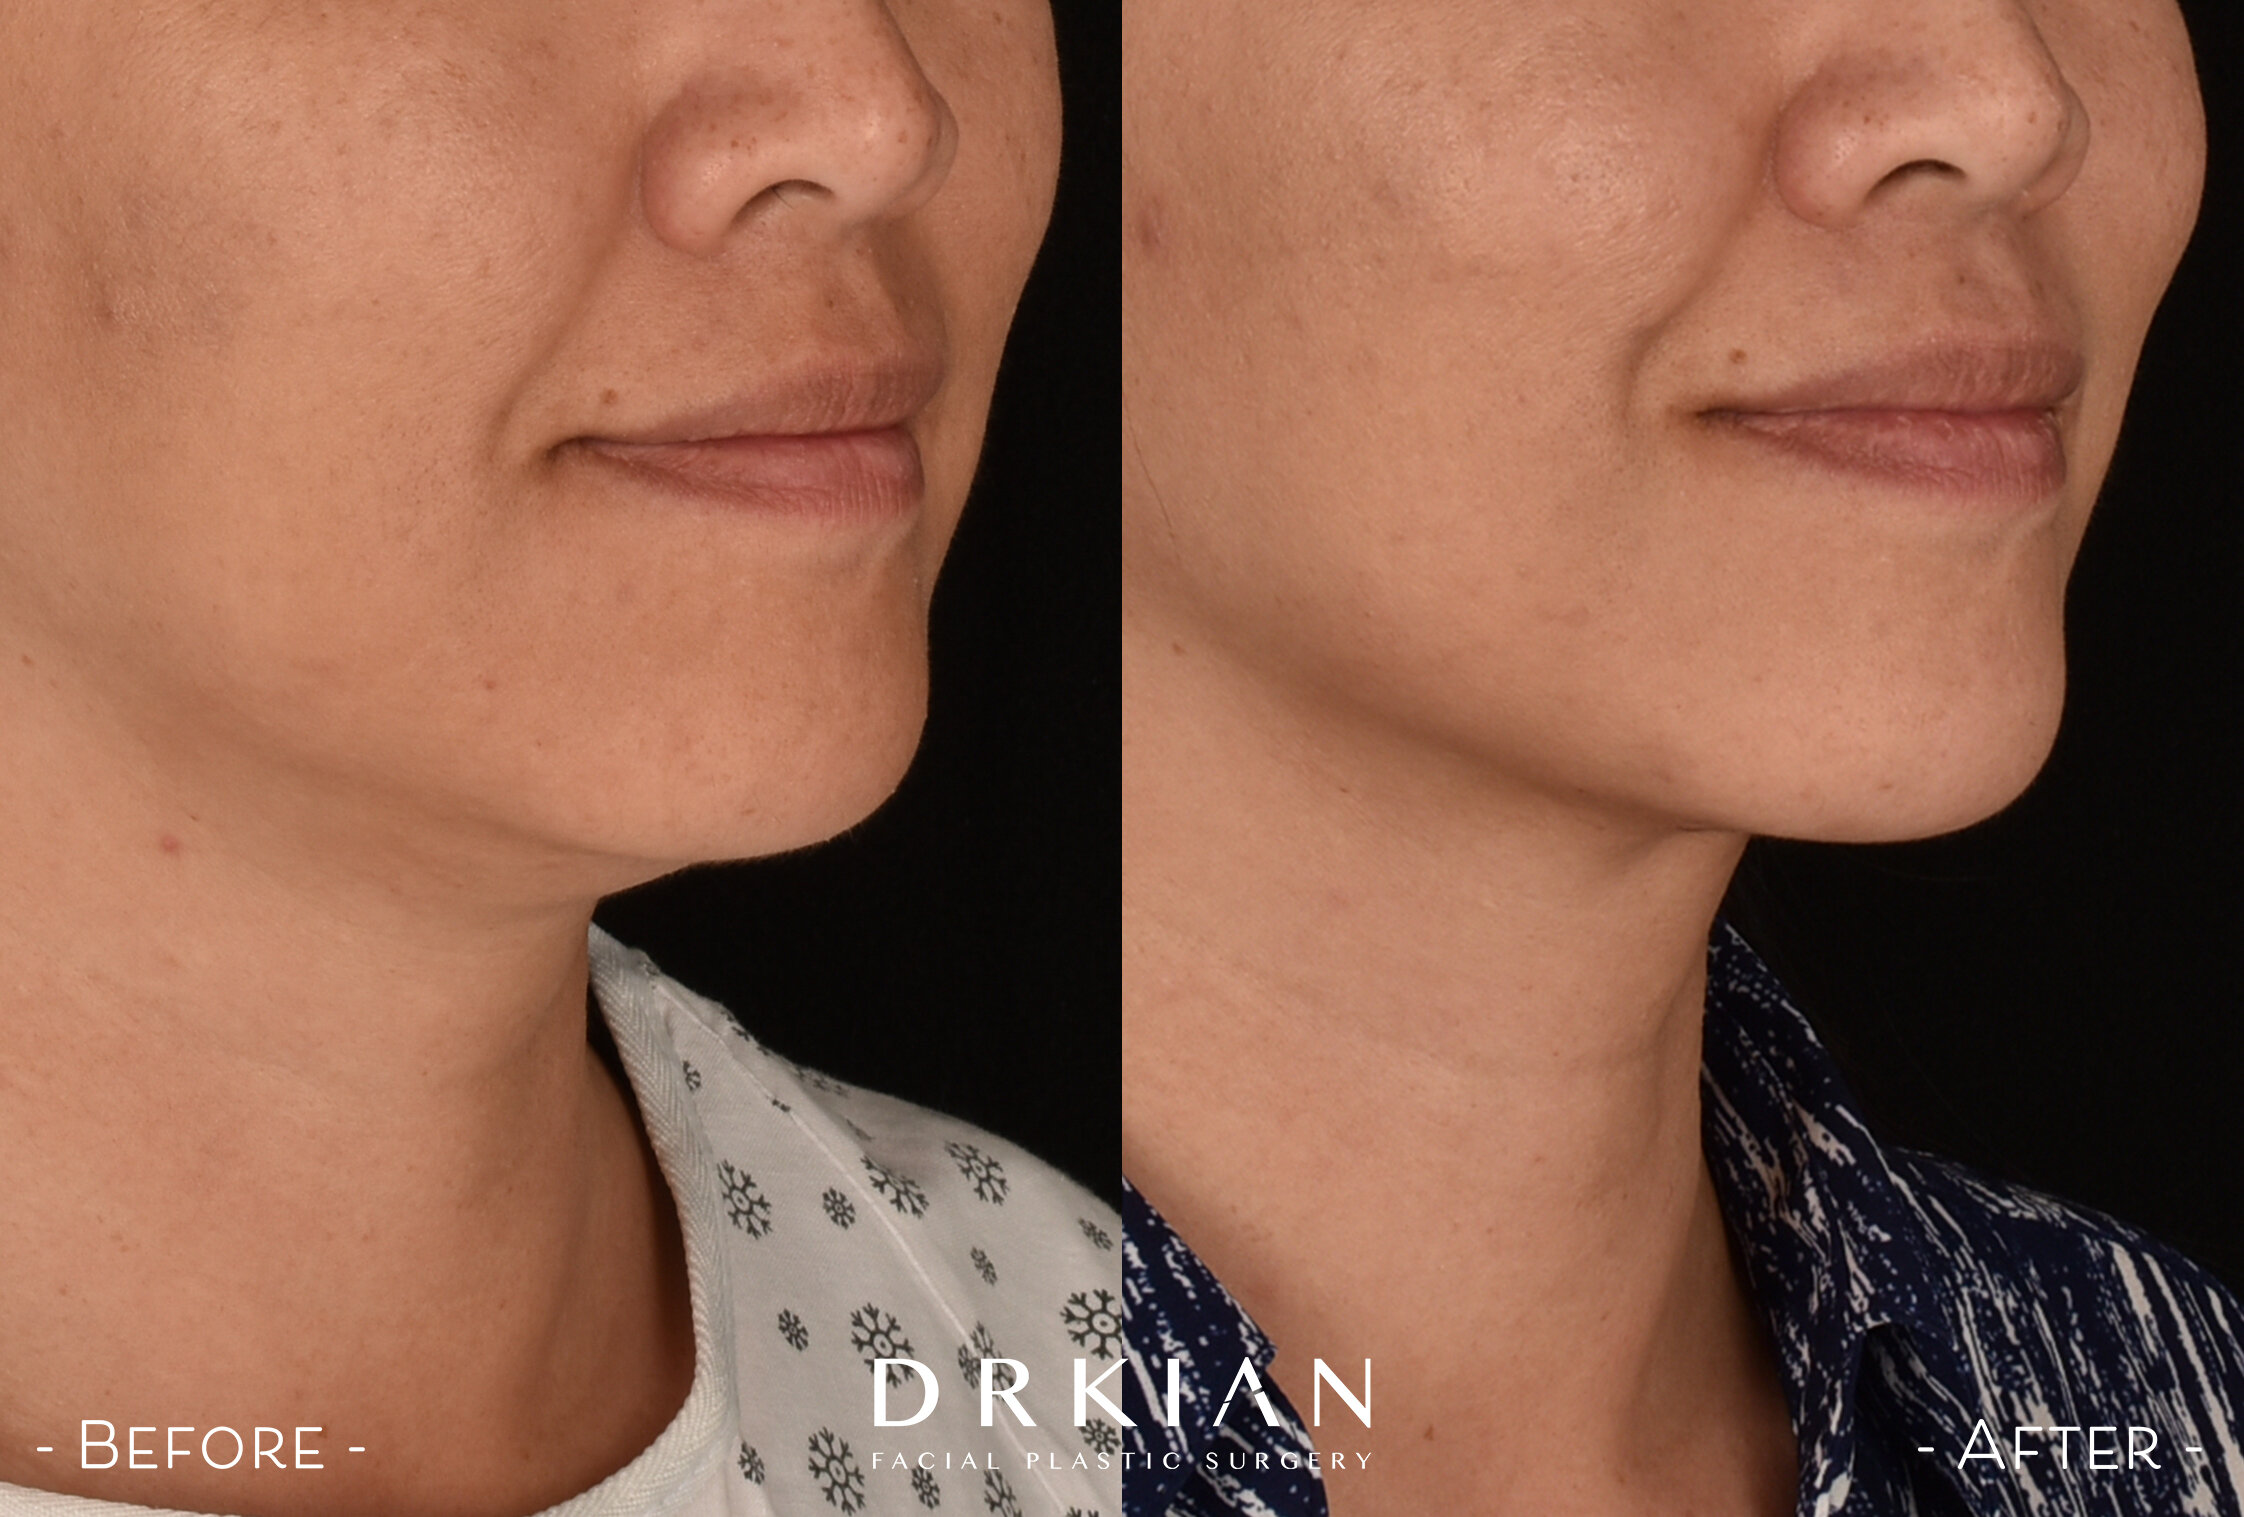
FaceTite & Morpheus8 to Submentum & Lower 1/3 of Face, Before & After 3 Months
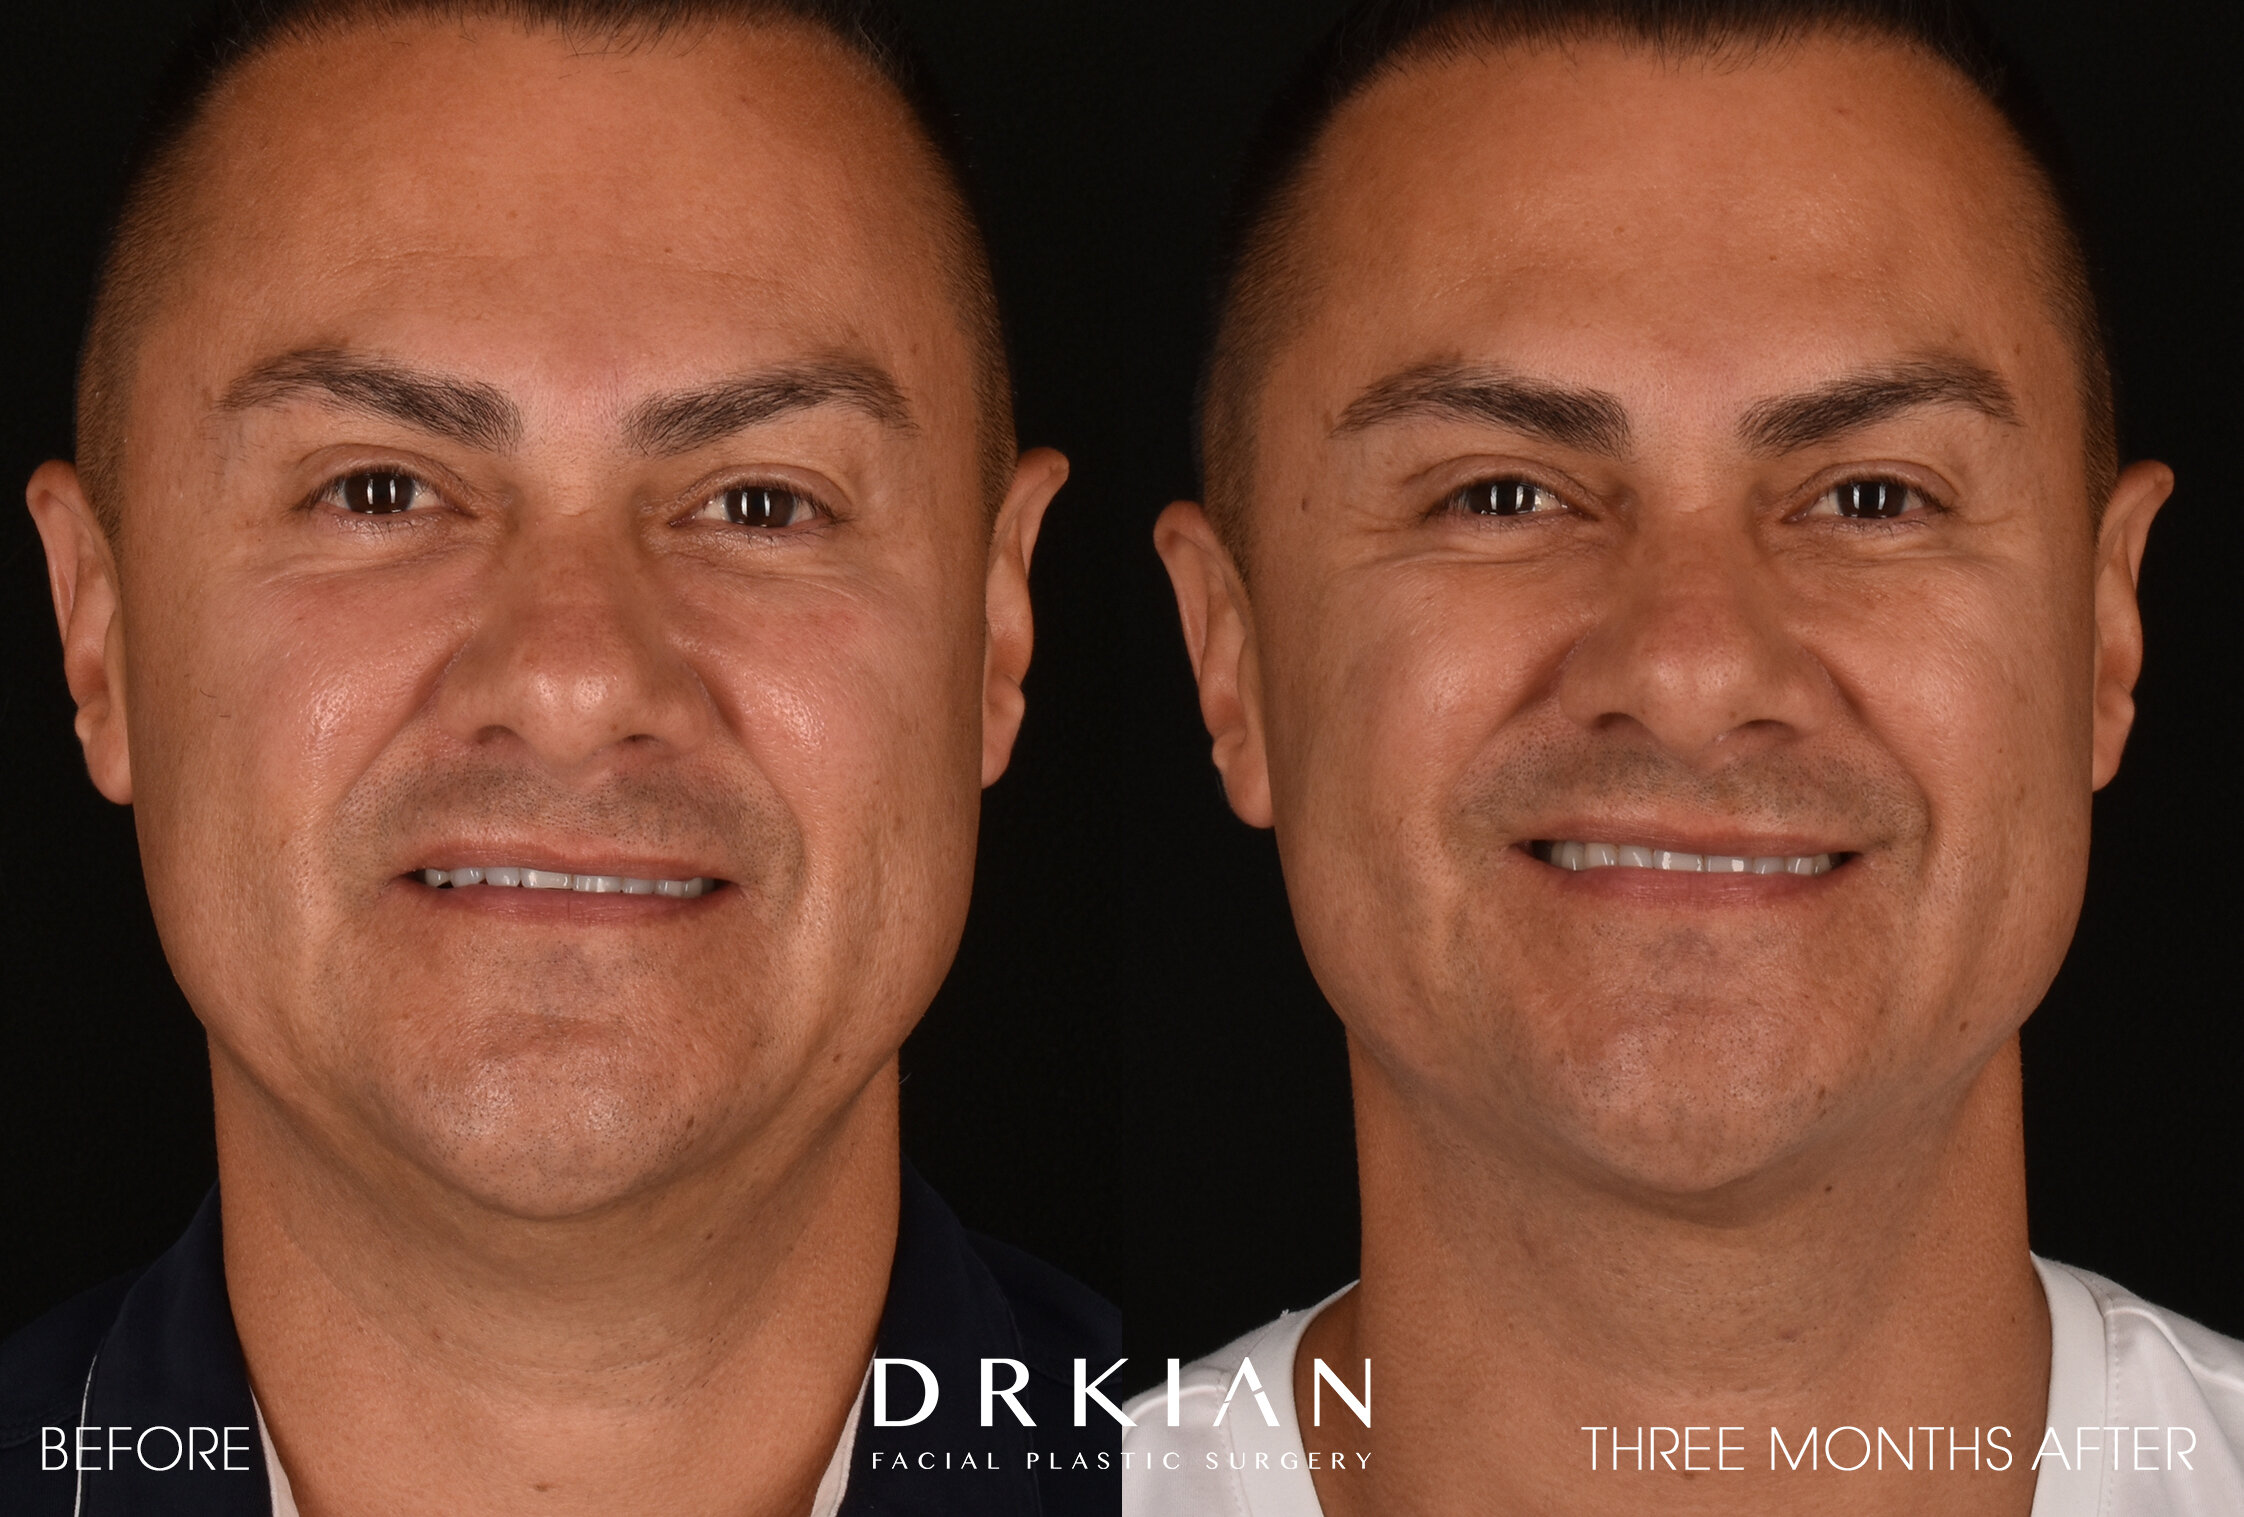
FaceTite & Morpheus8 to Submentum & Lower 1/3 of Face, Before & After 3 Months

FaceTite & Morpheus8 to Submentum & Lower 1/3 of Face, Before & After 3 Months
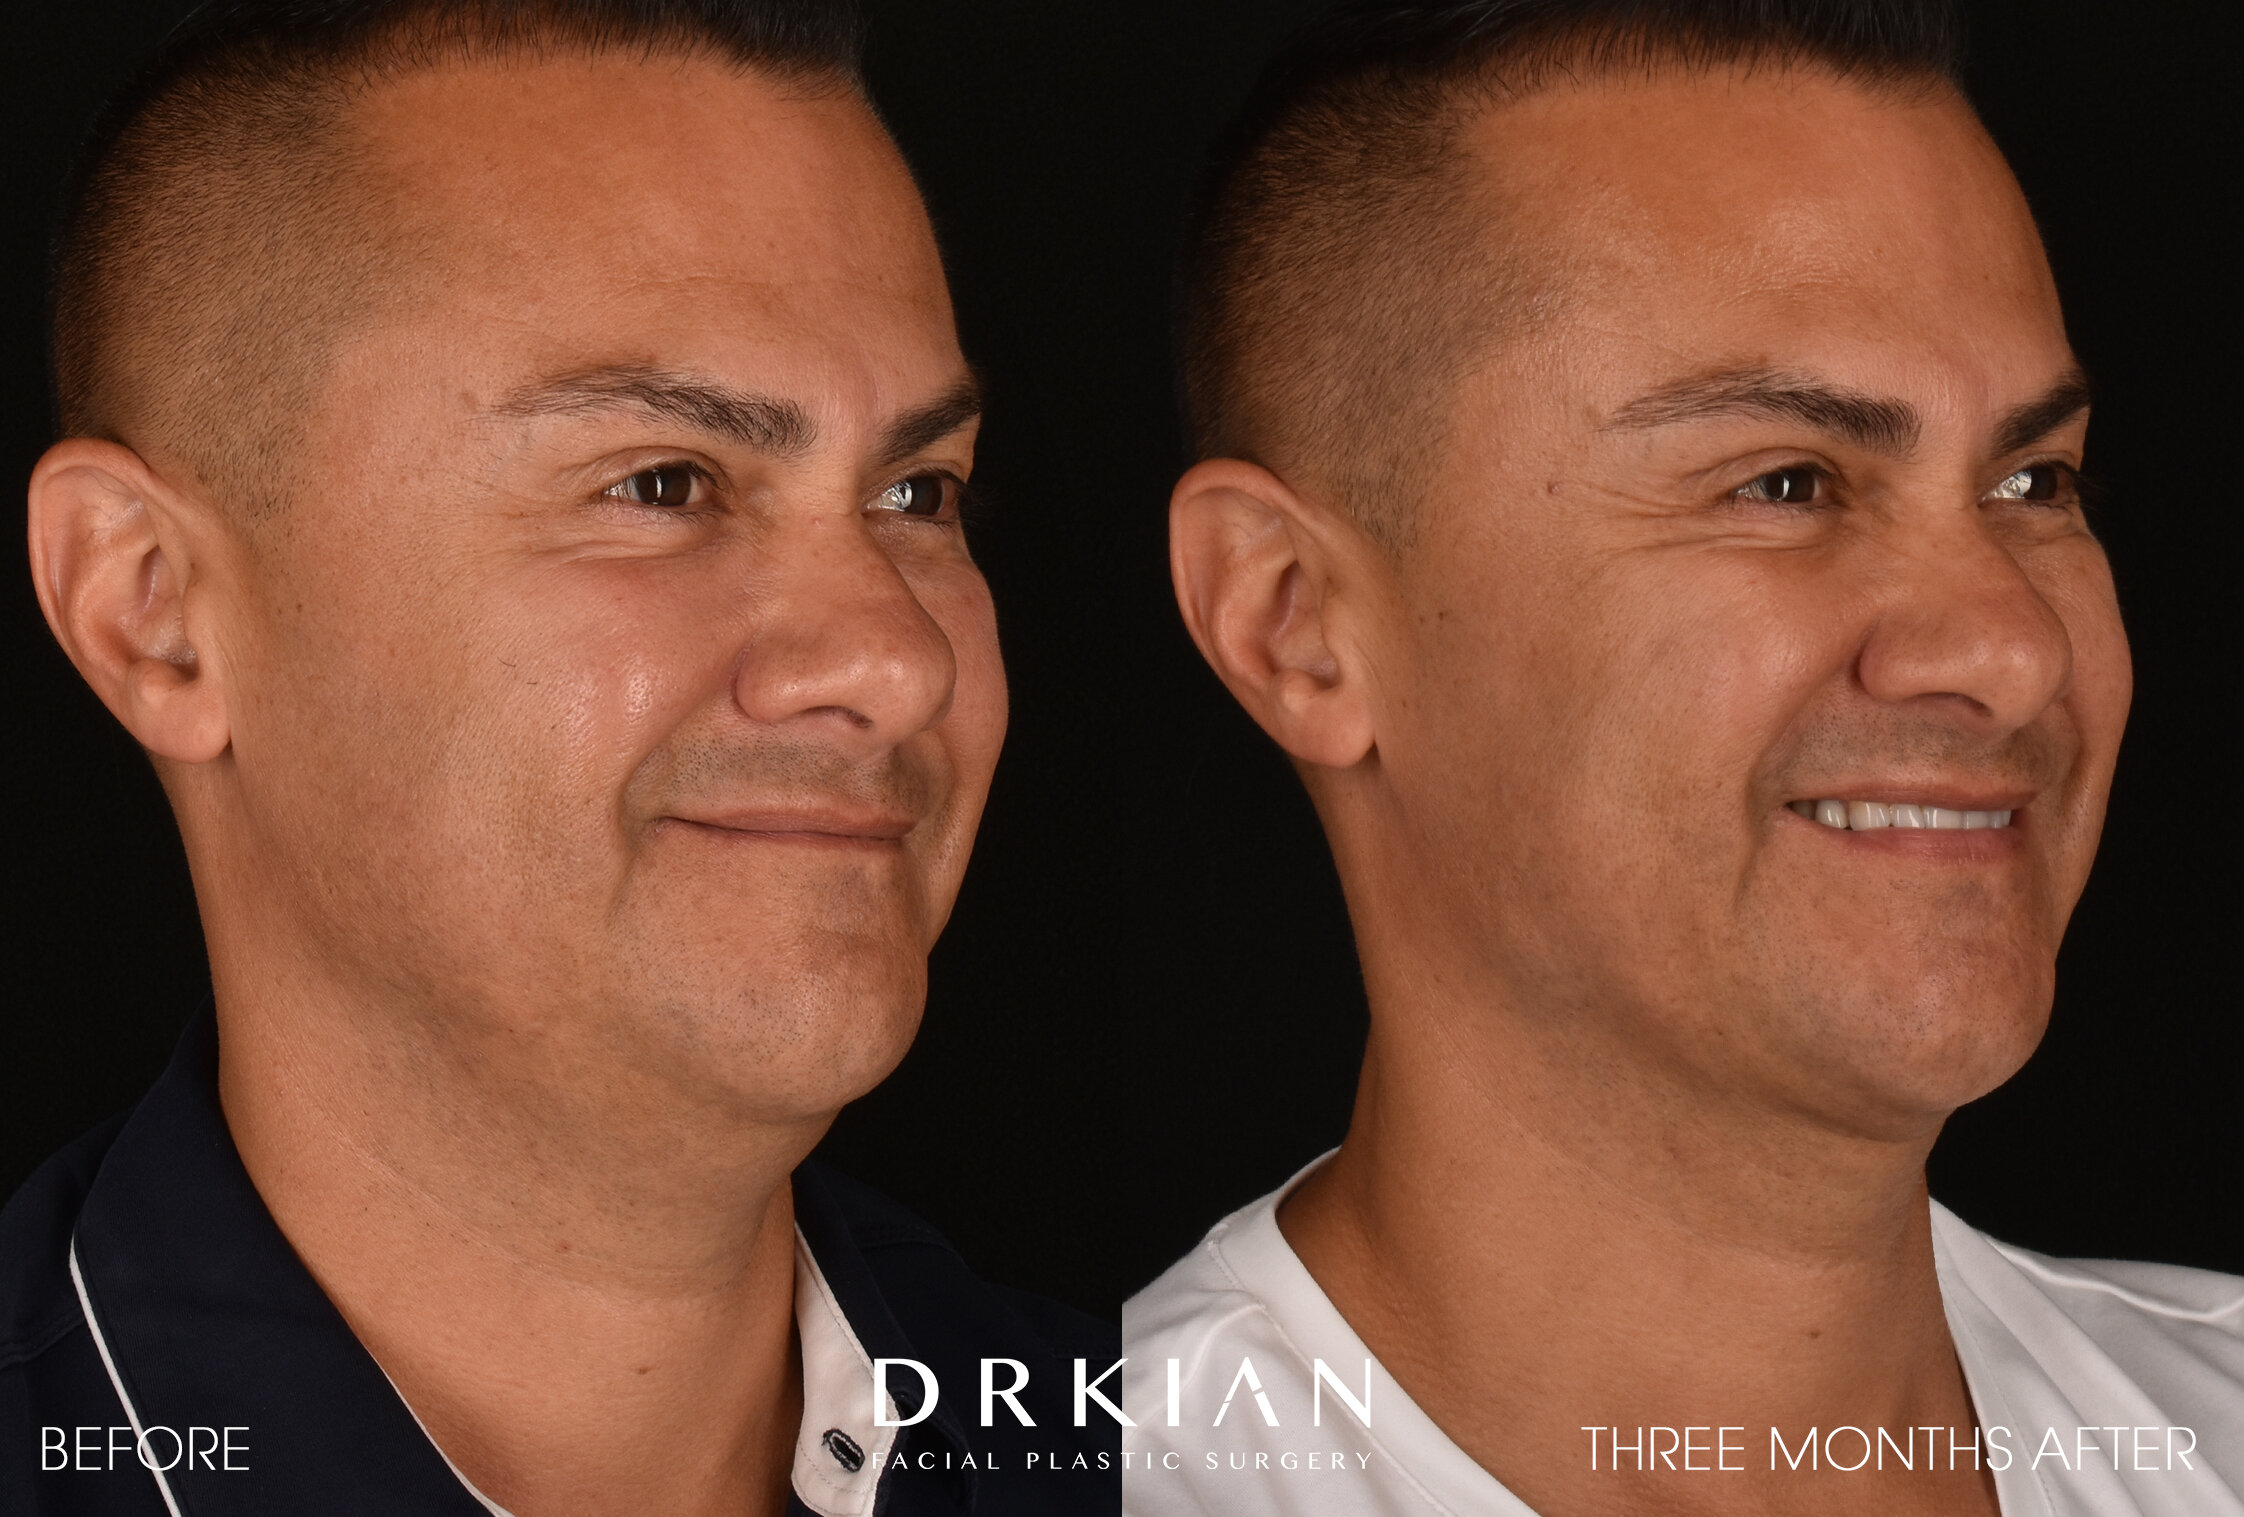
FaceTite & Morpheus8 to Submentum & Lower 1/3 of Face, Before & After 3 Months

FaceTite & Morpheus8 to Submentum & Lower 1/3 of Face, Before & After 3 Months

FaceTite & Morpheus8 to Submentum & Lower 1/3 of Face, Before & After 3 Months
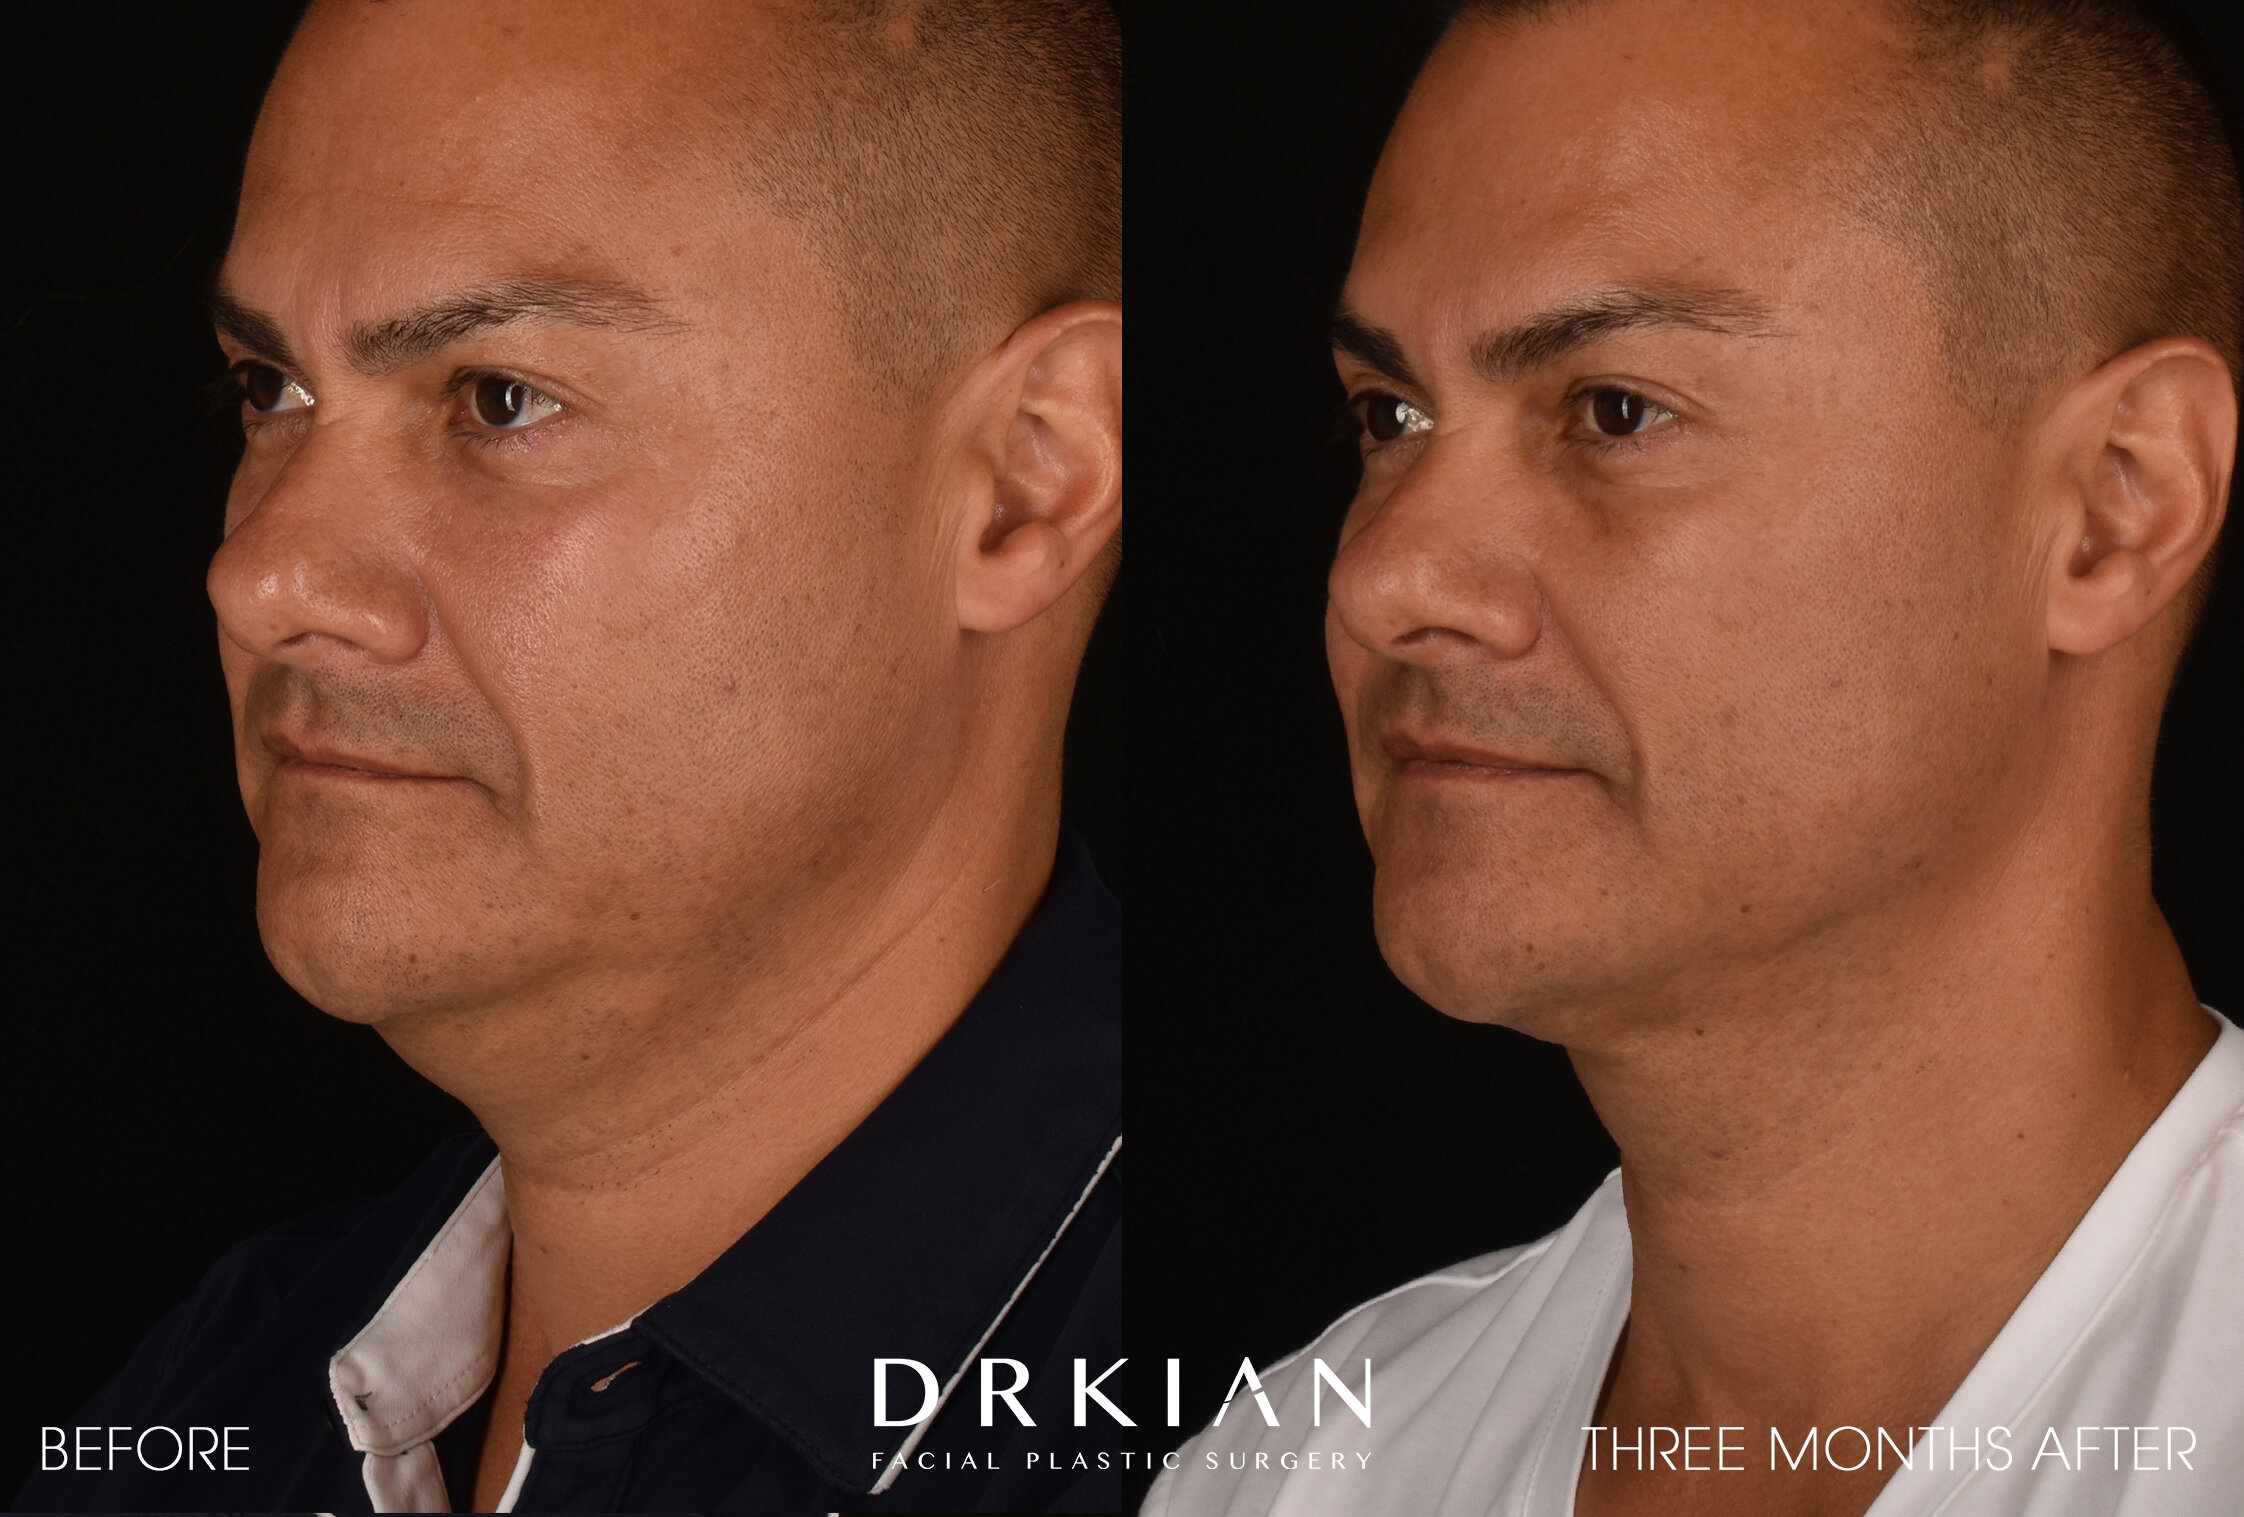
FaceTite & Morpheus8 to Submentum & Lower 1/3 of Face, Before & After 3 Months

FaceTite & Morpheus8 to Submentum & Lower 1/3 of Face, Before & After 3 Months
FaceTite & Morpheus8 to Submentum & Lower 1/3 of Face, Before & After 3 Months

FaceTite & Morpheus8 to Submentum & Lower 1/3 of Face, Before & After 3 Months

FaceTite & Morpheus8 to Submentum & Lower 1/3 of Face, Before & After 3 Months

FaceTite & Morpheus8 to Submentum & Lower 1/3 of Face, Before & After 3 Months

FaceTite & Morpheus8 to Submentum & Lower 1/3 of Face, Before & After 3 Months

FaceTite & Morpheus8 to Submentum & Lower 1/3 of Face, Before & After 3 Months

FaceTite & Morpheus8 to Submentum & Lower 1/3 of Face, Before & After 3 Months

FaceTite & Morpheus8 to Submentum & Lower 1/3 of Face, Before & After 3 Months

FaceTite & Morpheus8 to Submentum & Lower 1/3 of Face, Before & After 3 Months


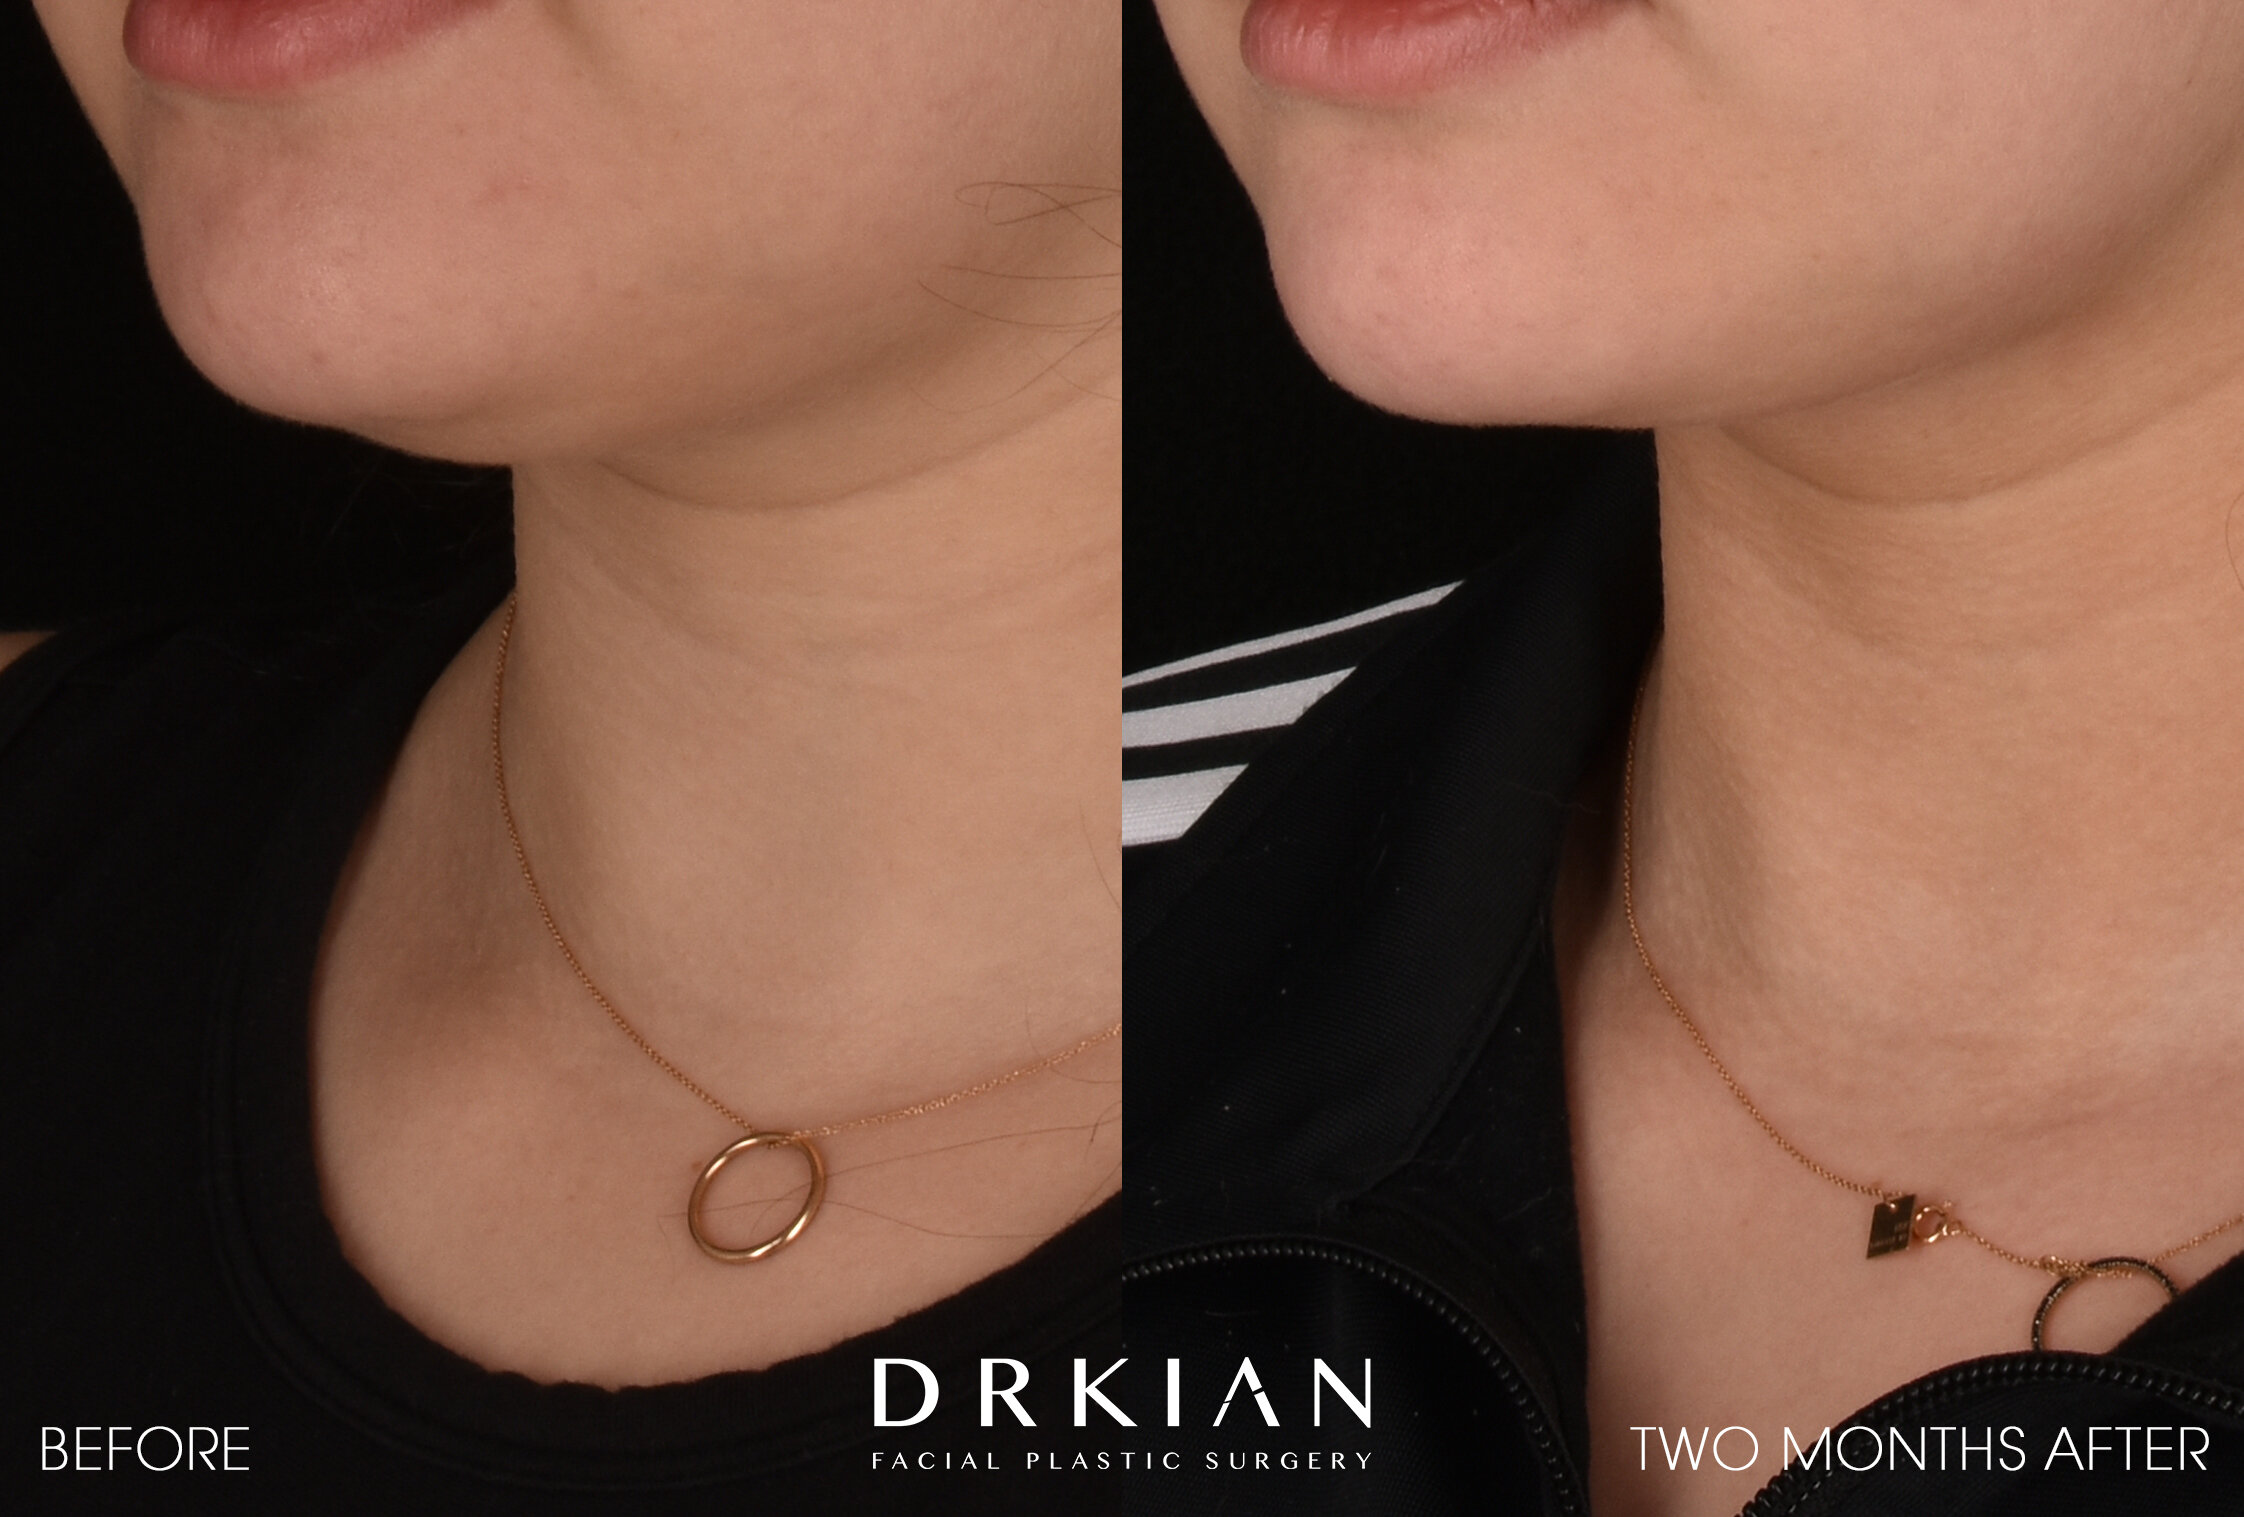
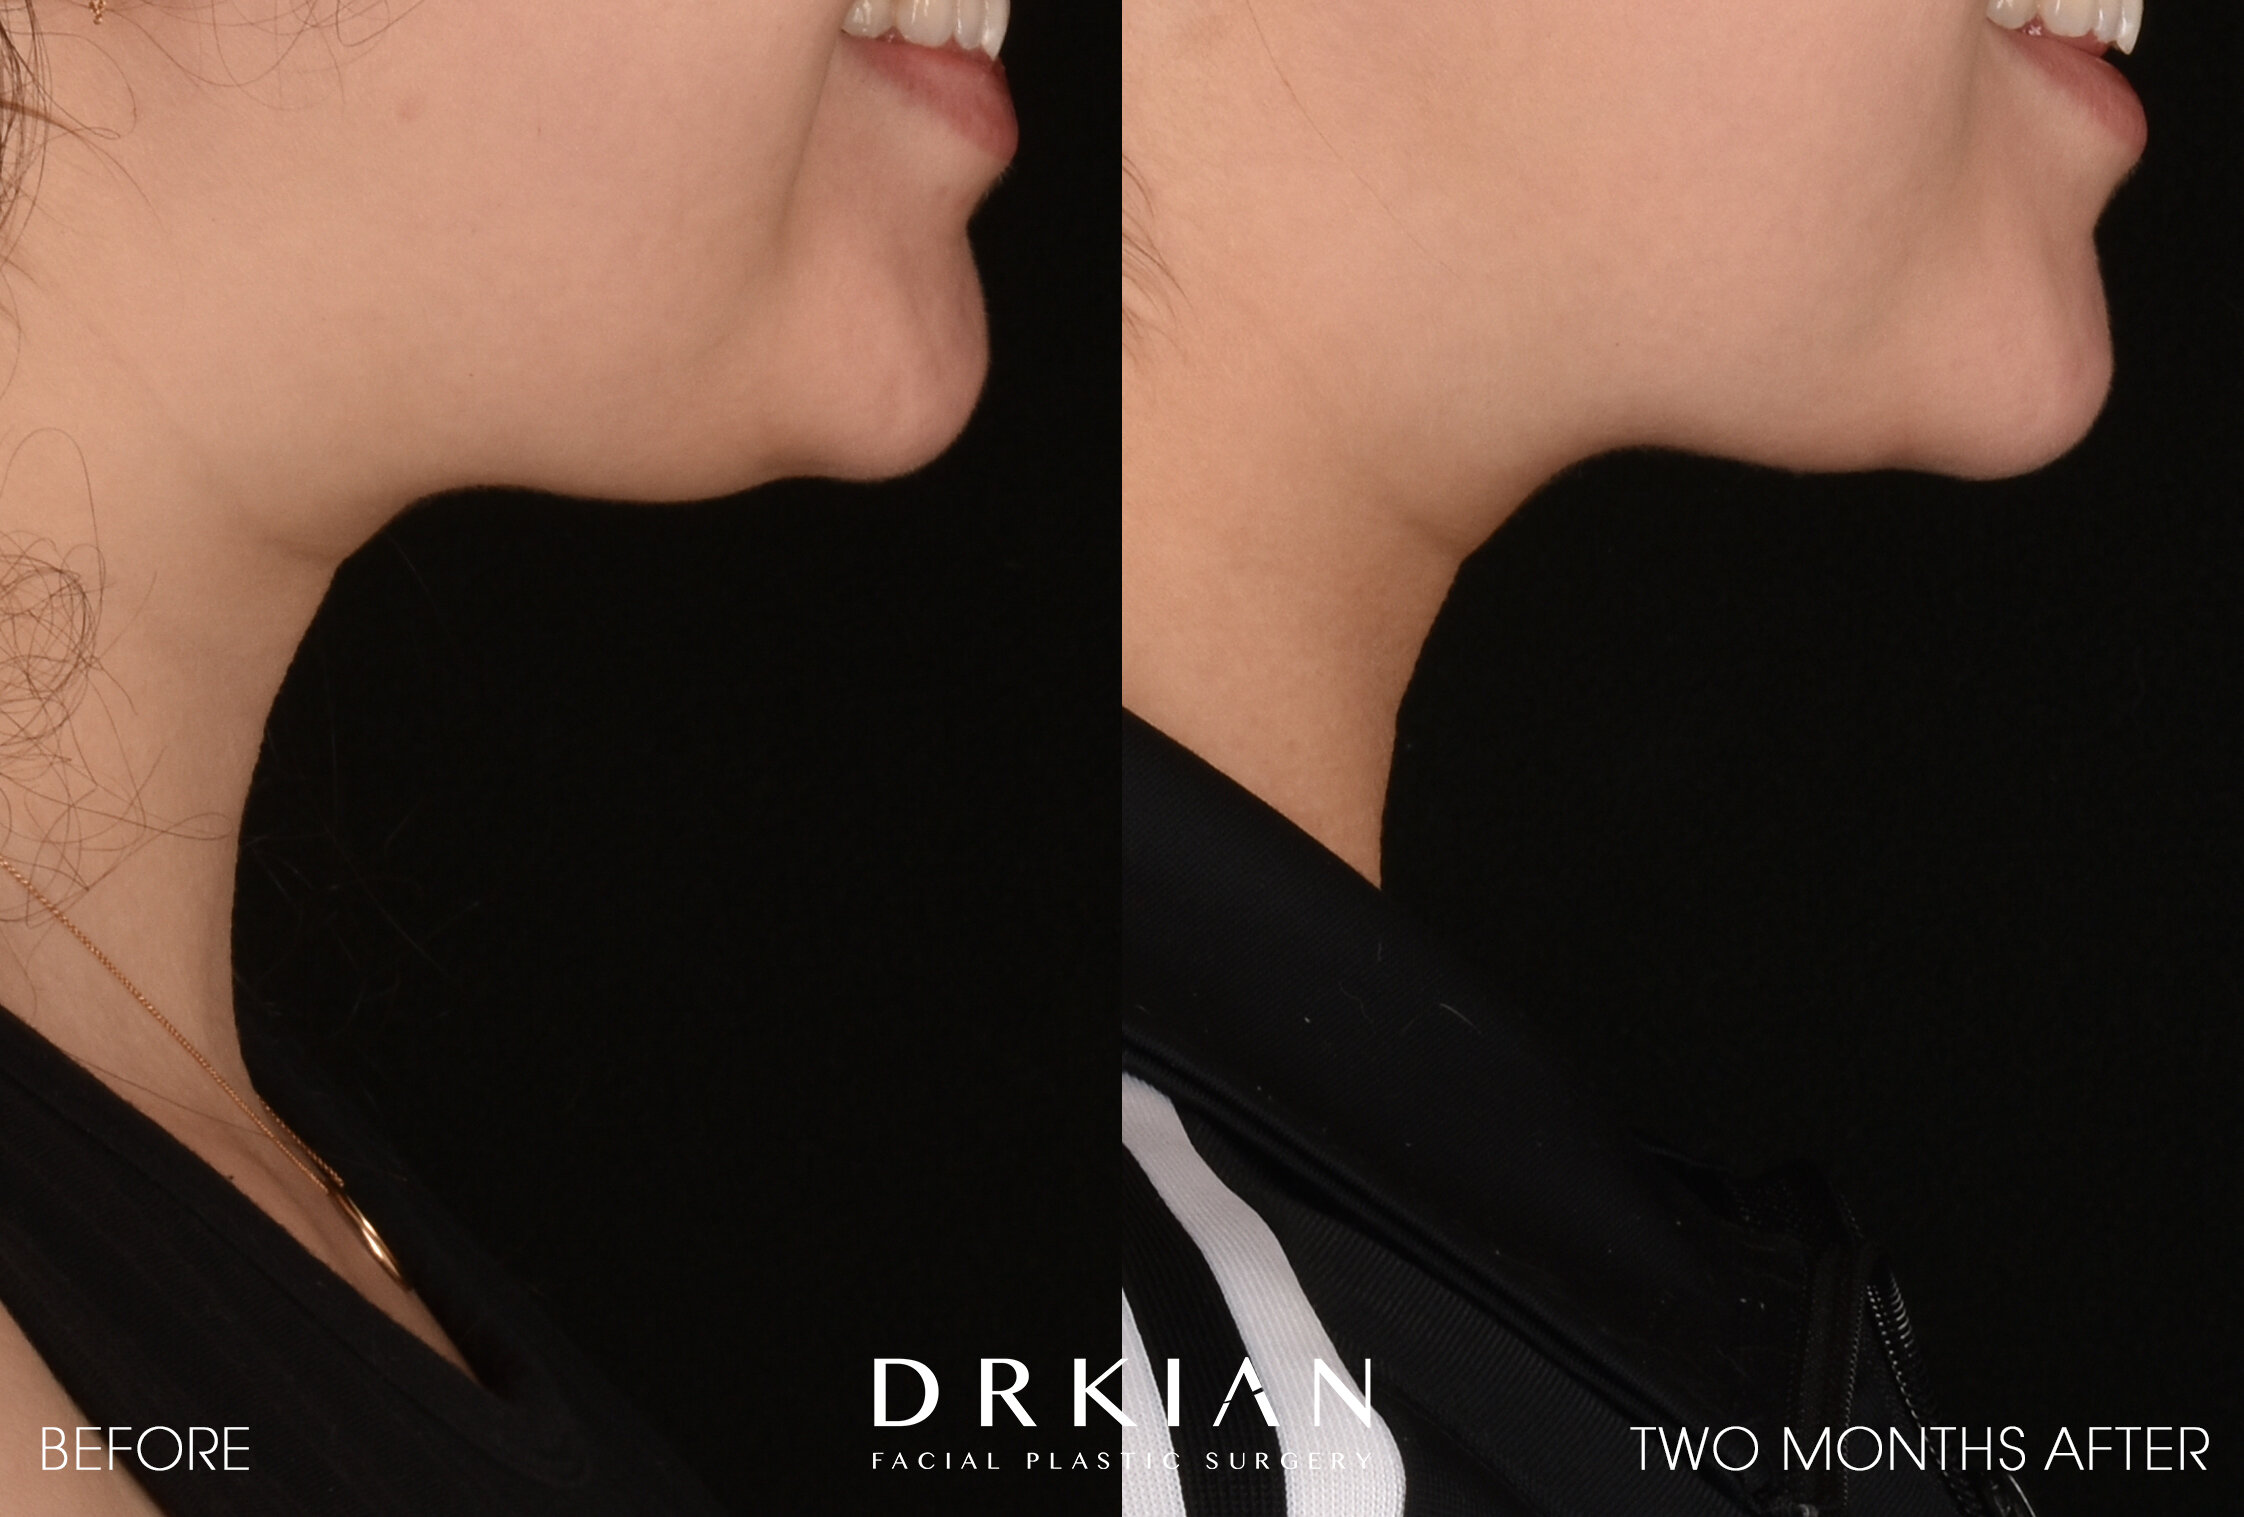
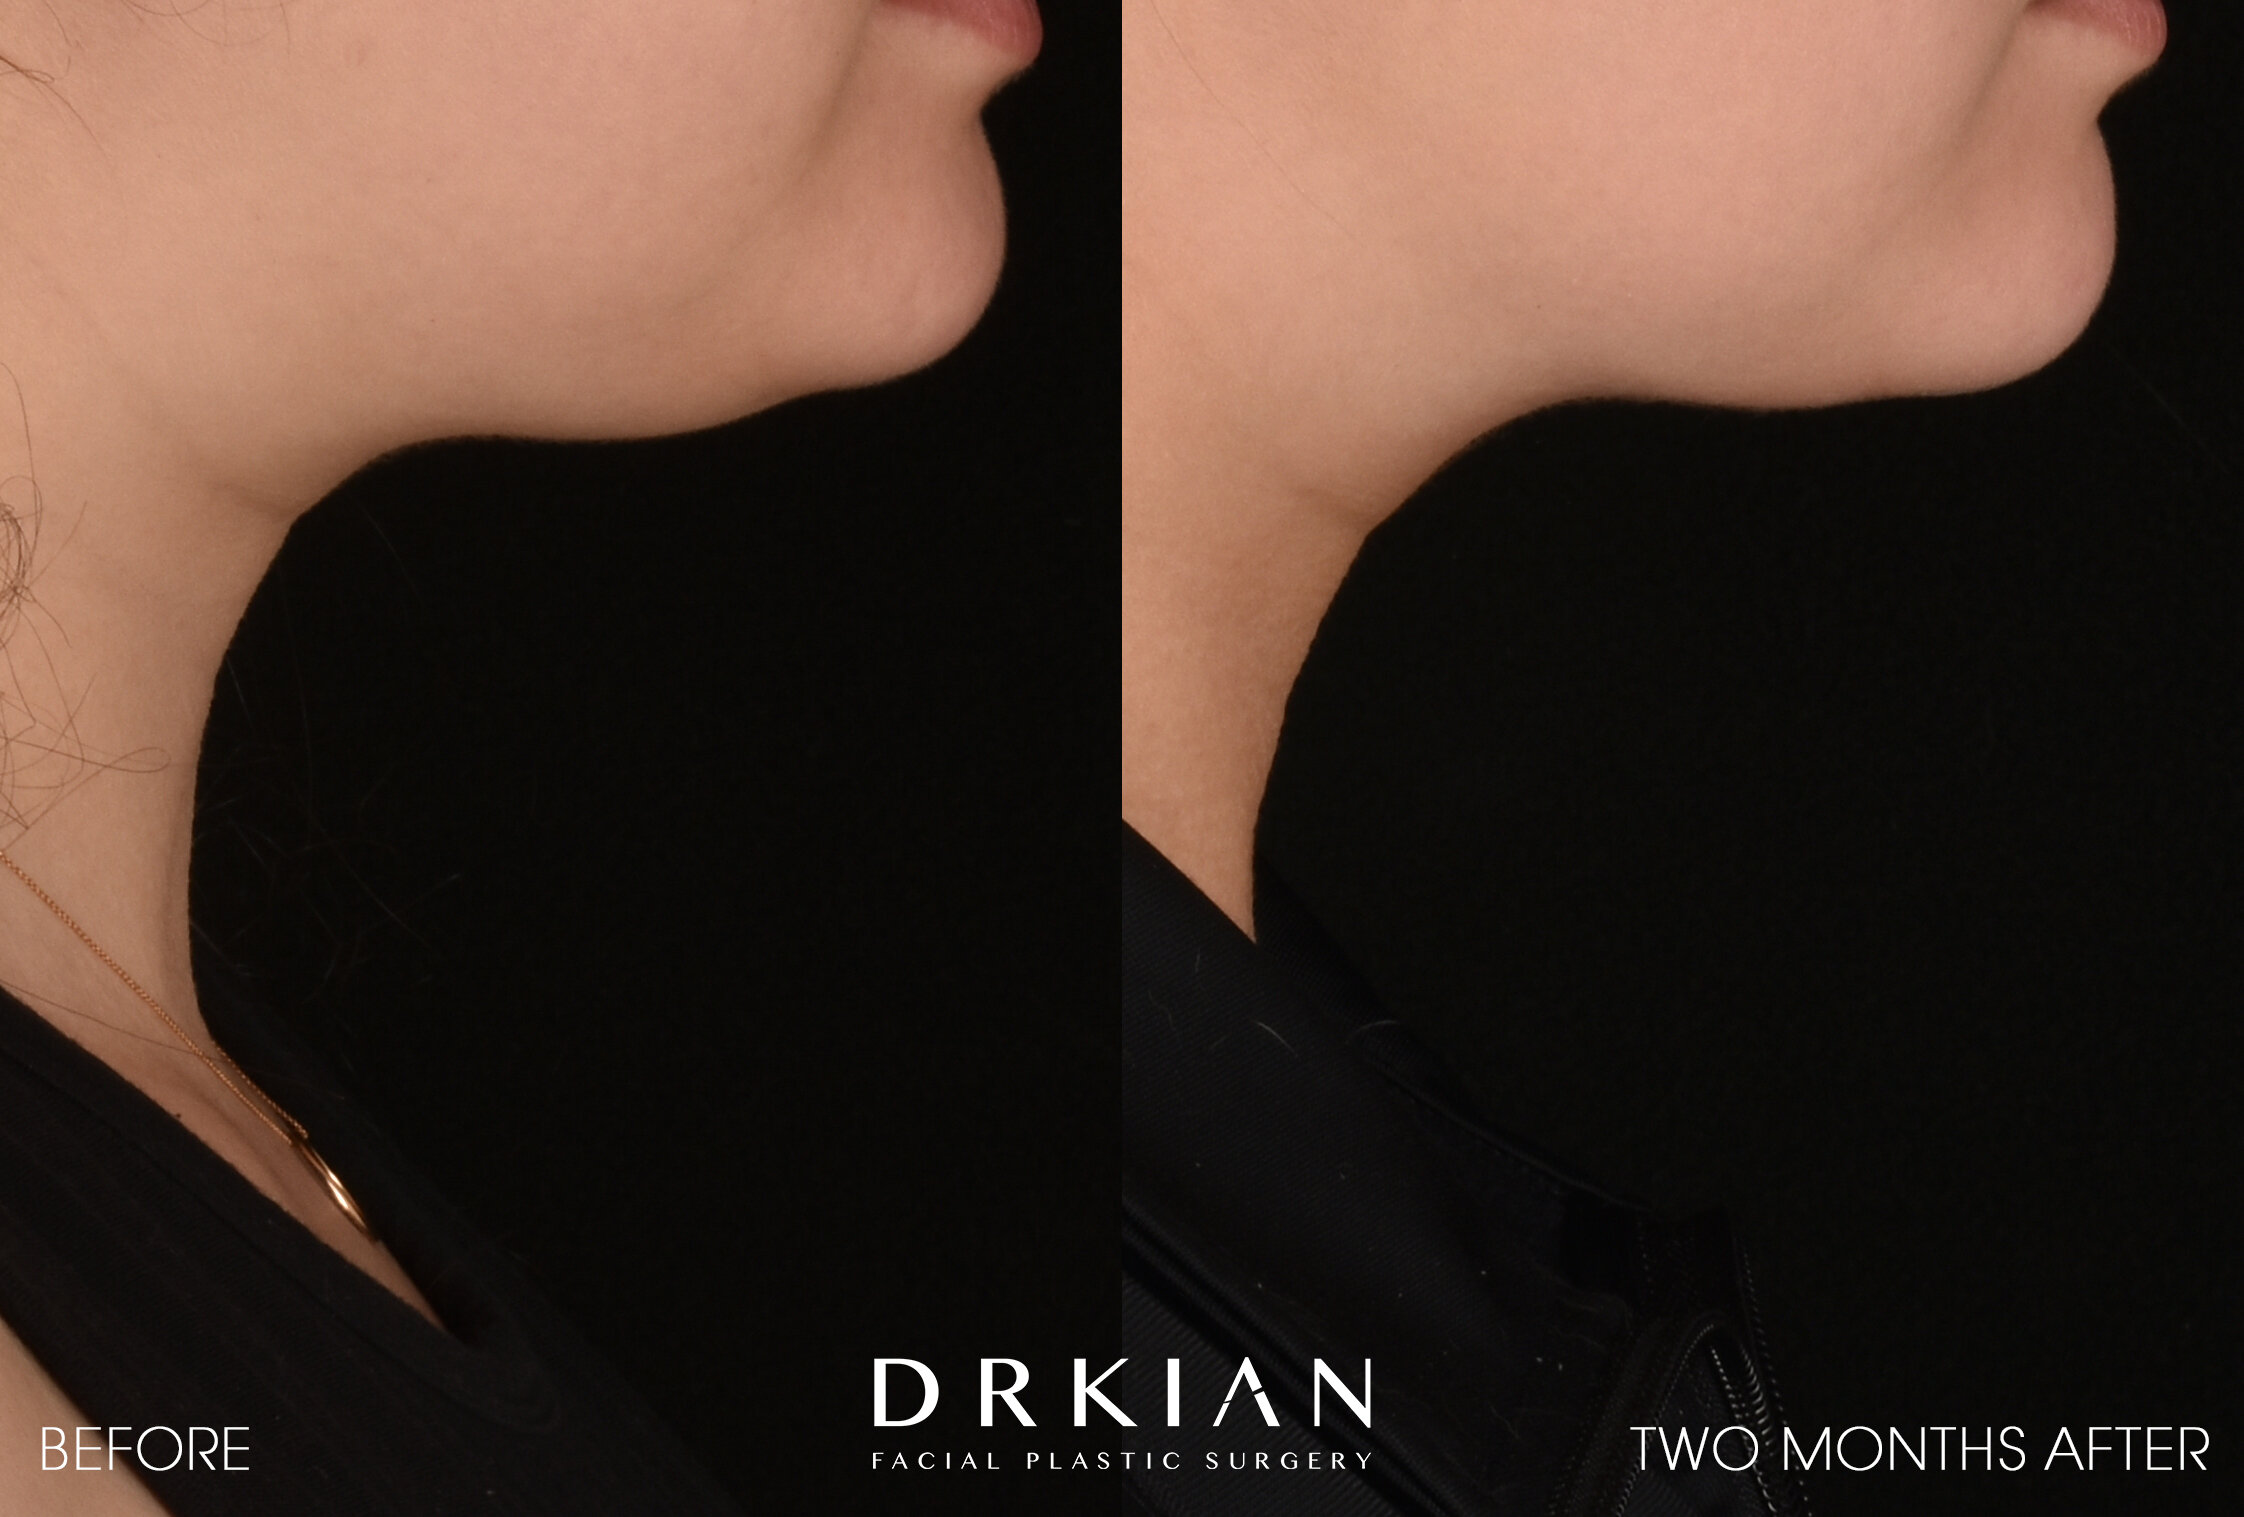
Submental Liposuction Before & After 2 Months
Submental Liposuction Before & After 2 Months
Submental Liposuction Before & After 2 Months
Submental Liposuction Before & After 2 Months
Submental Liposuction Before & After 2 Months

FaceTite & Morpheus8 to Lower Face & Neck Before & After

FaceTite & Morpheus8 to Lower Face & Neck Before & After

FaceTite & Morpheus8 to Lower Face & Neck Before & After
FaceTite & Morpheus8 to Lower Face & Neck Before & After

AccuTite to Submentum & Lower 1/3 of Face Before & After

AccuTite to Submentum & Lower 1/3 of Face Before & After

AccuTite to Submentum & Lower 1/3 of Face Before & After

AccuTite to Submentum & Lower 1/3 of Face Before & After

Buccal Fat Removal Before & After 5 Months

Buccal Fat Removal Before & After 5 Months

Buccal Fat Removal Before & After 5 Months

Buccal Fat Removal Before & After 5 Months

Buccal Fat Removal Before & After 5 Months