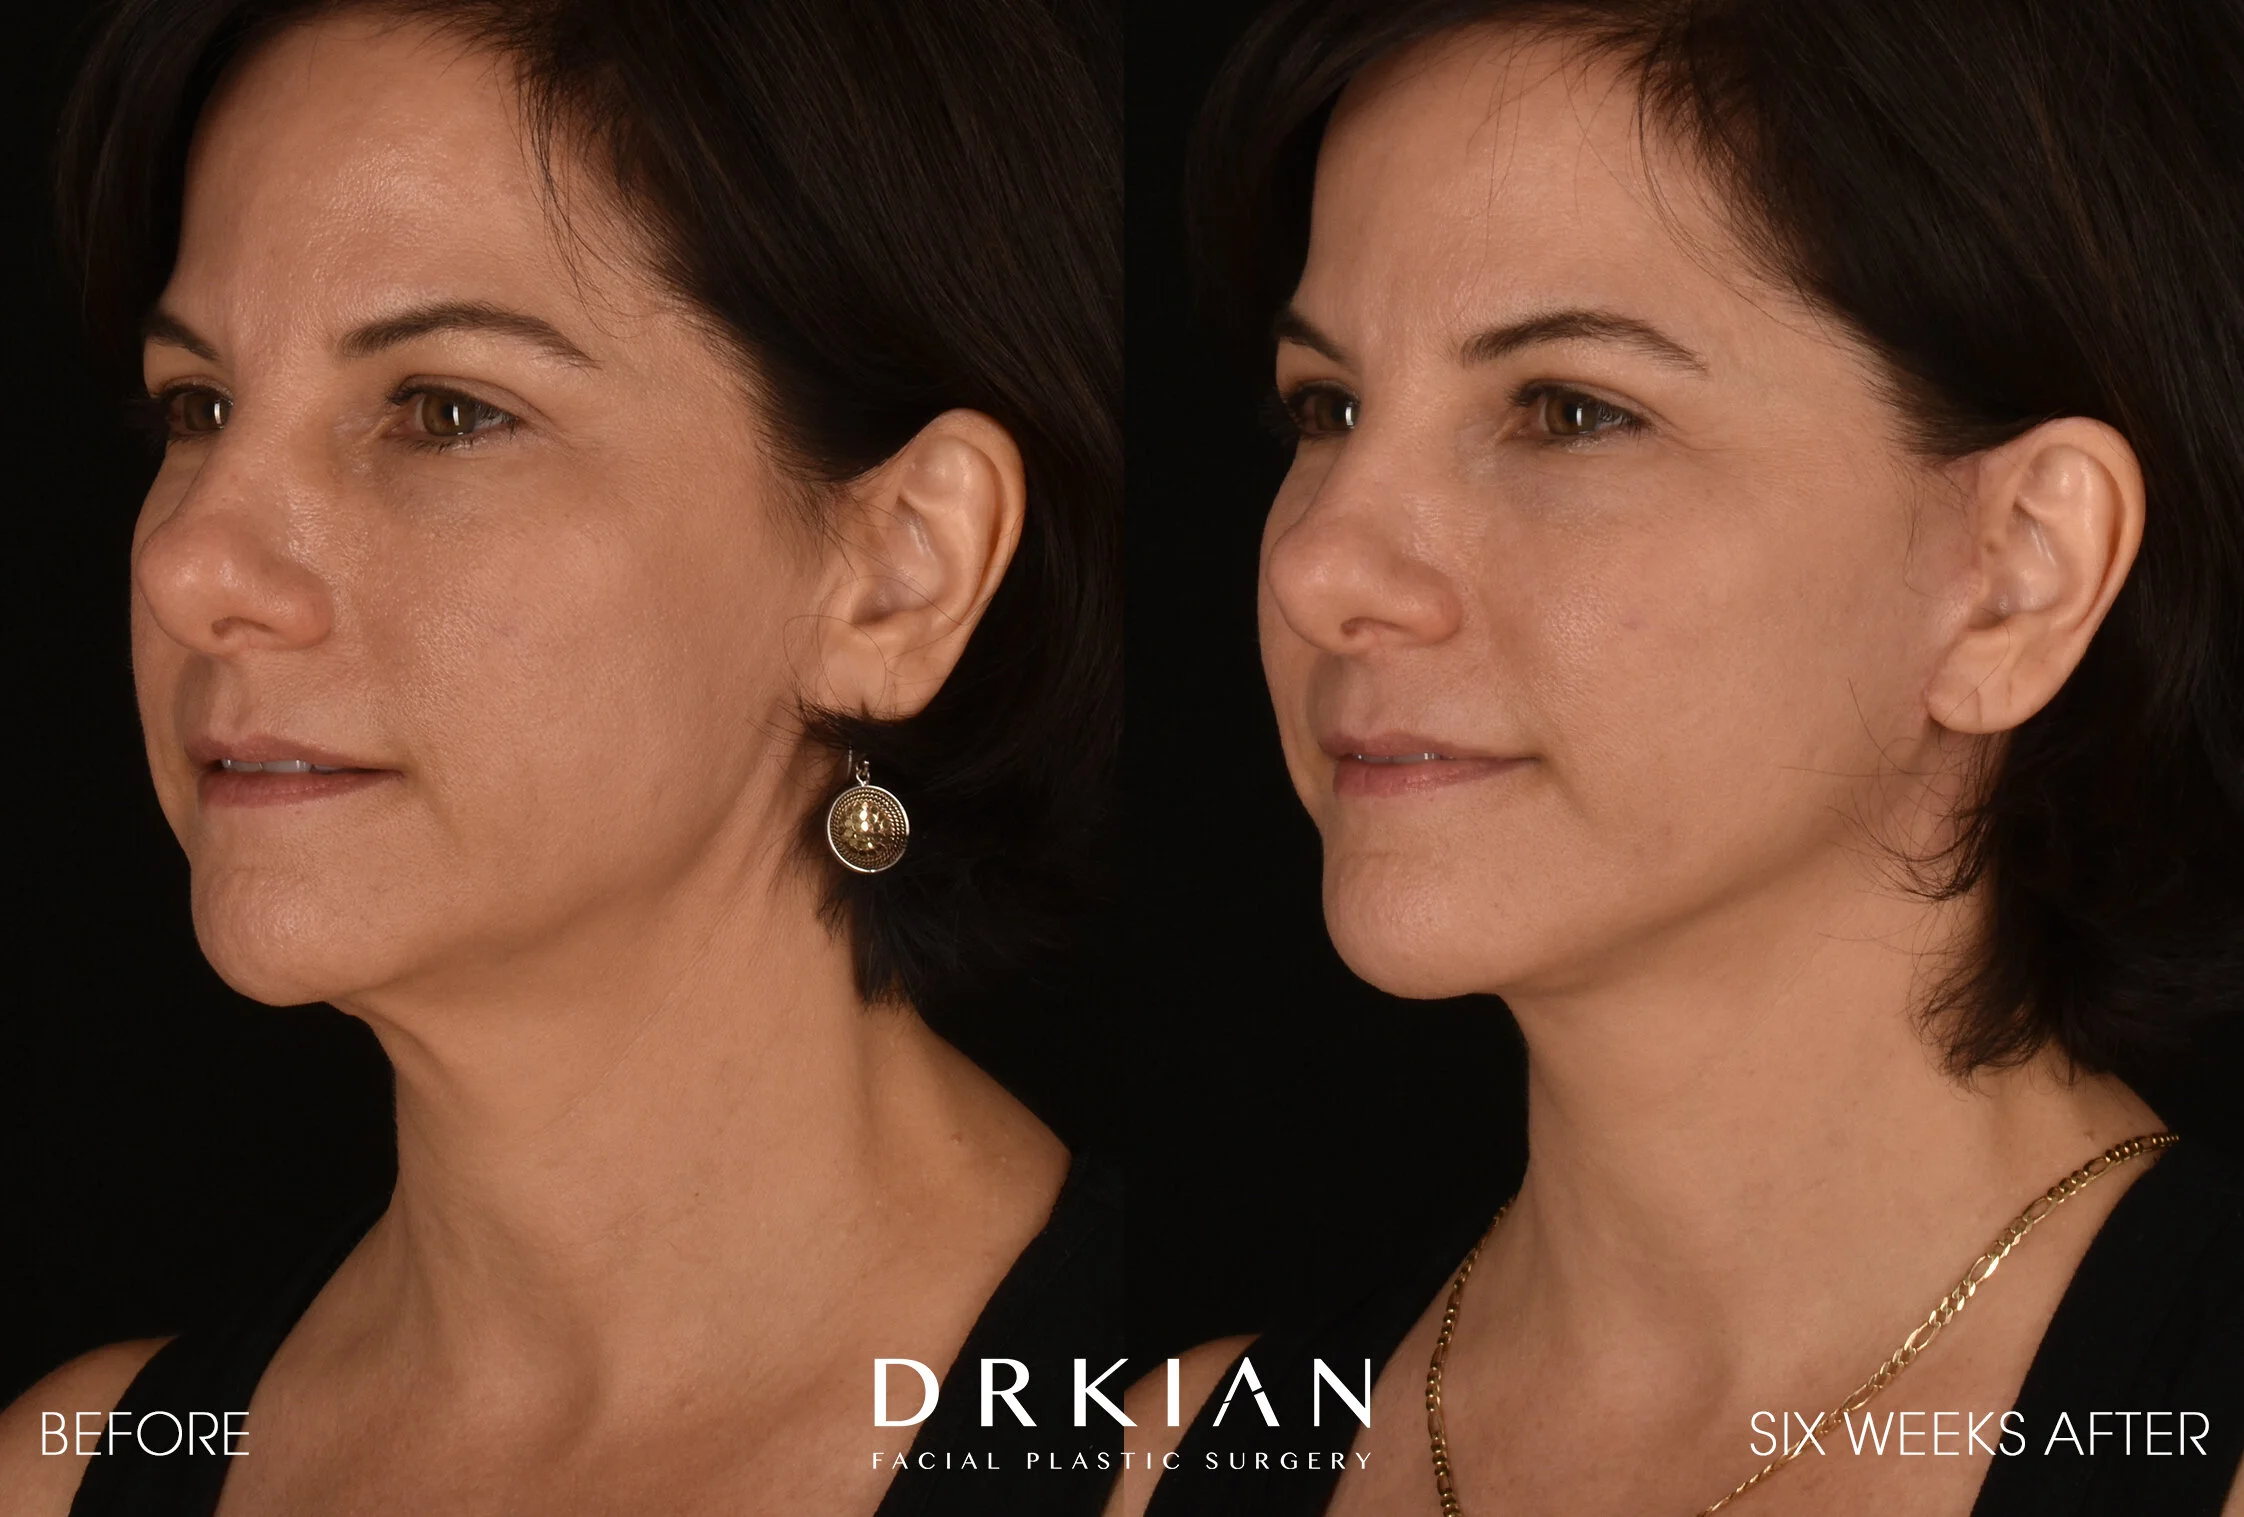
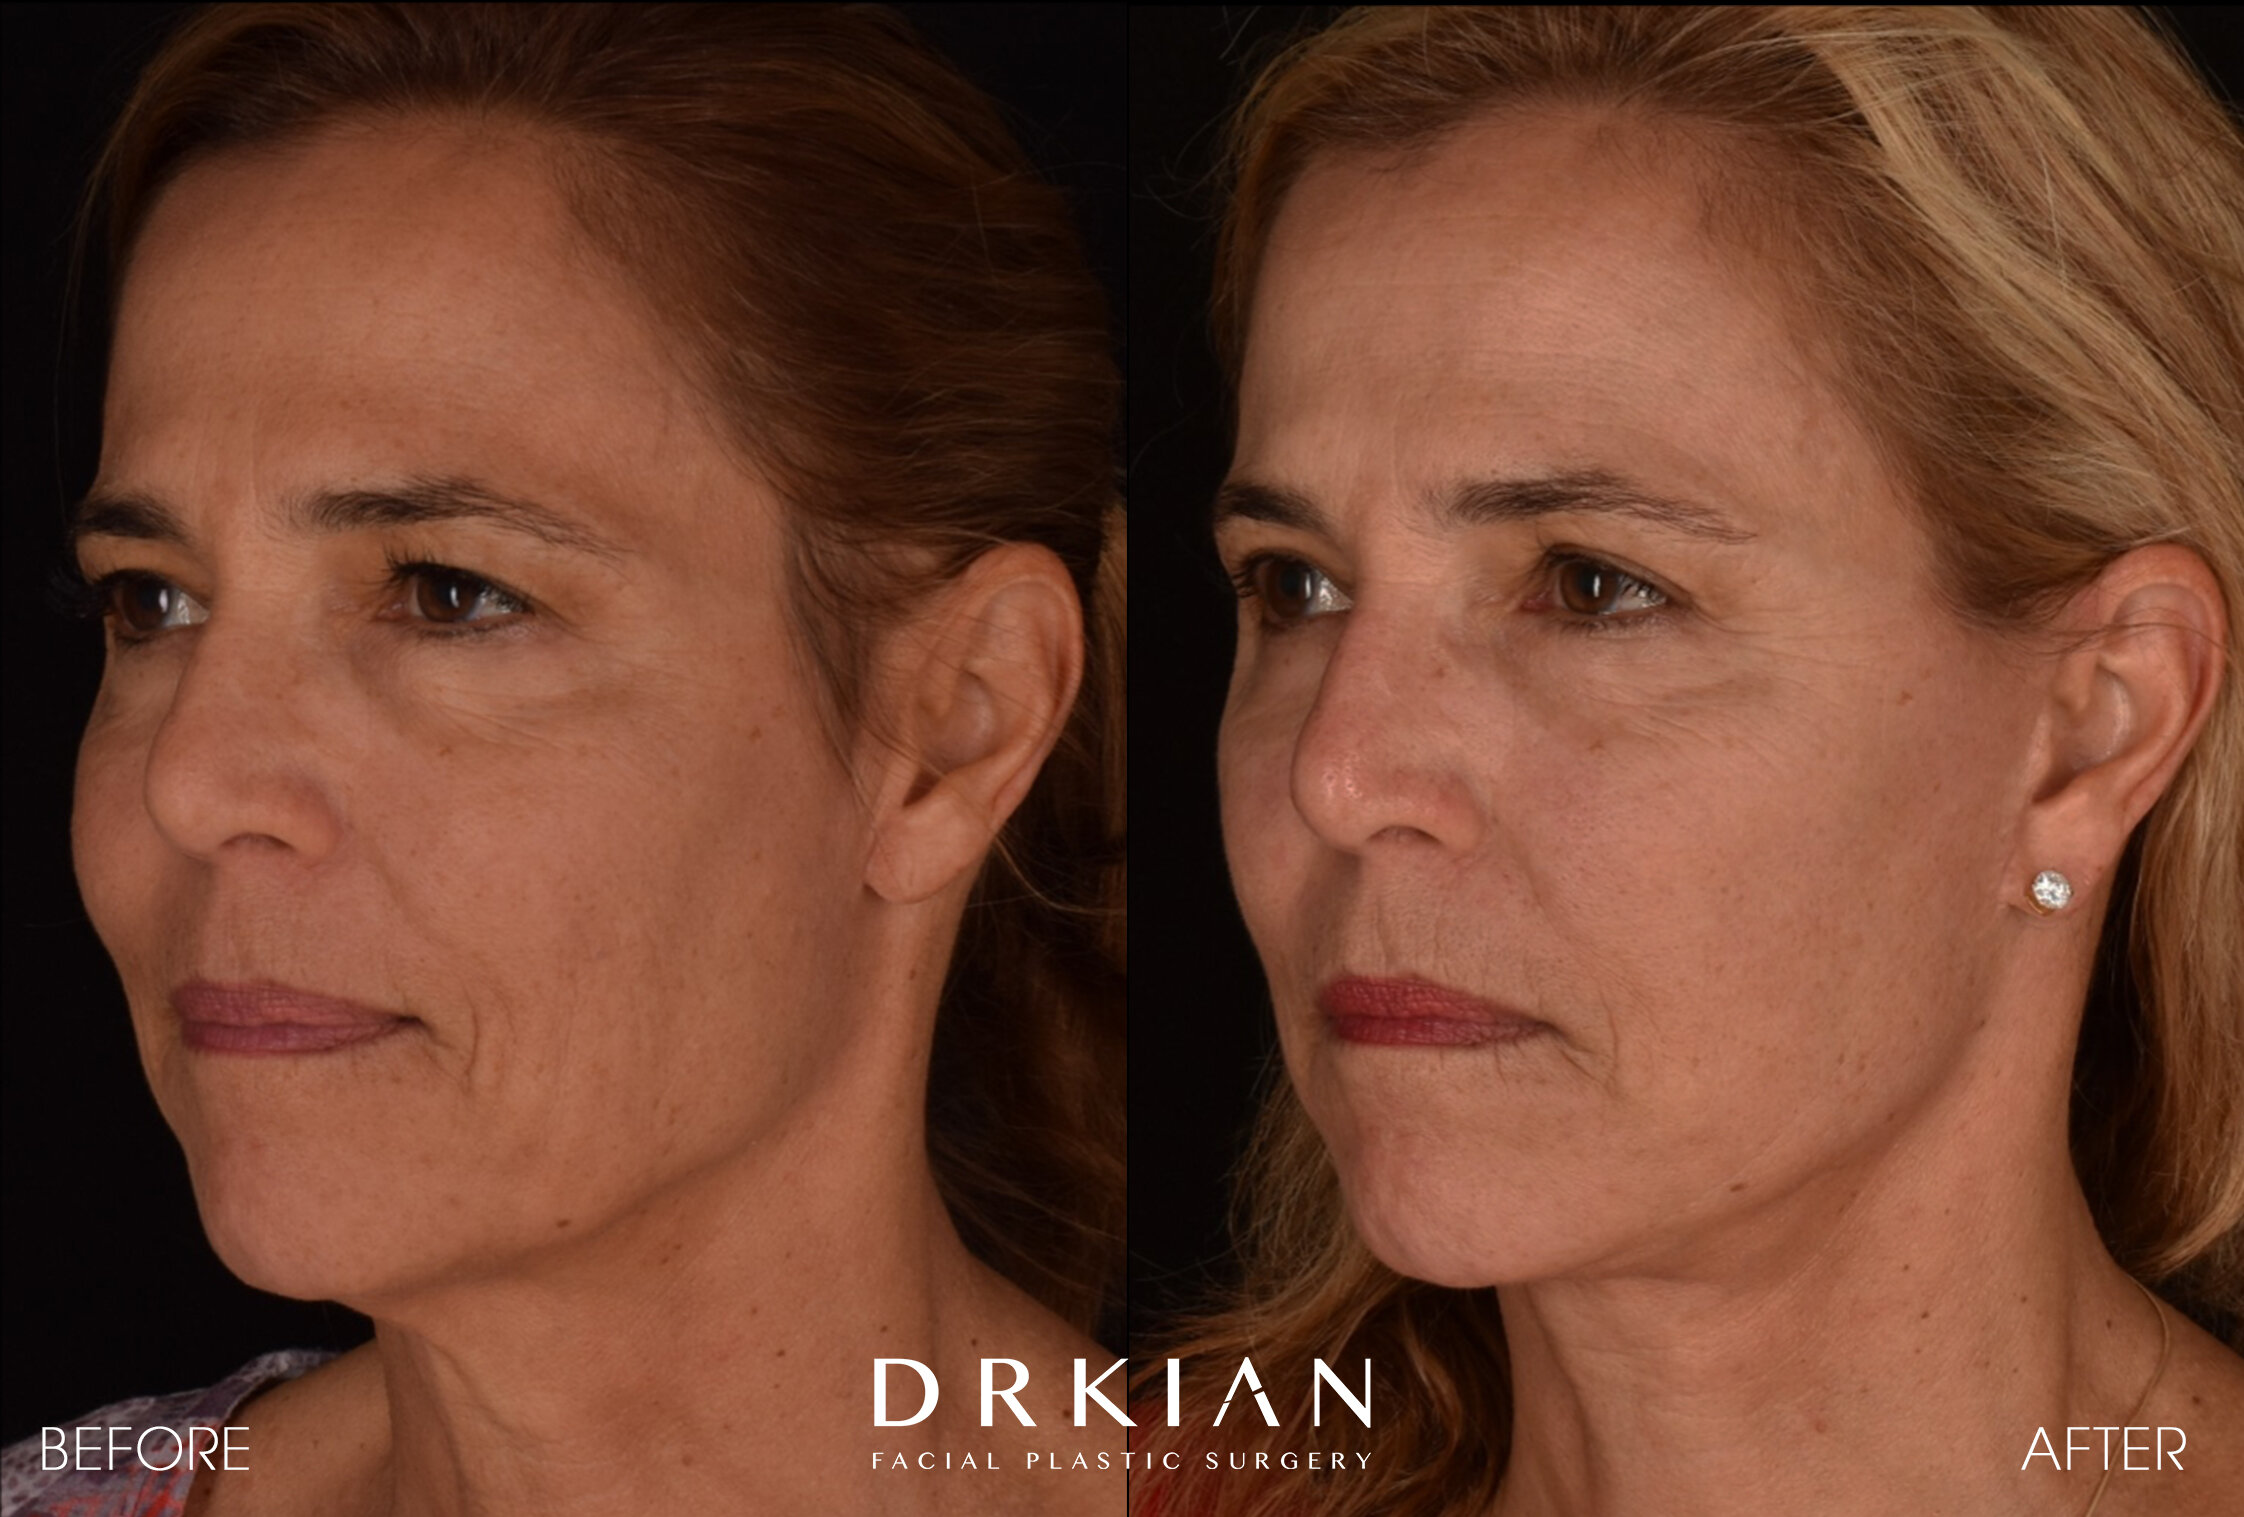
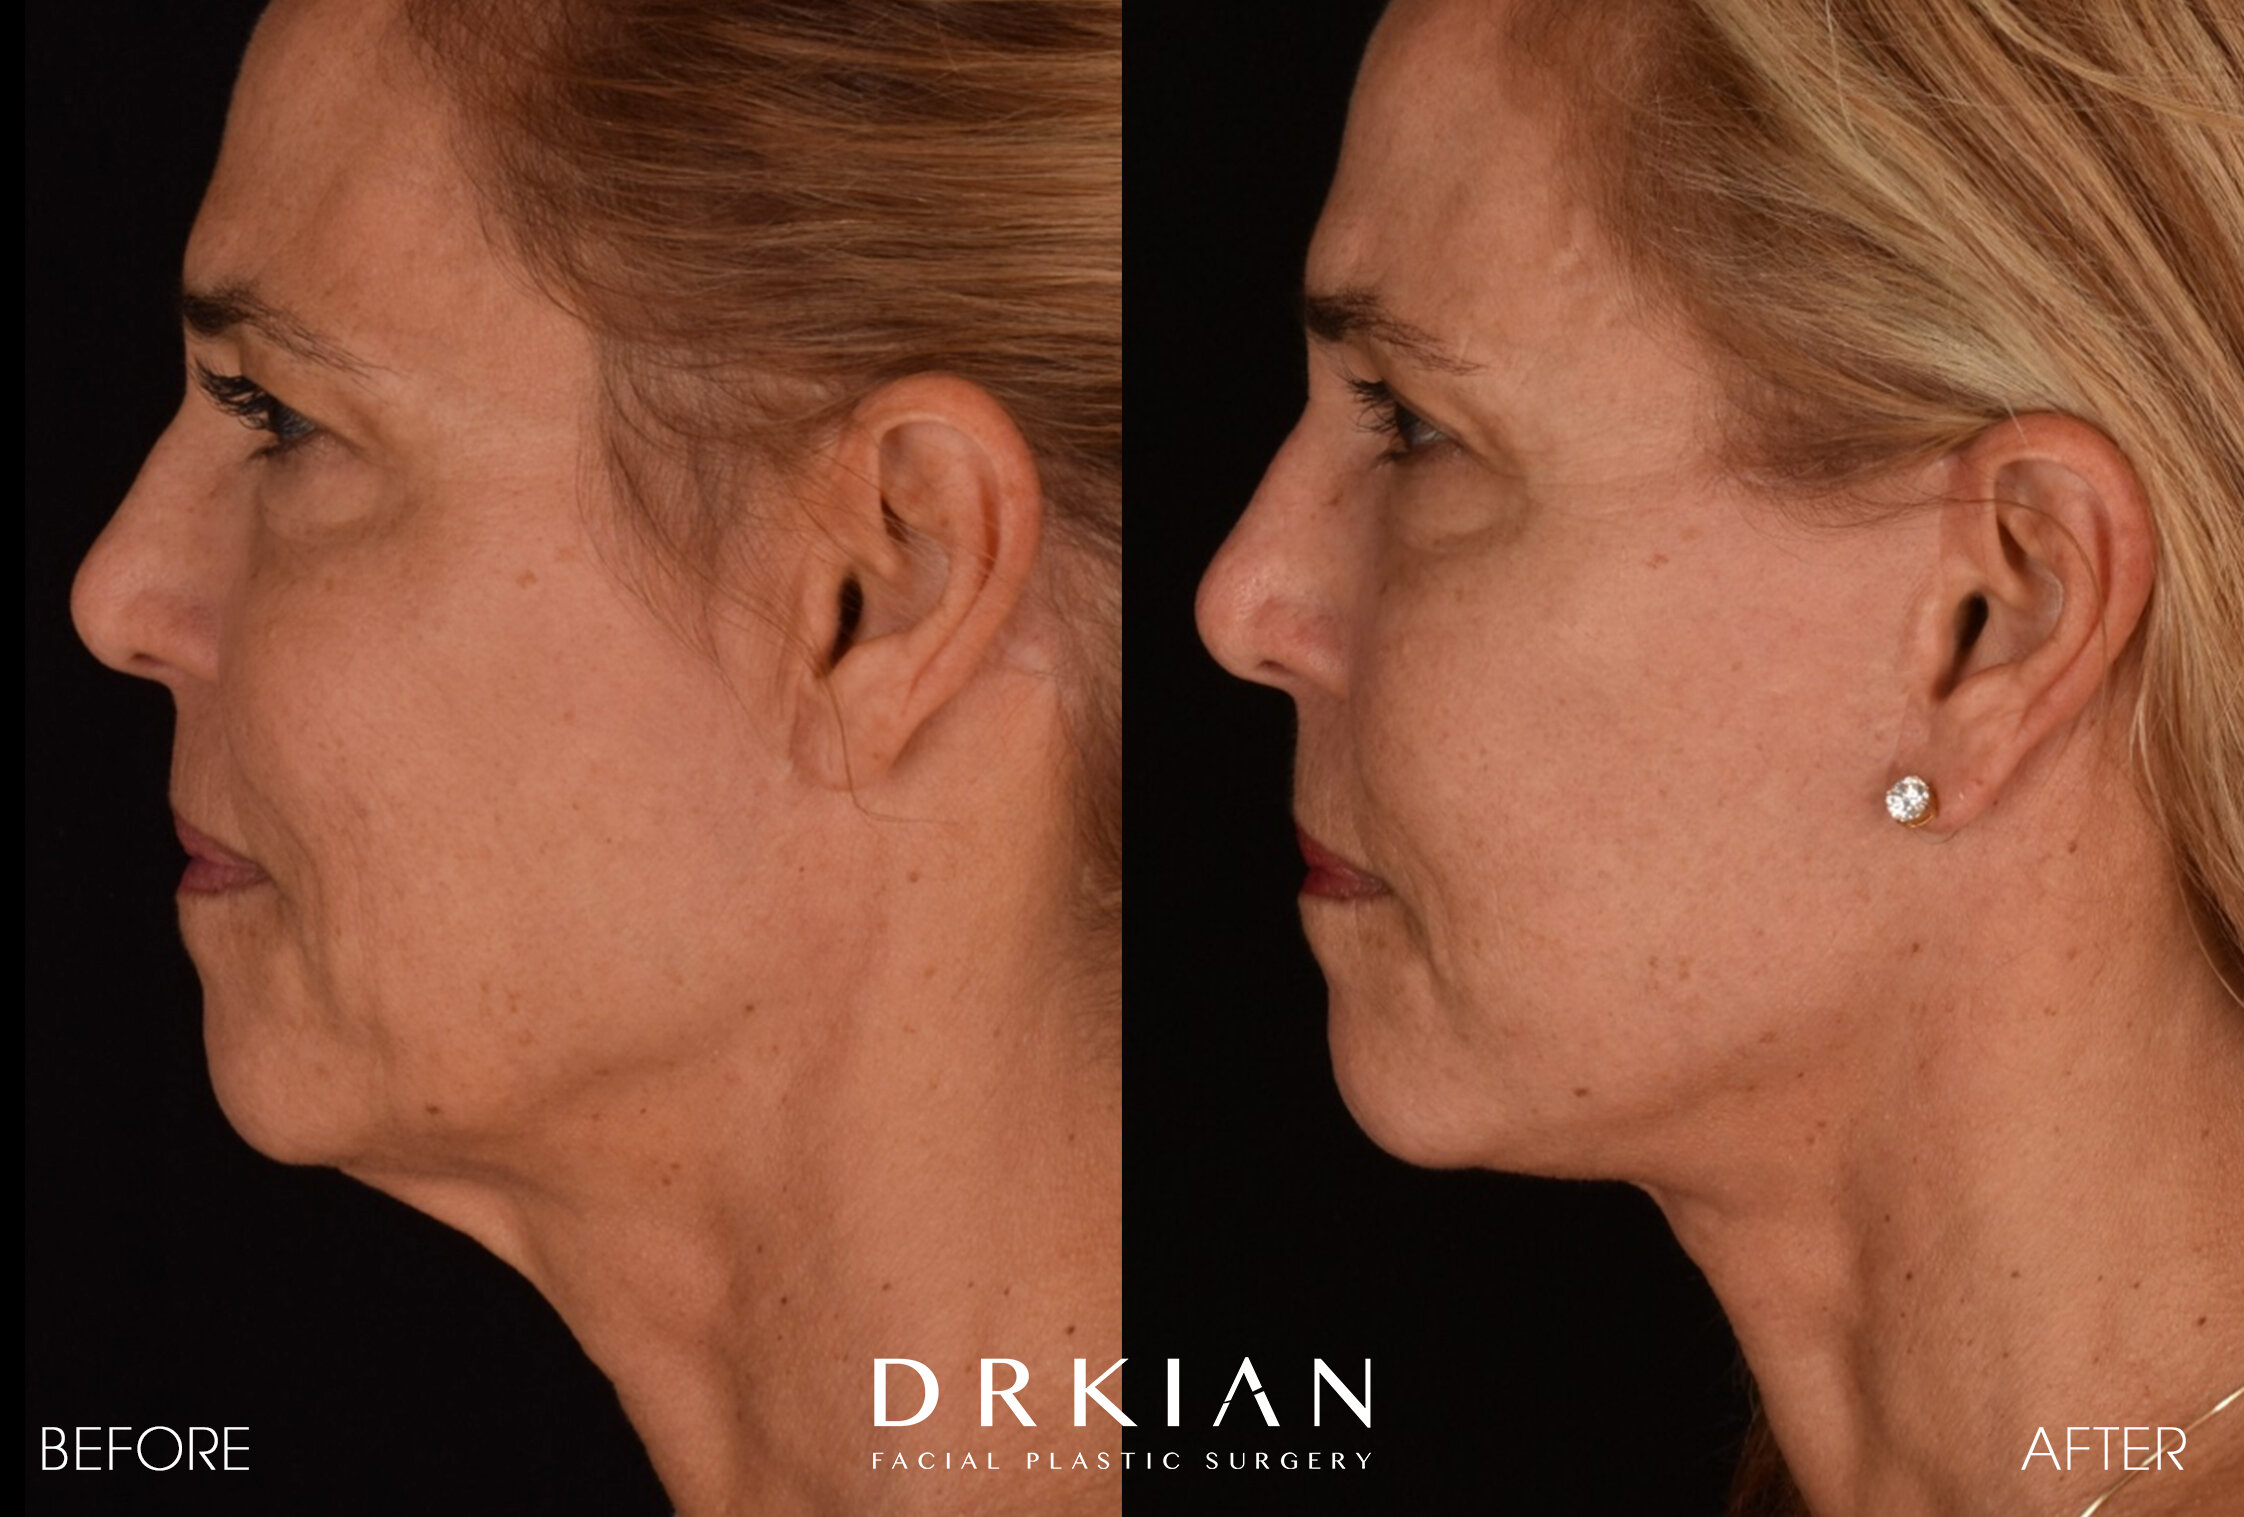
Micro Neck Lift

Micro Neck Lift: Before & After Two & Half Months (11 Weeks)

Micro Neck Lift: Before & After Two & Half Months (11 Weeks)

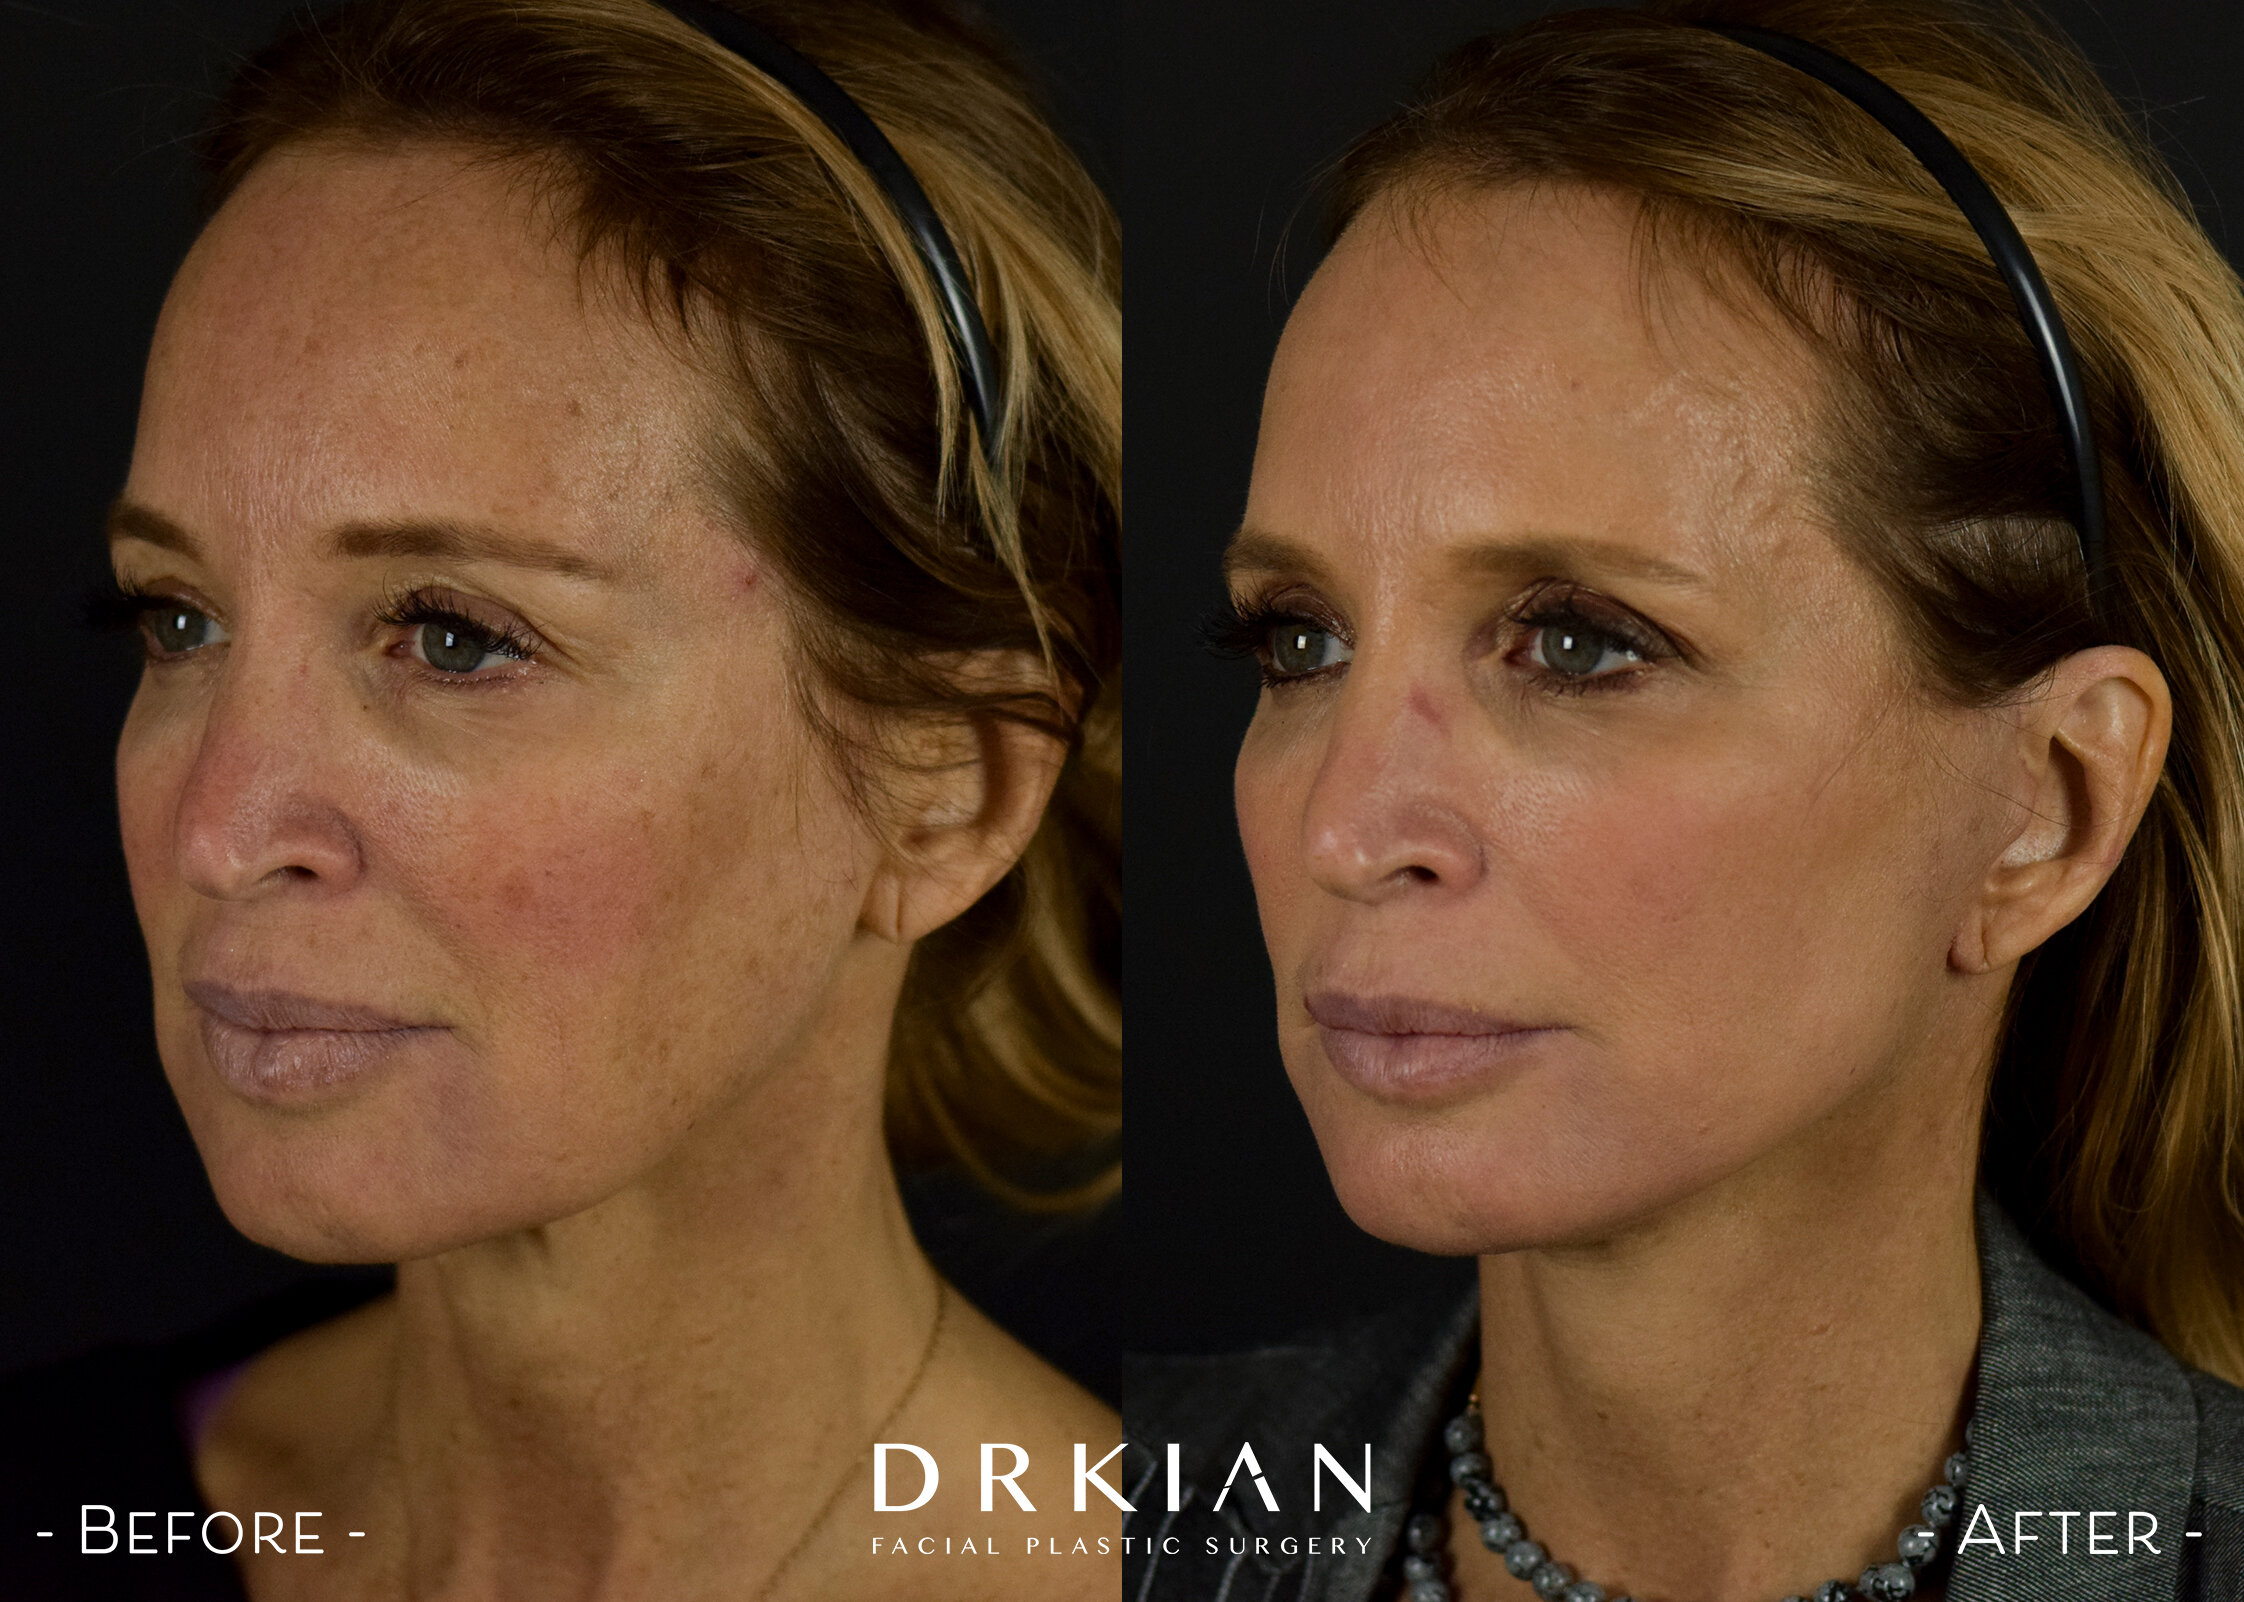
Micro Neck Lift Before & After 1 Month

Micro Neck Lift Before & After 1 Month

Micro Neck Lift Before & After 1 Month

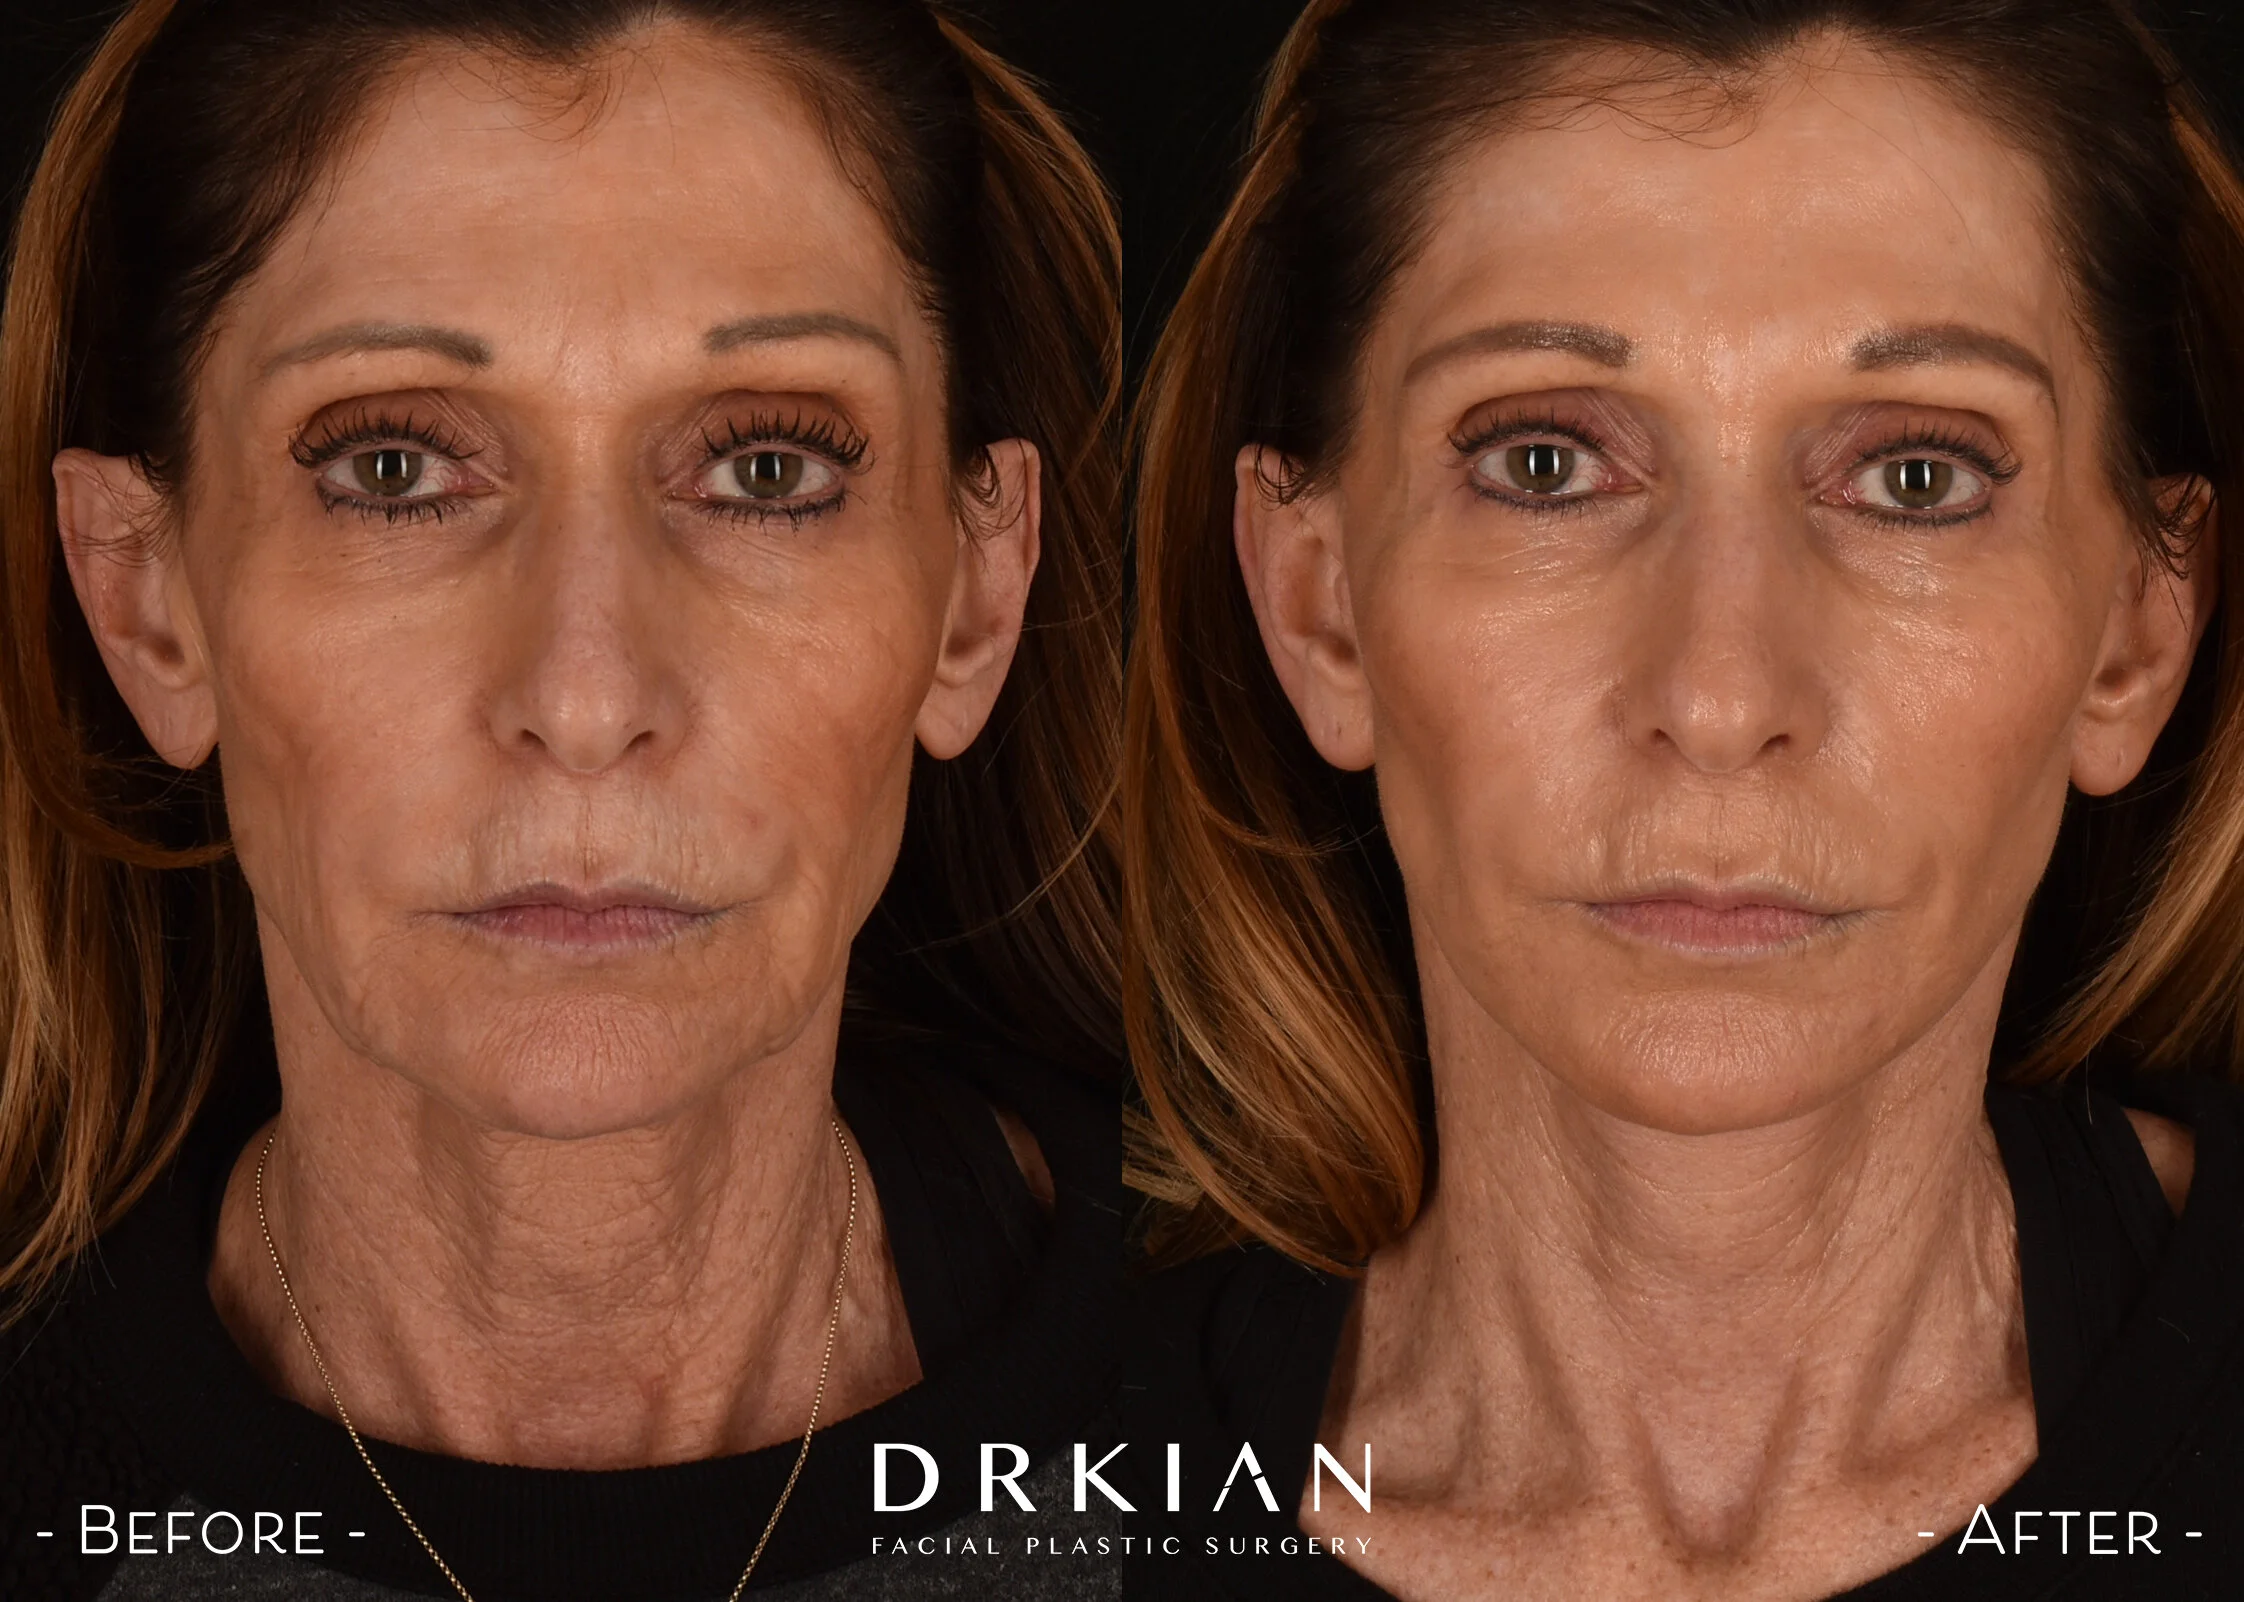
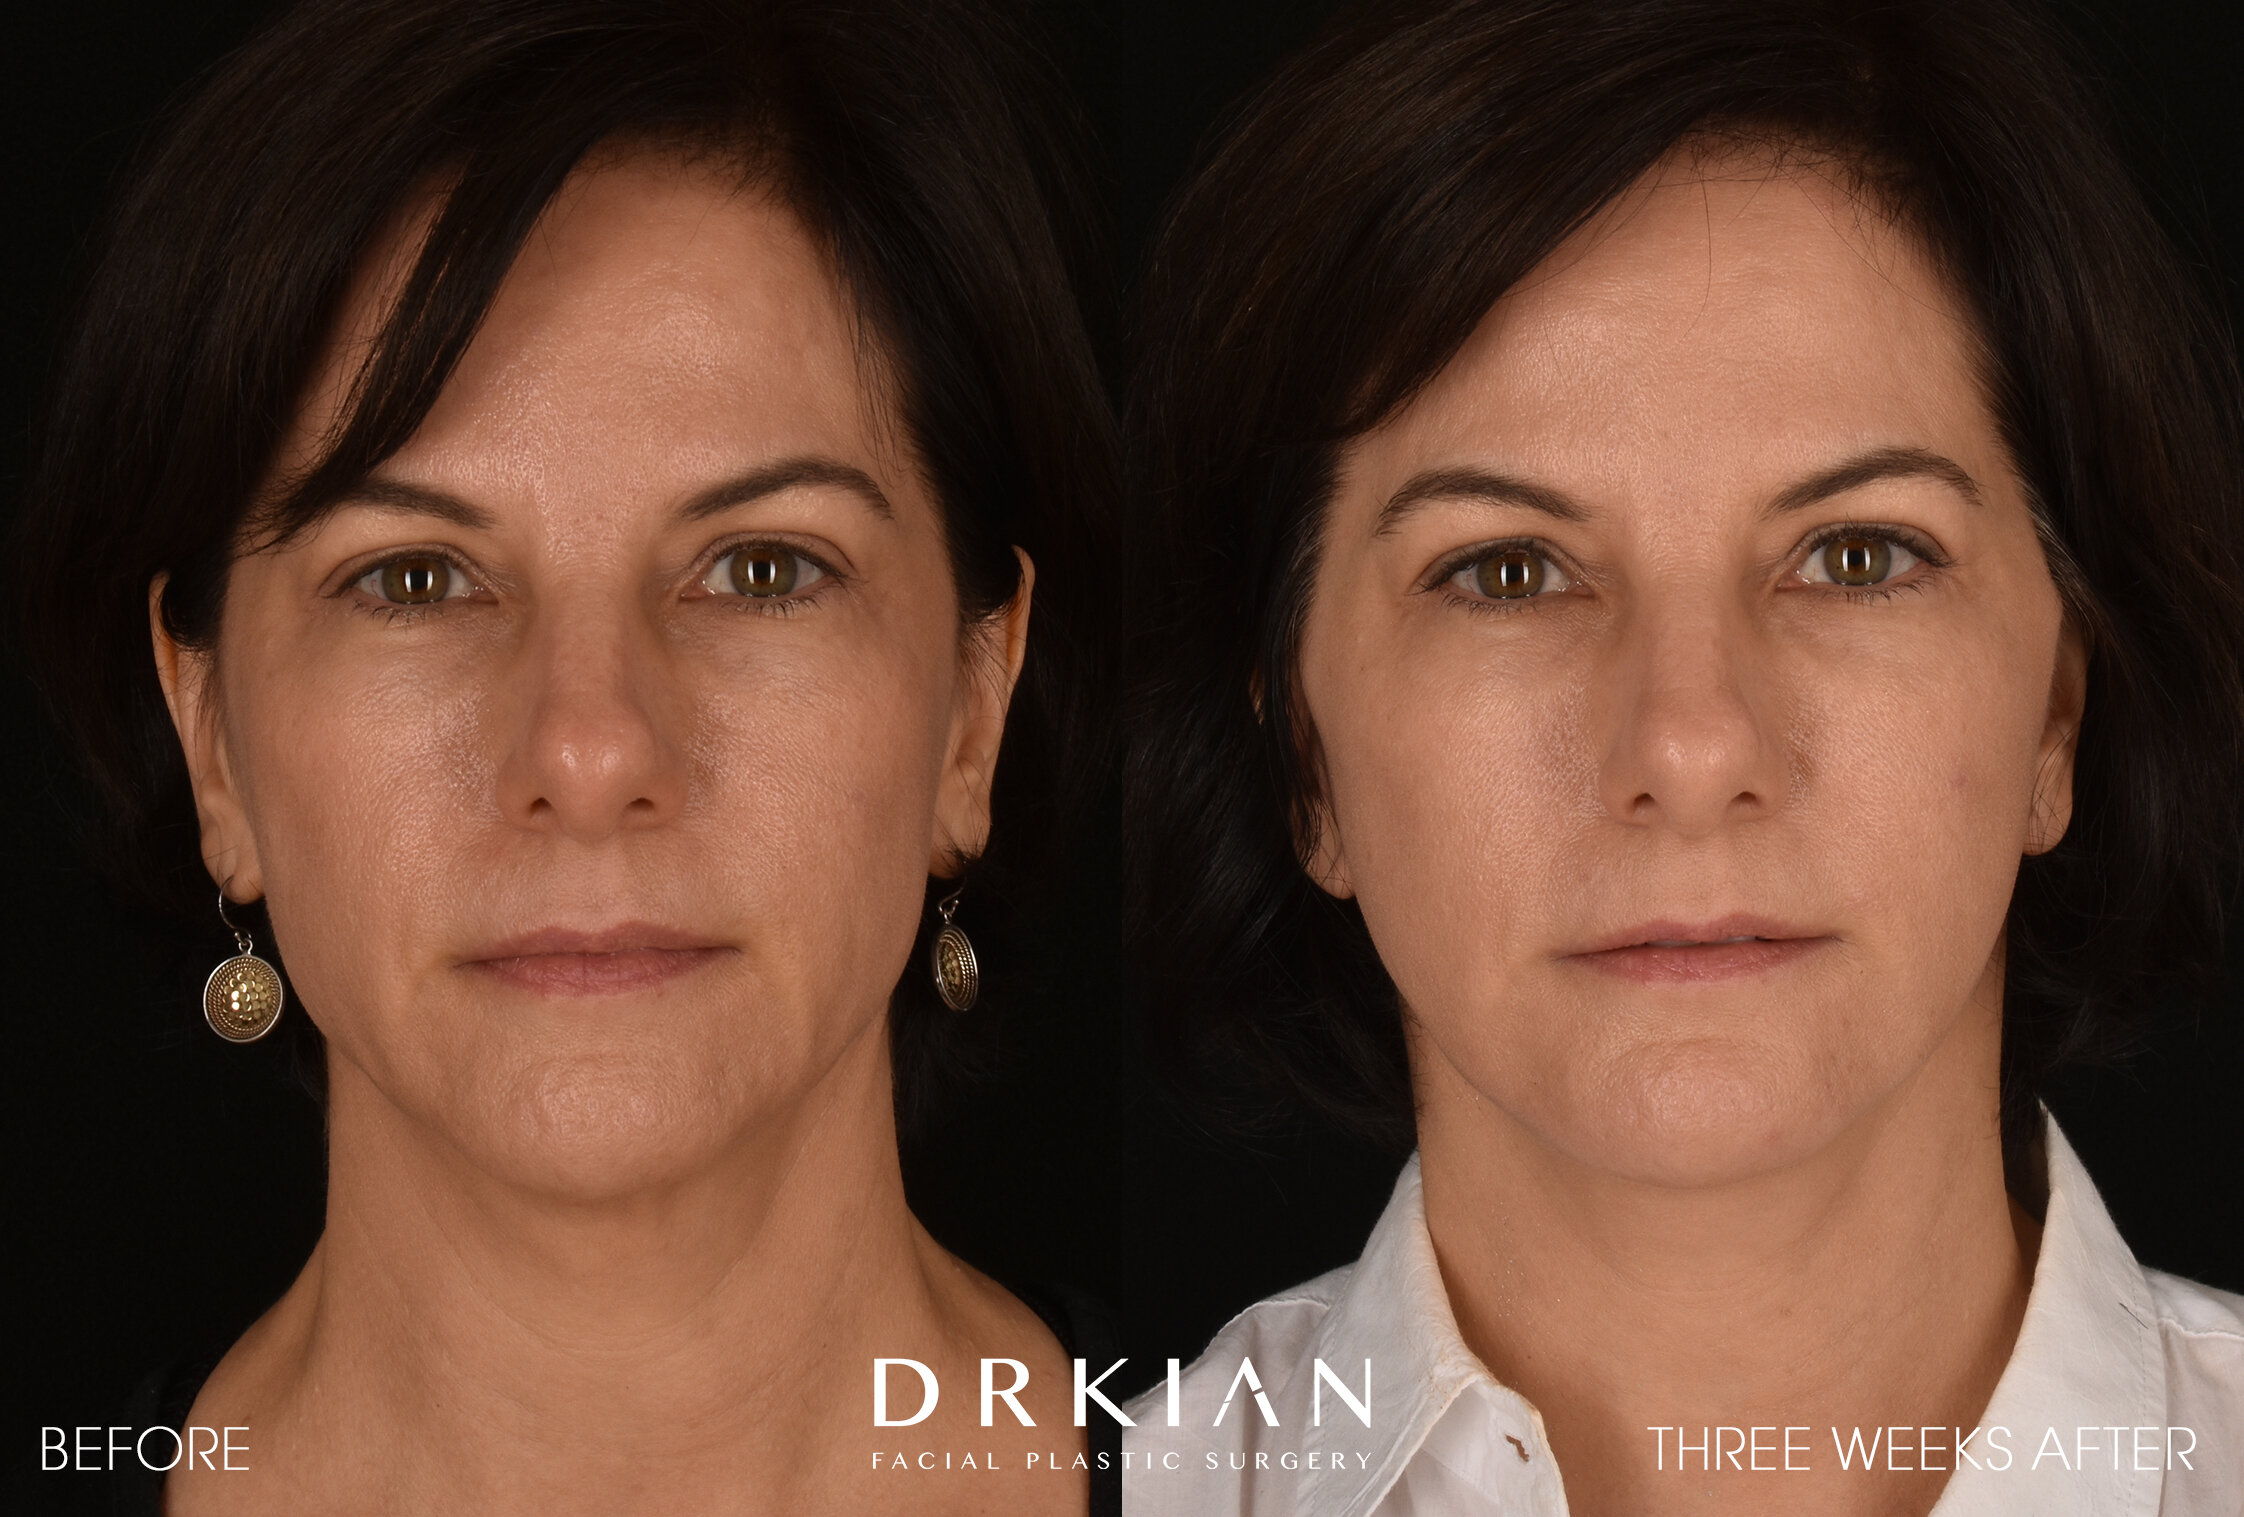
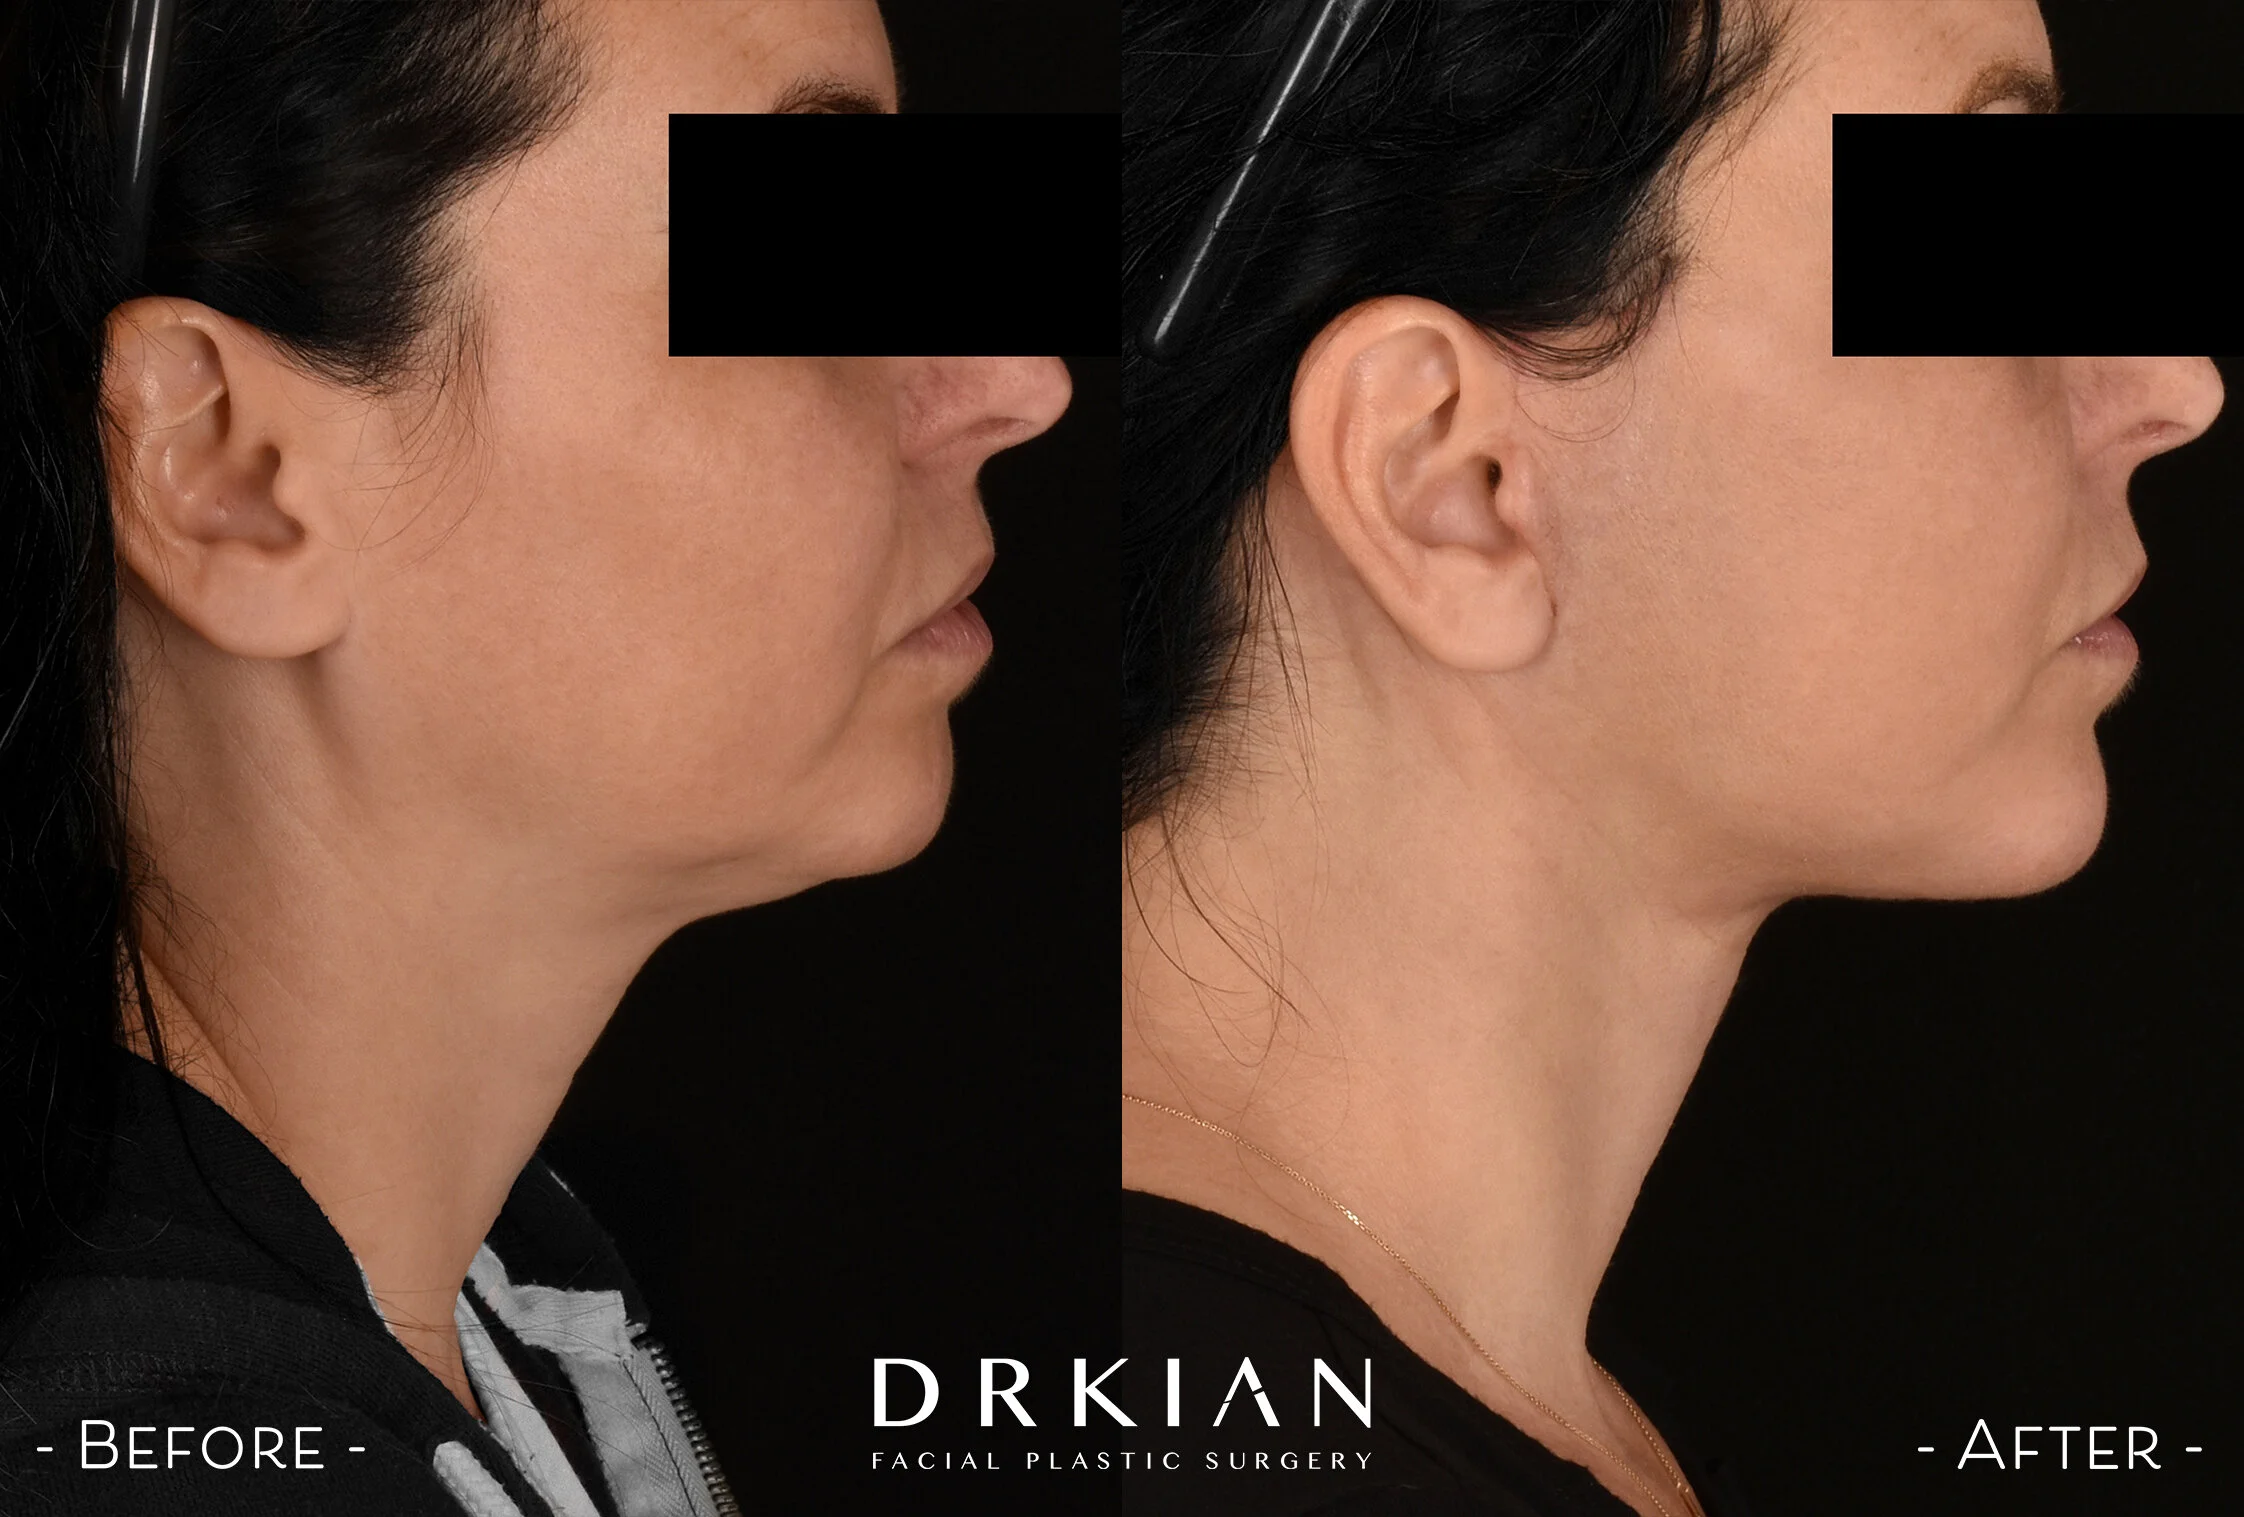
Micro Neck Lift with Fat Transfer to Chin & Cheeks Before & After 3 Weeks

Micro Neck Lift with Fat Transfer to Chin & Cheeks Before & After 3 Weeks

Micro Neck Lift with Fat Transfer to Chin & Cheeks Before & After 3 Weeks

Micro Neck Lift with Fat Transfer to Chin & Cheeks Before & After 3 Weeks

Micro Neck Lift with Fat Transfer to Chin & Cheeks Before & After 3 Weeks

Micro Neck Lift with Fat Transfer to Chin & Cheeks Before & After 3 Weeks

Micro Neck Lift with Fat Transfer to Chin & Cheeks Before & After 3 Weeks

Micro Neck Lift with Fat Transfer to Chin & Cheeks Before & After 3 Weeks

Micro Neck Lift with Fat Transfer to Chin & Cheeks Before & After 3 Weeks

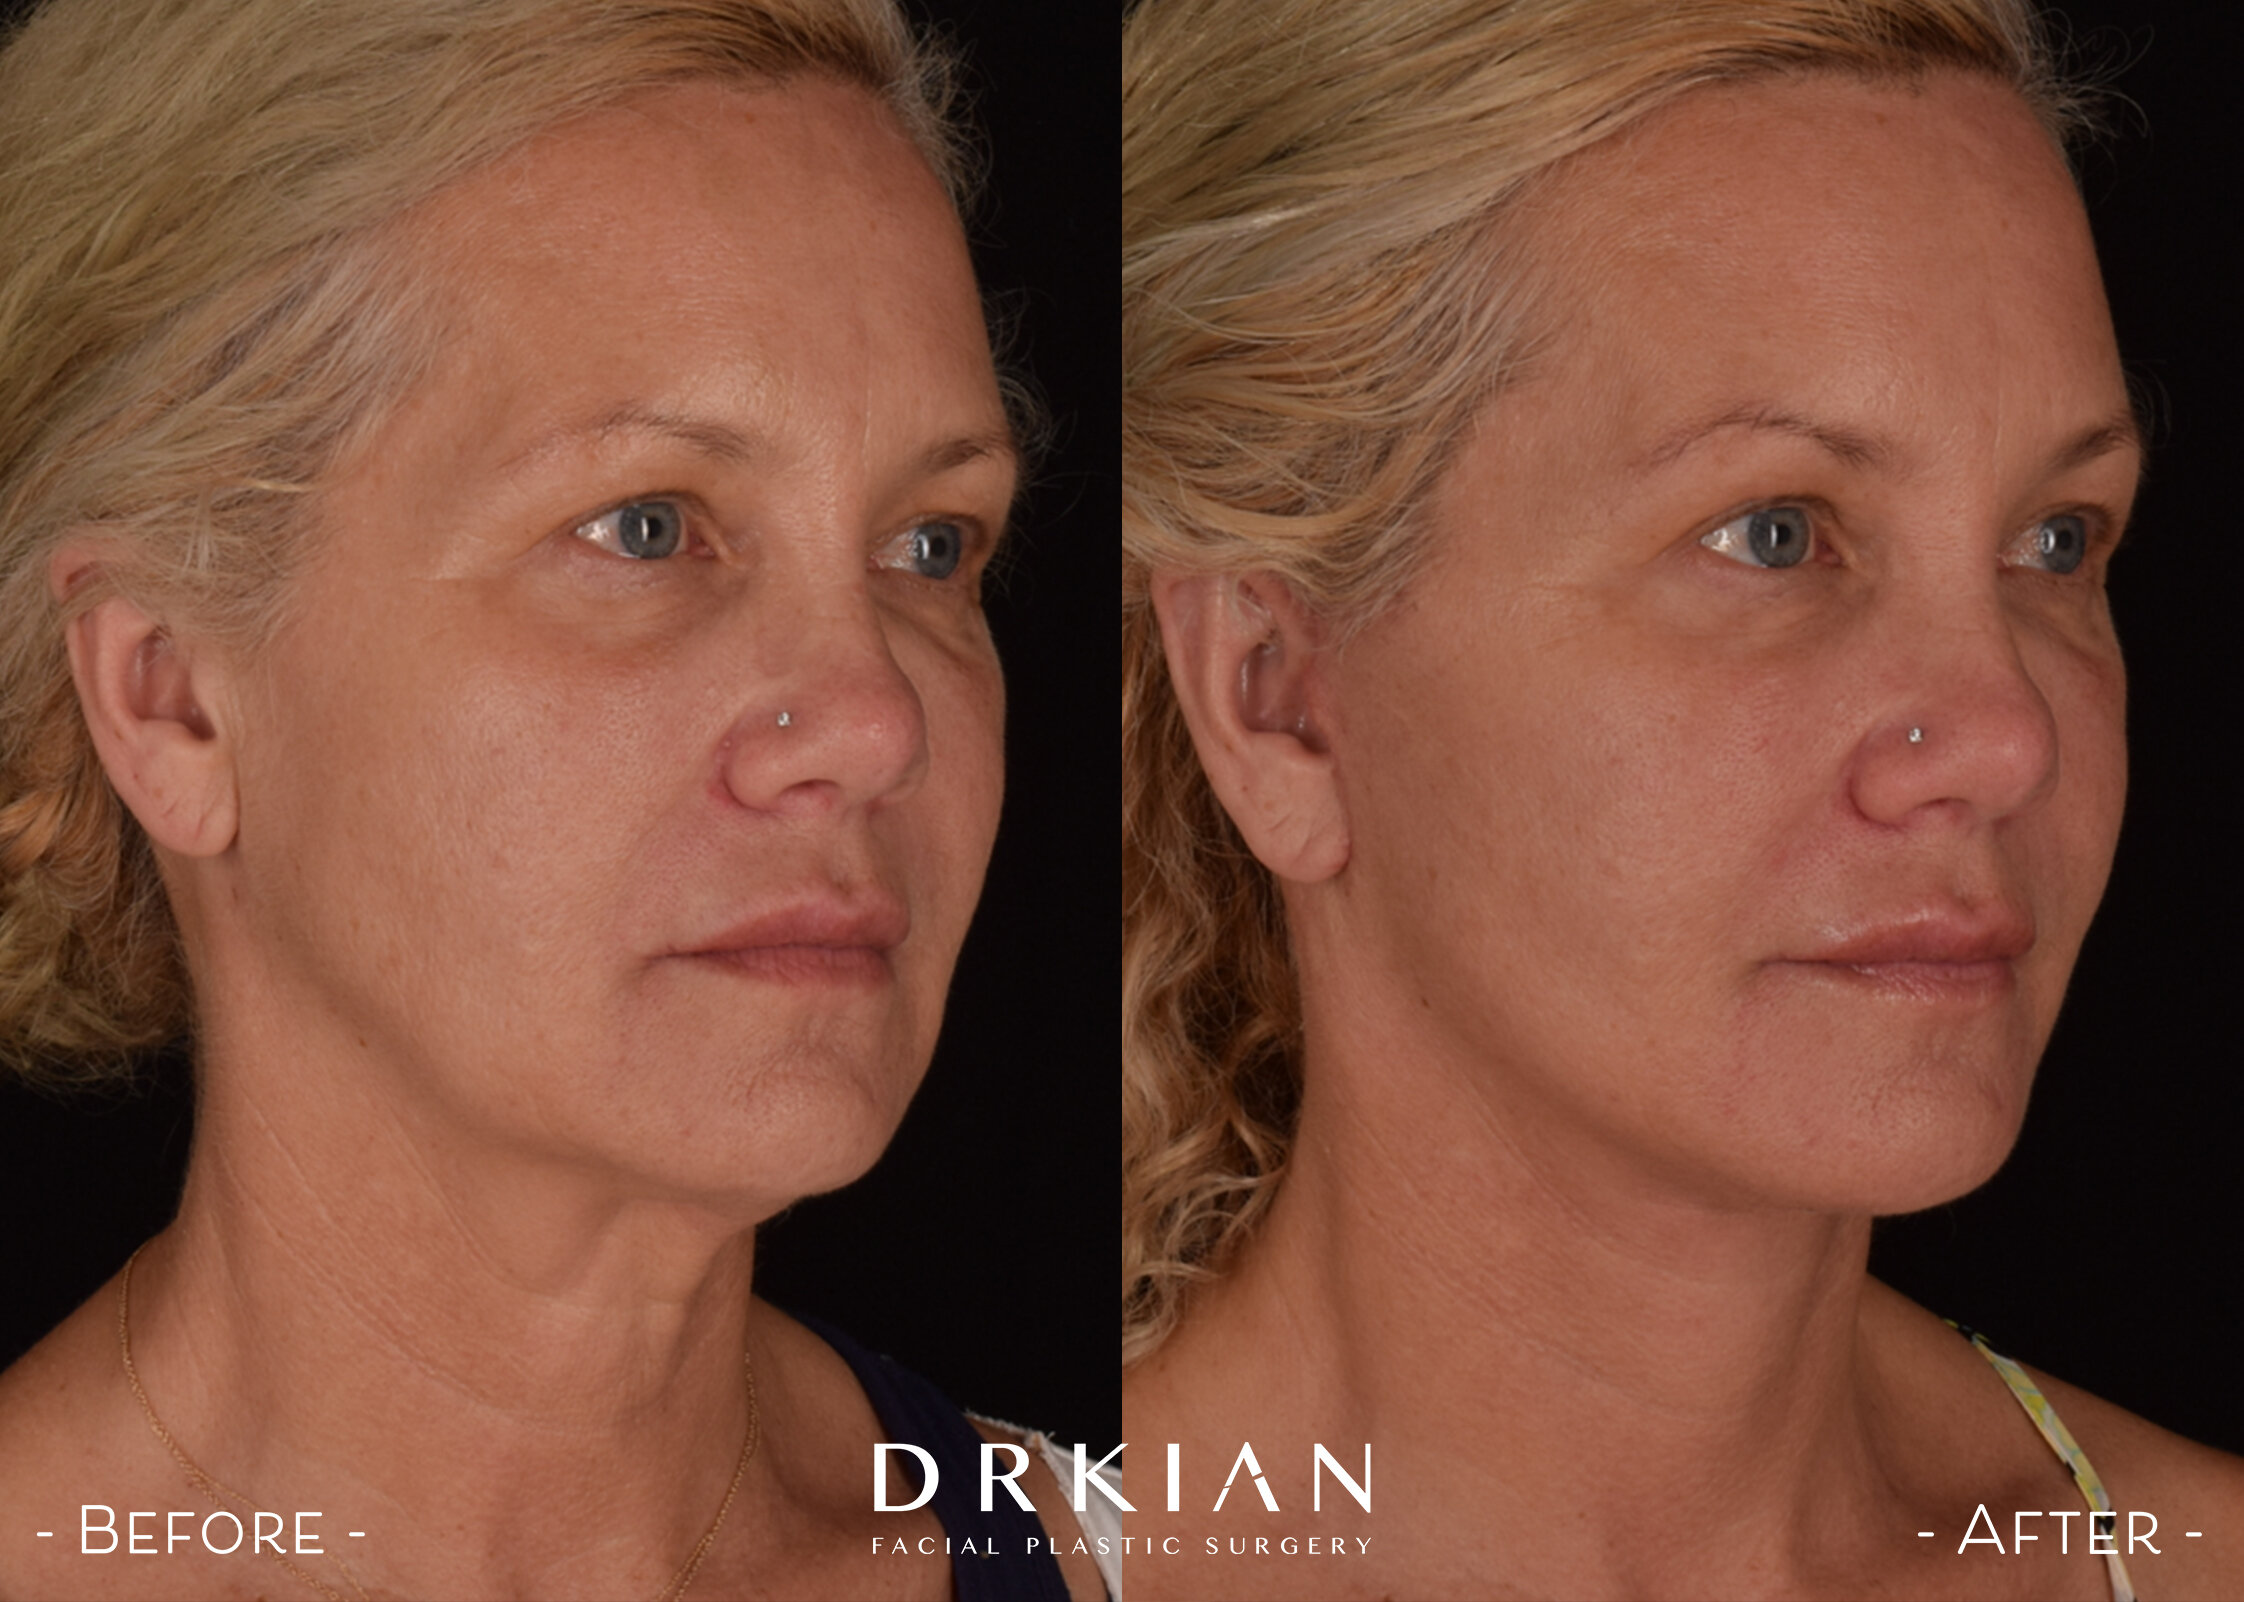
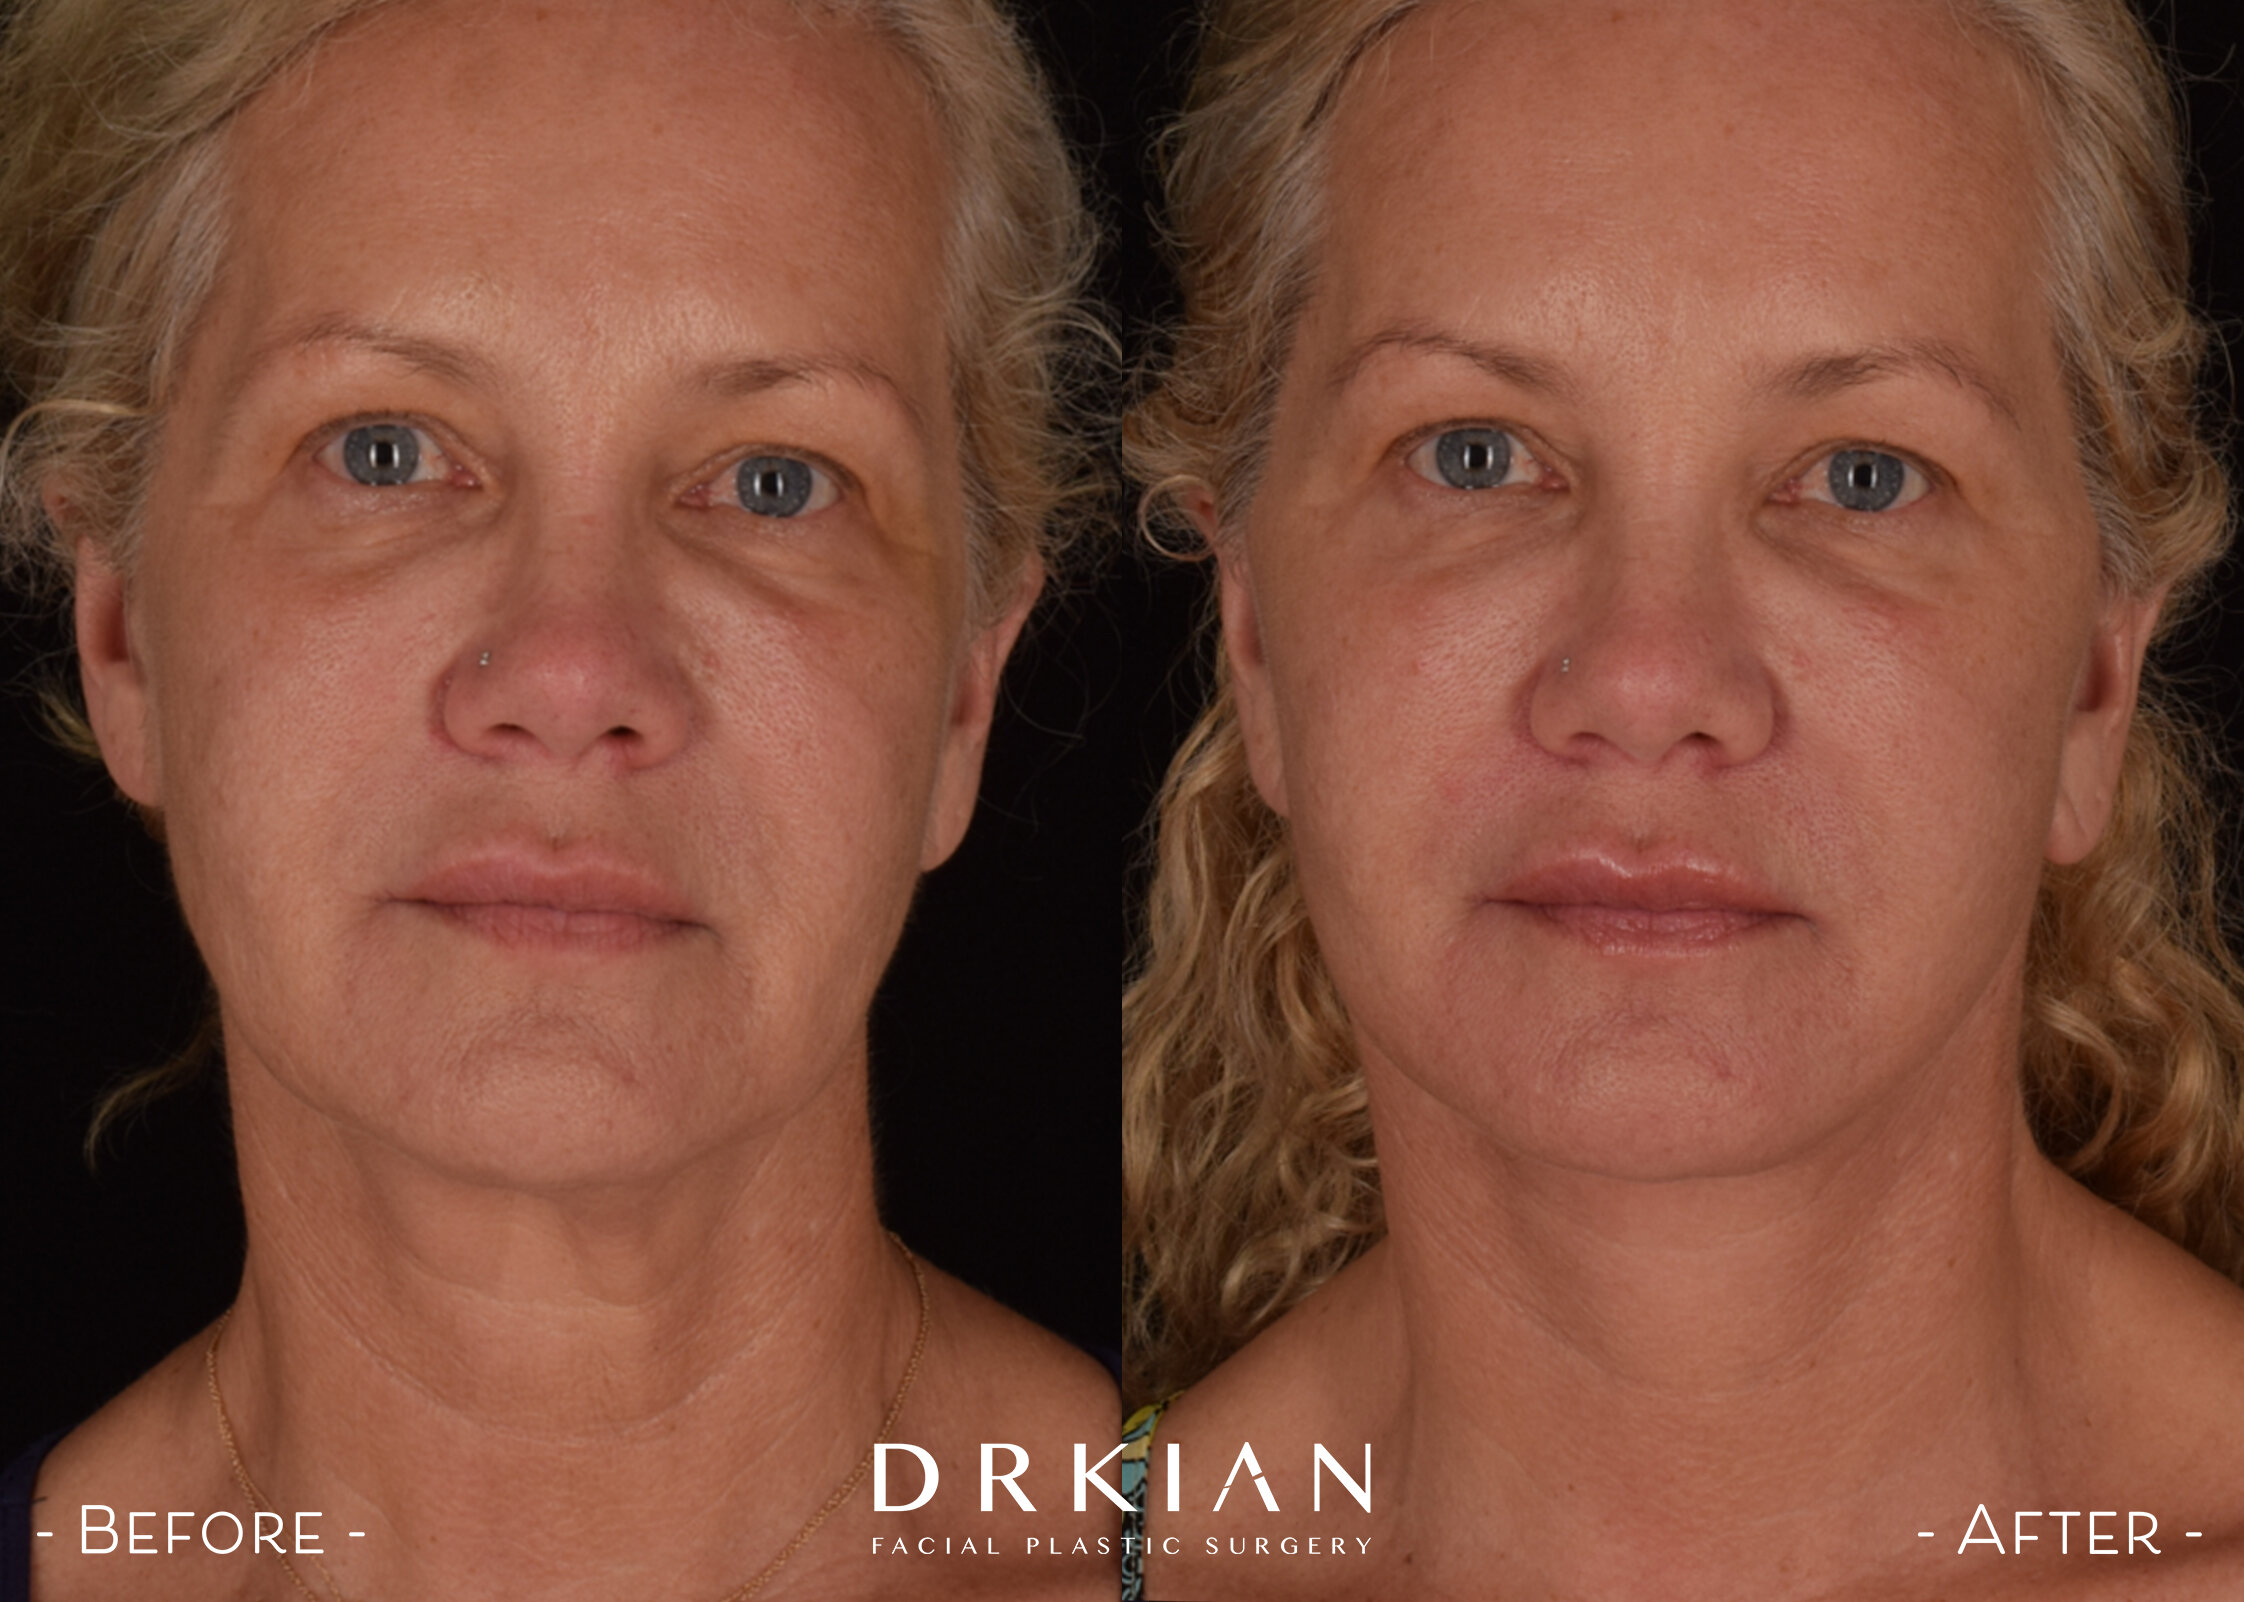
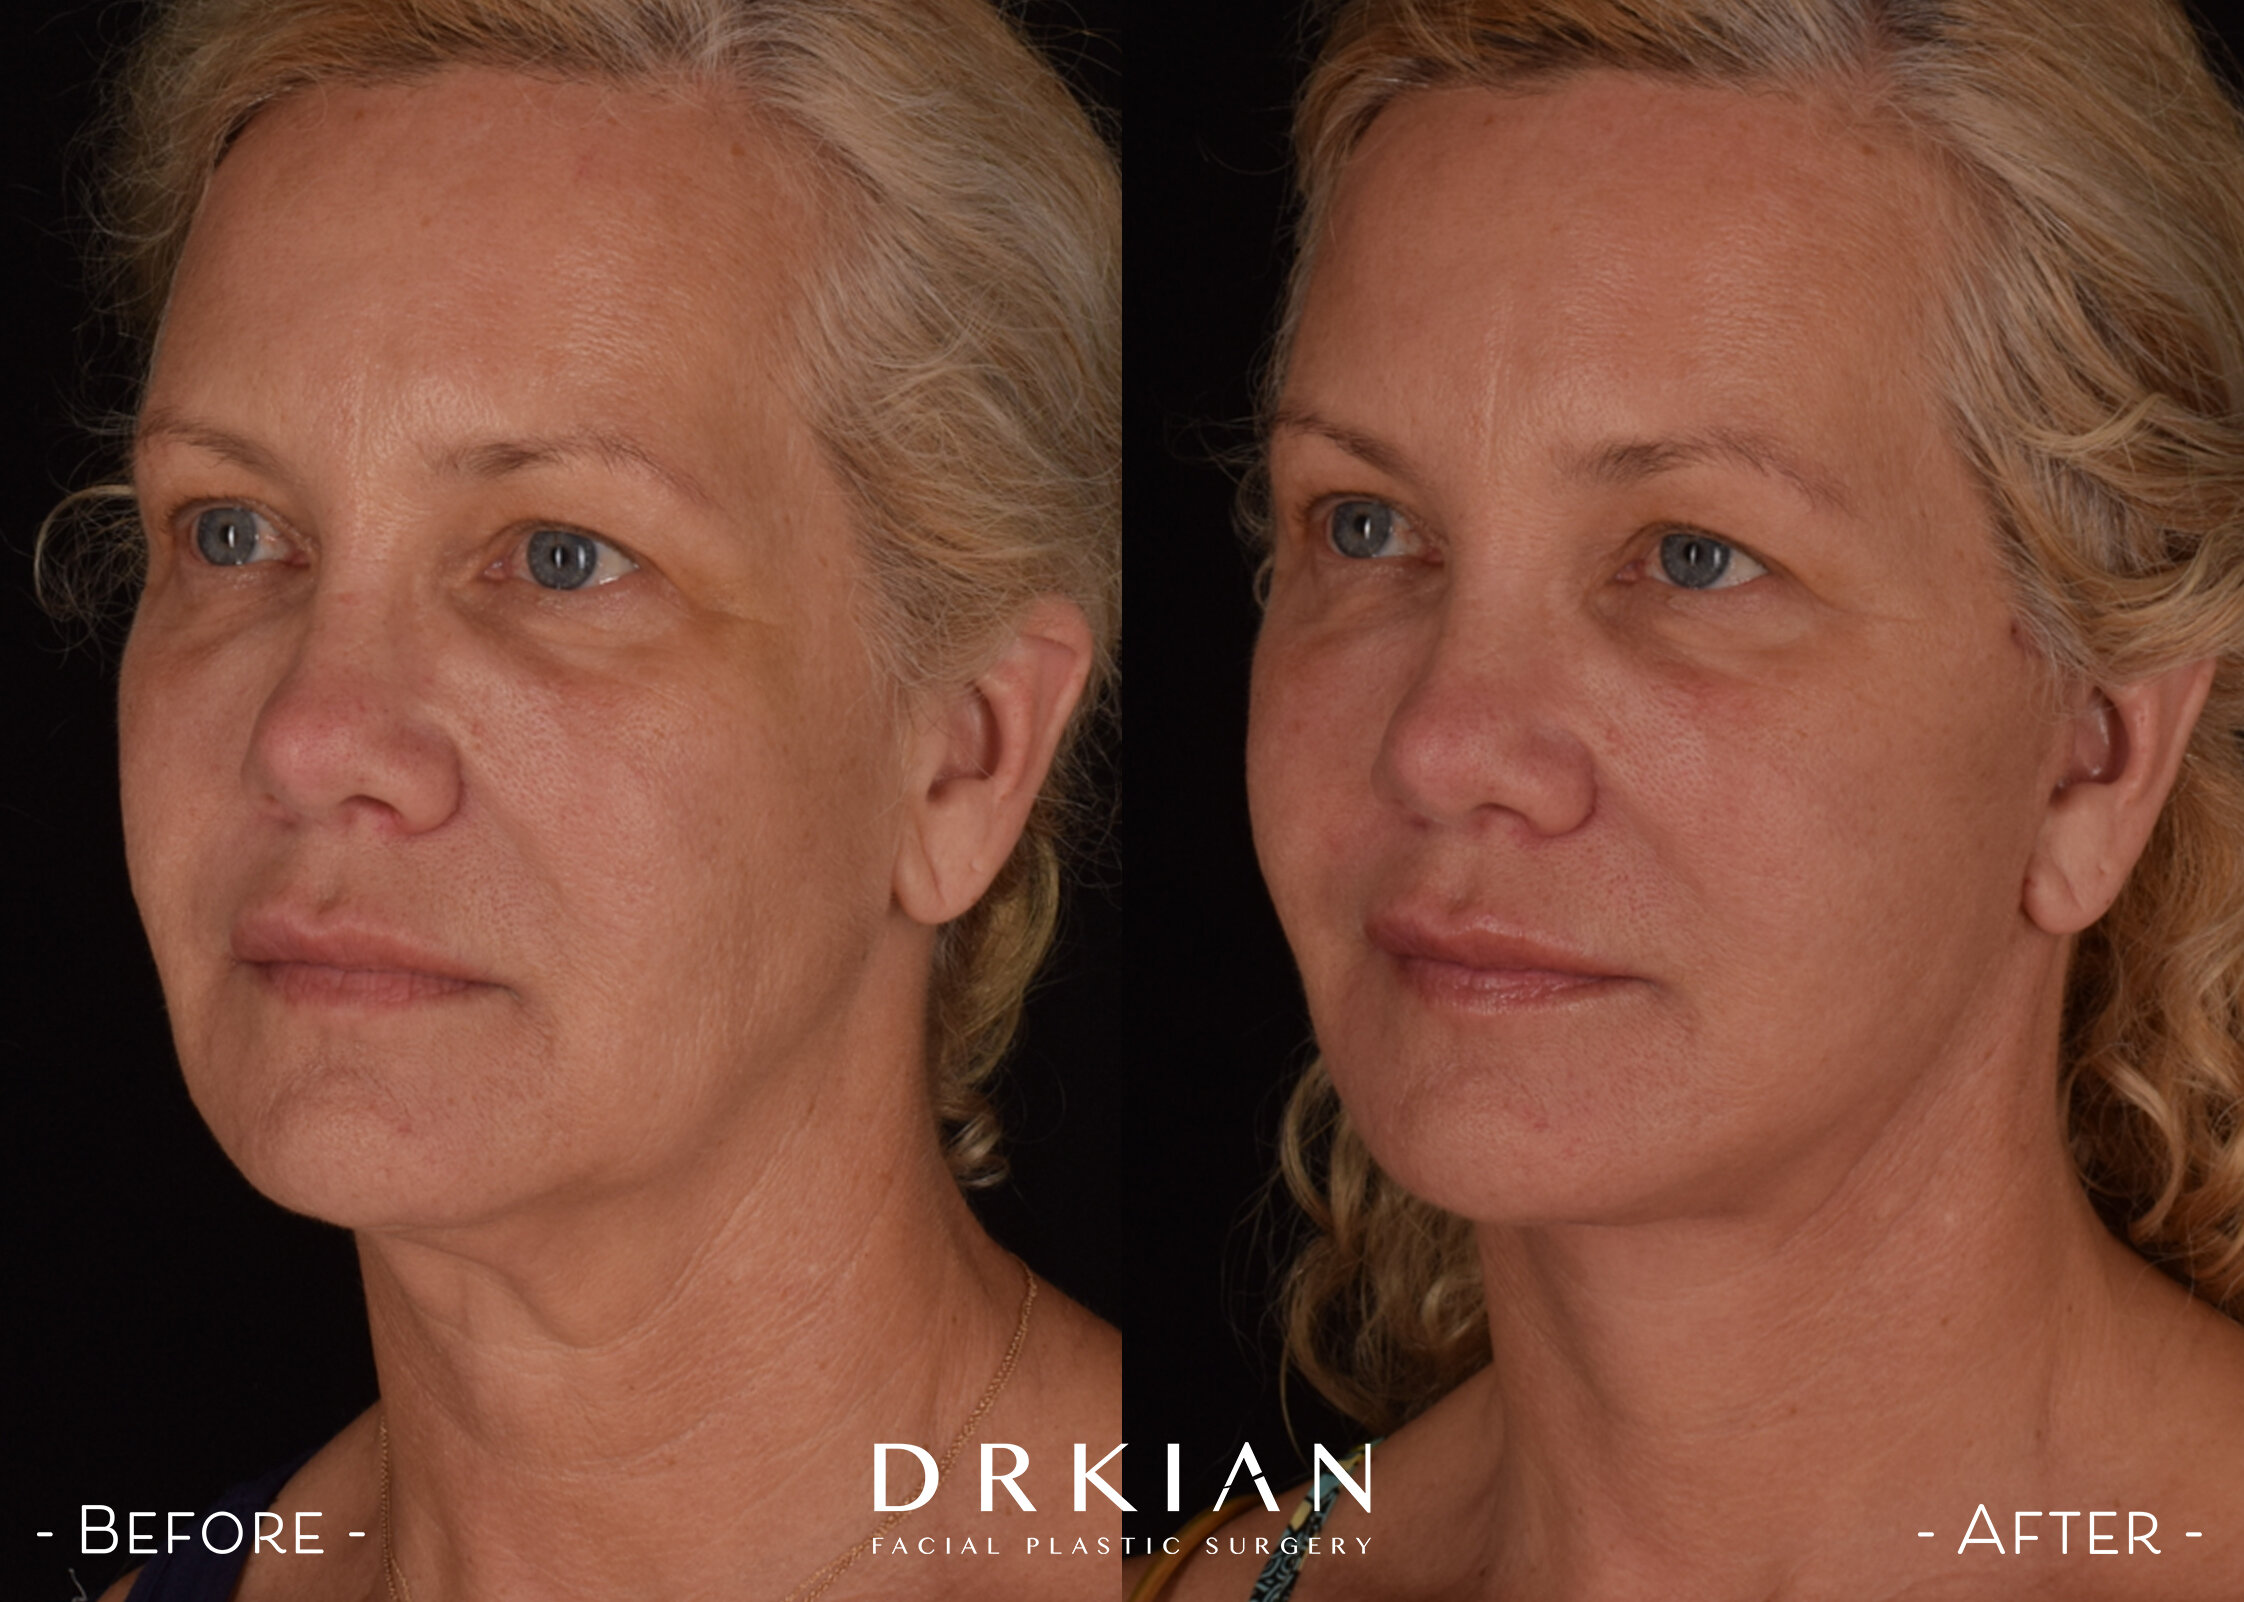
Micro Neck Lift with Fat Transfer to Chin & Cheeks Before & After 6 Weeks

Micro Neck Lift with Fat Transfer to Chin & Cheeks Before & After 6 Weeks

Micro Neck Lift with Fat Transfer to Chin & Cheeks Before & After 6 Weeks

Micro Neck Lift with Fat Transfer to Chin & Cheeks Before & After 6 Weeks

Micro Neck Lift with Fat Transfer to Chin & Cheeks Before & After 6 Weeks

Micro Neck Lift with Fat Transfer to Chin & Cheeks Before & After 6 Weeks
Micro Neck Lift with Fat Transfer to Chin & Cheeks Before & After 6 Weeks

Micro Neck Lift with Fat Transfer to Chin & Cheeks Before & After 6 Weeks

Micro Neck Lift with Fat Transfer to Chin & Cheeks Before & After 6 Weeks

Micro Neck Lift and Upper Blepharoplasty with Halo and BroadBand Light™ Therapy Before & After 2 Months

Micro Neck Lift and Upper Blepharoplasty with Halo and BroadBand Light™ Therapy Before & After 2 Months

Micro Neck Lift and Upper Blepharoplasty with Halo and BroadBand Light™ Therapy Before & After 2 Months
Micro Neck Lift and Upper Blepharoplasty with Halo and BroadBand Light™ Therapy Before & After 2 Months

Micro Neck Lift and Upper Blepharoplasty with Halo and BroadBand Light™ Therapy Before & After 2 Months

Micro Neck Lift with Perioral Fractora Before & After 5 Weeks
Micro Neck Lift with Perioral Fractora Before & After 5 Weeks

Micro Neck Lift with Perioral Fractora Before & After 5 Weeks

Micro Neck Lift with Perioral Fractora Before & After 5 Weeks

Micro Neck Lift Before & After 3 Weeks
Micro Neck Lift Before & After 3 Weeks
Micro Neck Lift Before & After 3 Weeks
Micro Neck Lift Before & After 3 Weeks
Micro Neck Lift with Upper & Lower Blepharoplasty Before & After
Micro Neck Lift with Upper & Lower Blepharoplasty Before & After
Micro Neck Lift with Upper & Lower Blepharoplasty Before & After
Micro Neck Lift with Upper & Lower Blepharoplasty Before & After


Mid-face Lift, Micro Neck Lift & Fat Transfer to Chin, Marionette Lines, Nasolabial Folds Before & After 3 Weeks

Mid-face Lift, Micro Neck Lift & Fat Transfer to Chin, Marionette Lines, Nasolabial Folds Before & After 3 Weeks
Mid-face Lift, Micro Neck Lift & Fat Transfer to Chin, Marionette Lines, Nasolabial Folds Before & After 3 Weeks

Mid-face Lift, Micro Neck Lift & Fat Transfer to Chin, Marionette Lines, Nasolabial Folds Before & After 3 Weeks

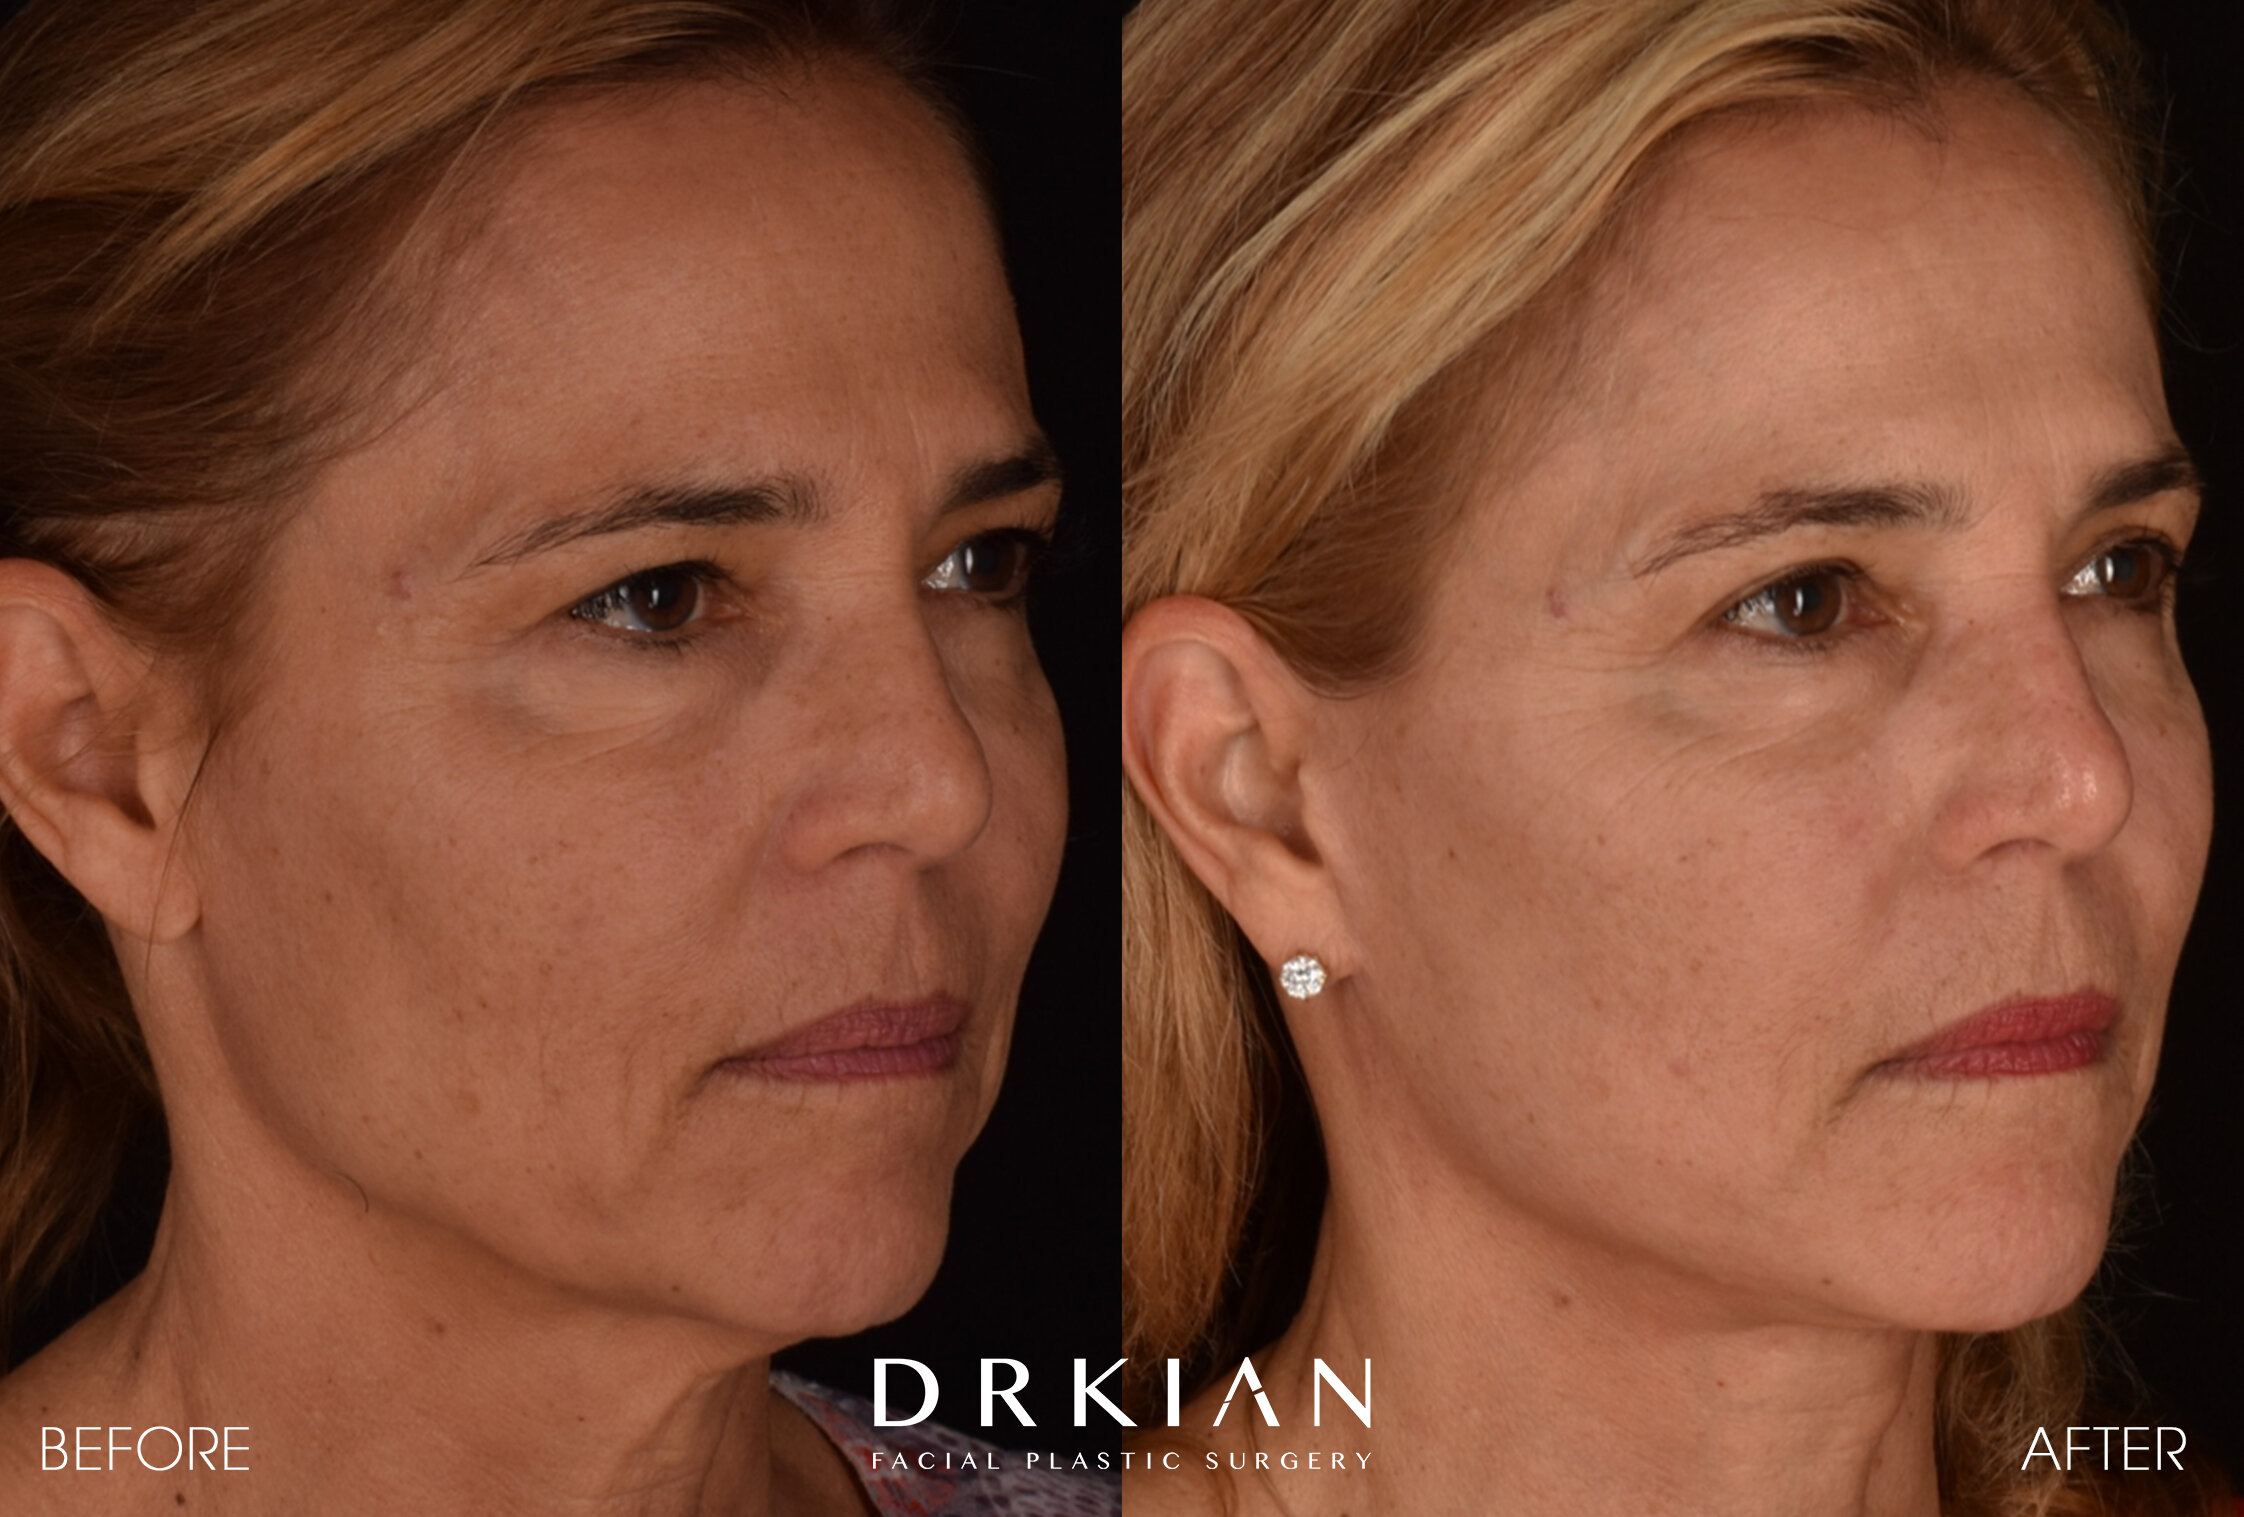
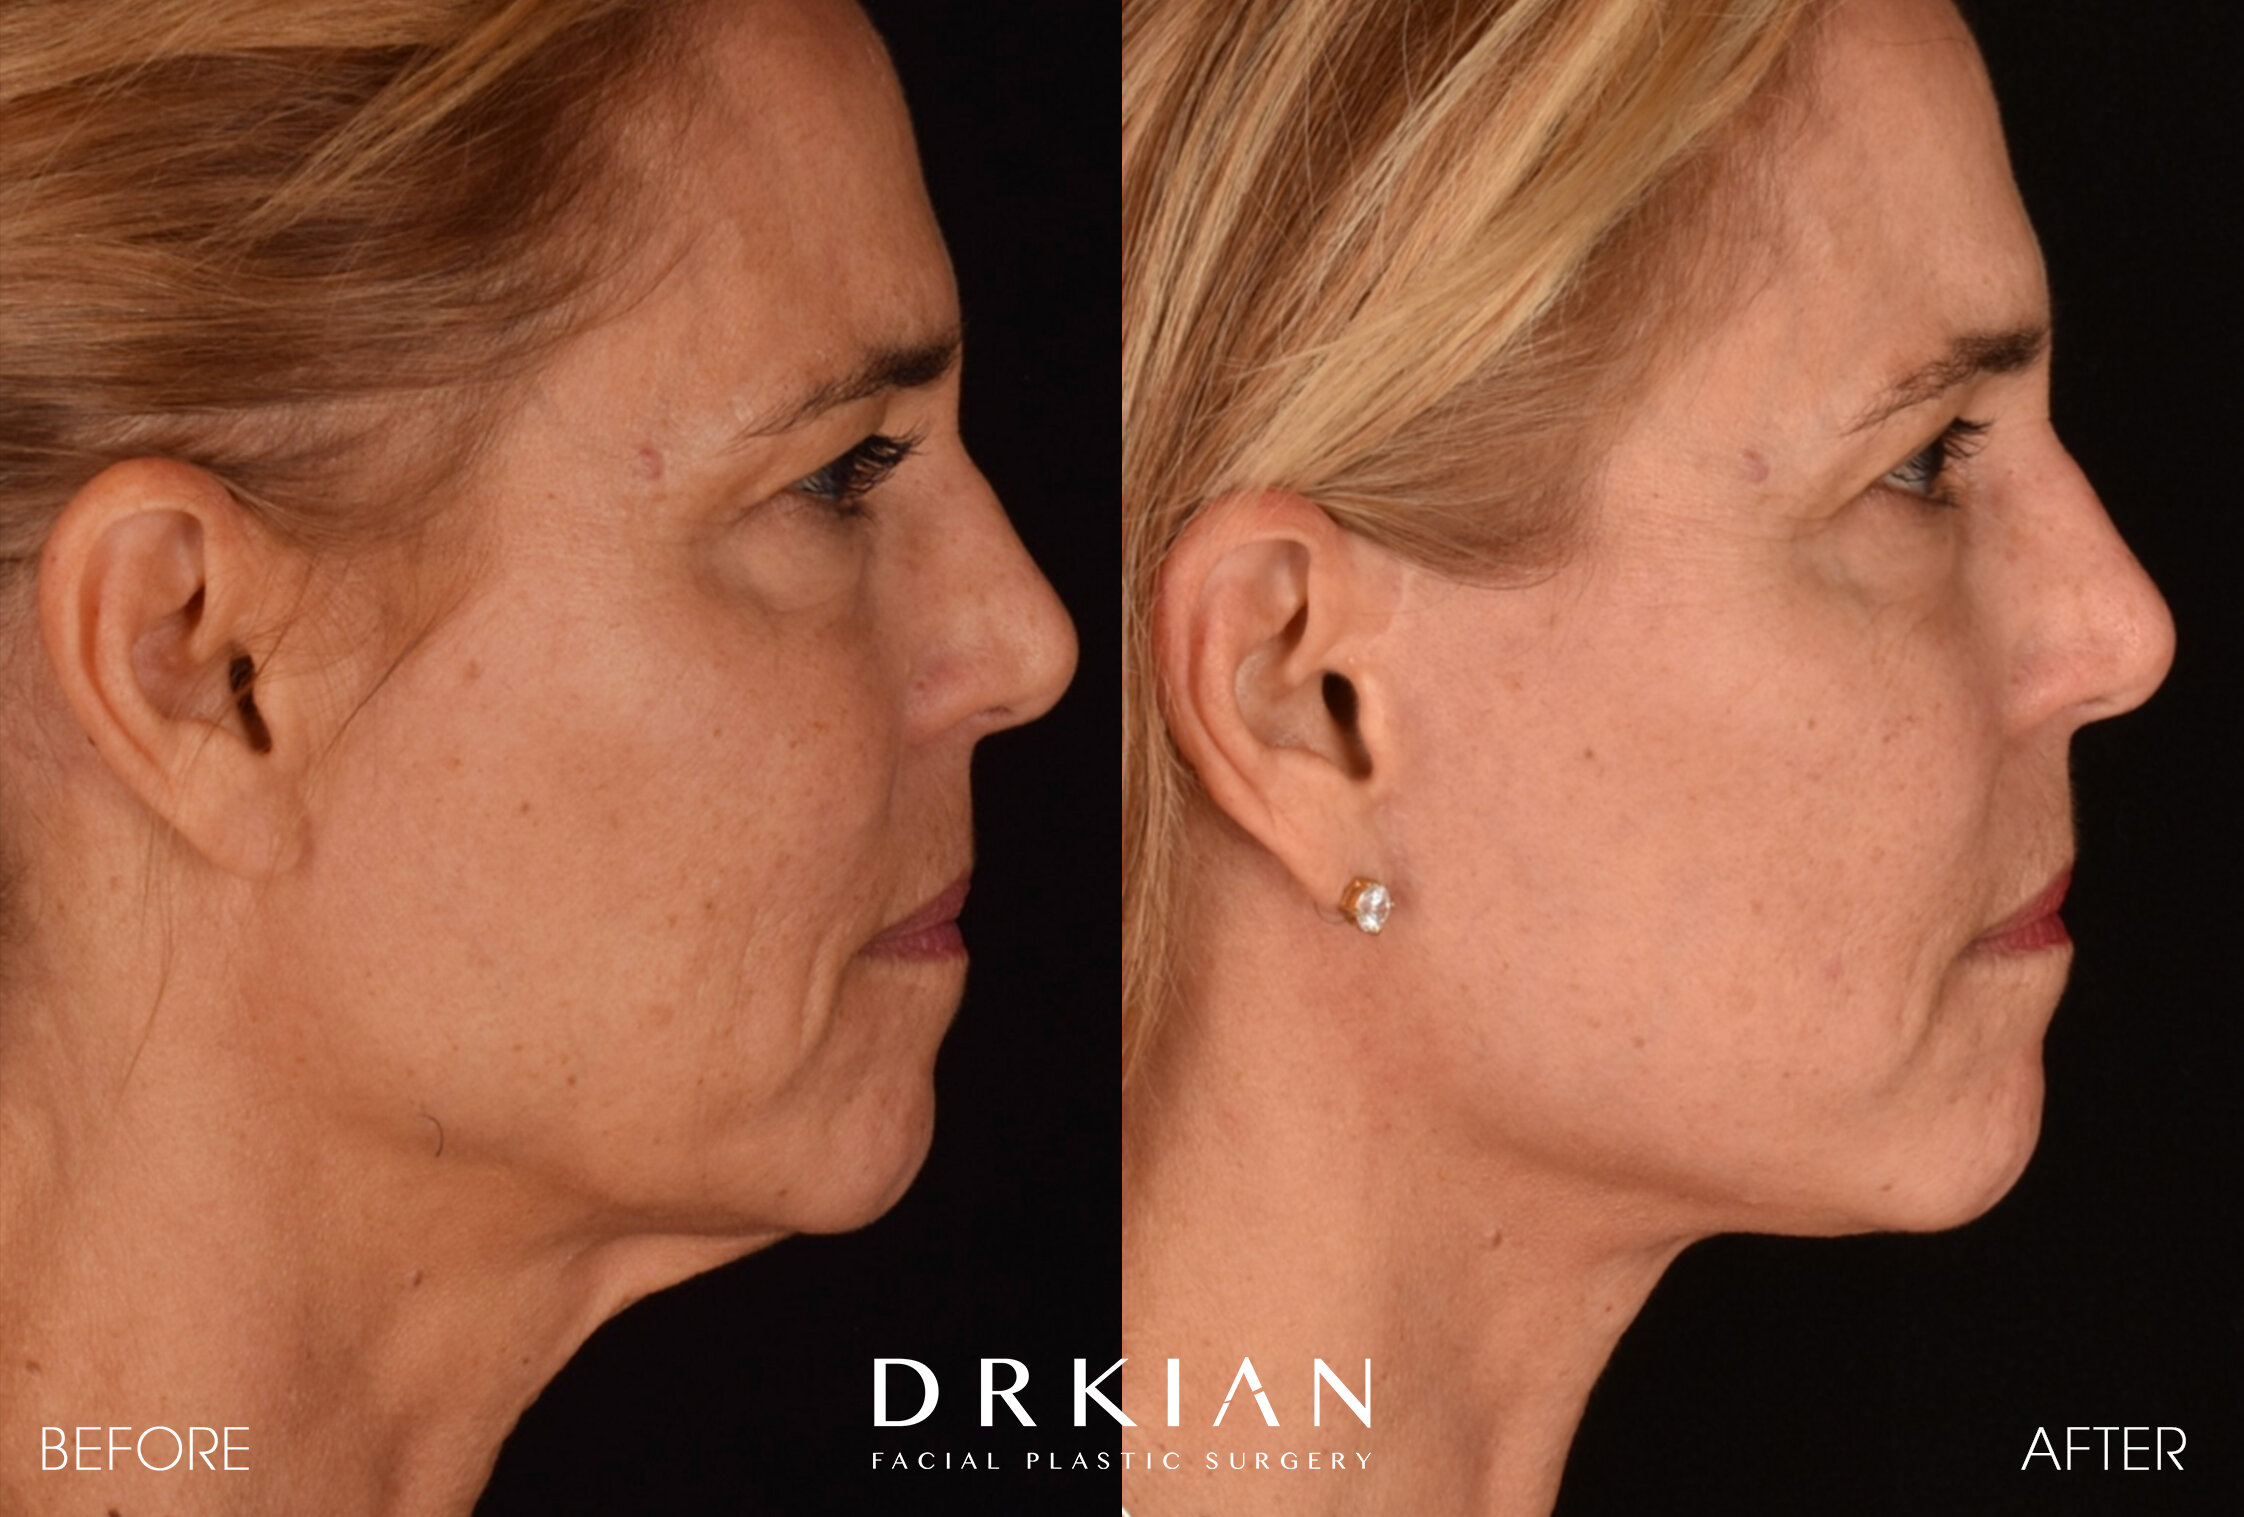
Micro Neck Lift Before & After 2 Months

Micro Neck Lift Before & After 2 Months

Micro Neck Lift Before & After 2 Months

Micro Neck Lift Before & After 2 Months
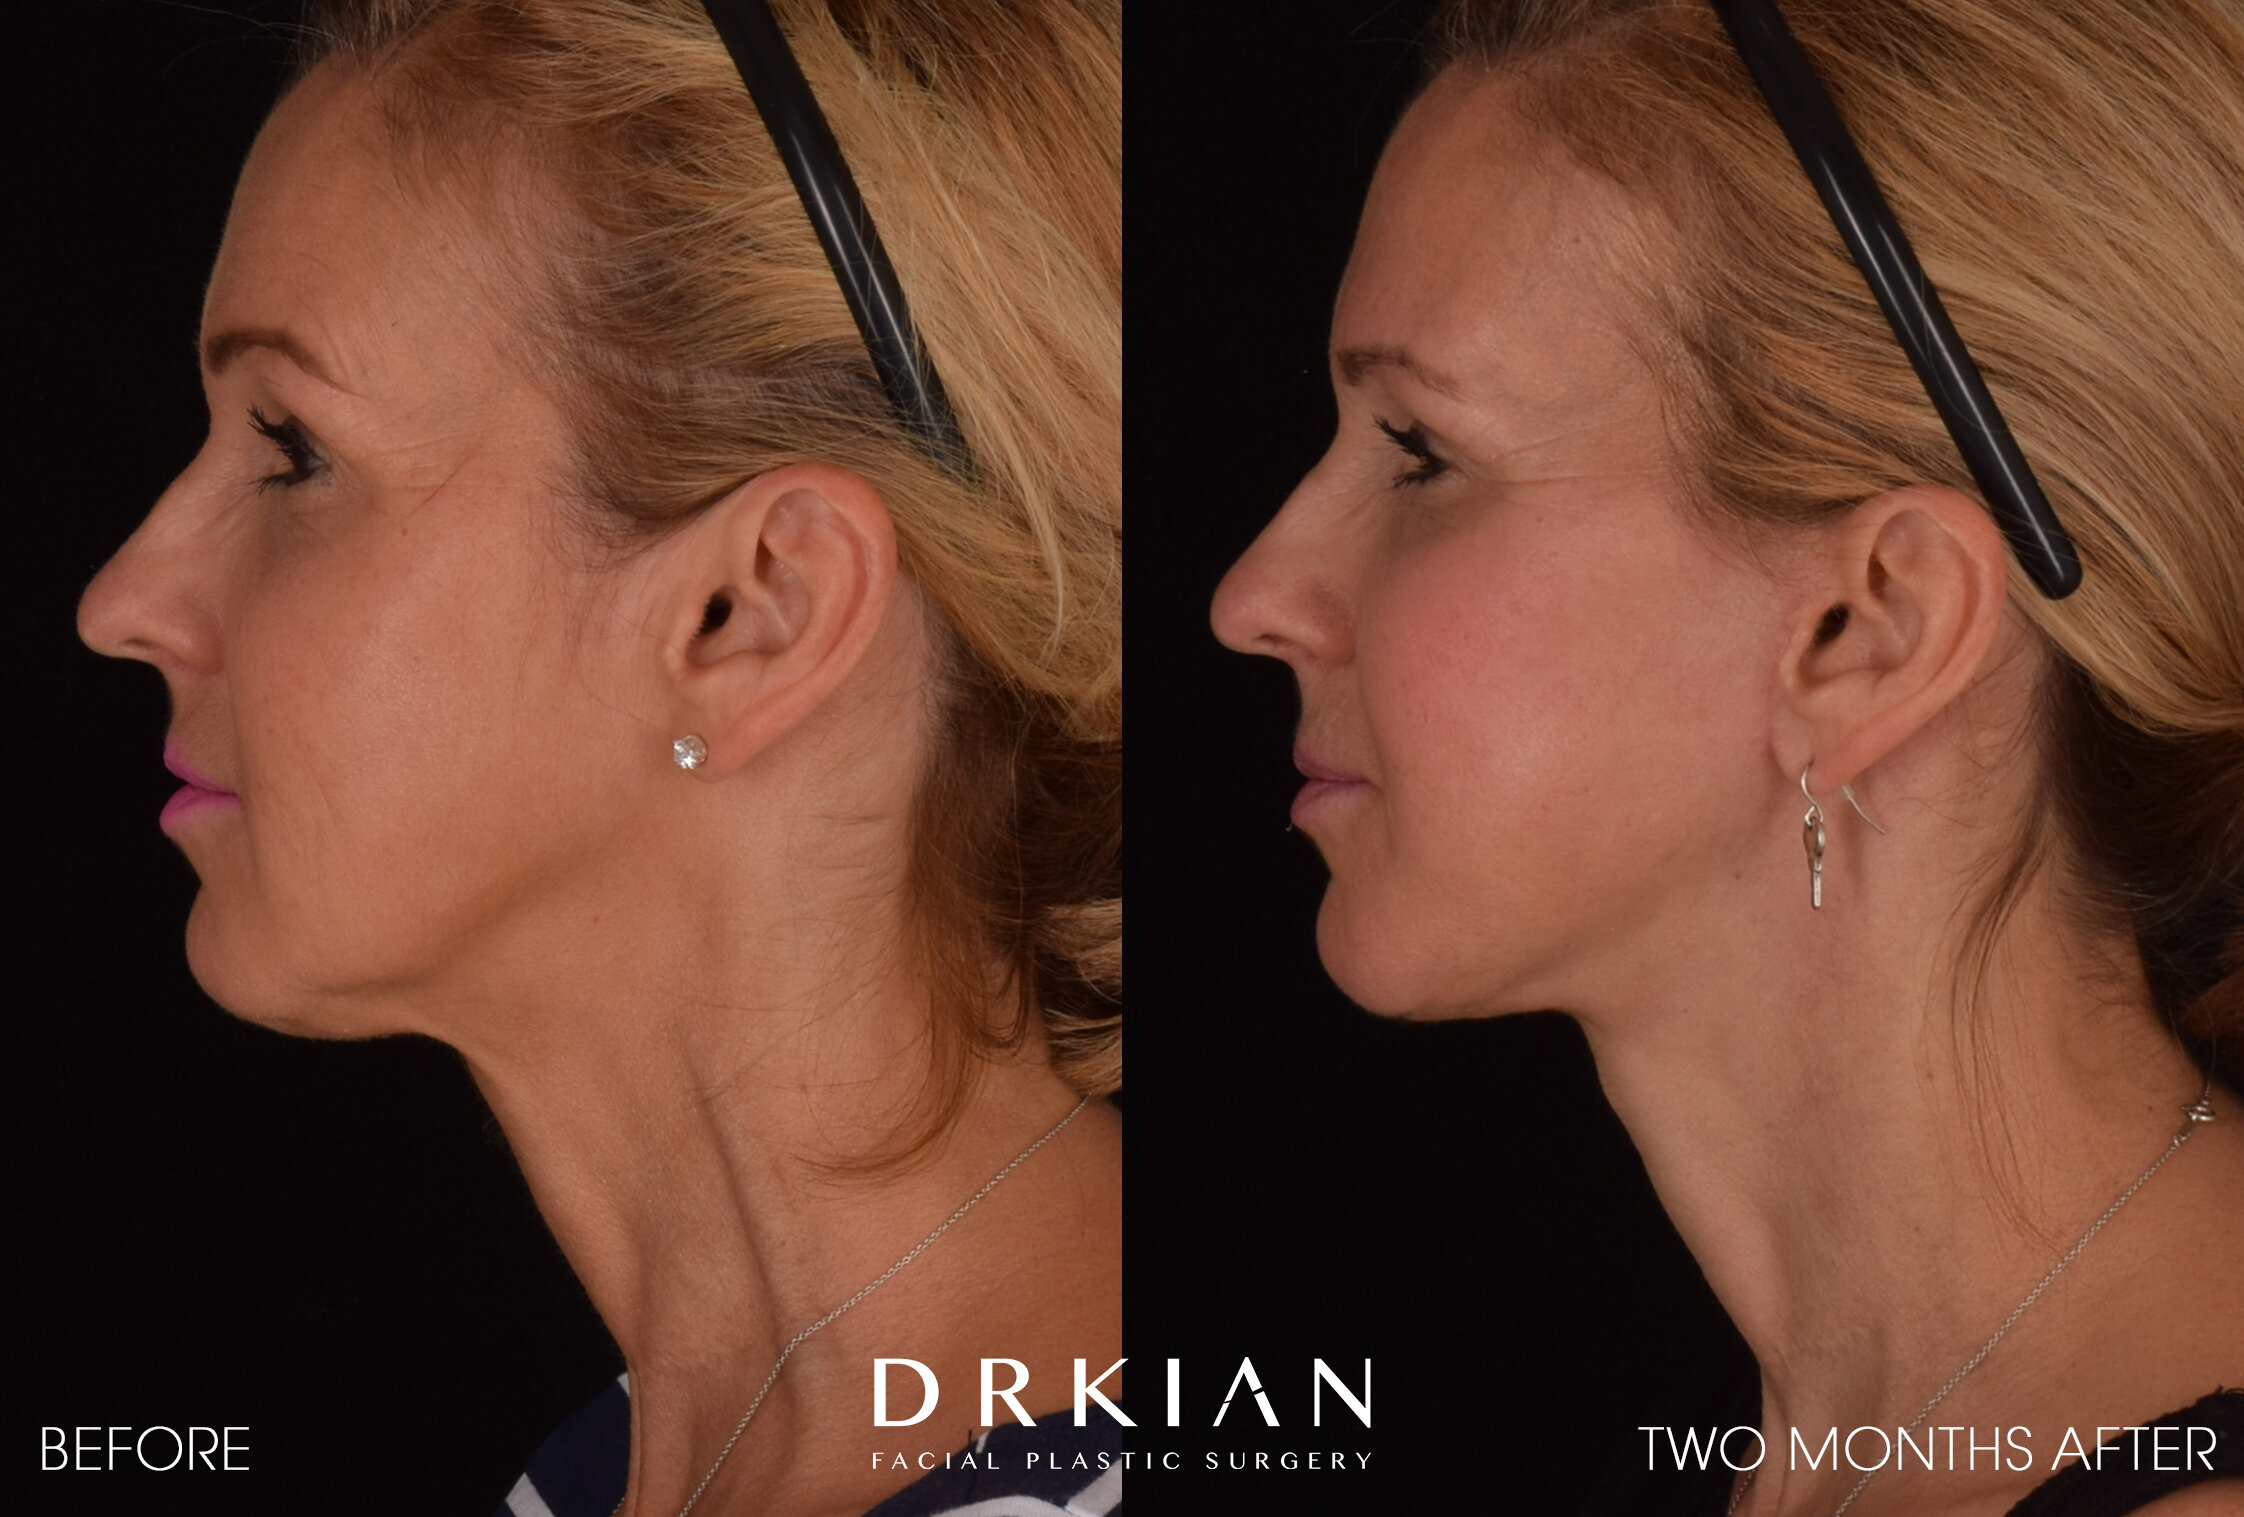
Micro Neck Lift Before & After 2 Months