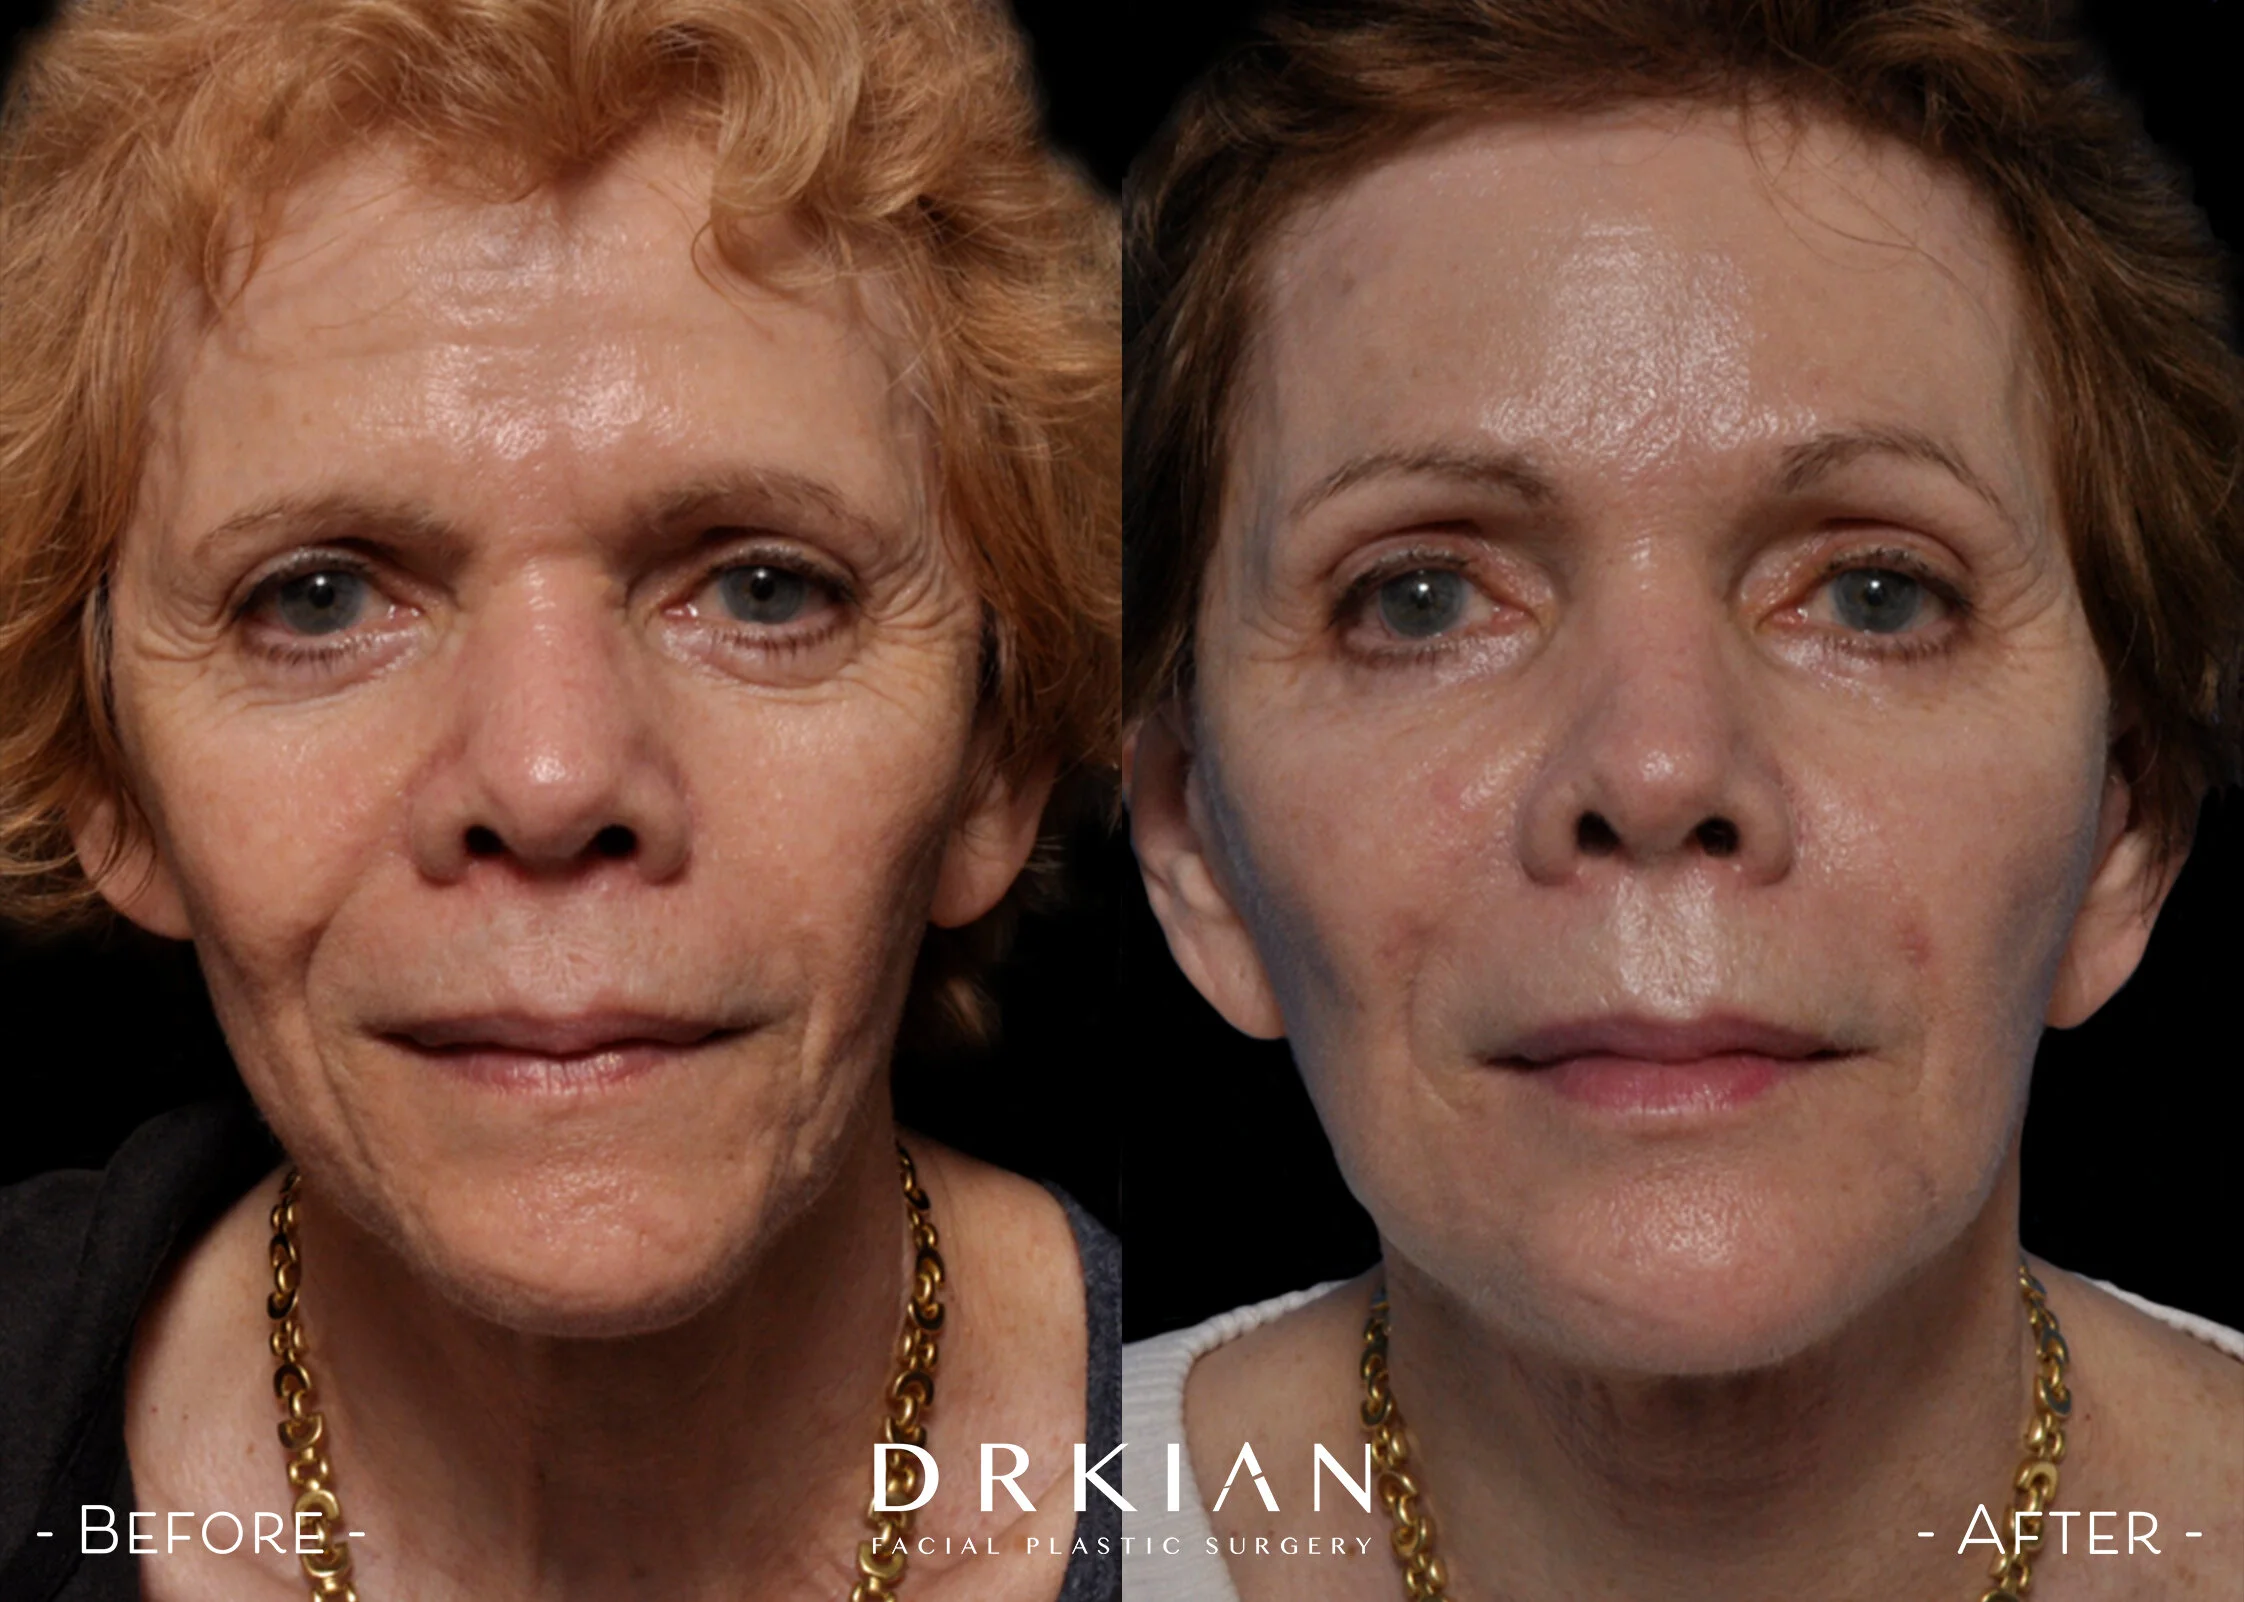
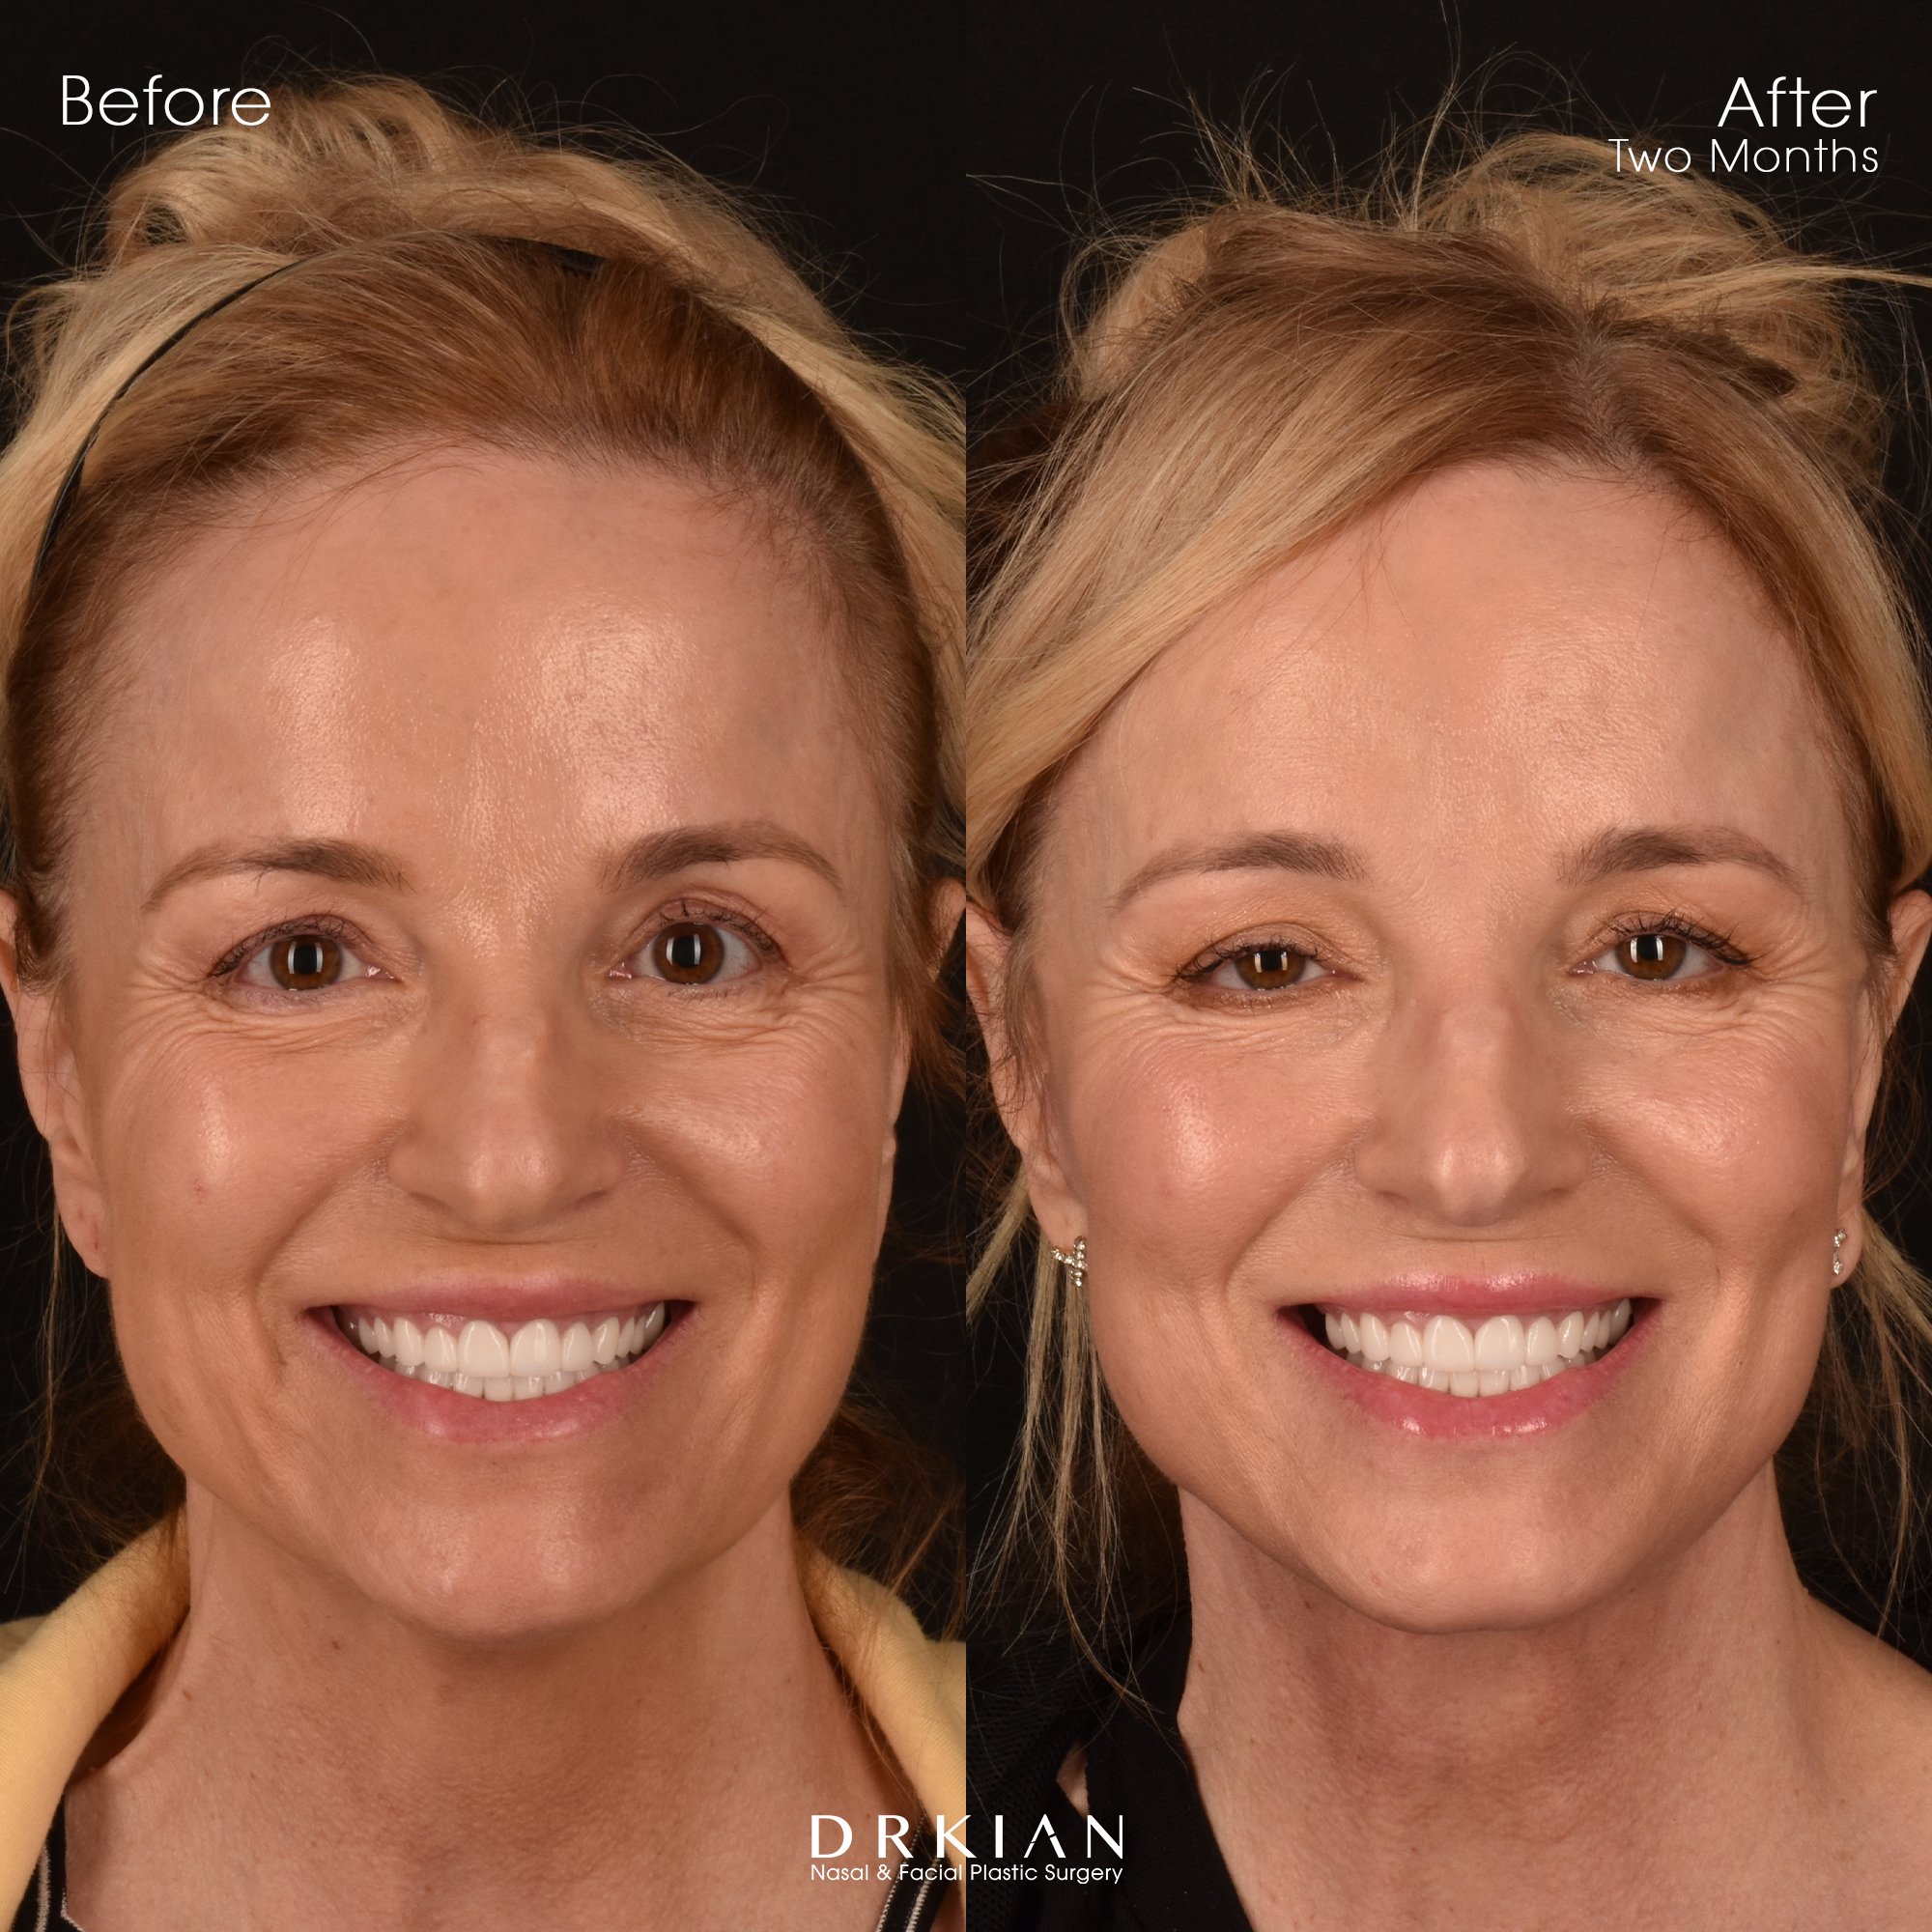
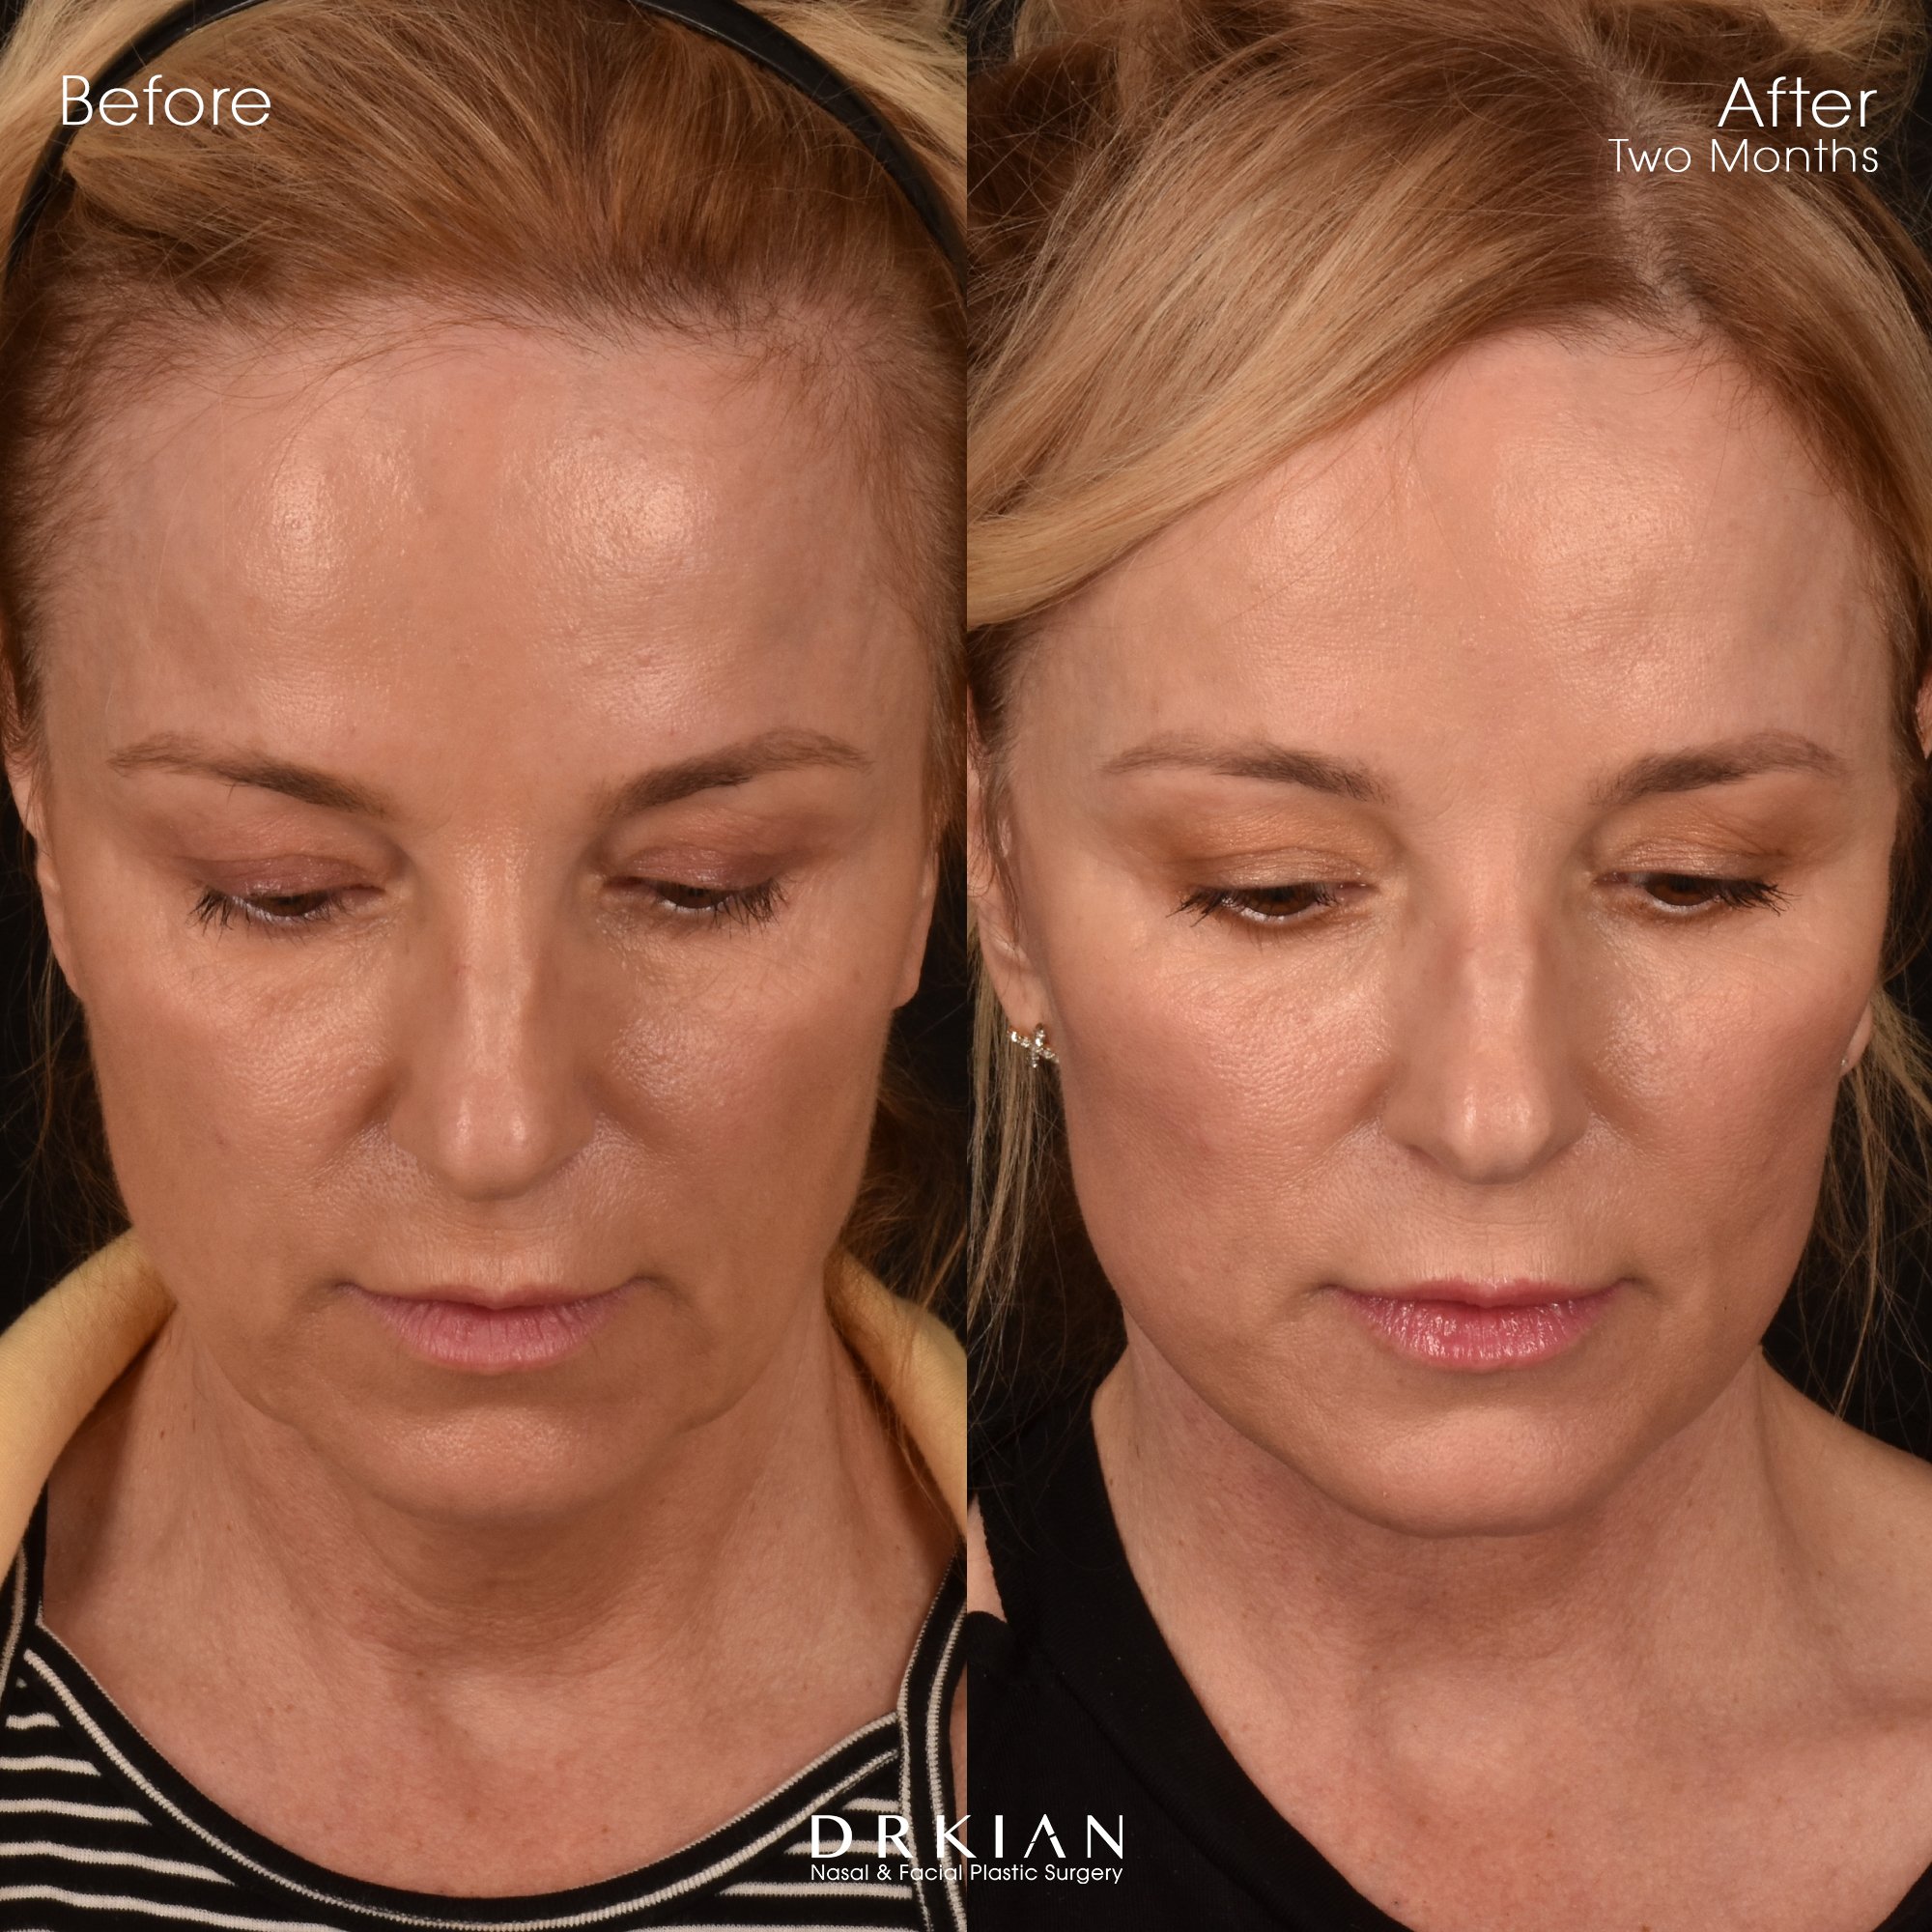
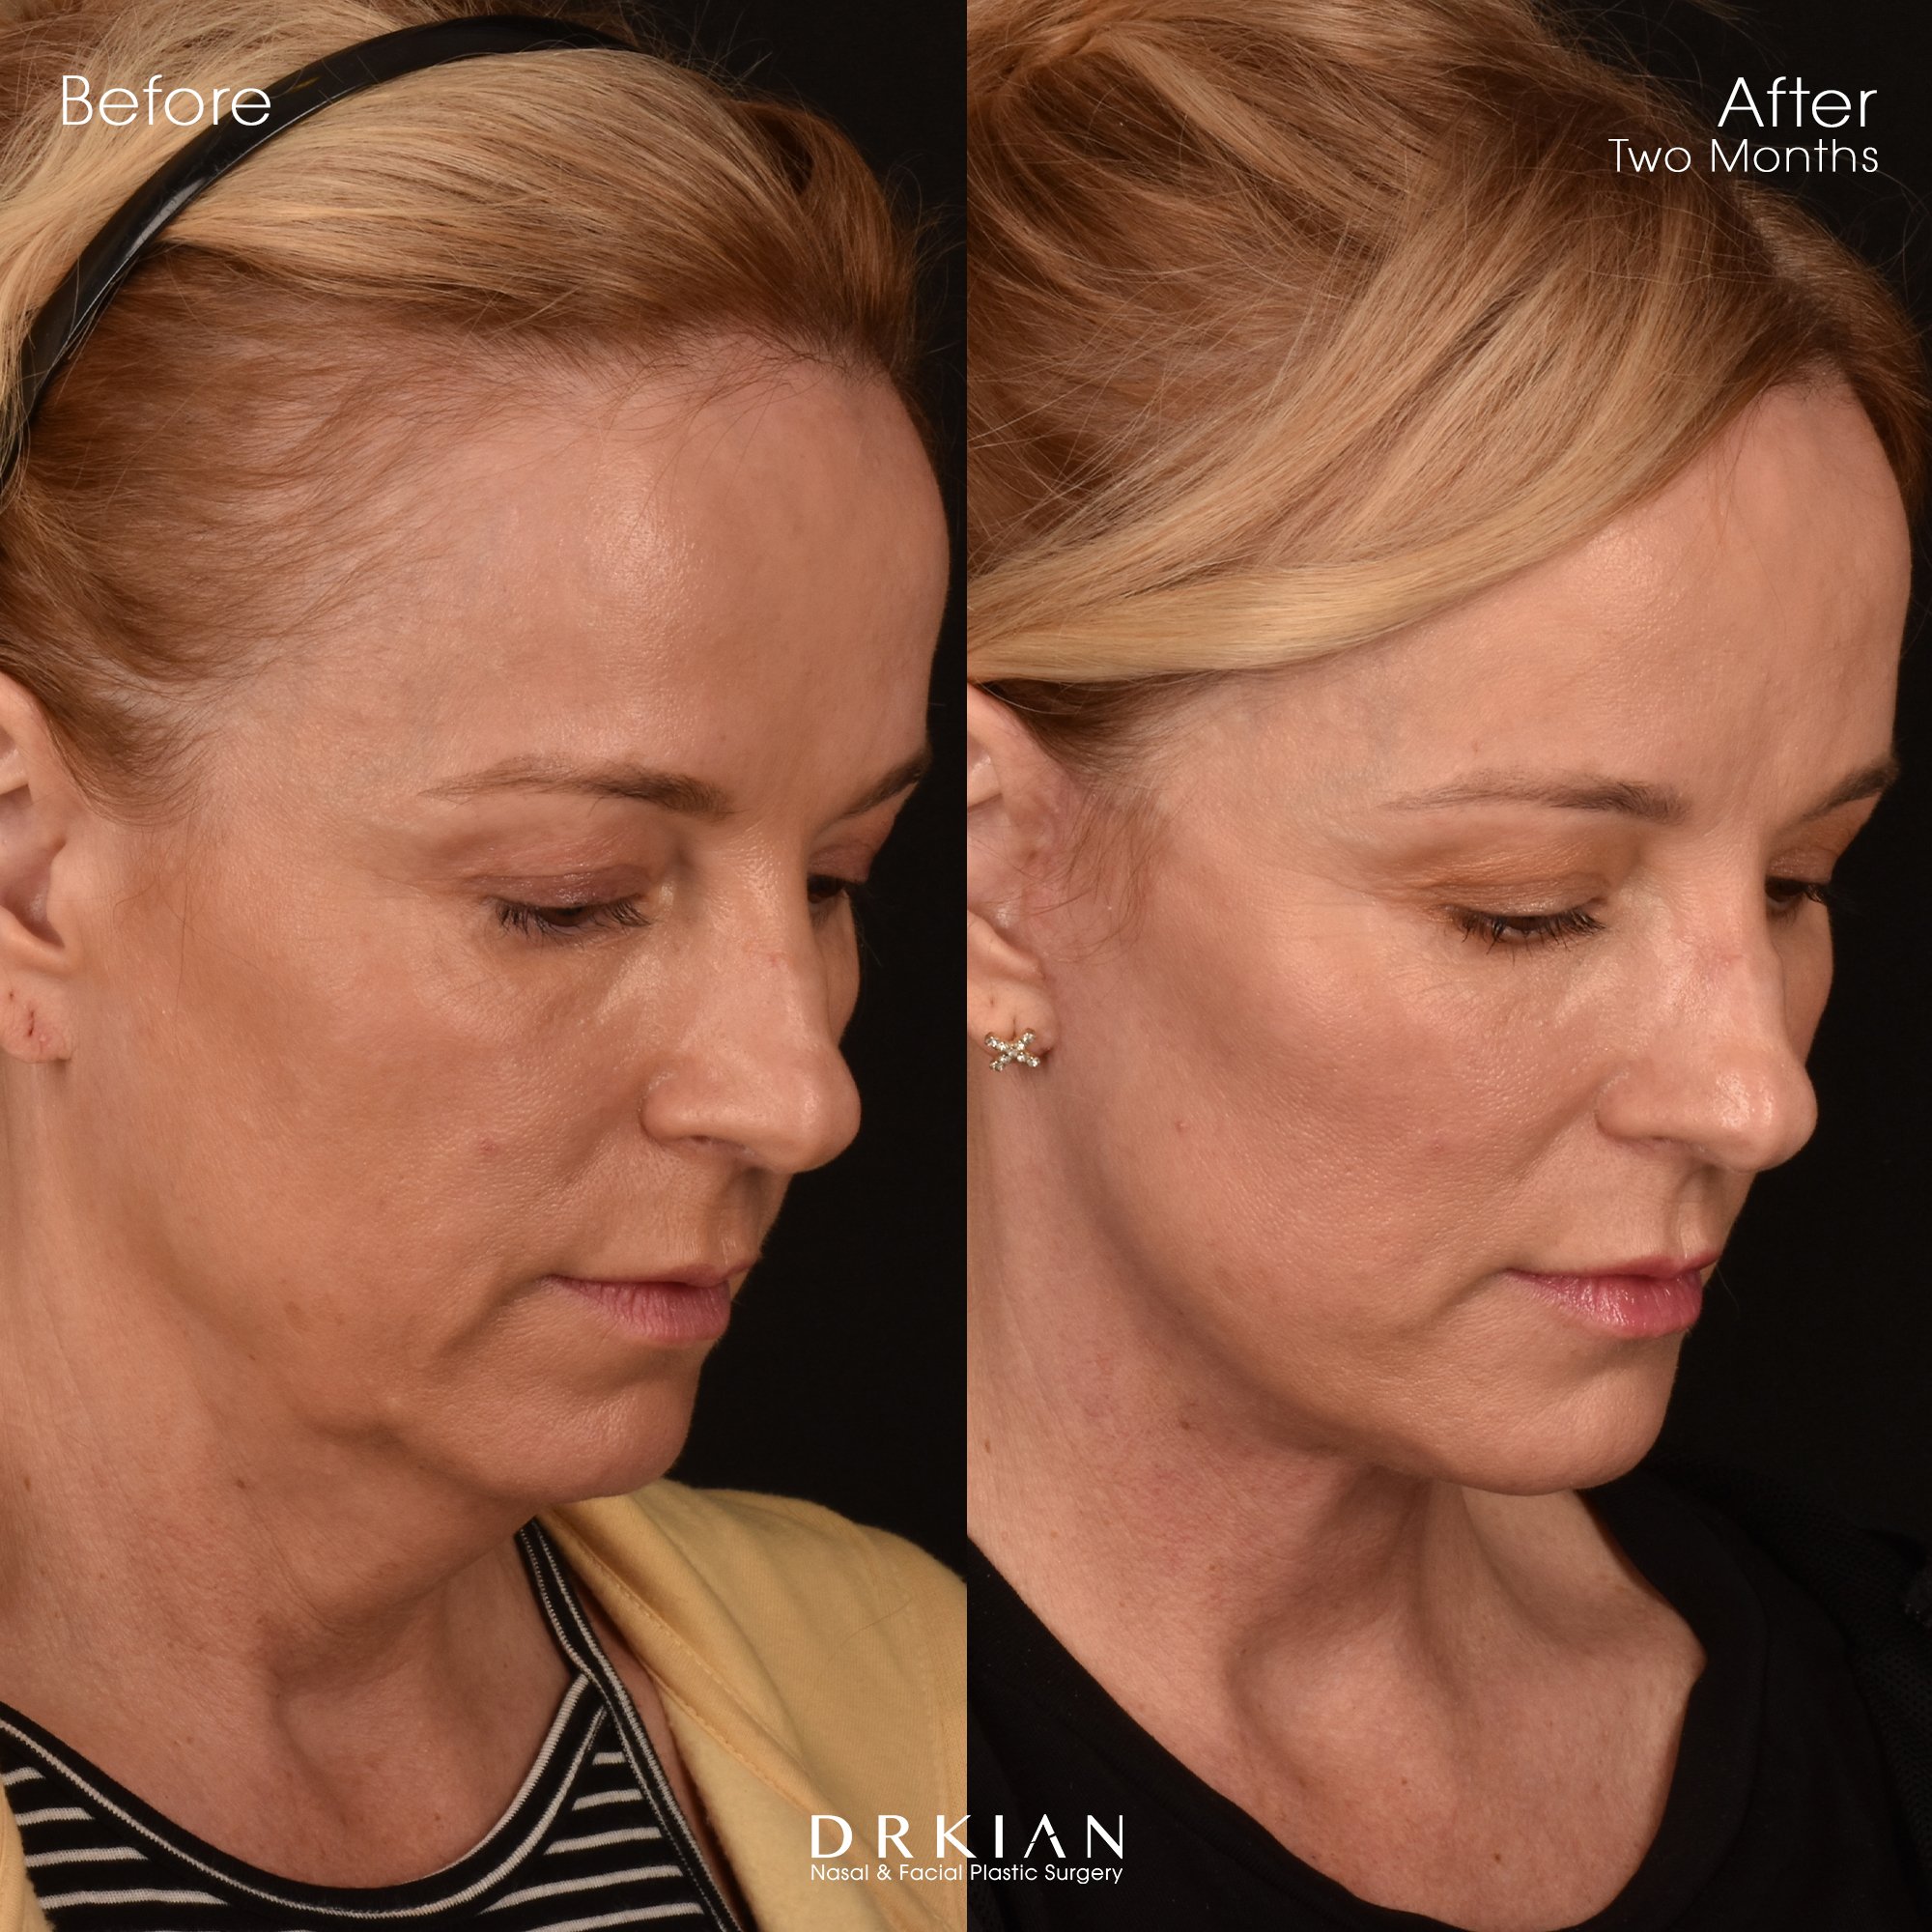
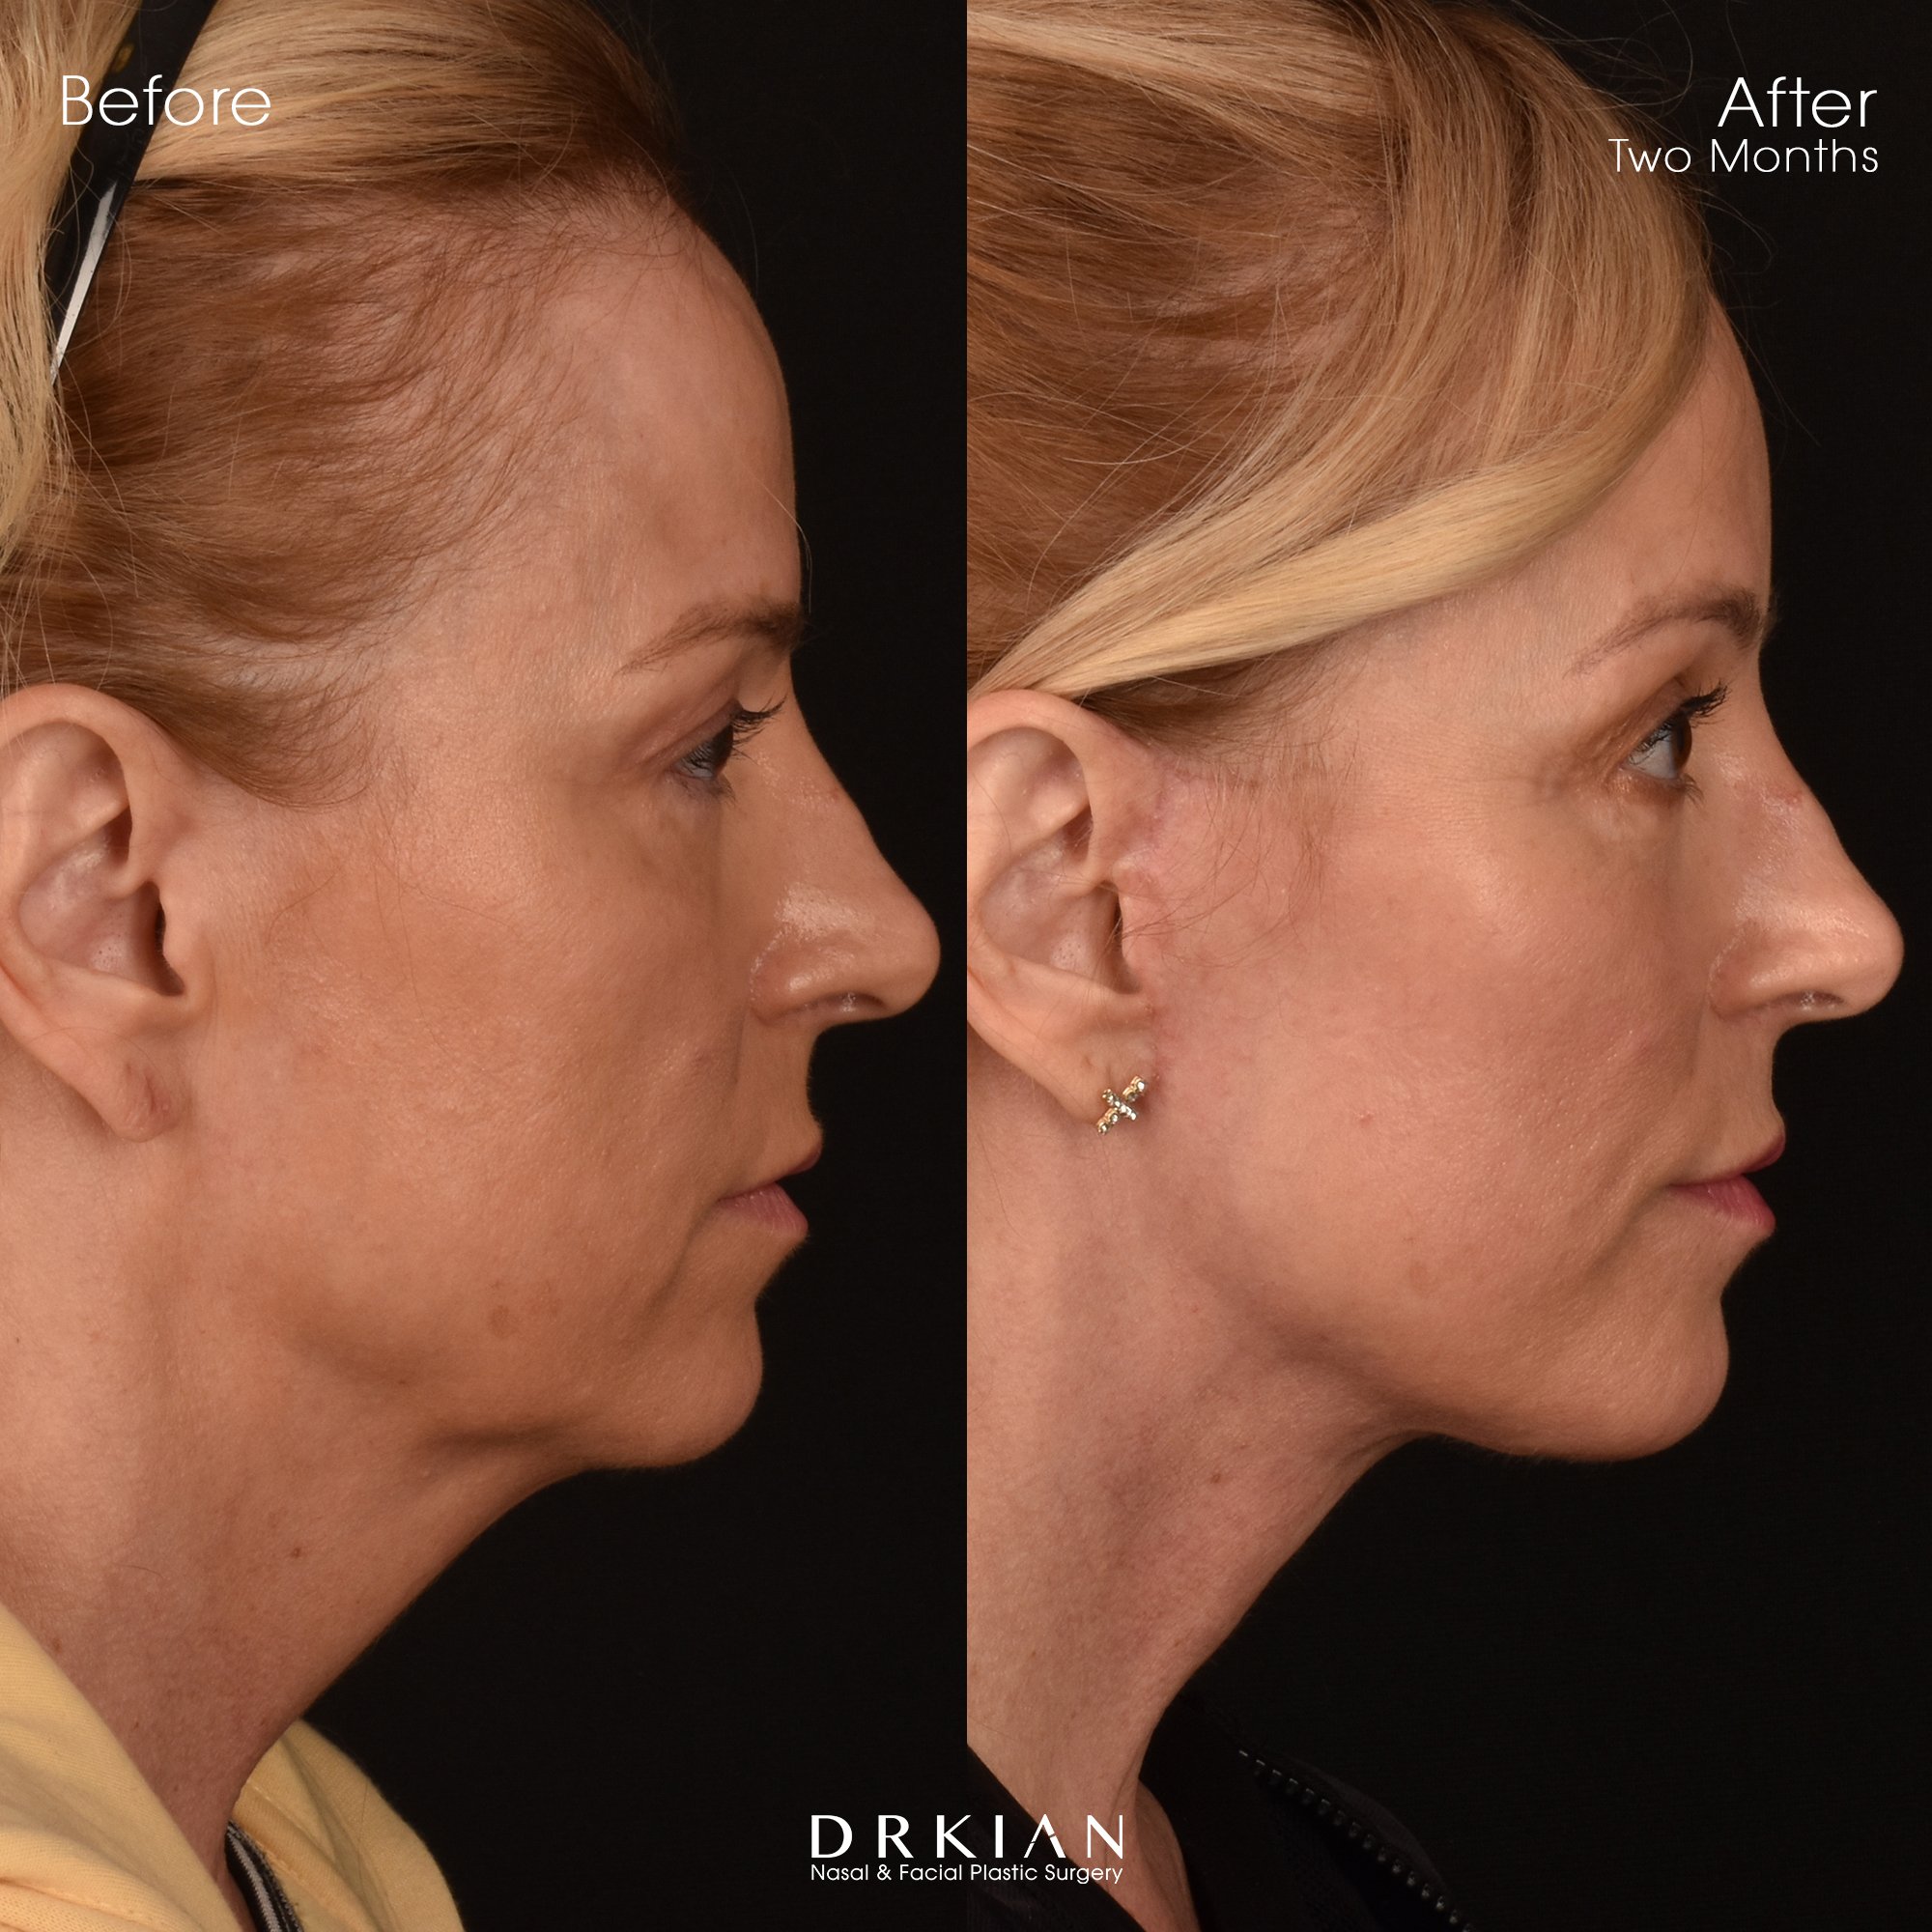
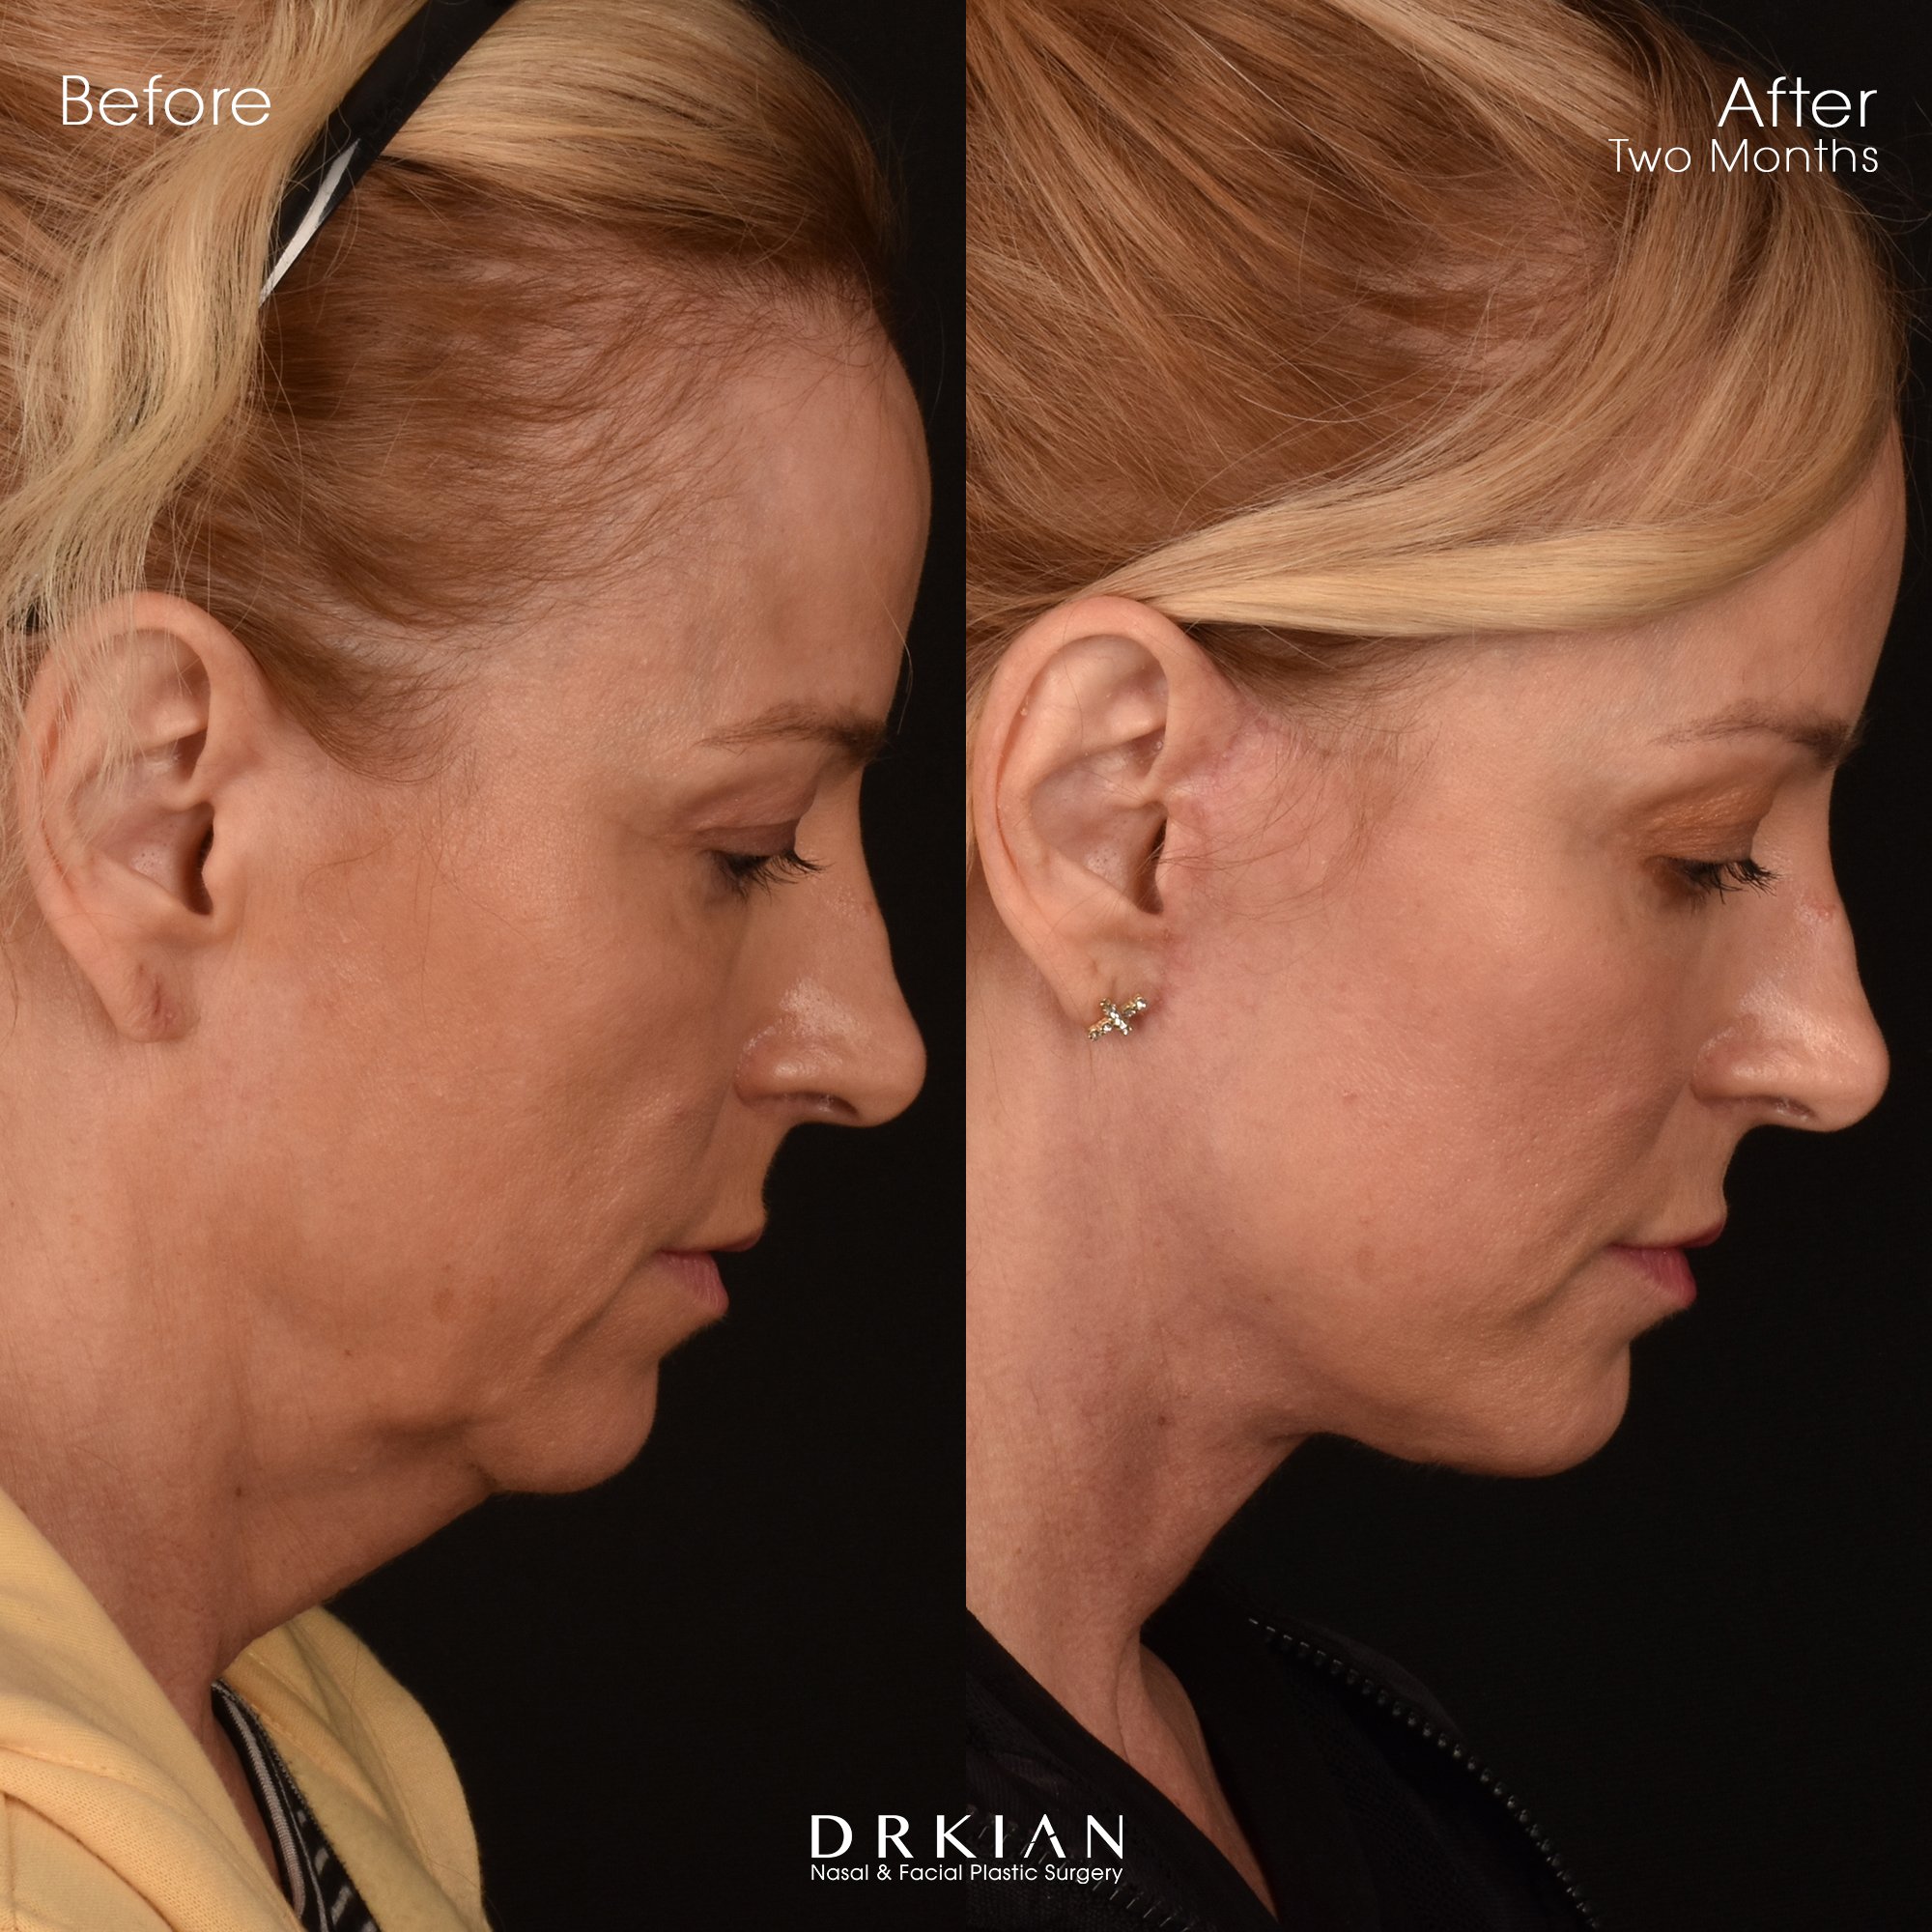
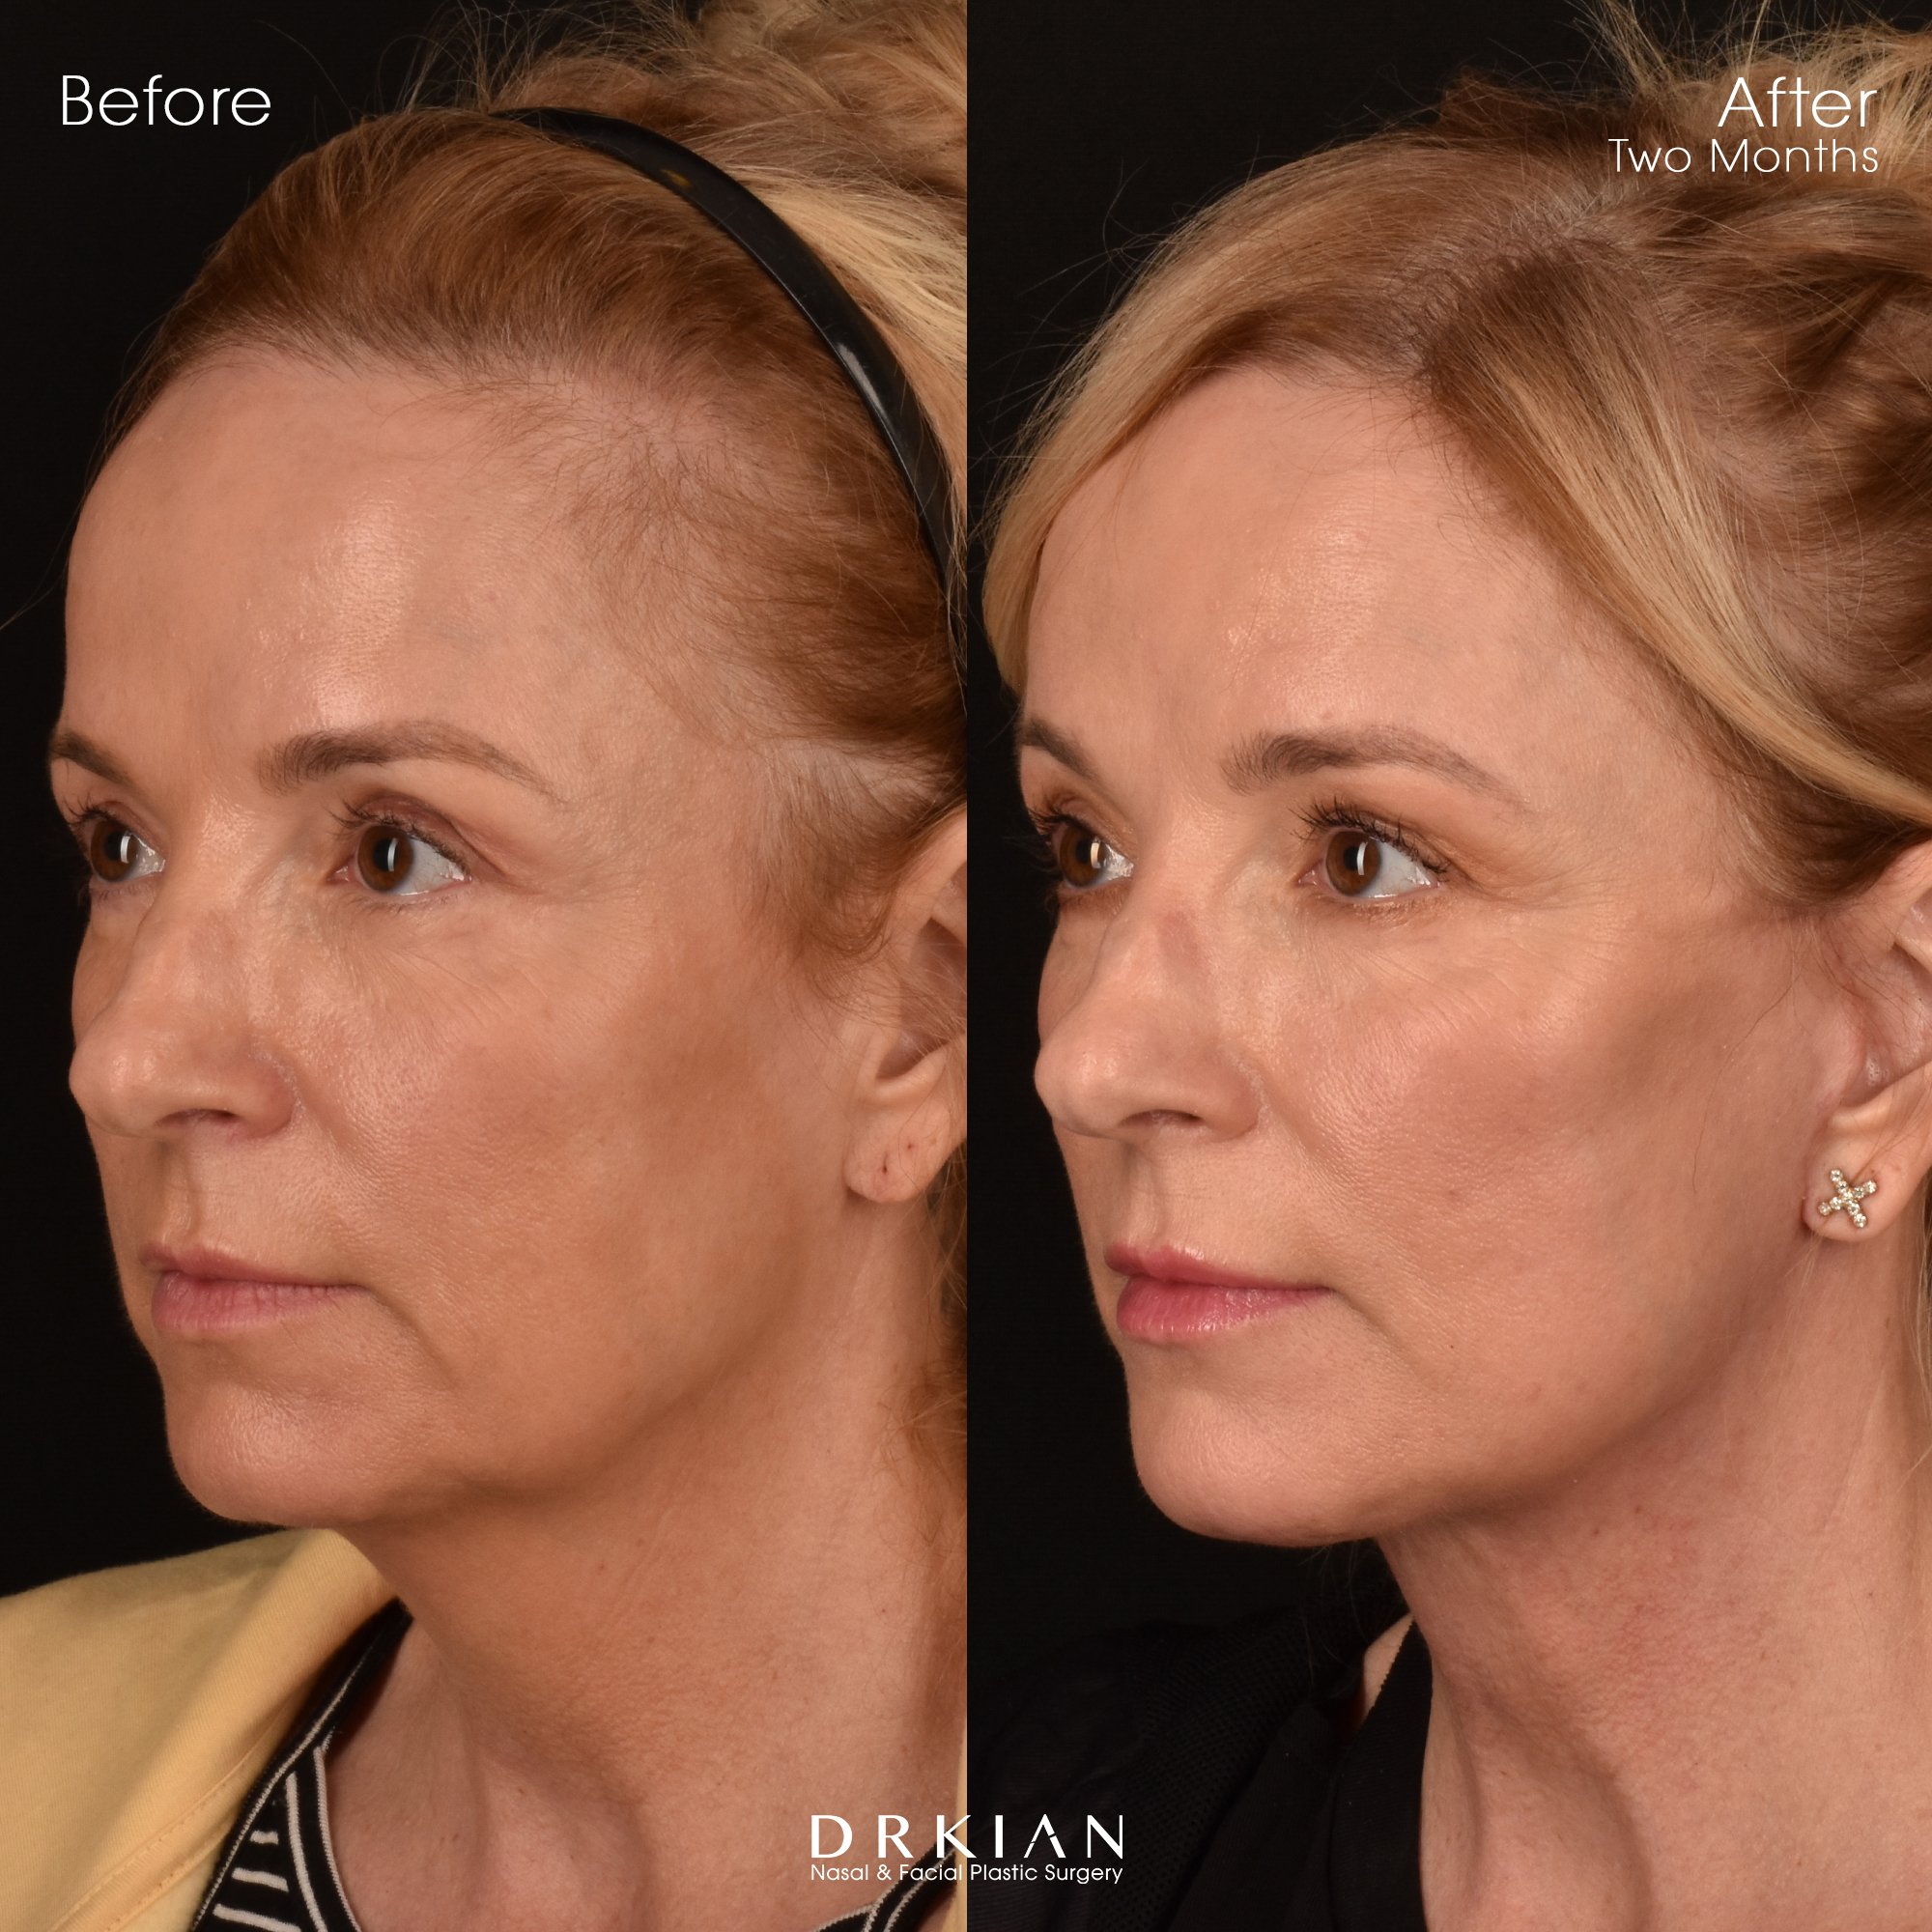
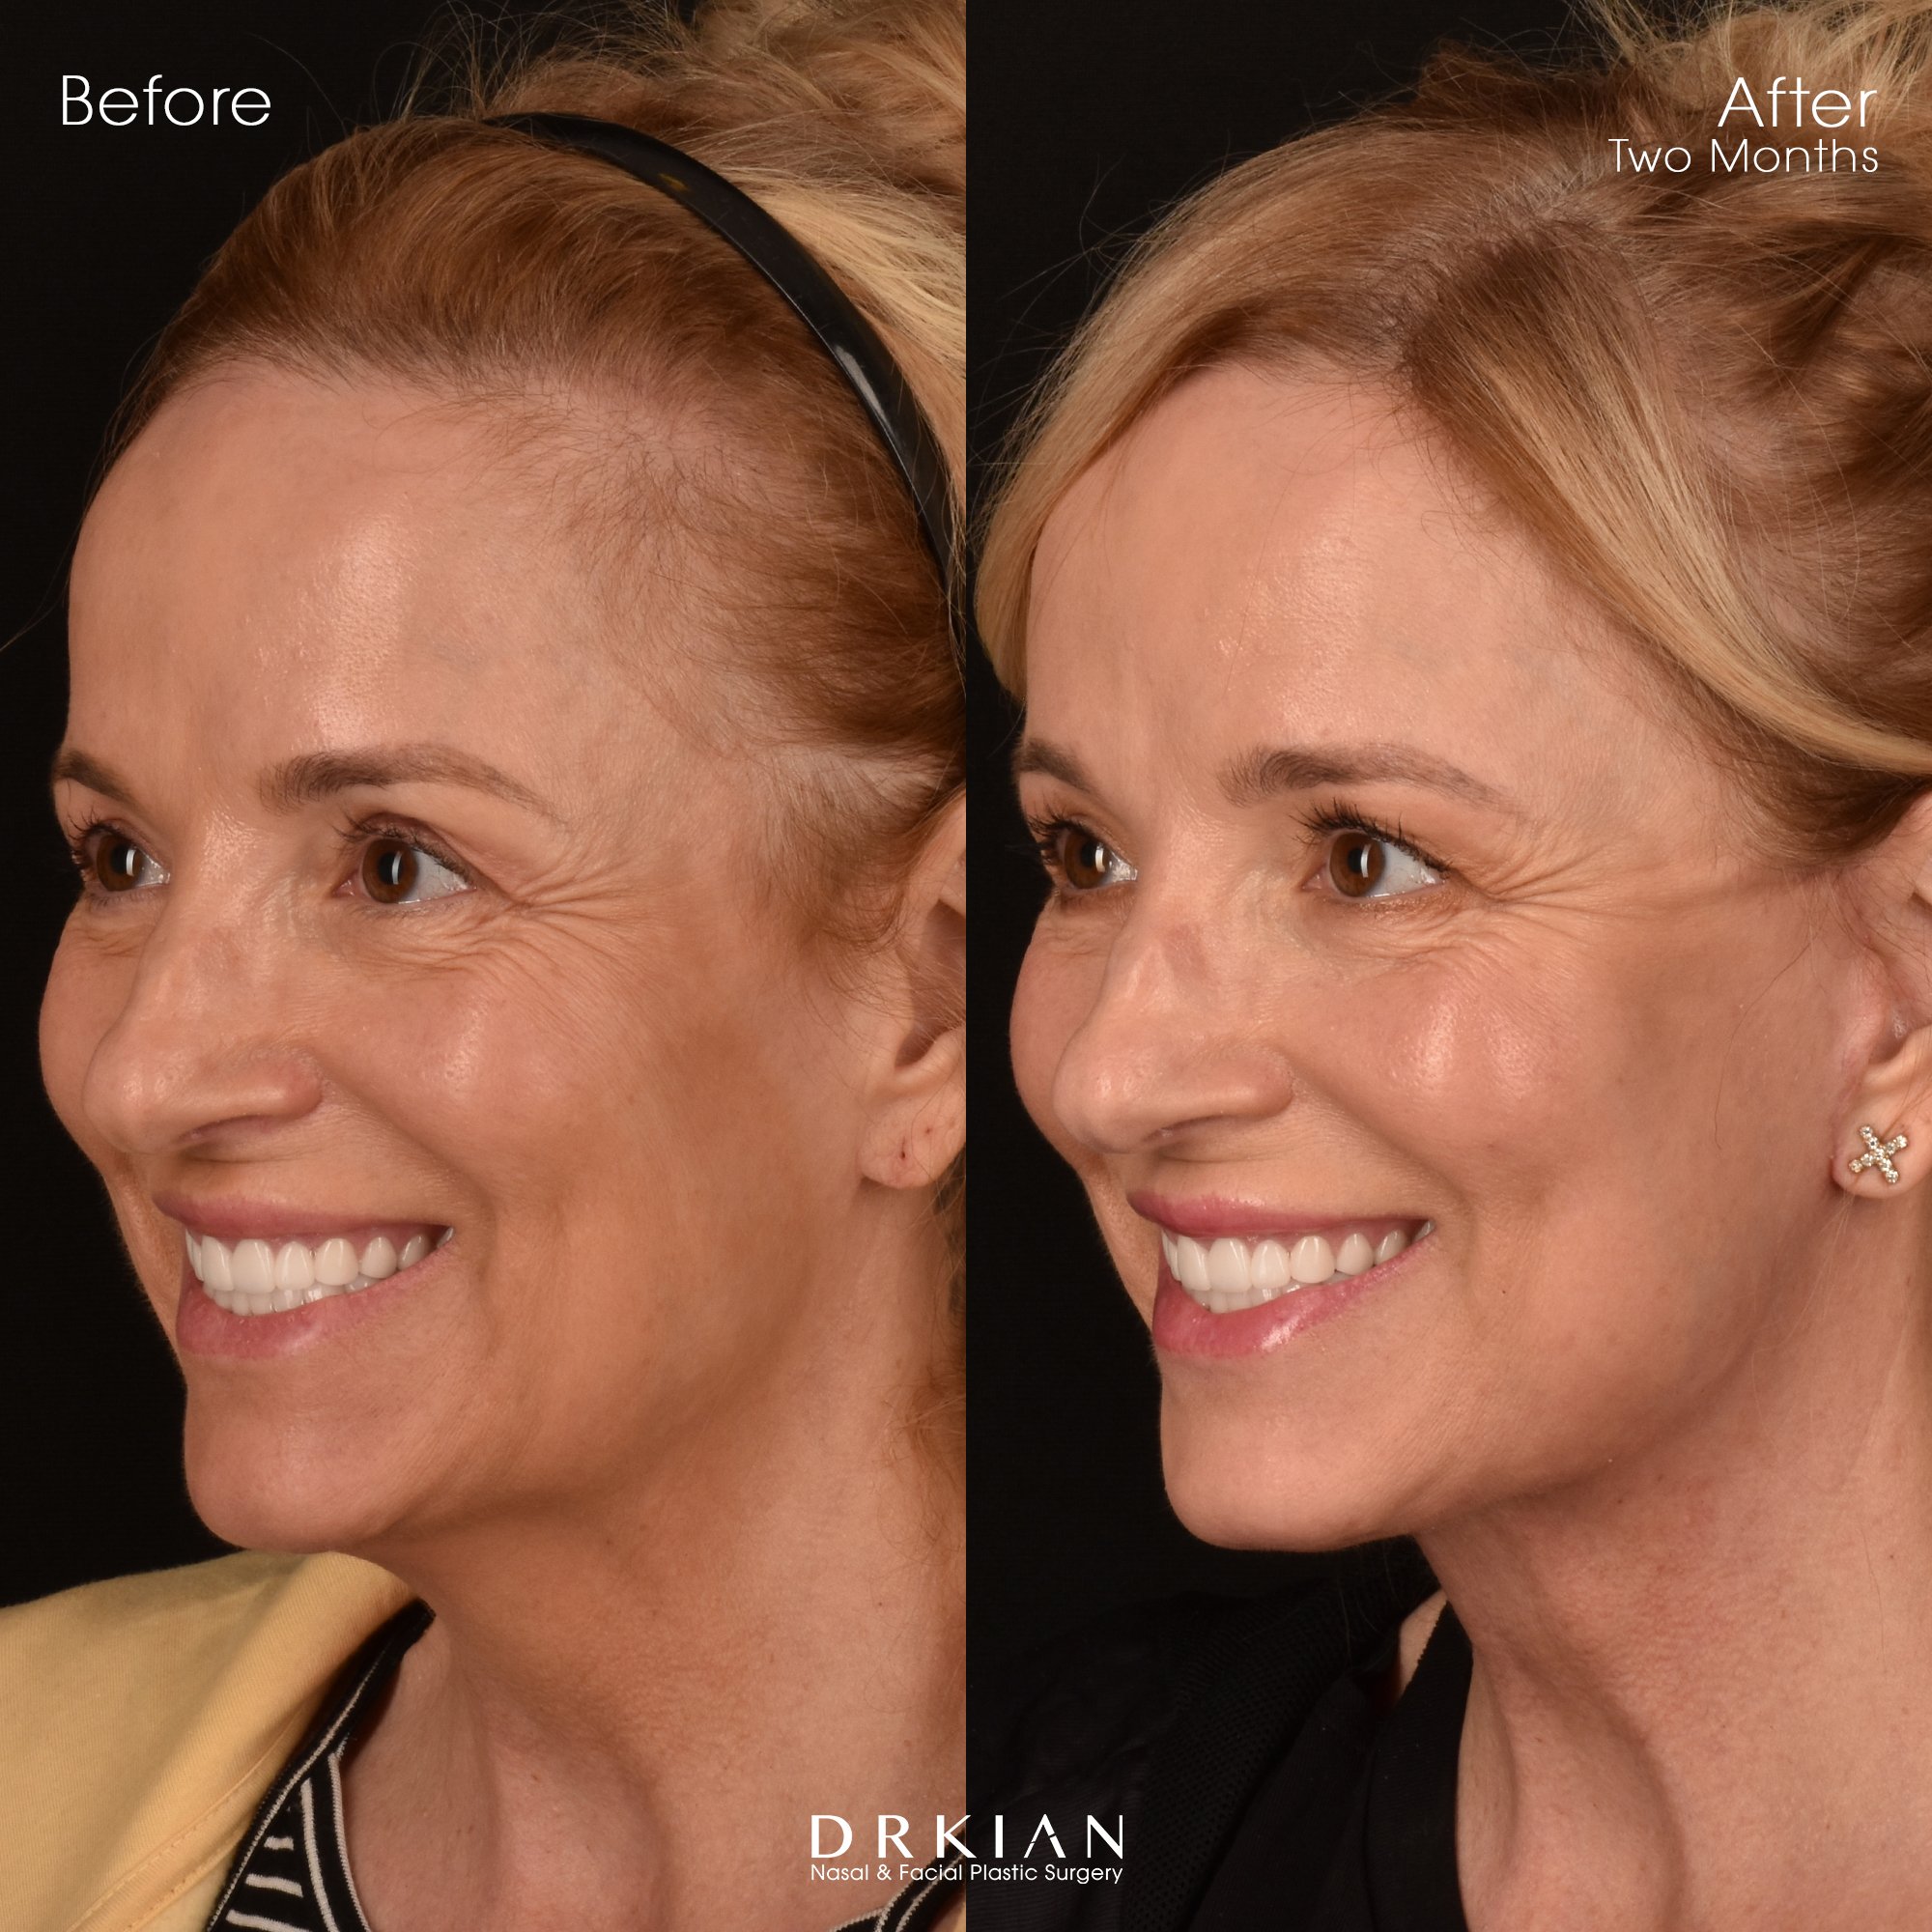
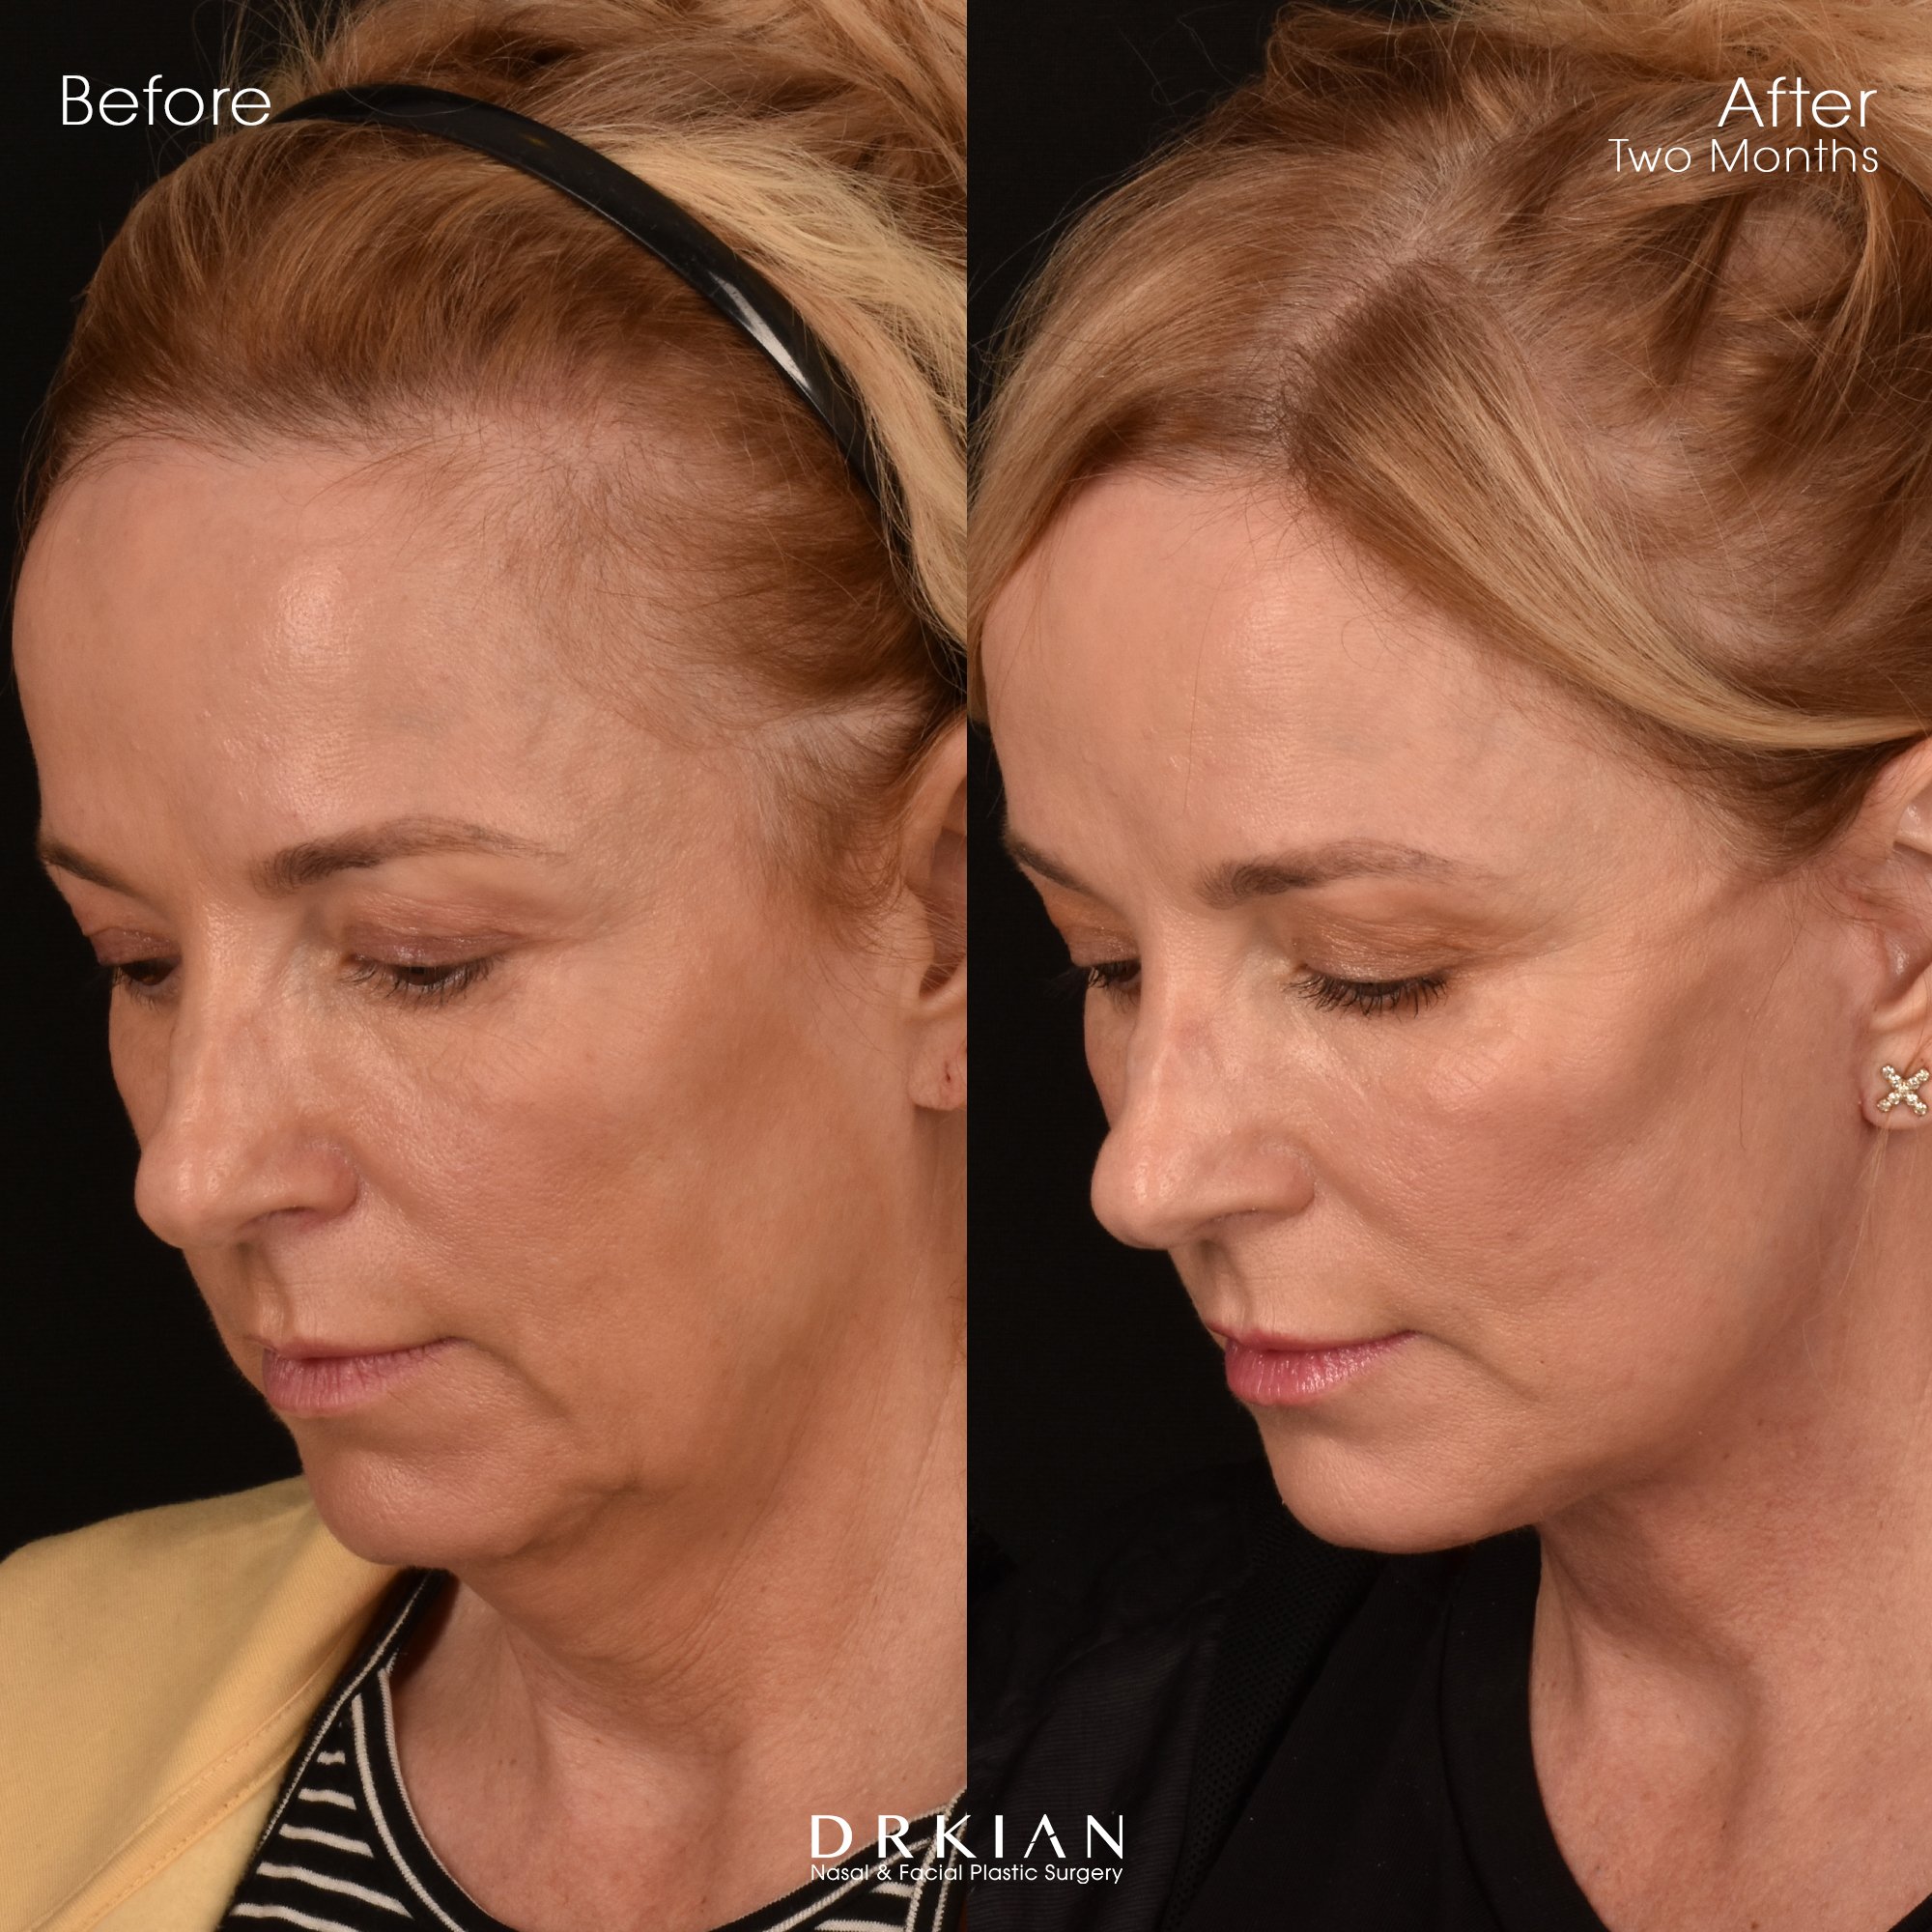
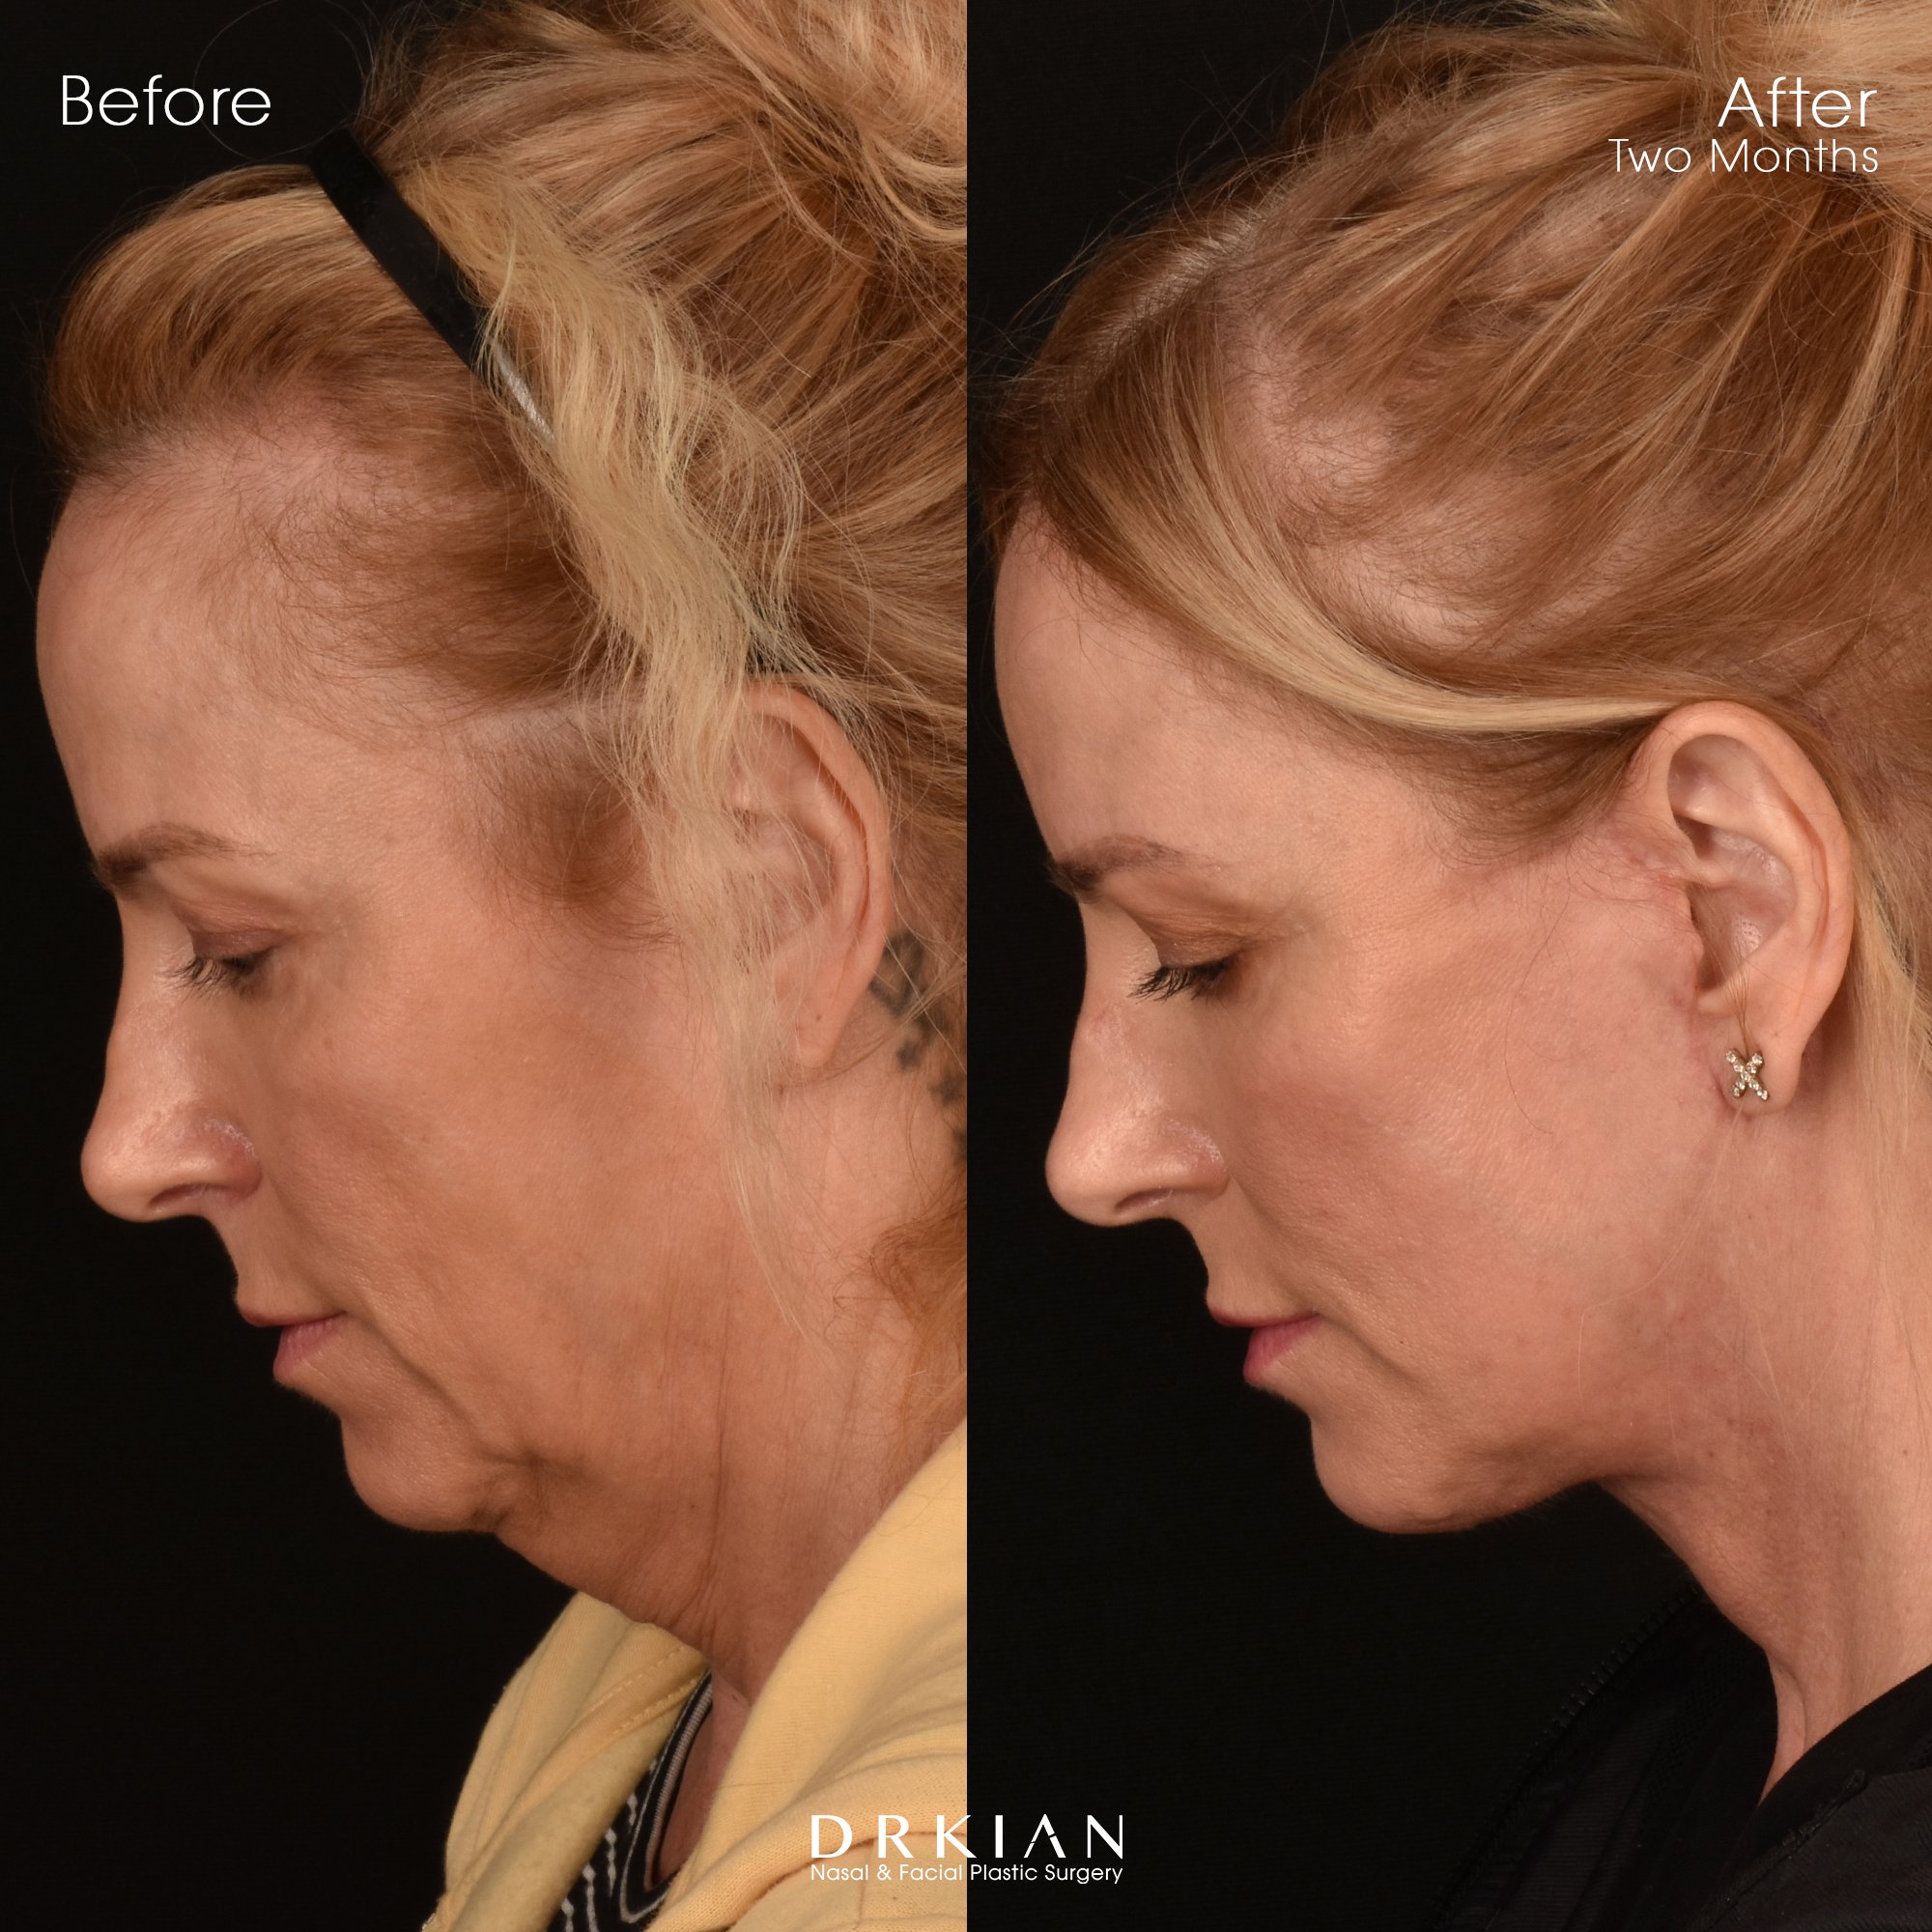
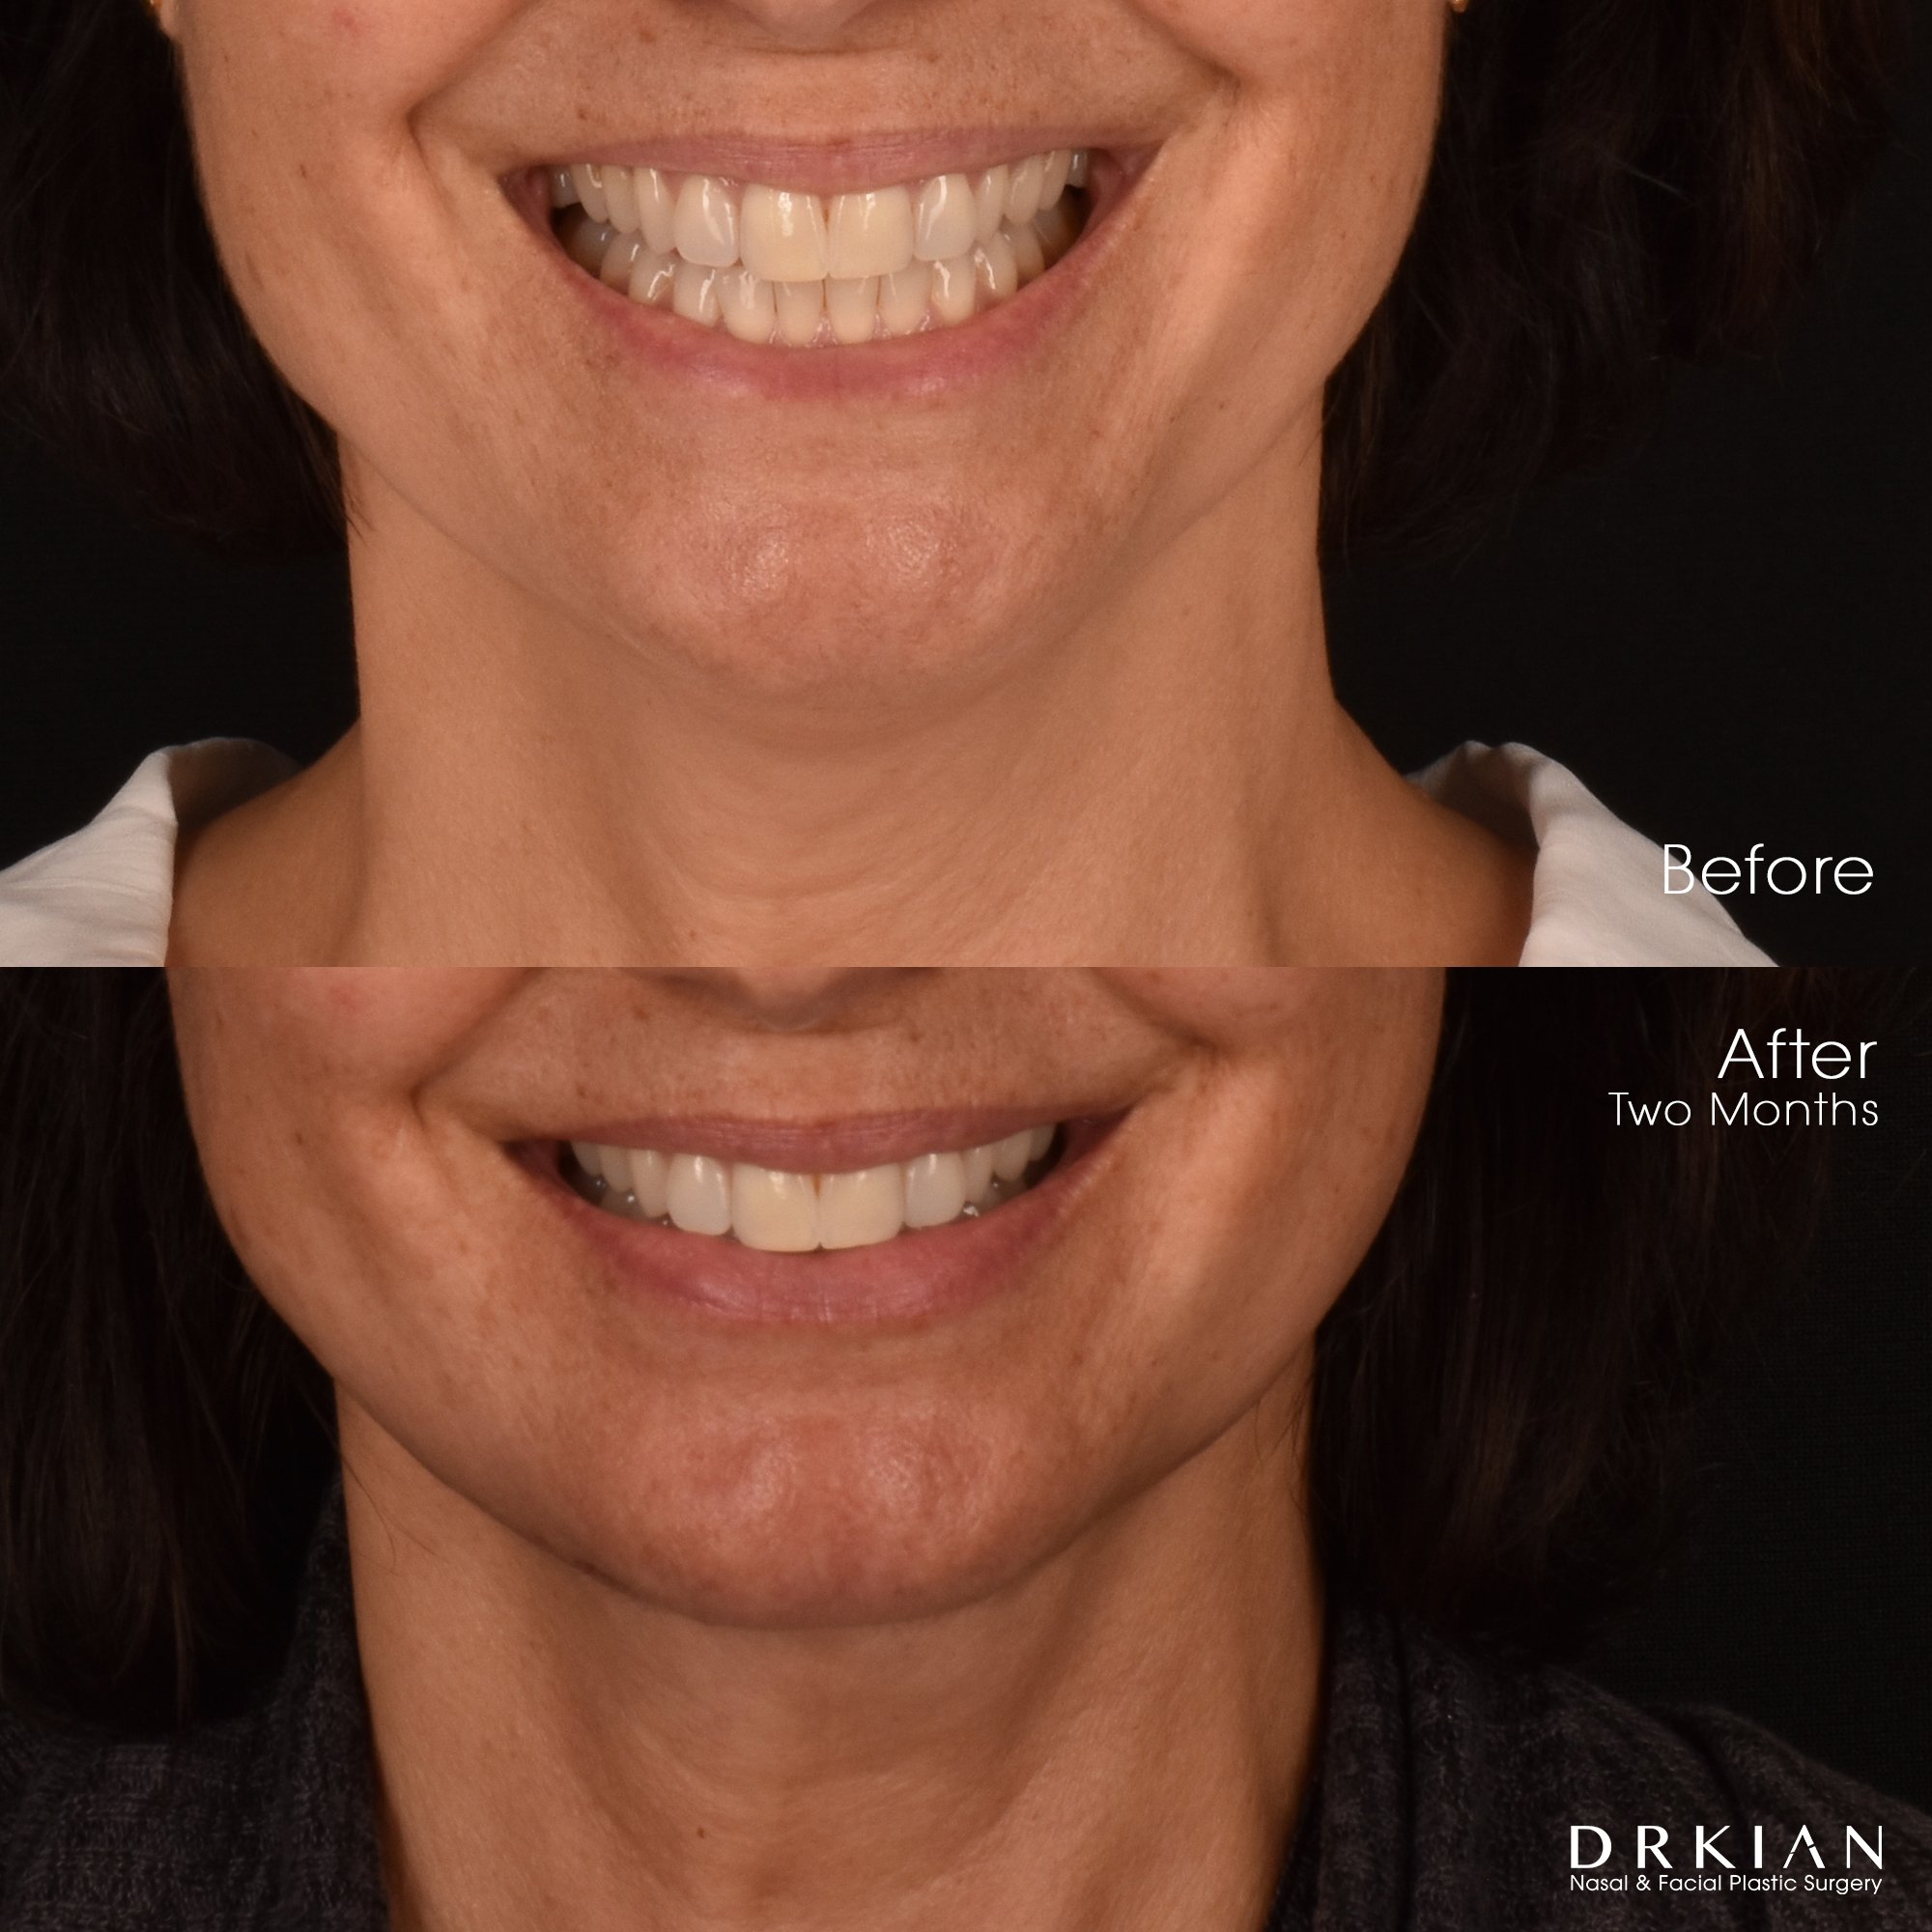
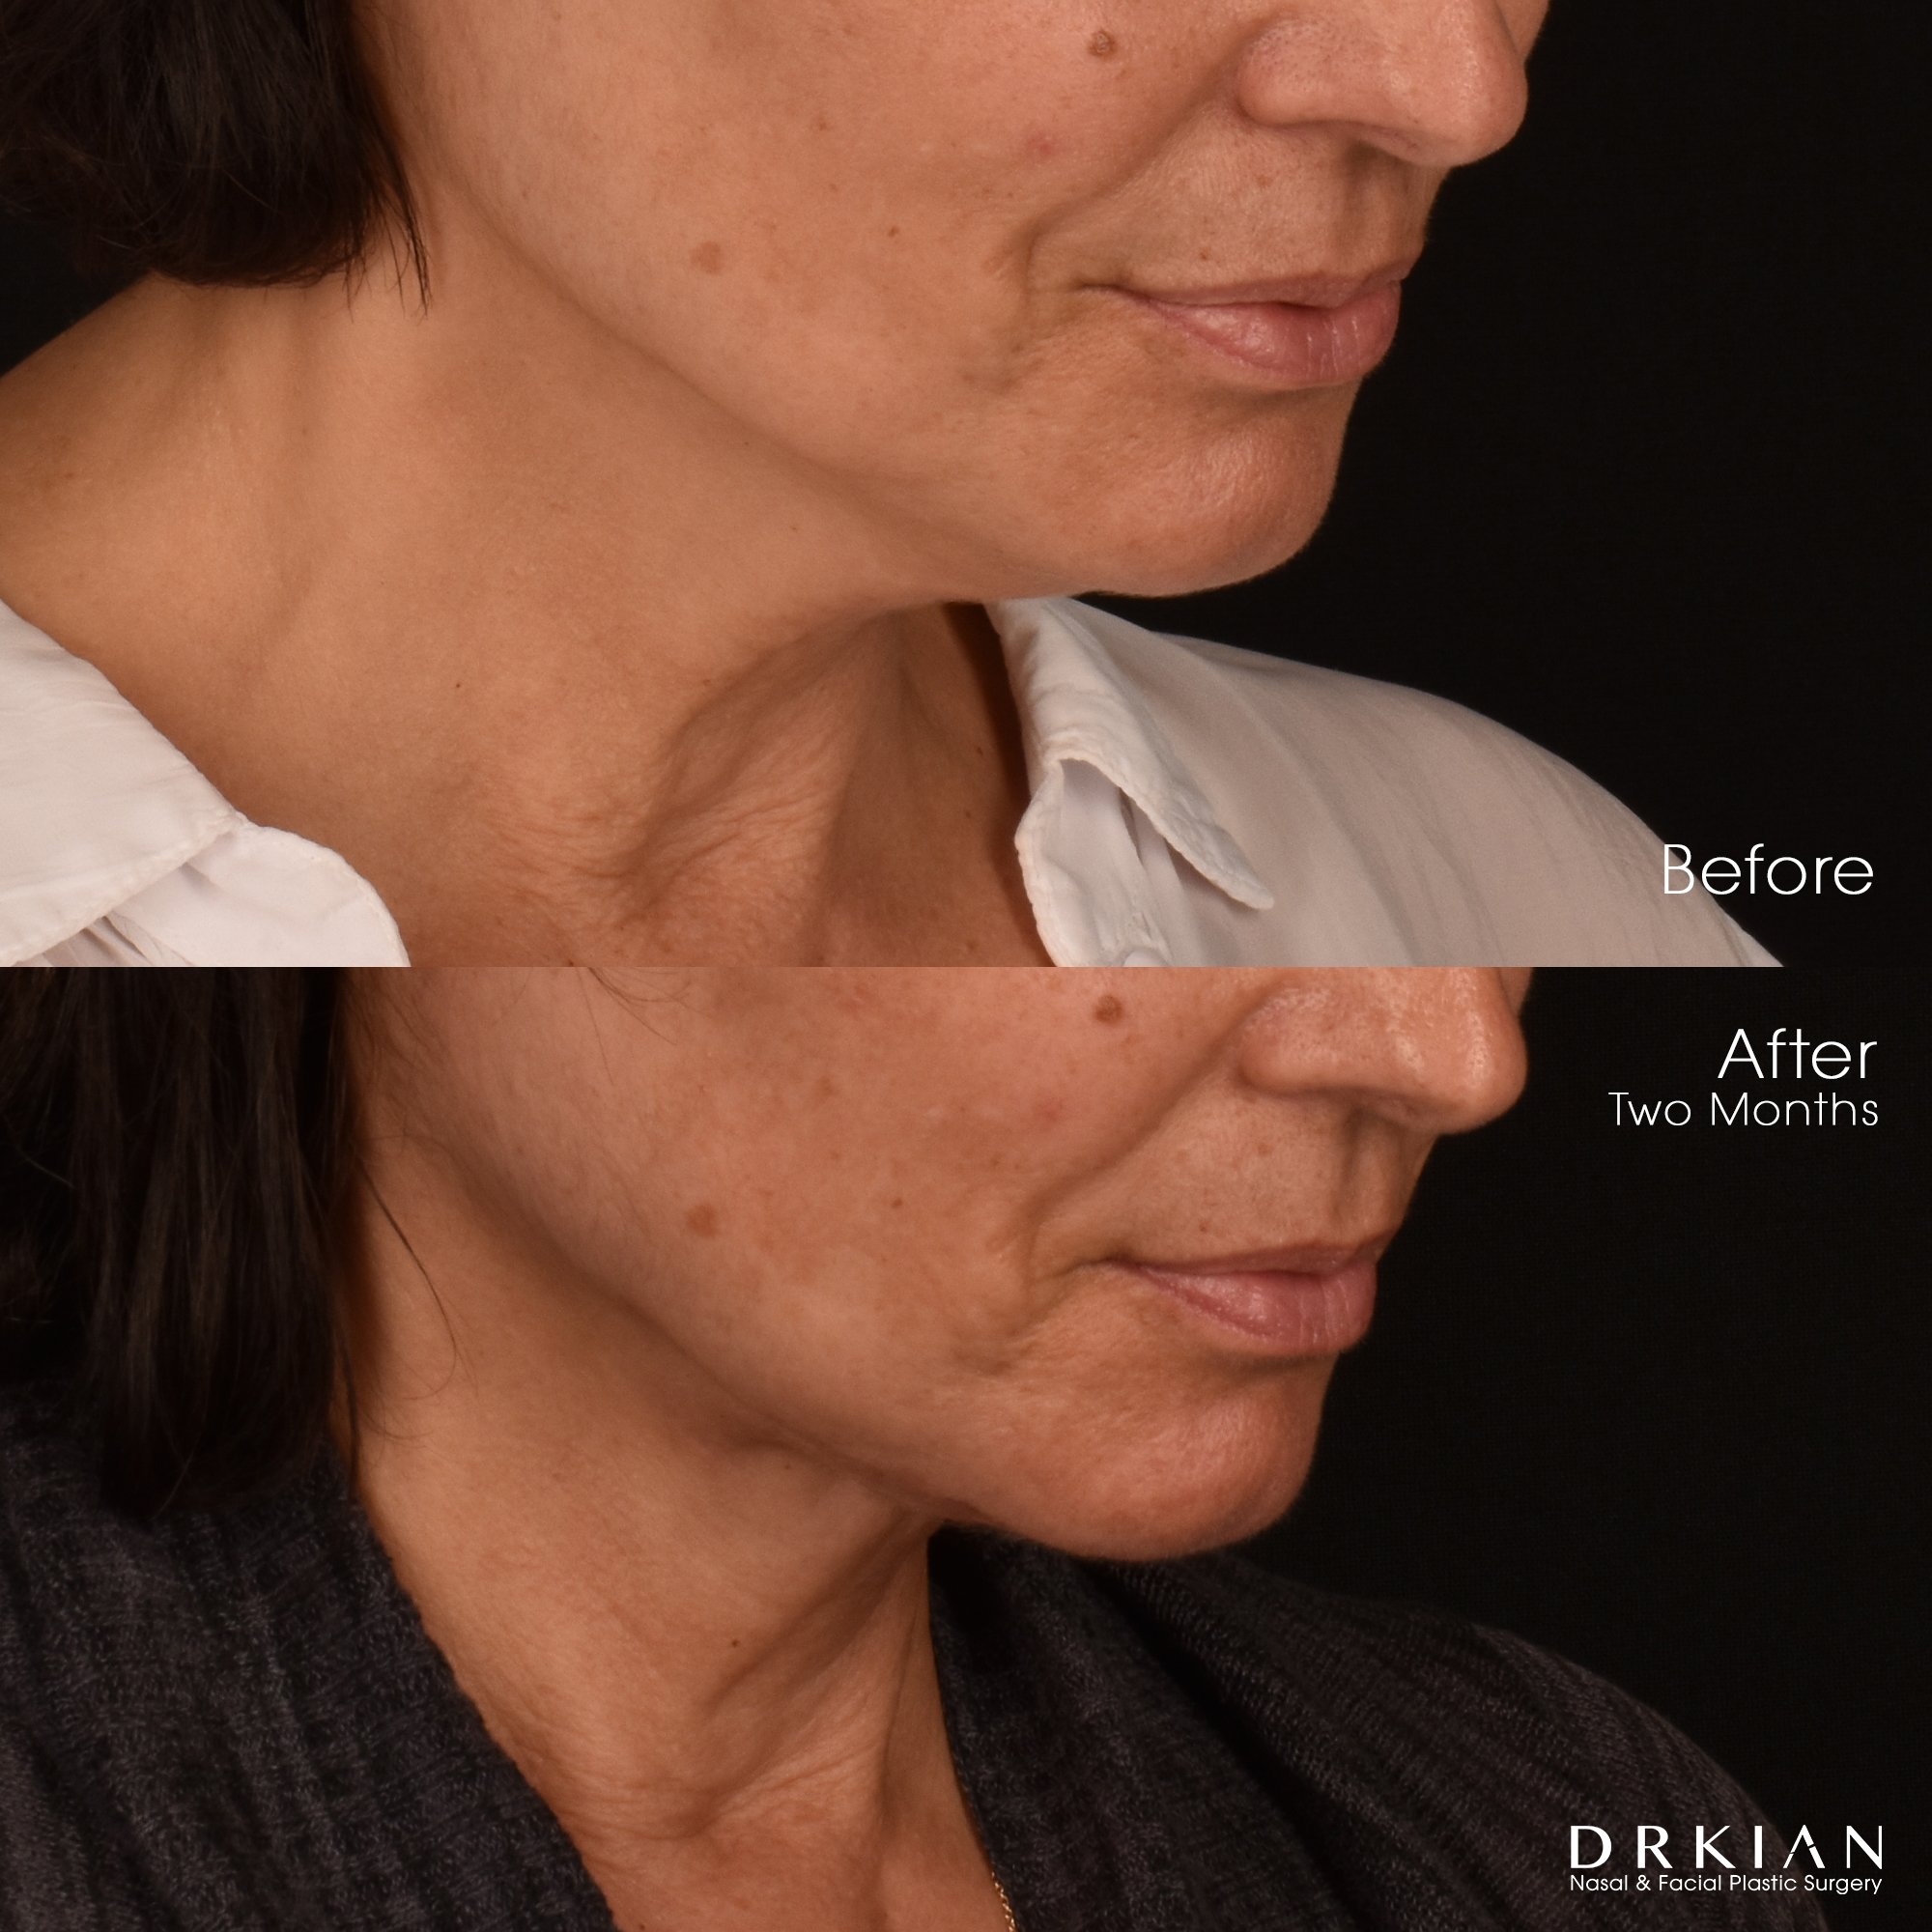
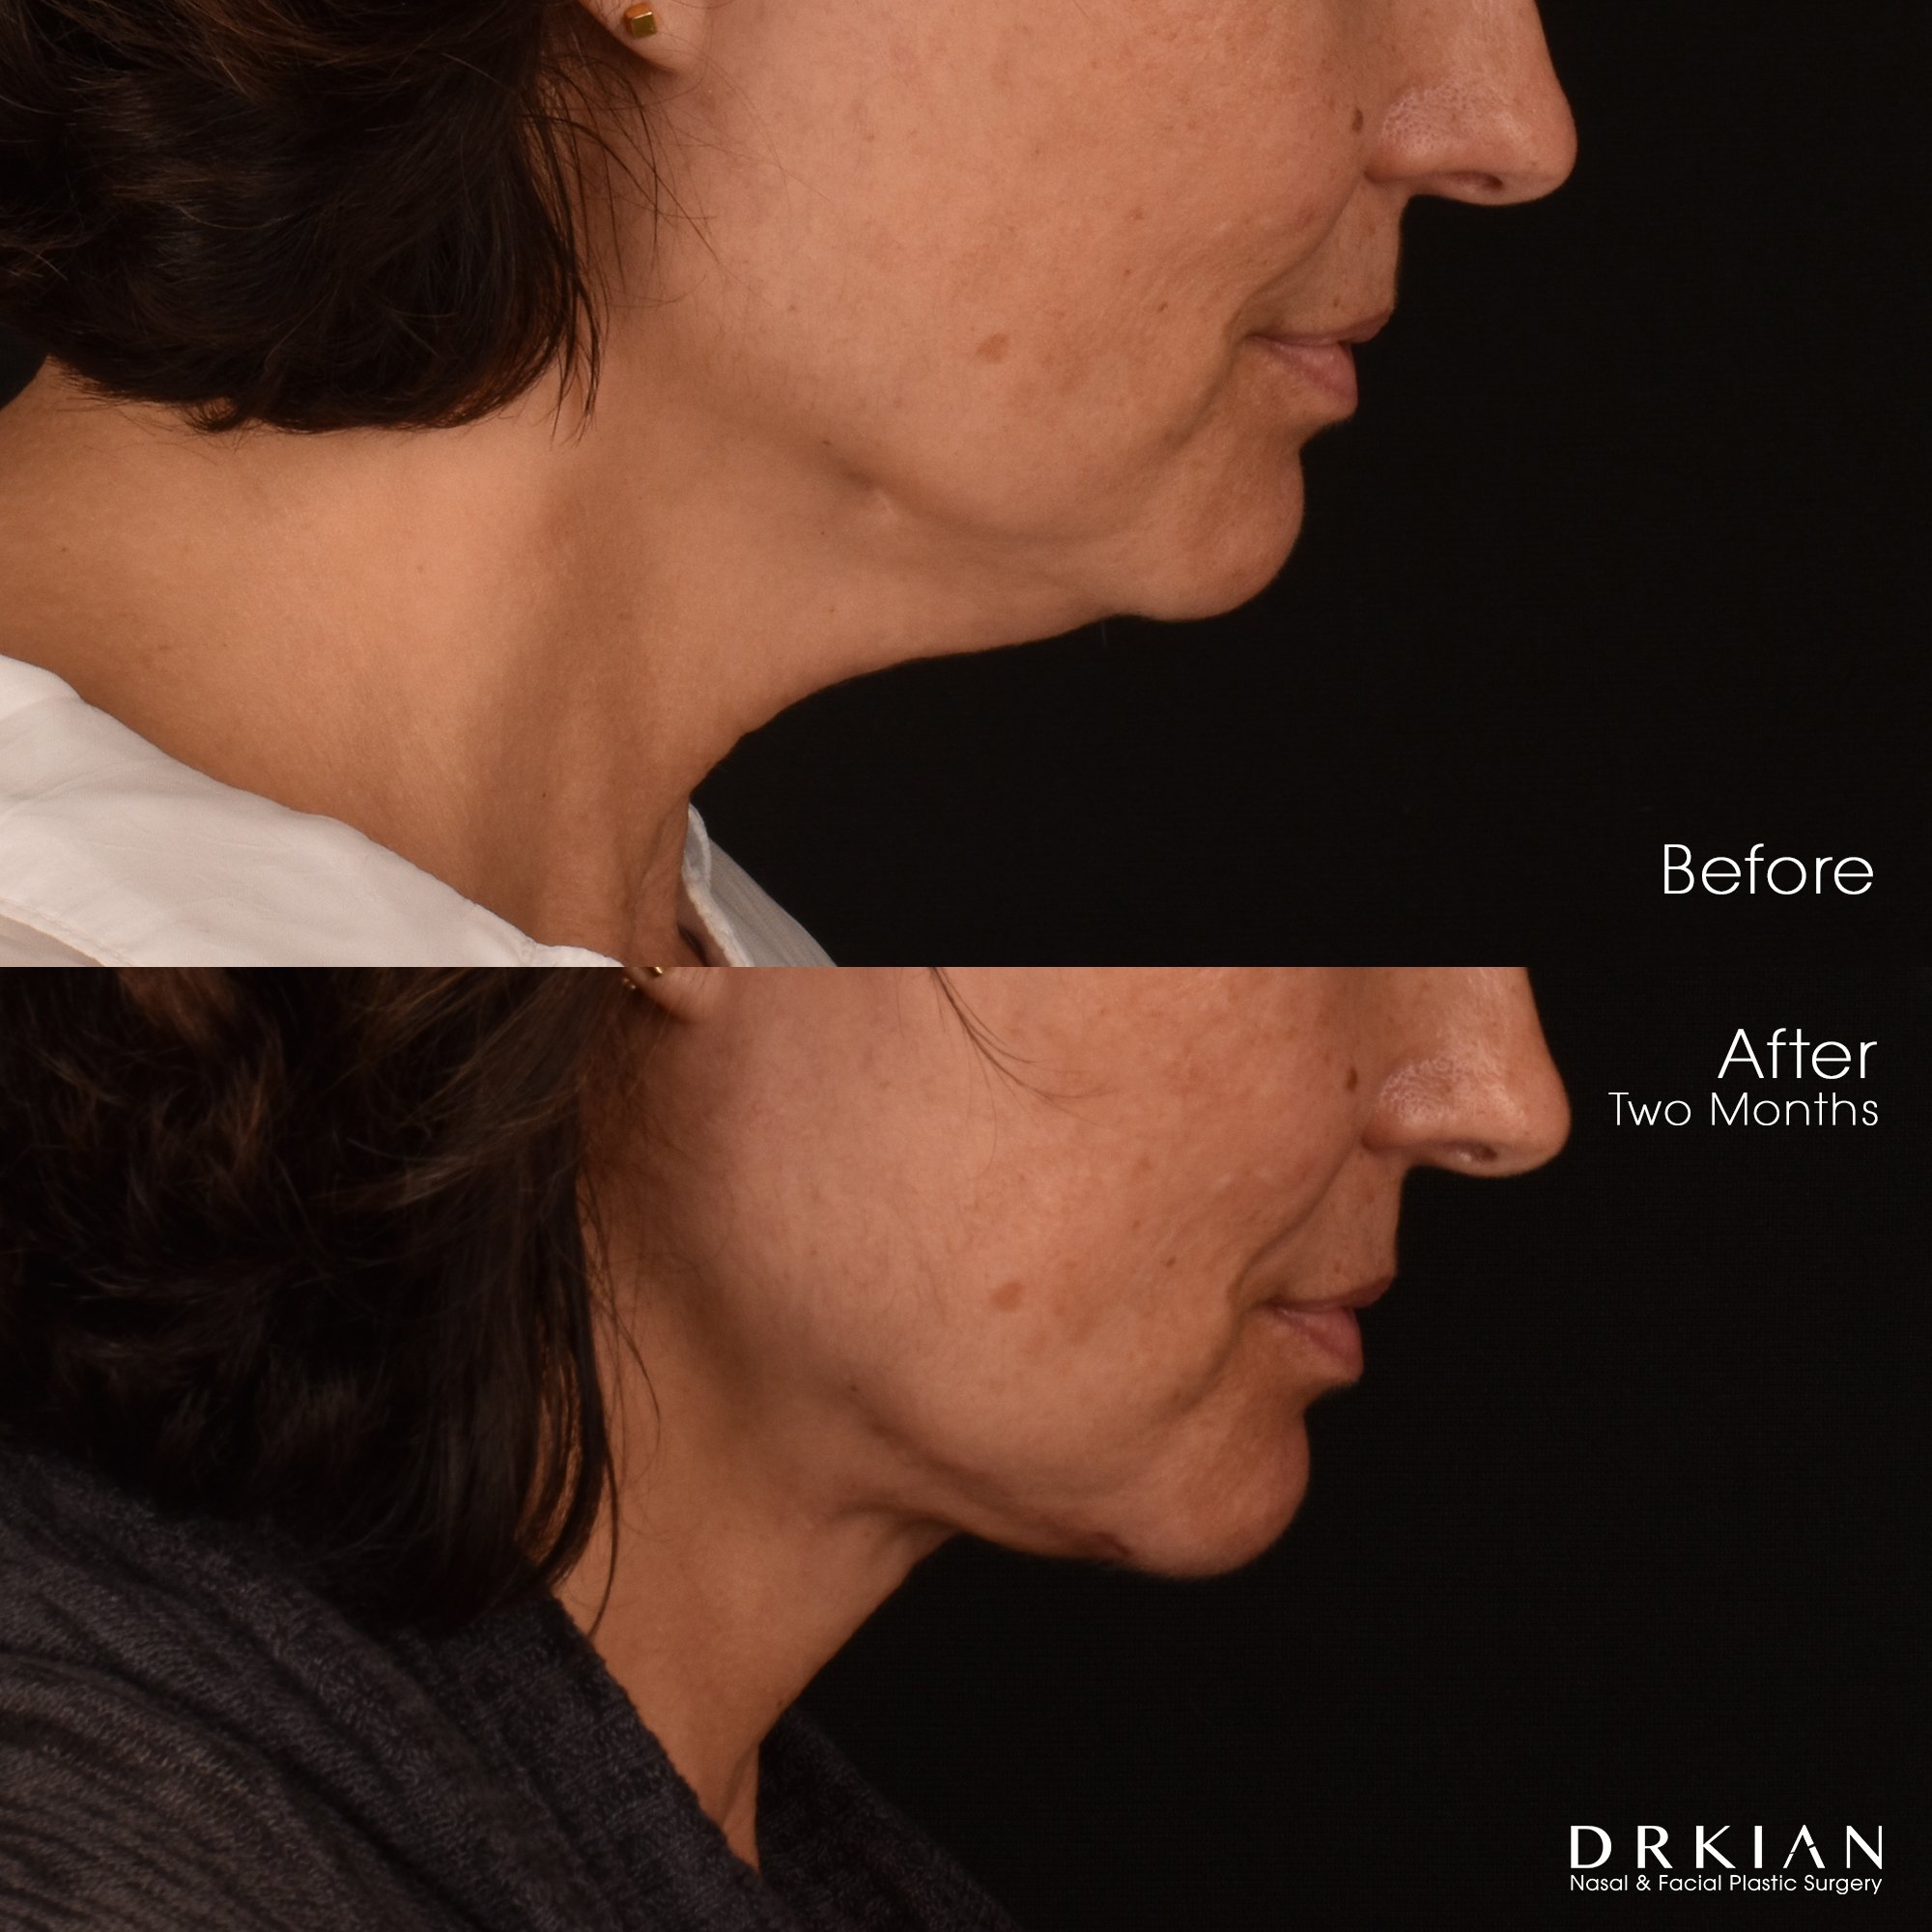
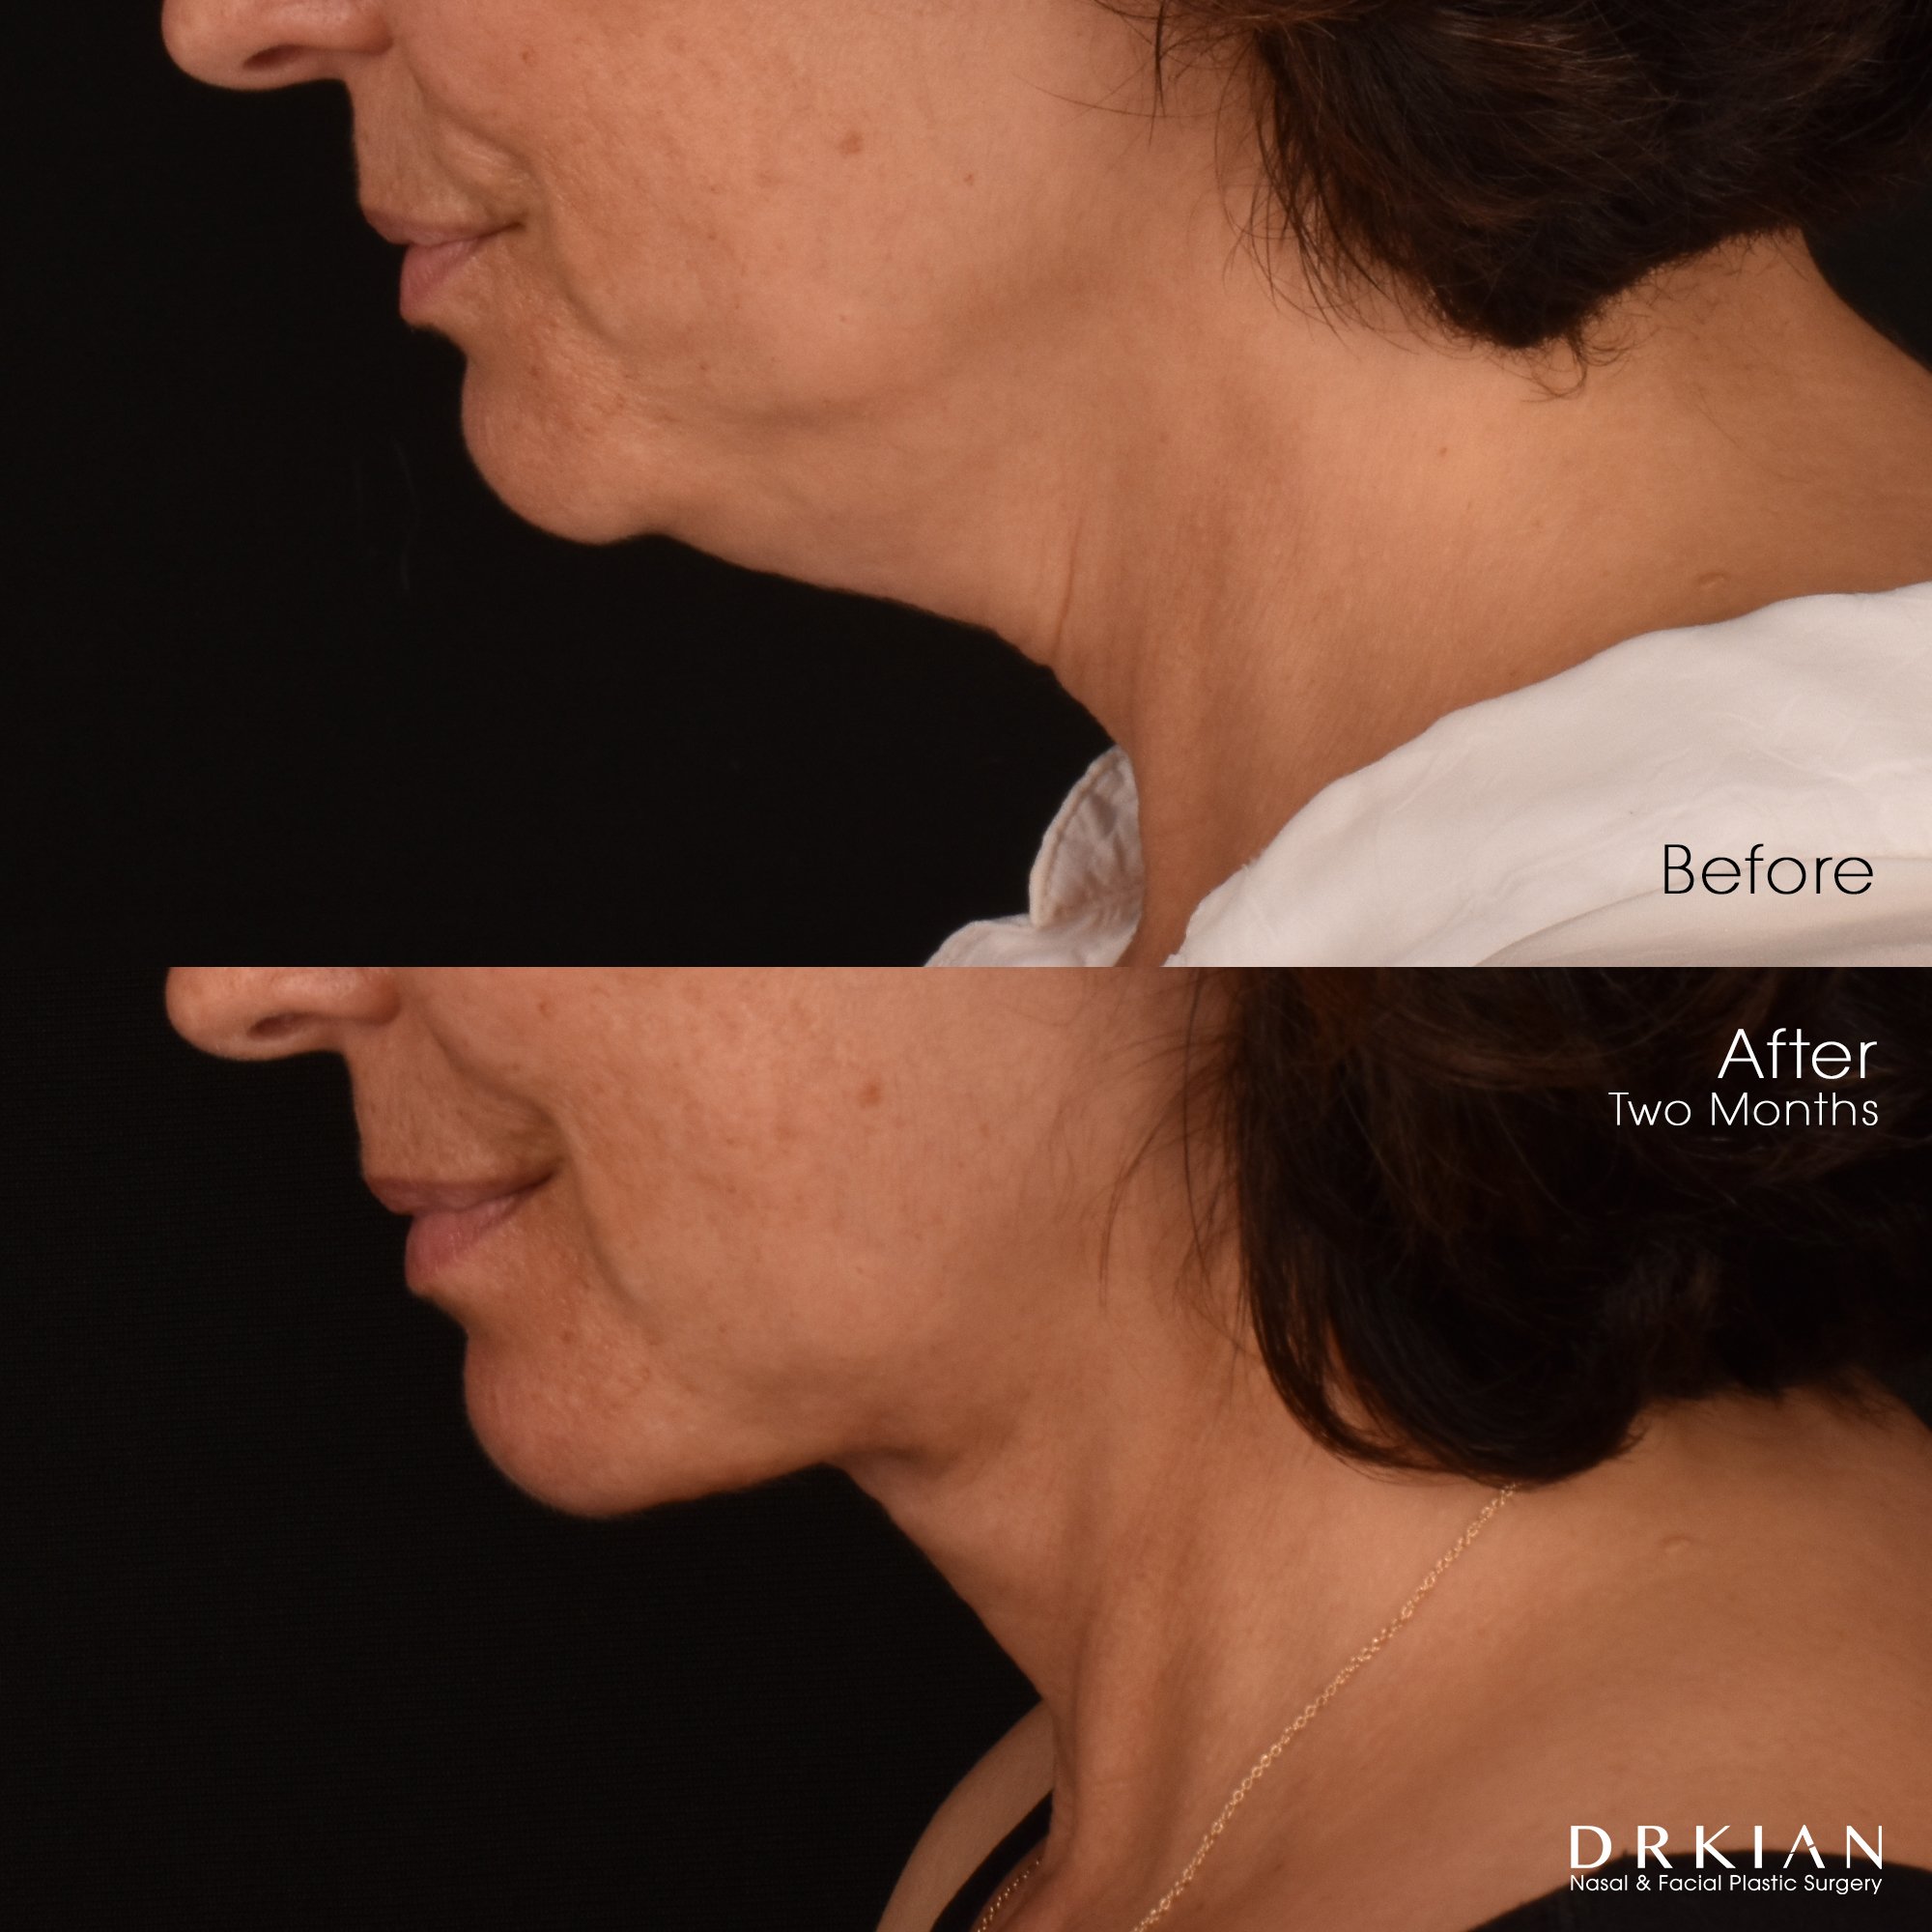
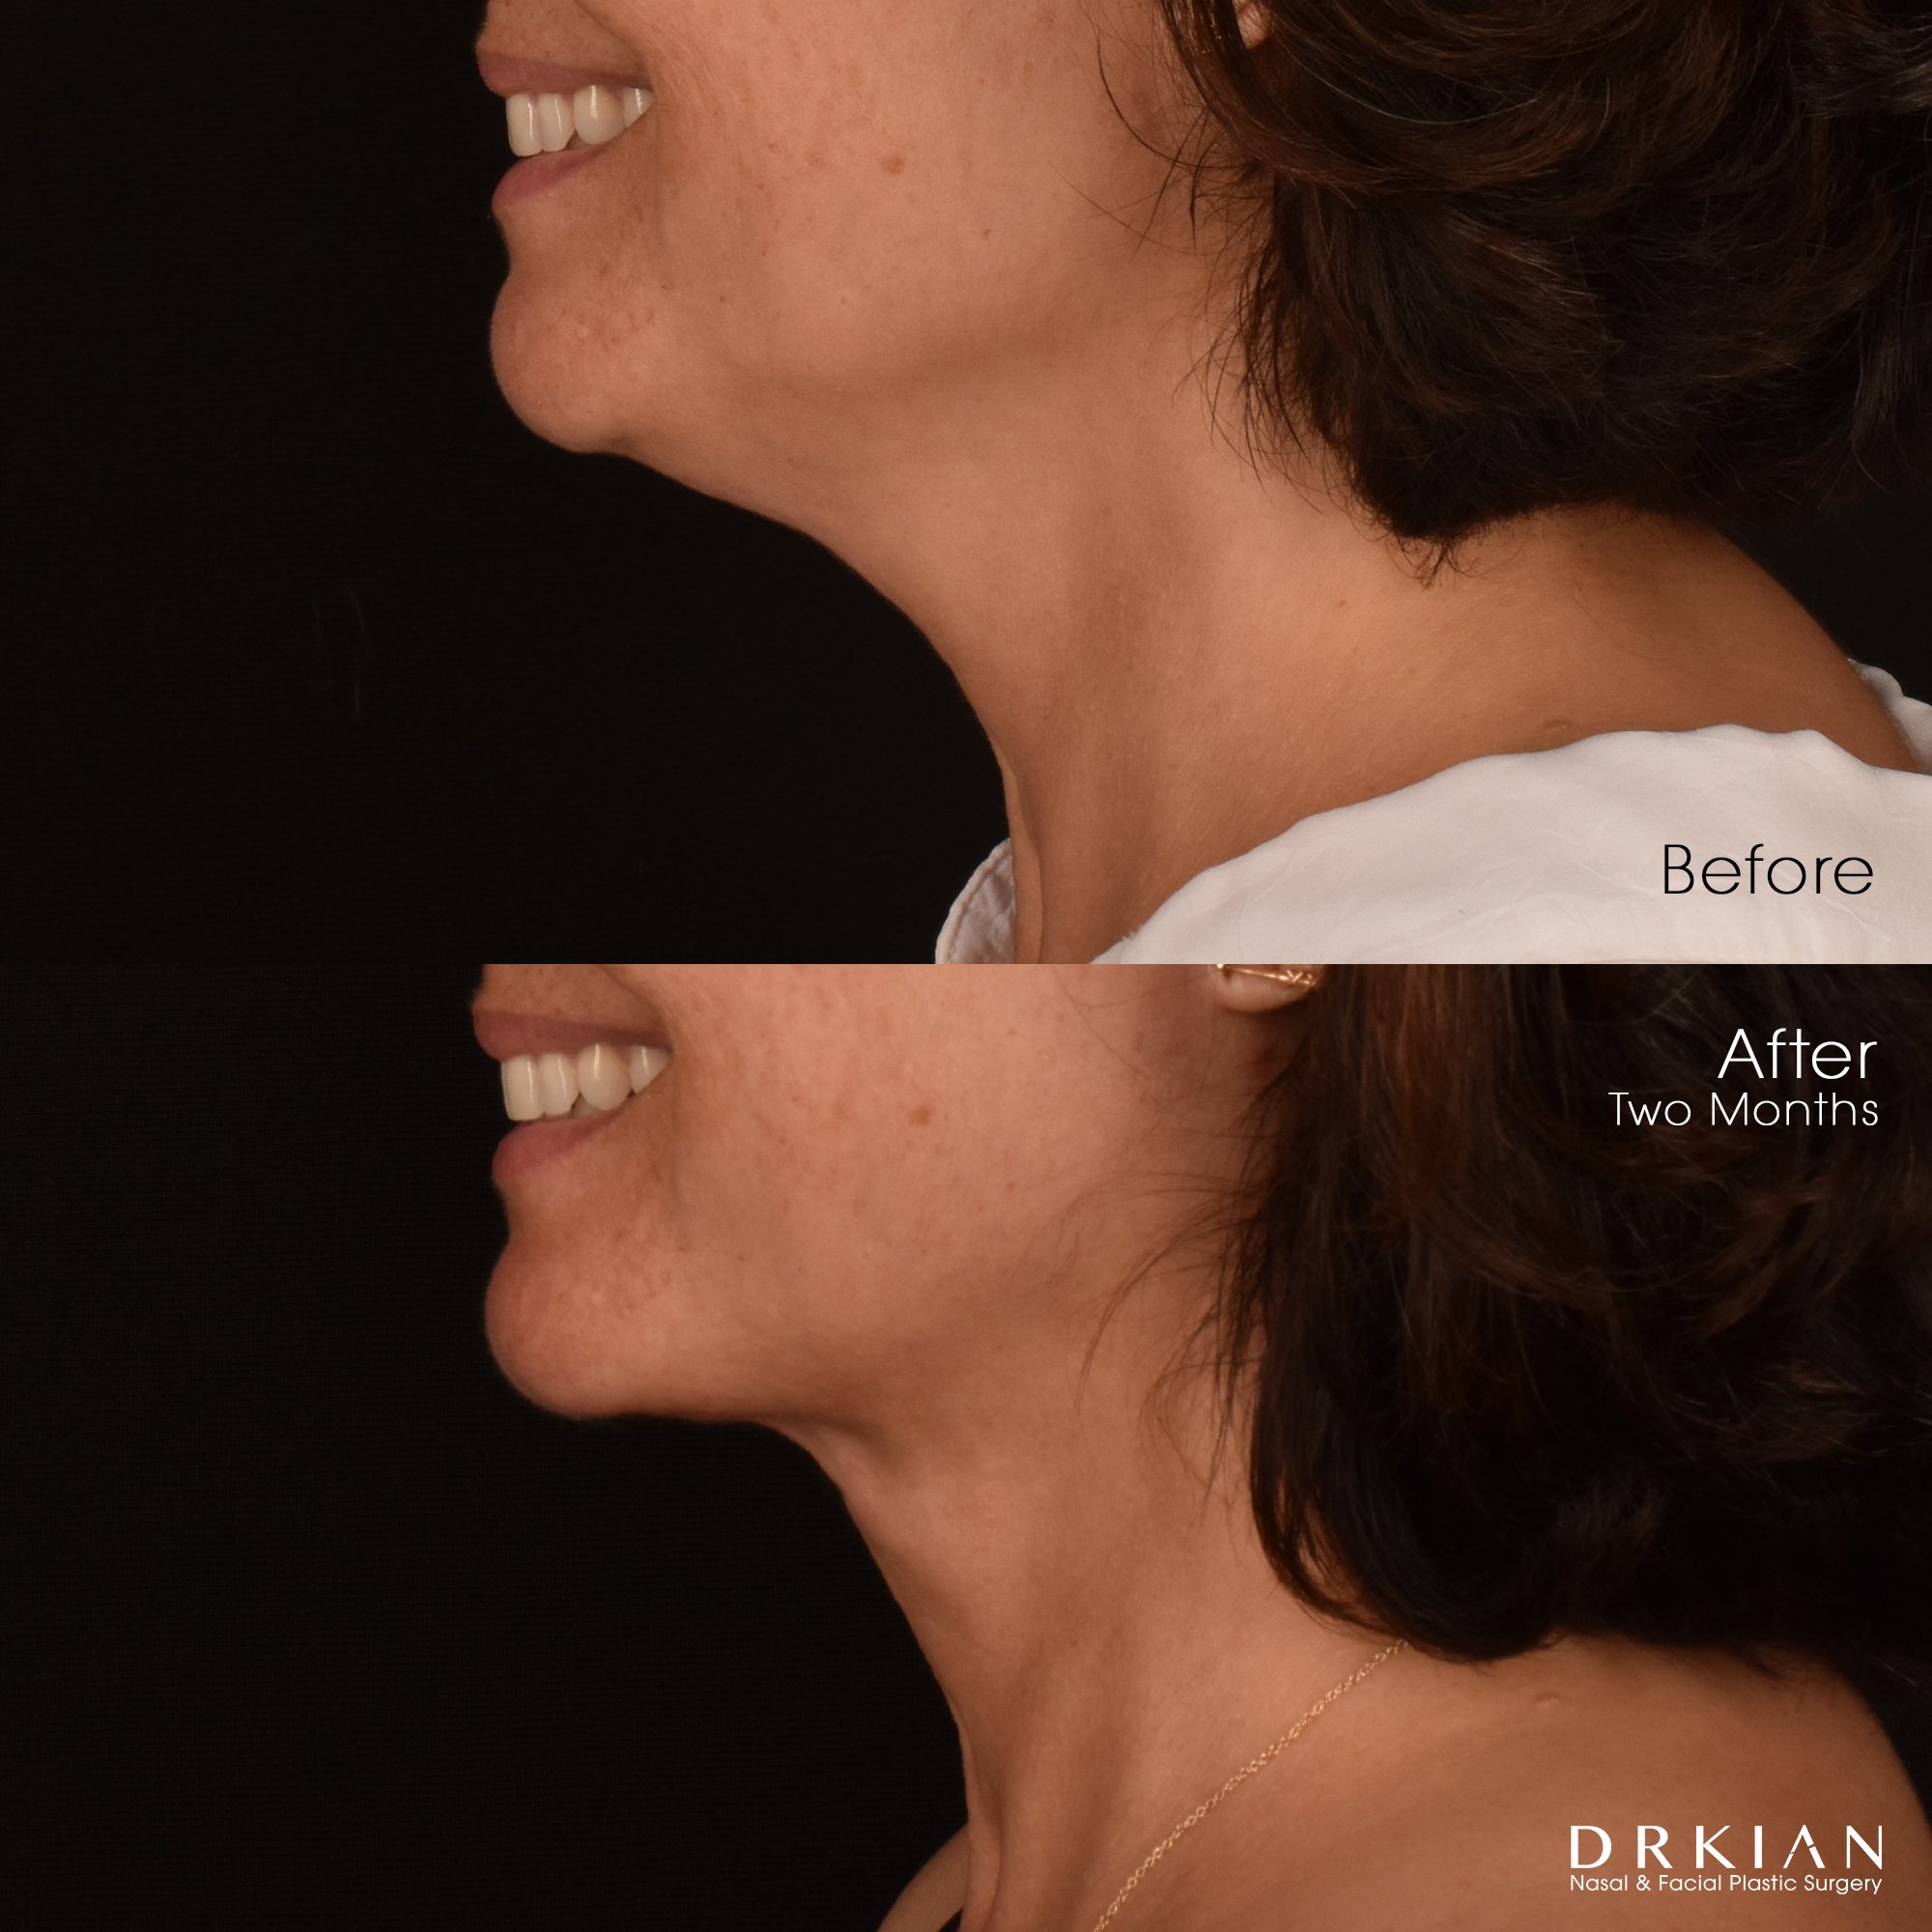
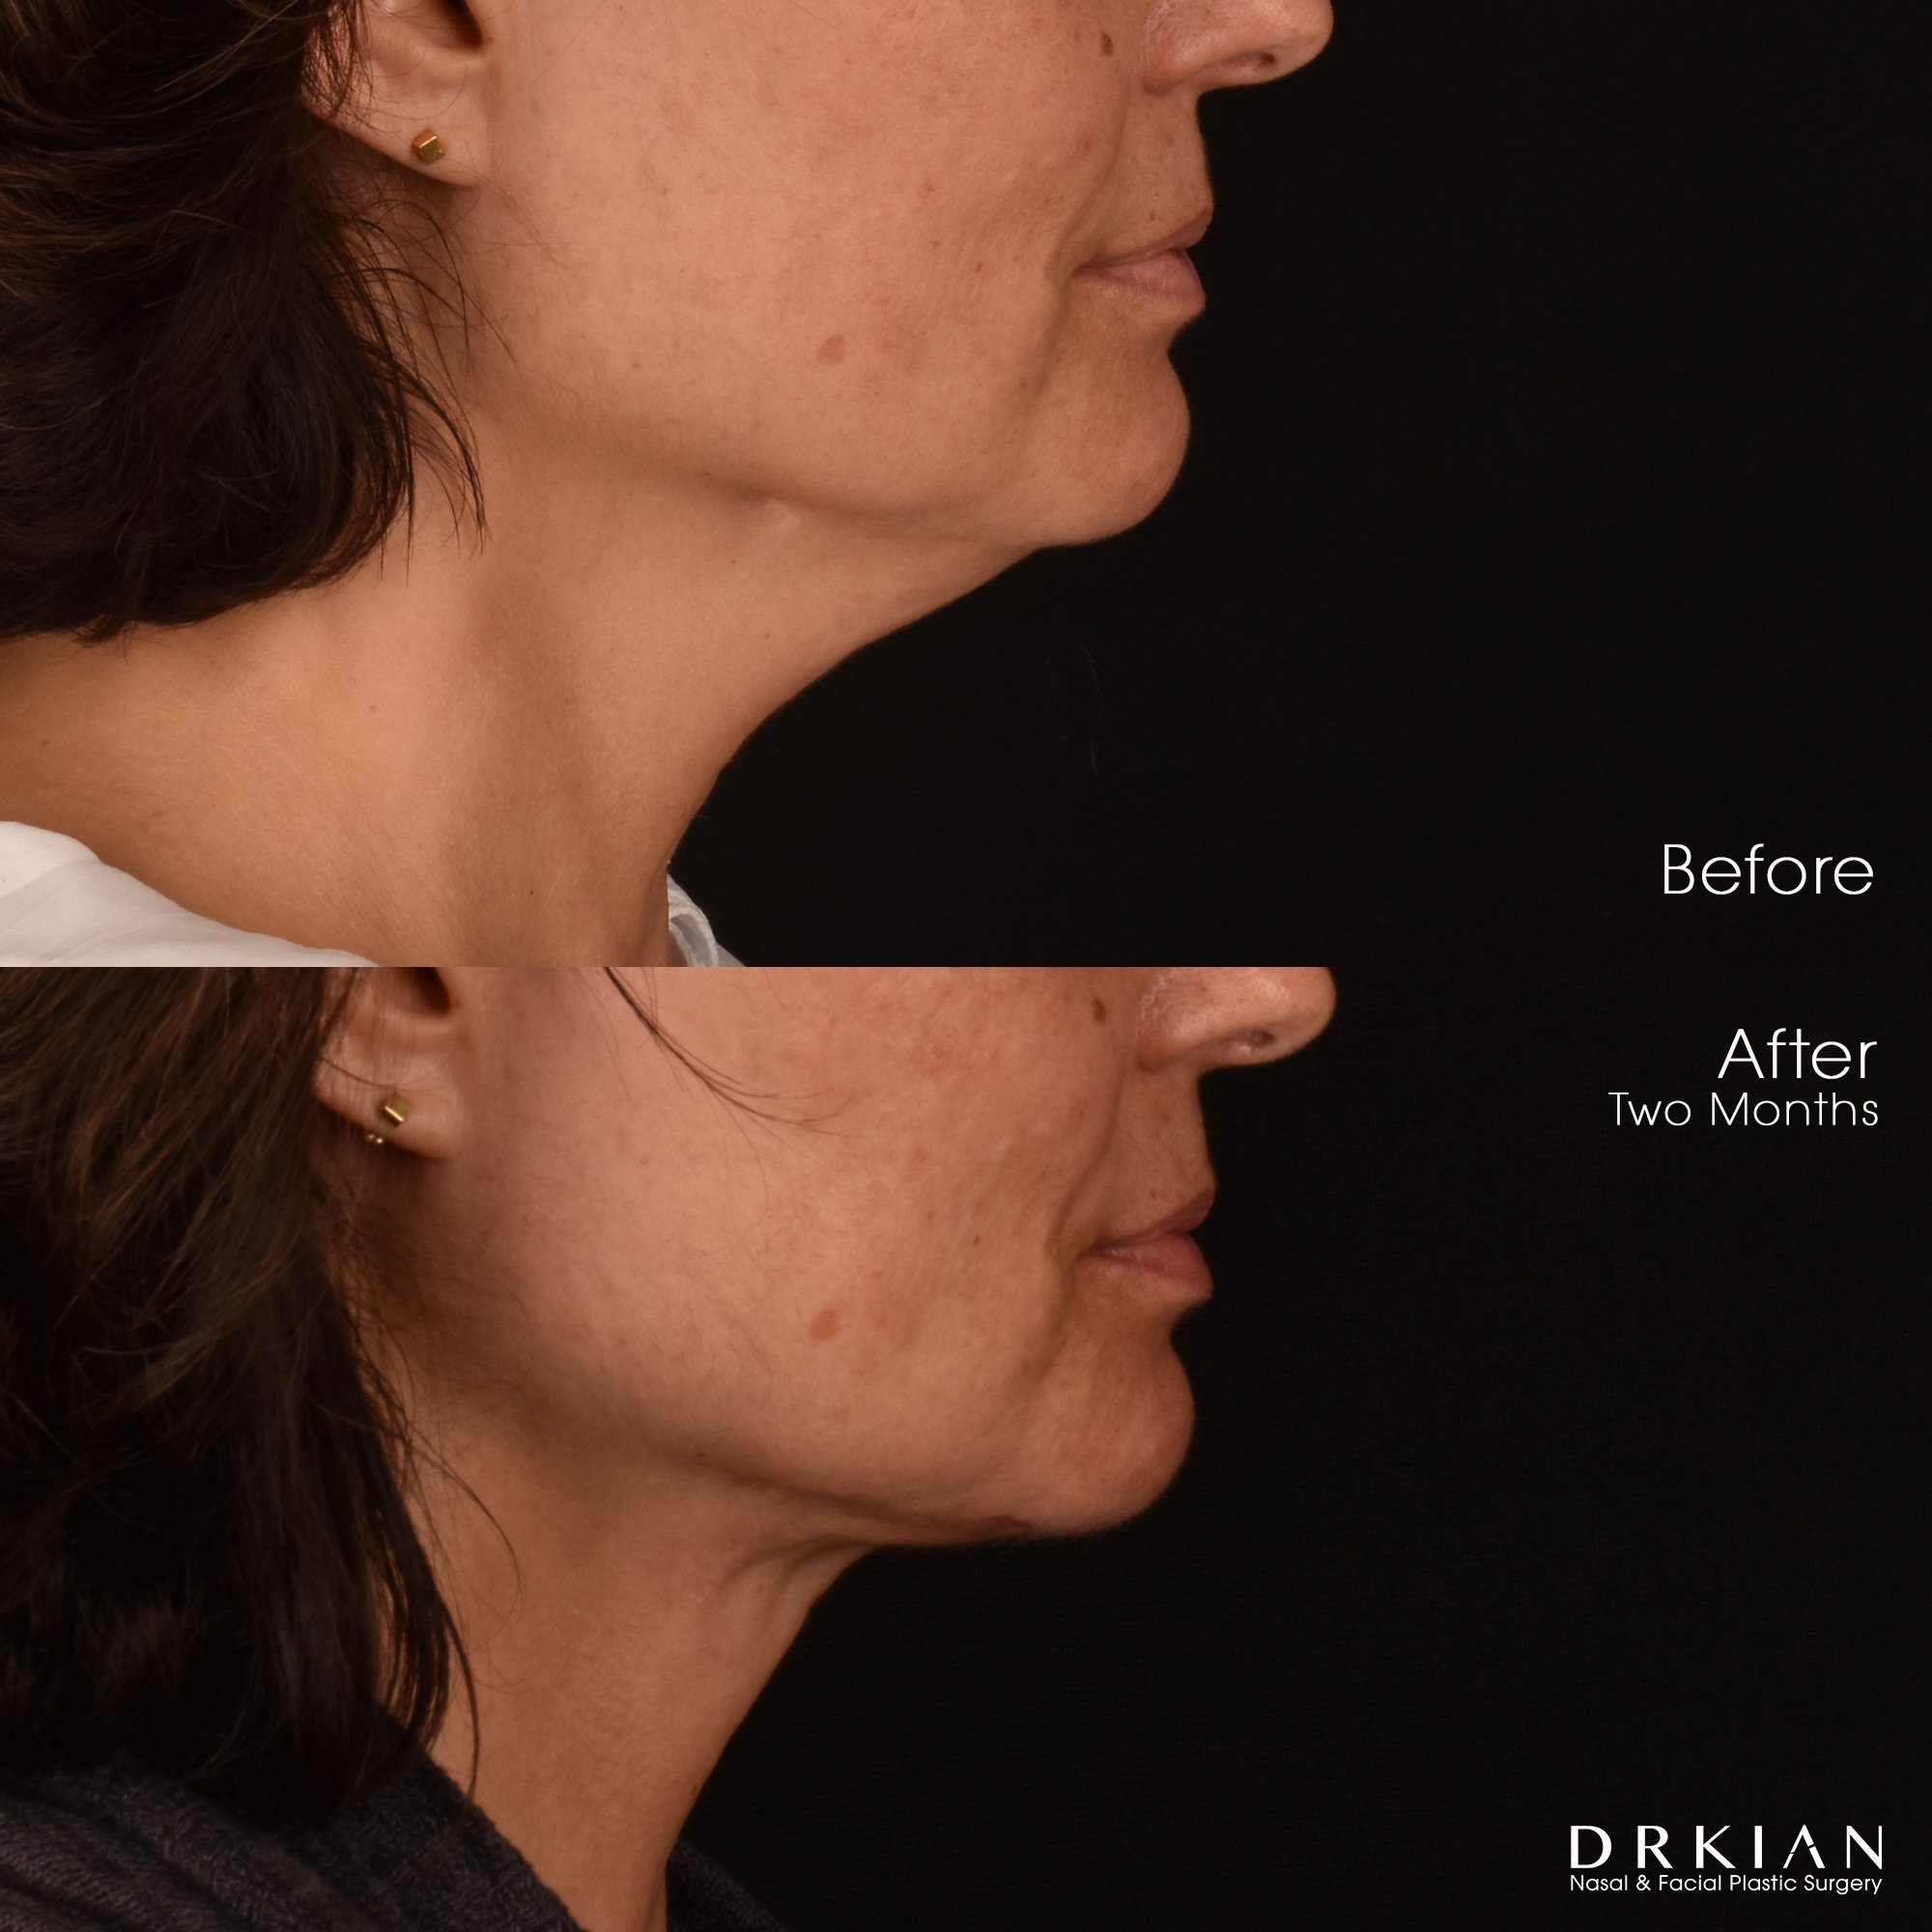
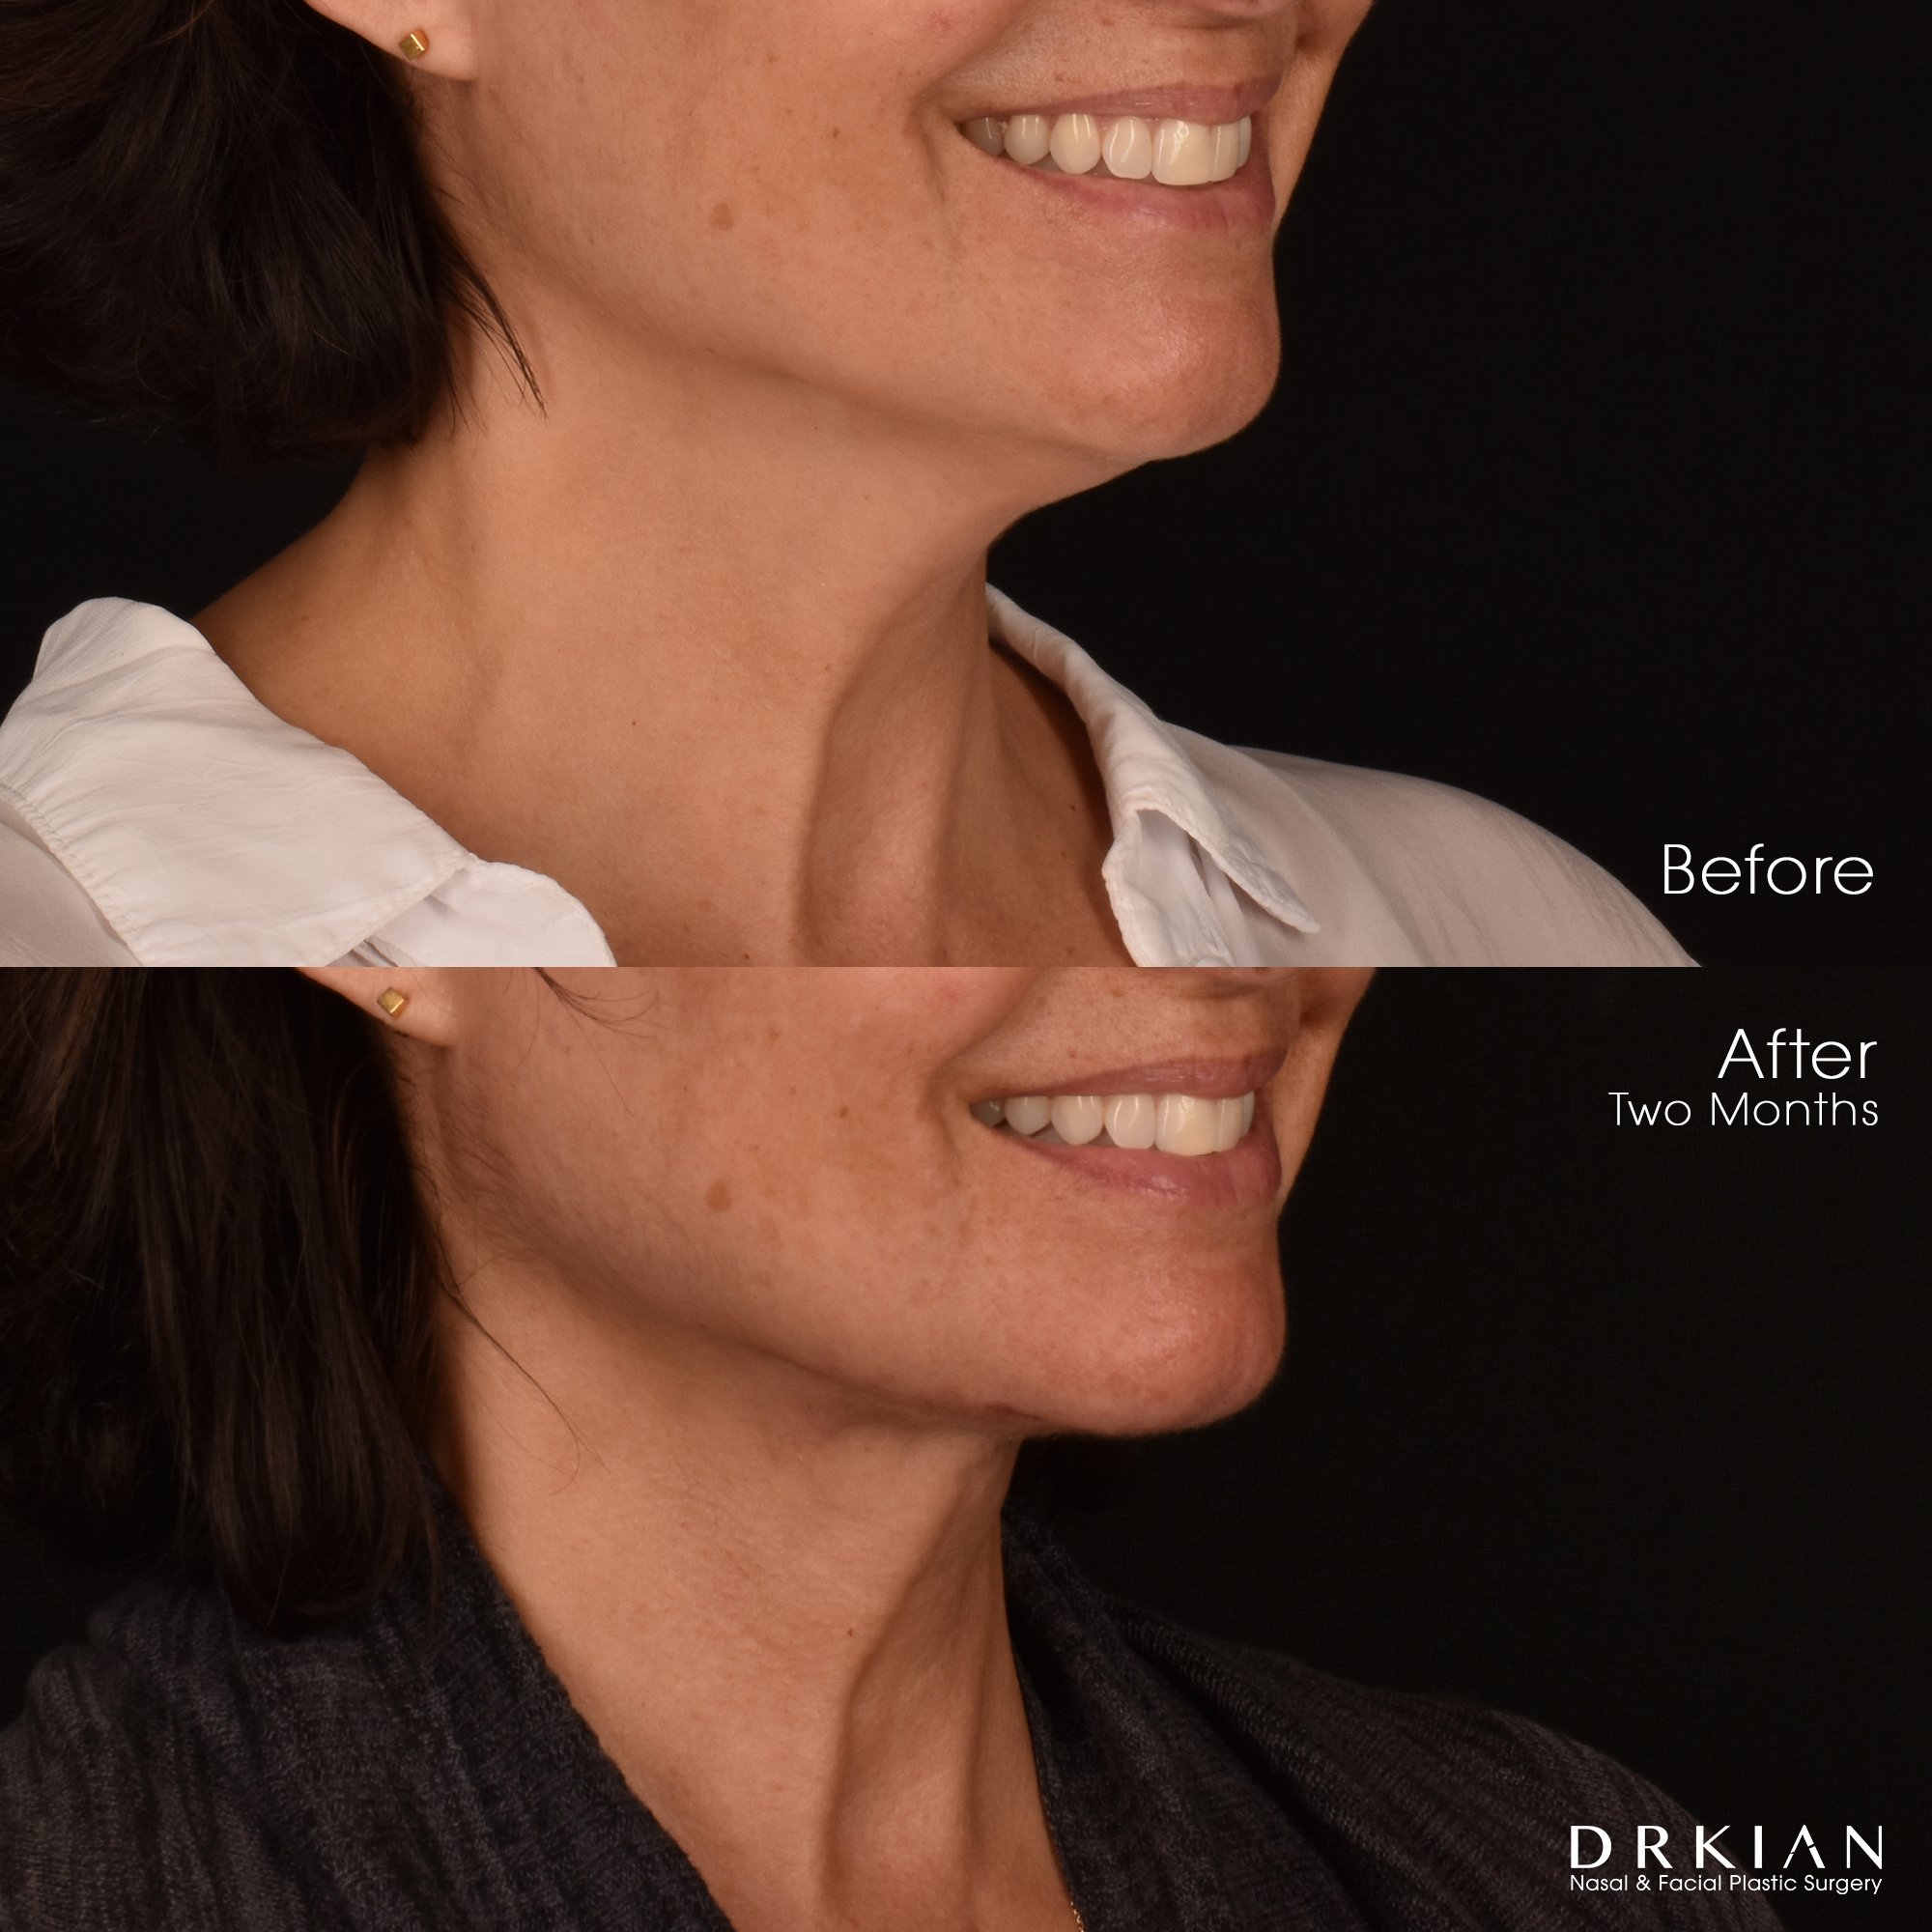
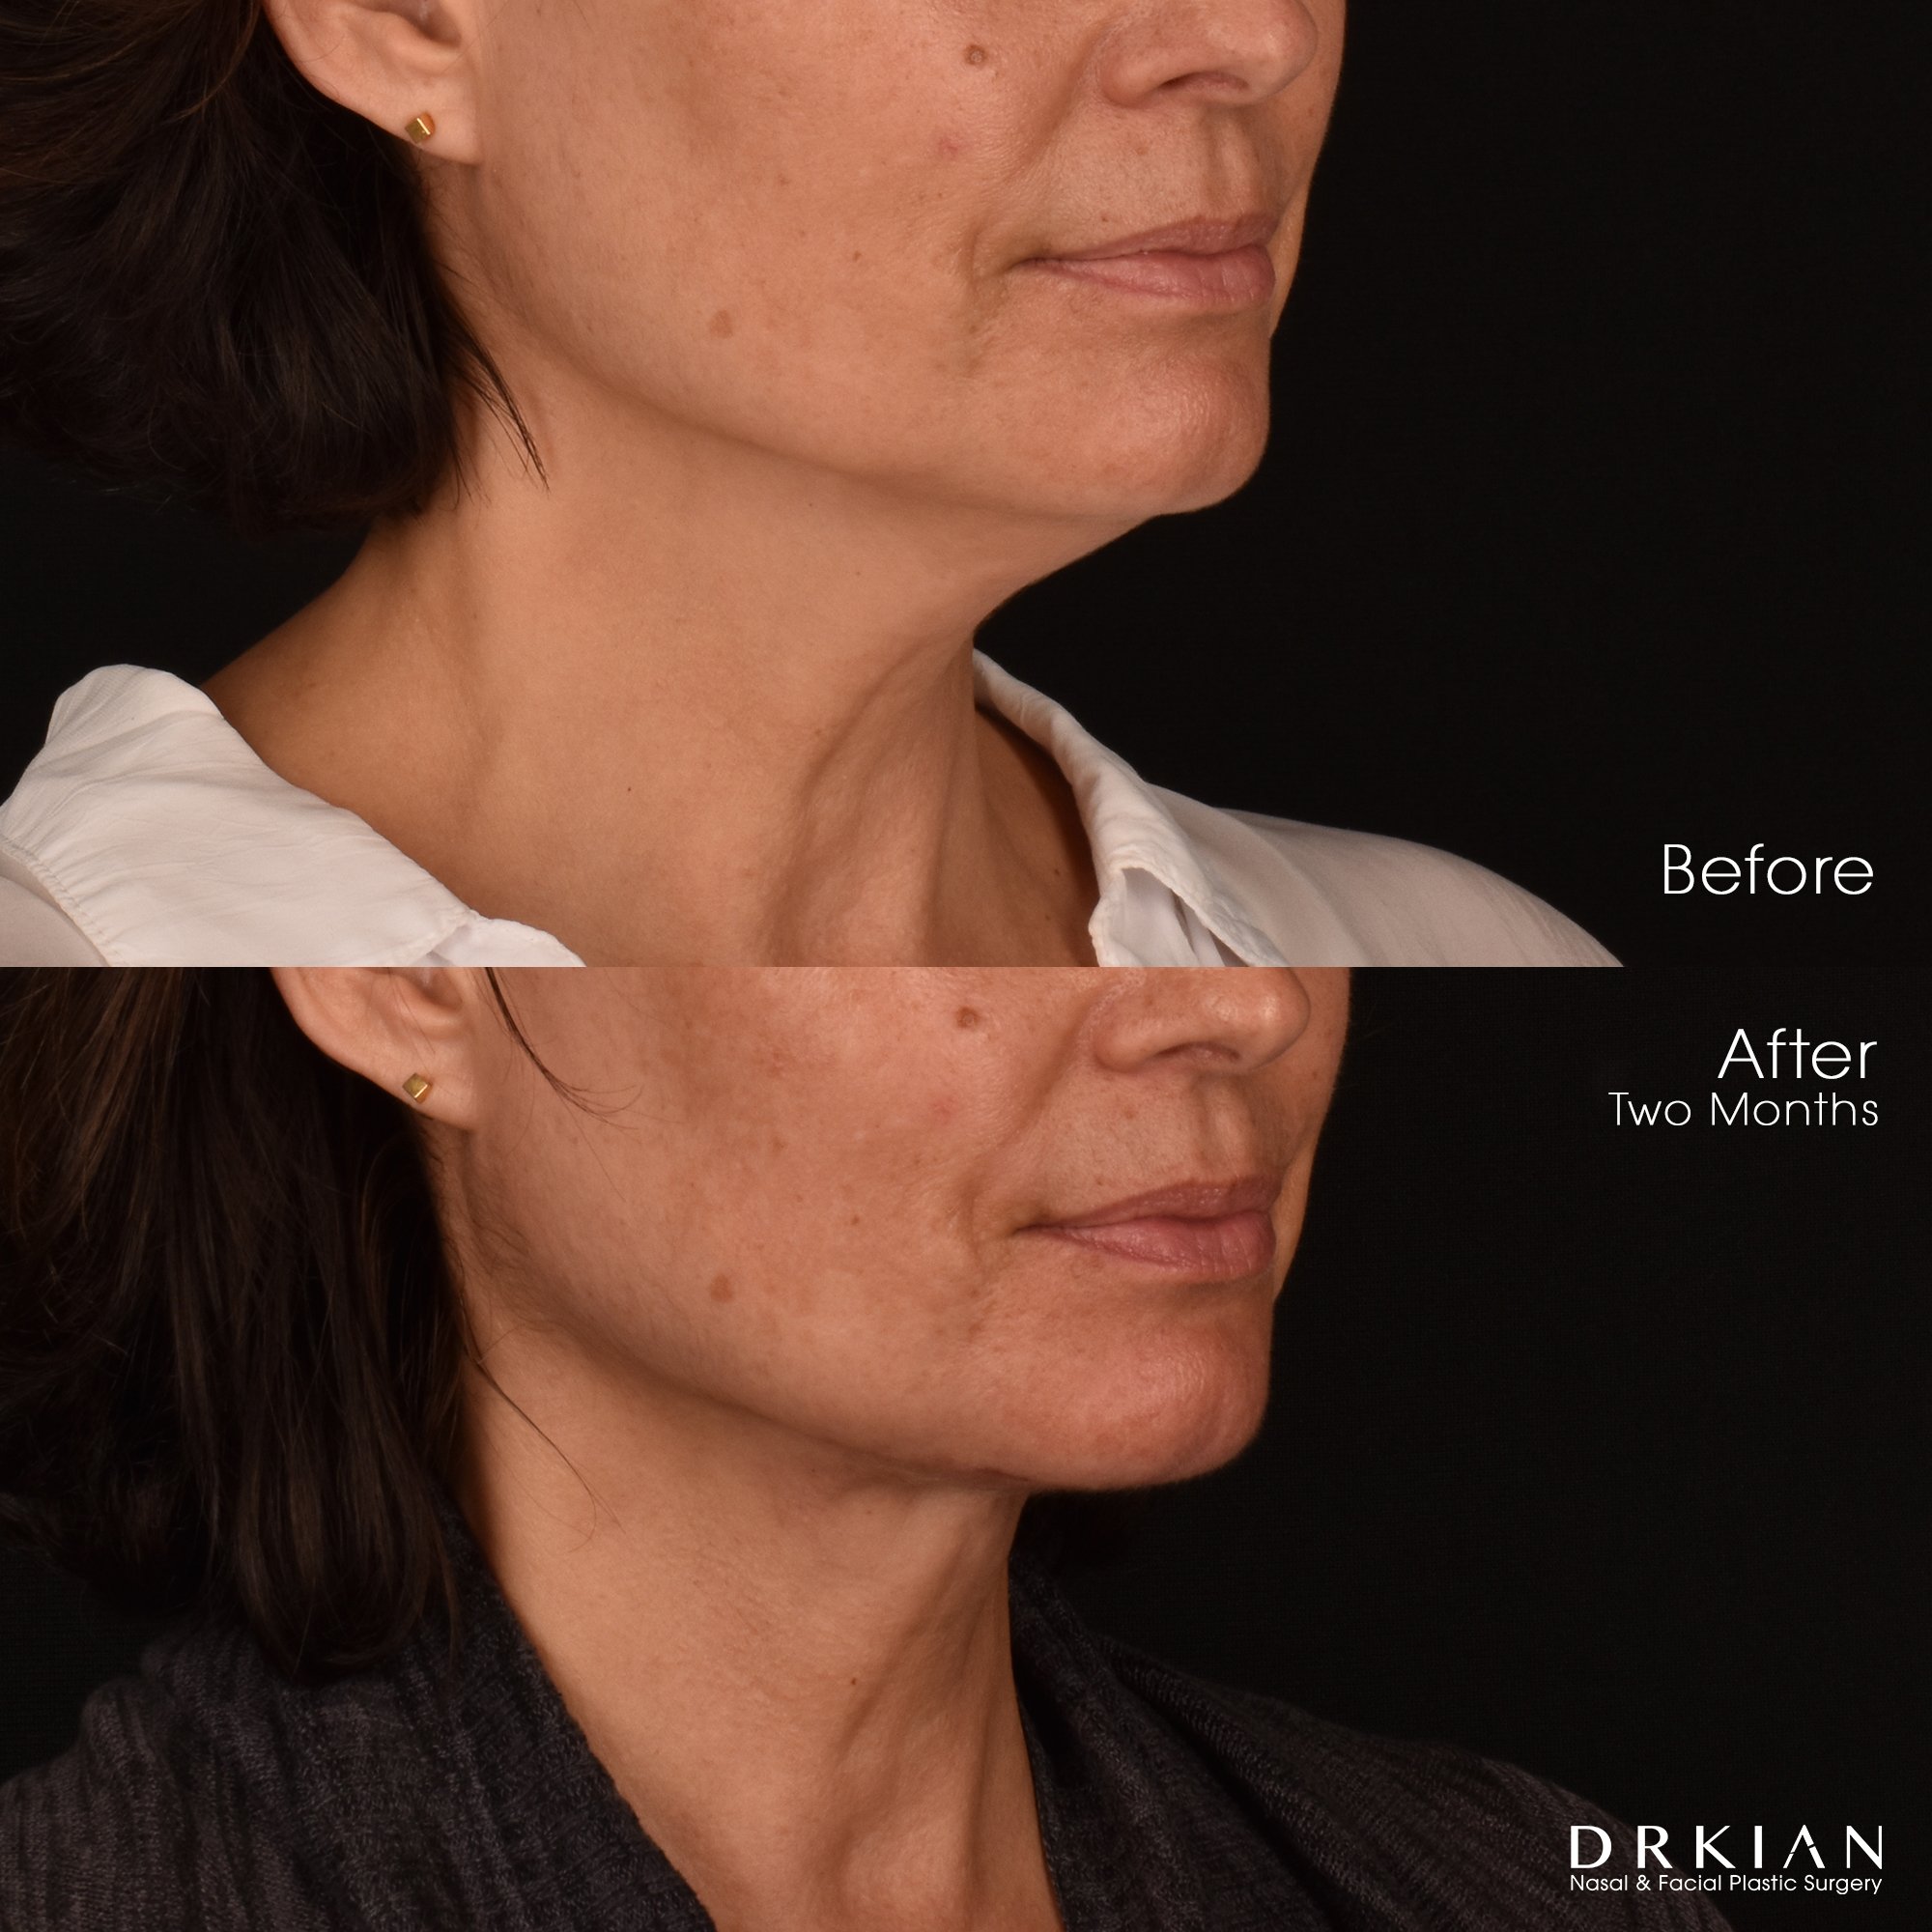
Lower Face & Neck Lift with Fat Transfer to Forehead, Temples, Mid-Face and Mouth Corners: Before & After Two Months
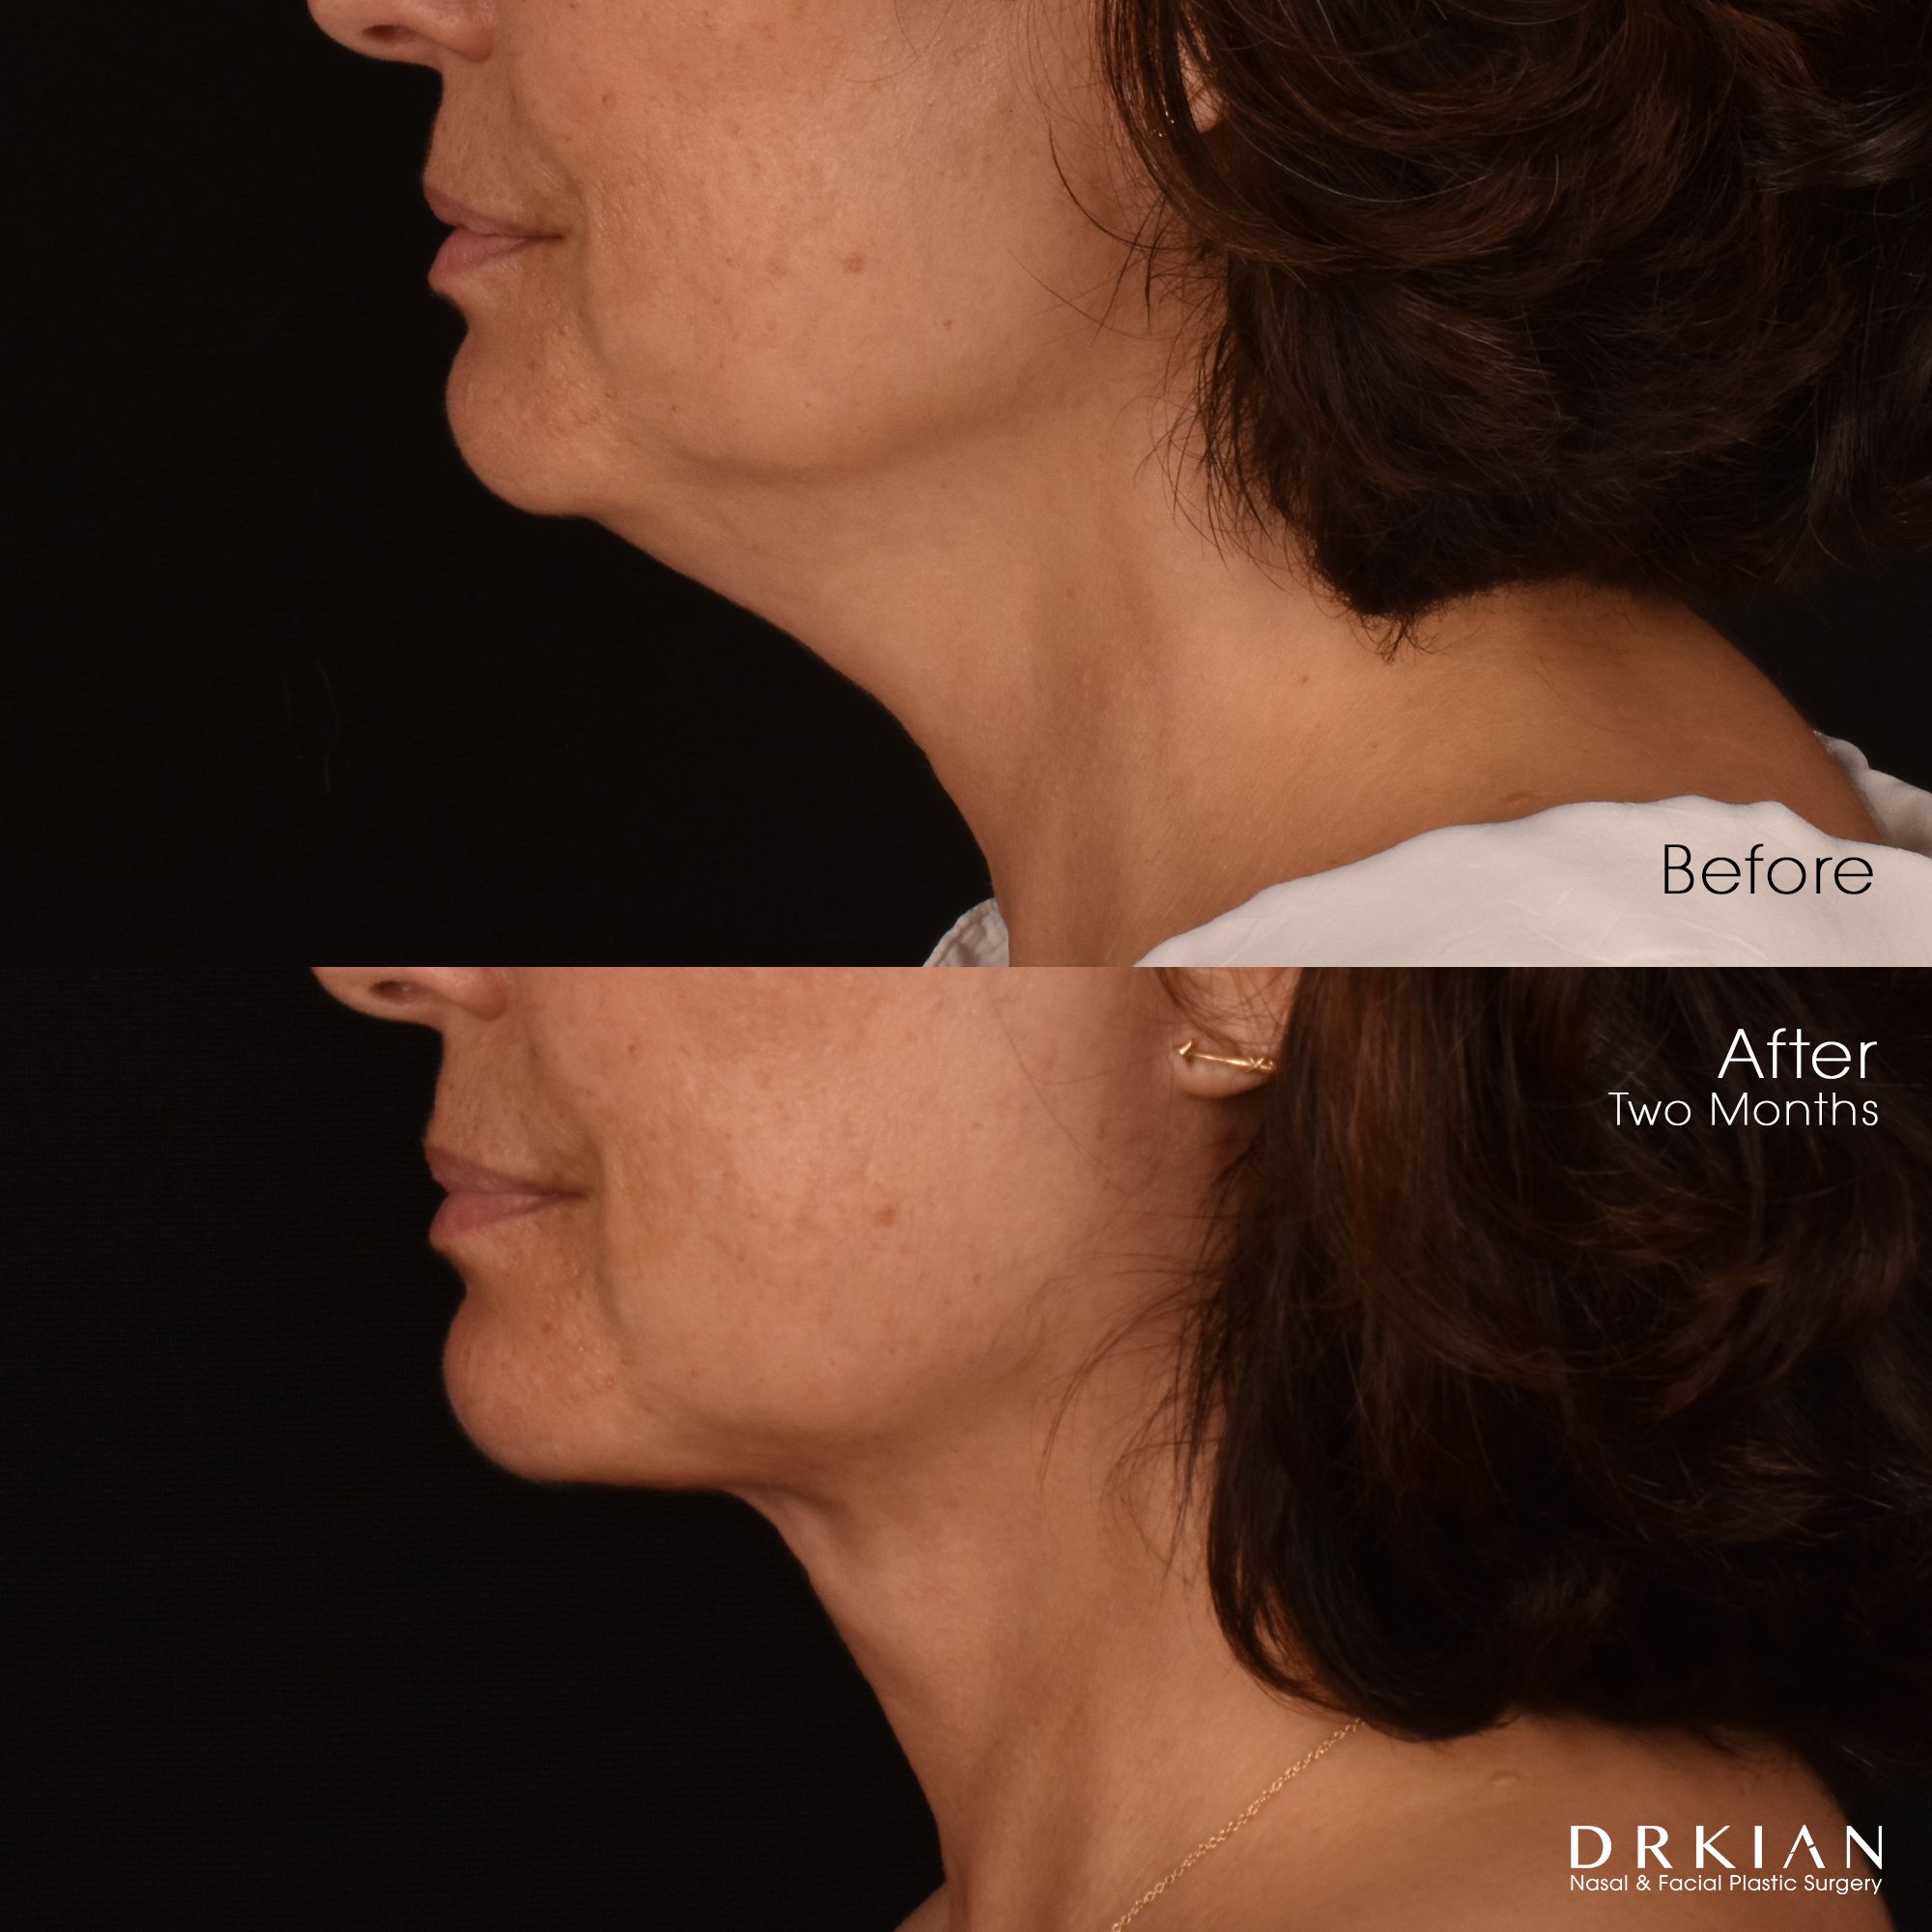
Lower Face & Neck Lift with Fat Transfer to Forehead, Temples, Mid-Face and Mouth Corners: Before & After Two Months
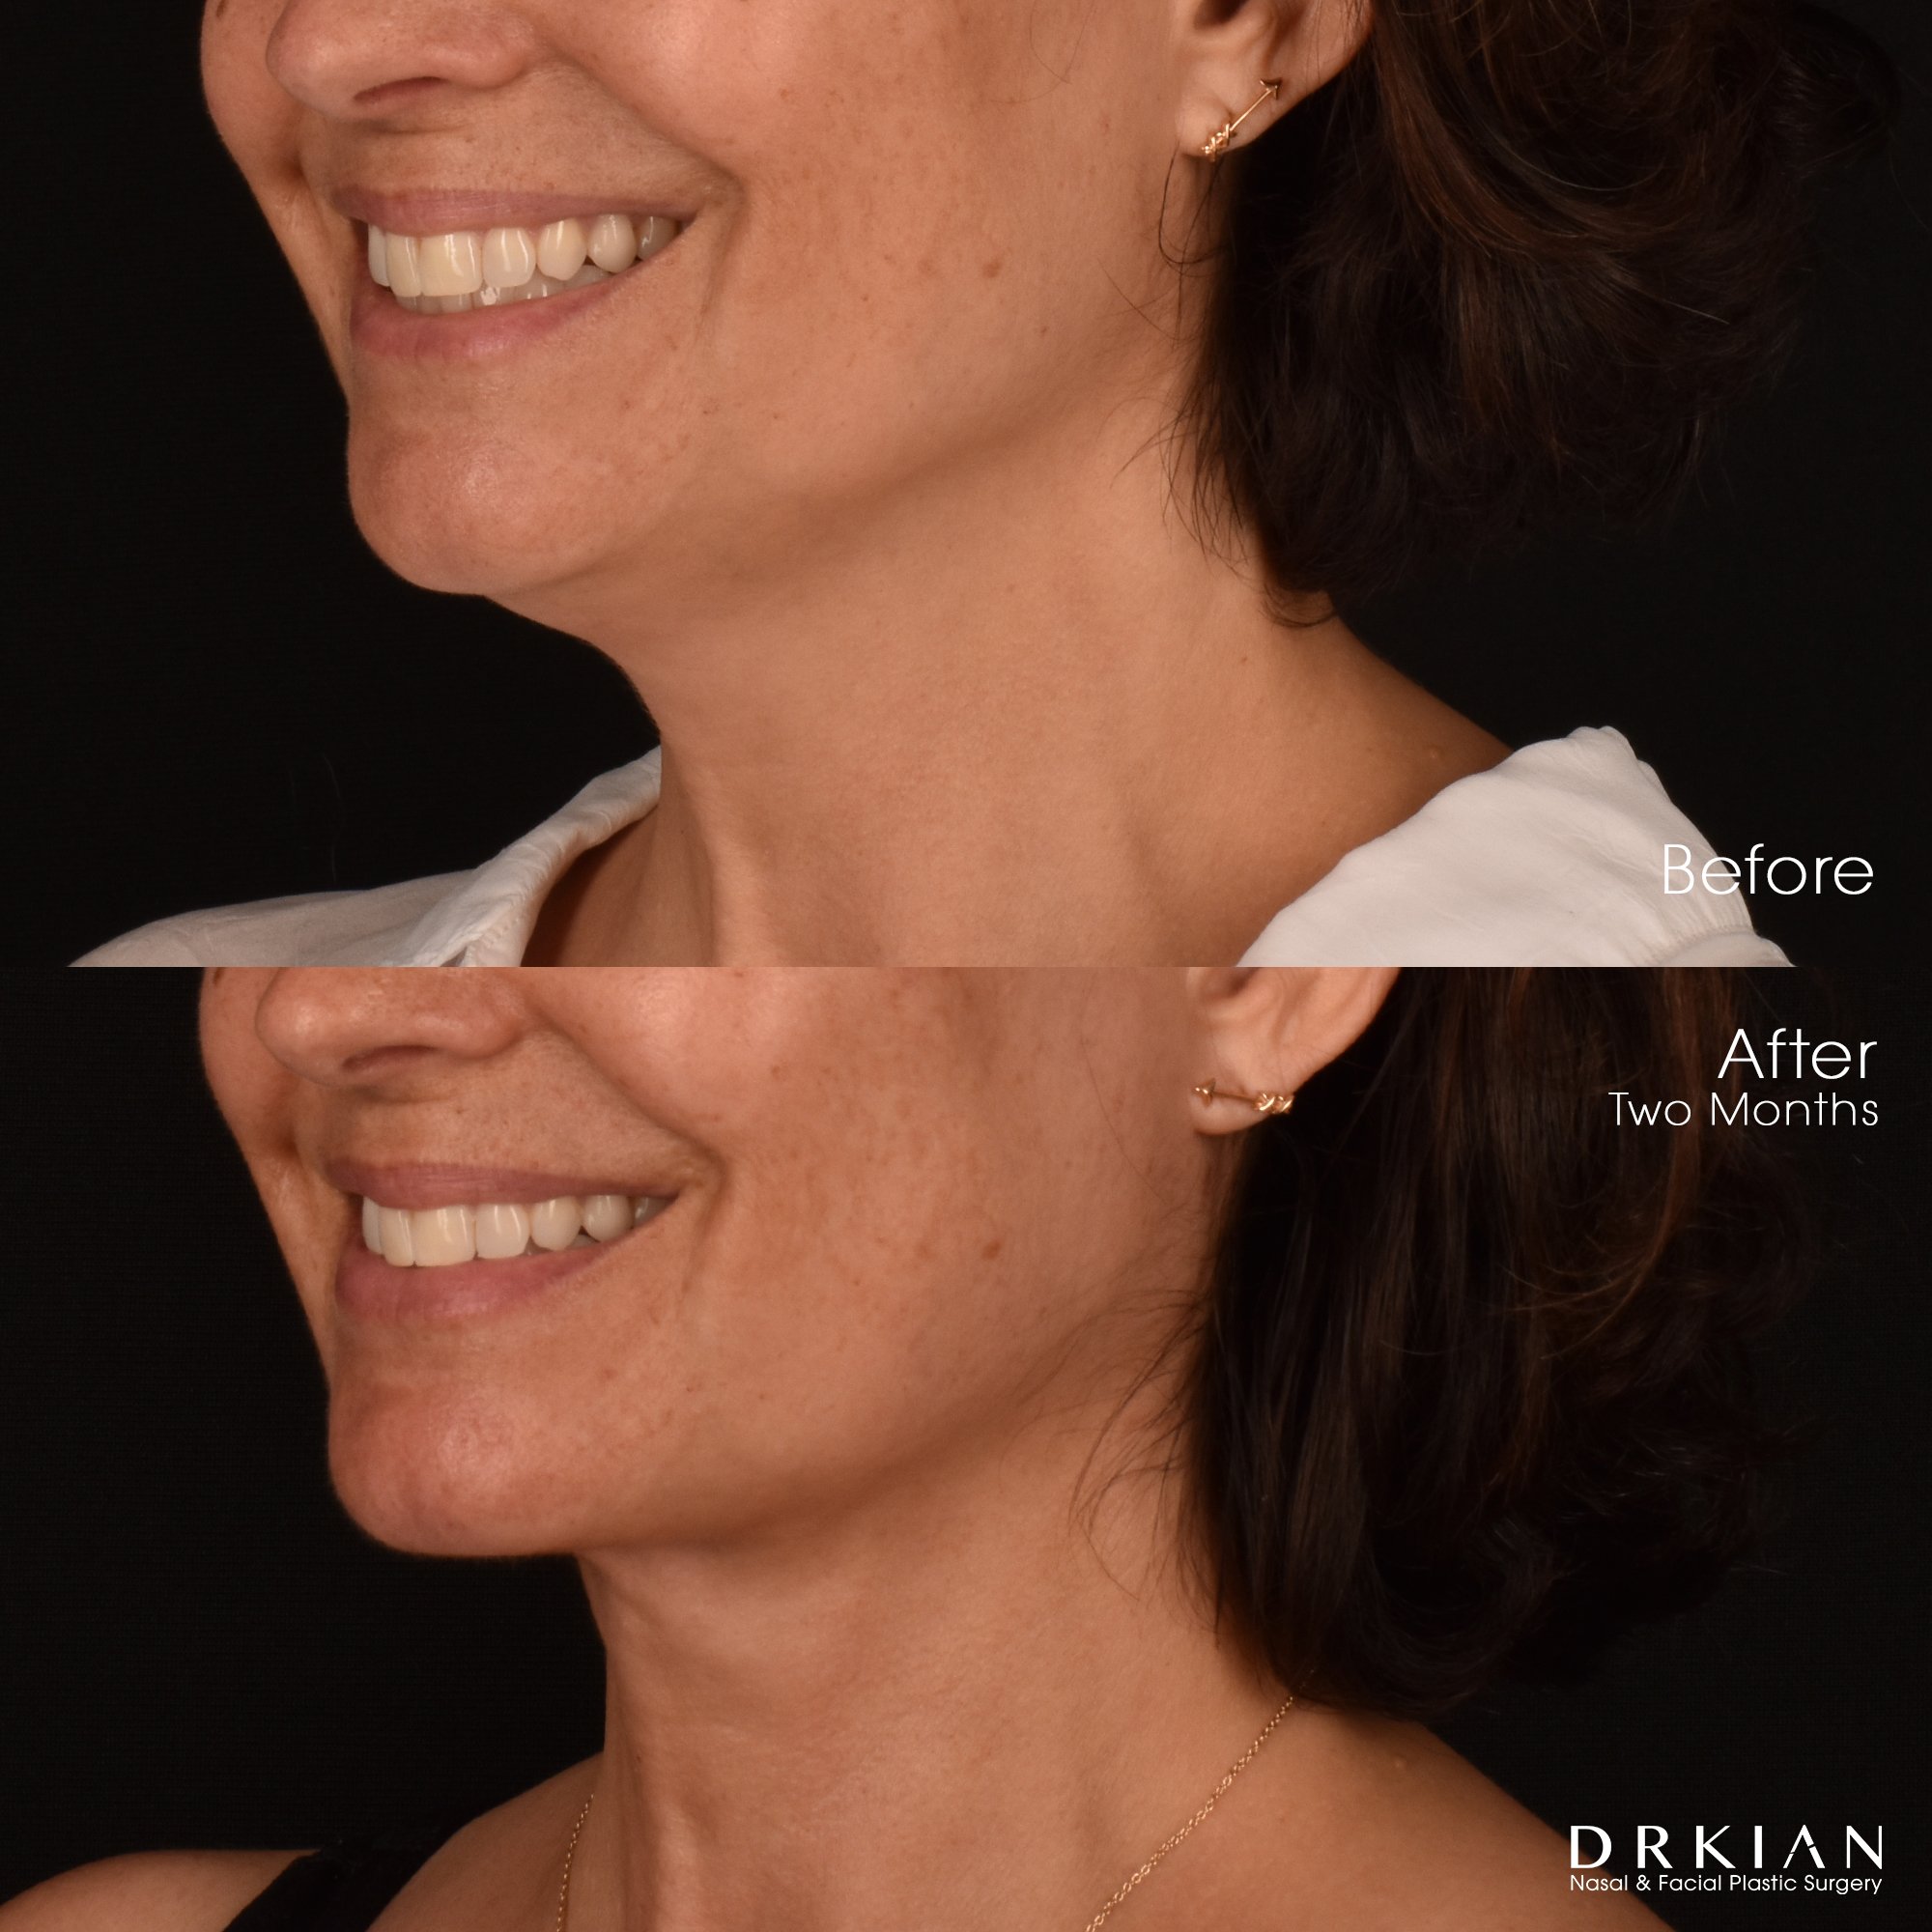
Lower Face & Neck Lift with Fat Transfer to Forehead, Temples, Mid-Face and Mouth Corners: Before & After Two Months

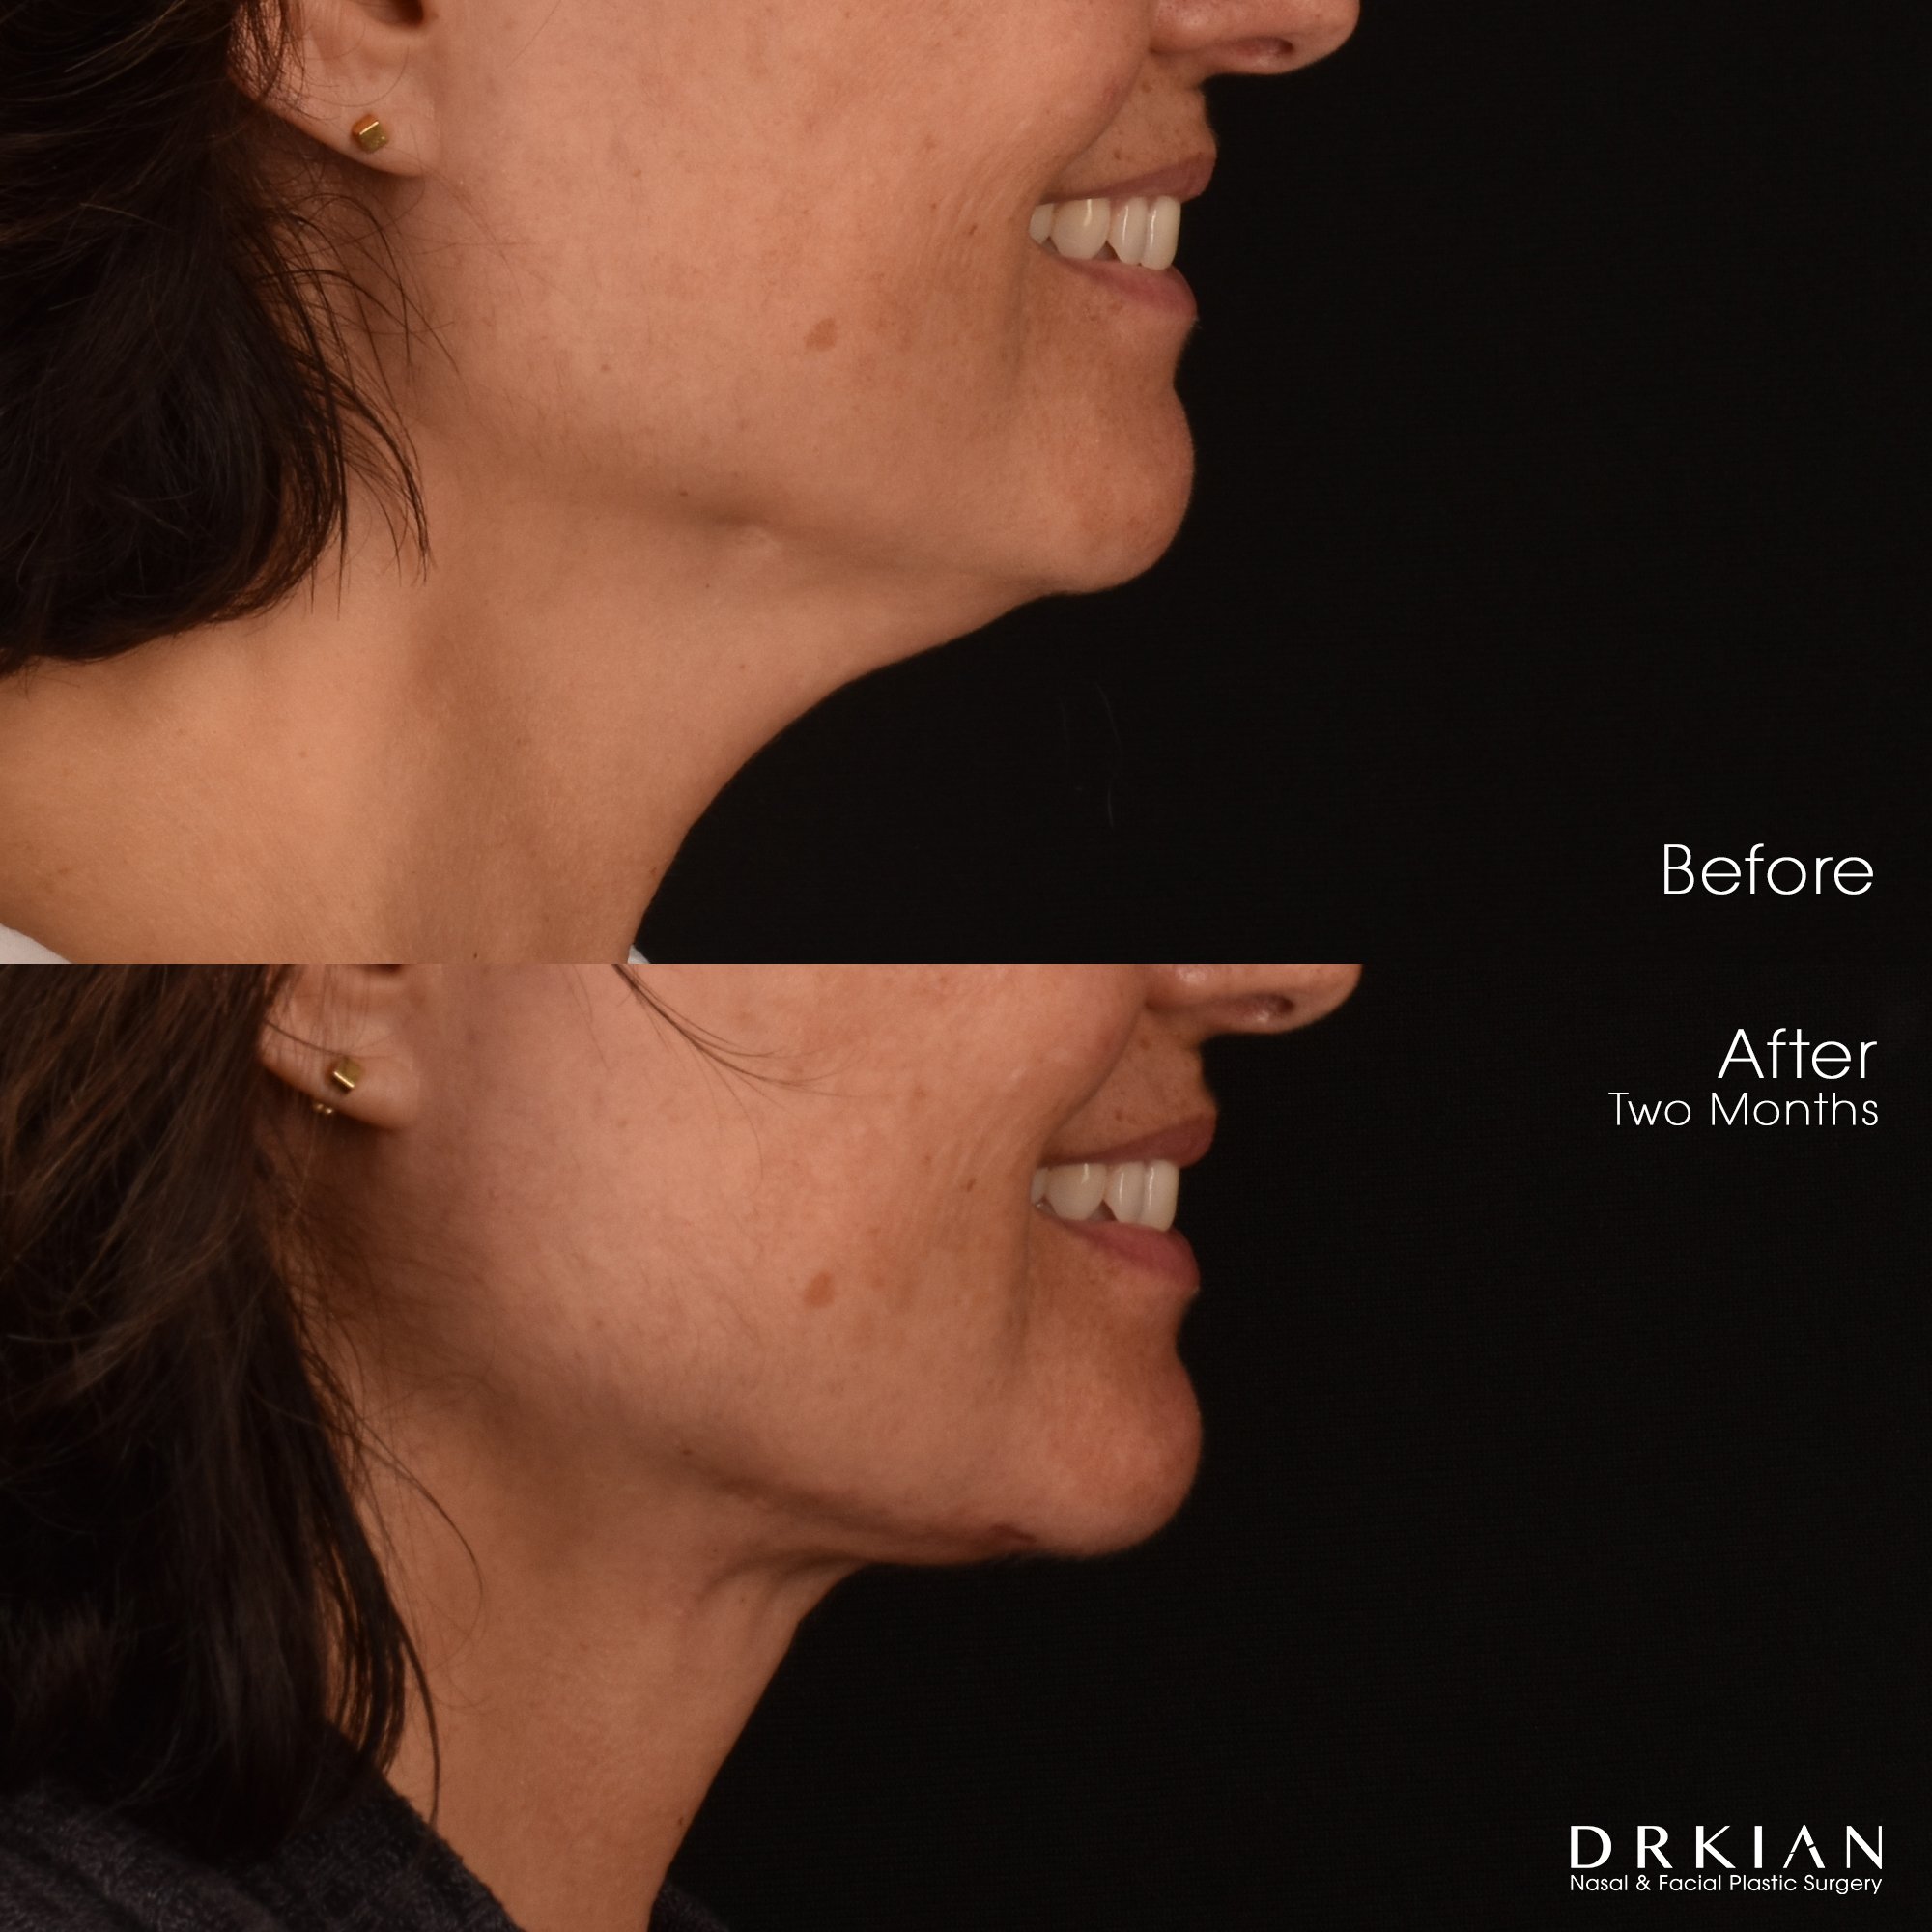
Lower Face & Neck Lift with Fat Transfer to Forehead, Temples, Mid-Face and Mouth Corners: Before & After Two Months

Lower Face & Neck Lift with Fat Transfer to Forehead, Temples, Mid-Face and Mouth Corners: Before & After Two Months
Lower Face & Neck Lift with Fat Transfer to Forehead, Temples, Mid-Face and Mouth Corners: Before & After Two Months
Lower Face & Neck Lift with Fat Transfer to Forehead, Temples, Mid-Face and Mouth Corners: Before & After Two Months

Lower Face & Neck Lift with Fat Transfer to Forehead, Temples, Mid-Face and Mouth Corners: Before & After Two Months
Lower Face & Neck Lift with Fat Transfer to Forehead, Temples, Mid-Face and Mouth Corners: Before & After Two Months
Lower Face & Neck Lift with Fat Transfer to Forehead, Temples, Mid-Face and Mouth Corners: Before & After Two Months
Lower Face & Neck Lift with Fat Transfer to Forehead, Temples, Mid-Face and Mouth Corners: Before & After Two Months
Lower Face & Neck Lift with Fat Transfer to Forehead, Temples, Mid-Face and Mouth Corners: Before & After Two Months

Lower Face & Neck Lift with Fat Transfer to Forehead, Temples, Mid-Face and Mouth Corners: Before & After Two Months

Lower Face & Neck Lift with Fat Transfer to Forehead, Temples, Mid-Face and Mouth Corners: Before & After Two Months
Lower Face & Neck Lift with Fat Transfer to Forehead, Temples, Mid-Face and Mouth Corners: Before & After Two Months
Face & Neck Lift

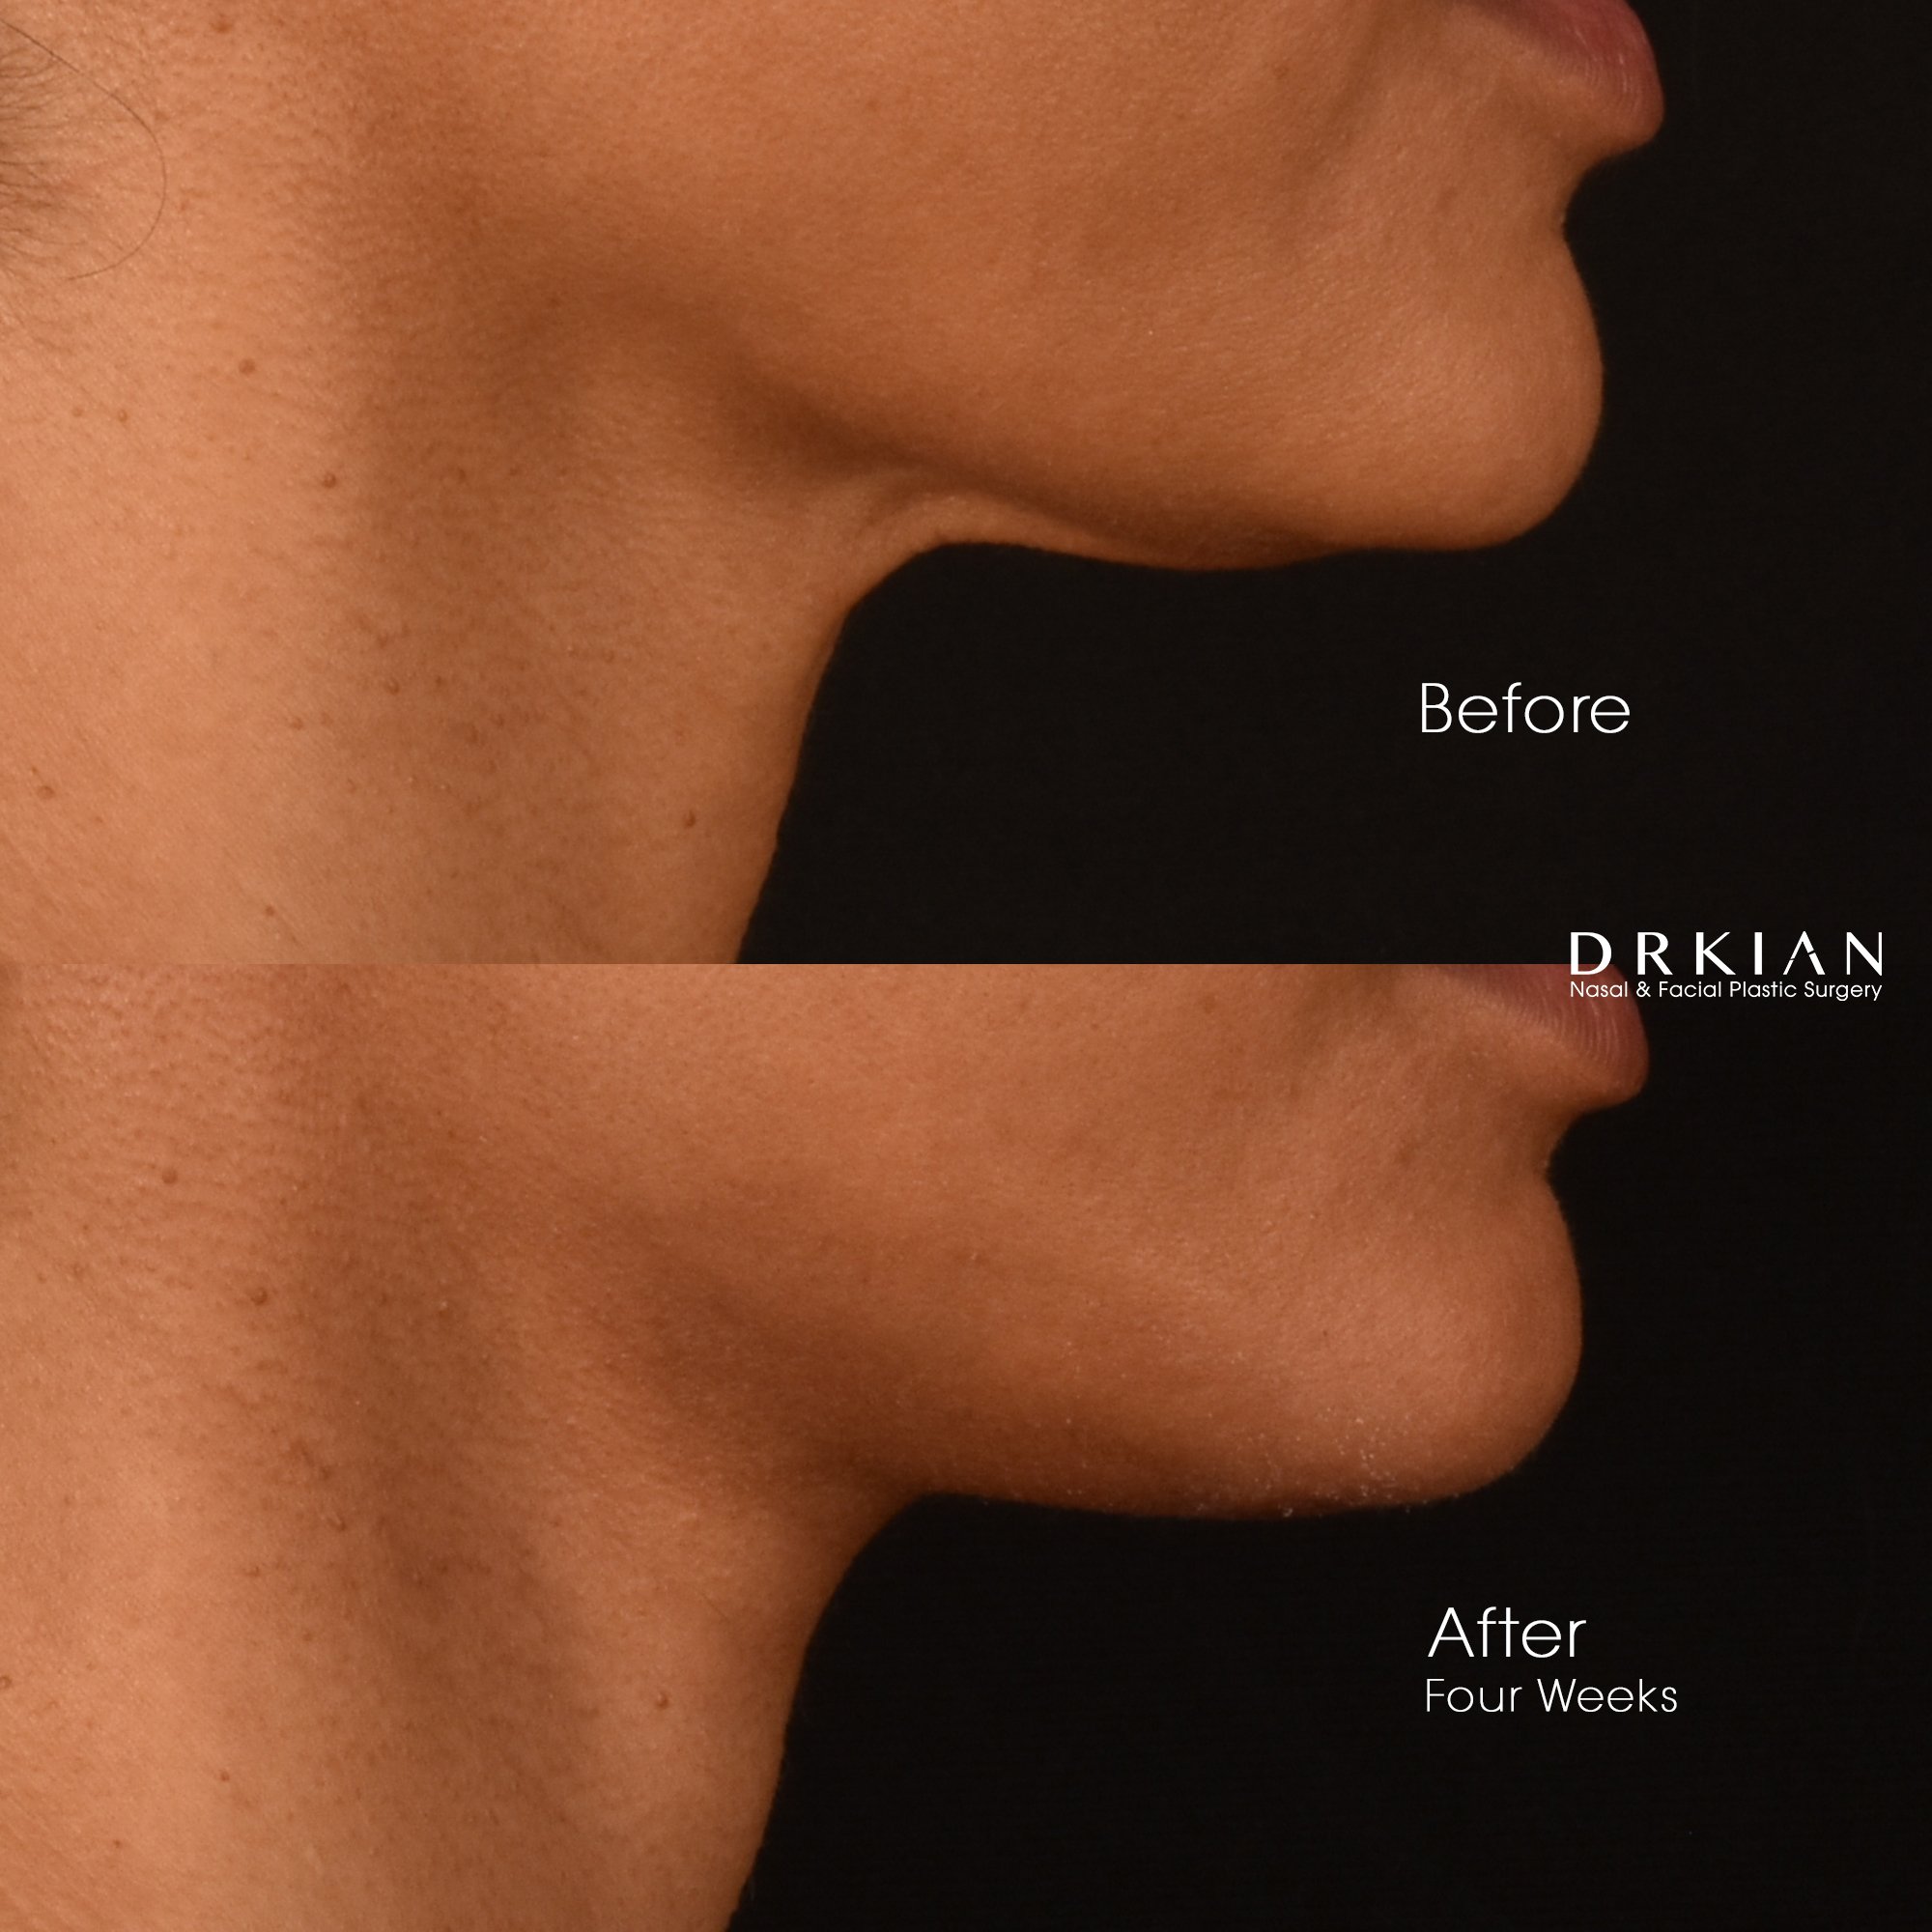
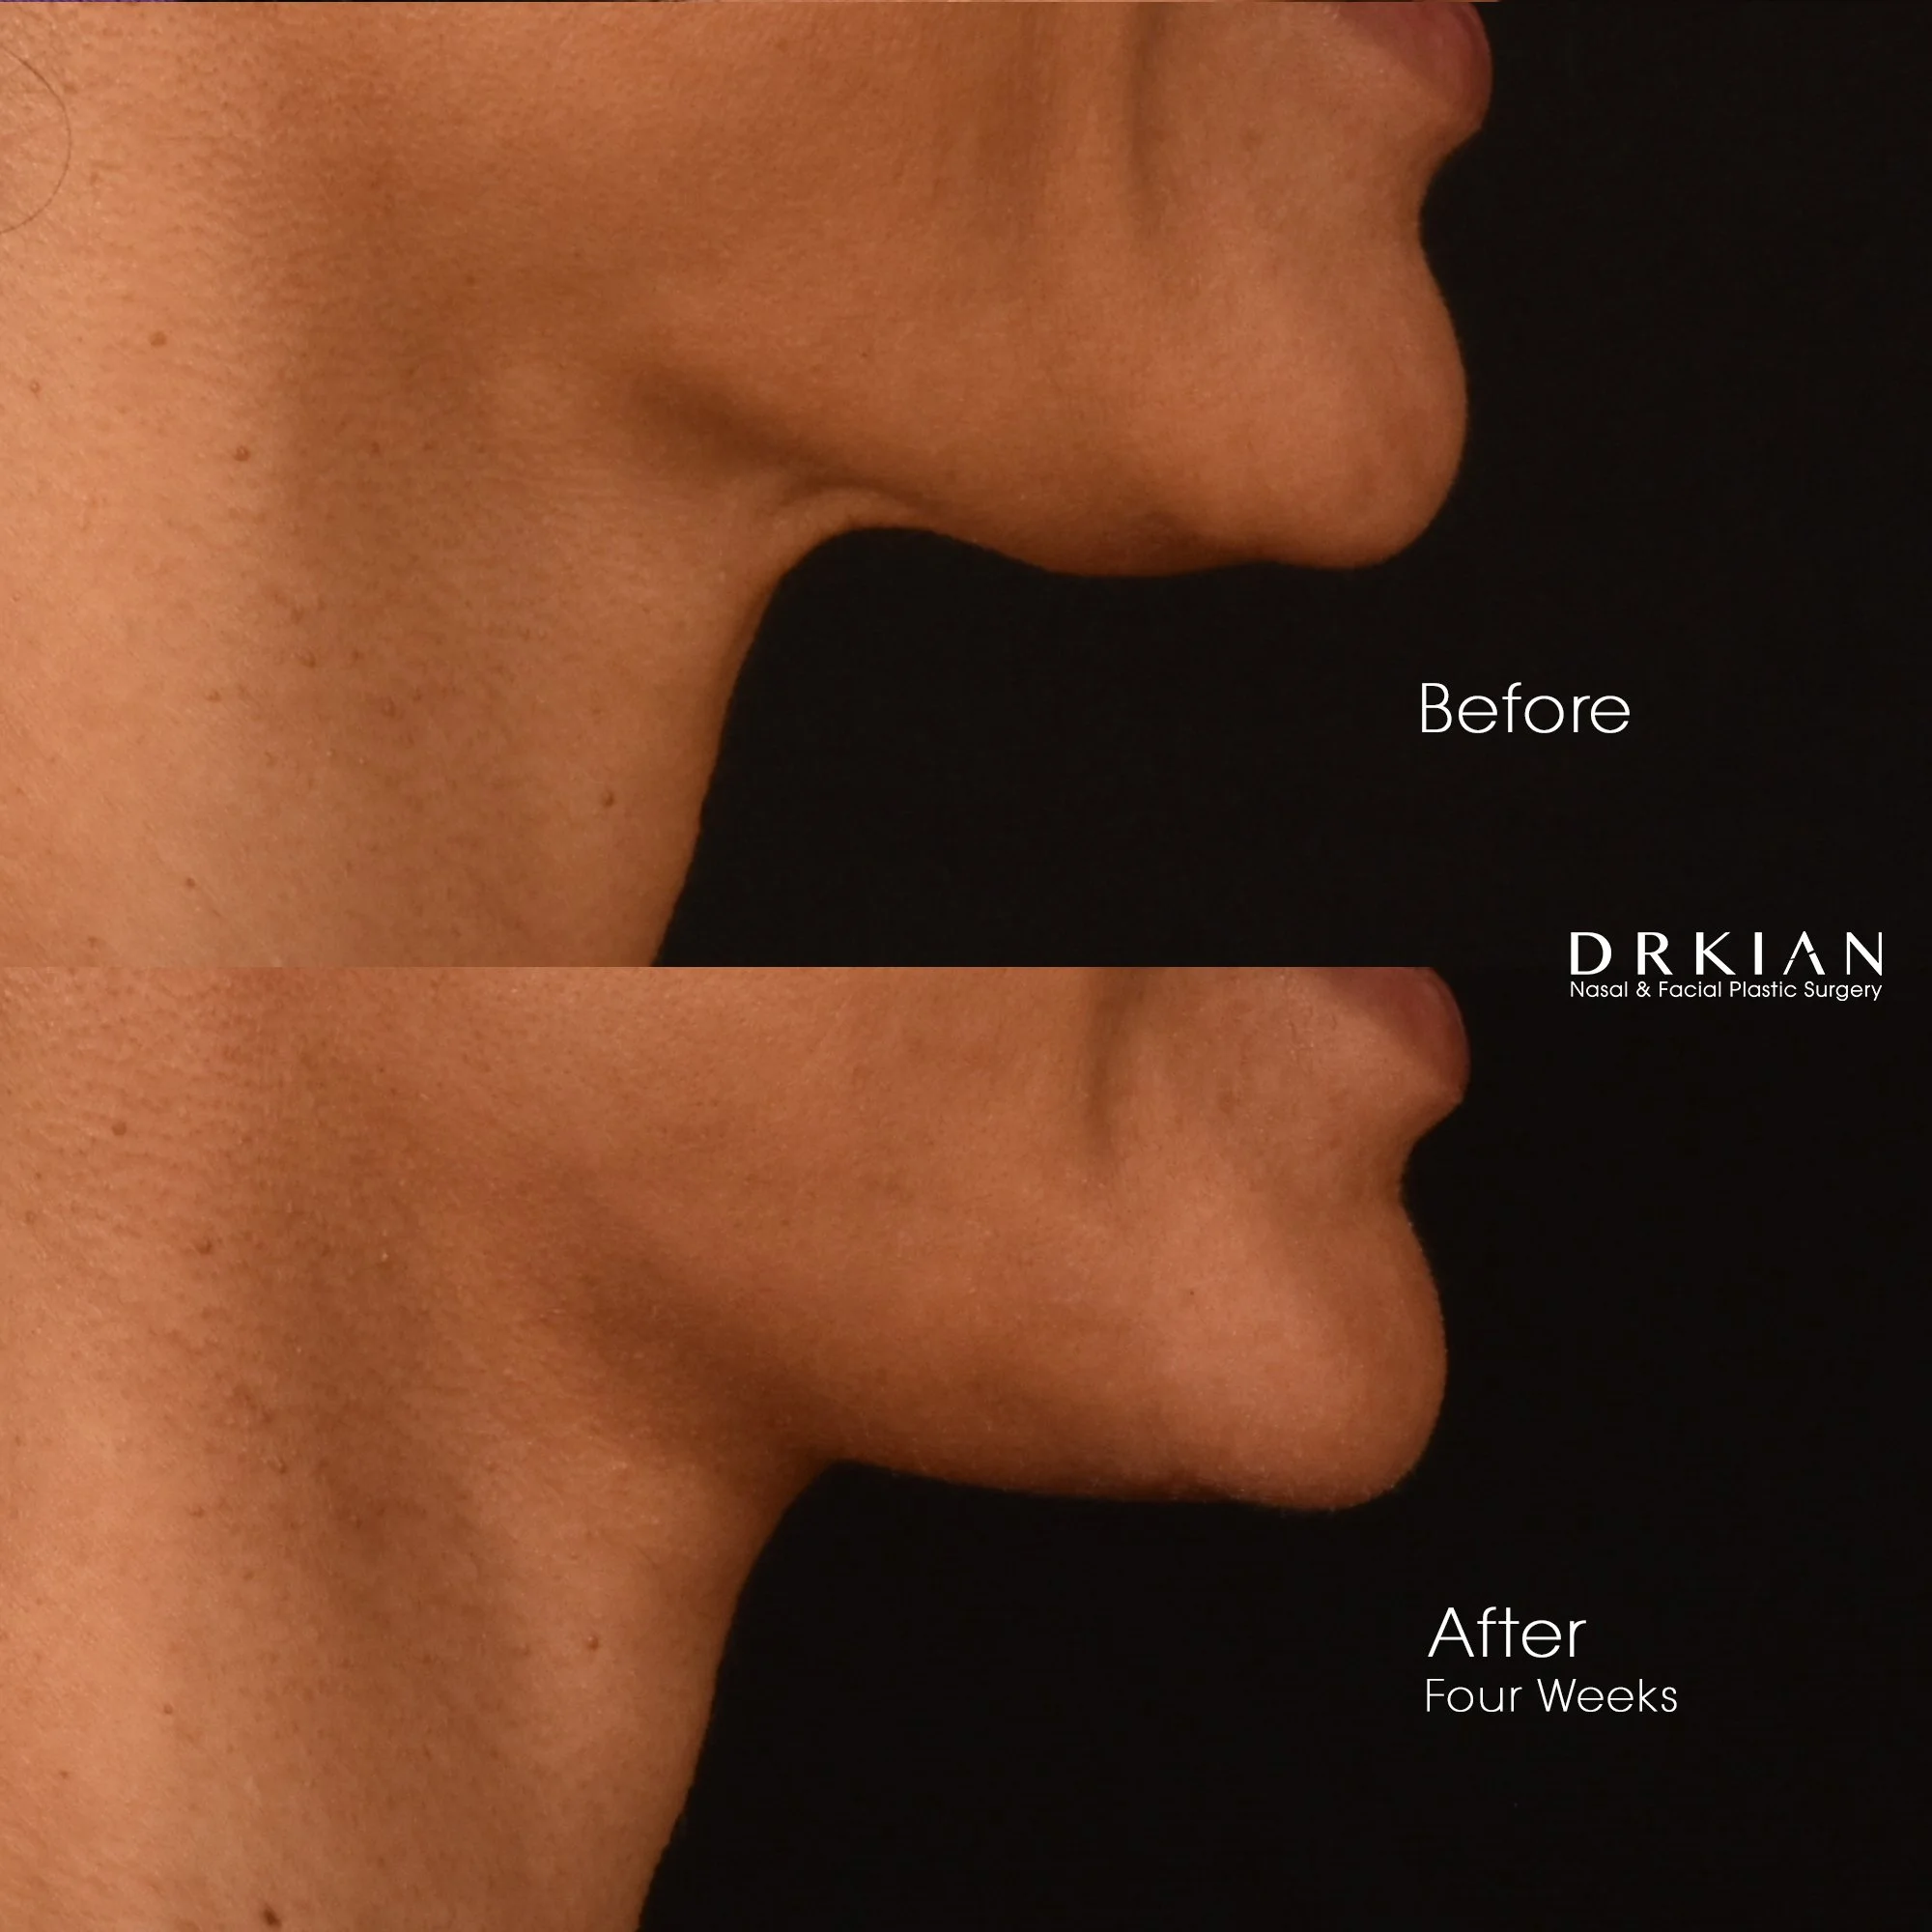
Deep Plane Lower Face & Neck Lift: Before & After Four Weeks
Deep Plane Lower Face & Neck Lift: Before & After Four Weeks
Deep Plane Lower Face & Neck Lift: Before & After Four Weeks

Deep Plane Lower Face & Neck Lift: Before & After Four Weeks

Deep Plane Lower Face & Neck Lift: Before & After Four Weeks
Deep Plane Lower Face & Neck Lift: Before & After Four Weeks
Deep Plane Lower Face & Neck Lift: Before & After Four Weeks
Deep Plane Lower Face & Neck Lift: Before & After Four Weeks
Deep Plane Lower Face & Neck Lift: Before & After Four Weeks

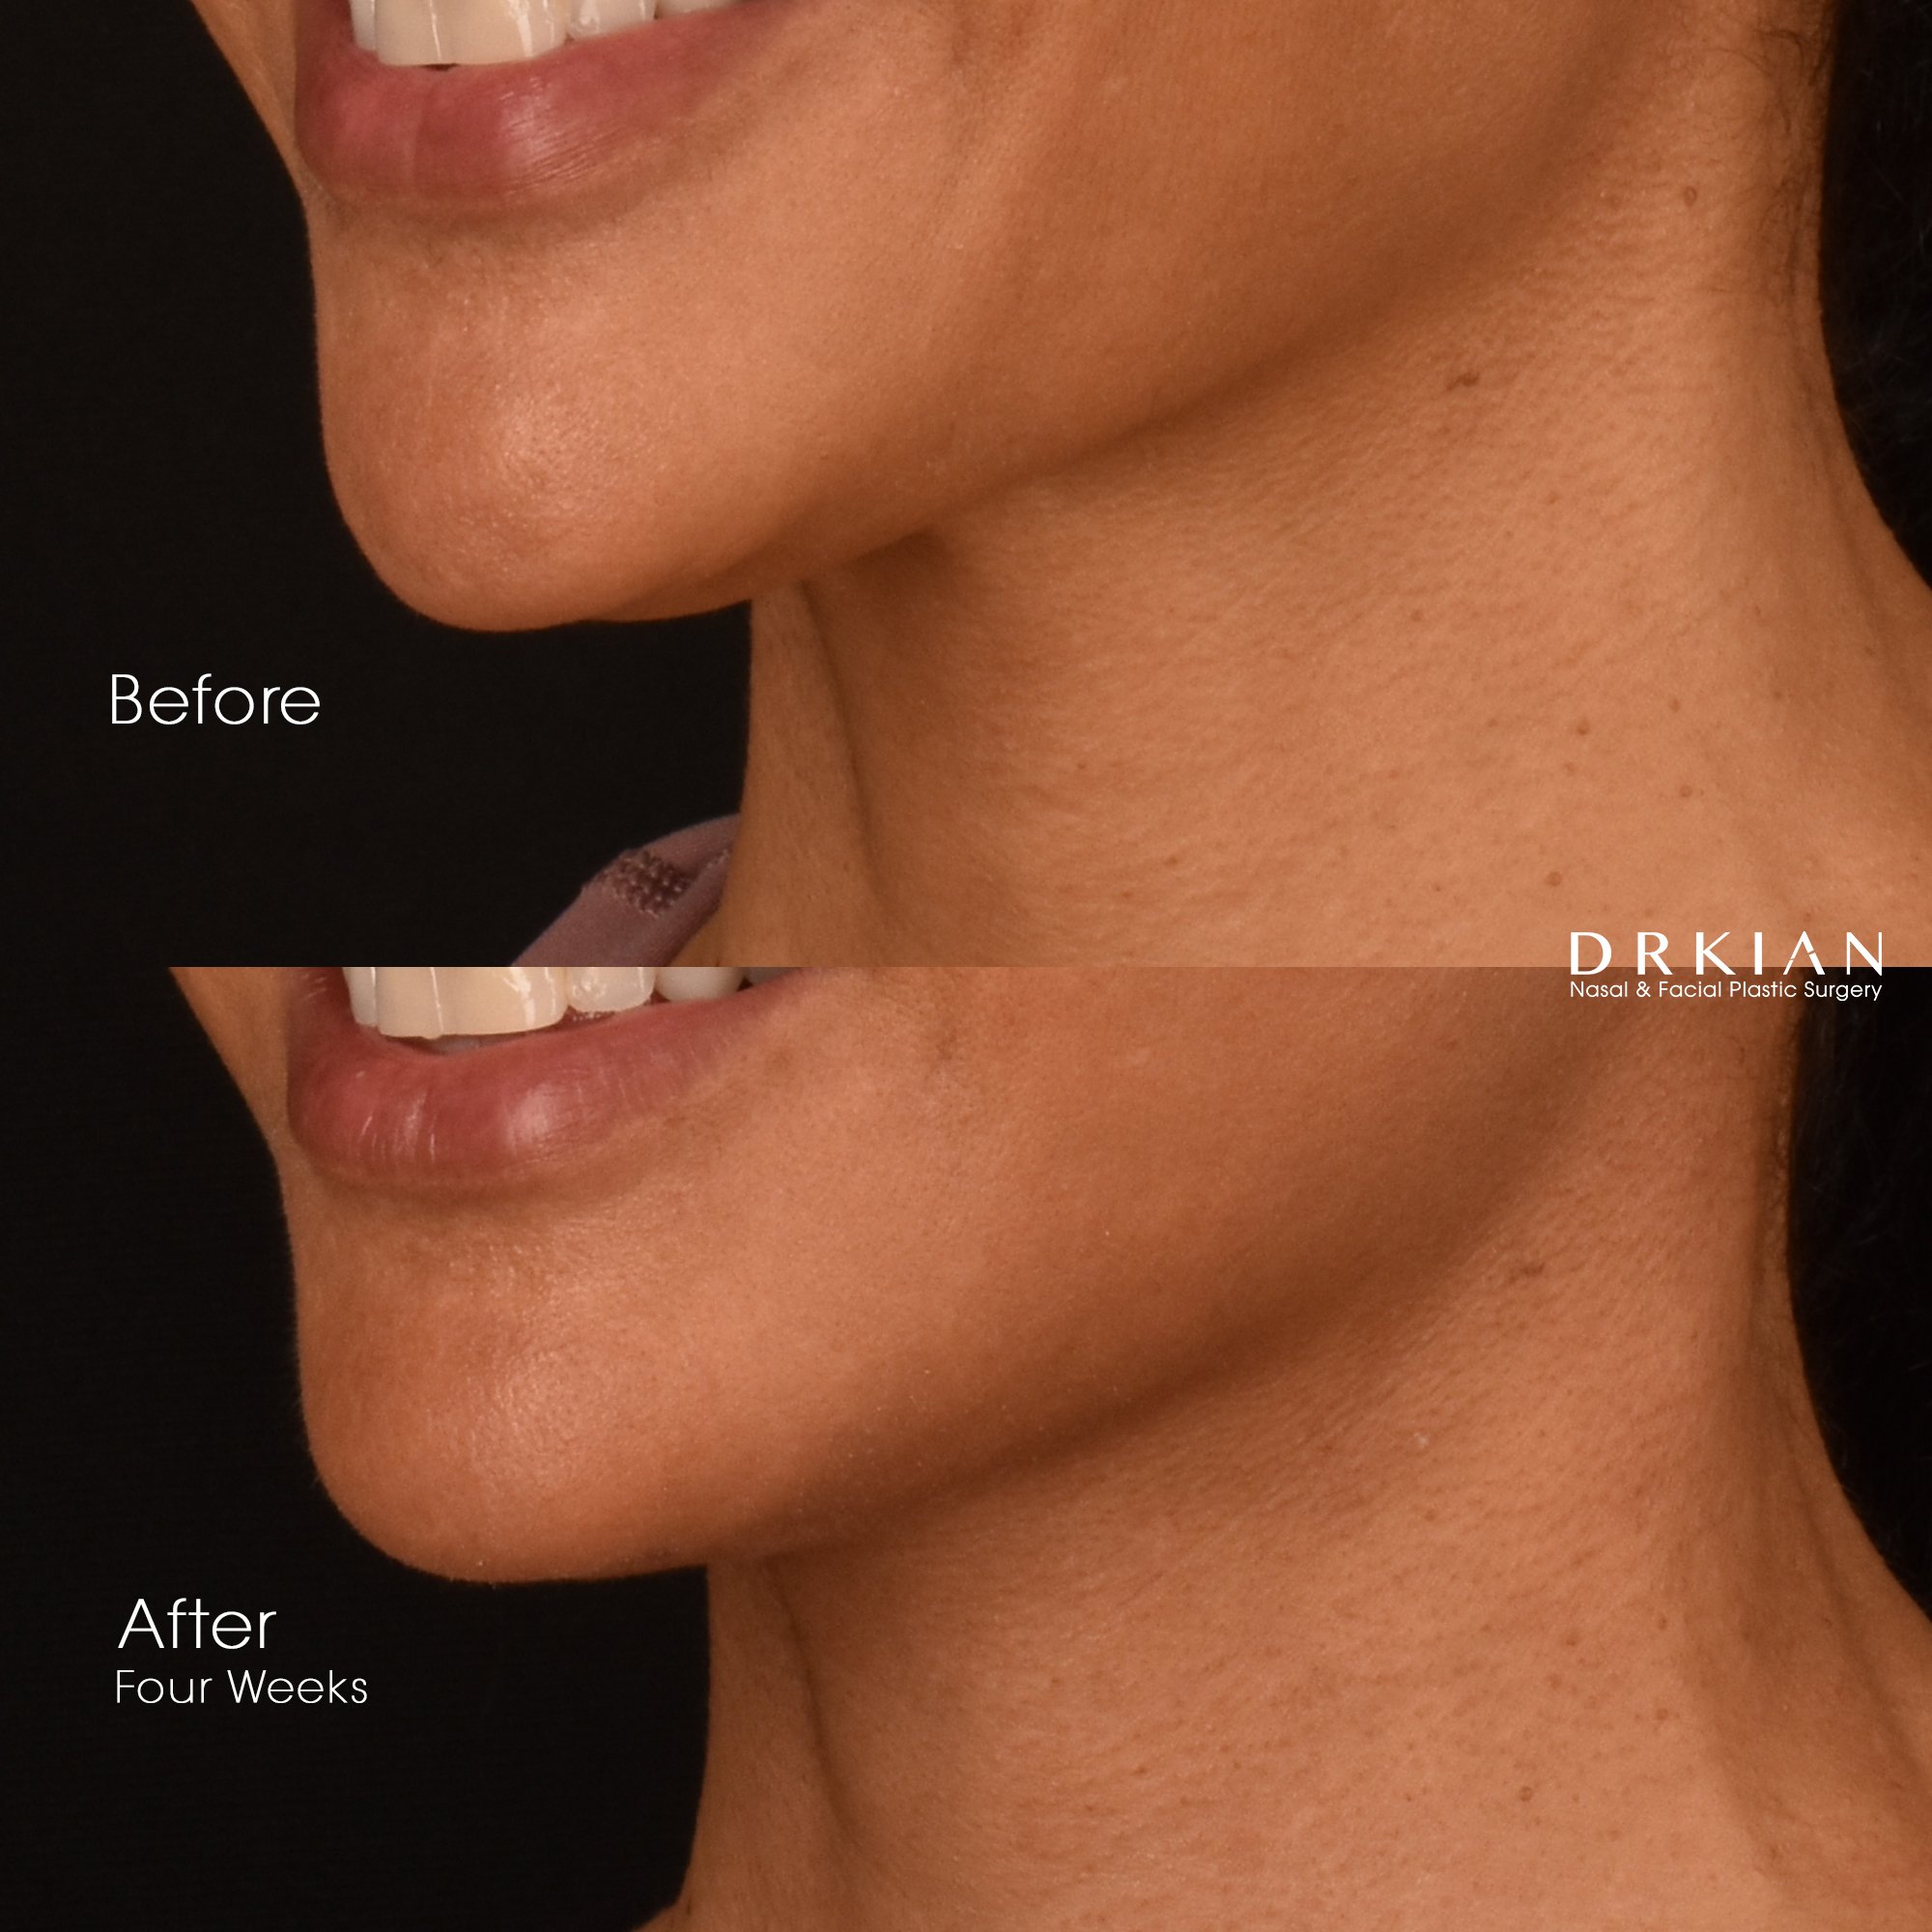
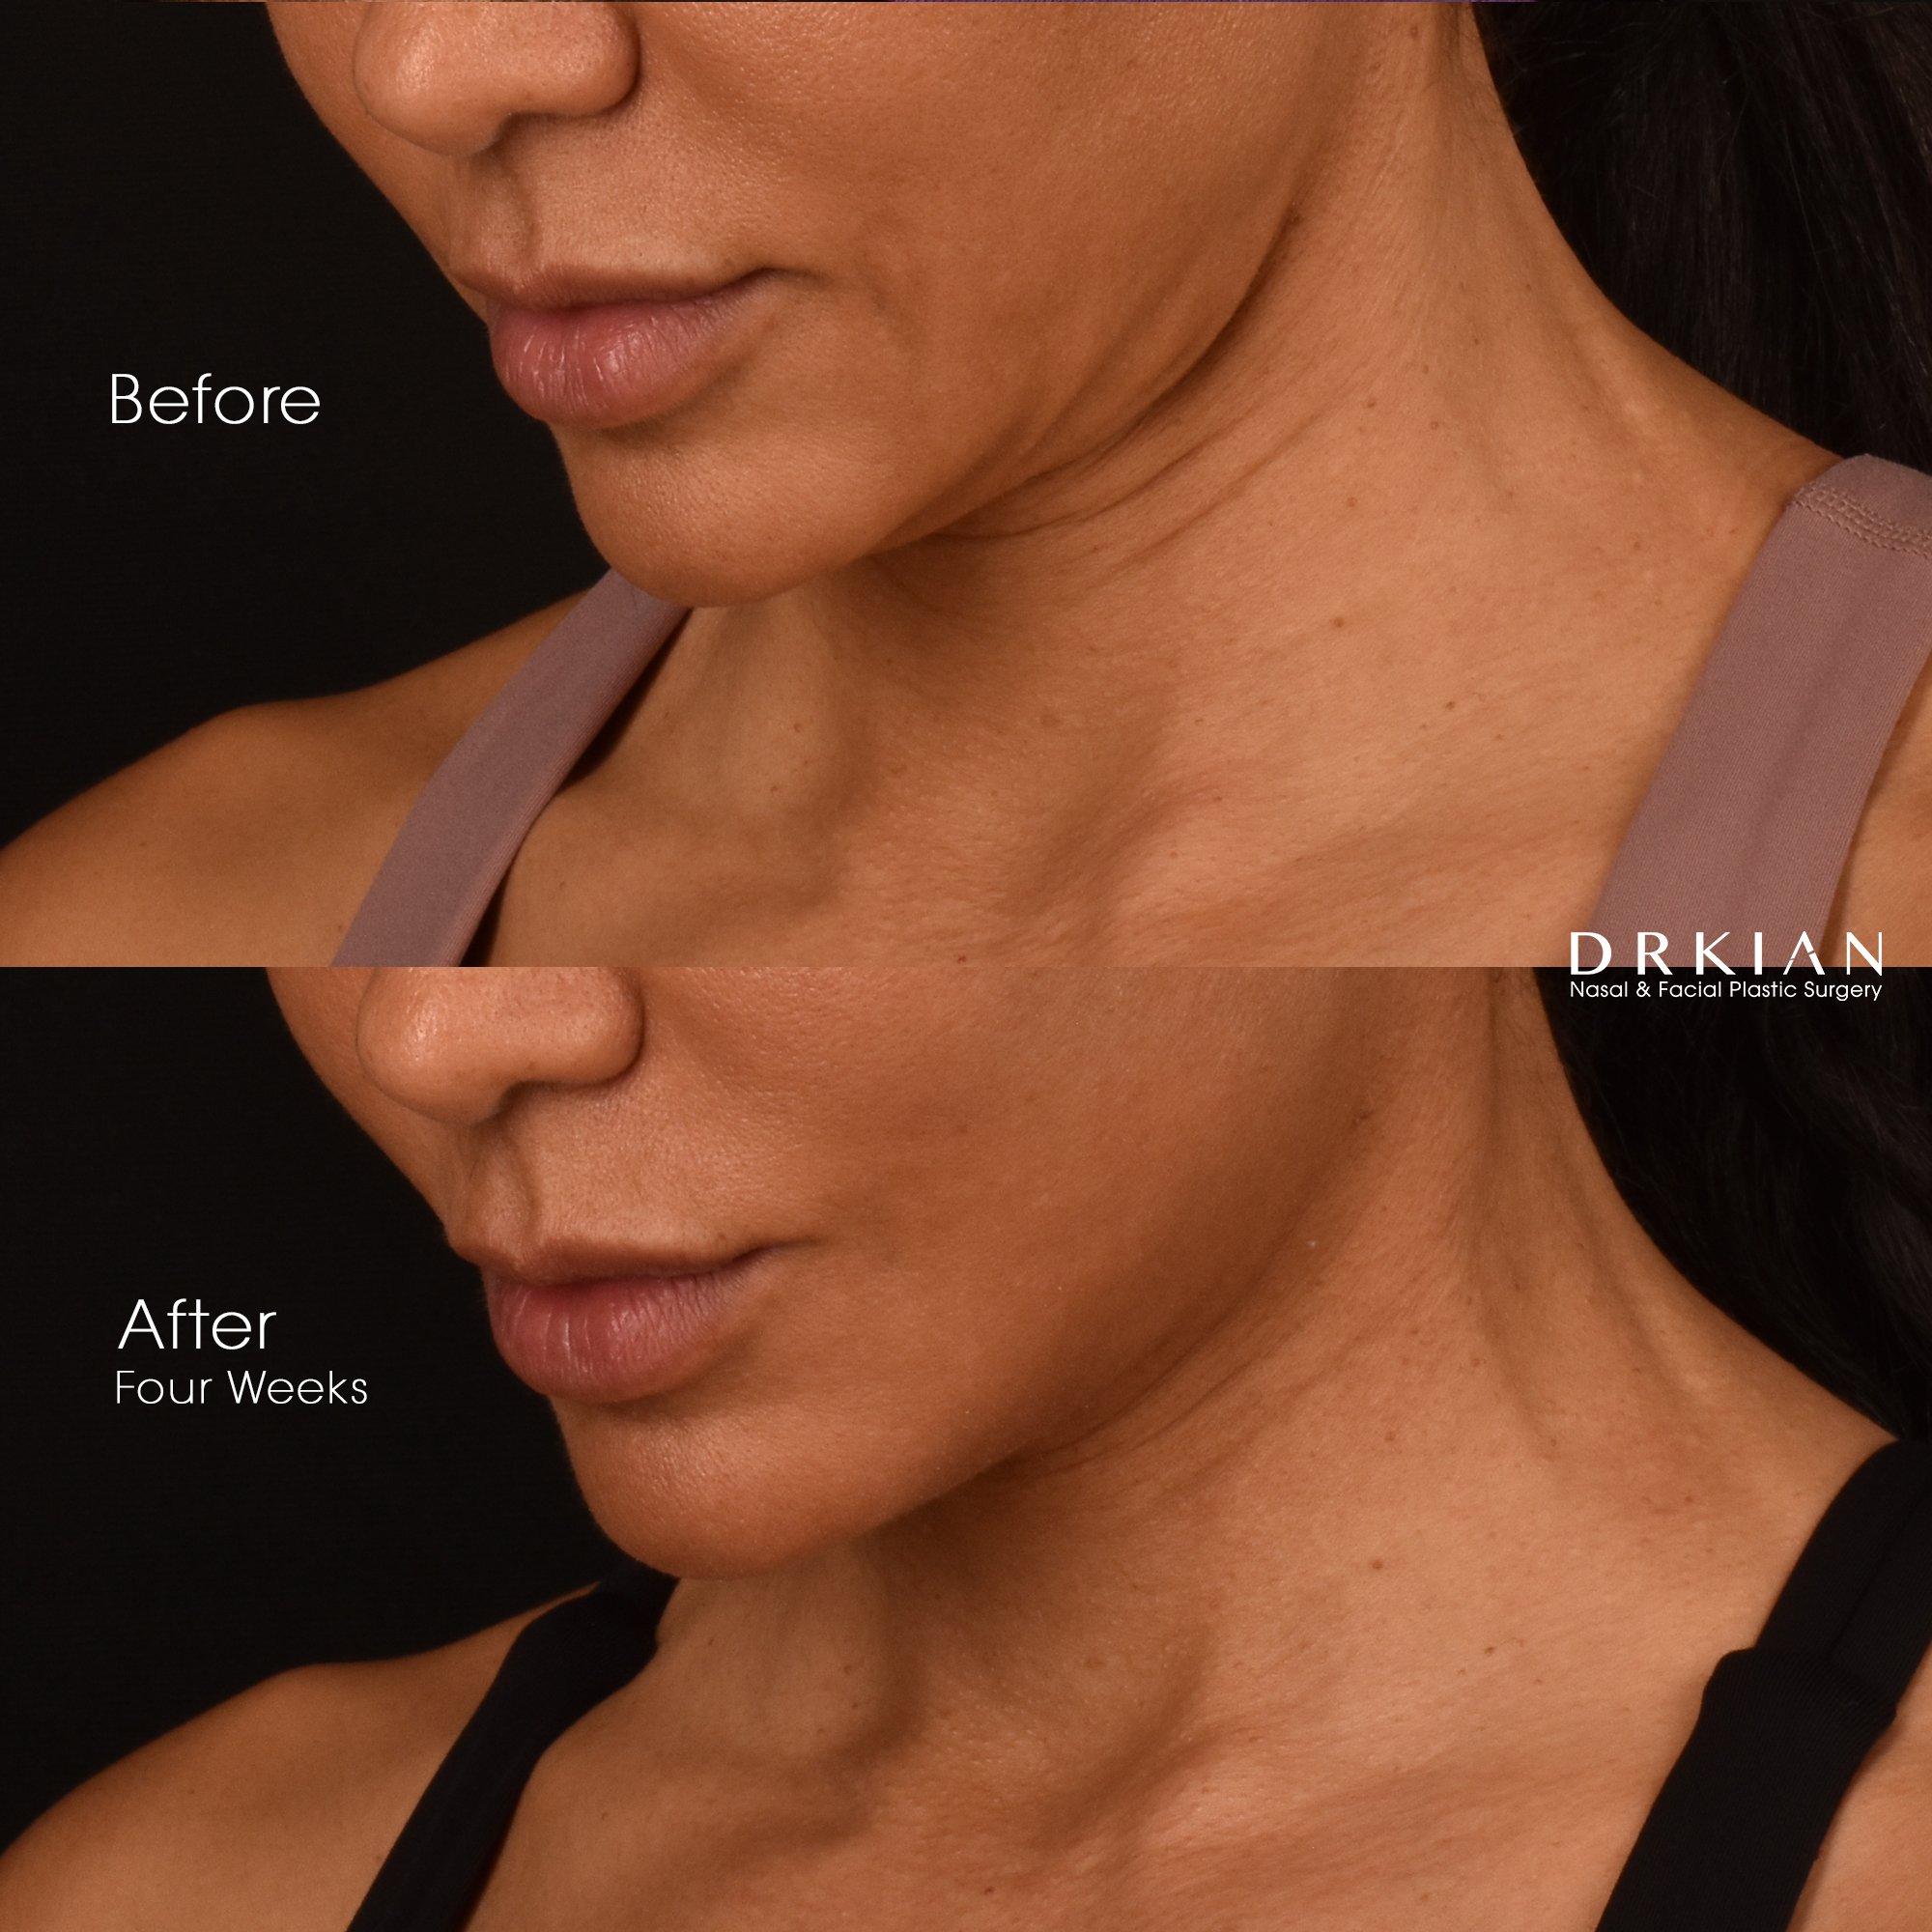
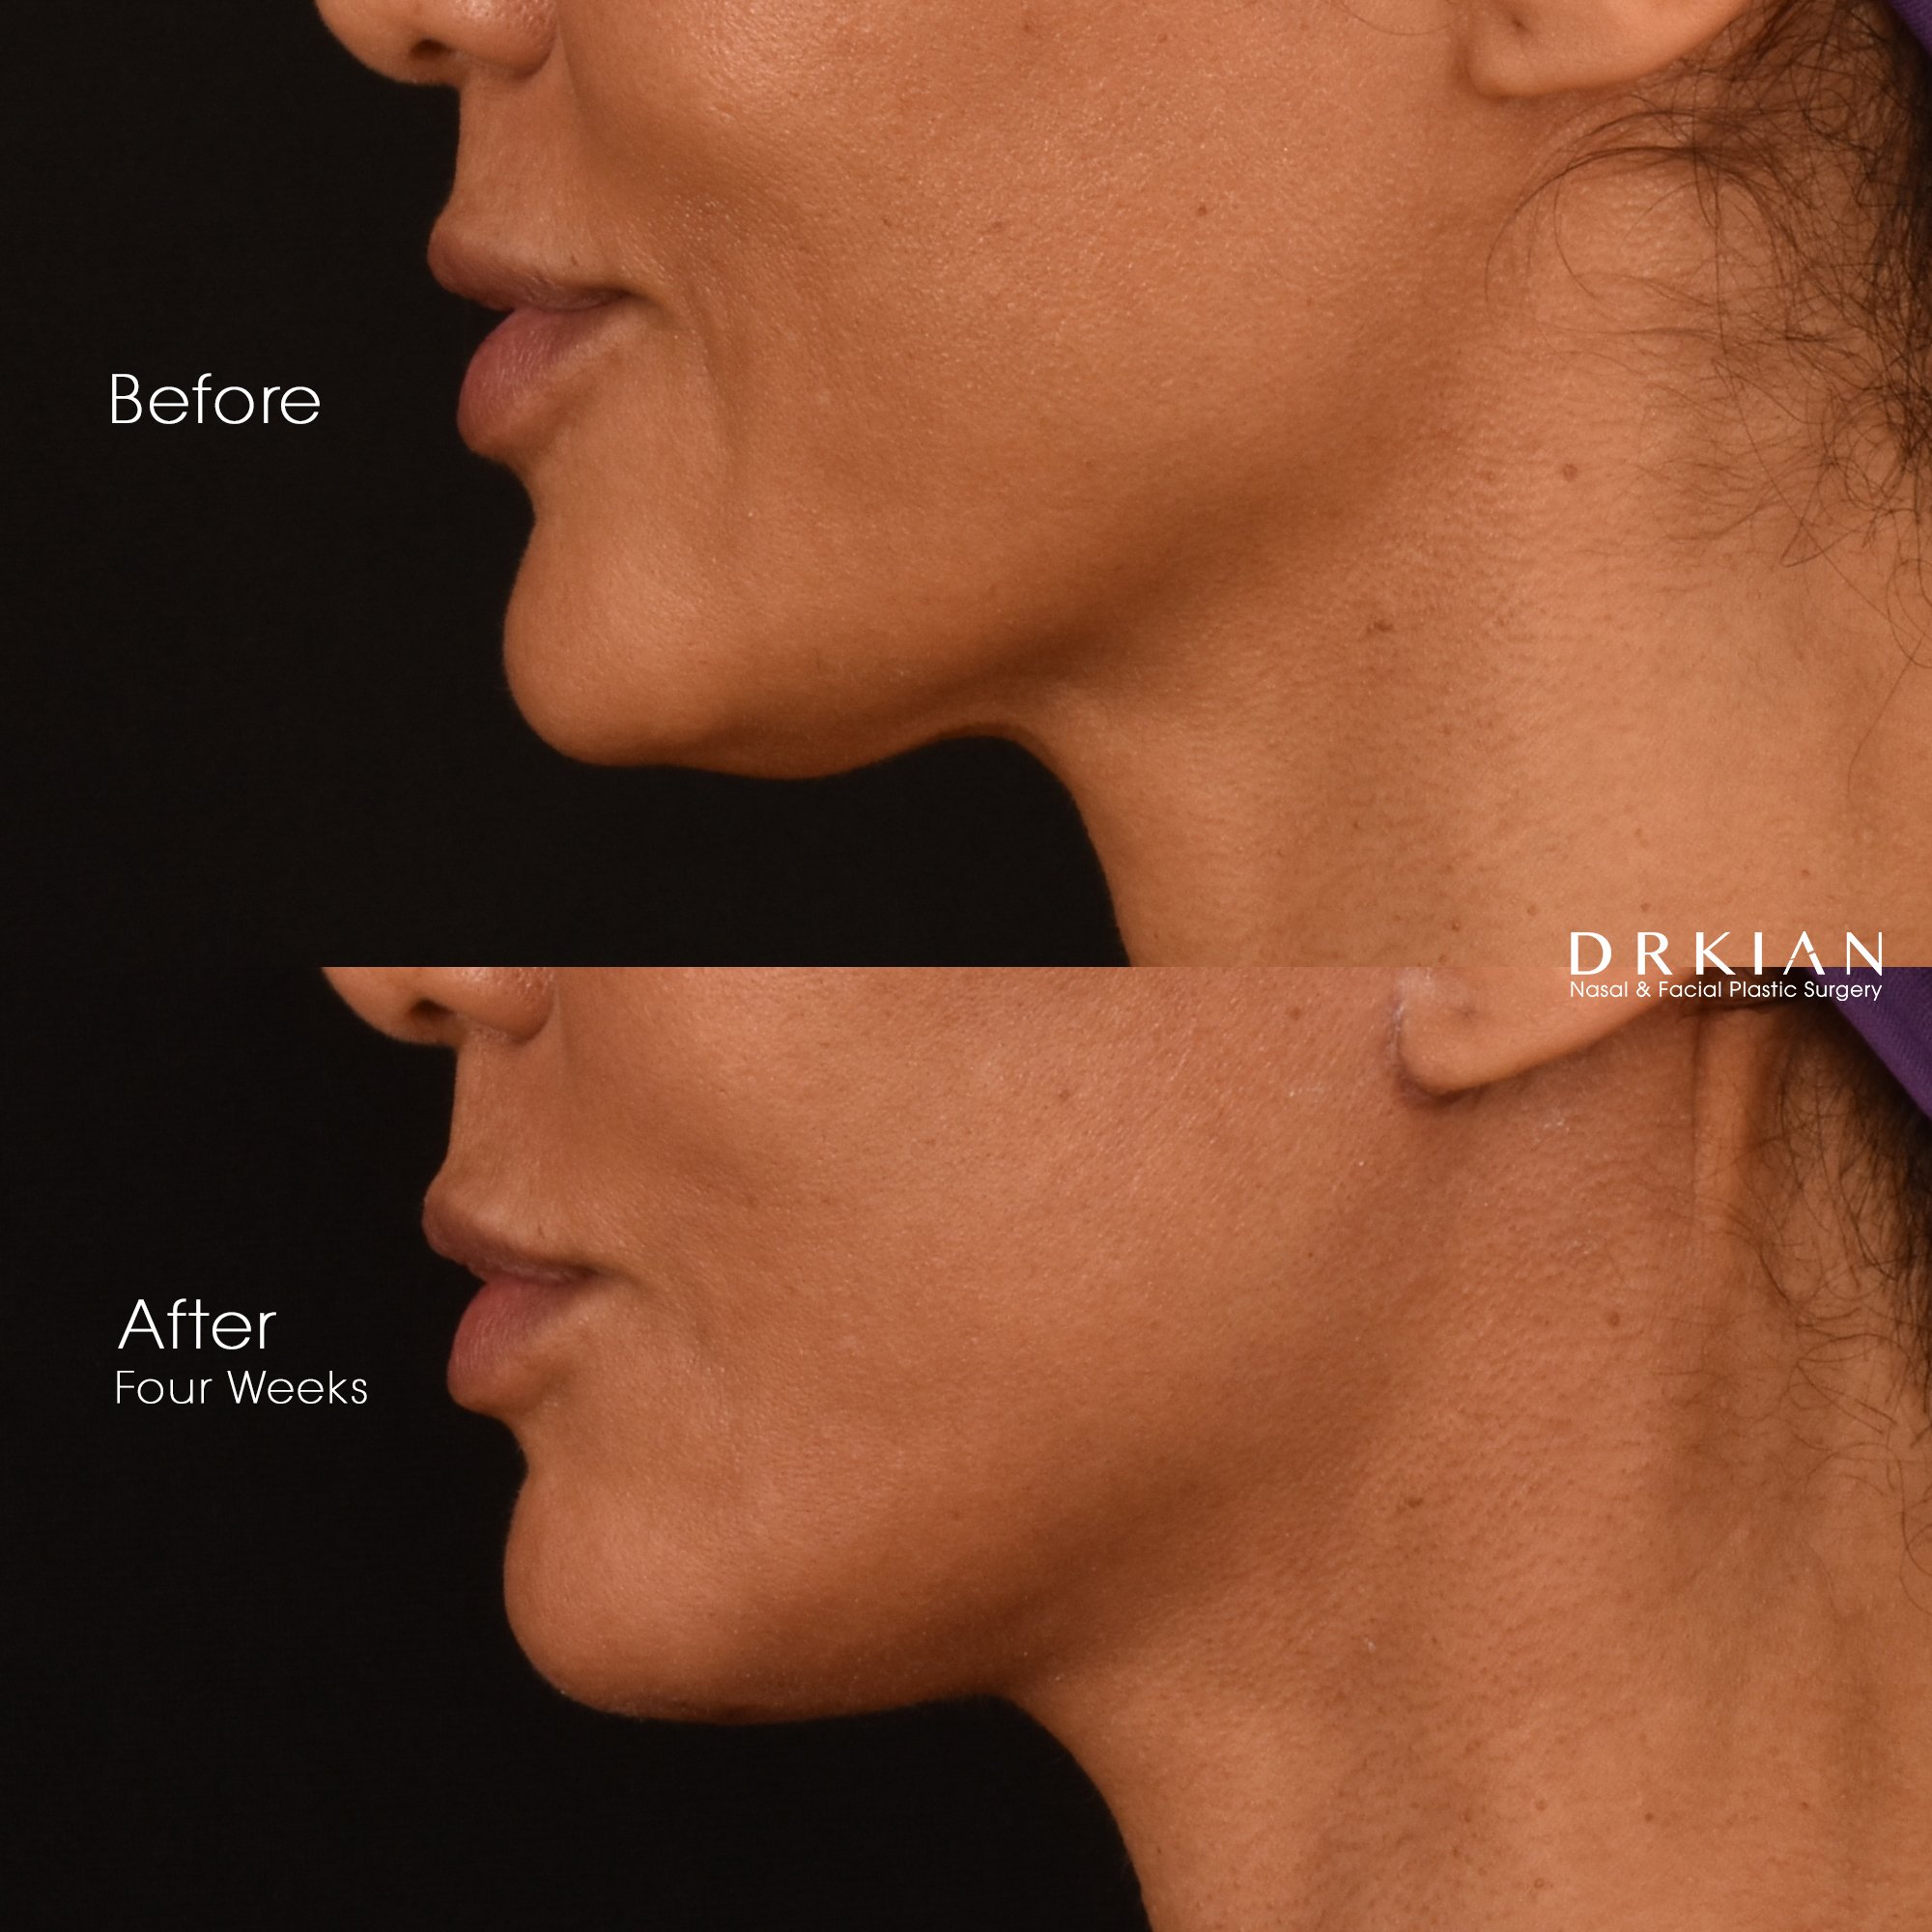
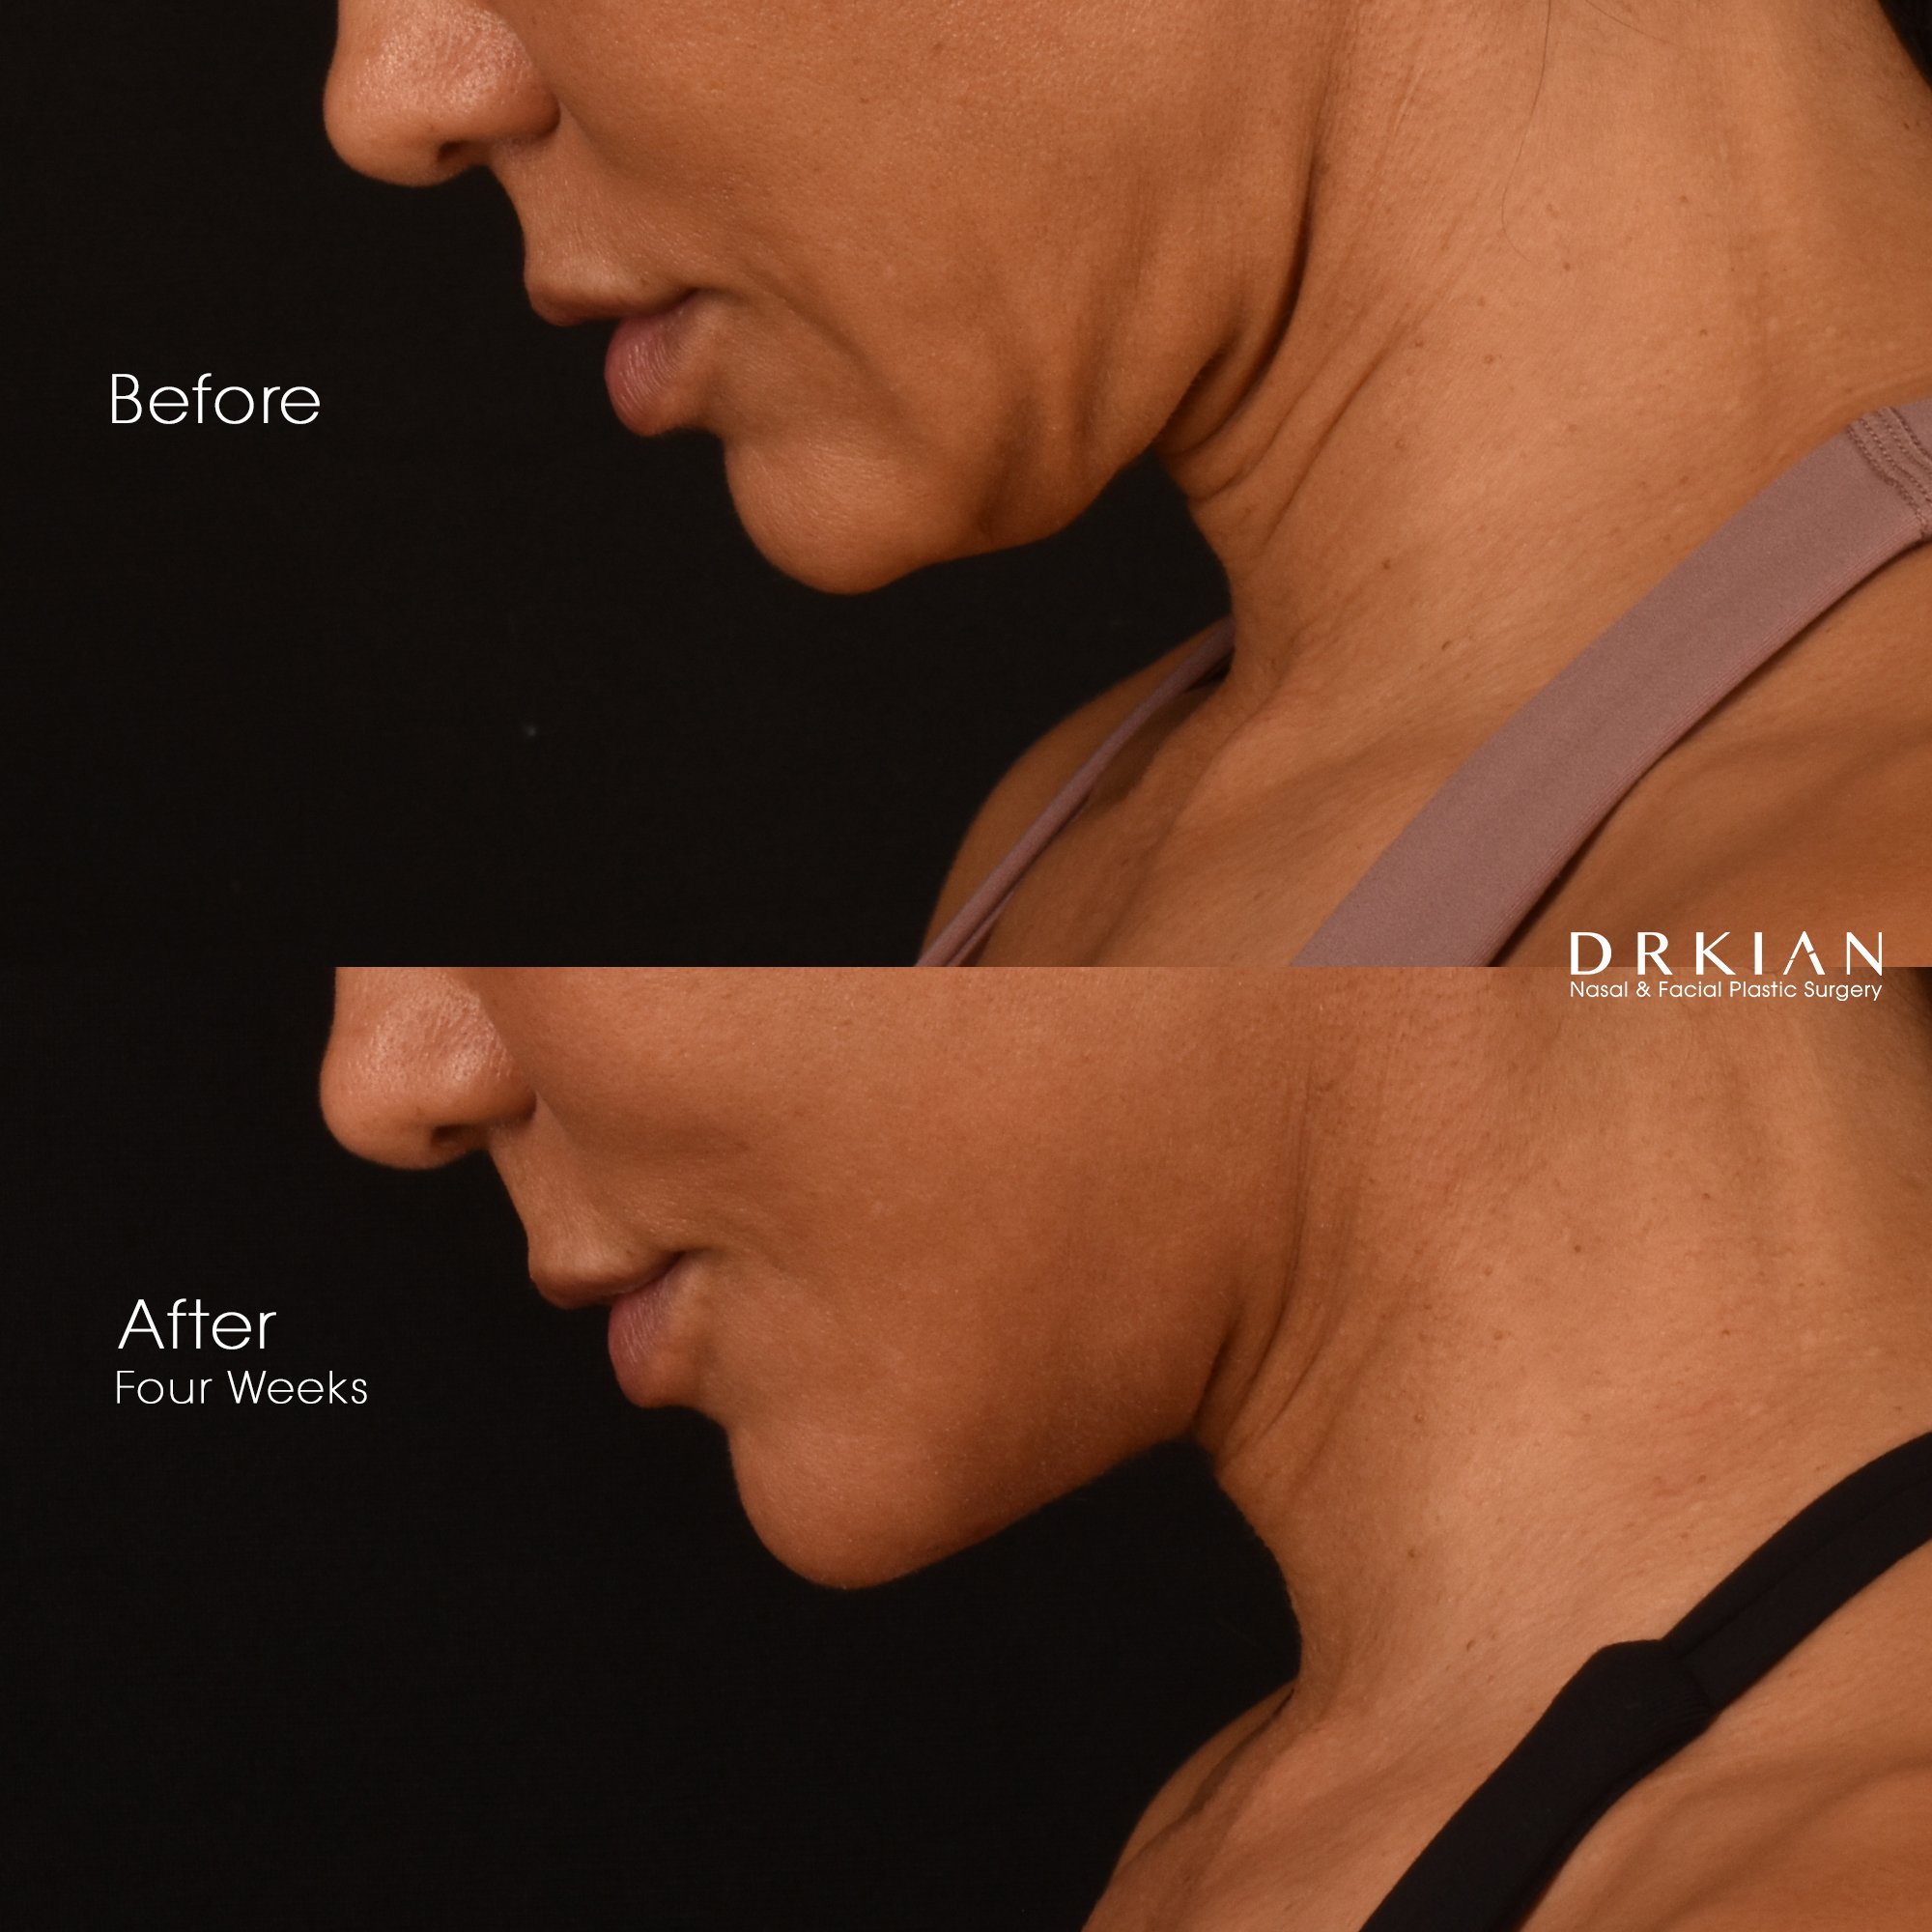
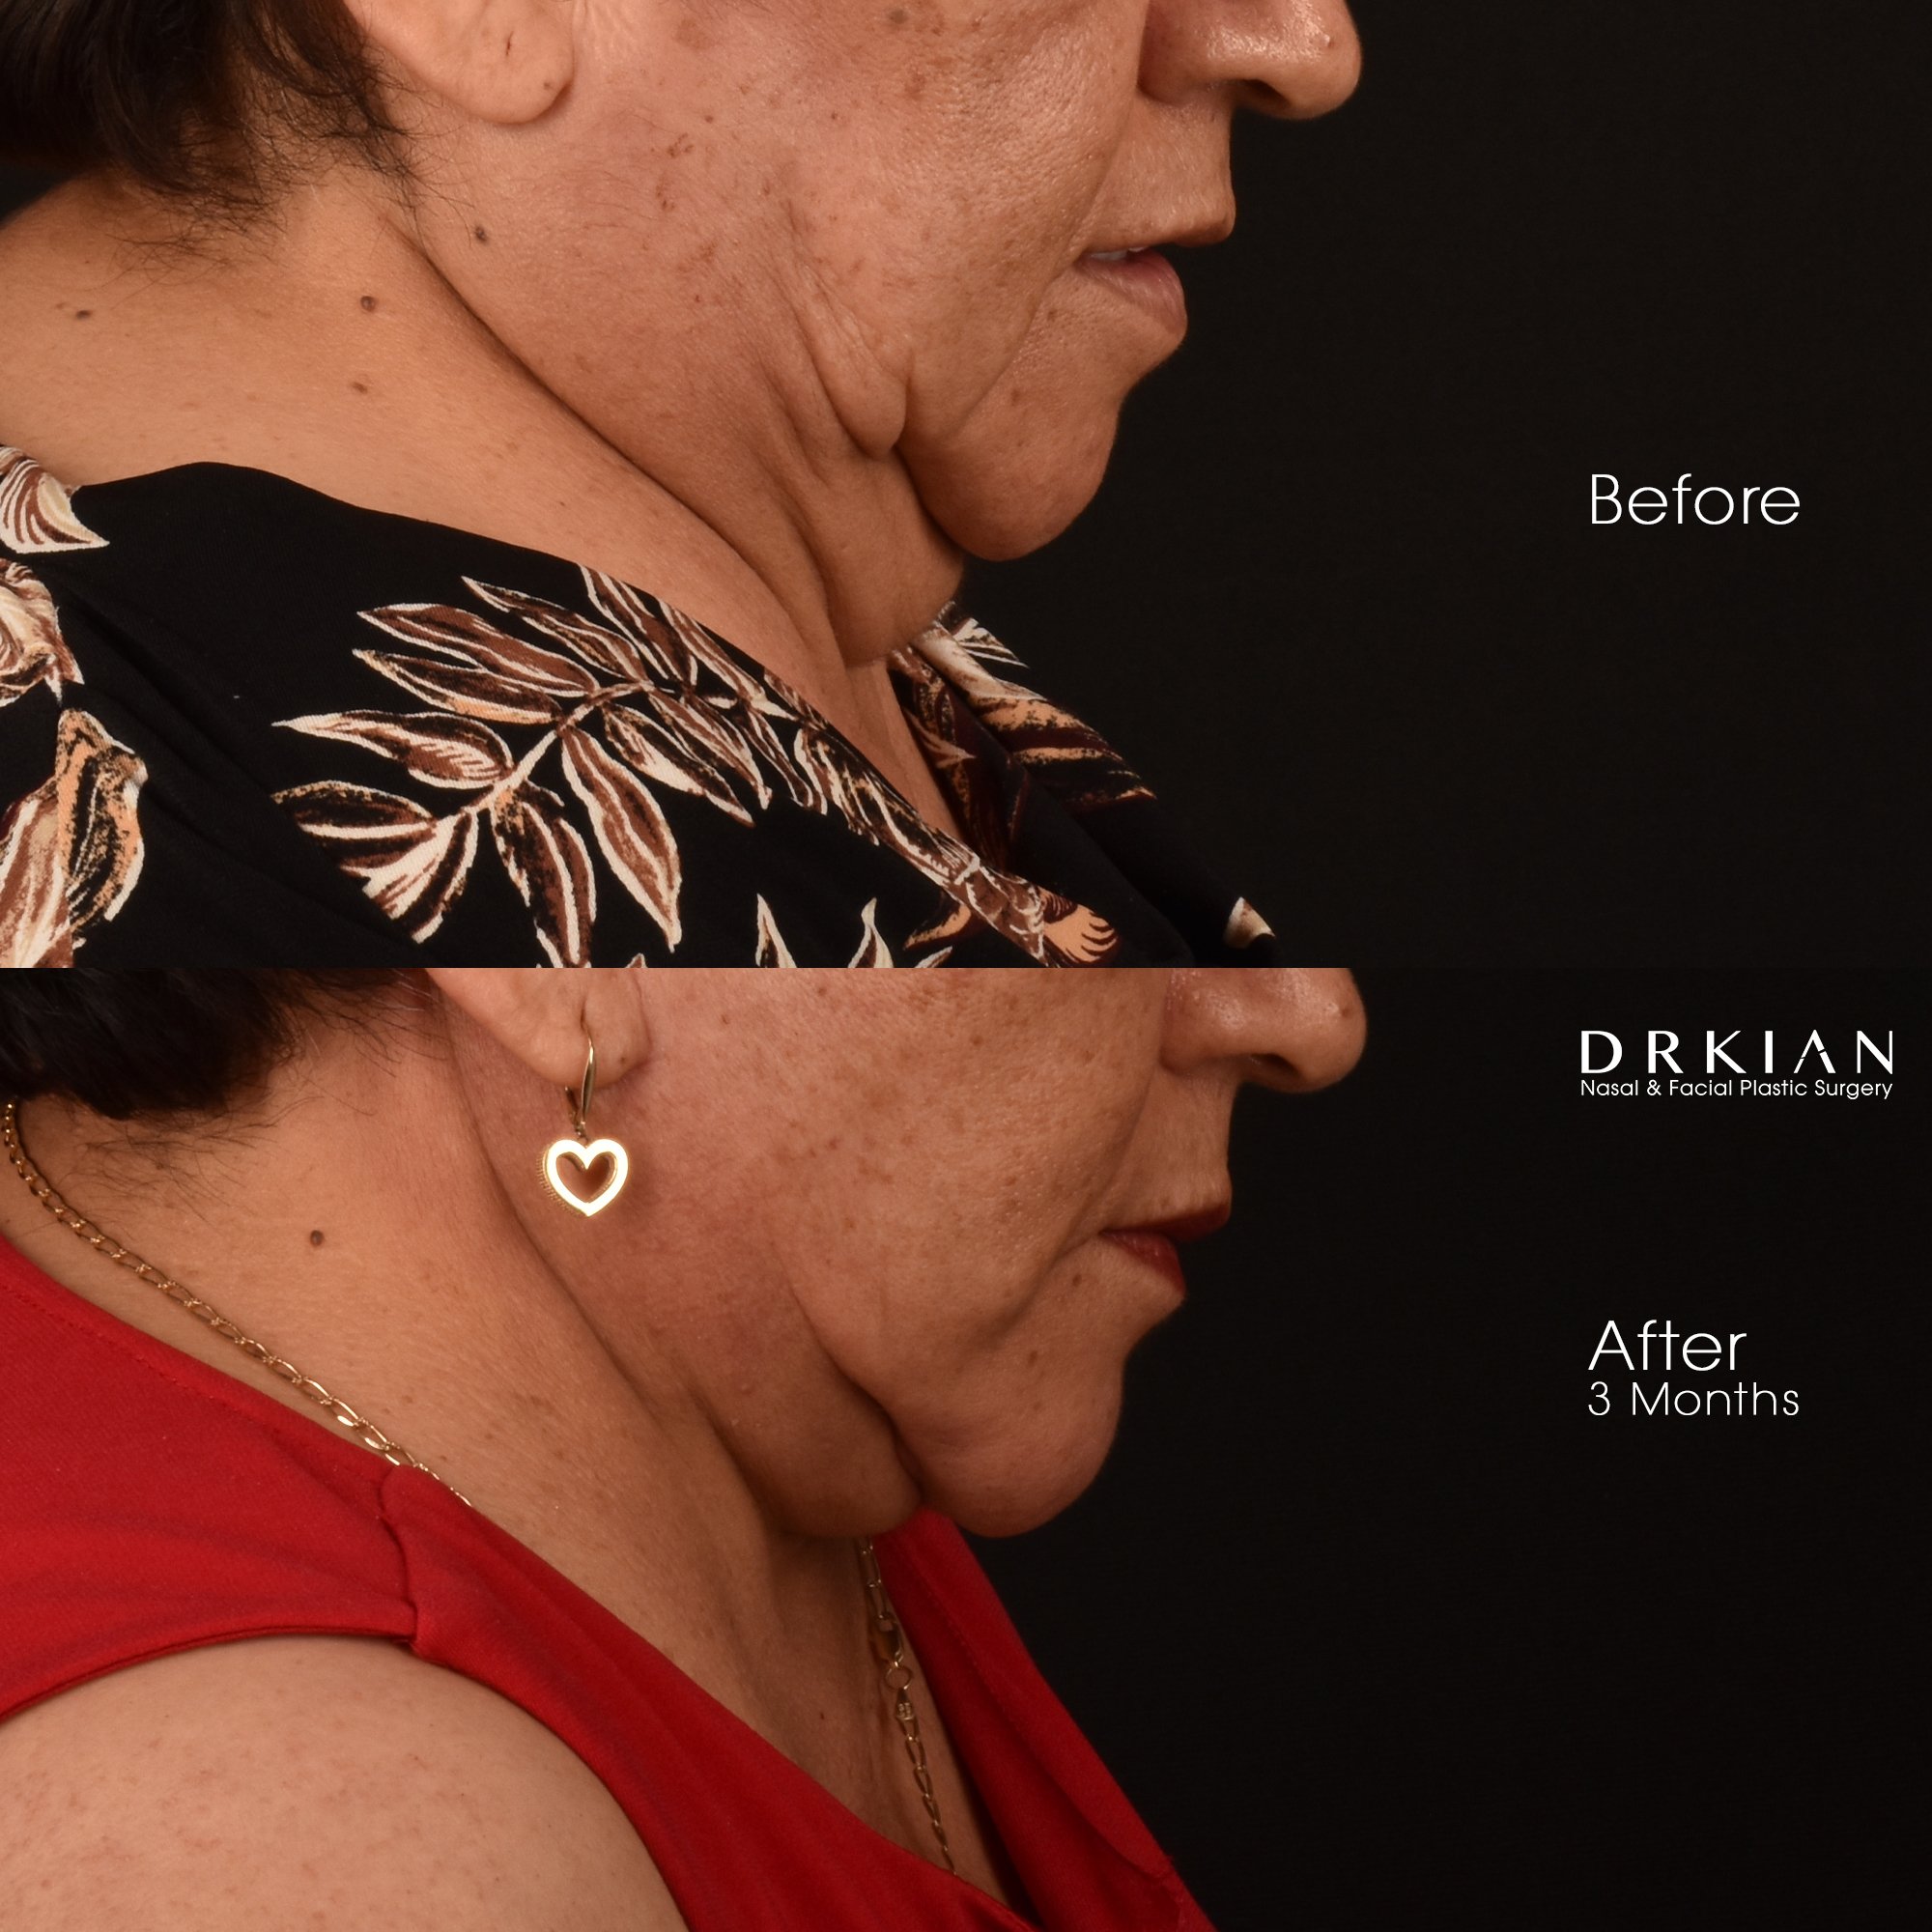
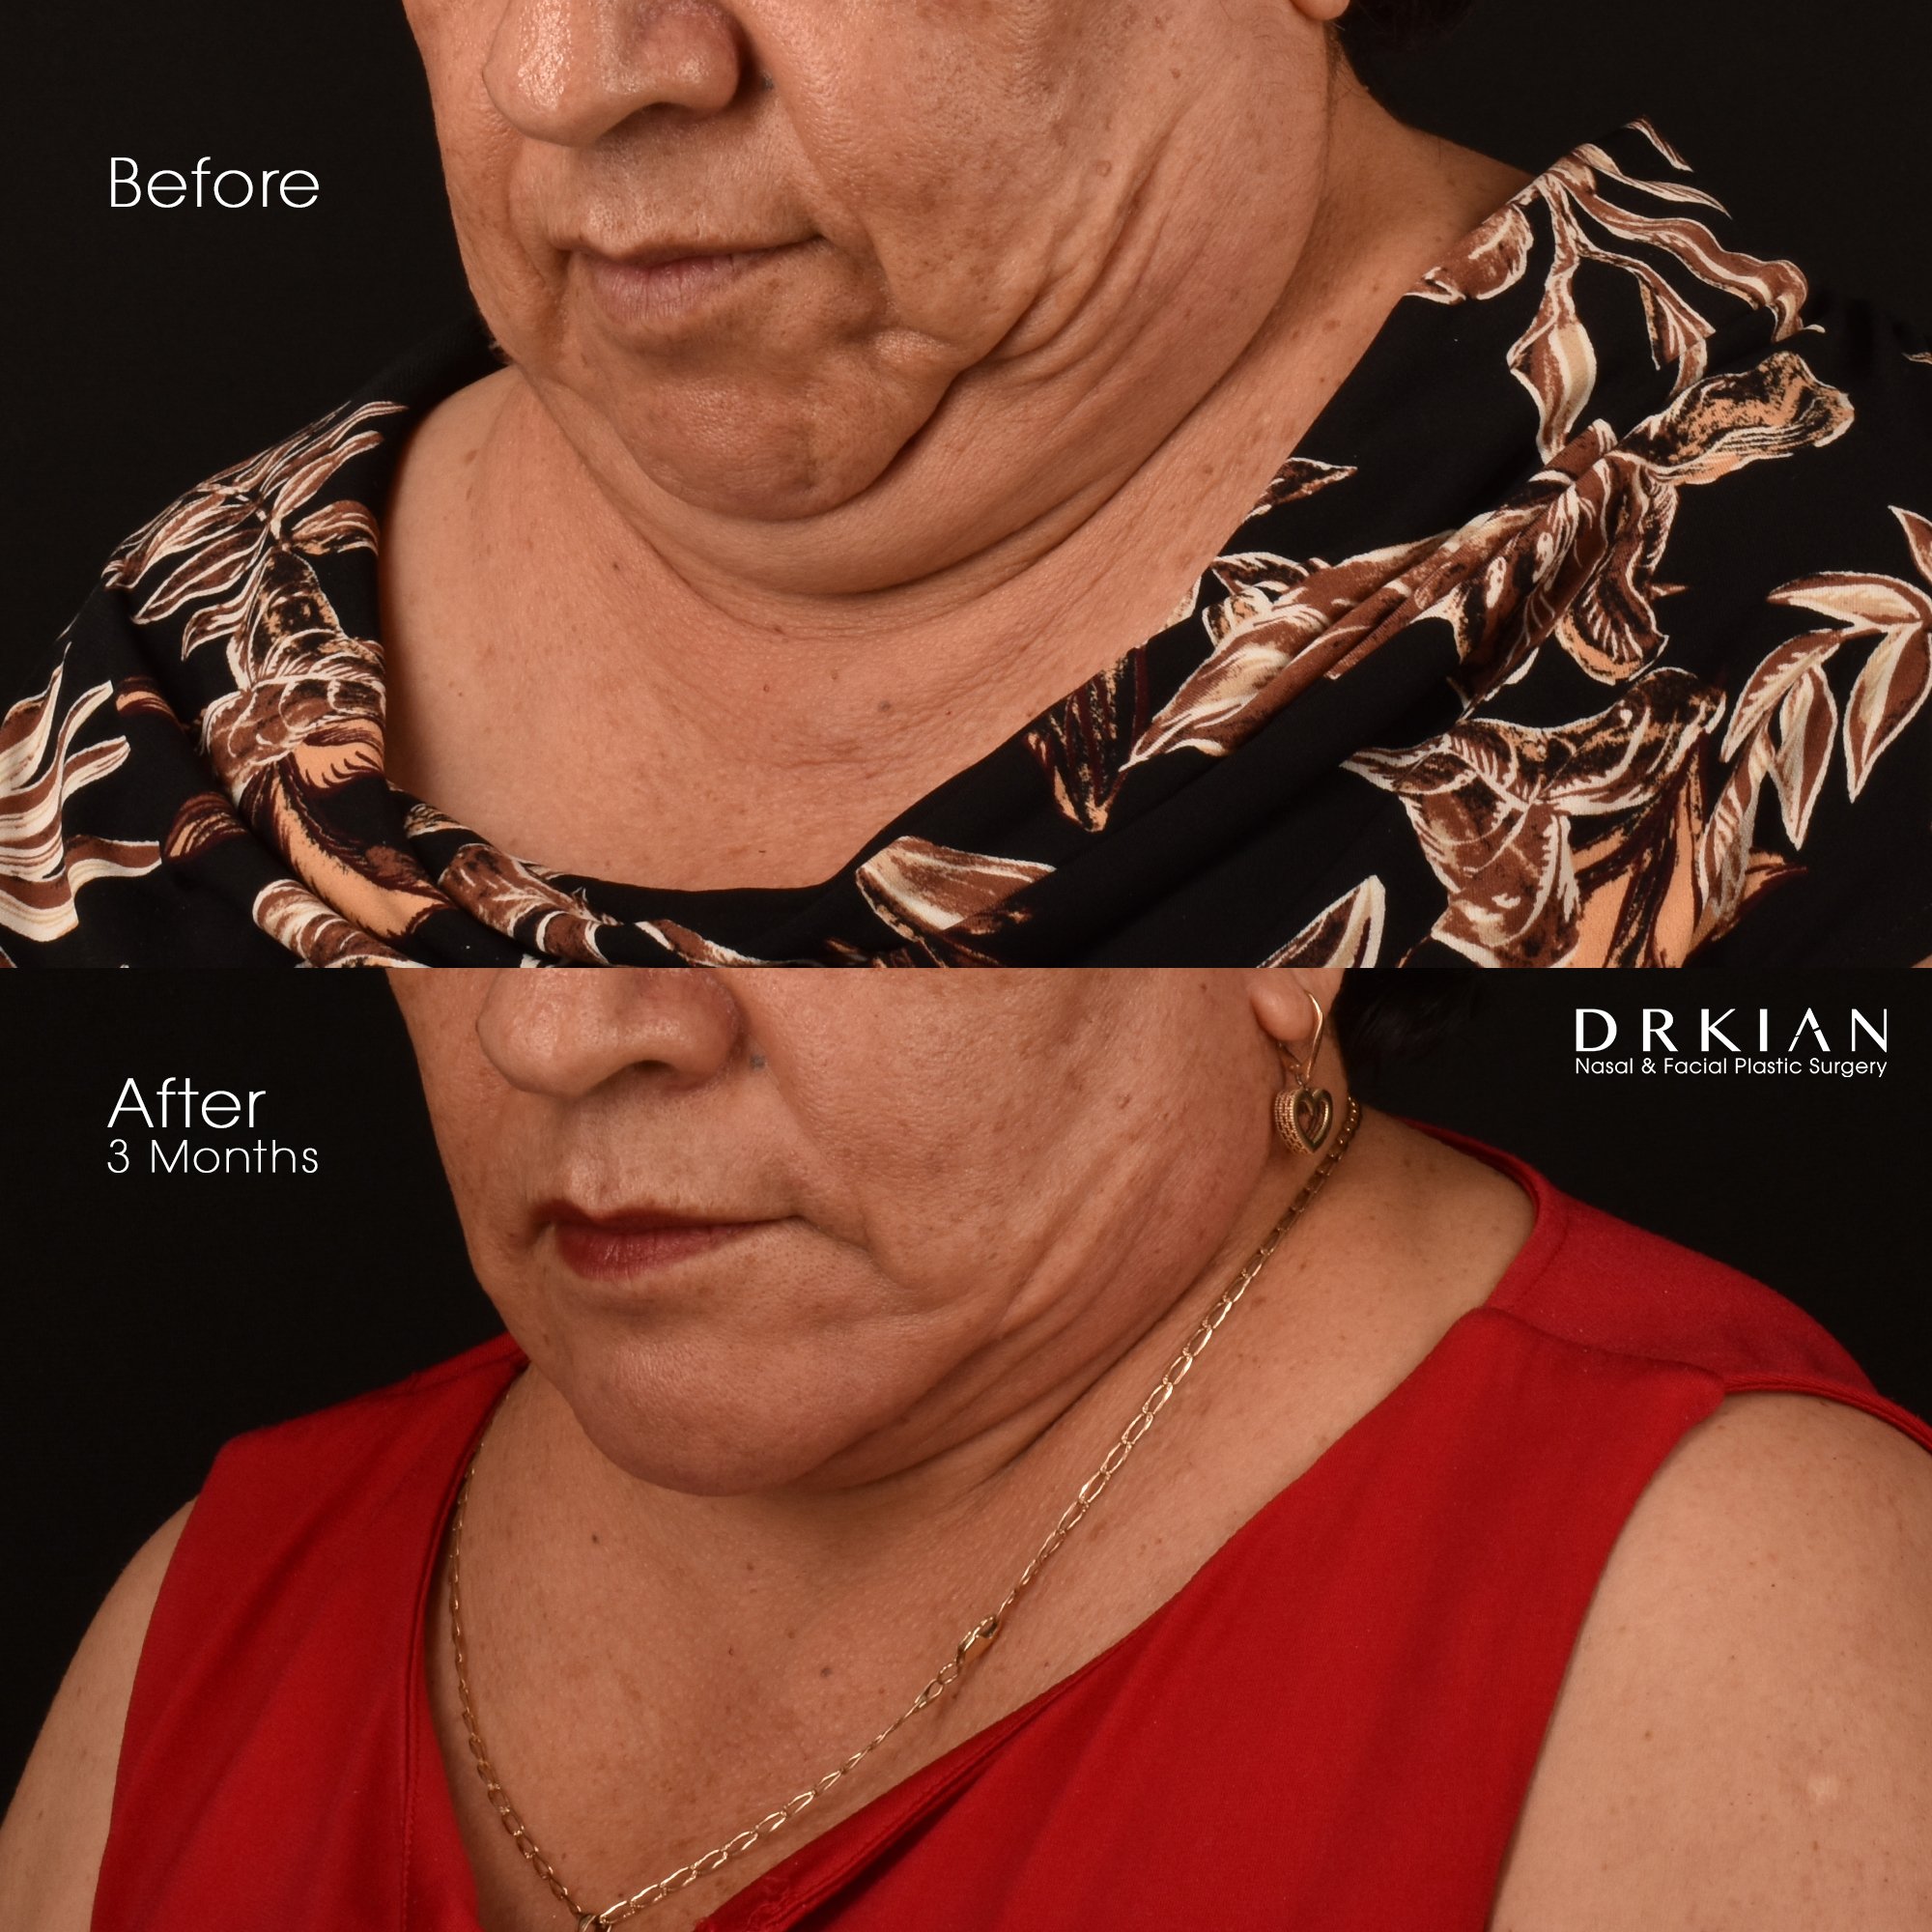
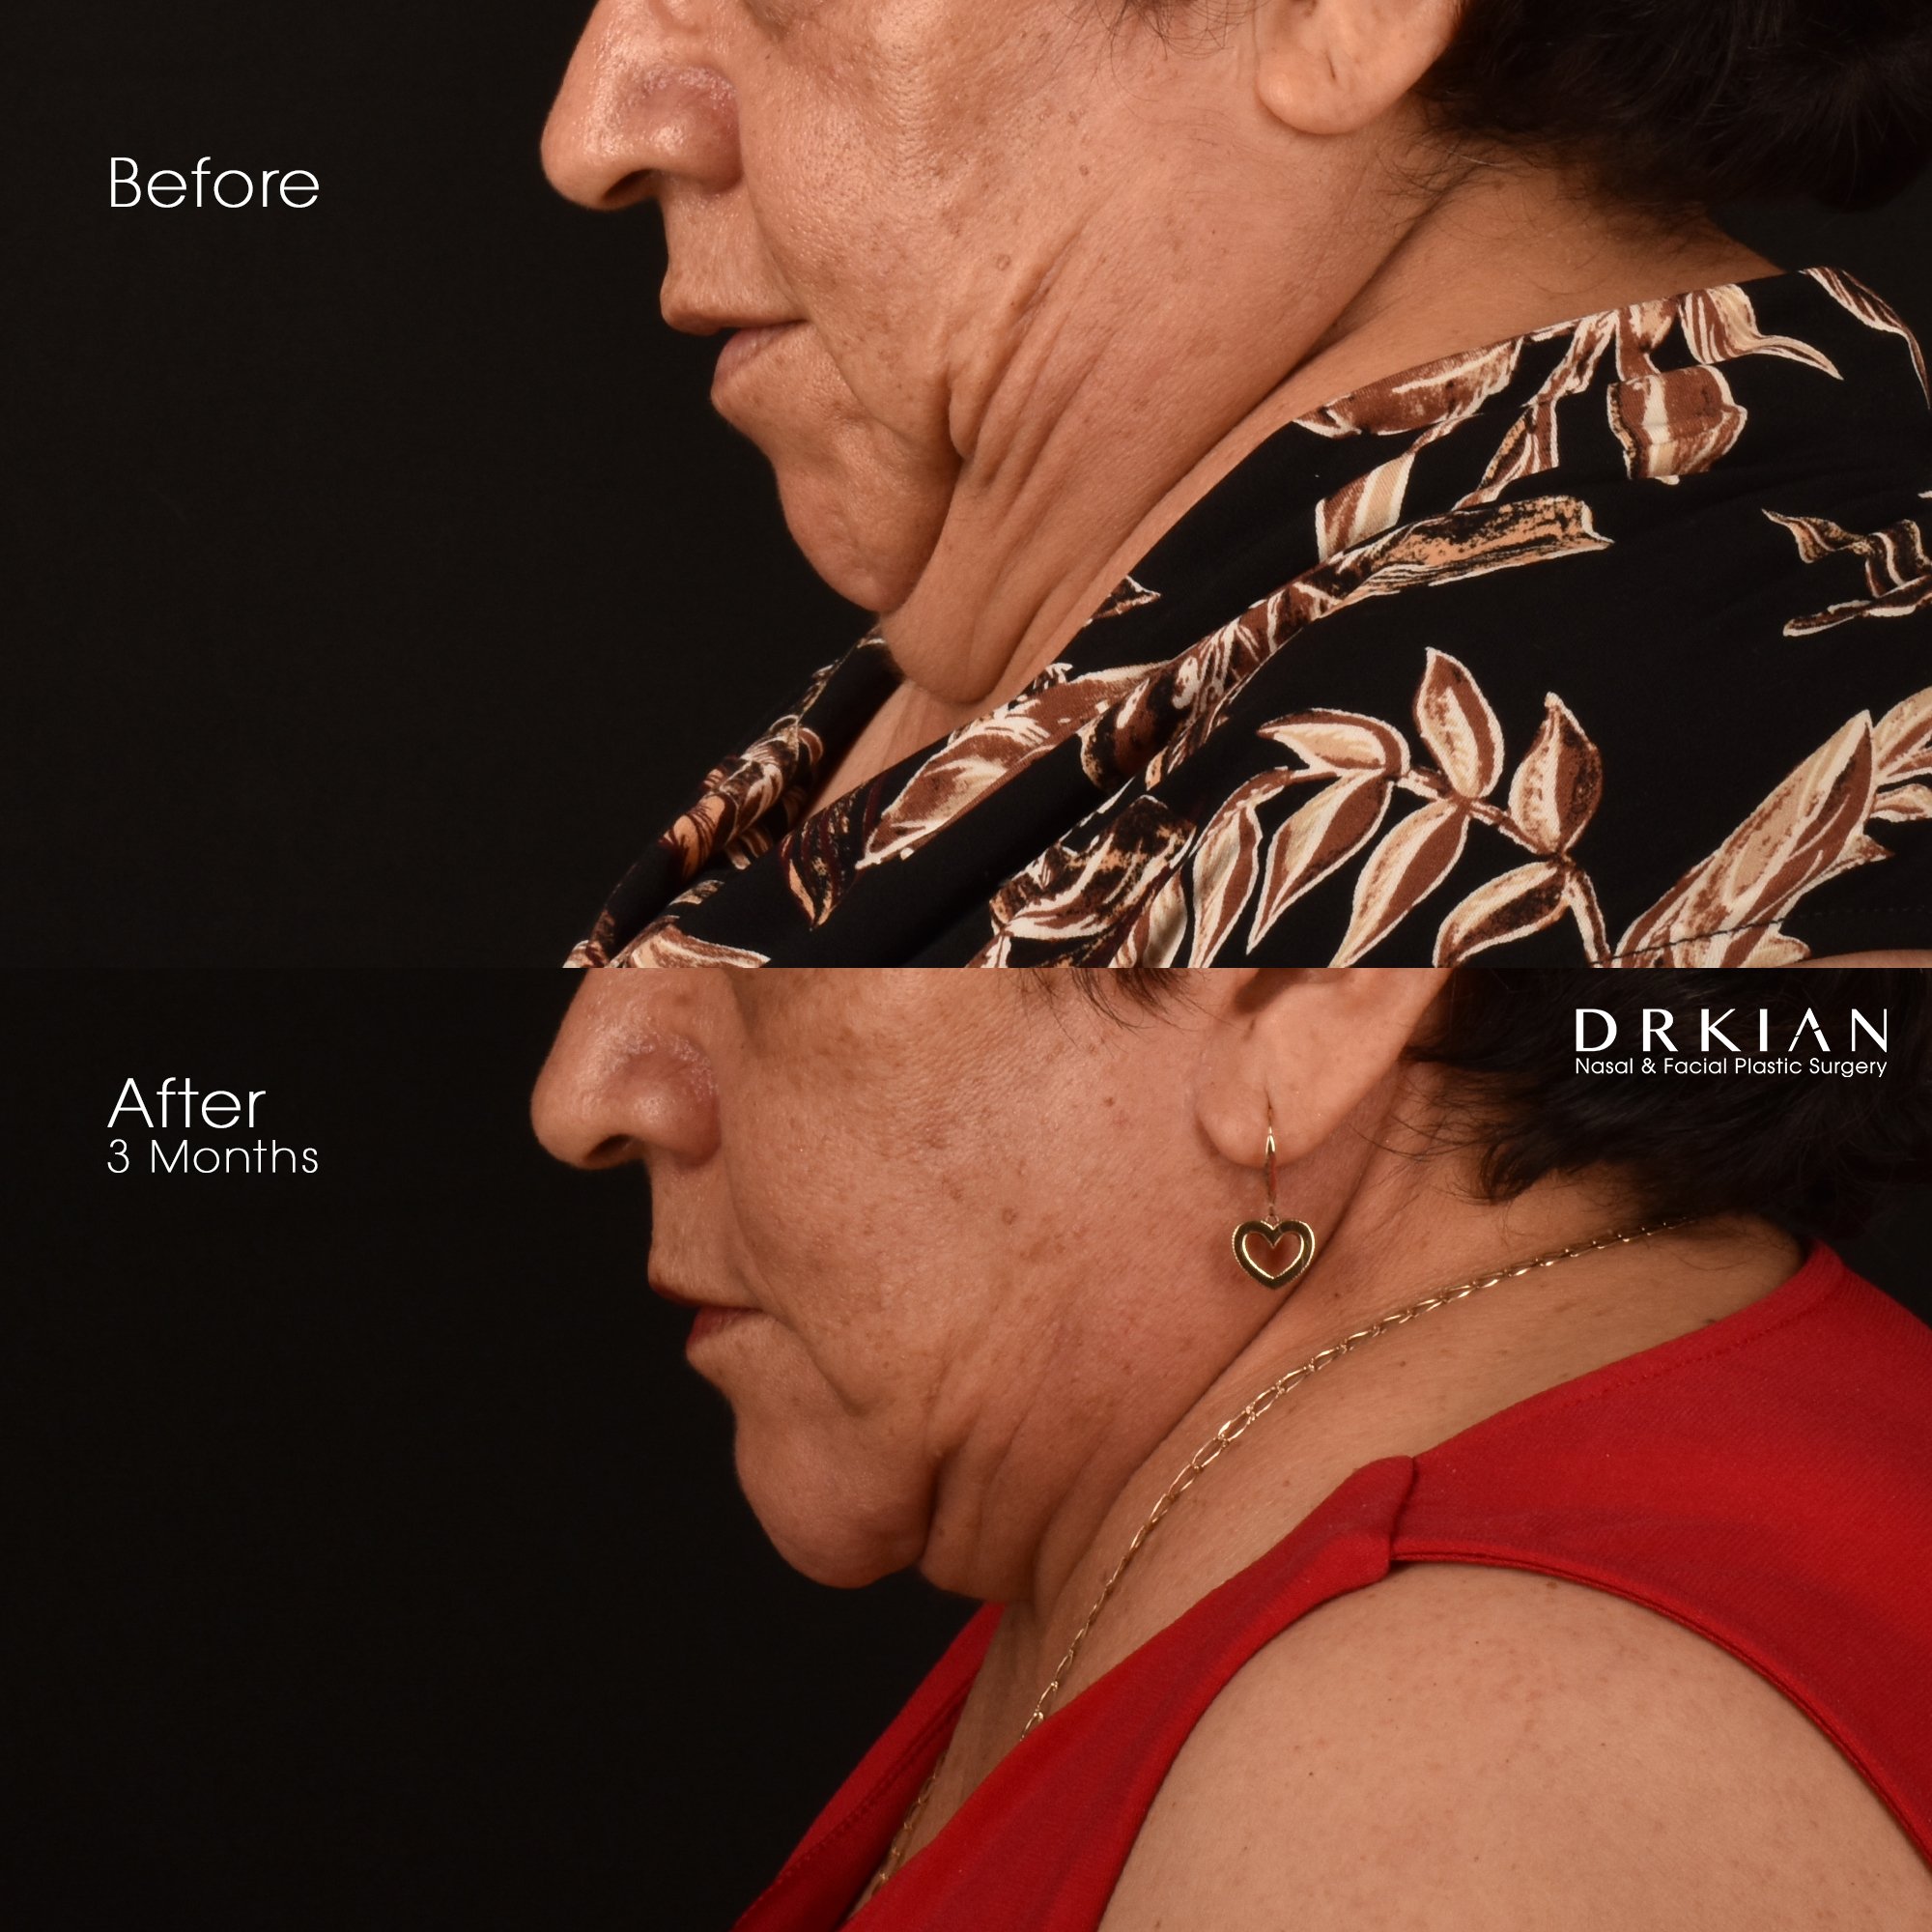
Deep Neck Lift with Limited Platysmaplasty + Embrace RF (FaceTite & Morpheus8 to Submentum & Lower 1/3 of Face): Before & After Six Months
Deep Neck Lift with Limited Platysmaplasty + Embrace RF (FaceTite & Morpheus8 to Submentum & Lower 1/3 of Face): Before & After Six Months
Deep Neck Lift with Limited Platysmaplasty + Embrace RF (FaceTite & Morpheus8 to Submentum & Lower 1/3 of Face): Before & After Six Months
Deep Neck Lift with Limited Platysmaplasty + Embrace RF (FaceTite & Morpheus8 to Submentum & Lower 1/3 of Face): Before & After Six Months

Deep Neck Lift with Limited Platysmaplasty + Embrace RF (FaceTite & Morpheus8 to Submentum & Lower 1/3 of Face): Before & After Six Months
Deep Neck Lift with Limited Platysmaplasty + Embrace RF (FaceTite & Morpheus8 to Submentum & Lower 1/3 of Face): Before & After Six Months
Deep Neck Lift with Limited Platysmaplasty + Embrace RF (FaceTite & Morpheus8 to Submentum & Lower 1/3 of Face): Before & After Six Months
Deep Neck Lift with Limited Platysmaplasty + Embrace RF (FaceTite & Morpheus8 to Submentum & Lower 1/3 of Face): Before & After Six Months
Deep Neck Lift with Limited Platysmaplasty + Embrace RF (FaceTite & Morpheus8 to Submentum & Lower 1/3 of Face): Before & After Six Months

Deep Neck Lift with Limited Platysmaplasty + Embrace RF (FaceTite & Morpheus8 to Submentum & Lower 1/3 of Face): Before & After Six Months
Deep Neck Lift with Limited Platysmaplasty + Embrace RF (FaceTite & Morpheus8 to Submentum & Lower 1/3 of Face): Before & After Six Months
Deep Neck Lift with Limited Platysmaplasty + Embrace RF (FaceTite & Morpheus8 to Submentum & Lower 1/3 of Face): Before & After Six Months
Deep Neck Lift with Limited Platysmaplasty + Embrace RF (FaceTite & Morpheus8 to Submentum & Lower 1/3 of Face): Before & After Six Months
Deep Neck Lift with Limited Platysmaplasty + Embrace RF (FaceTite & Morpheus8 to Submentum & Lower 1/3 of Face): Before & After Six Months
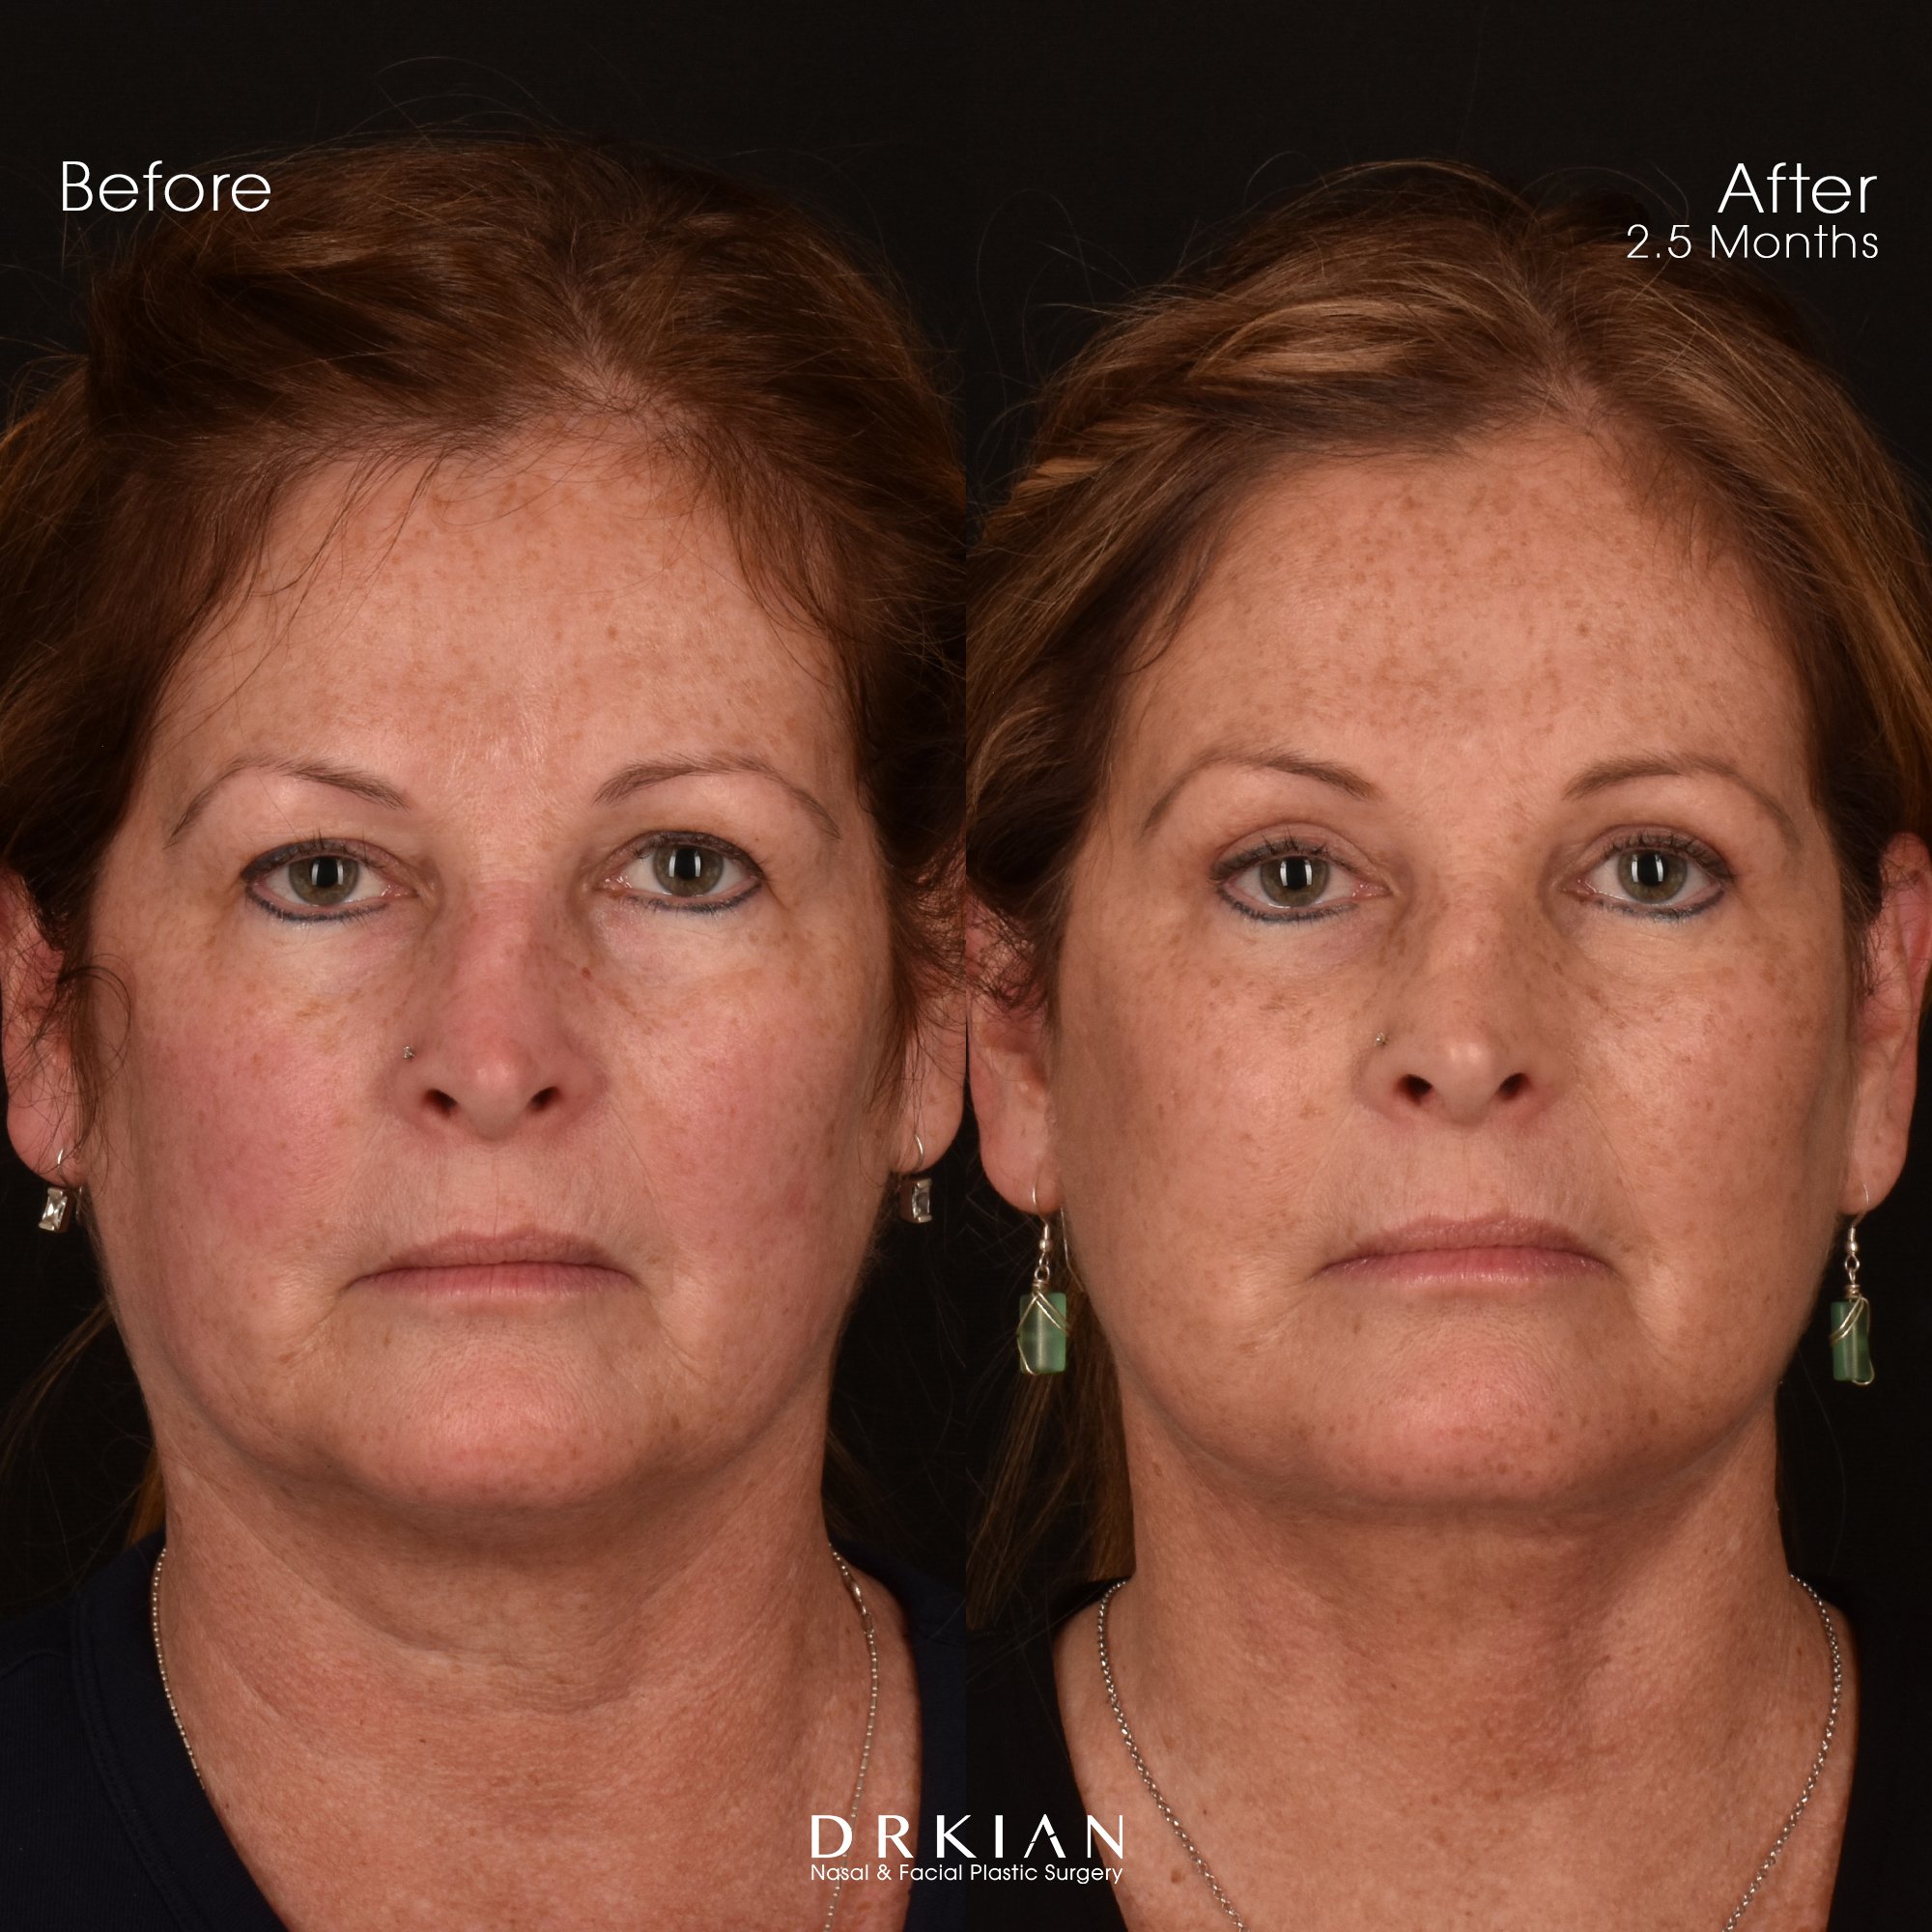
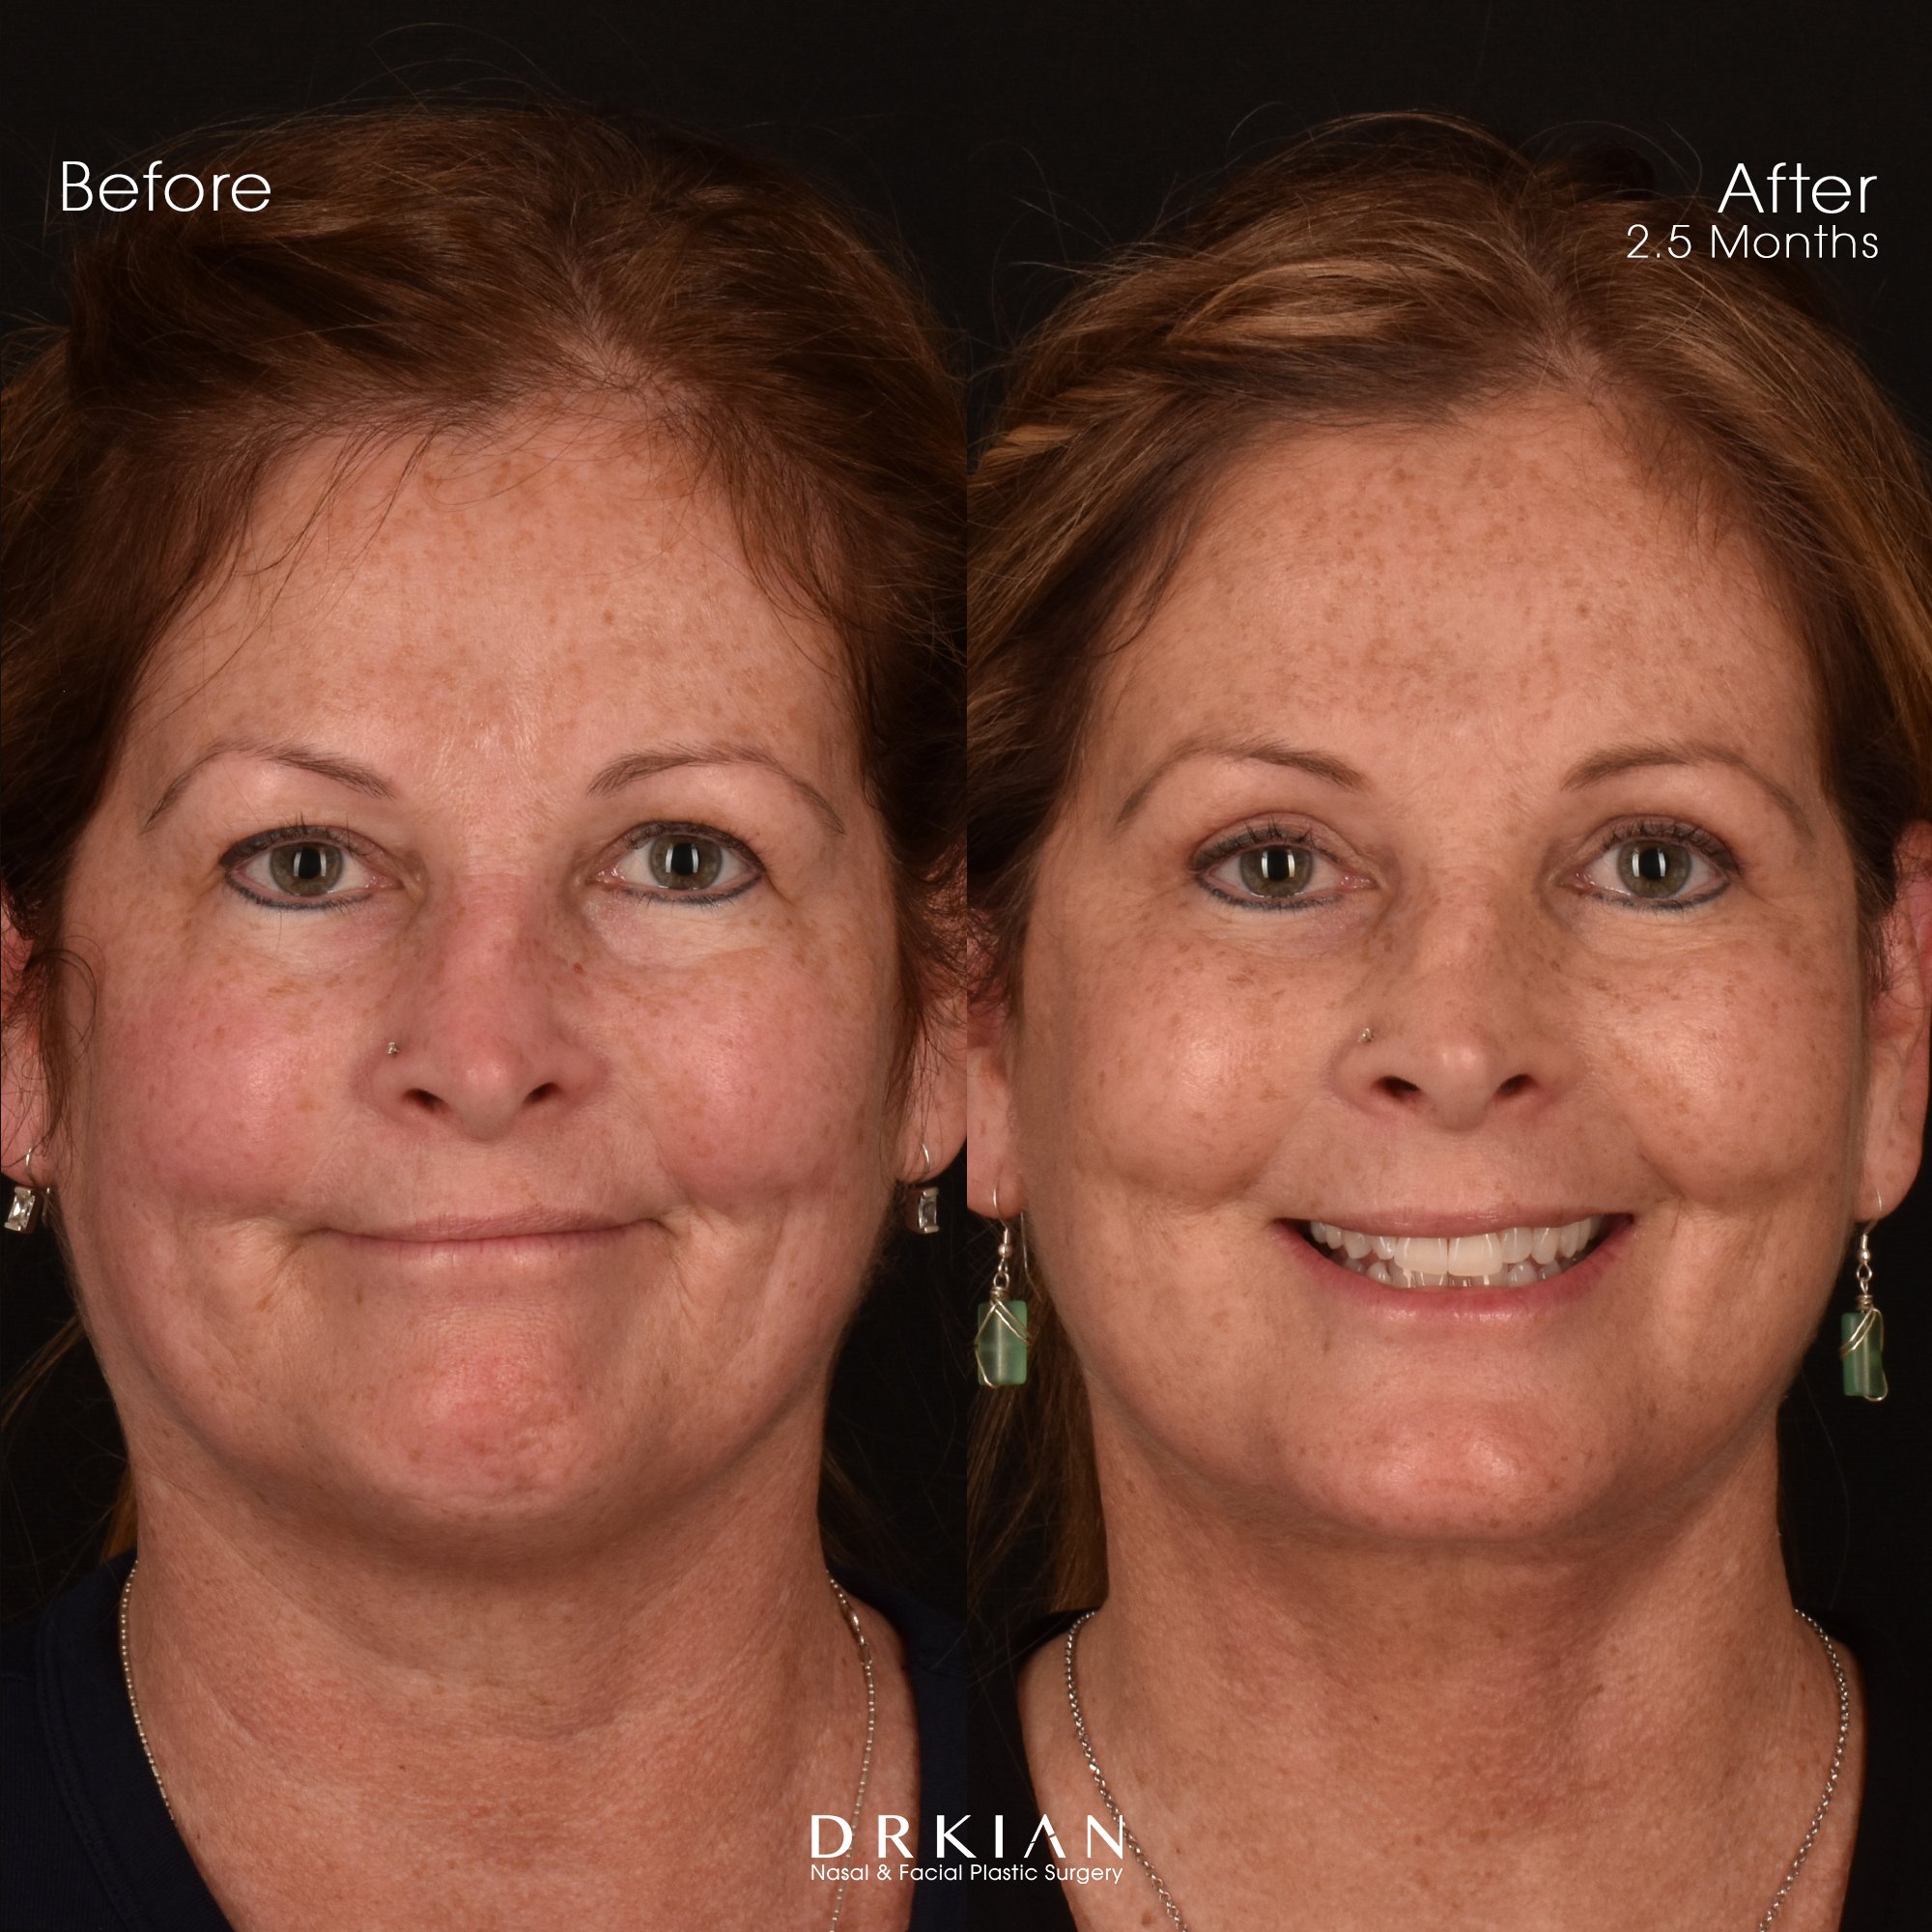
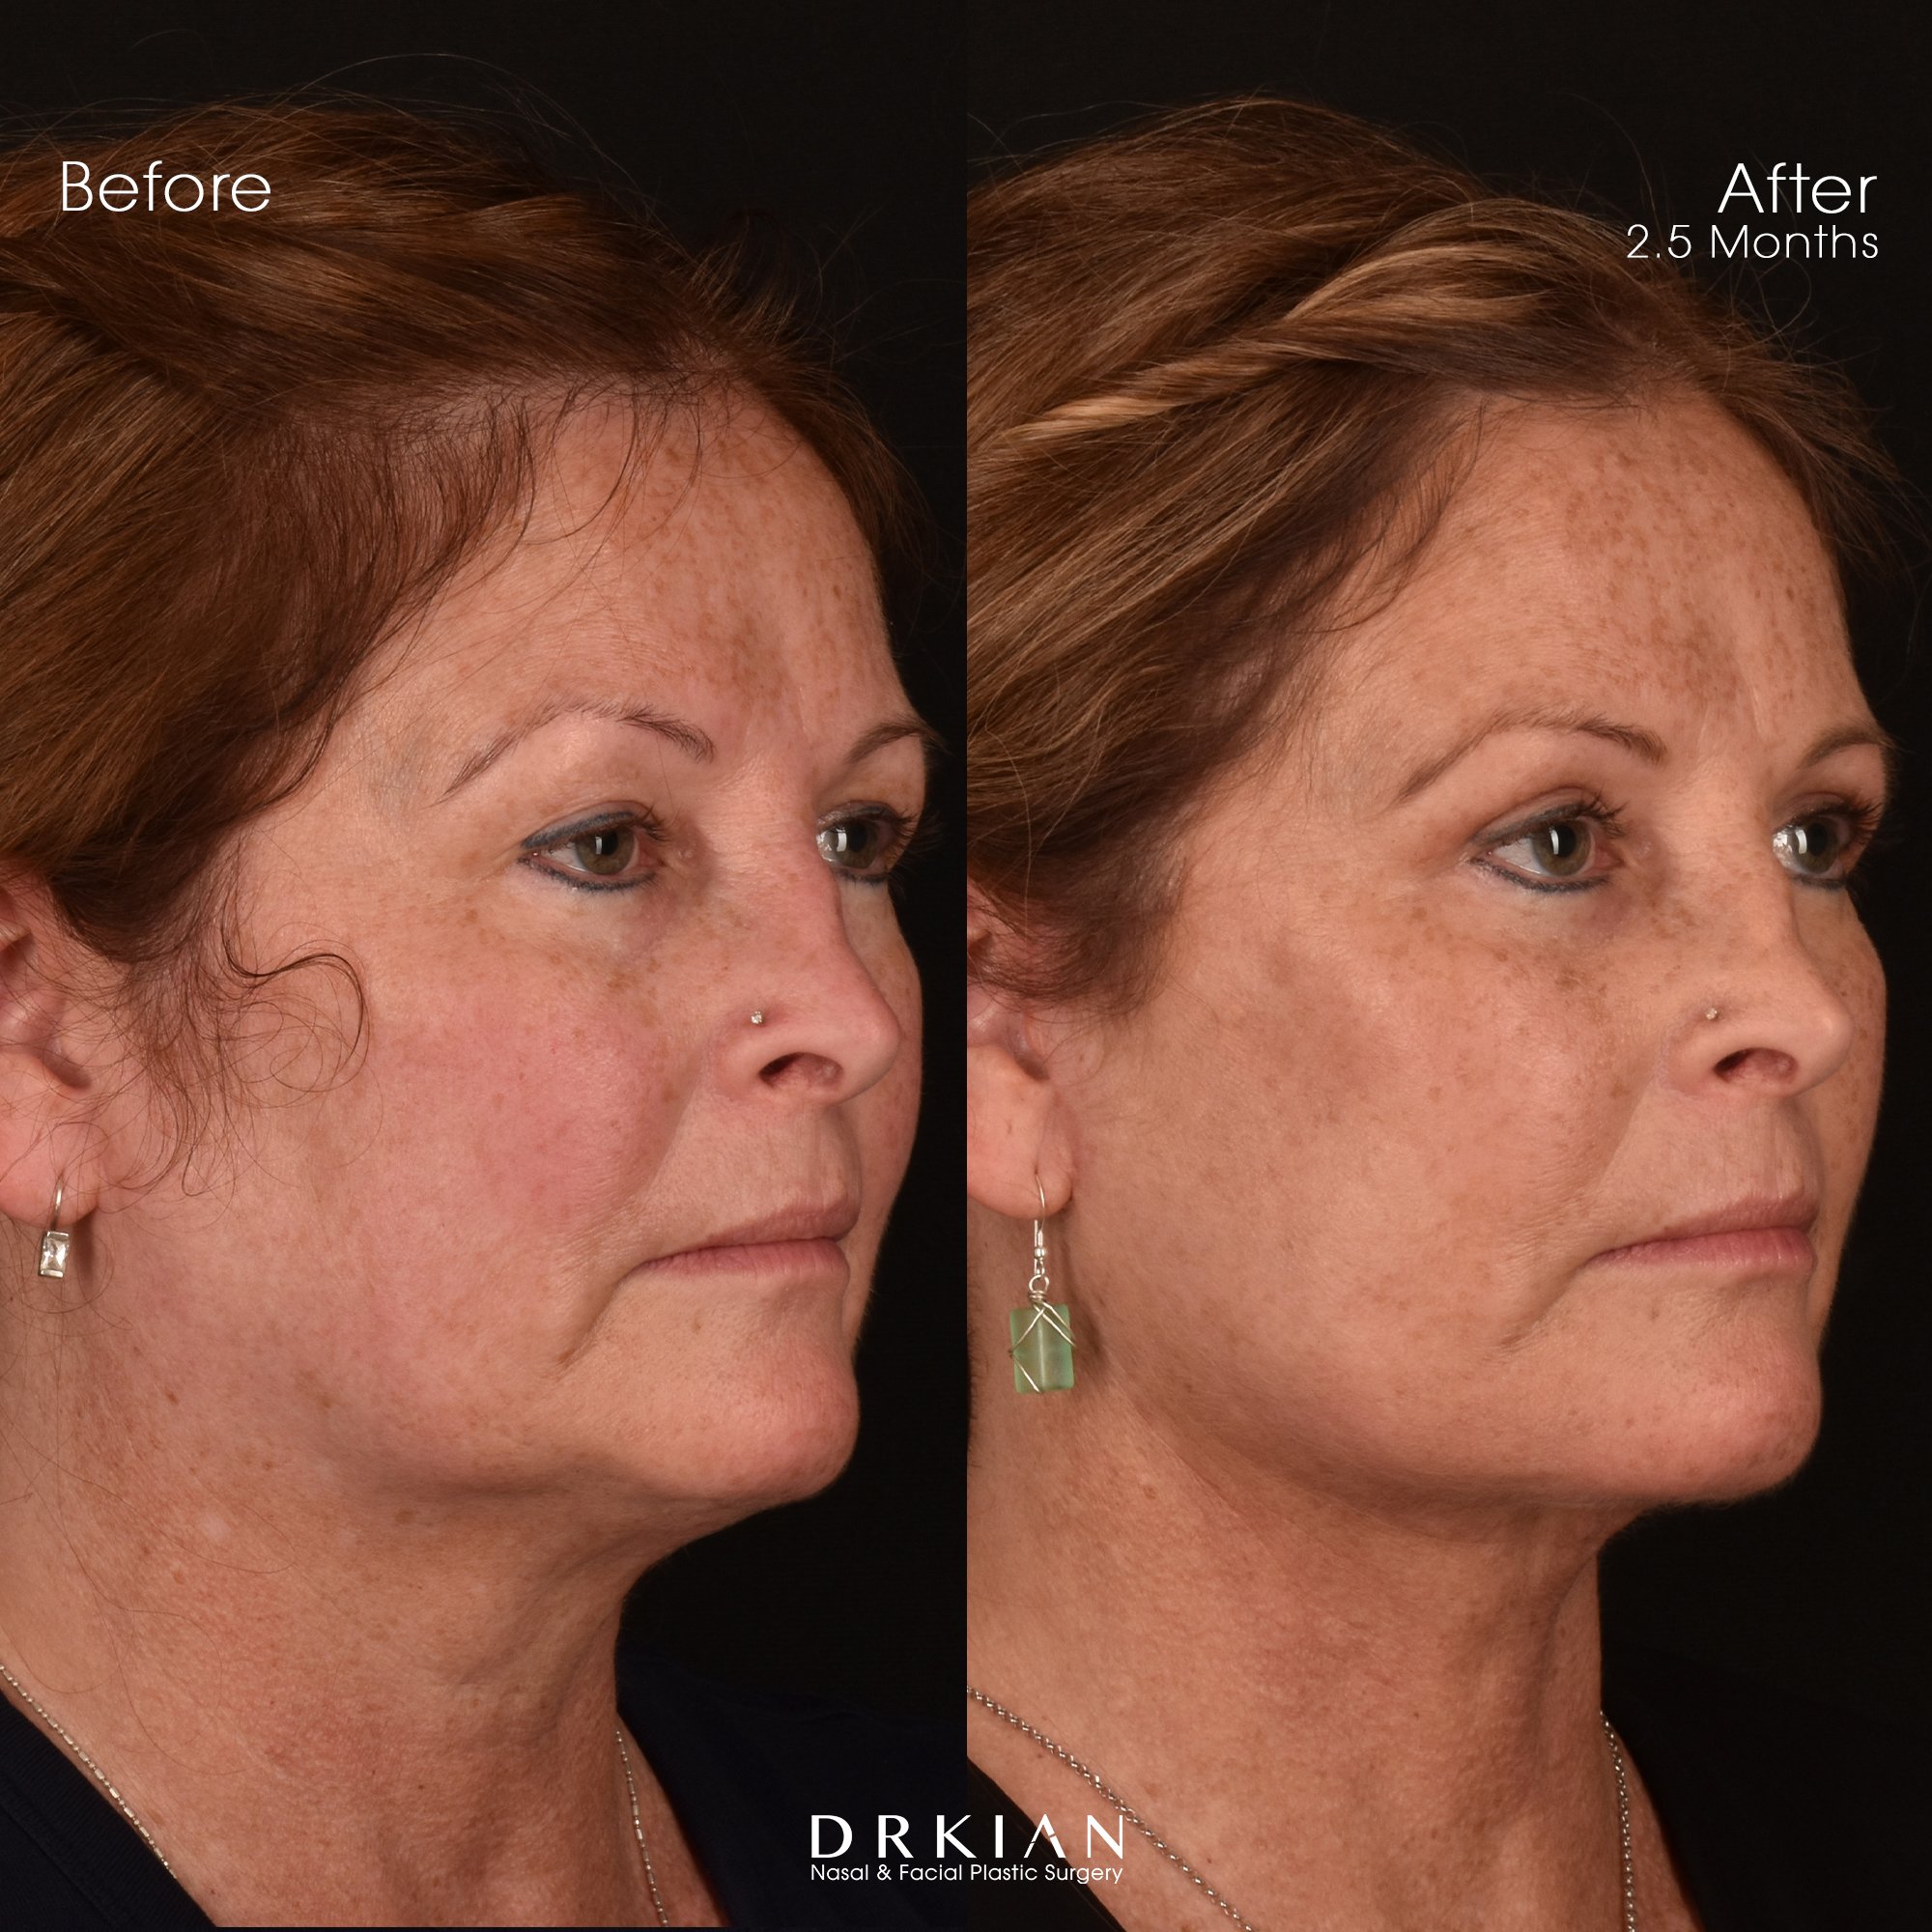
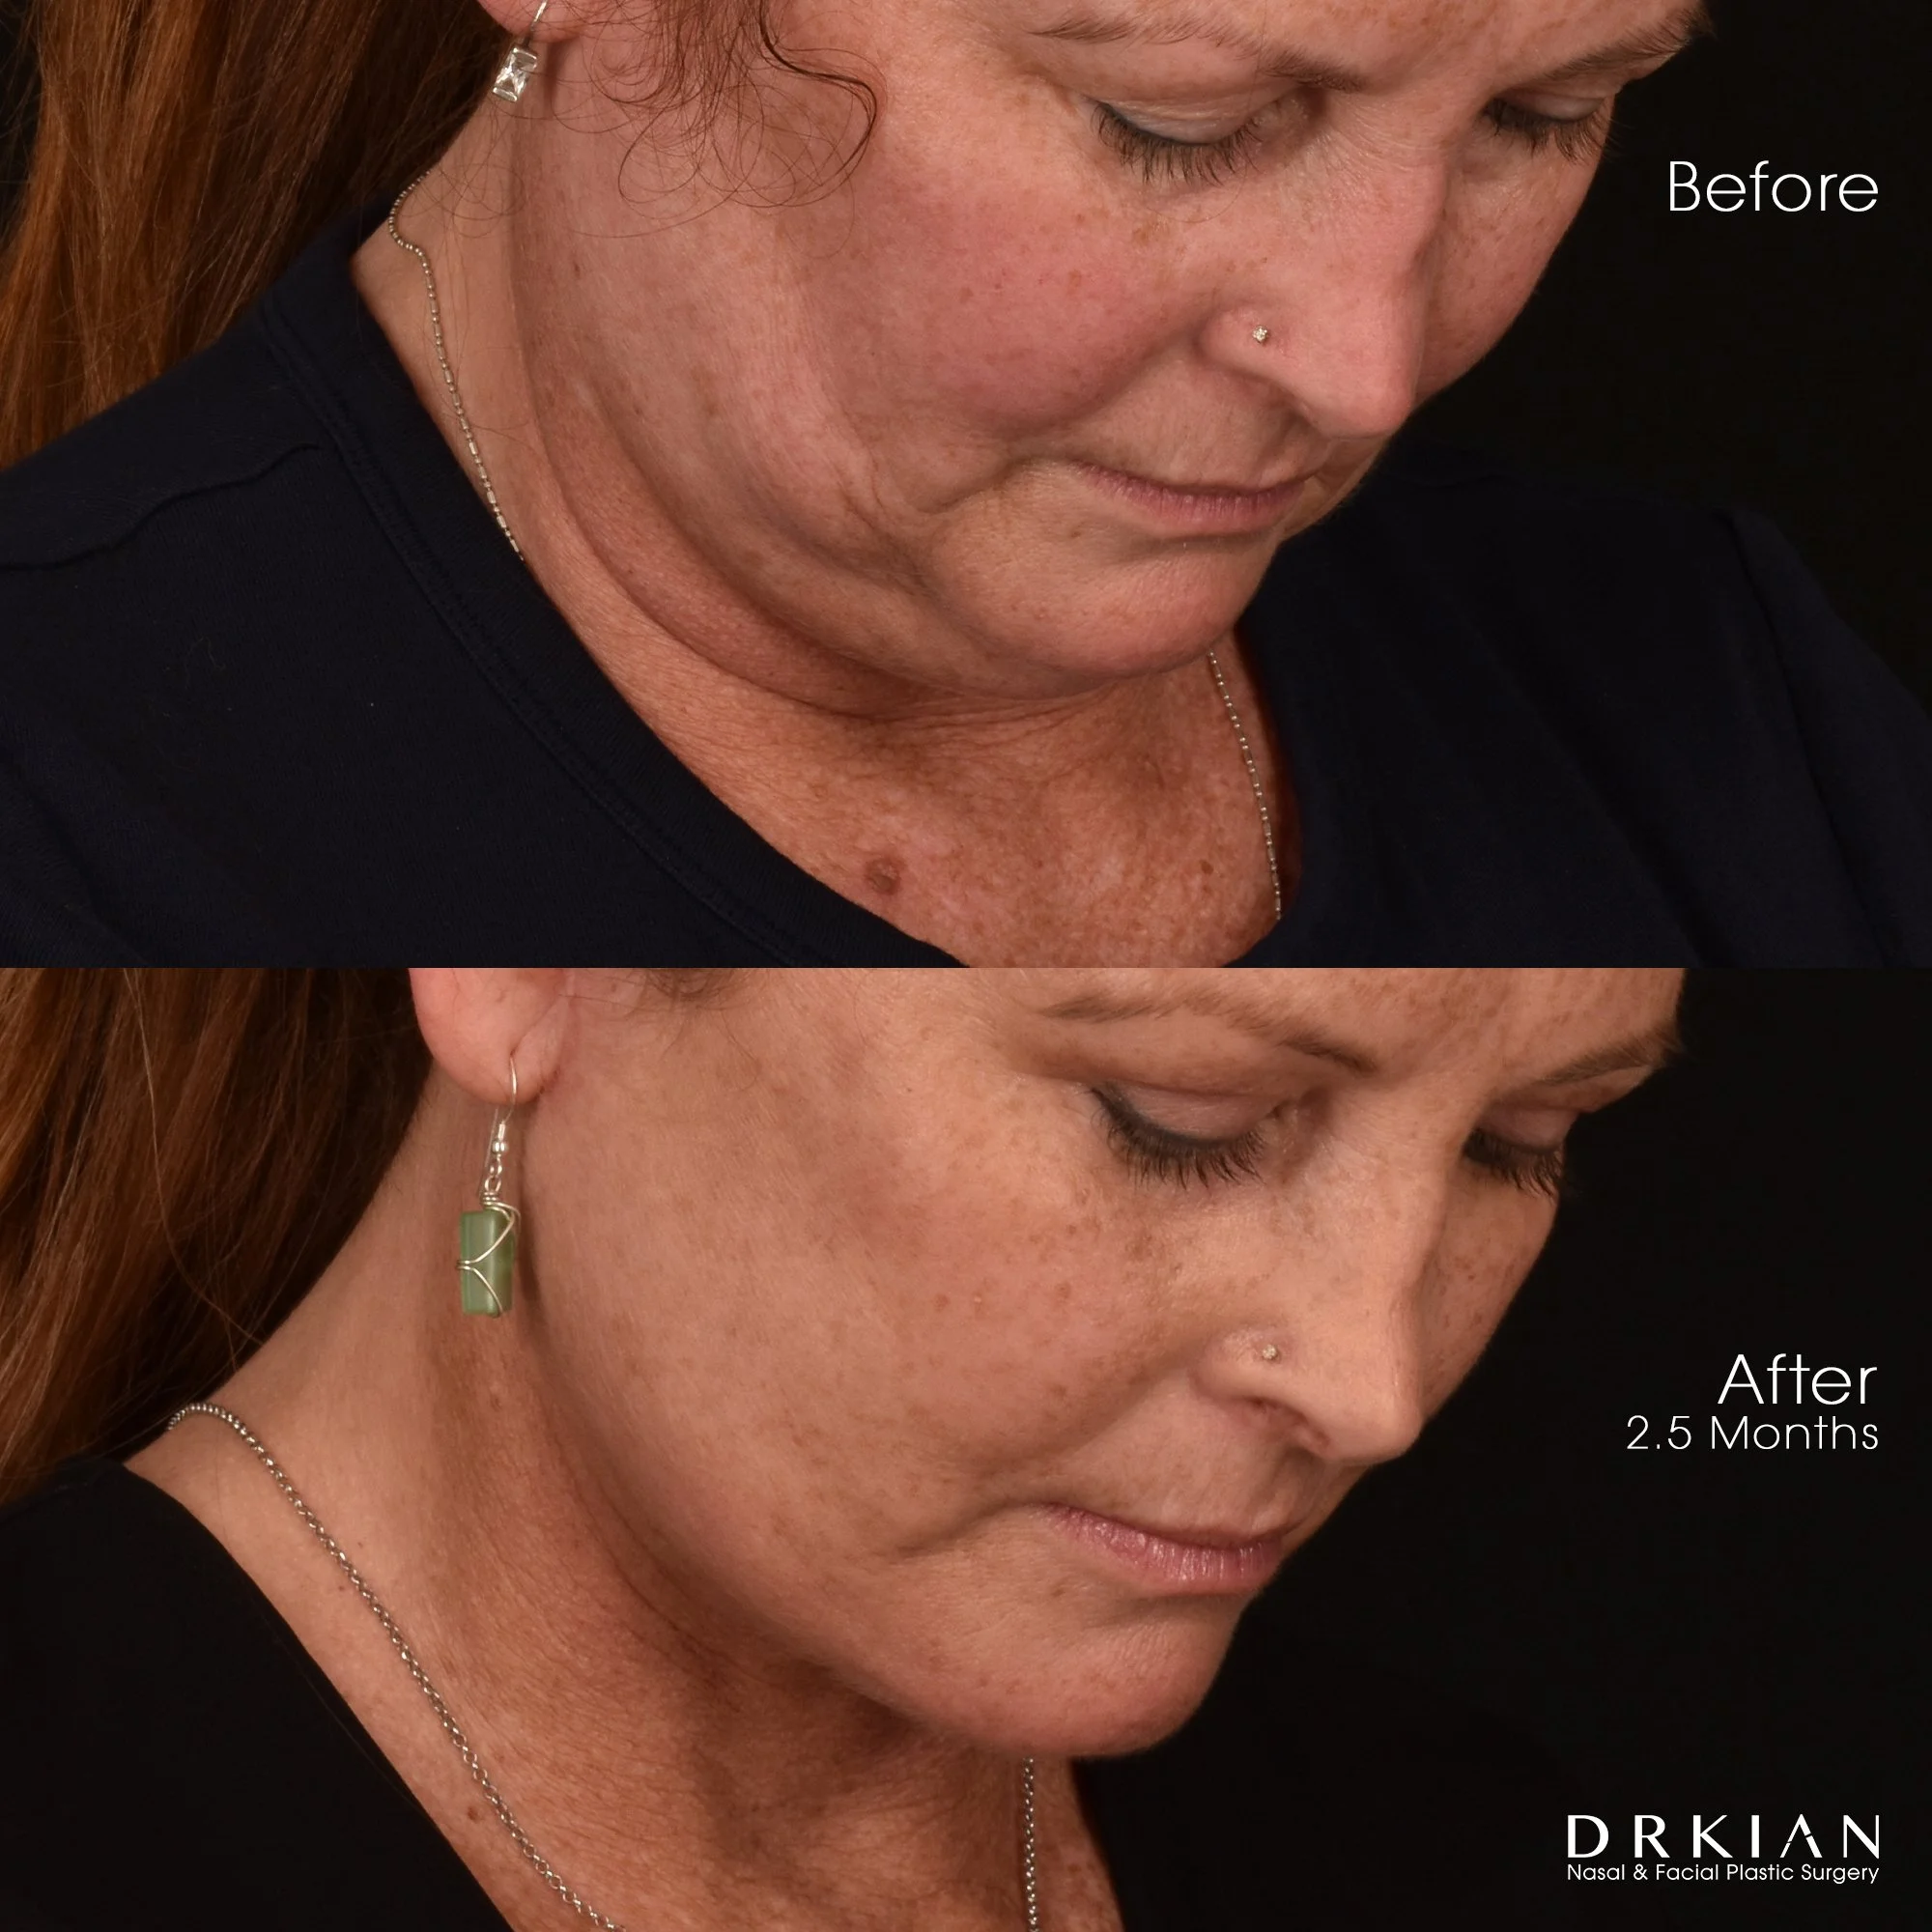
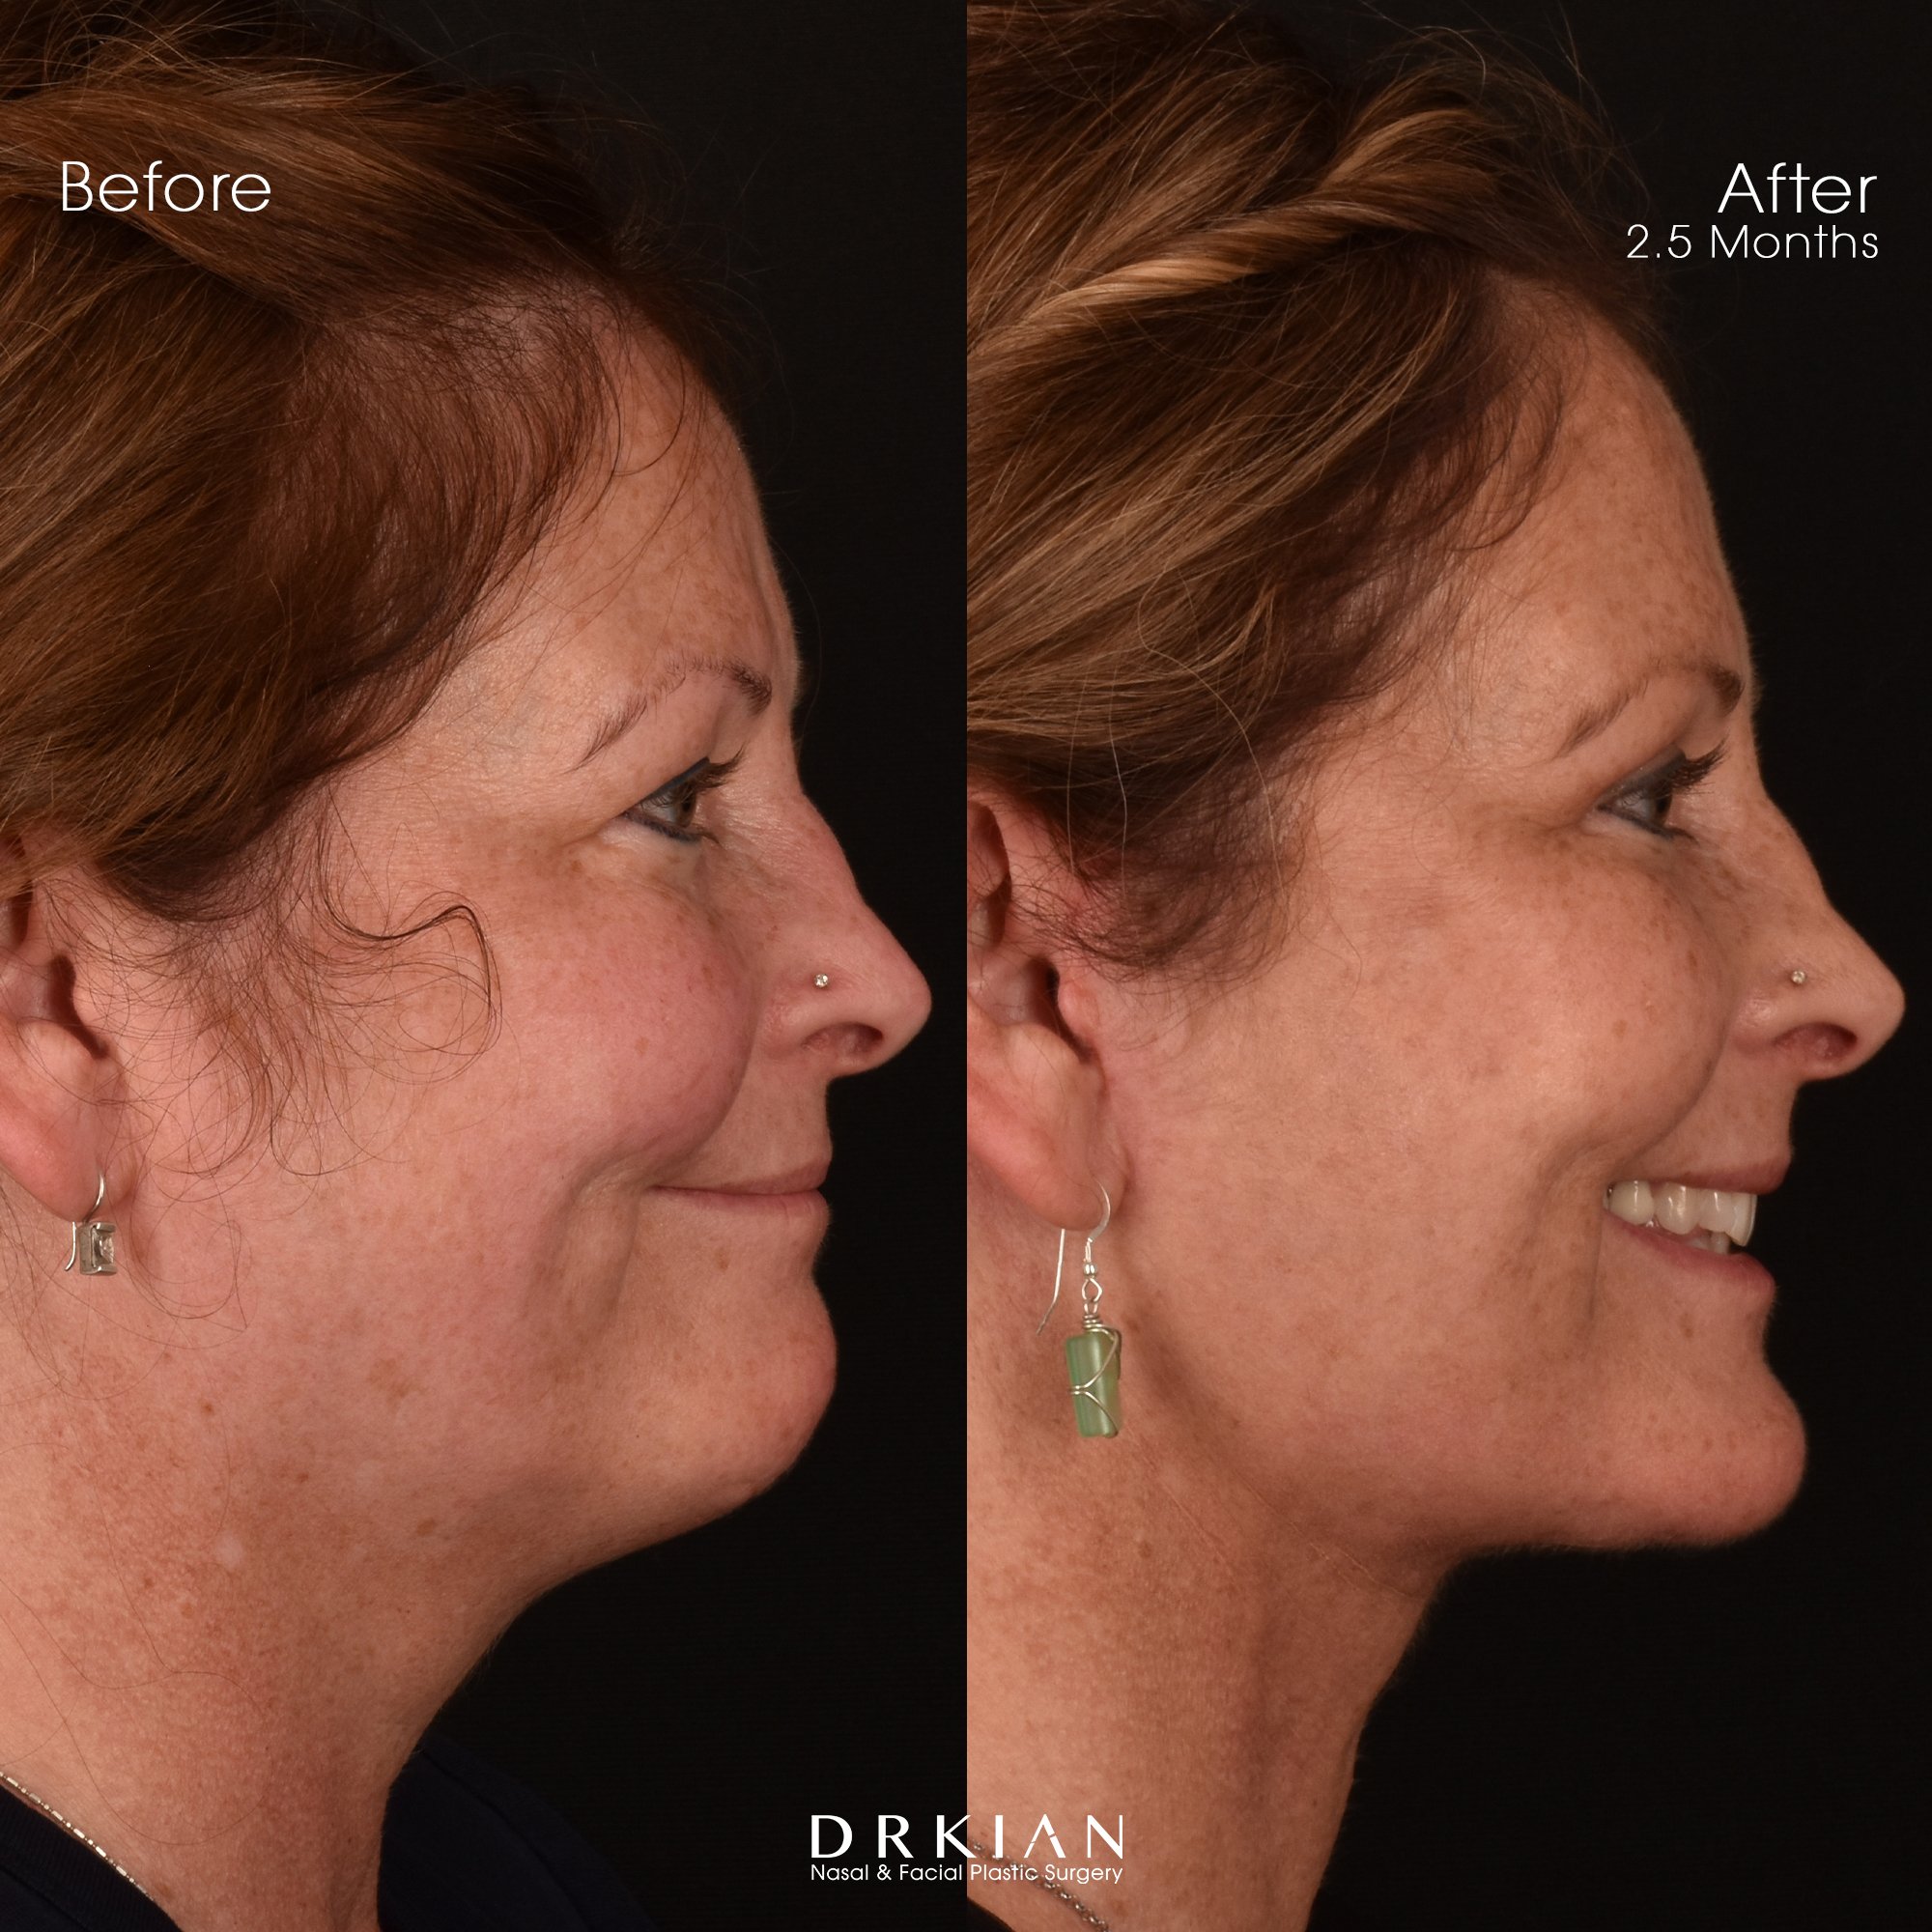
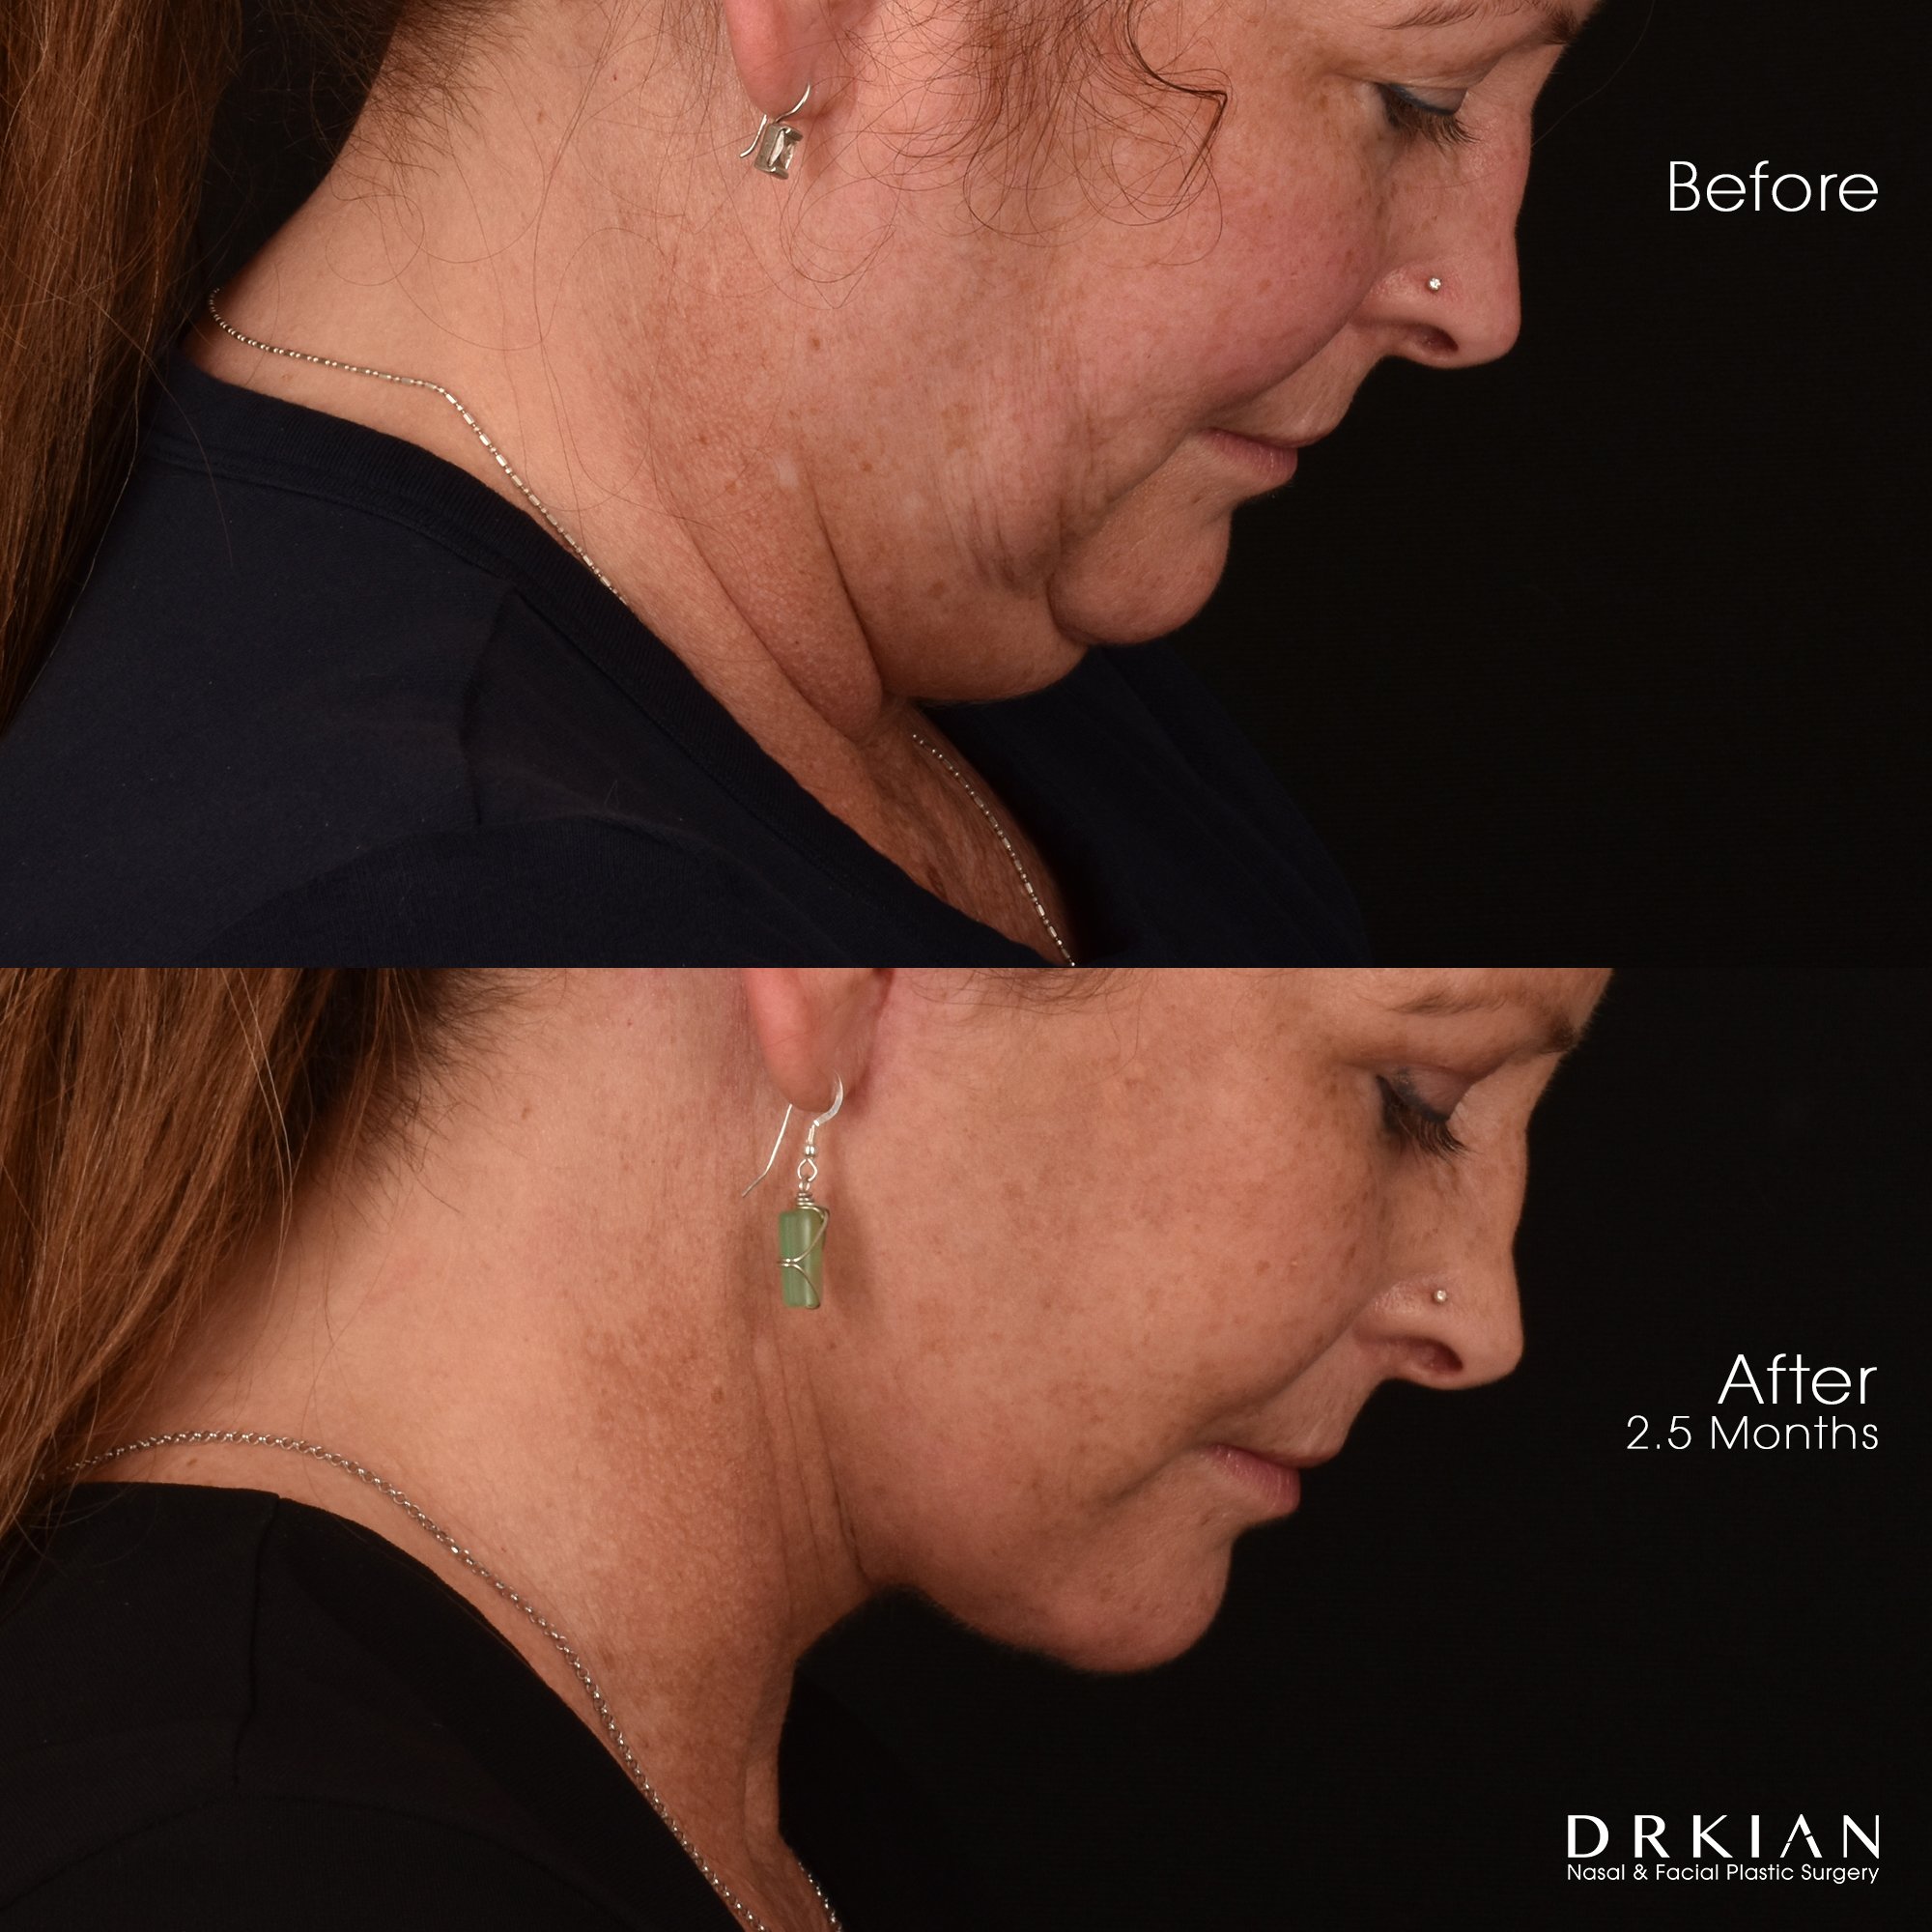
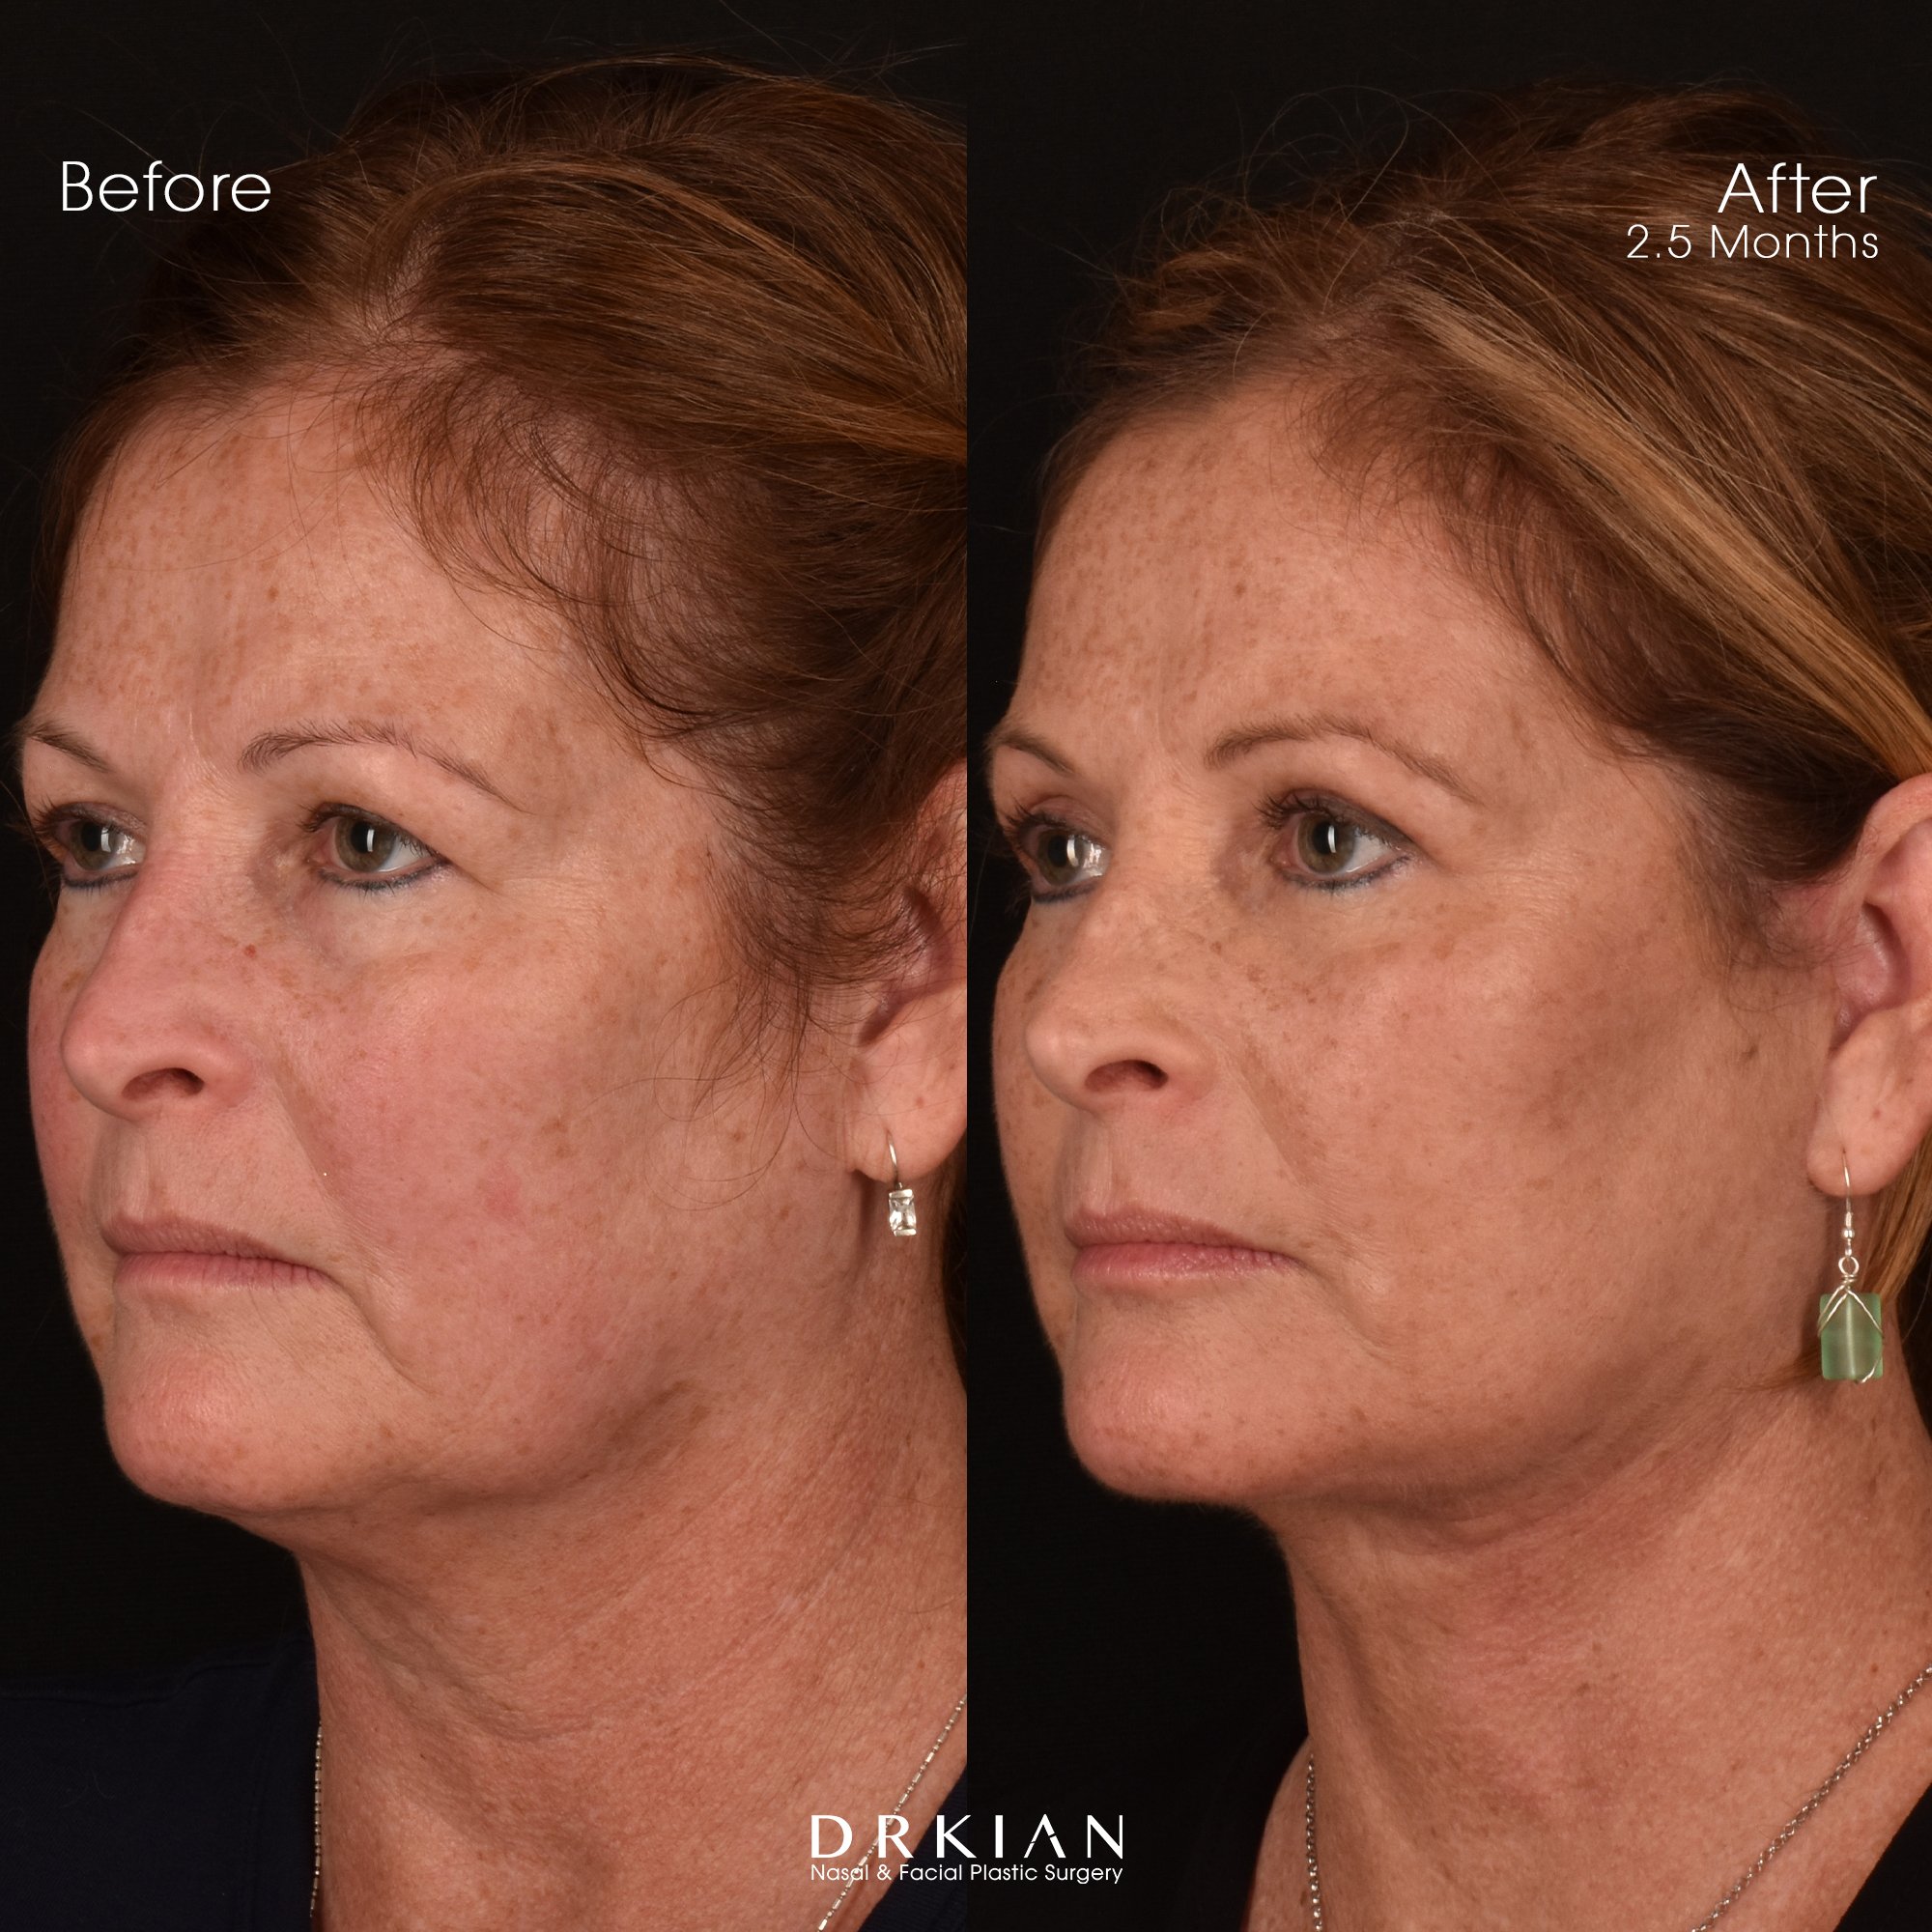
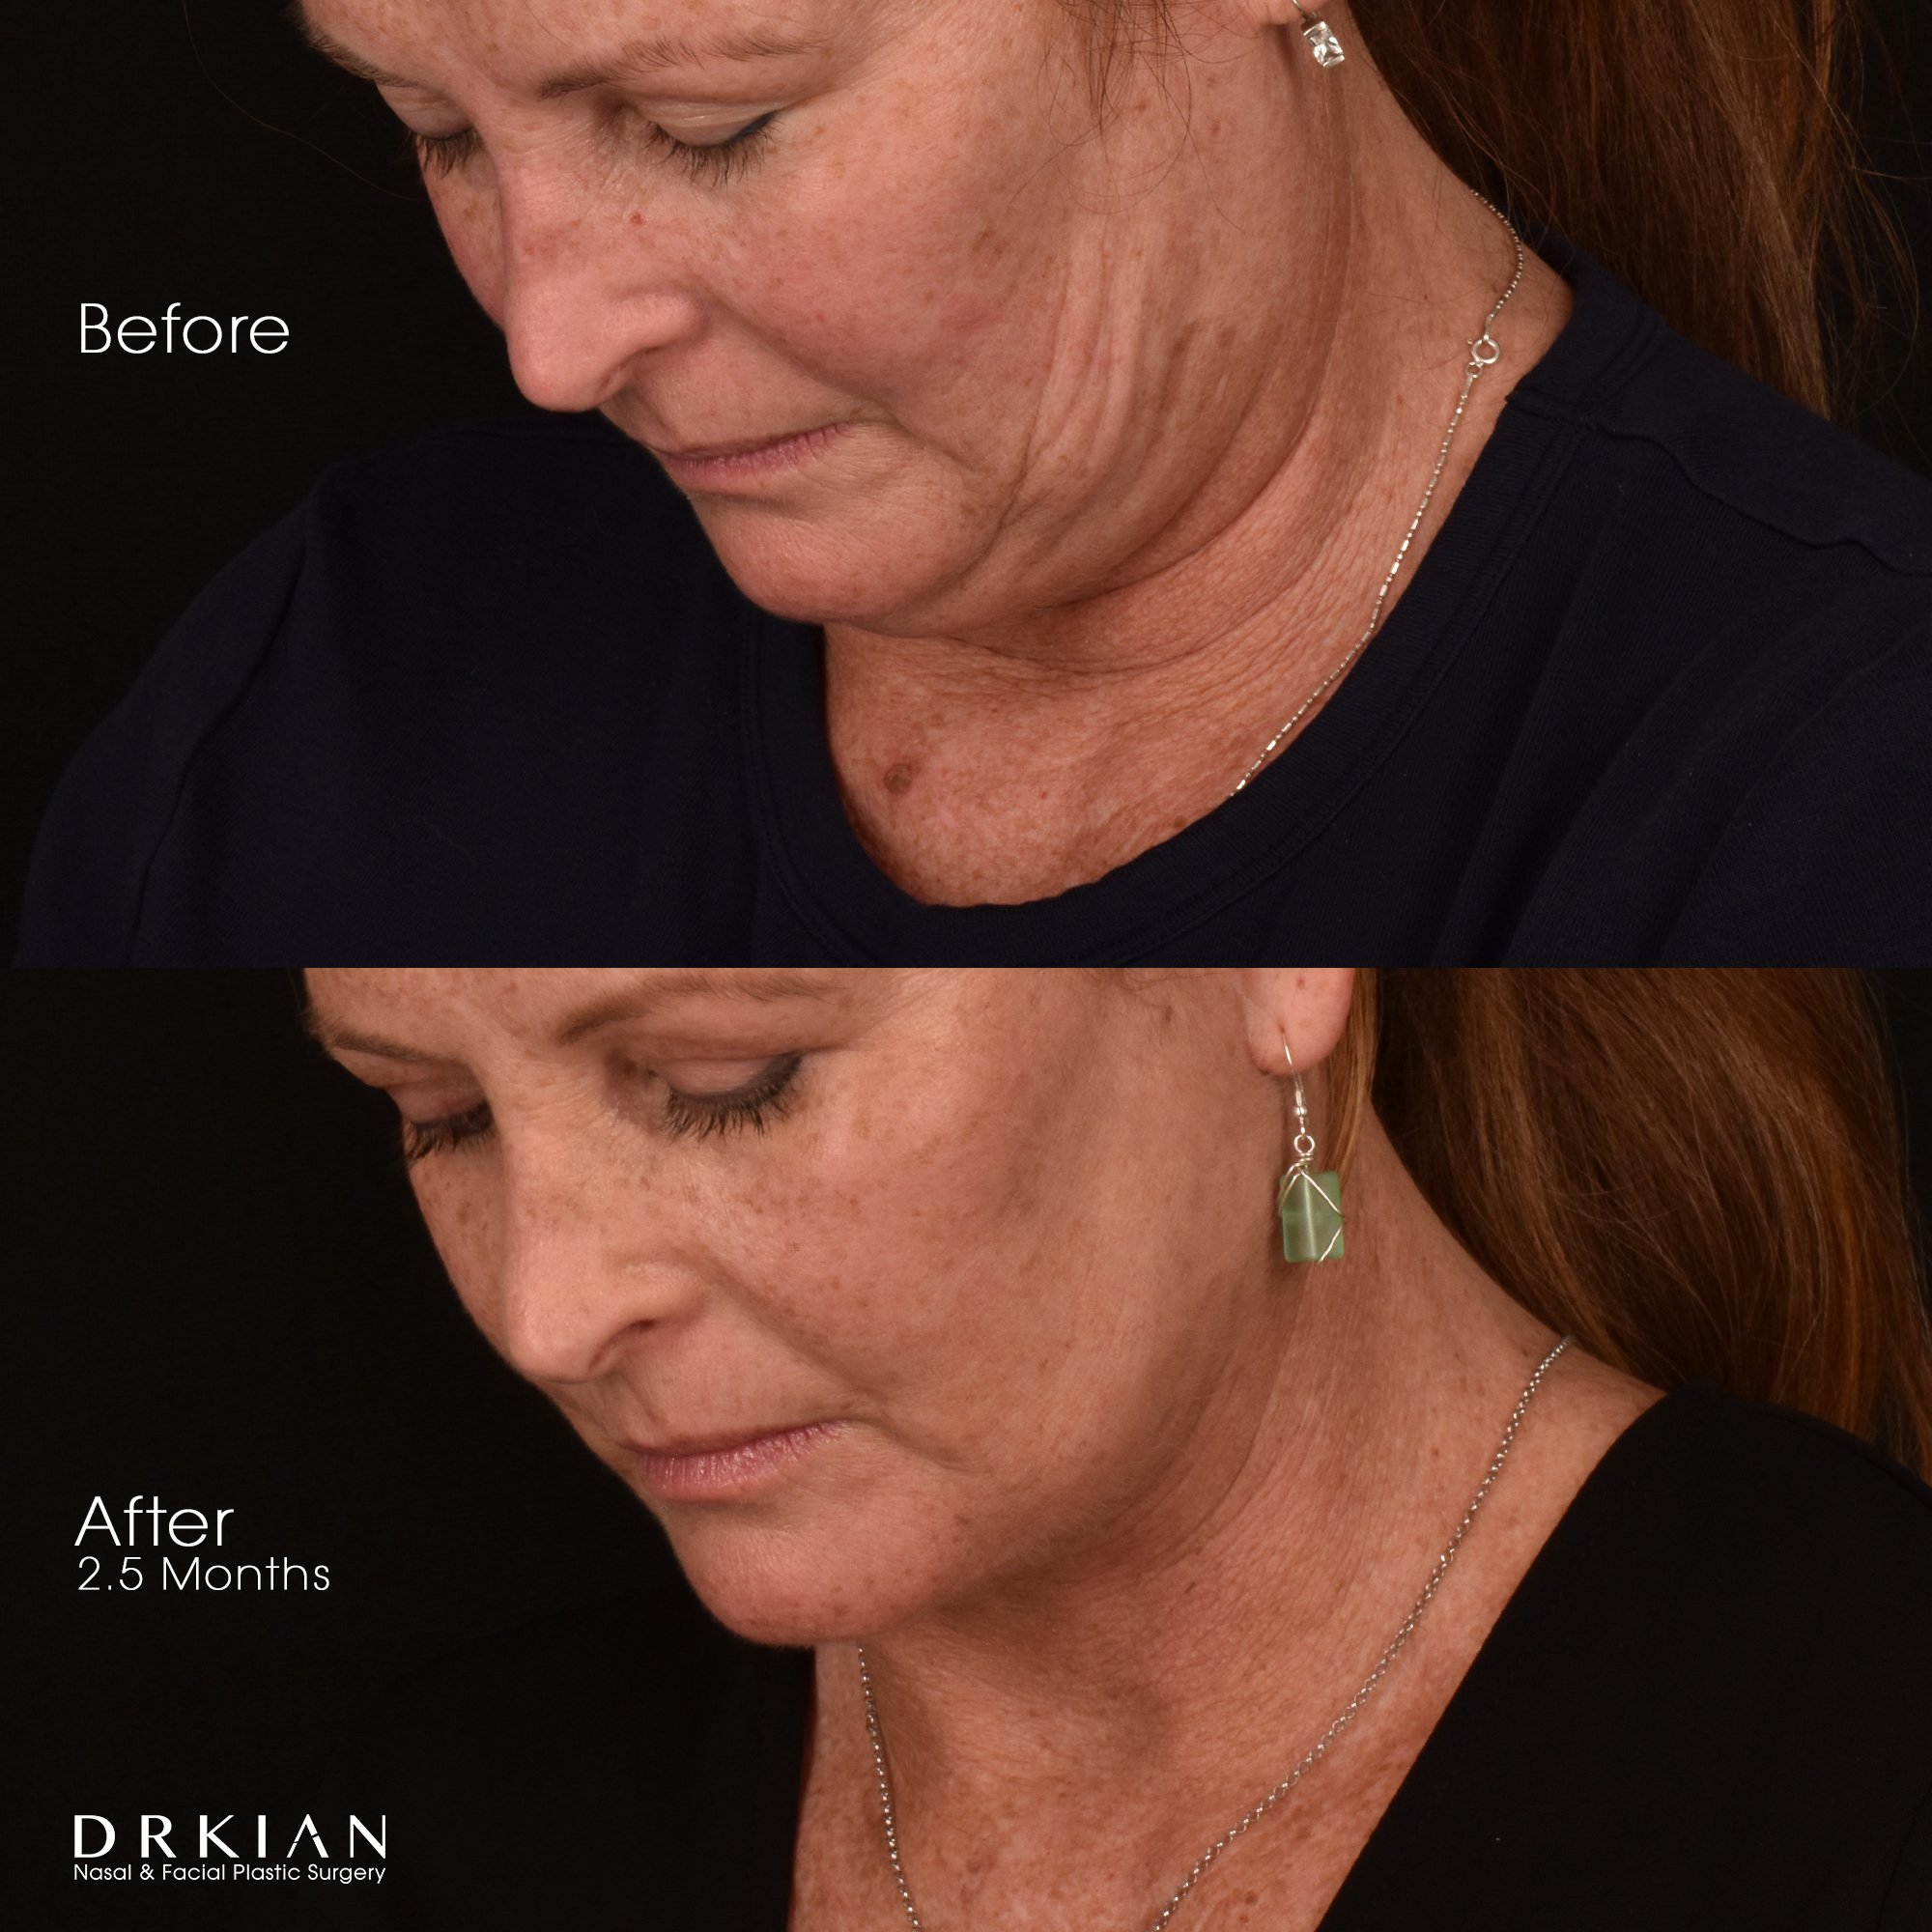
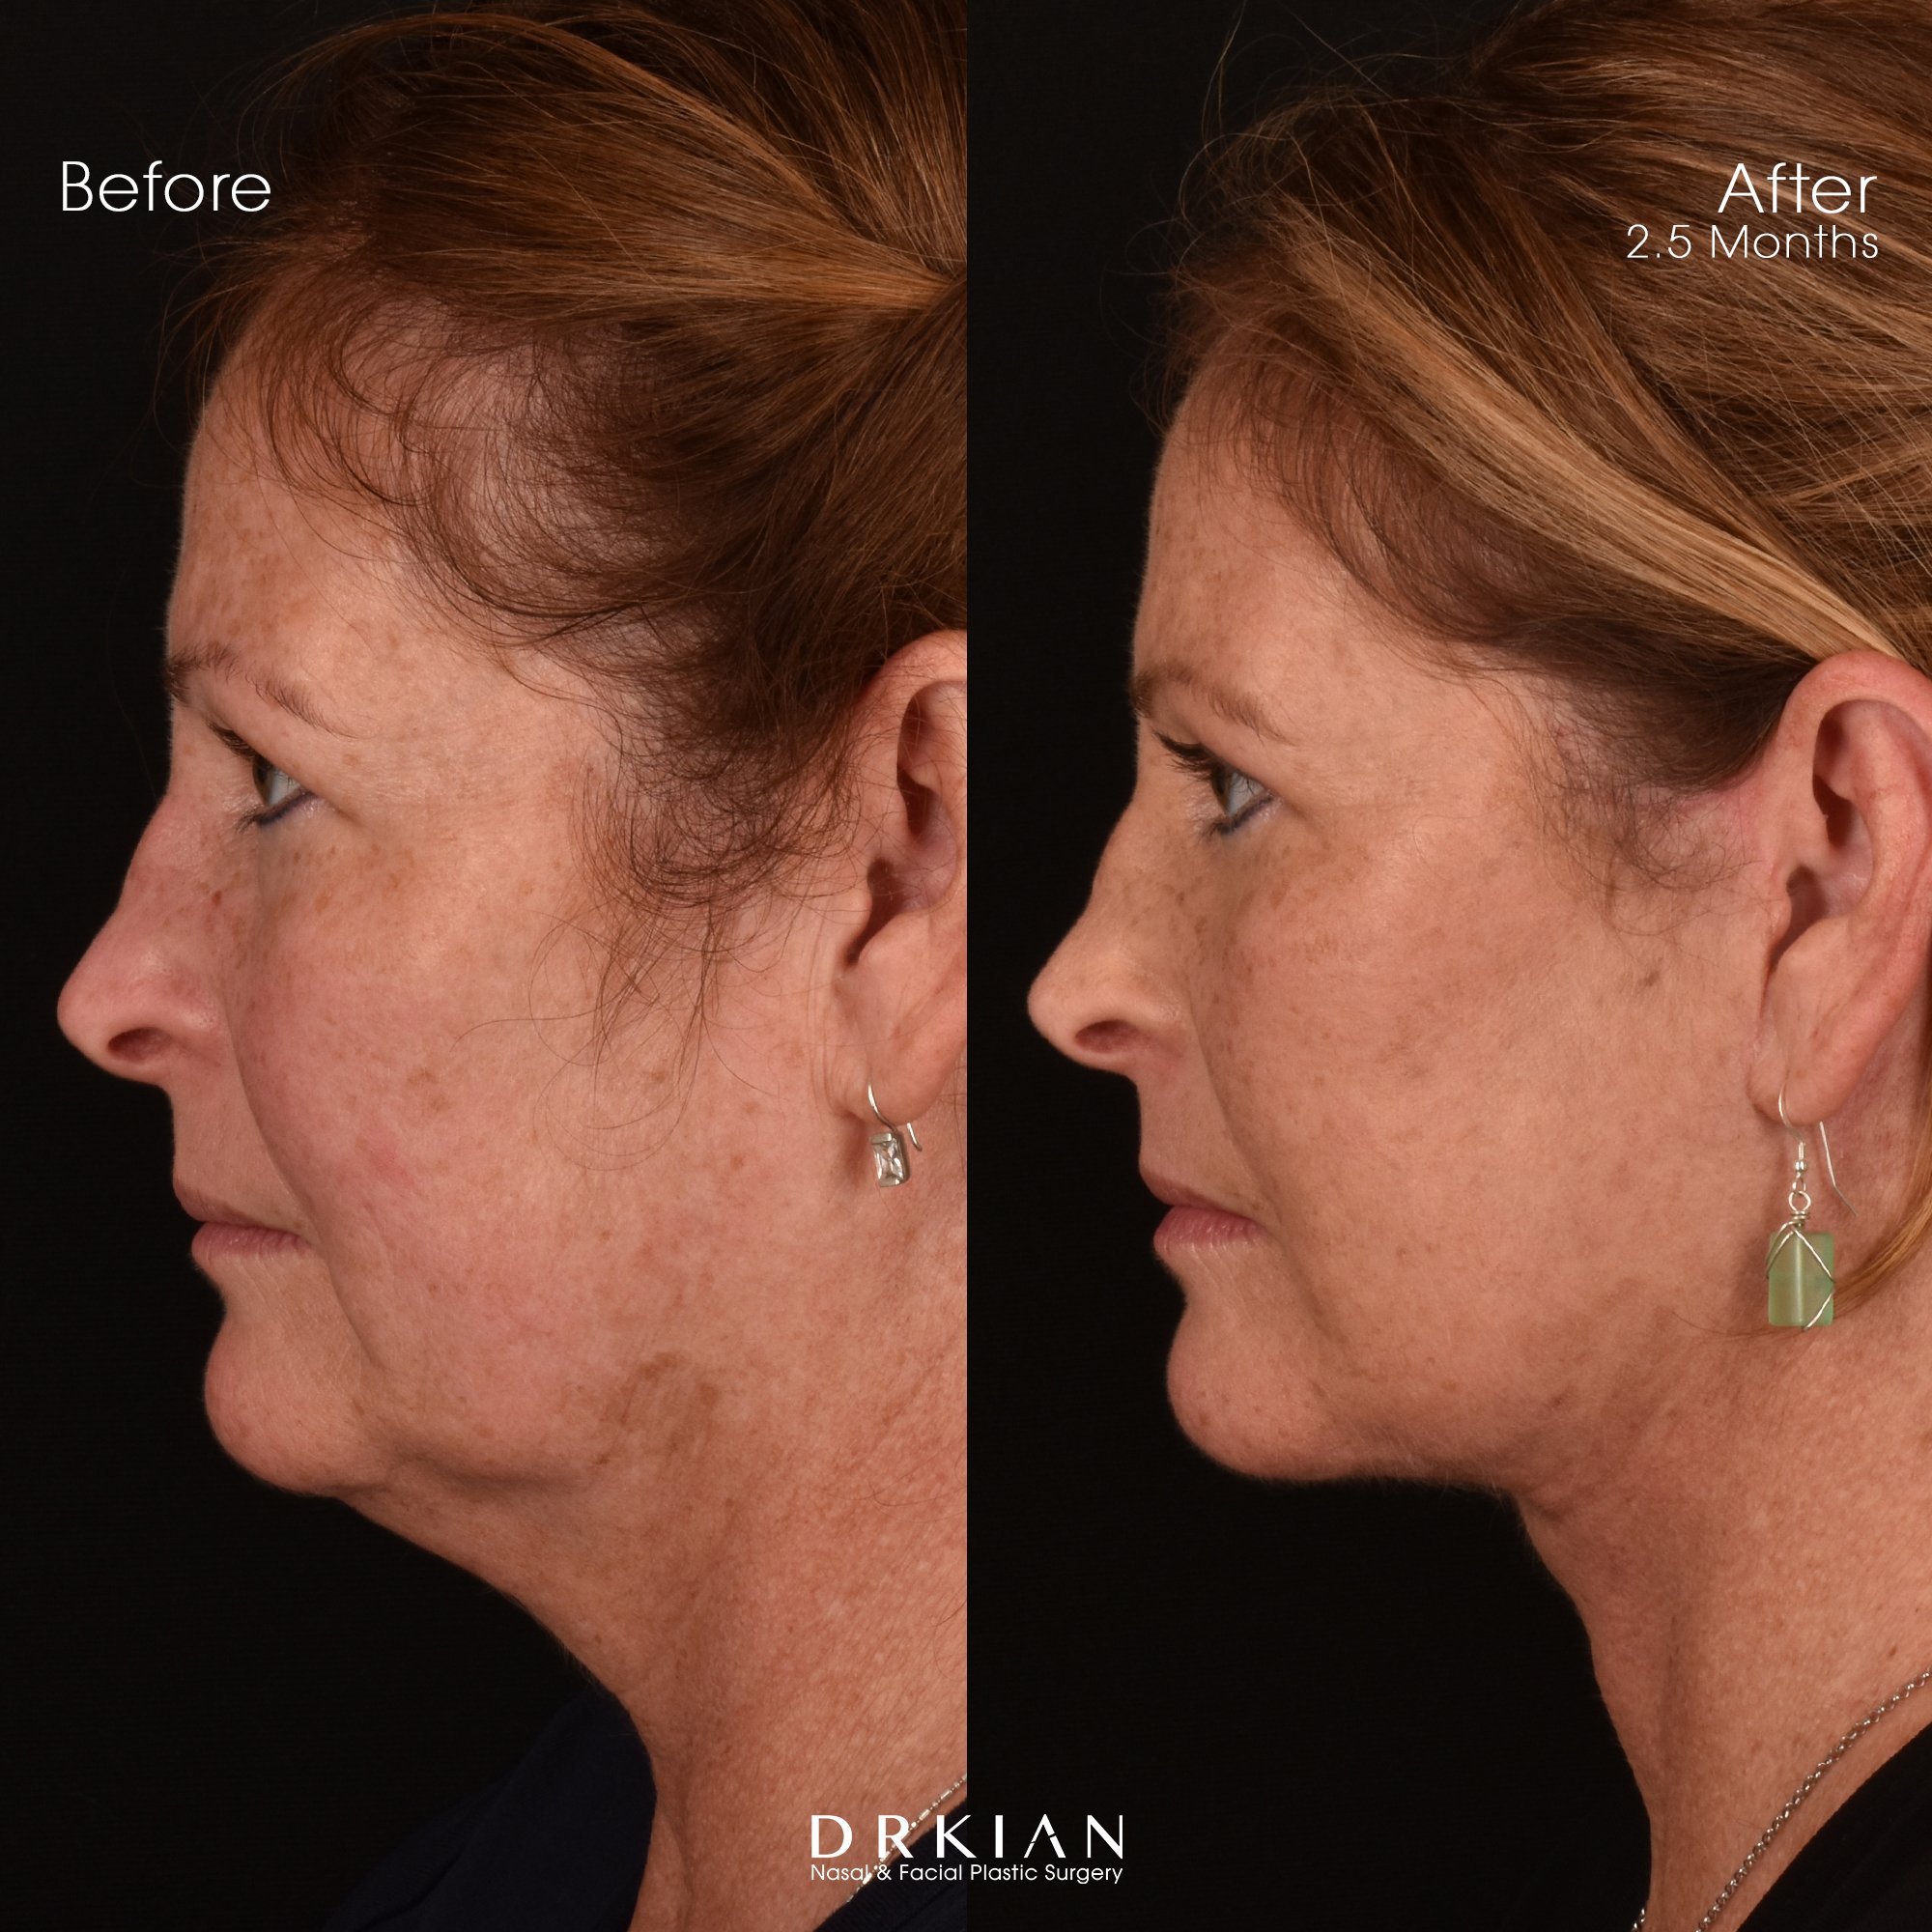
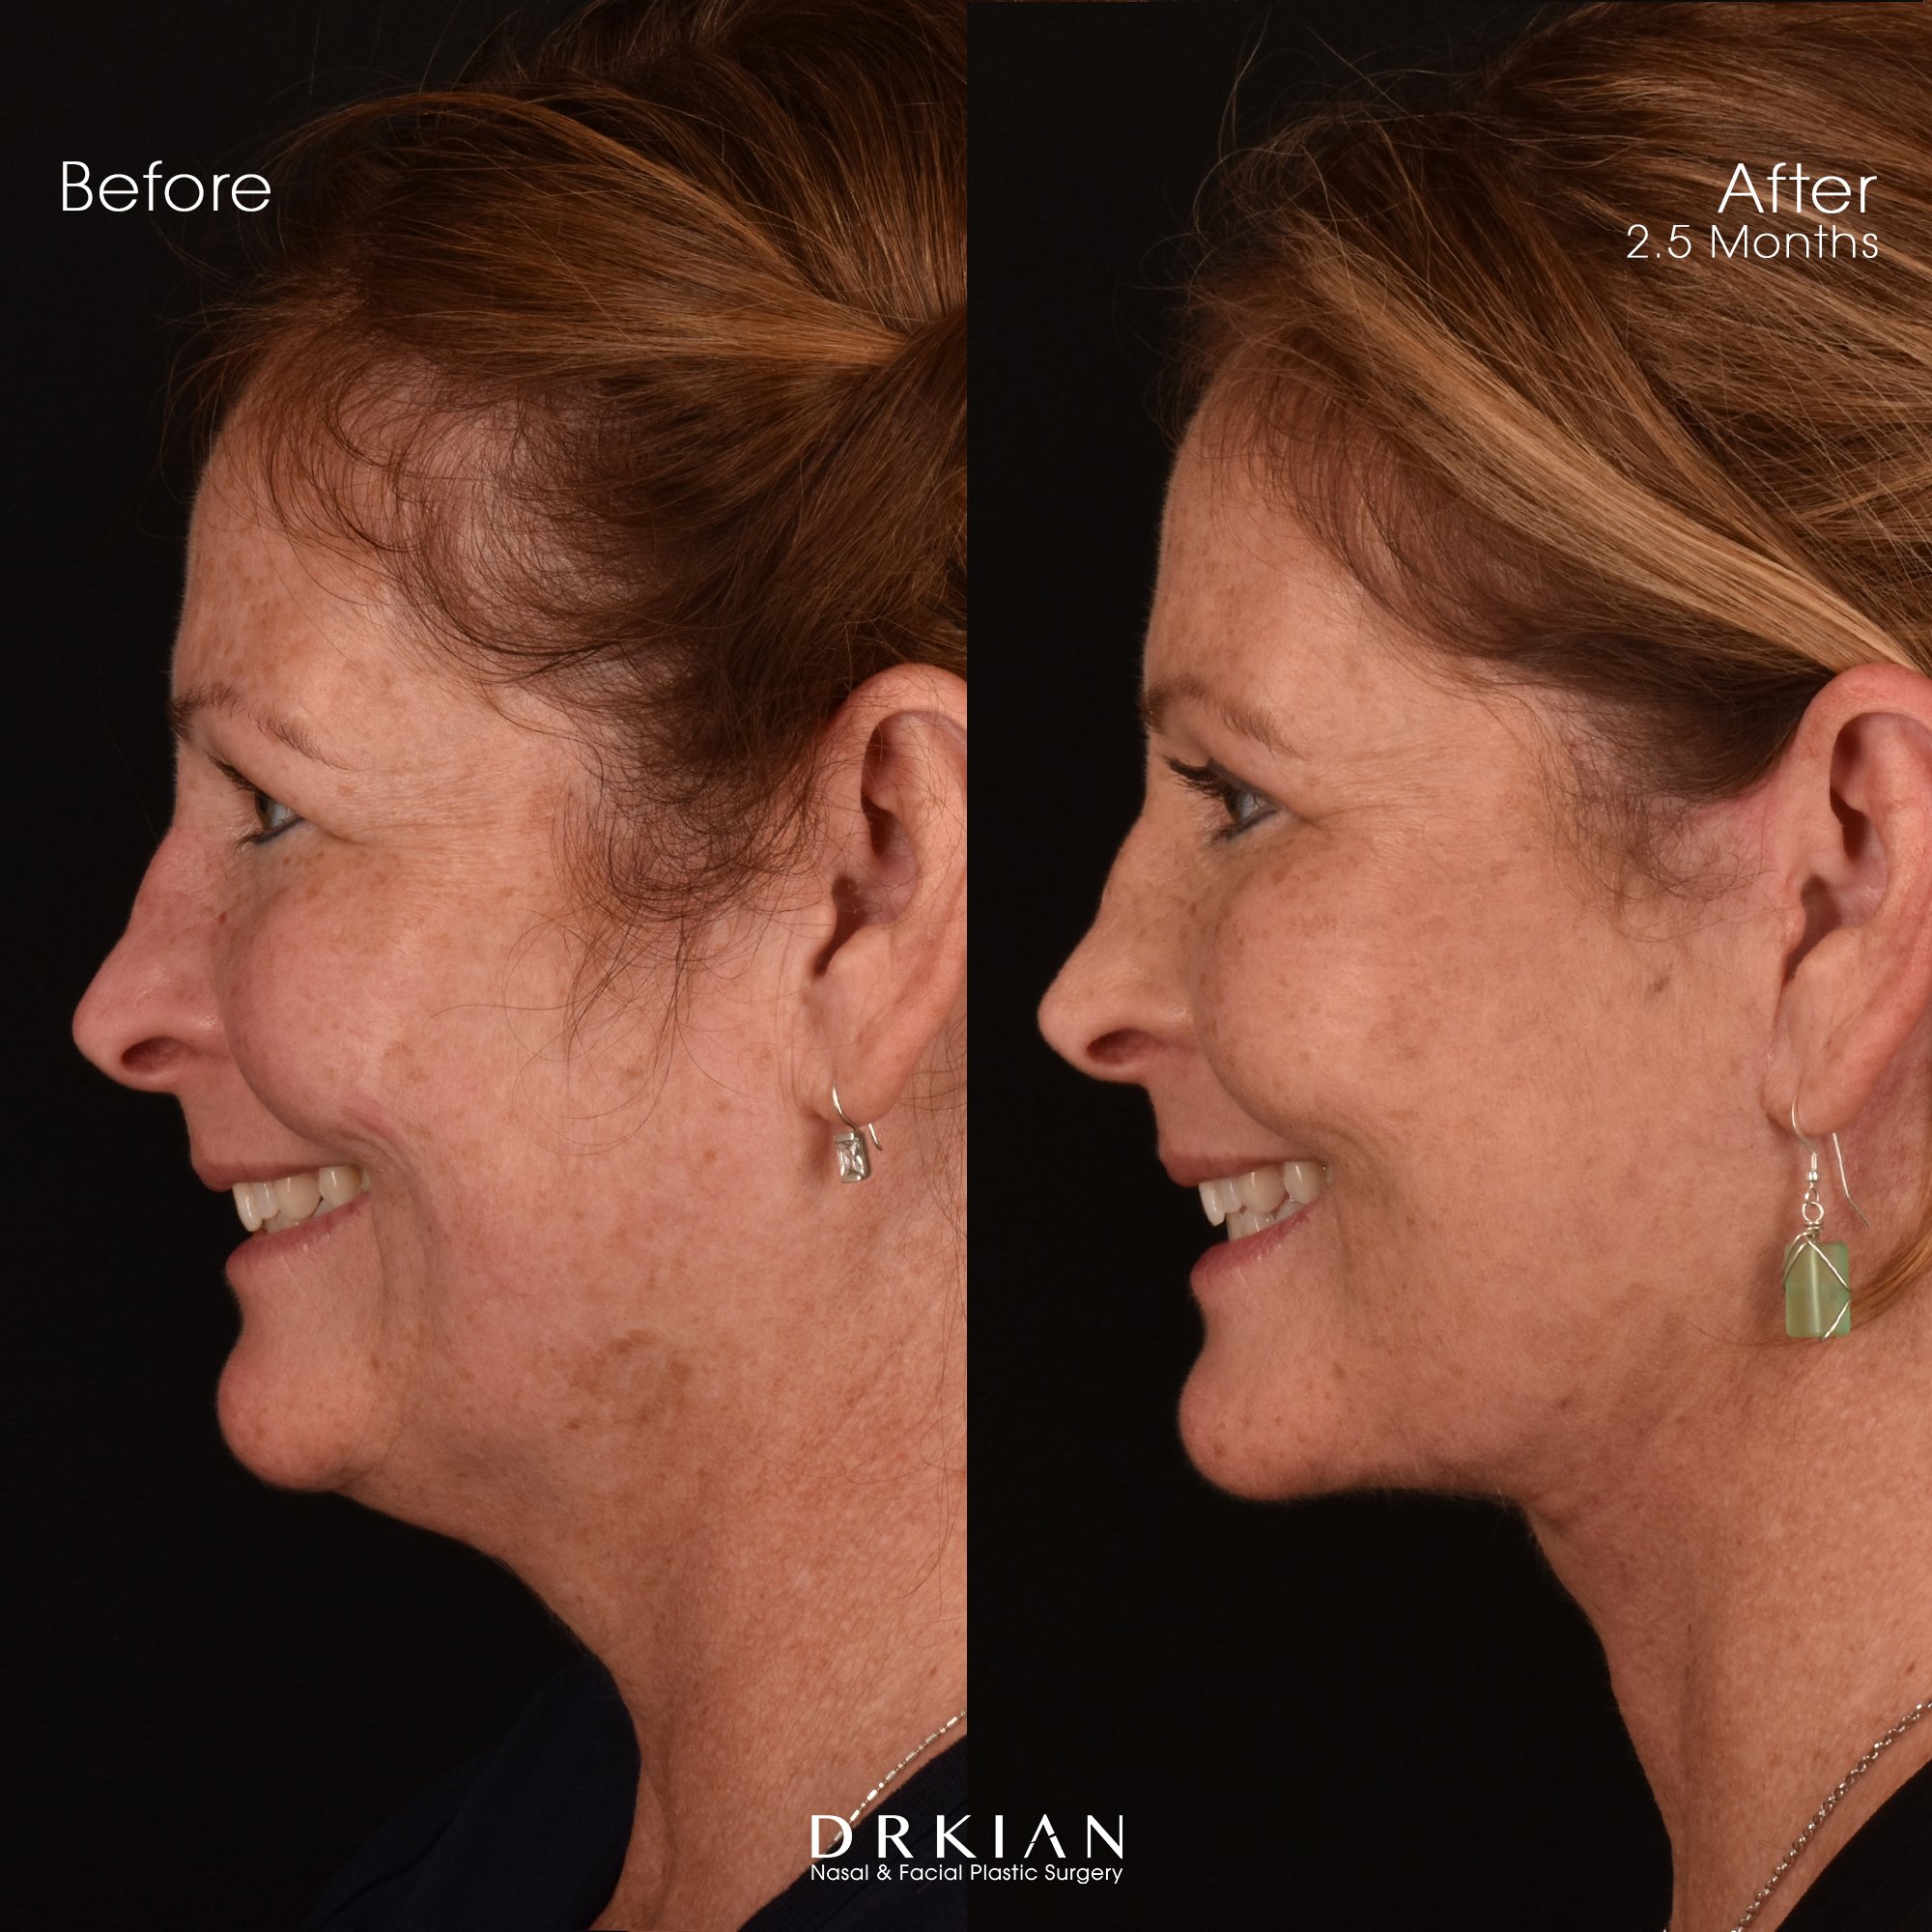
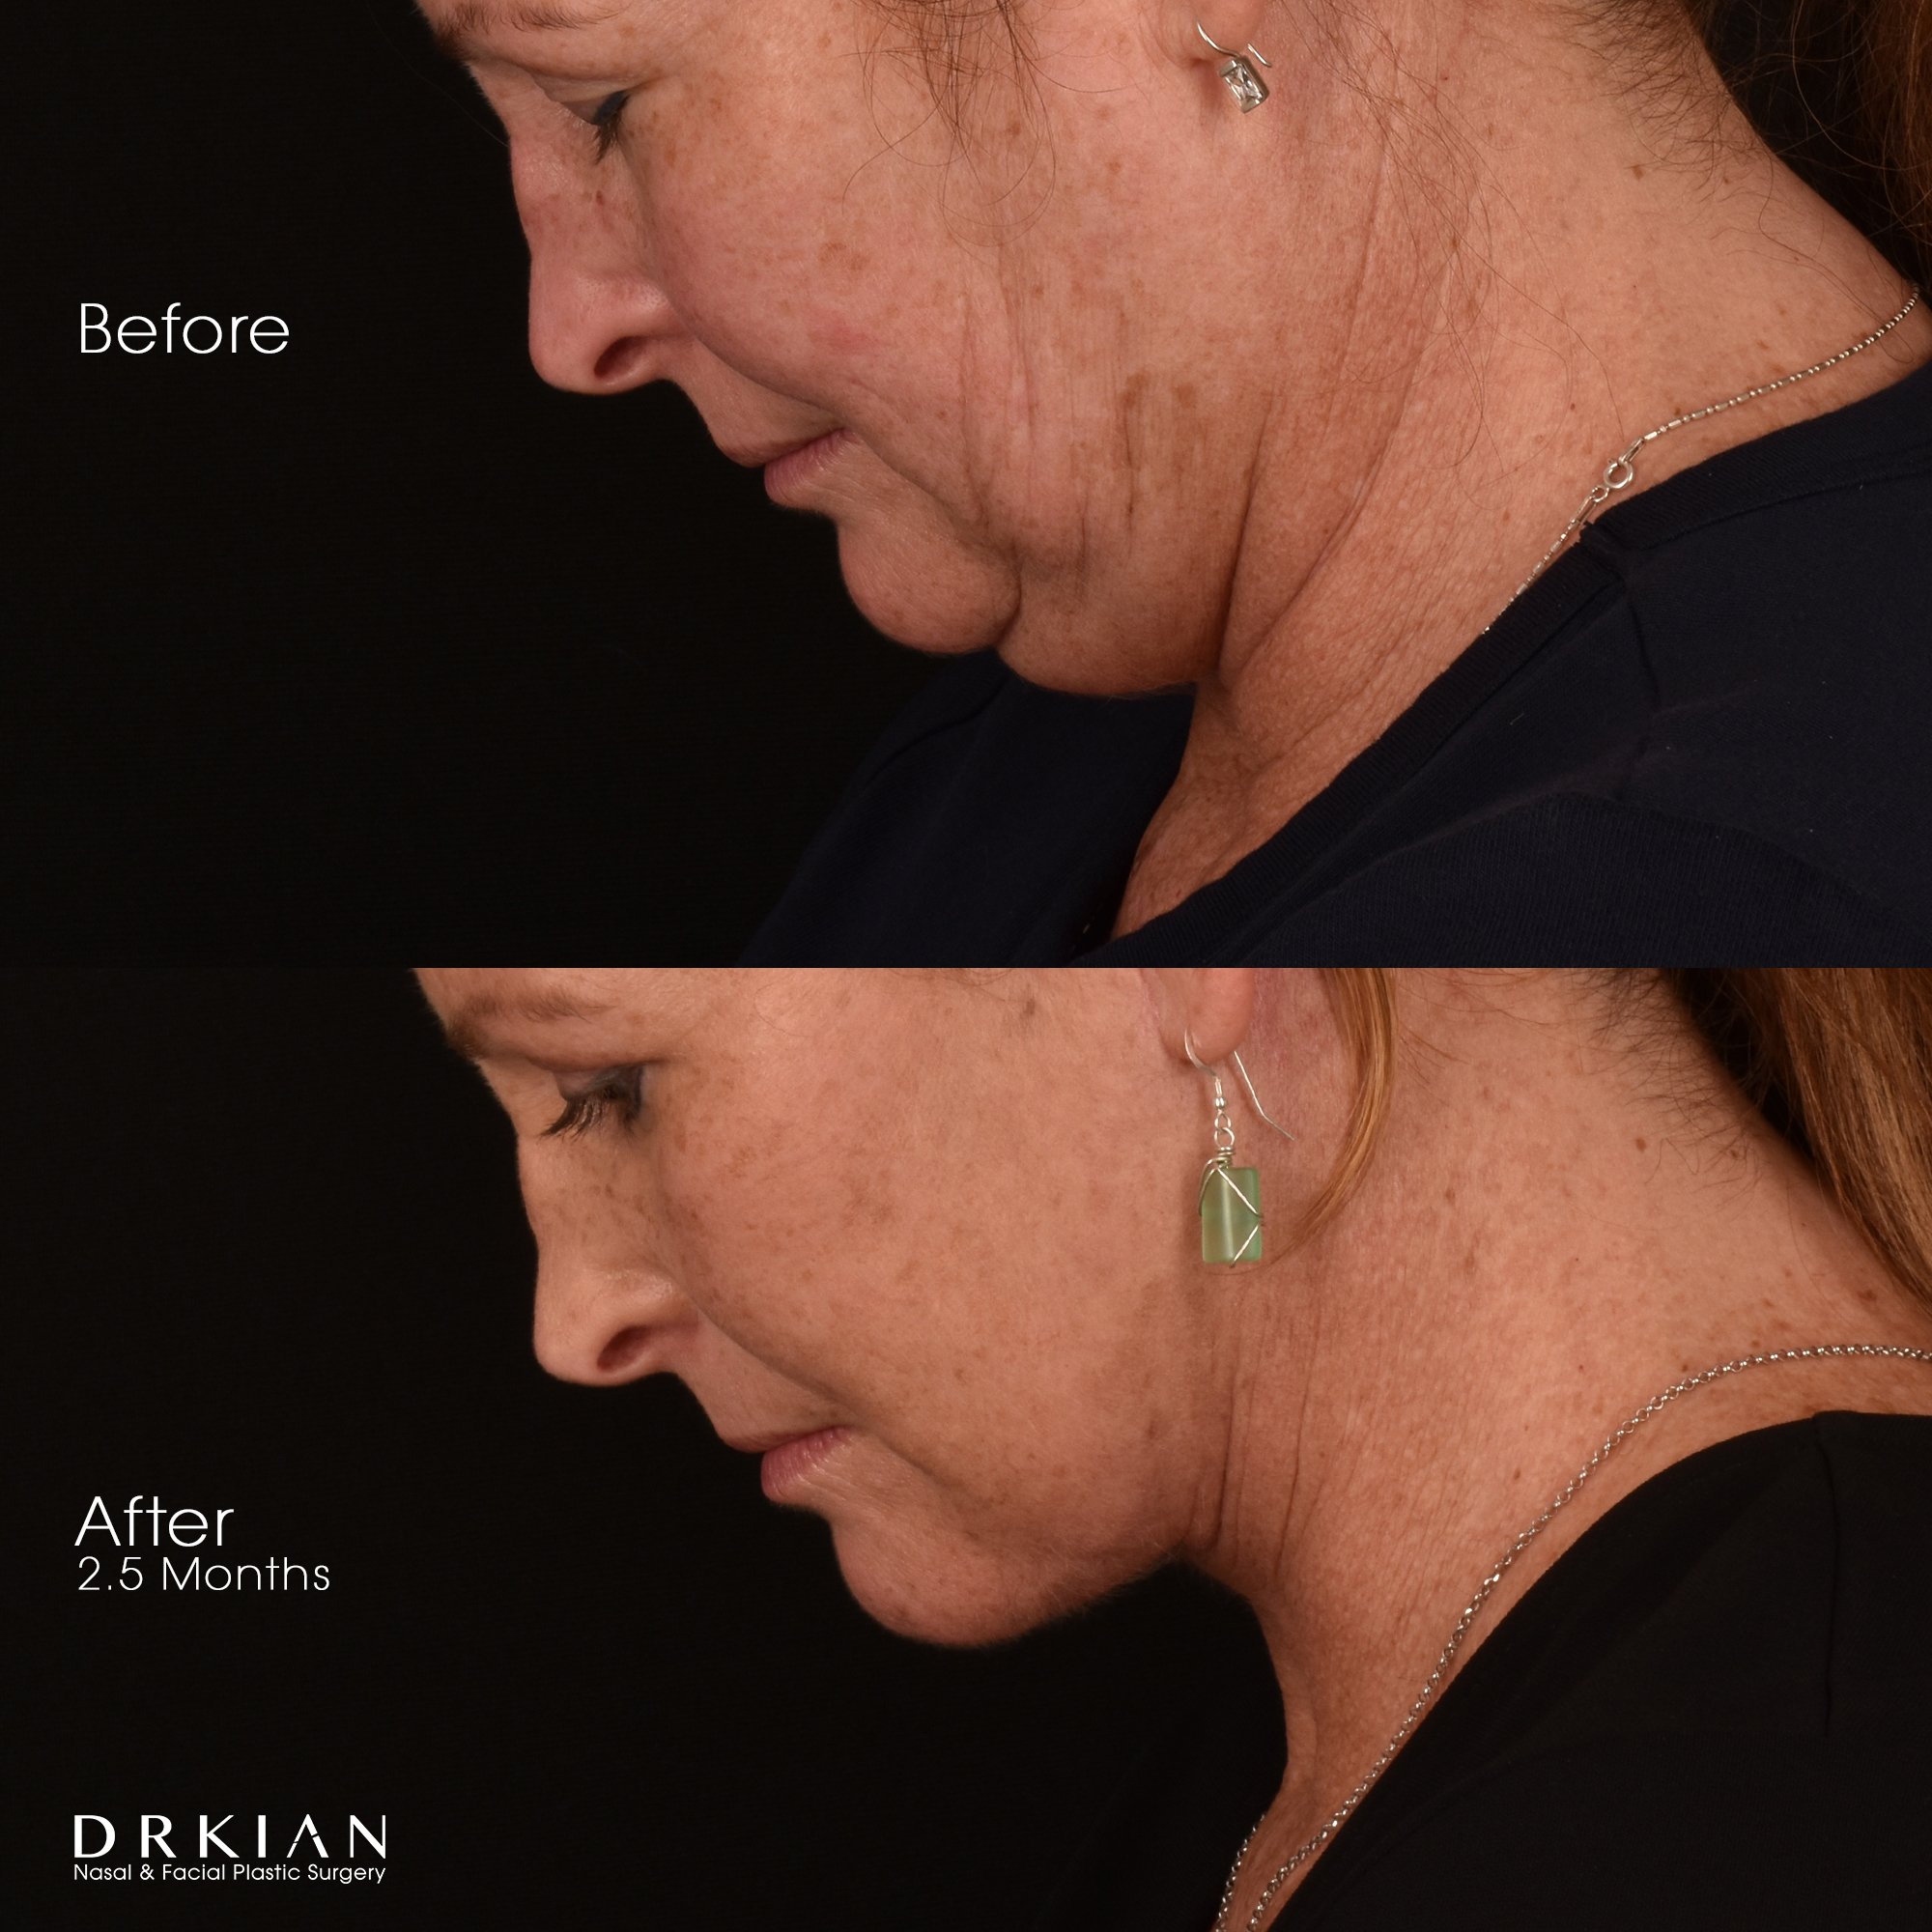
Lower Face & Neck Lift with Upper & Lower Blepharoplasty + Fat Repositioning: Before & After Two and a Half Months
Lower Face & Neck Lift with Upper & Lower Blepharoplasty + Fat Repositioning: Before & After Two and a Half Months

Lower Face & Neck Lift with Upper & Lower Blepharoplasty + Fat Repositioning: Before & After Two and a Half Months
Lower Face & Neck Lift with Upper & Lower Blepharoplasty + Fat Repositioning: Before & After Two and a Half Months

Lower Face & Neck Lift with Upper & Lower Blepharoplasty + Fat Repositioning: Before & After Two and a Half Months
Lower Face & Neck Lift with Upper & Lower Blepharoplasty + Fat Repositioning: Before & After Two and a Half Months

Lower Face & Neck Lift with Upper & Lower Blepharoplasty + Fat Repositioning: Before & After Two and a Half Months
Lower Face & Neck Lift with Upper & Lower Blepharoplasty + Fat Repositioning: Before & After Two and a Half Months
Lower Face & Neck Lift with Upper & Lower Blepharoplasty + Fat Repositioning: Before & After Two and a Half Months
Lower Face & Neck Lift with Upper & Lower Blepharoplasty + Fat Repositioning: Before & After Two and a Half Months

Lower Face & Neck Lift with Upper & Lower Blepharoplasty + Fat Repositioning: Before & After Two and a Half Months
Lower Face & Neck Lift with Upper & Lower Blepharoplasty + Fat Repositioning: Before & After Two and a Half Months
Lower Face & Neck Lift with Upper & Lower Blepharoplasty + Fat Repositioning: Before & After Two and a Half Months
Lower Face & Neck Lift with Upper & Lower Blepharoplasty + Fat Repositioning: Before & After Two and a Half Months
Lower Face & Neck Lift with Upper & Lower Blepharoplasty + Fat Repositioning: Before & After Two and a Half Months

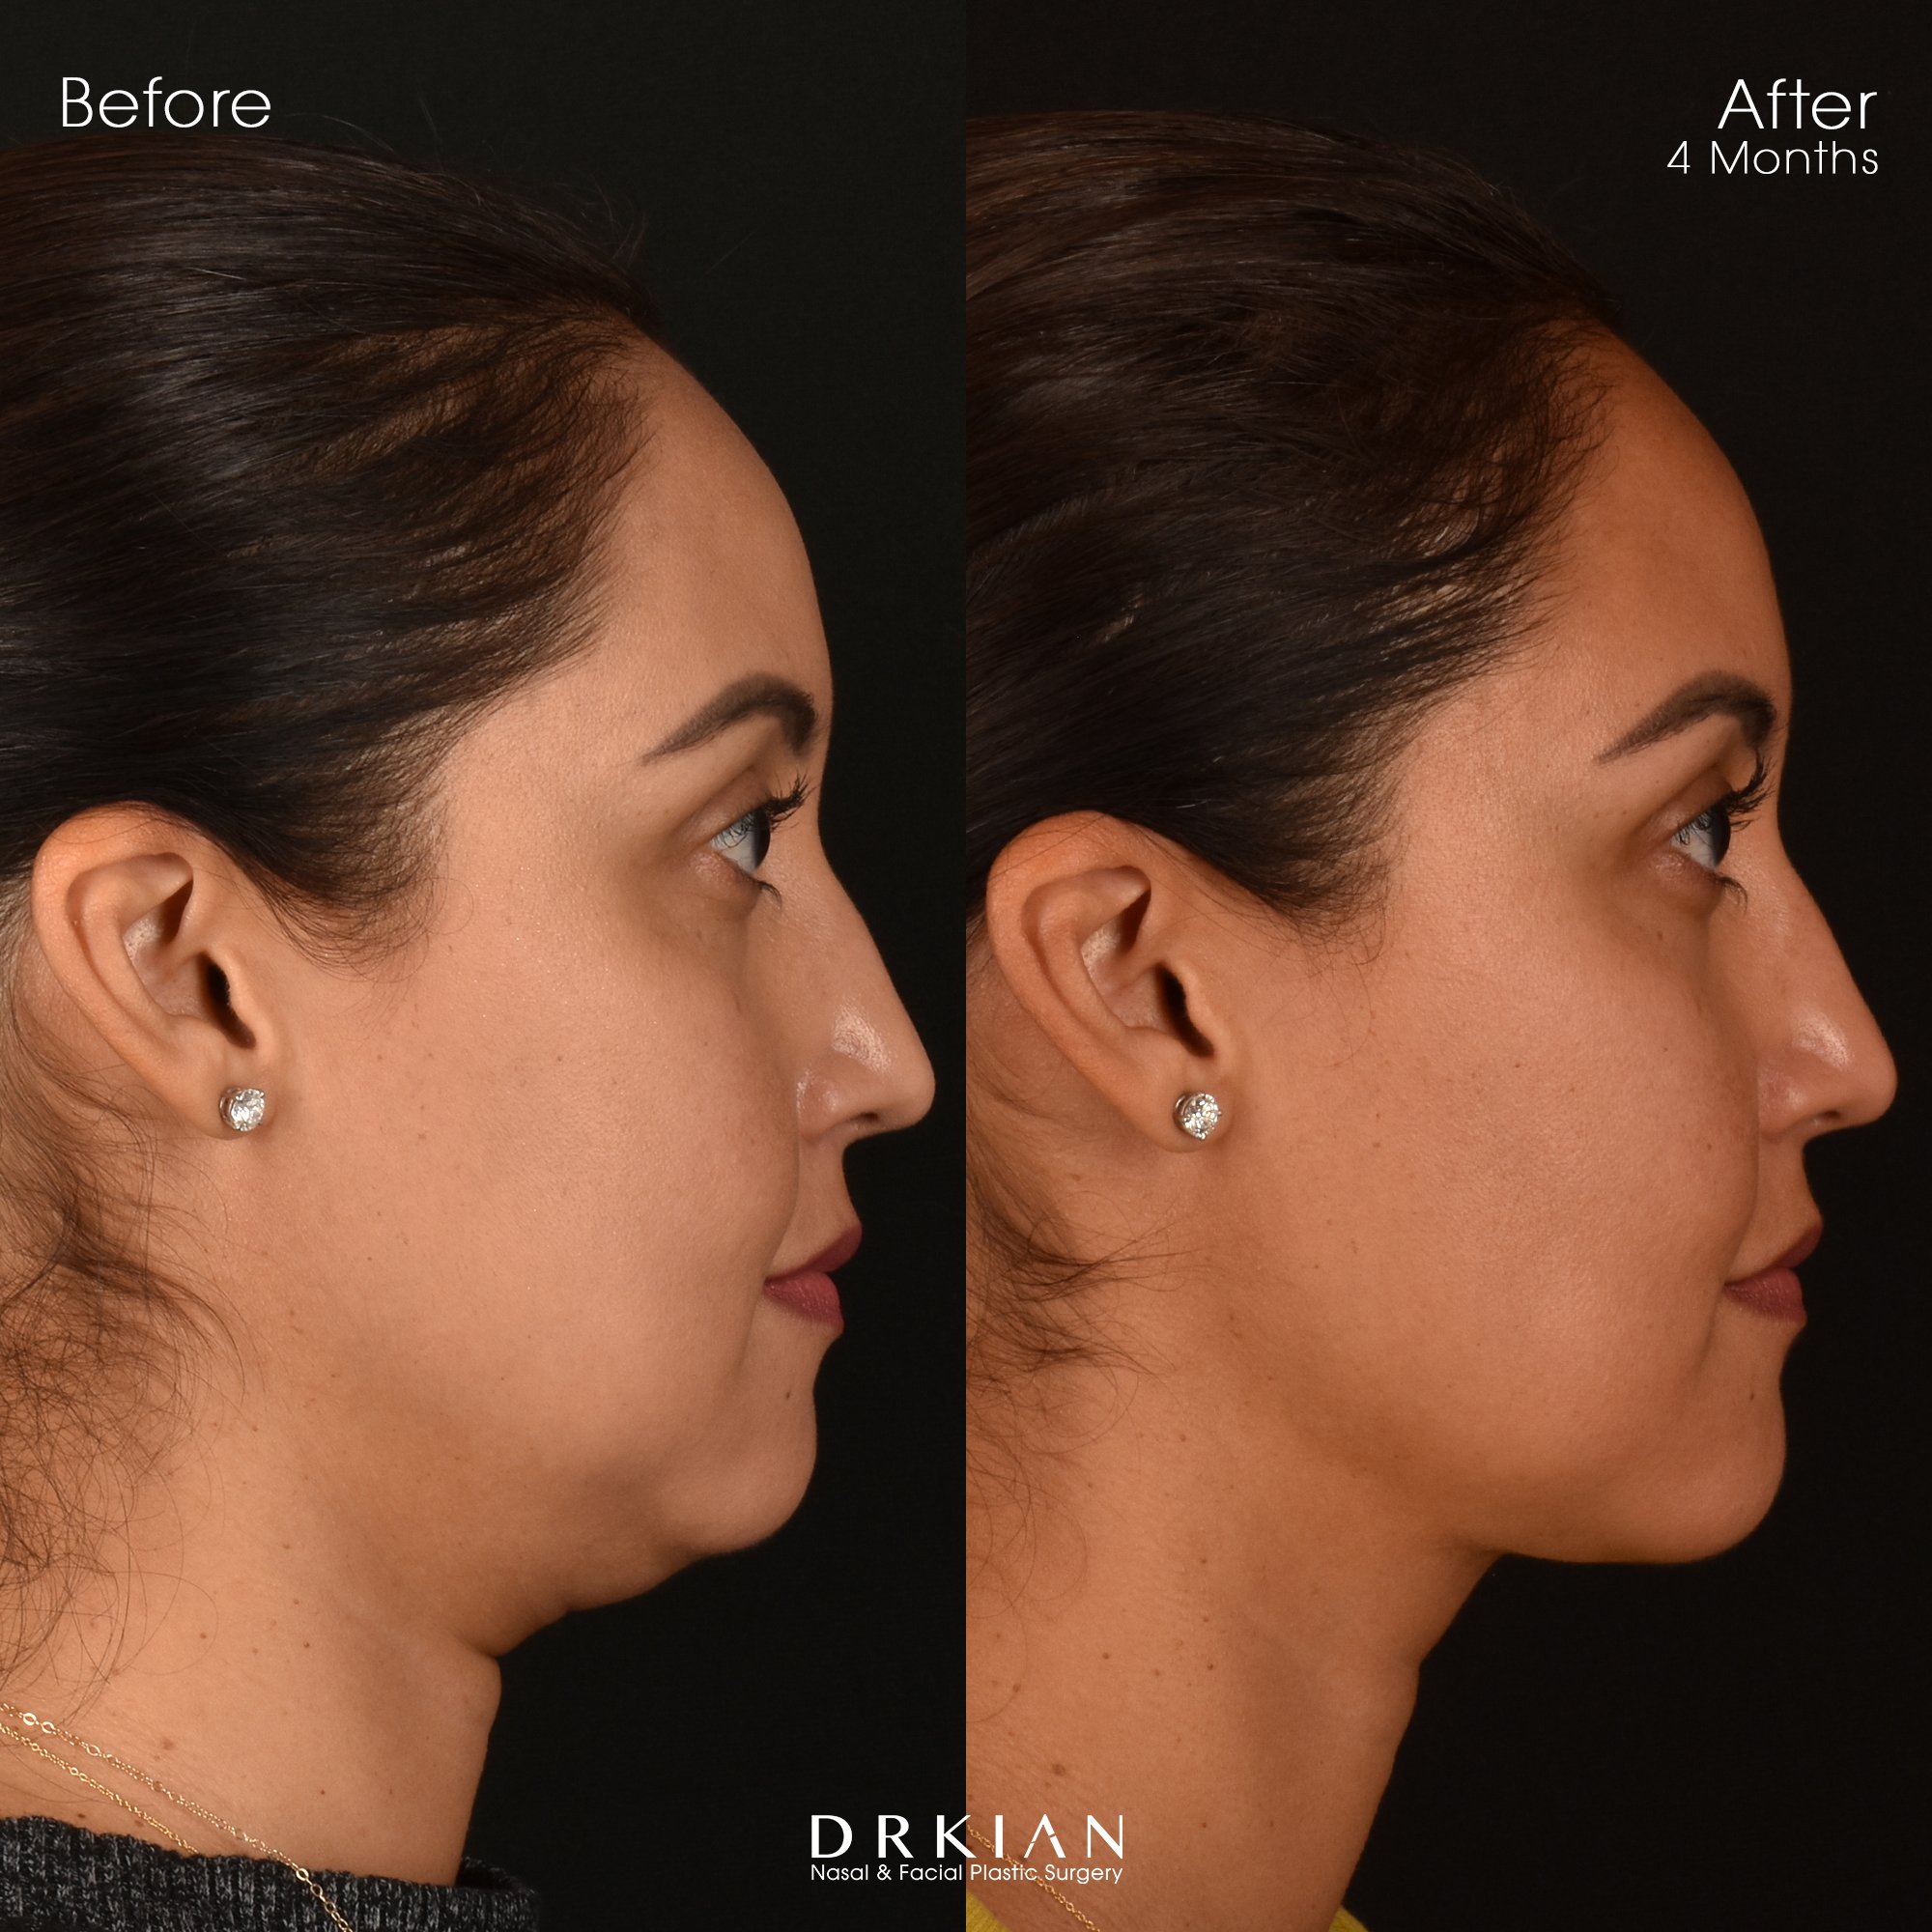
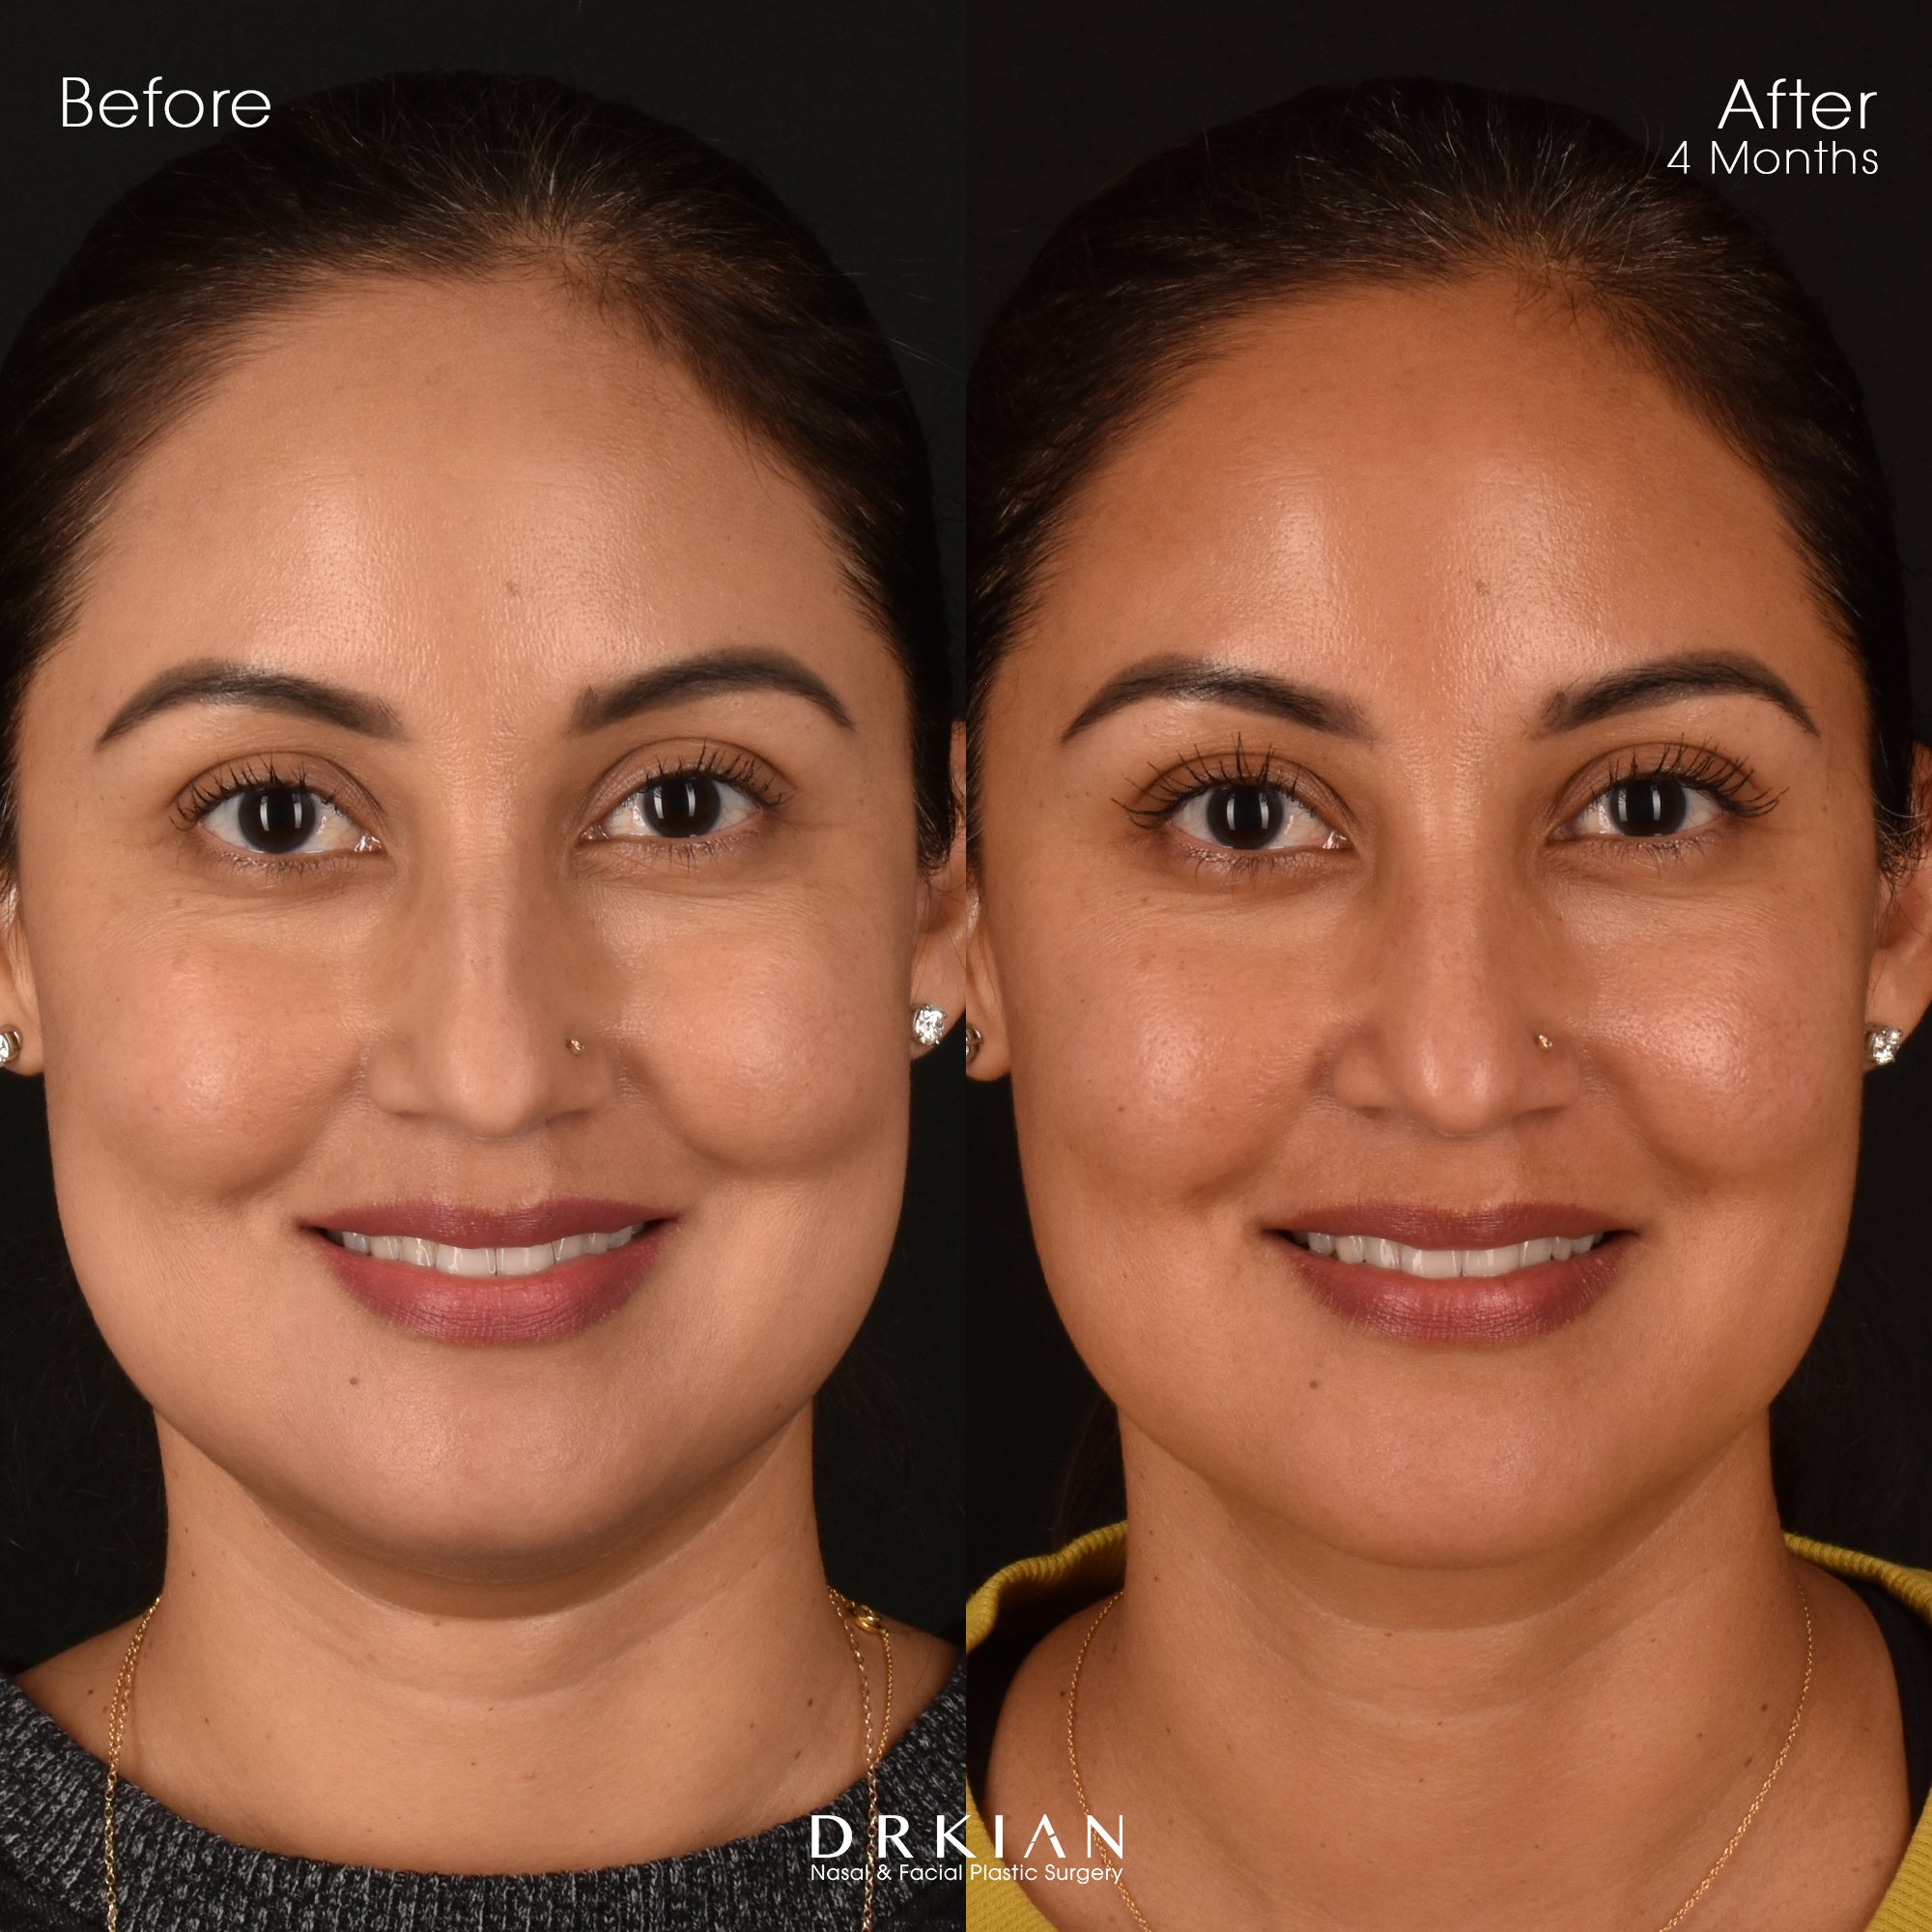
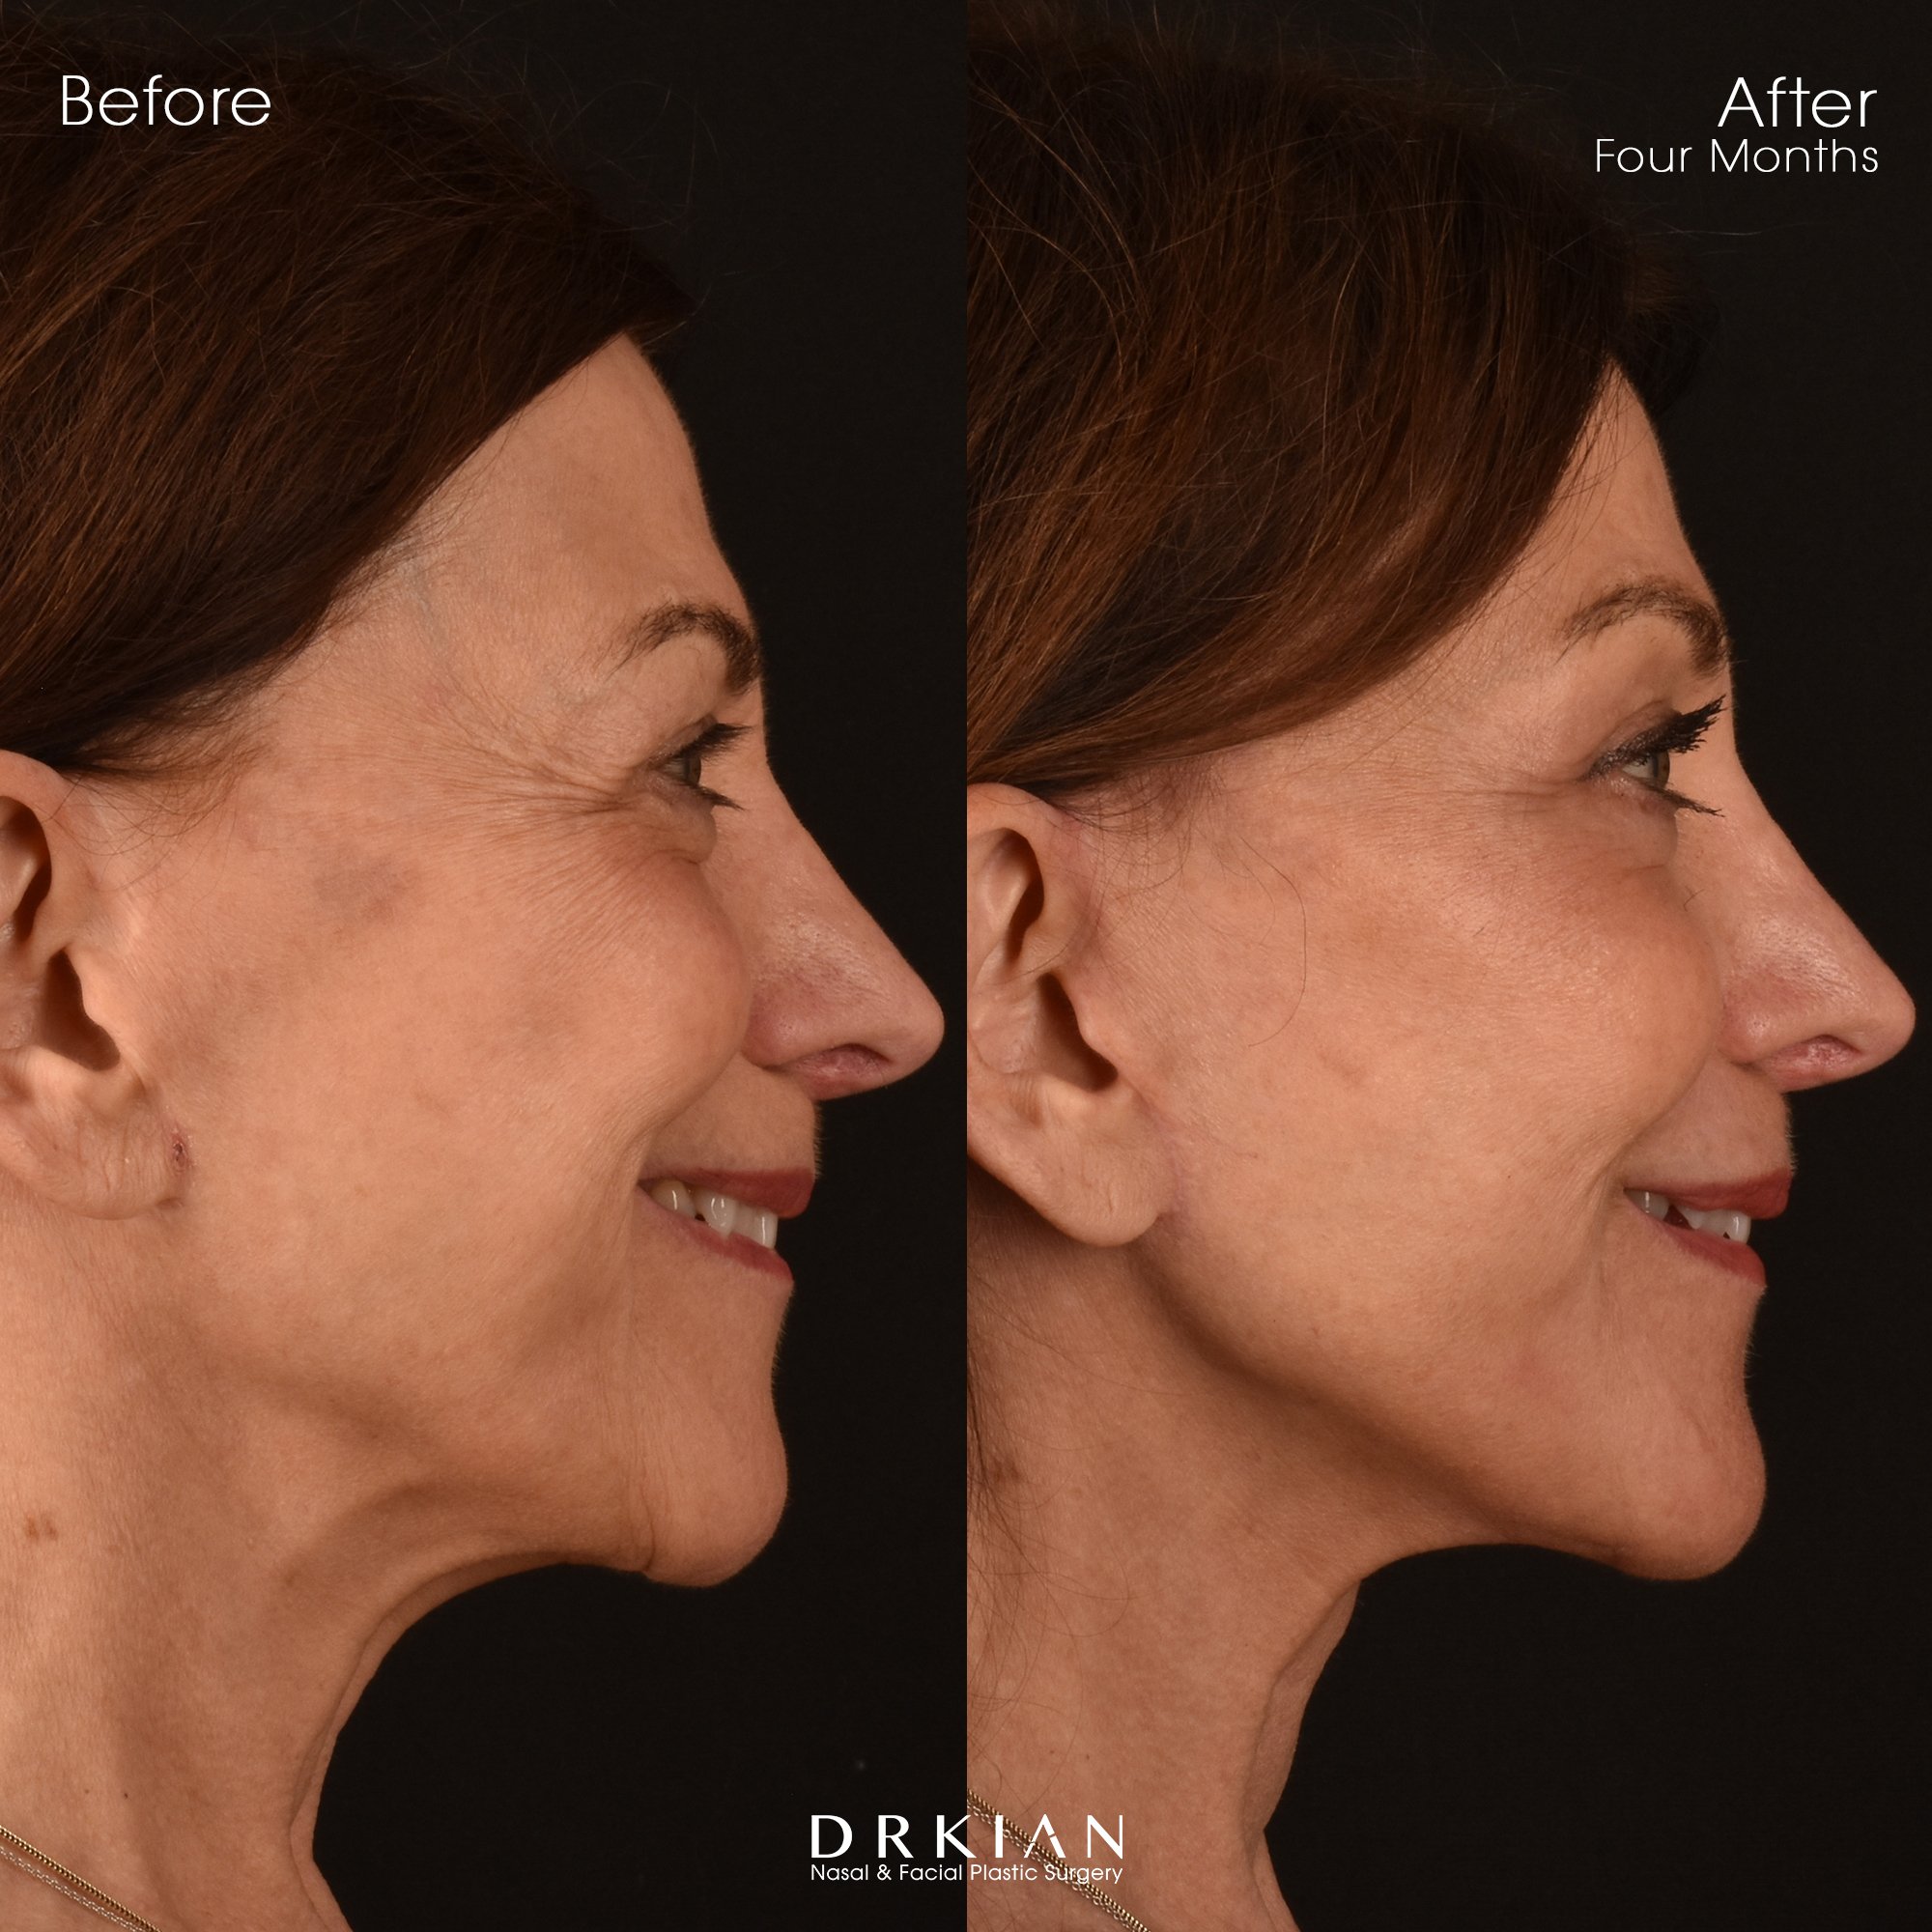
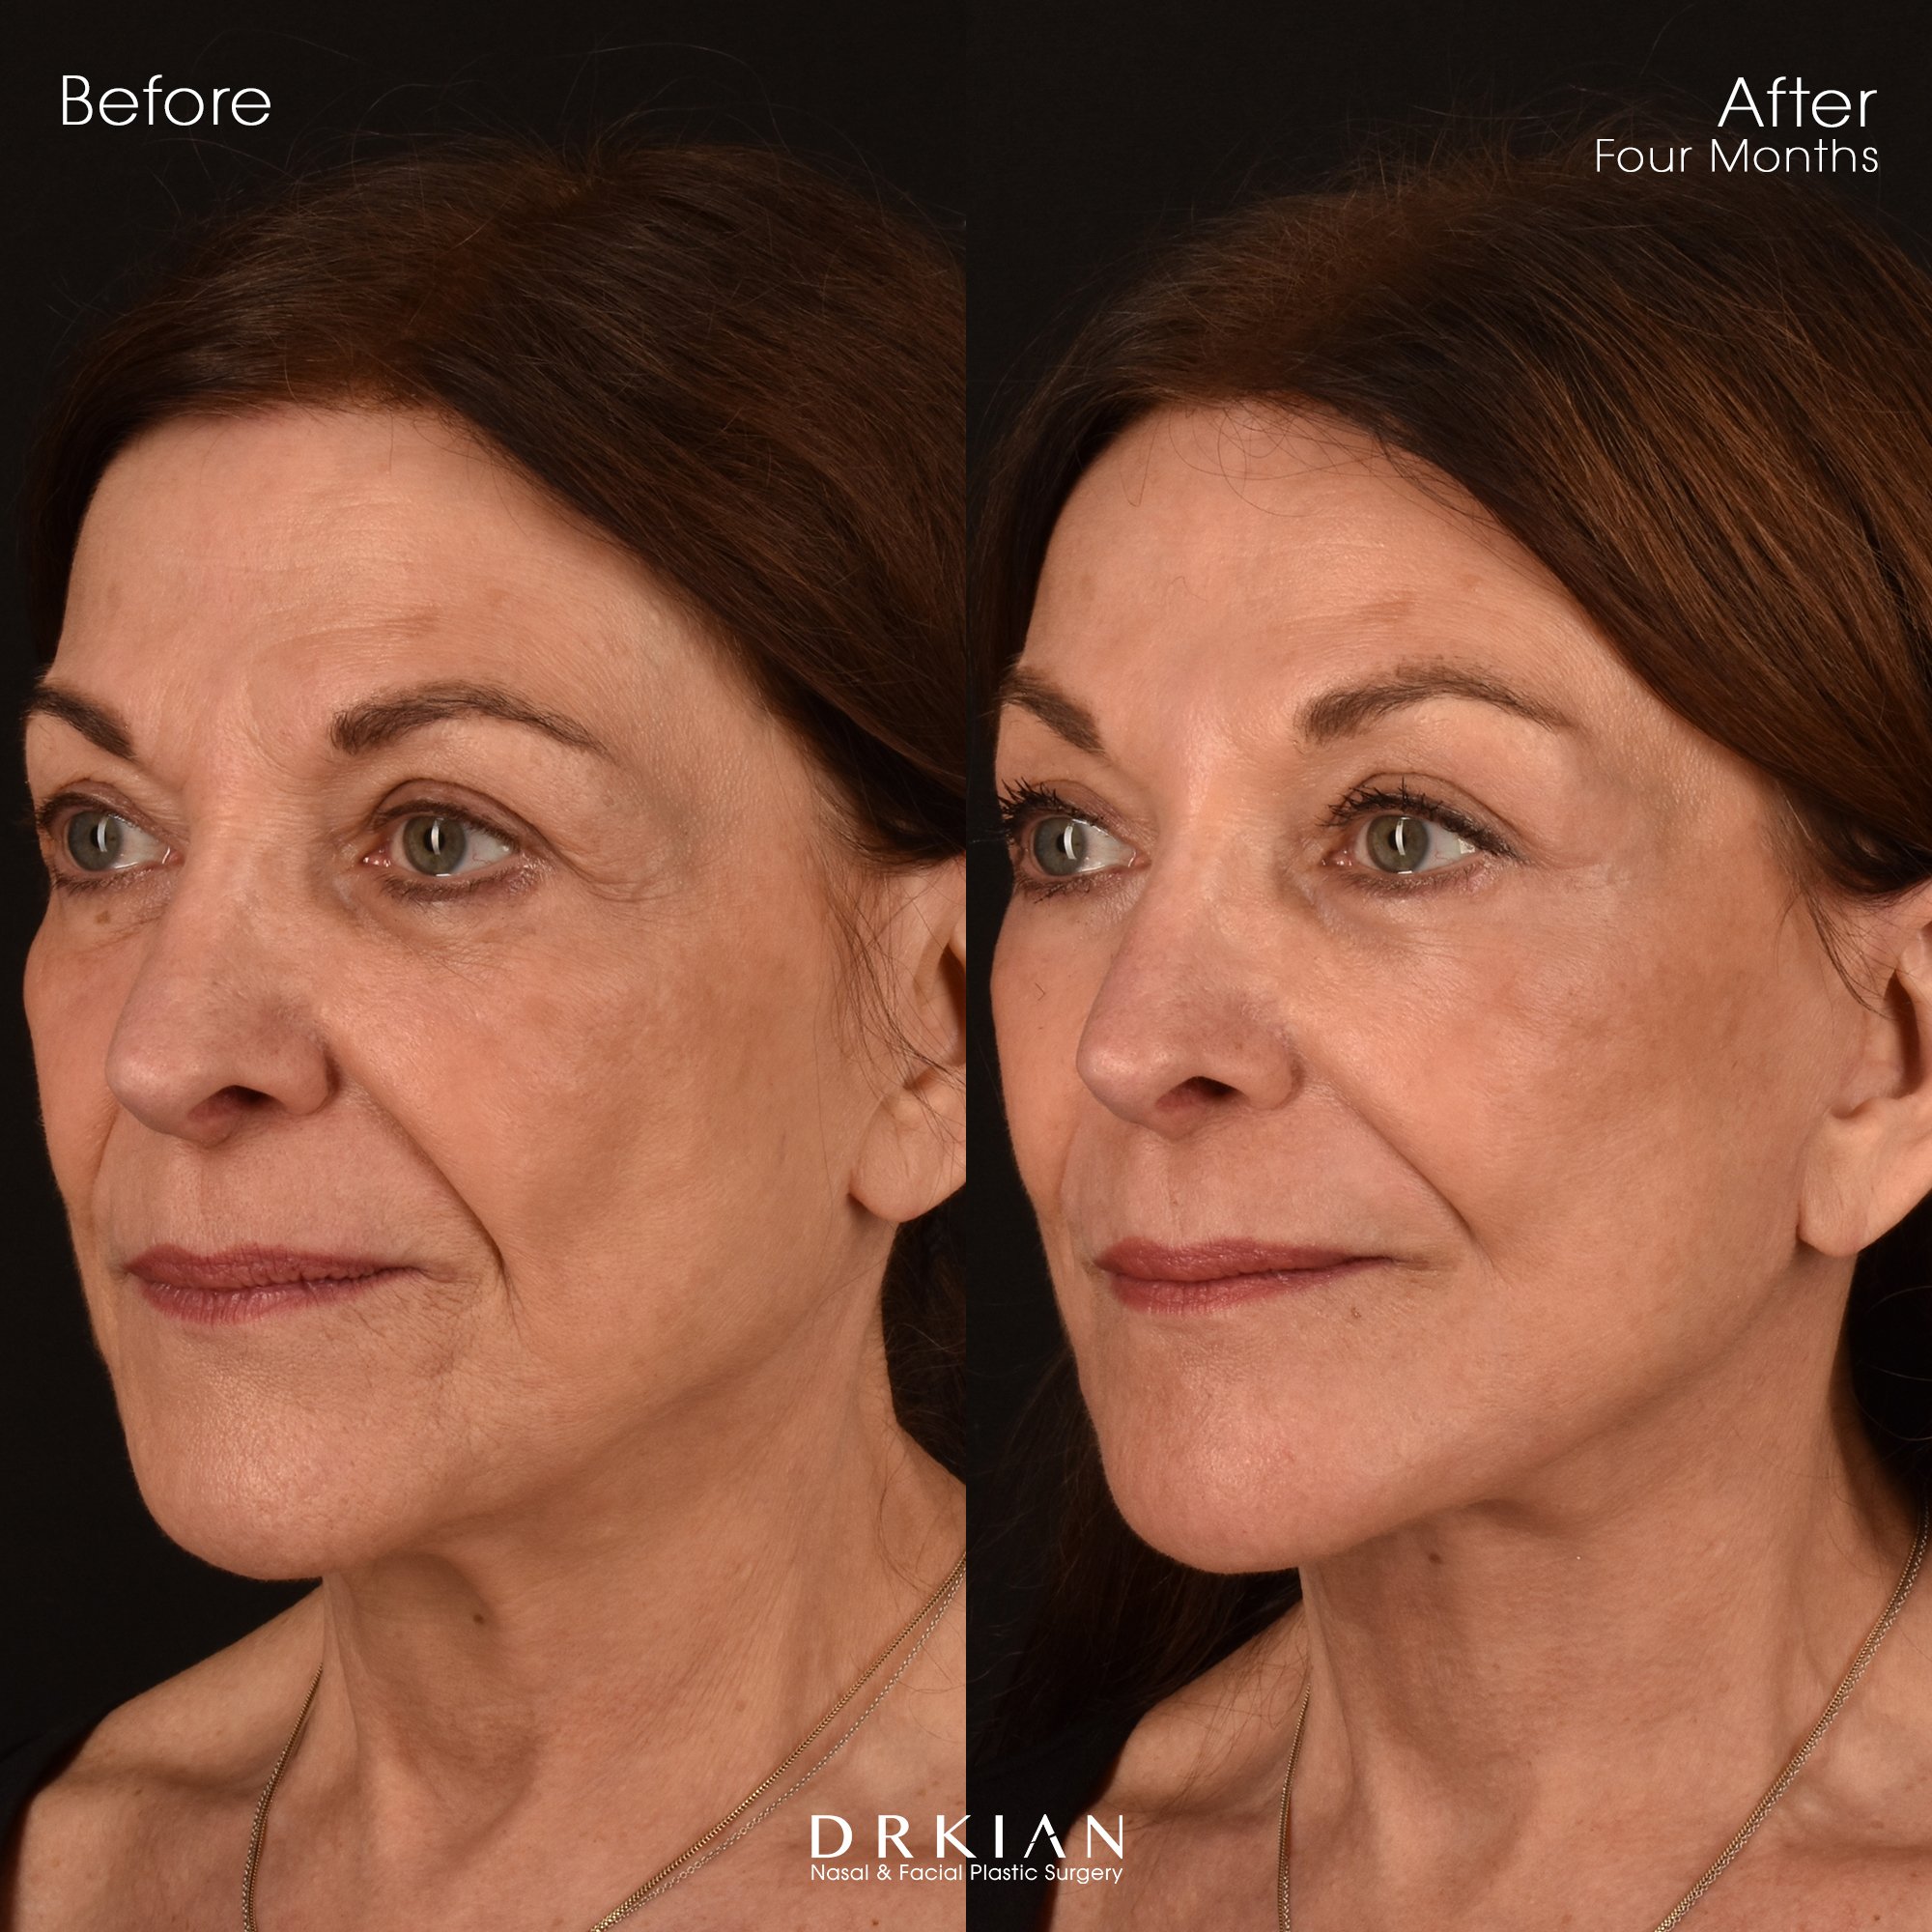
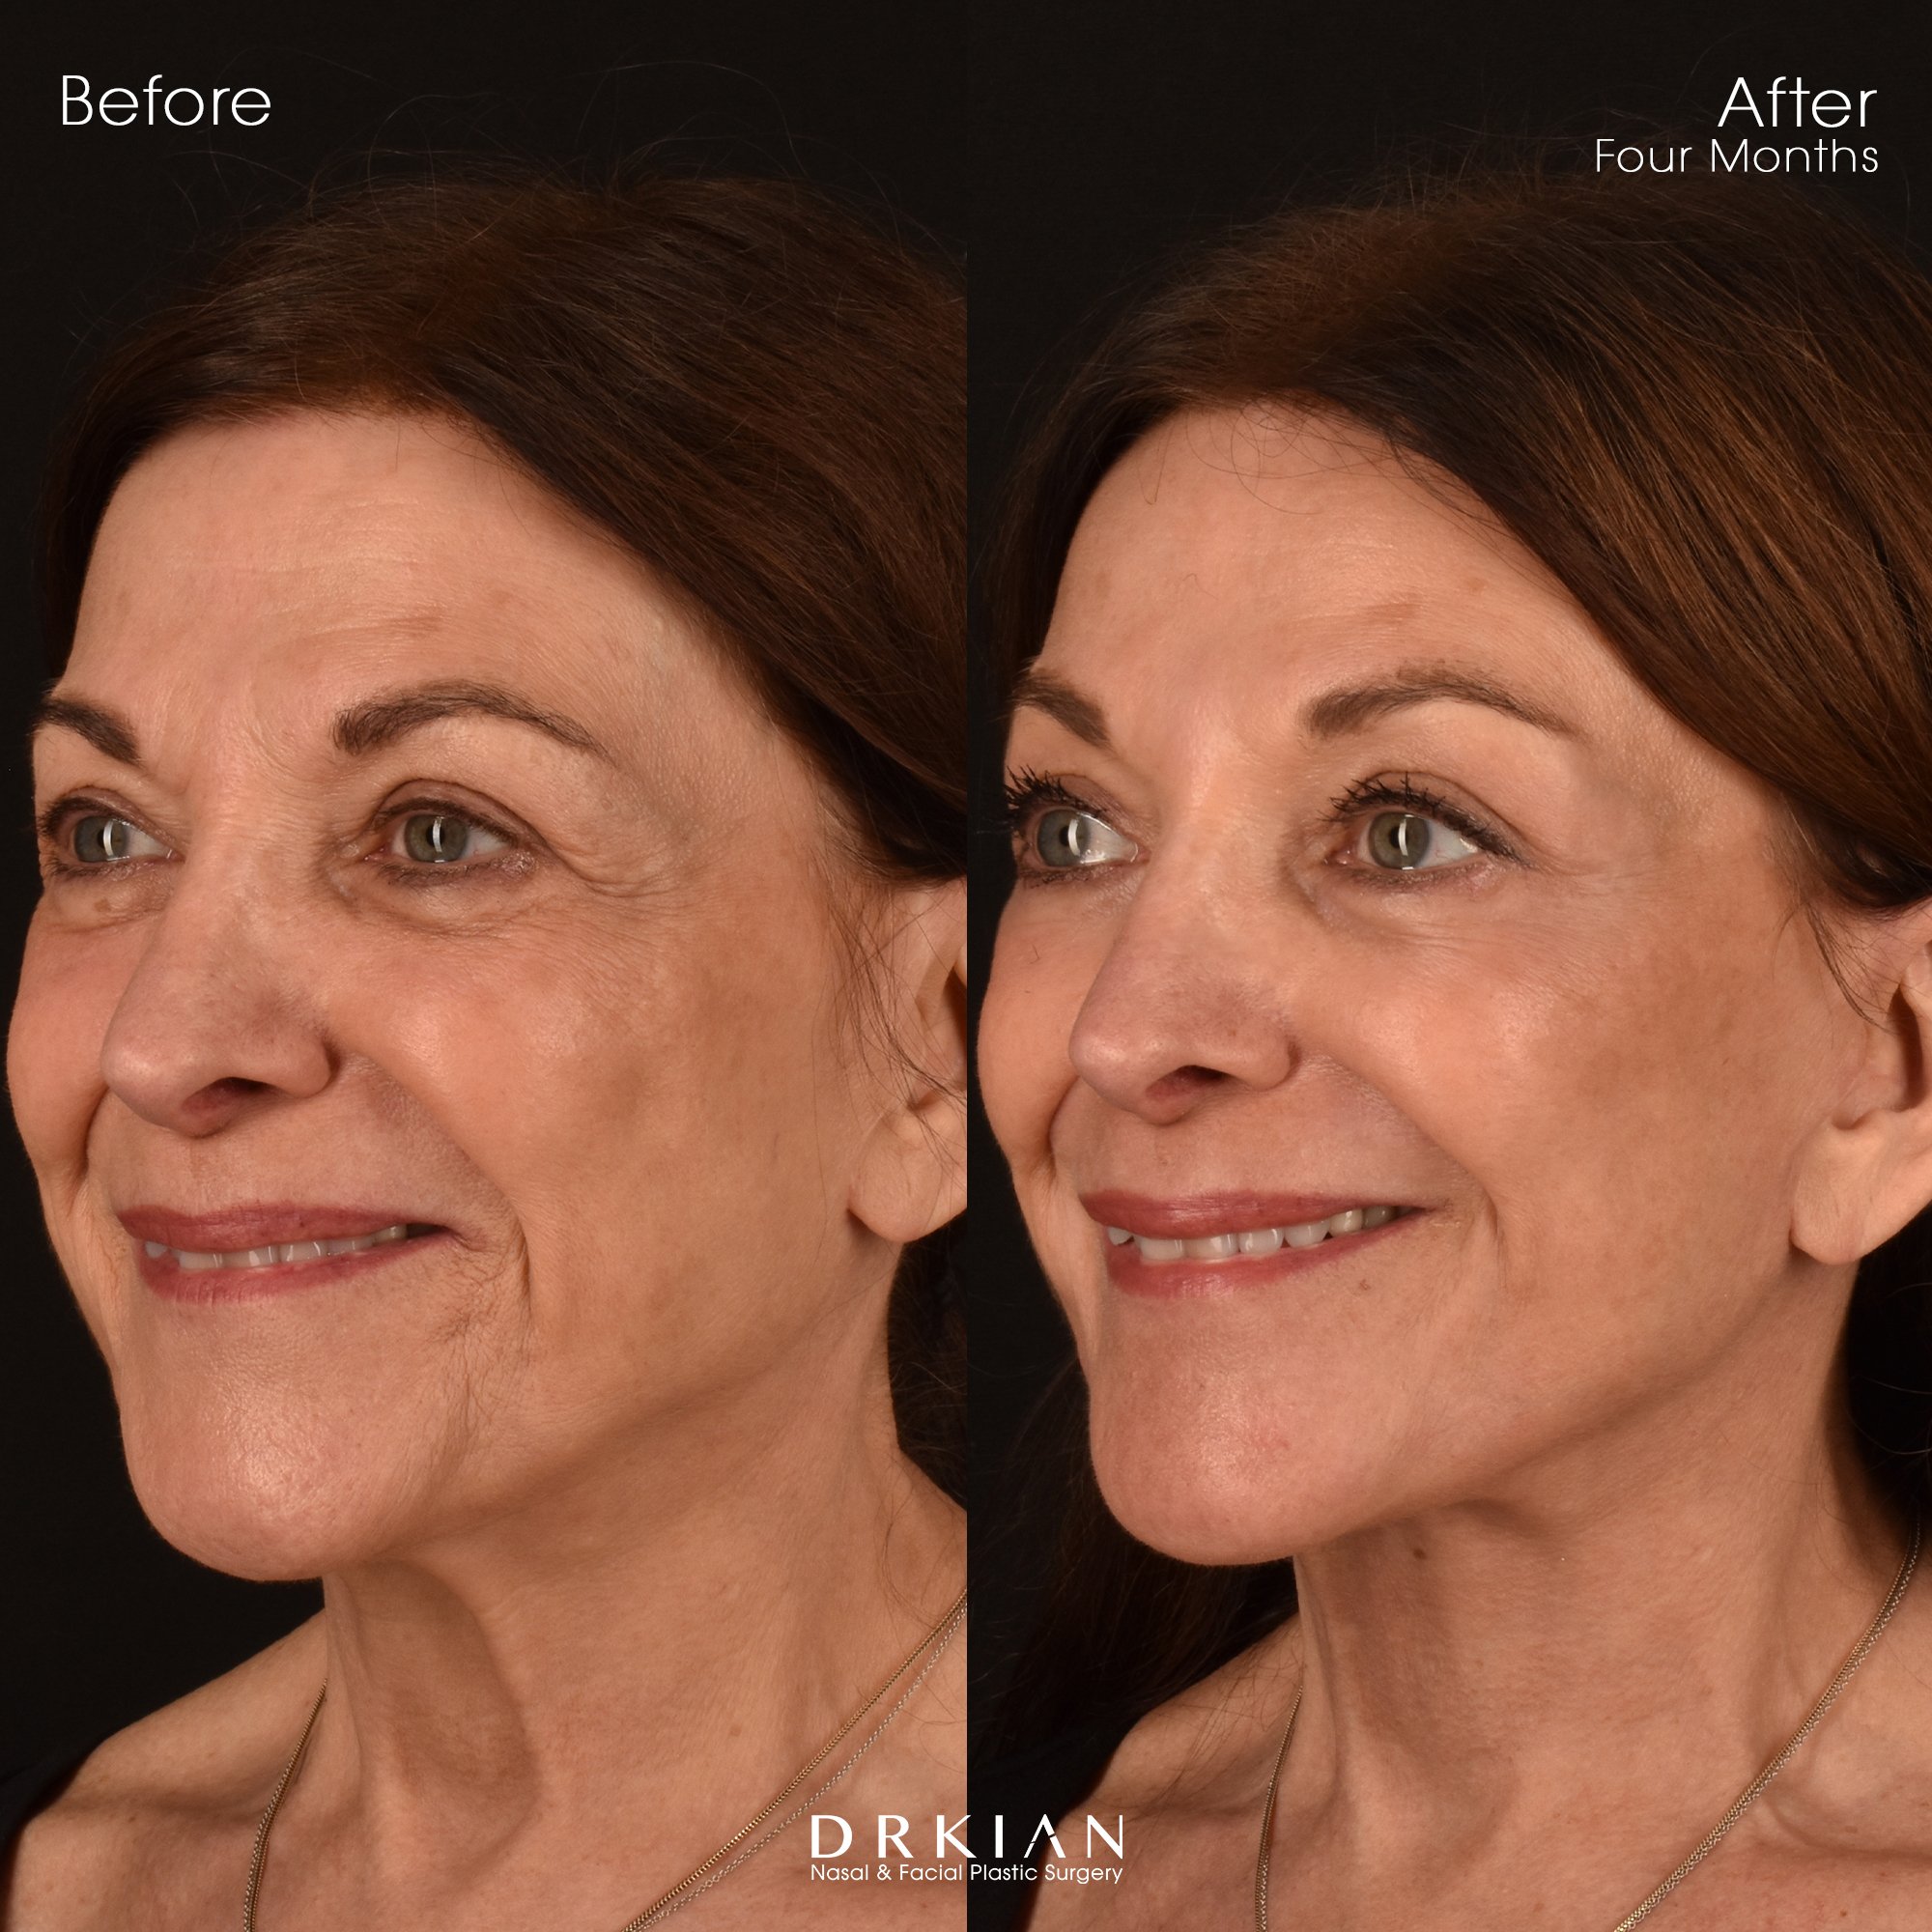
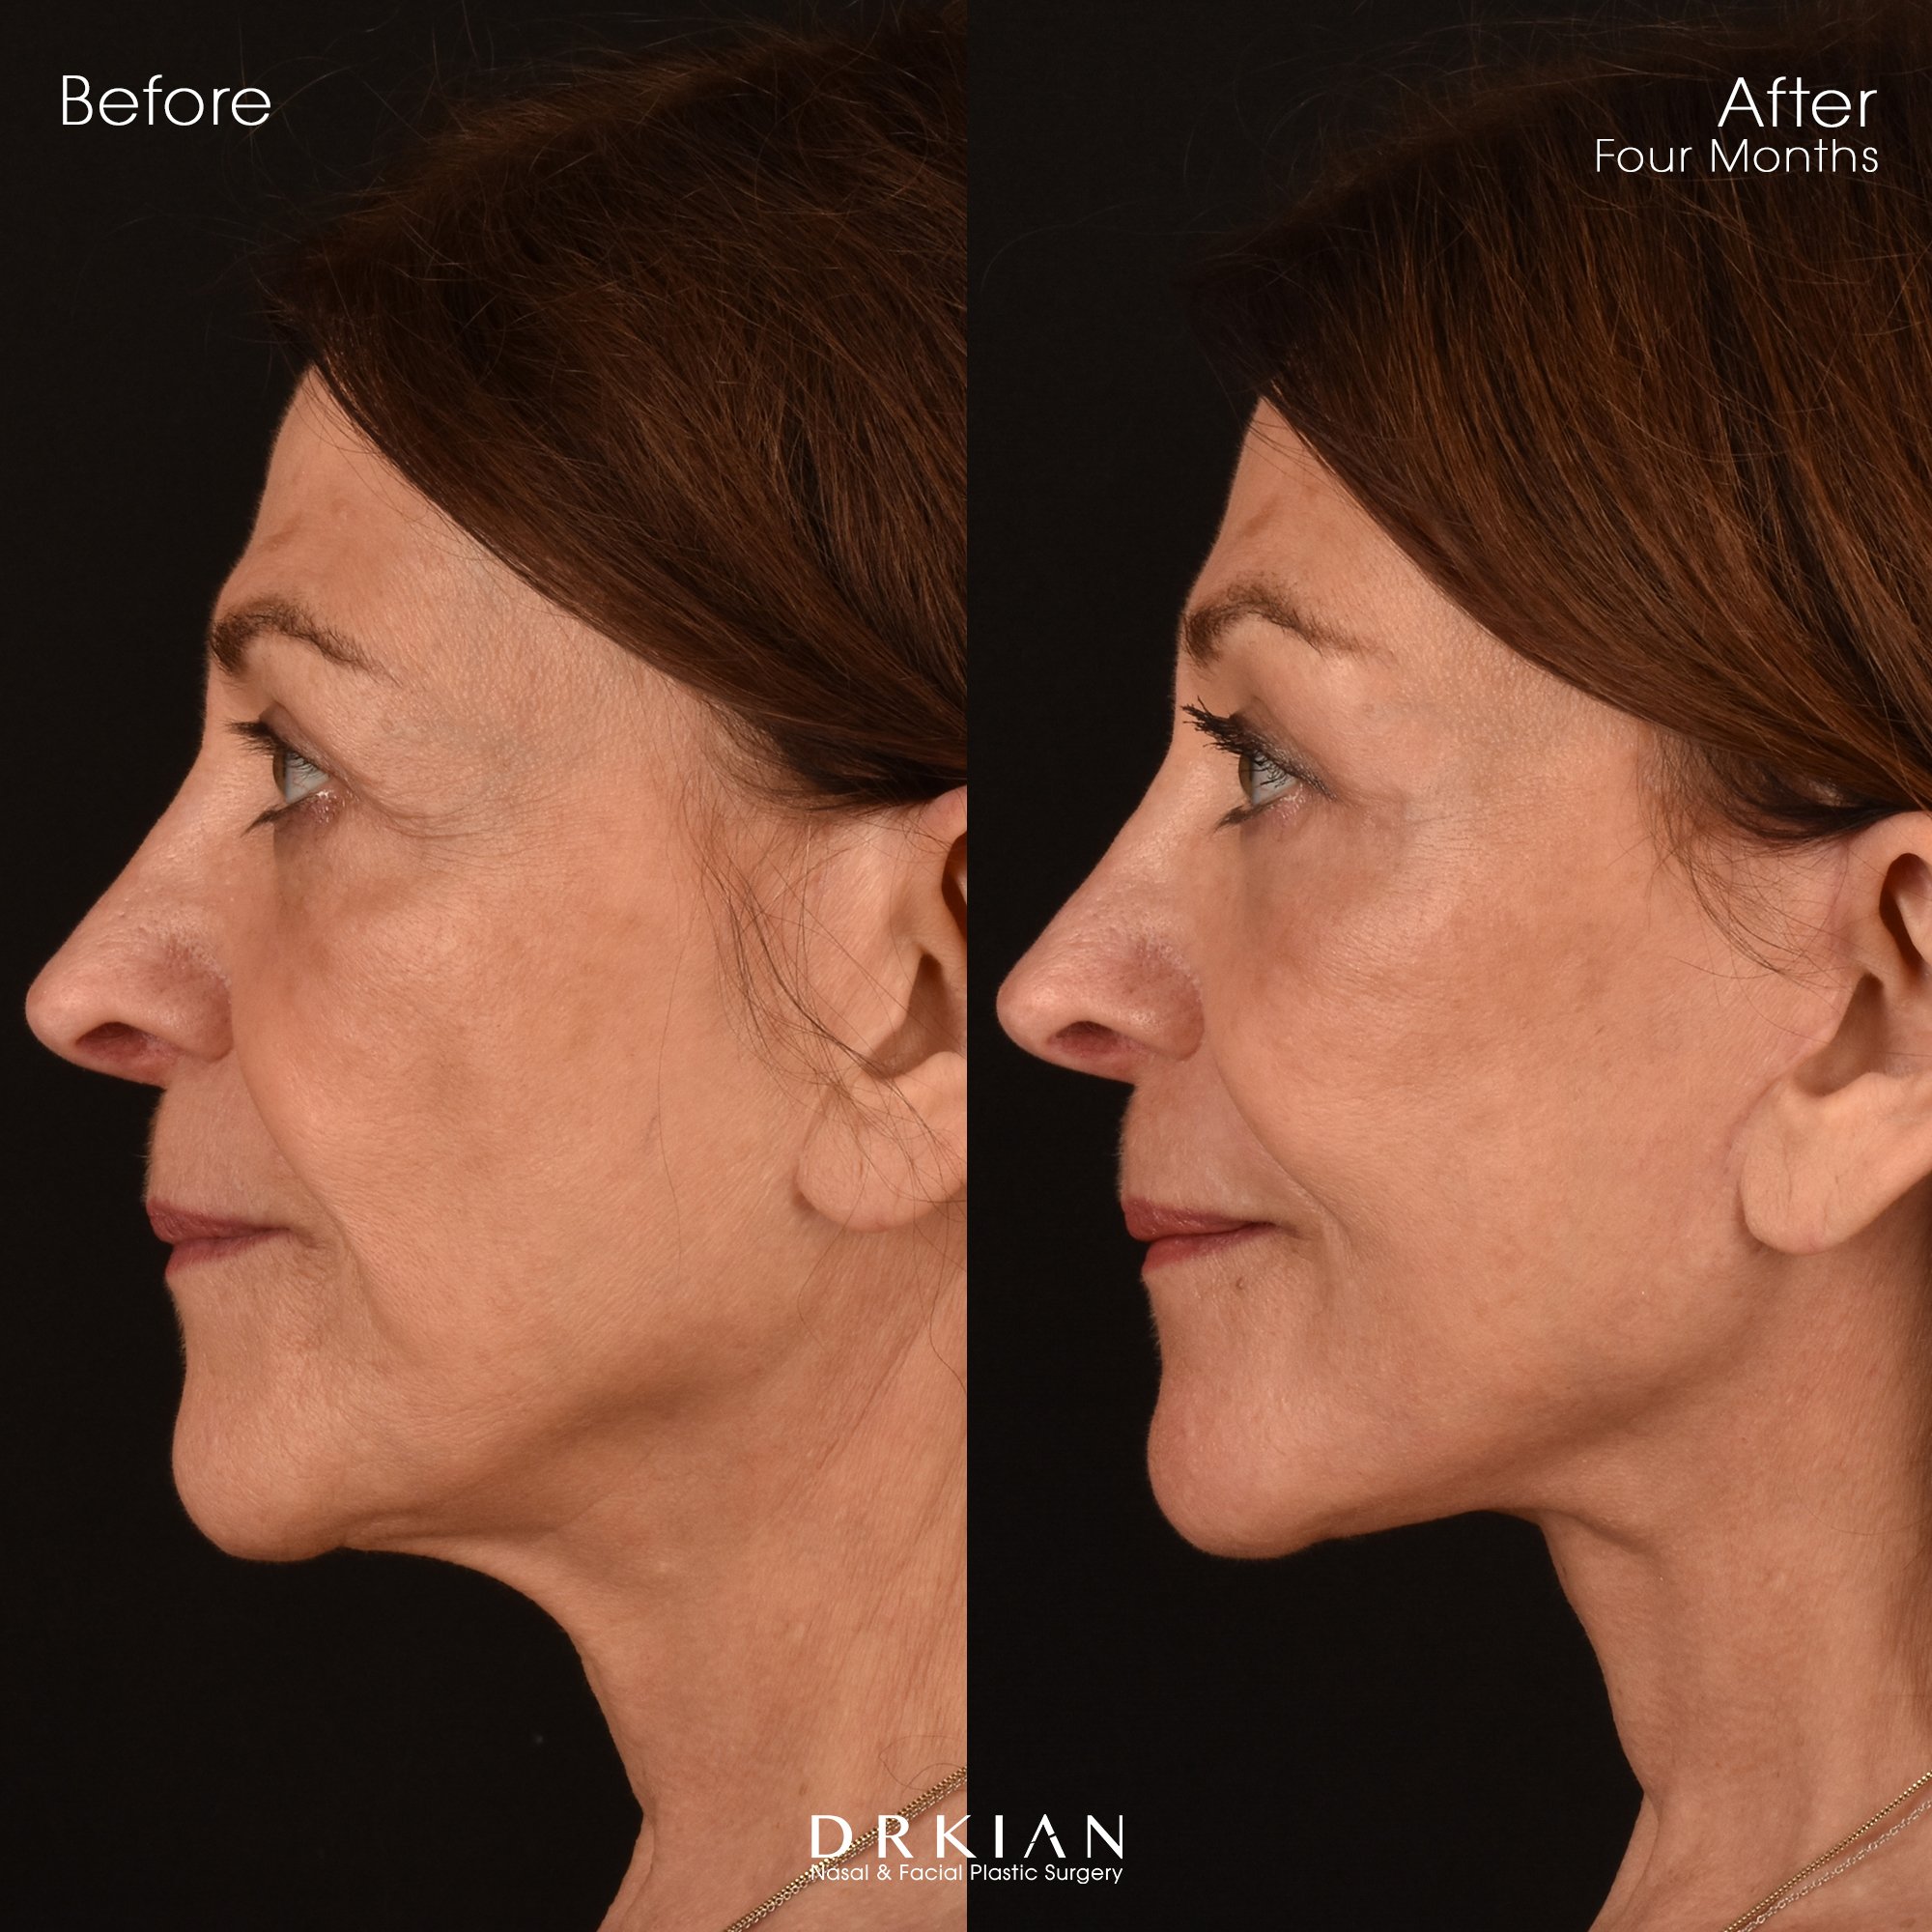
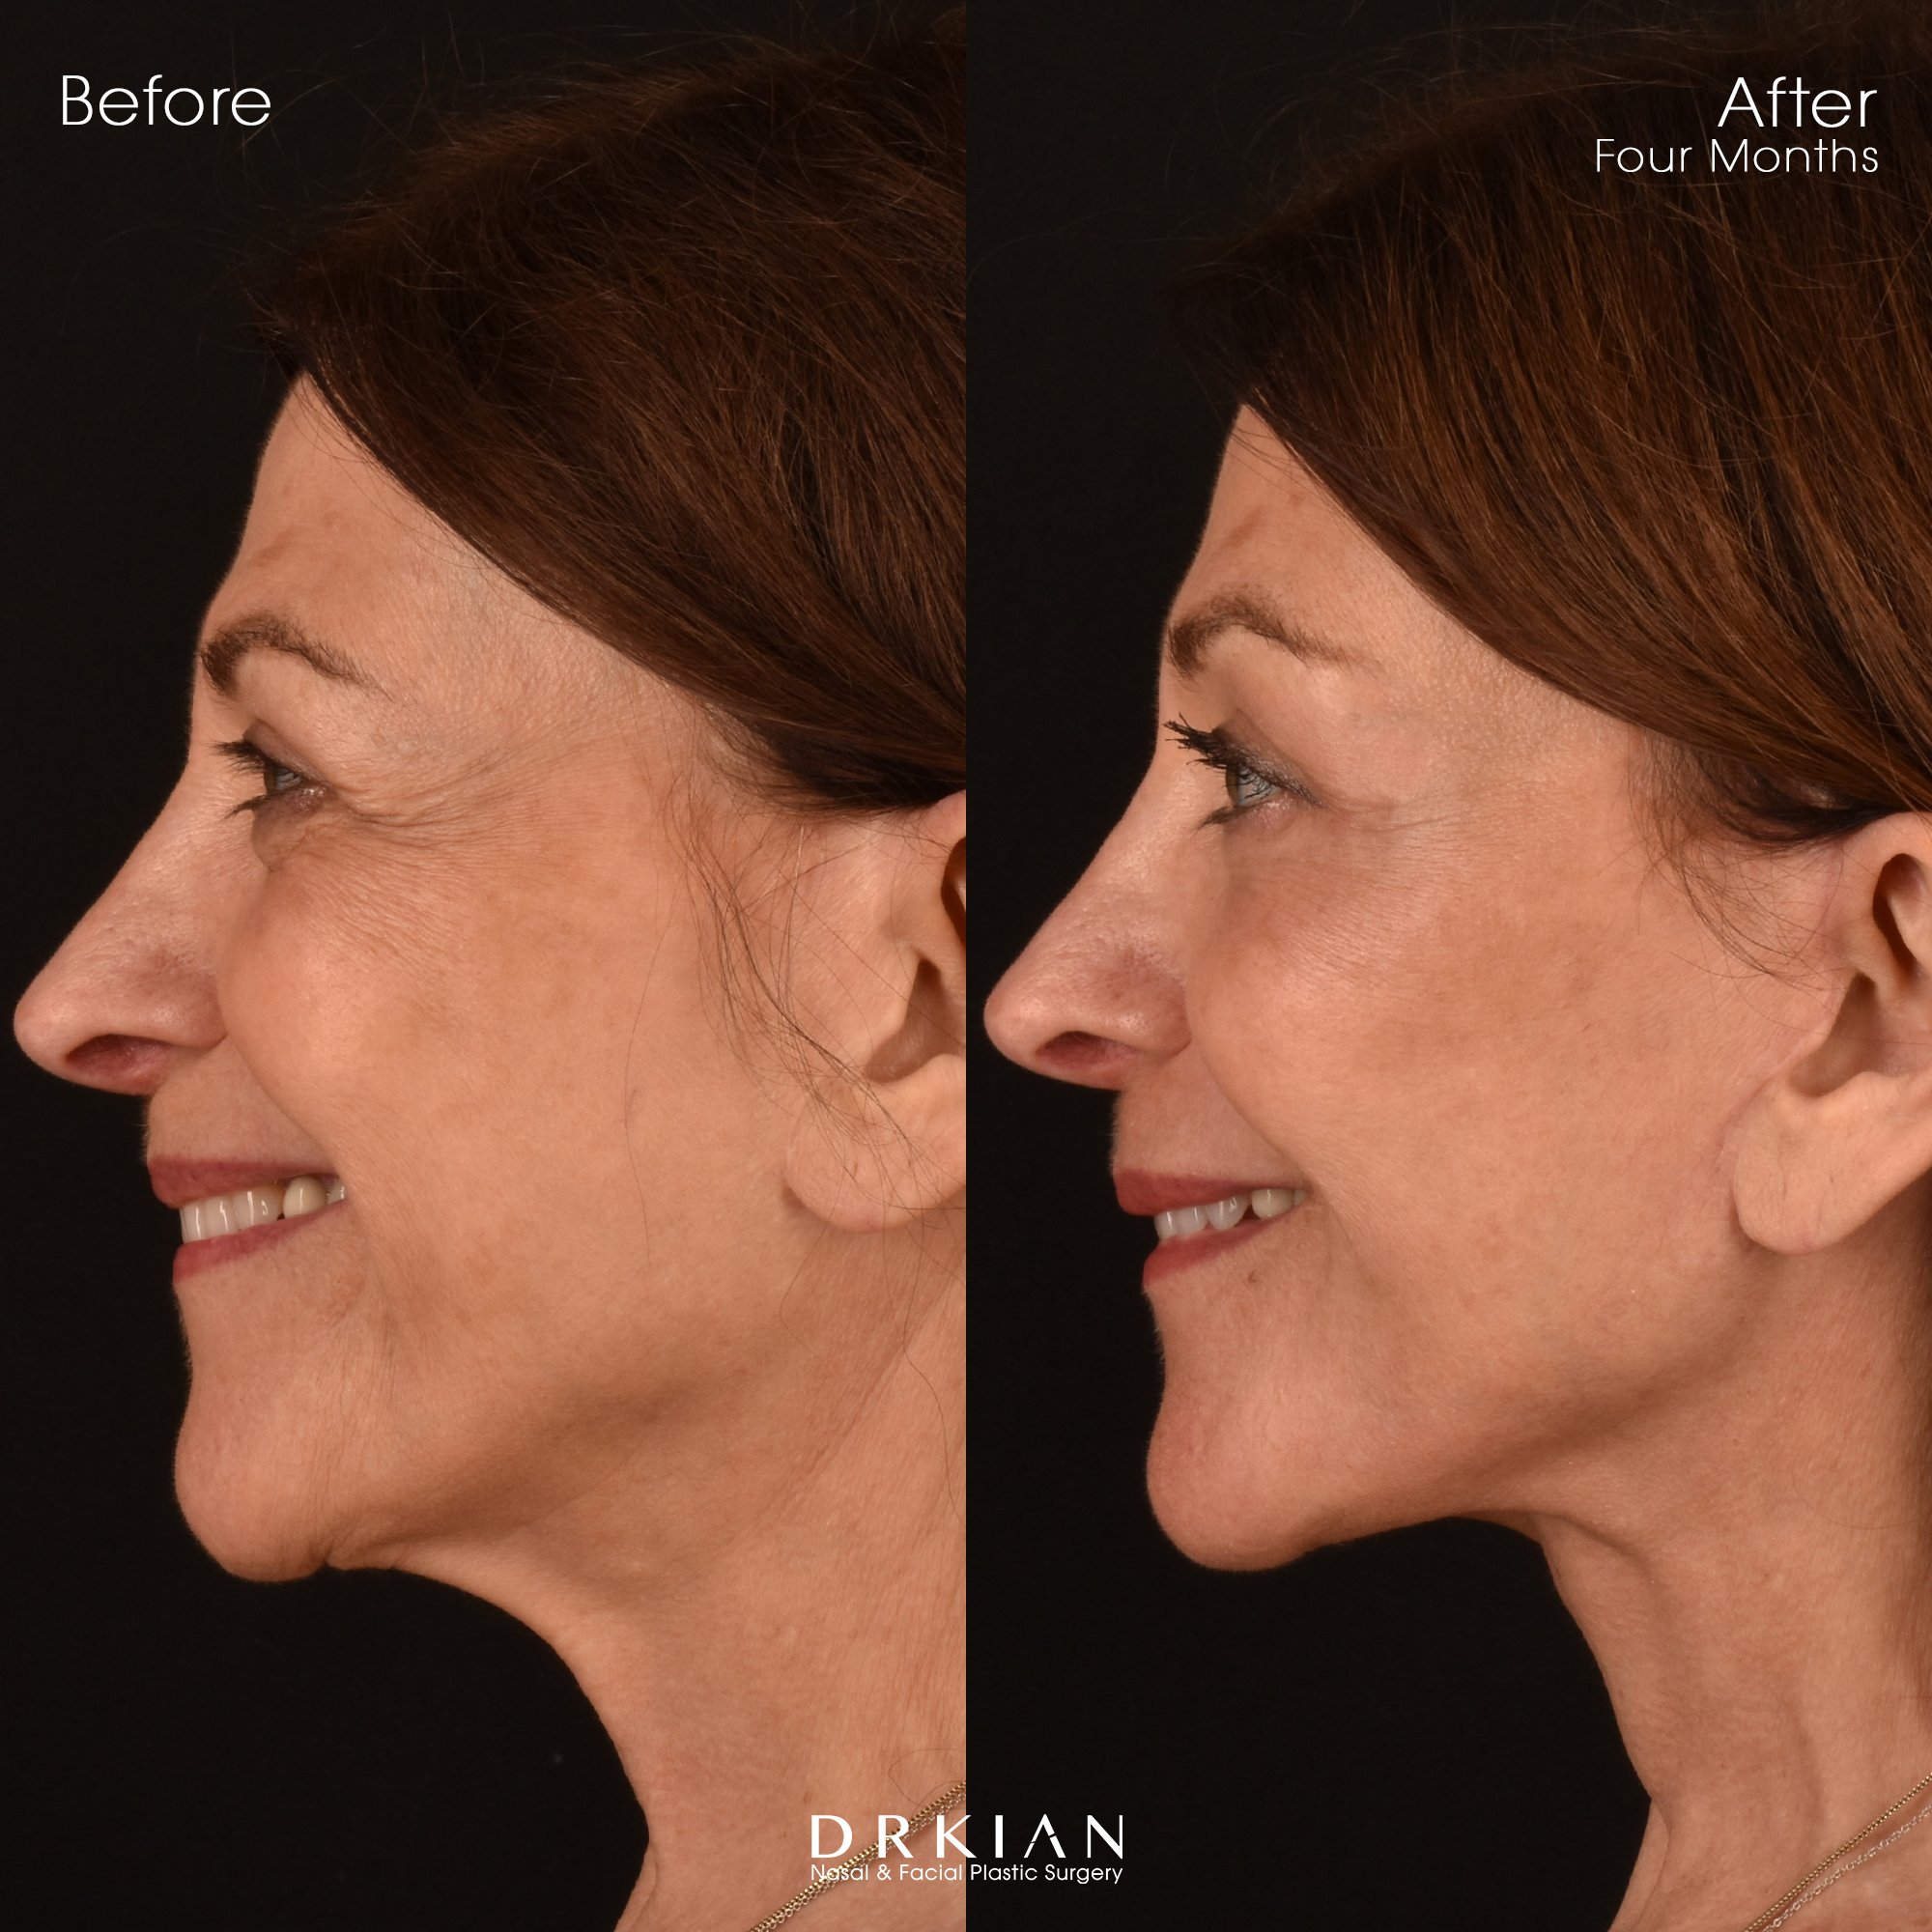
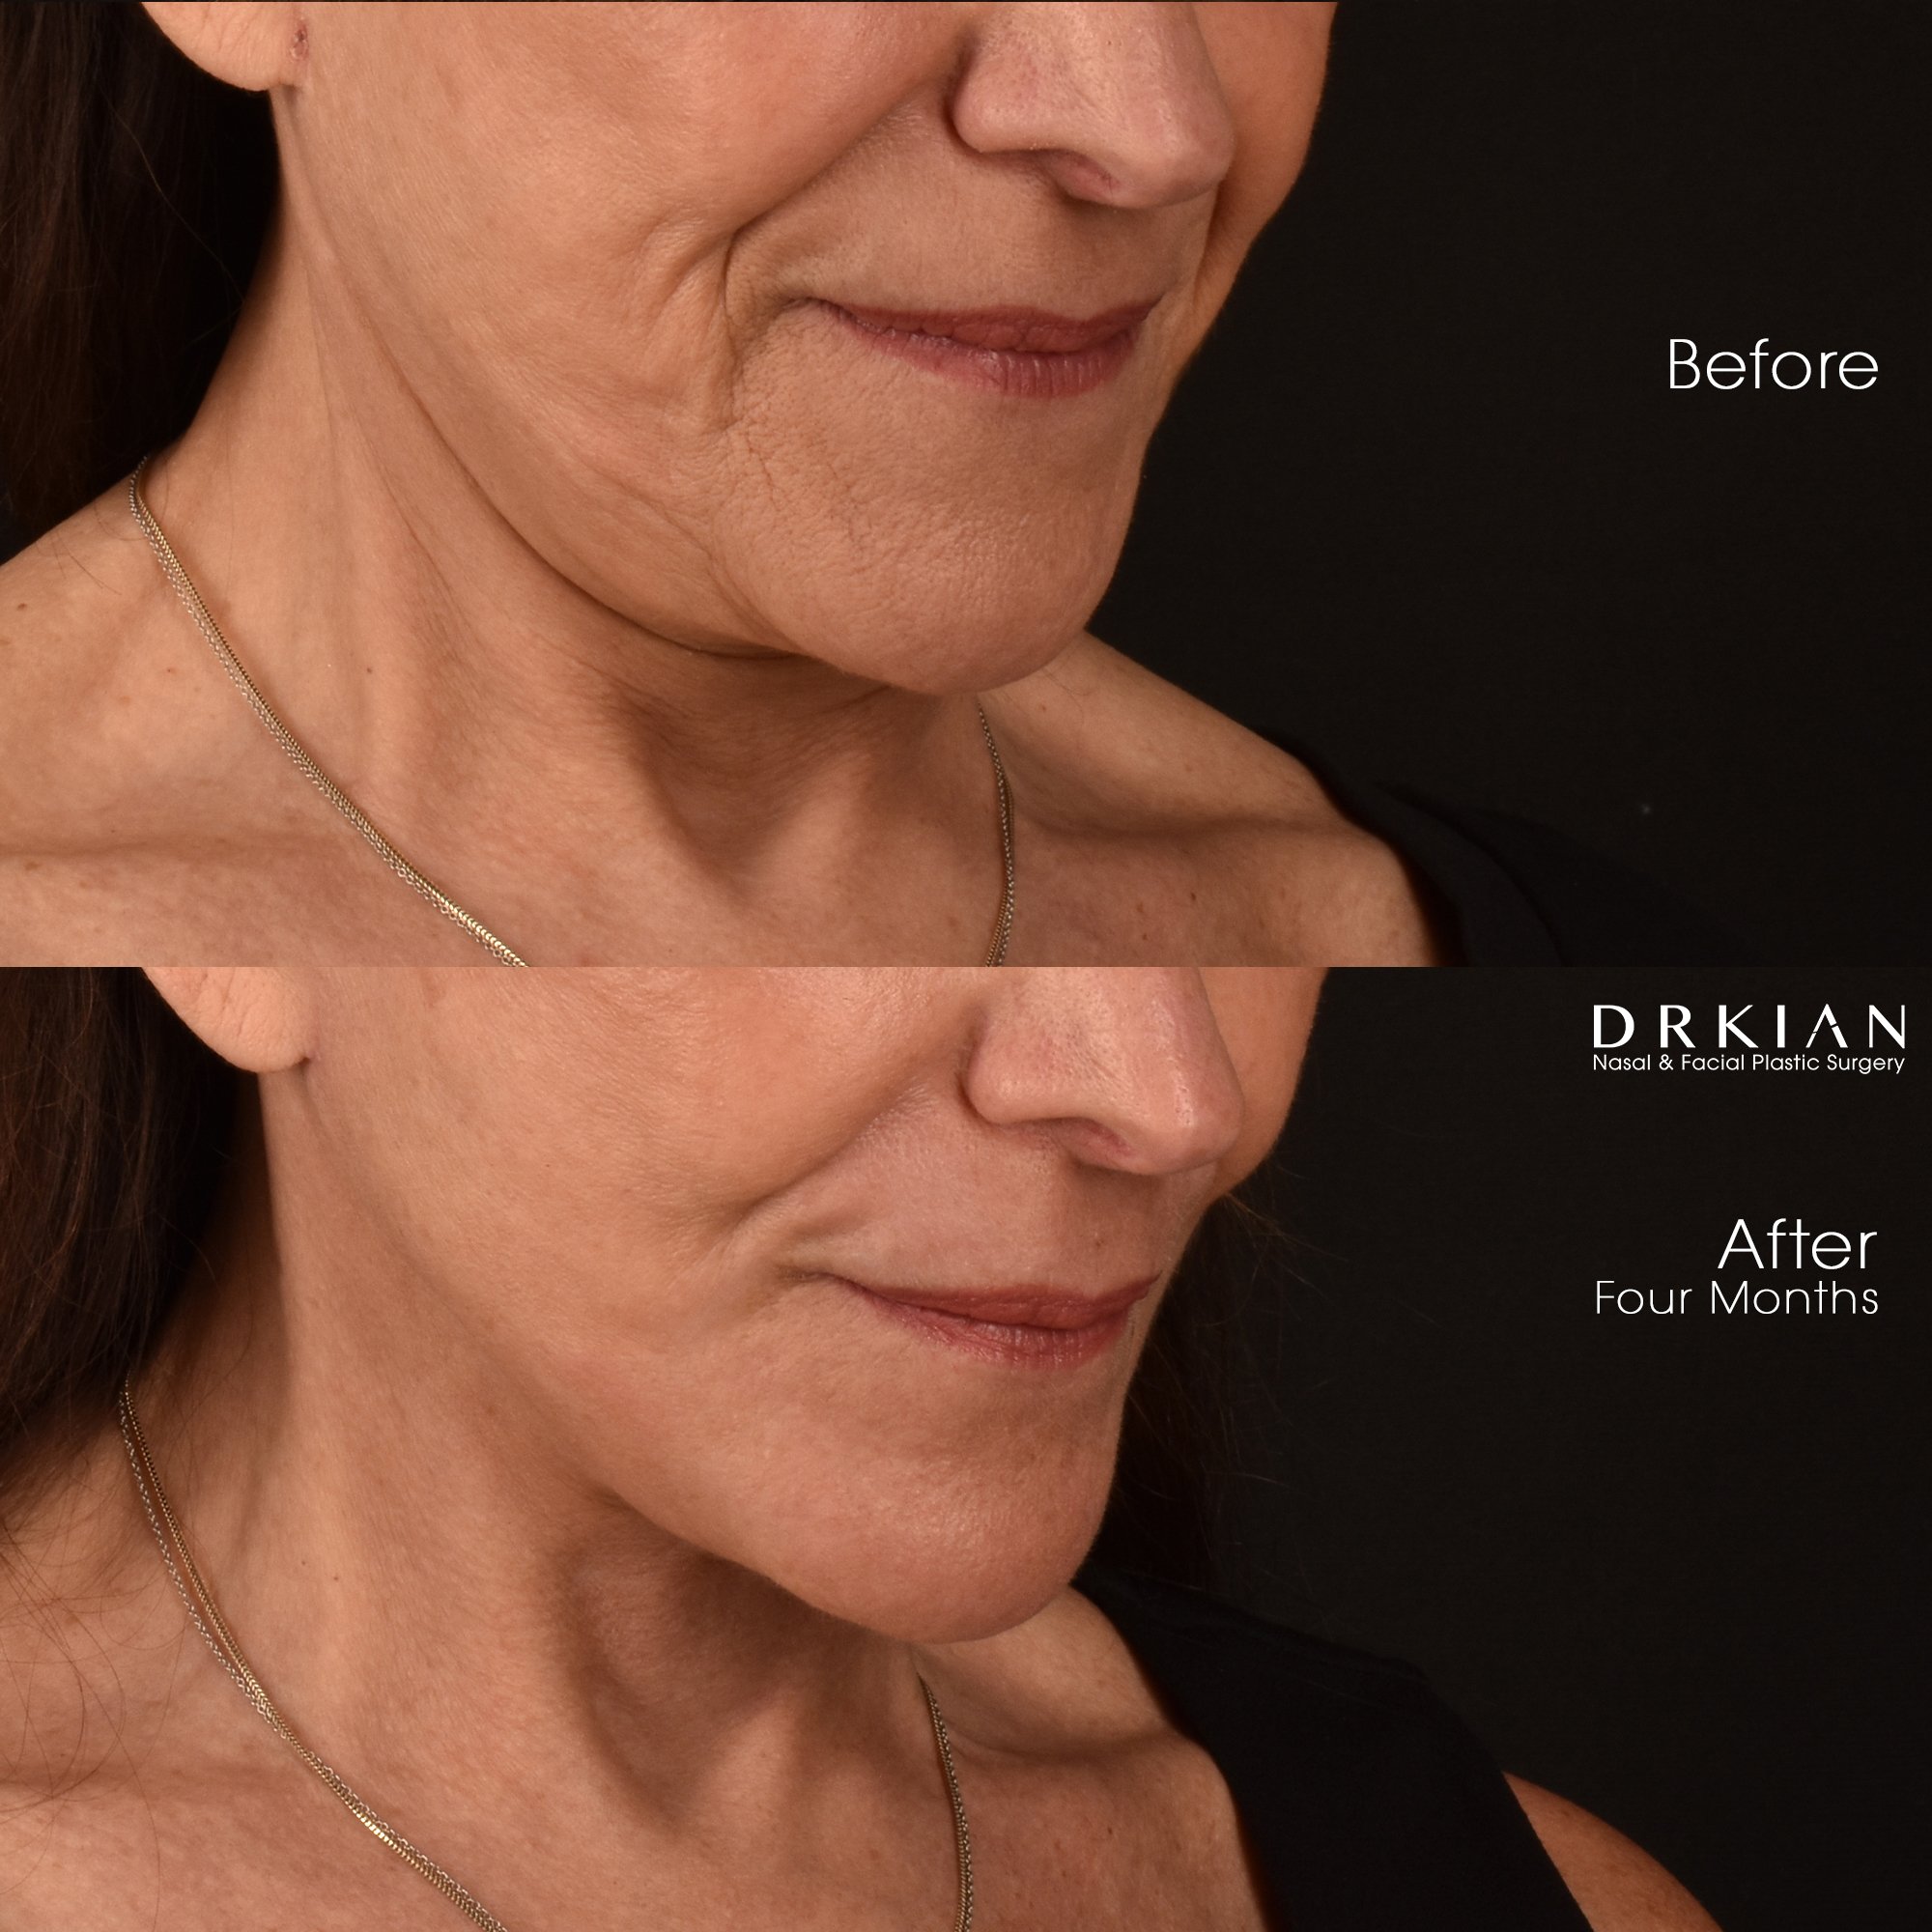
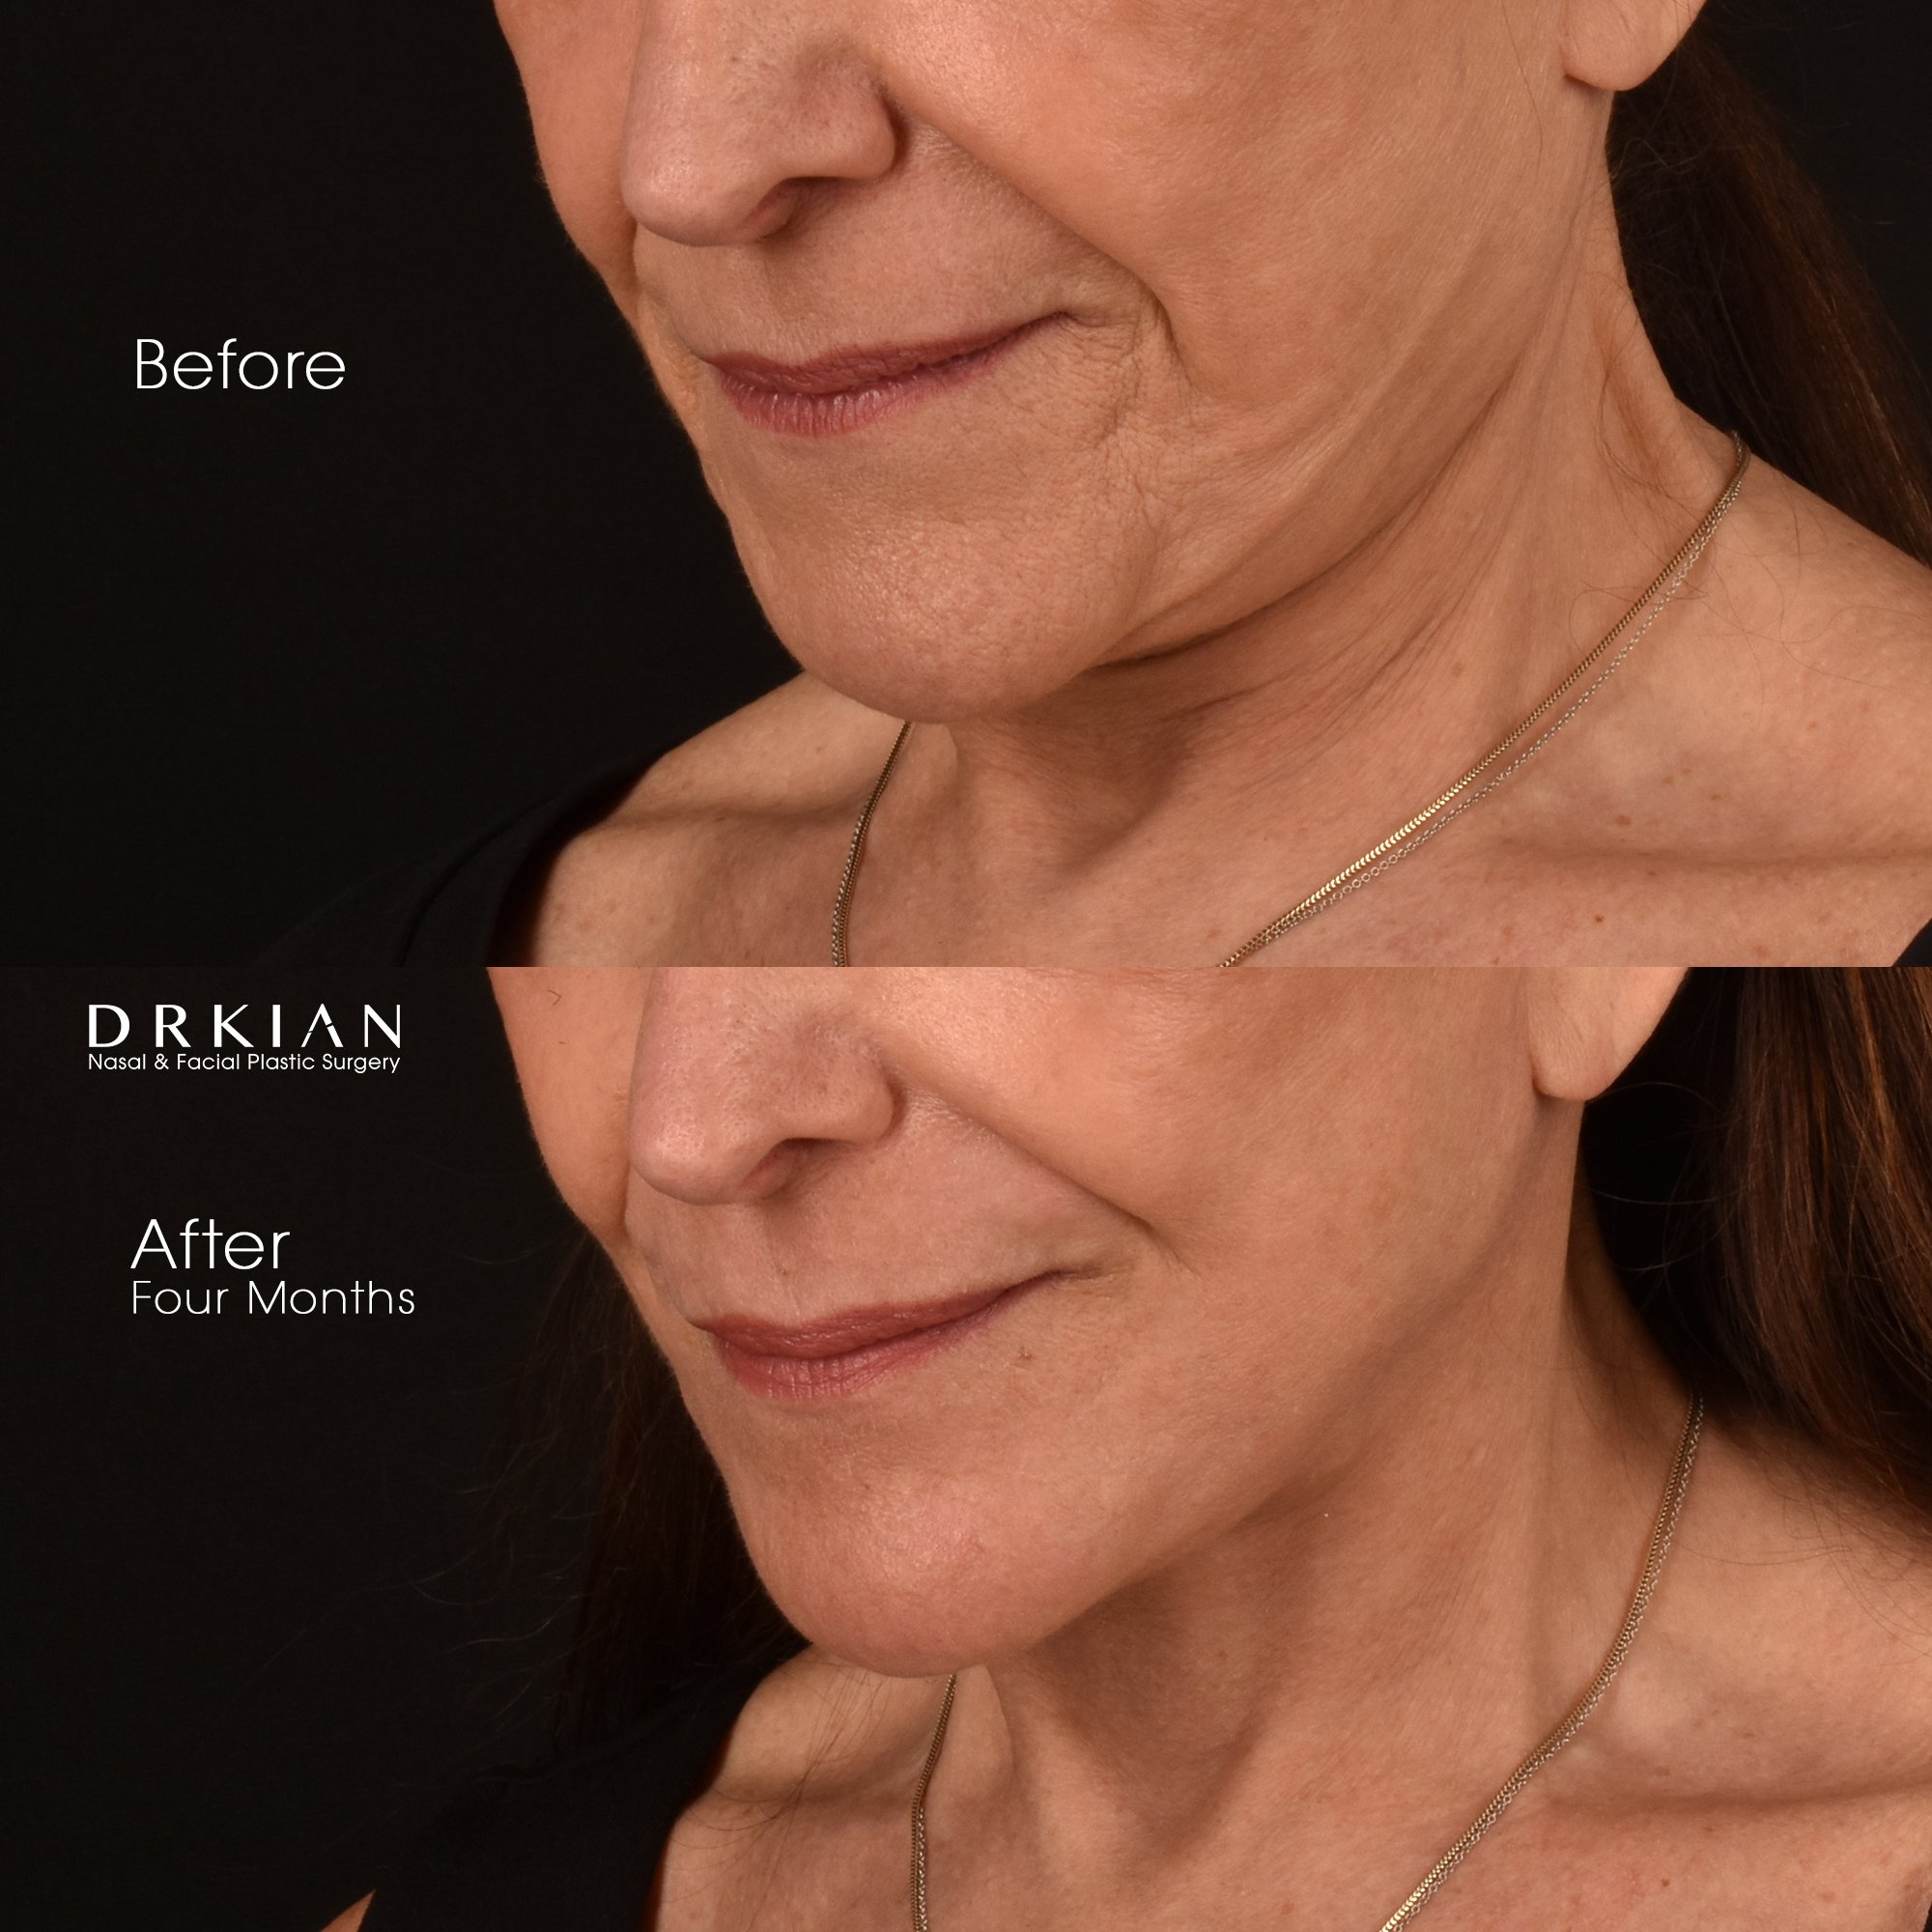
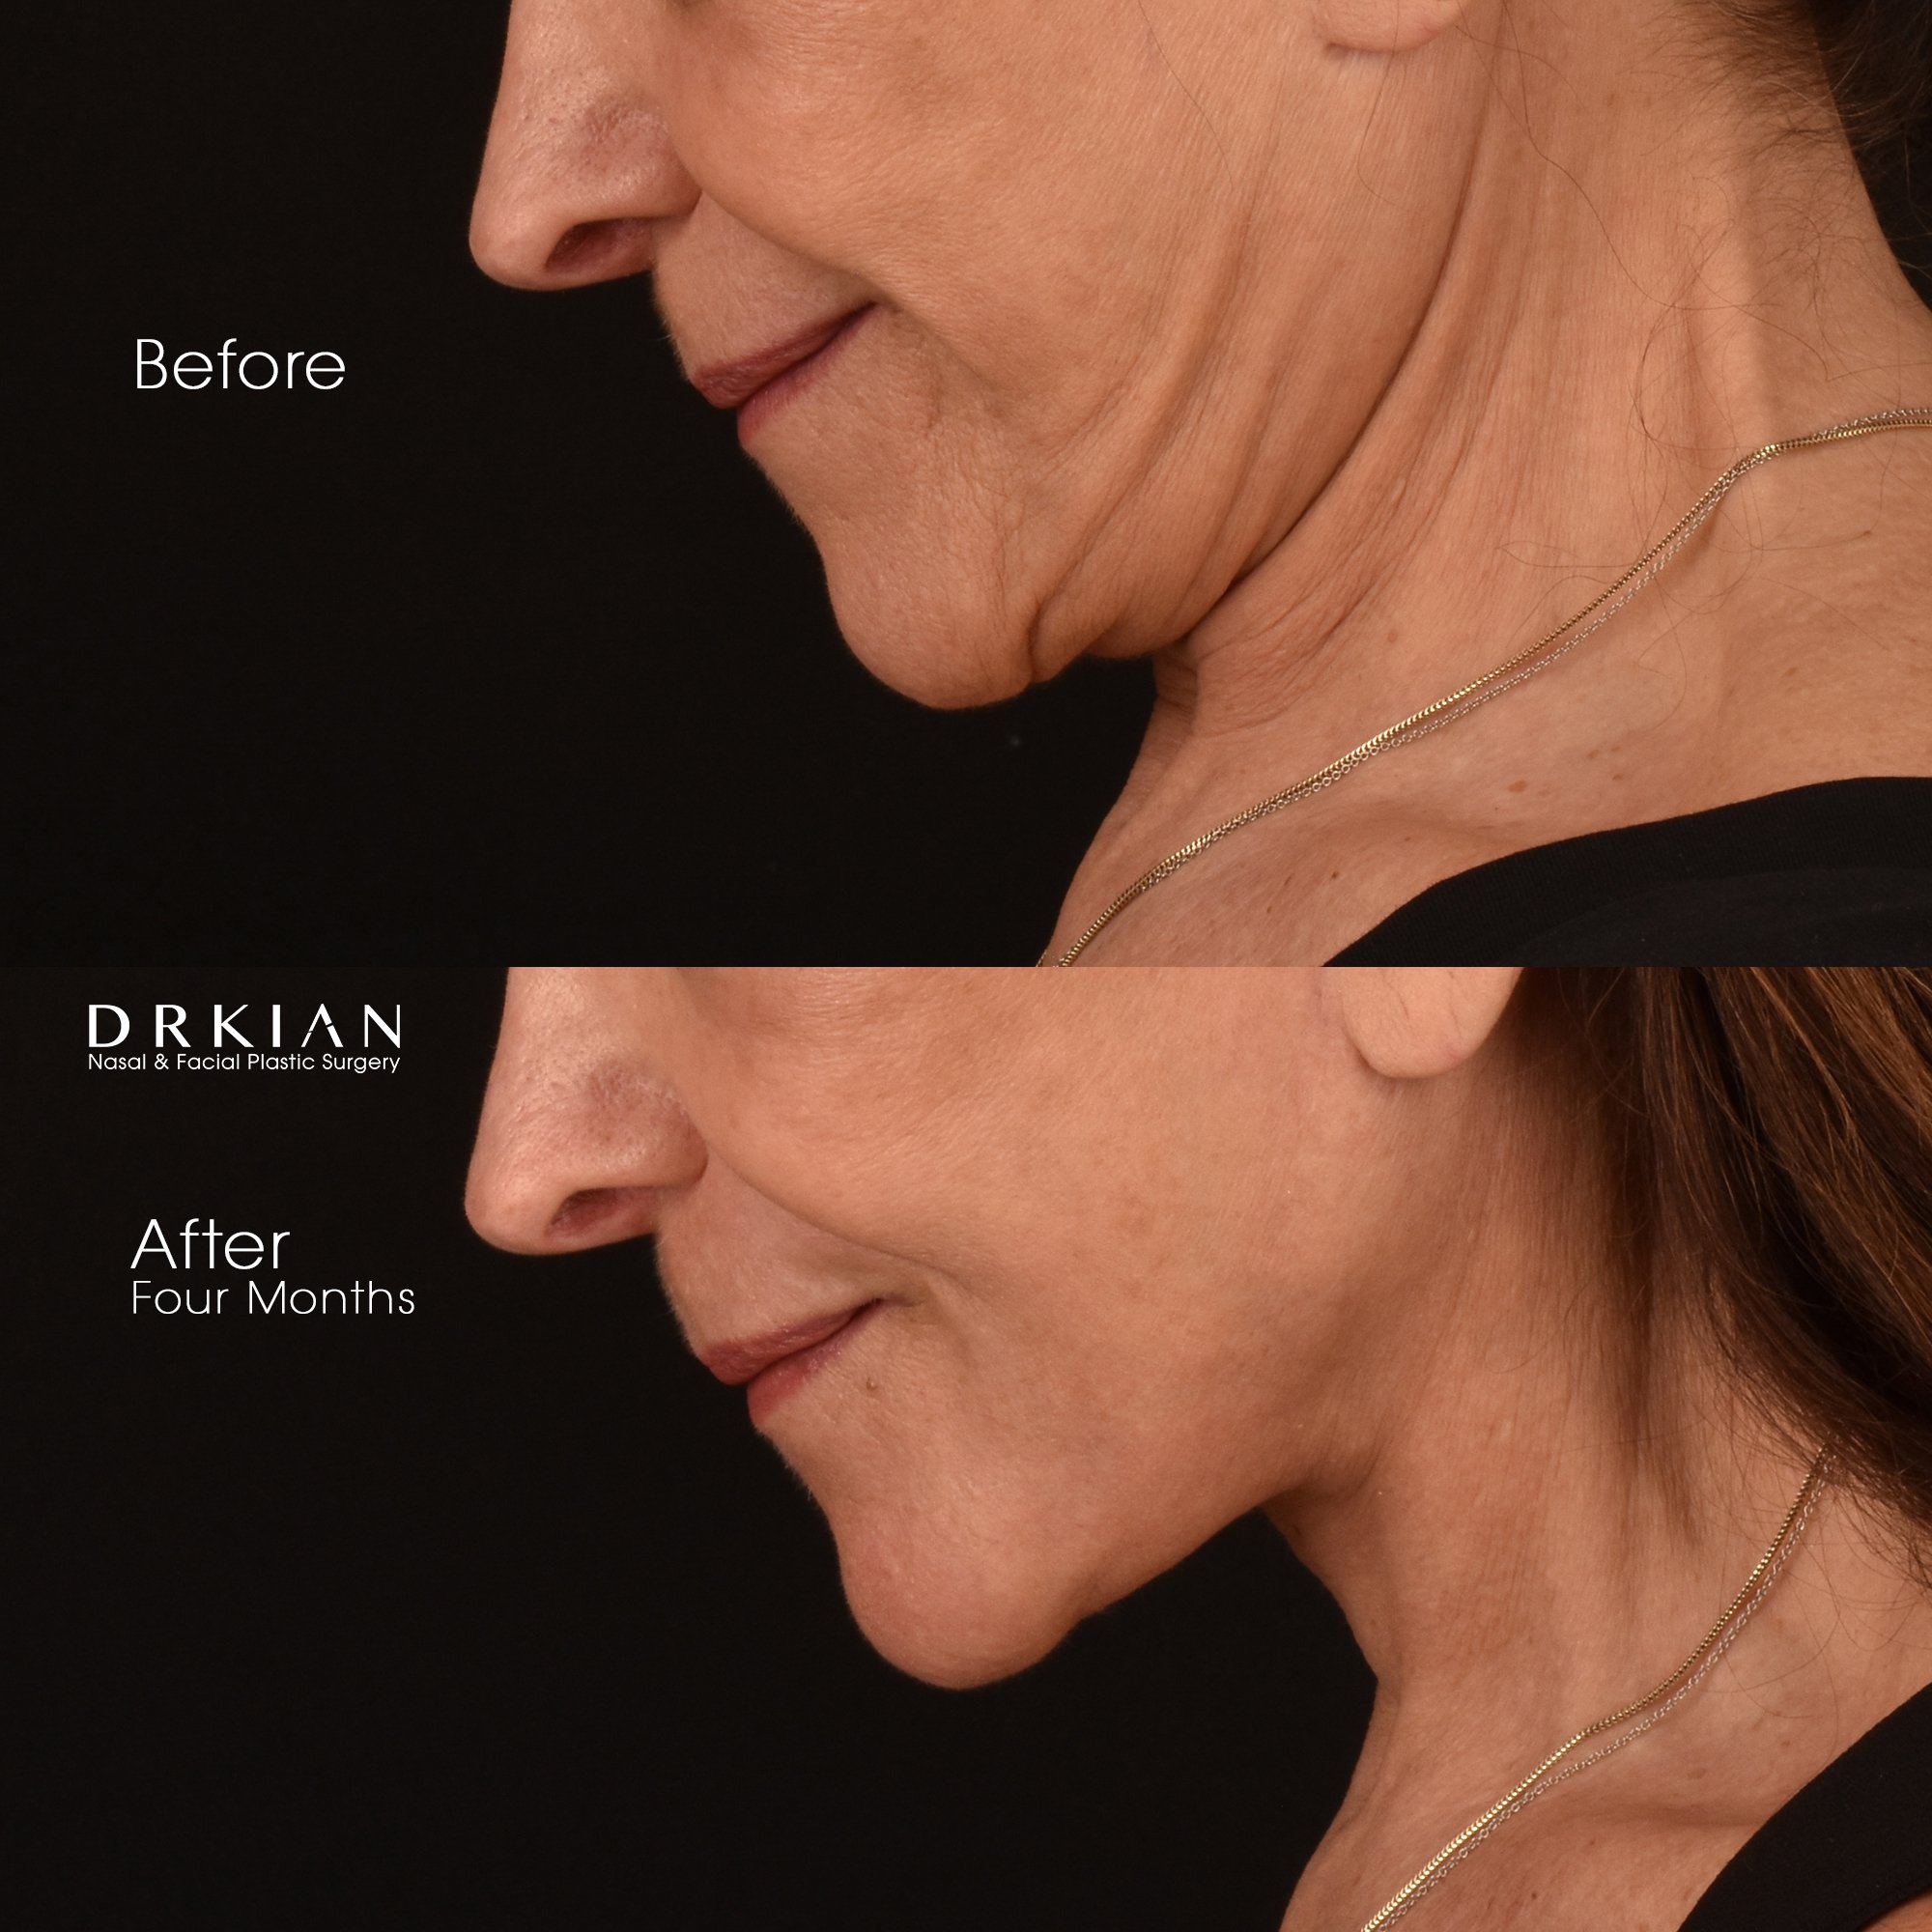
Deep Neck Liposuction and Lift, Buccal Fat Removal and Fat Harvest and Transfer to Chin, Mid-Face, Under-Eyes & Temples: Before & After Four Months

Deep Neck Liposuction and Lift, Buccal Fat Removal and Fat Harvest and Transfer to Chin, Mid-Face, Under-Eyes & Temples: Before & After Four Months

Deep Neck Liposuction and Lift, Buccal Fat Removal and Fat Harvest and Transfer to Chin, Mid-Face, Under-Eyes & Temples: Before & After Four Months

Deep Neck Liposuction and Lift, Buccal Fat Removal and Fat Harvest and Transfer to Chin, Mid-Face, Under-Eyes & Temples: Before & After Four Months

Deep Neck Liposuction and Lift, Buccal Fat Removal and Fat Harvest and Transfer to Chin, Mid-Face, Under-Eyes & Temples: Before & After Four Months

Deep Neck Liposuction and Lift, Buccal Fat Removal and Fat Harvest and Transfer to Chin, Mid-Face, Under-Eyes & Temples: Before & After Four Months
Deep Neck Liposuction and Lift, Buccal Fat Removal and Fat Harvest and Transfer to Chin, Mid-Face, Under-Eyes & Temples: Before & After Four Months

Deep Neck Liposuction and Lift, Buccal Fat Removal and Fat Harvest and Transfer to Chin, Mid-Face, Under-Eyes & Temples: Before & After Four Months

Deep Neck Liposuction and Lift, Buccal Fat Removal and Fat Harvest and Transfer to Chin, Mid-Face, Under-Eyes & Temples: Before & After Four Months
Deep Neck Liposuction and Lift, Buccal Fat Removal and Fat Harvest and Transfer to Chin, Mid-Face, Under-Eyes & Temples: Before & After Four Months

Deep Neck Liposuction and Lift, Buccal Fat Removal and Fat Harvest and Transfer to Chin, Mid-Face, Under-Eyes & Temples: Before & After Four Months

Deep Neck Liposuction and Lift, Buccal Fat Removal and Fat Harvest and Transfer to Chin, Mid-Face, Under-Eyes & Temples: Before & After Four Months

Deep Neck Liposuction and Lift, Buccal Fat Removal and Fat Harvest and Transfer to Chin, Mid-Face, Under-Eyes & Temples: Before & After Four Months
Deep Neck Liposuction and Lift, Buccal Fat Removal and Fat Harvest and Transfer to Chin, Mid-Face, Under-Eyes & Temples: Before & After Four Months
Deep Neck Liposuction and Lift, Buccal Fat Removal and Fat Harvest and Transfer to Chin, Mid-Face, Under-Eyes & Temples: Before & After Four Months

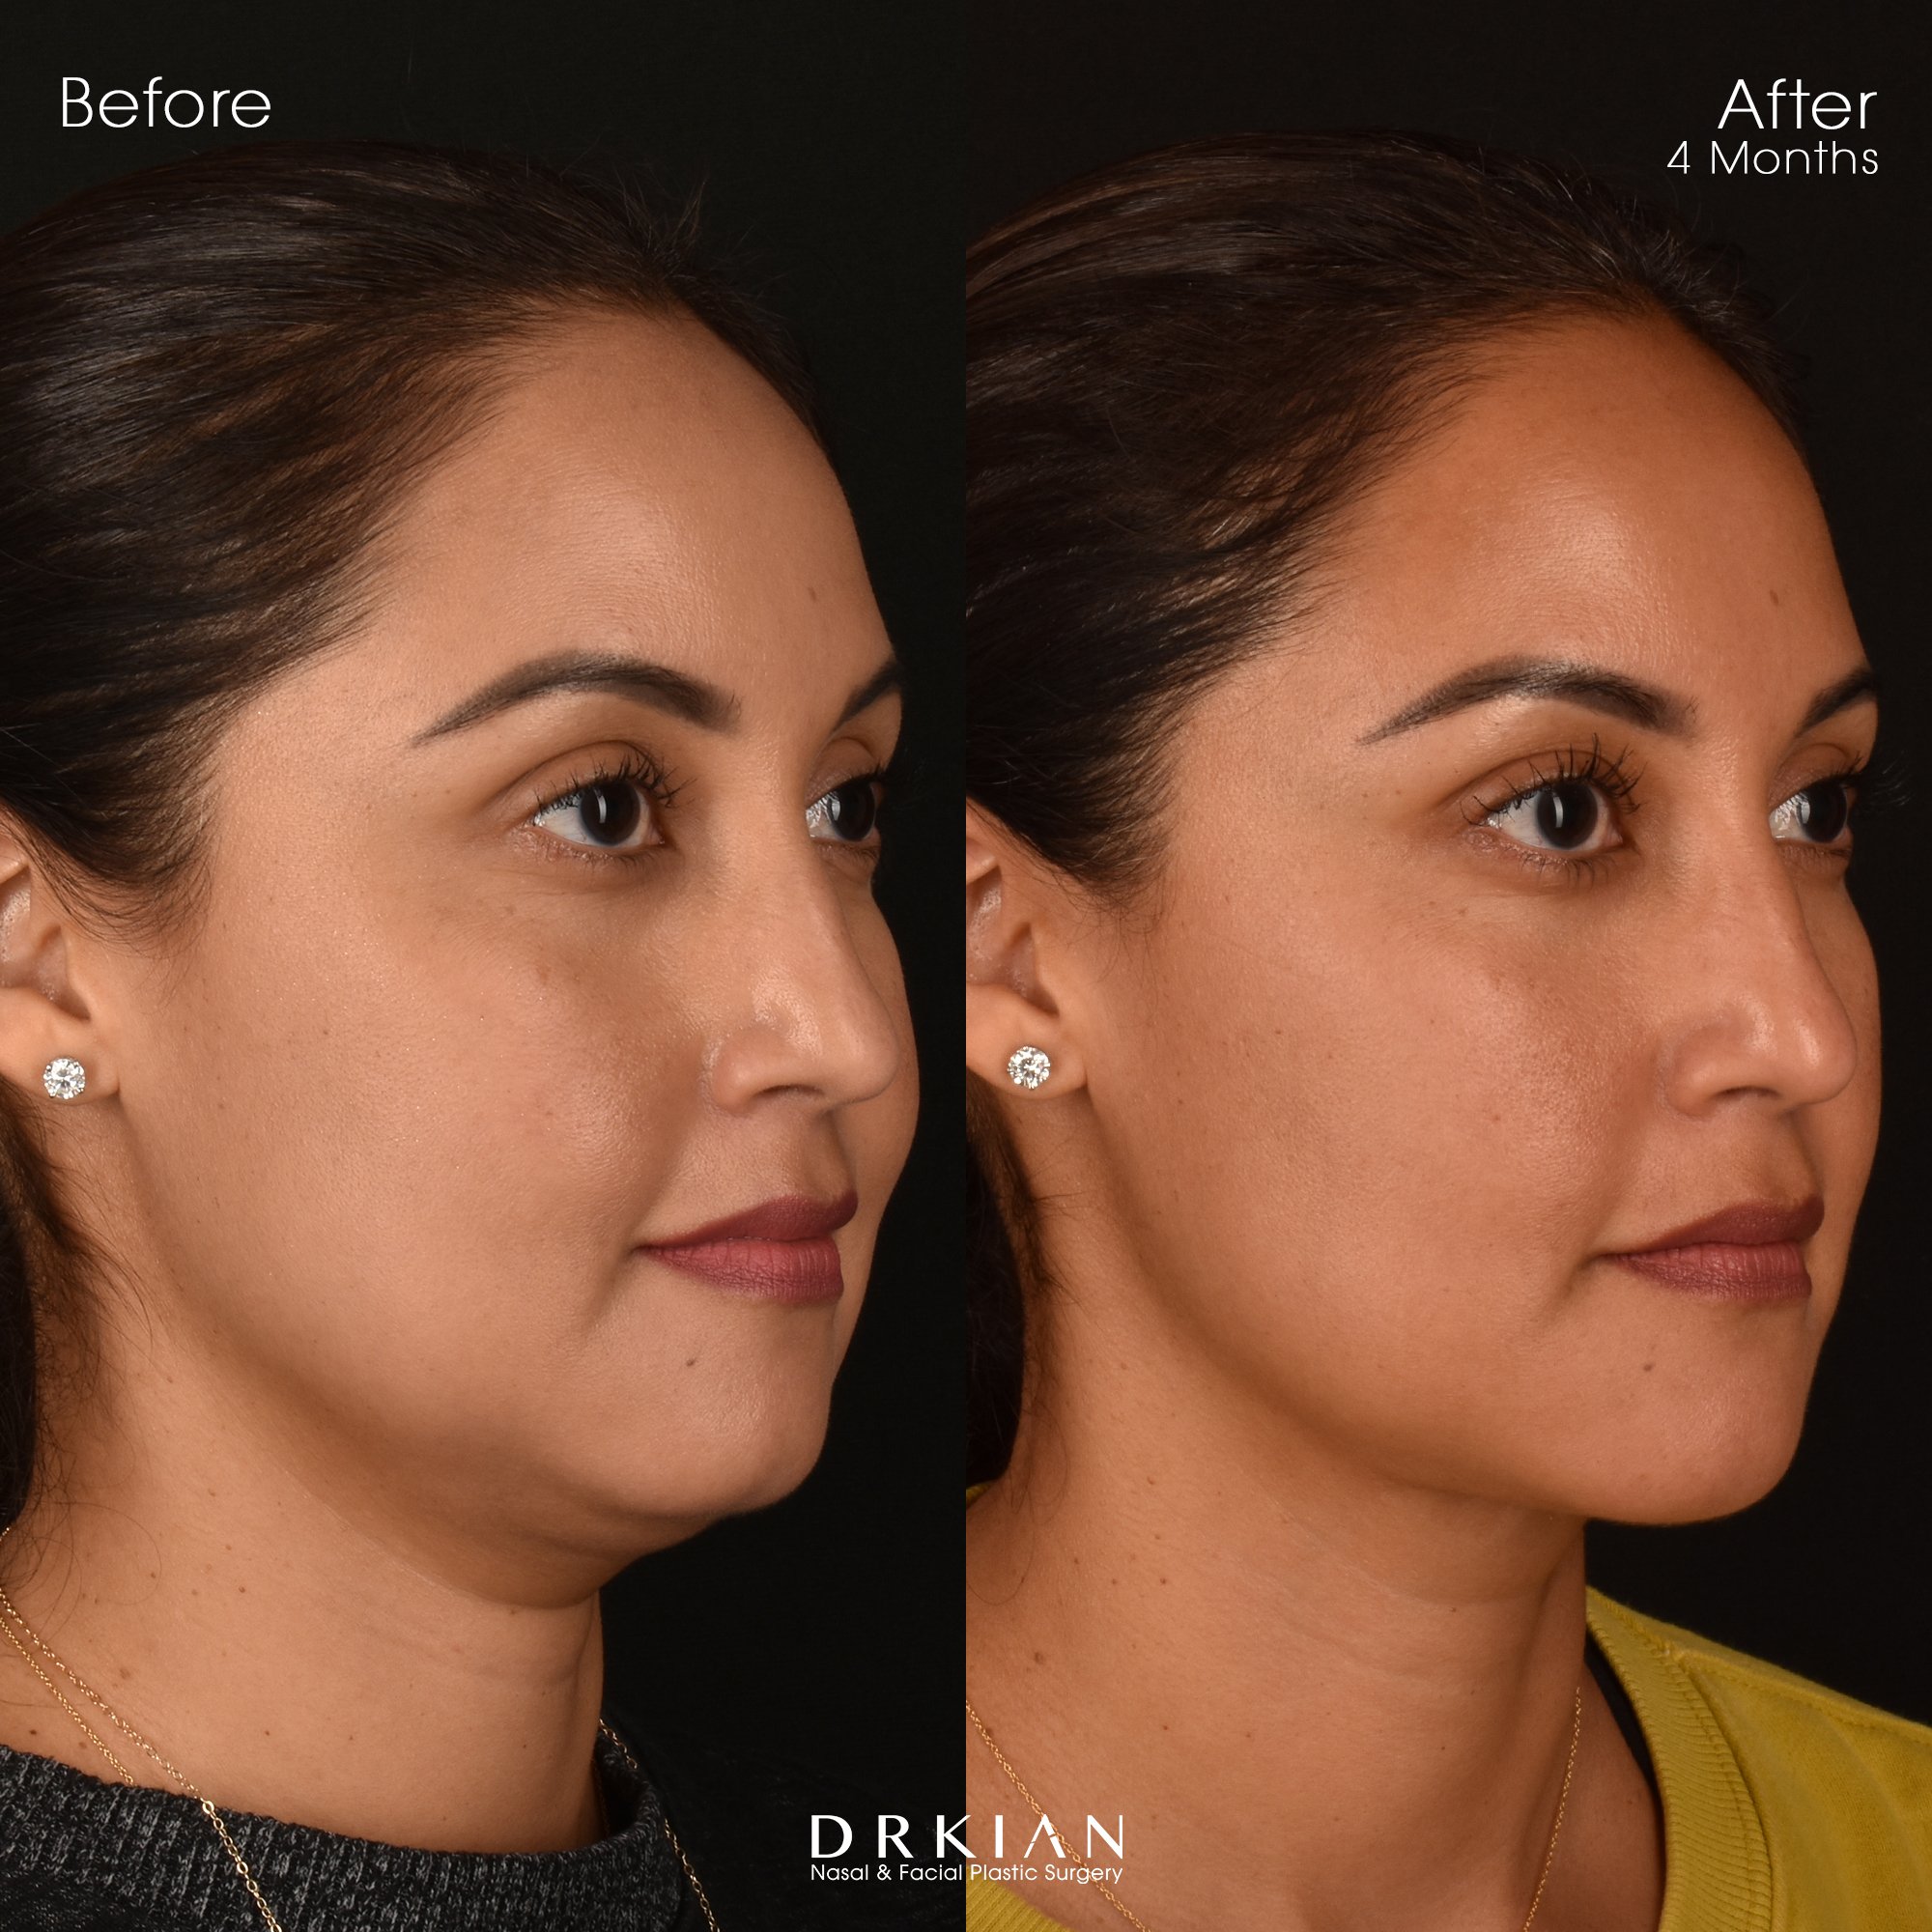
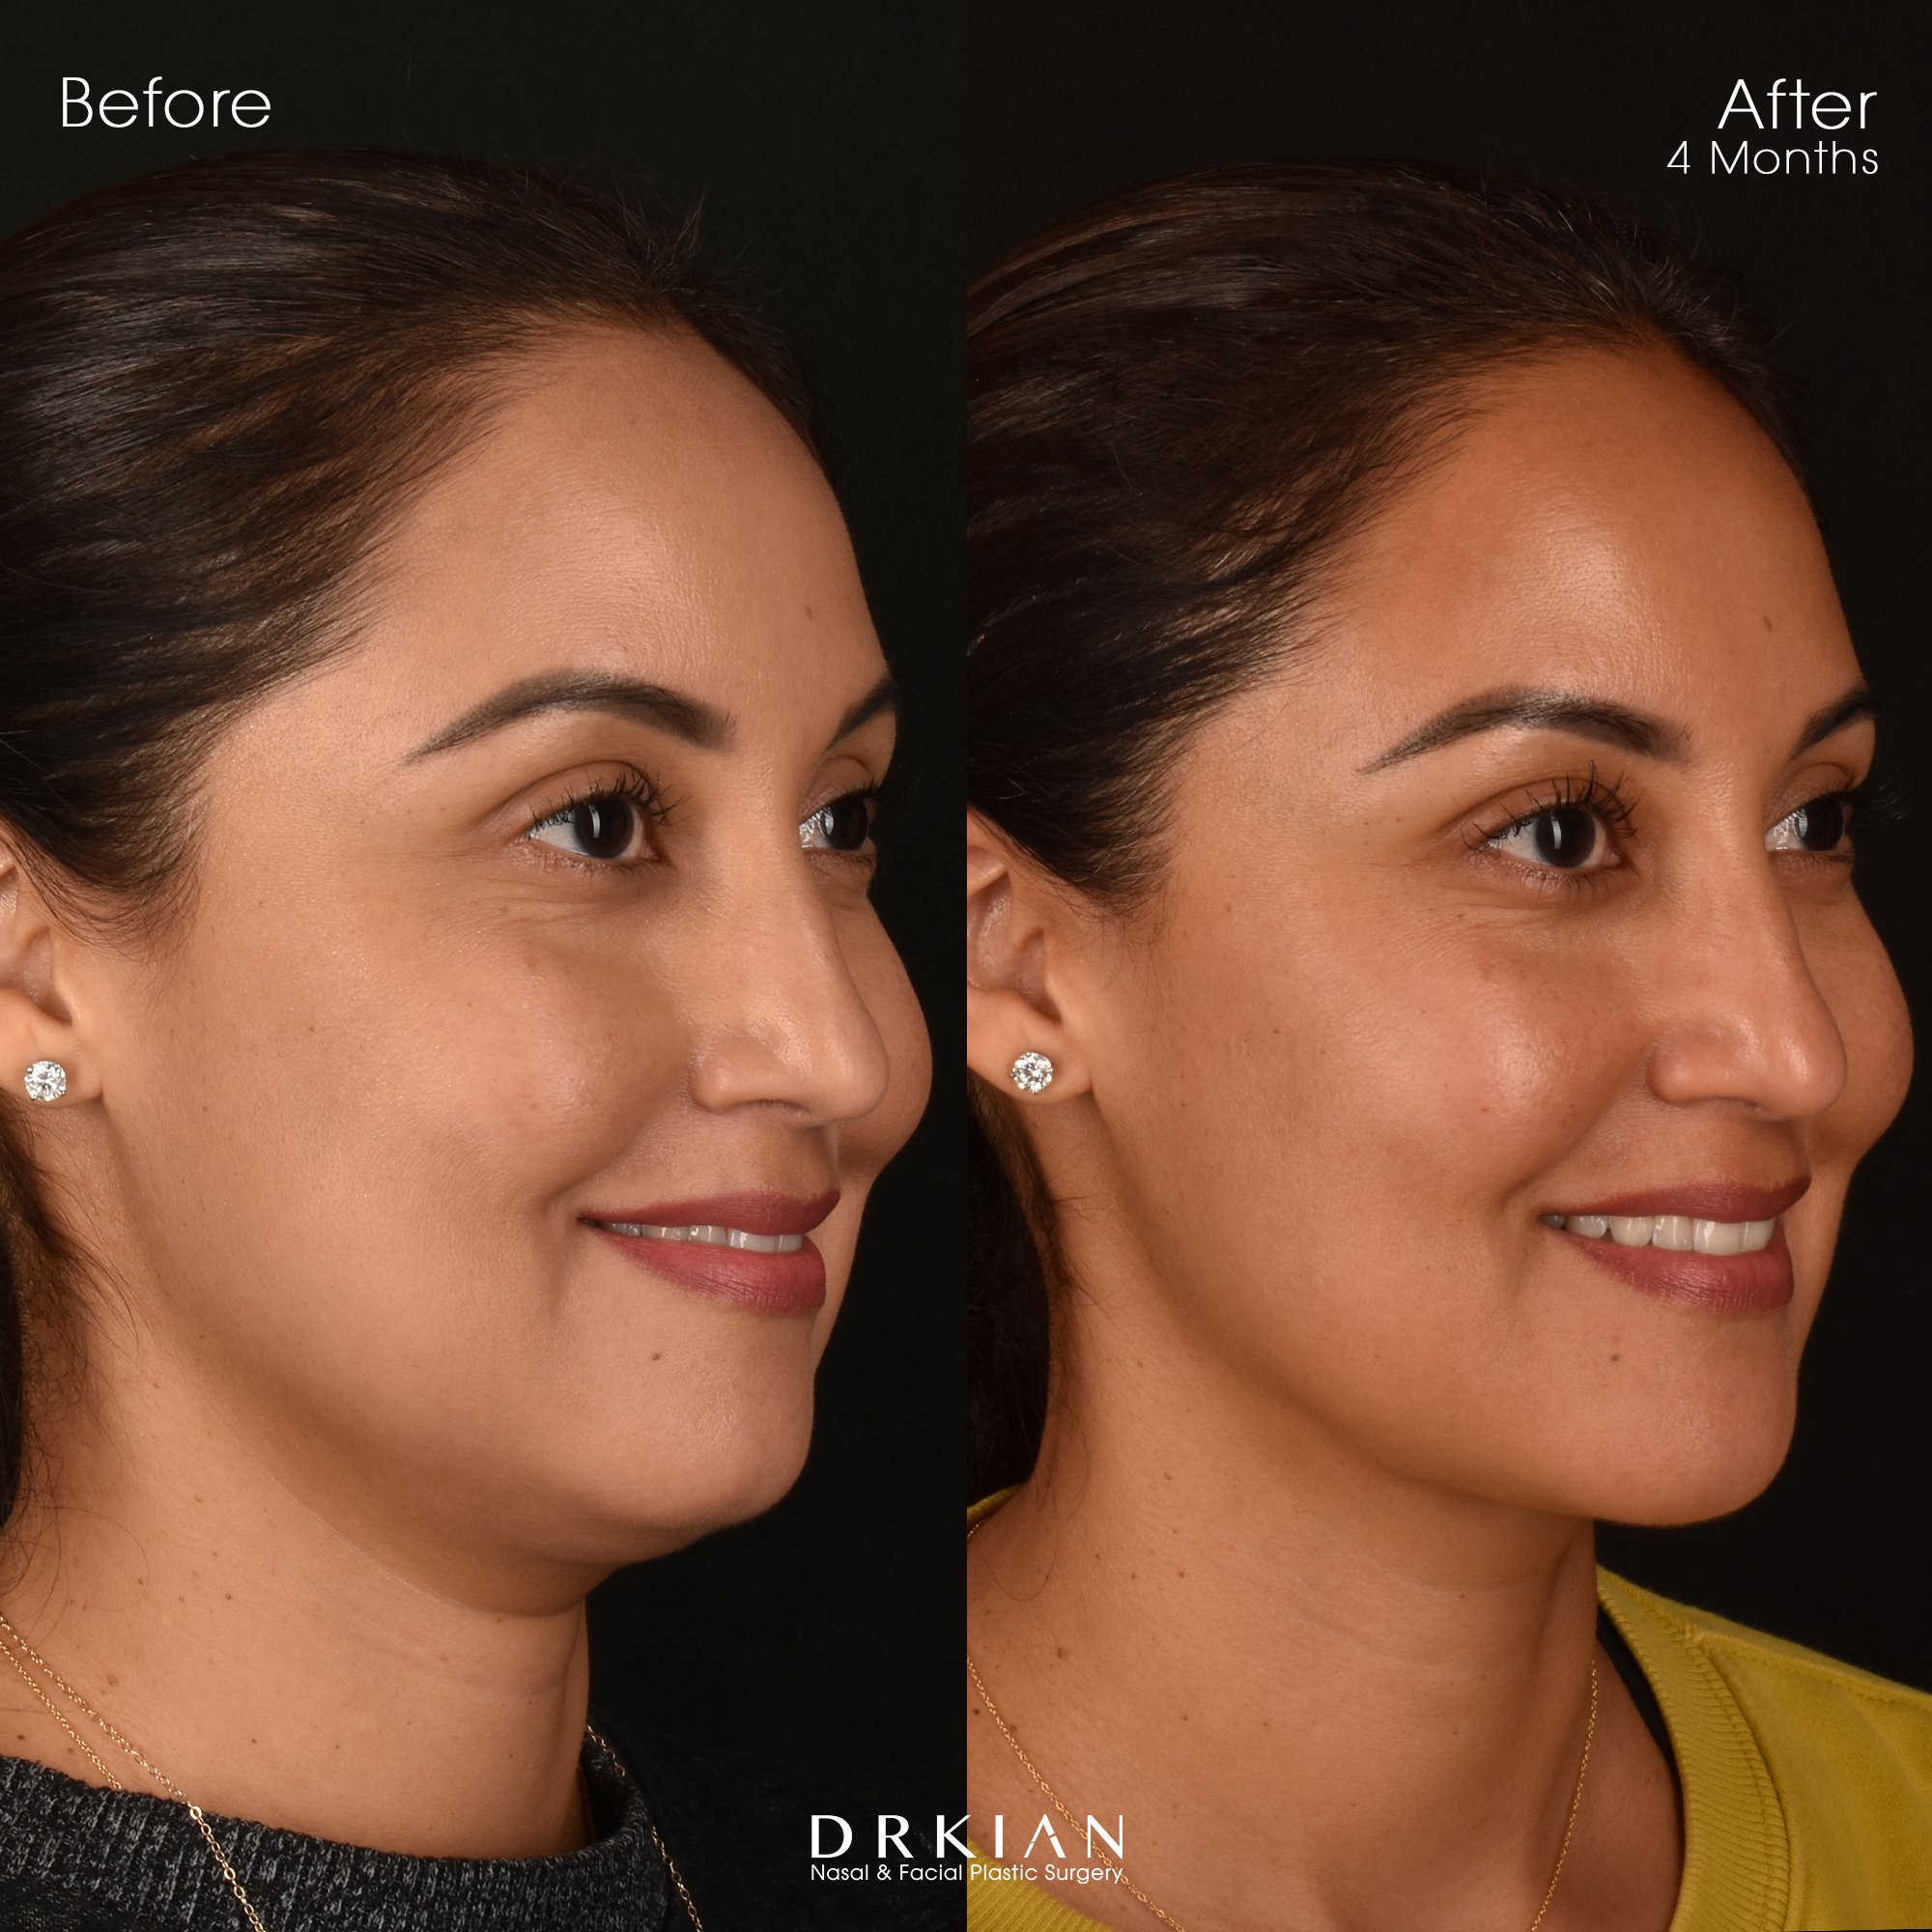
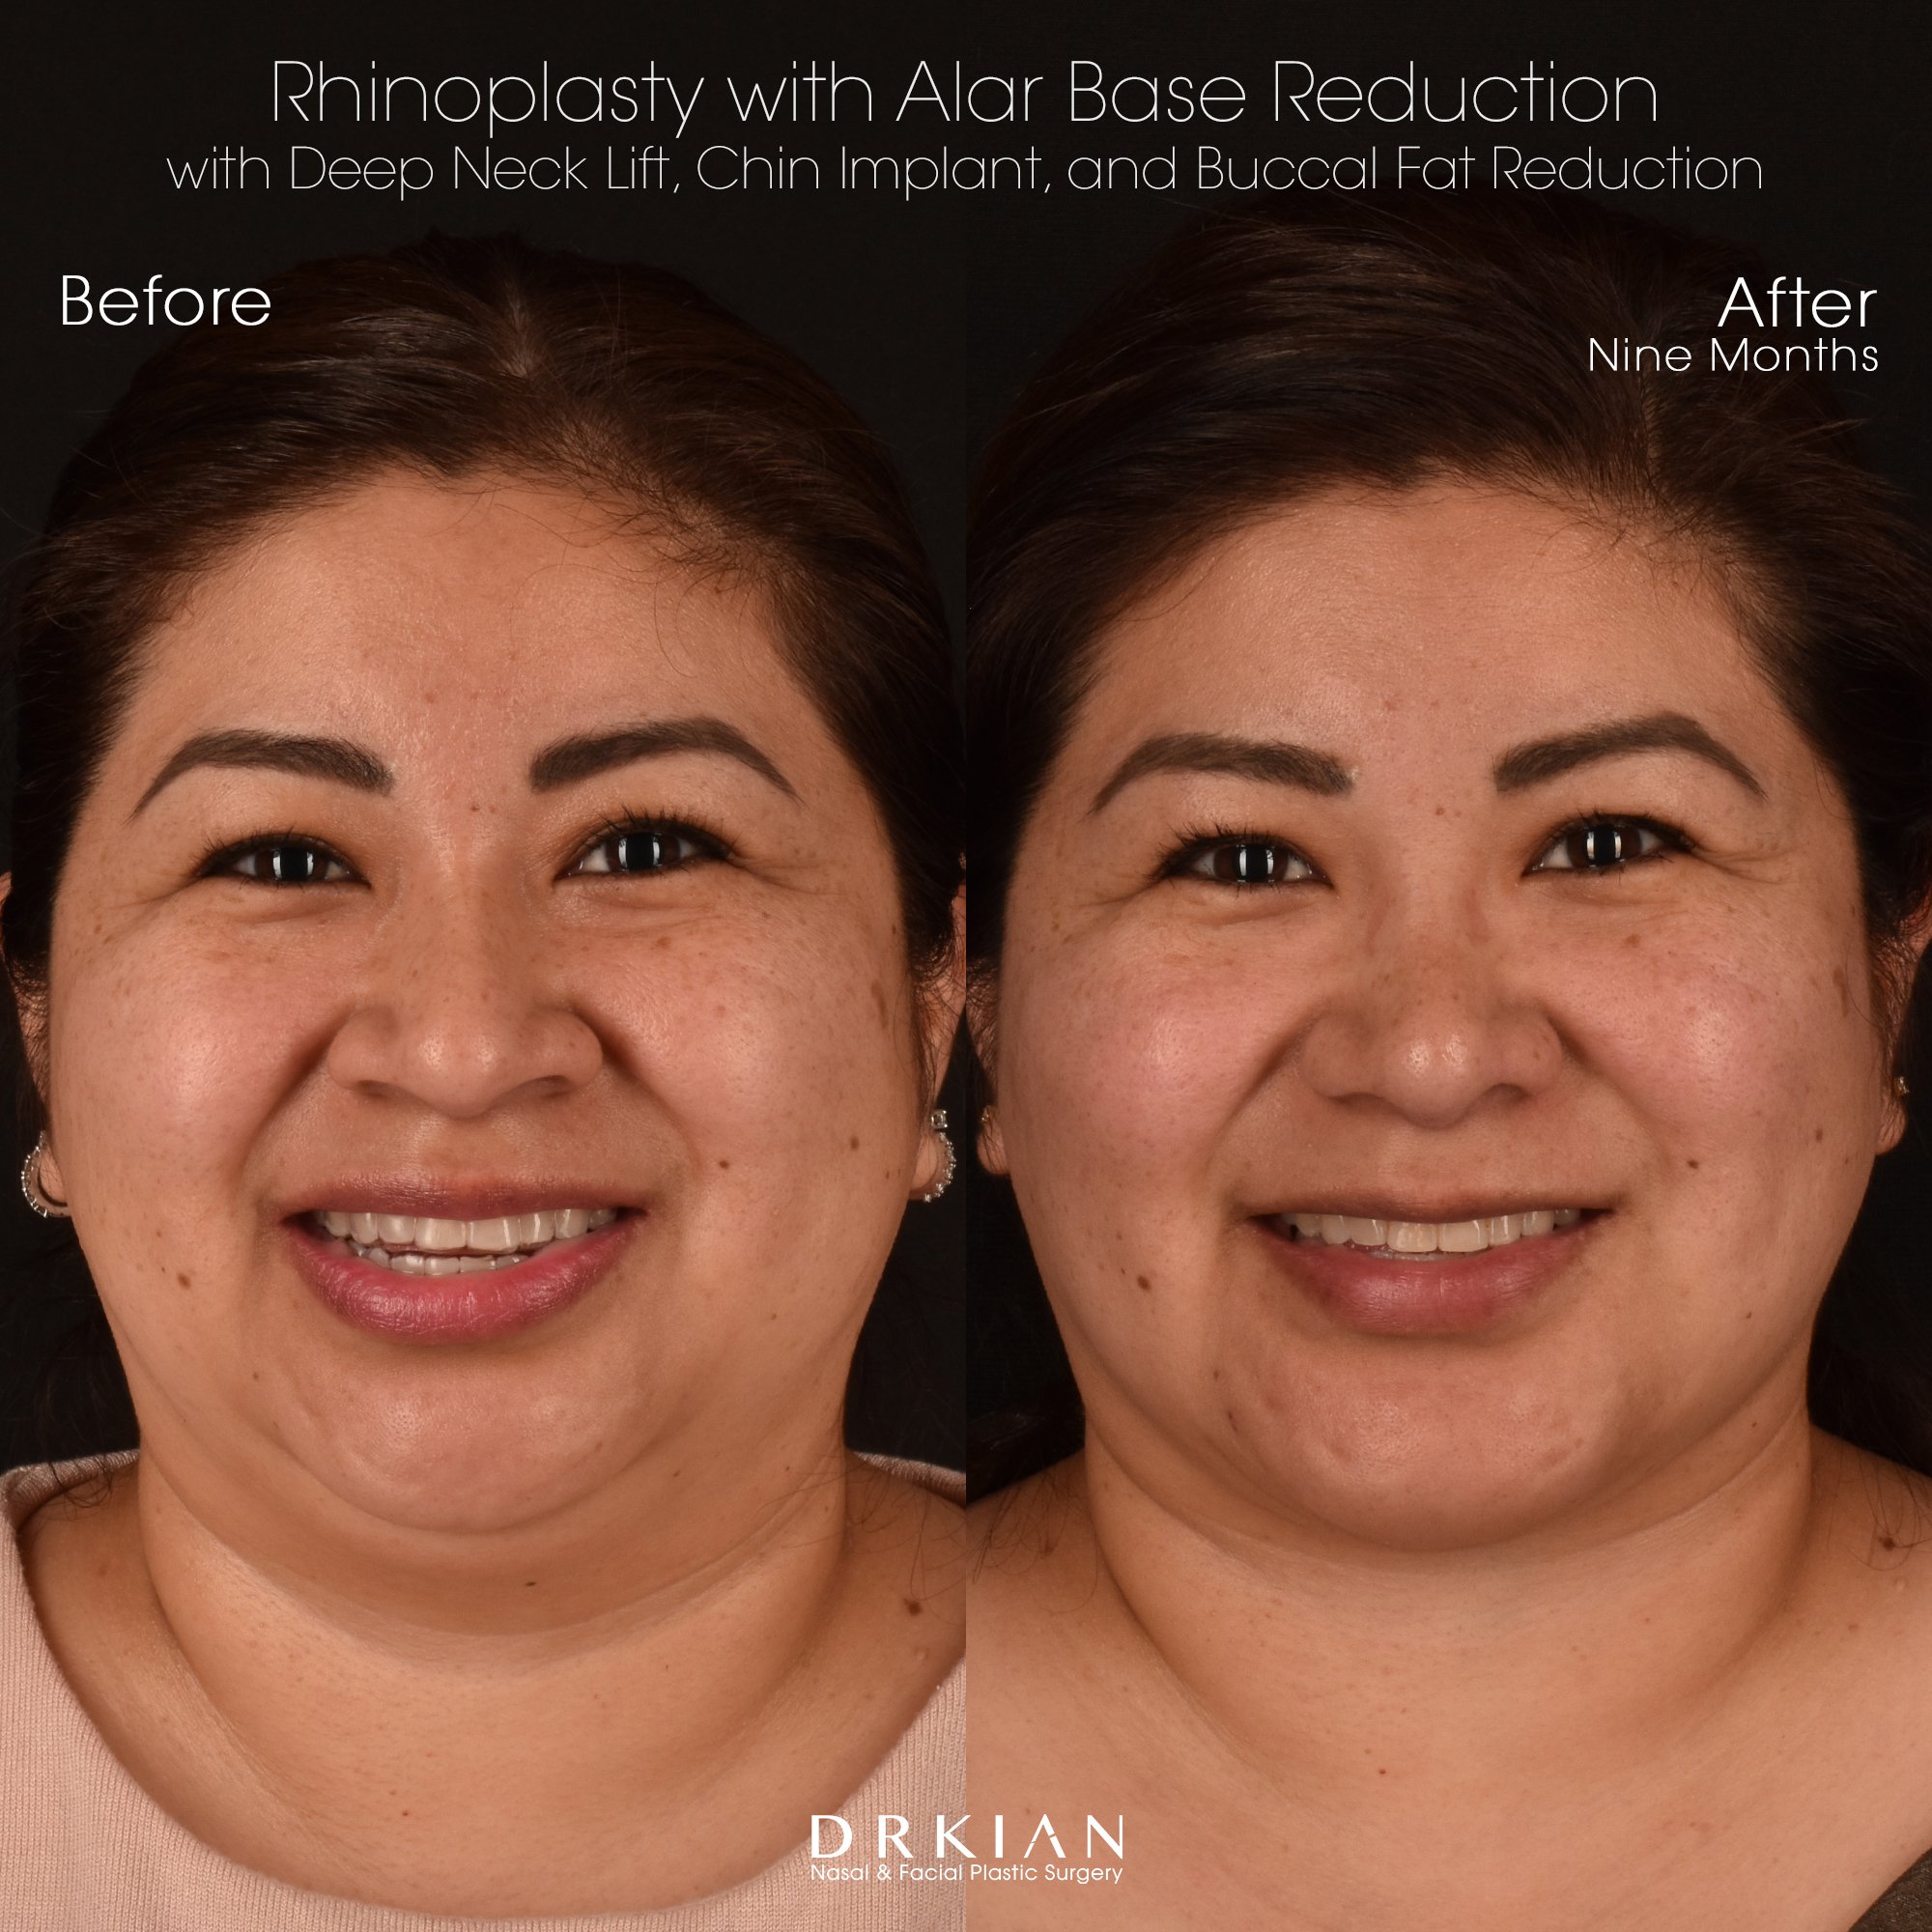
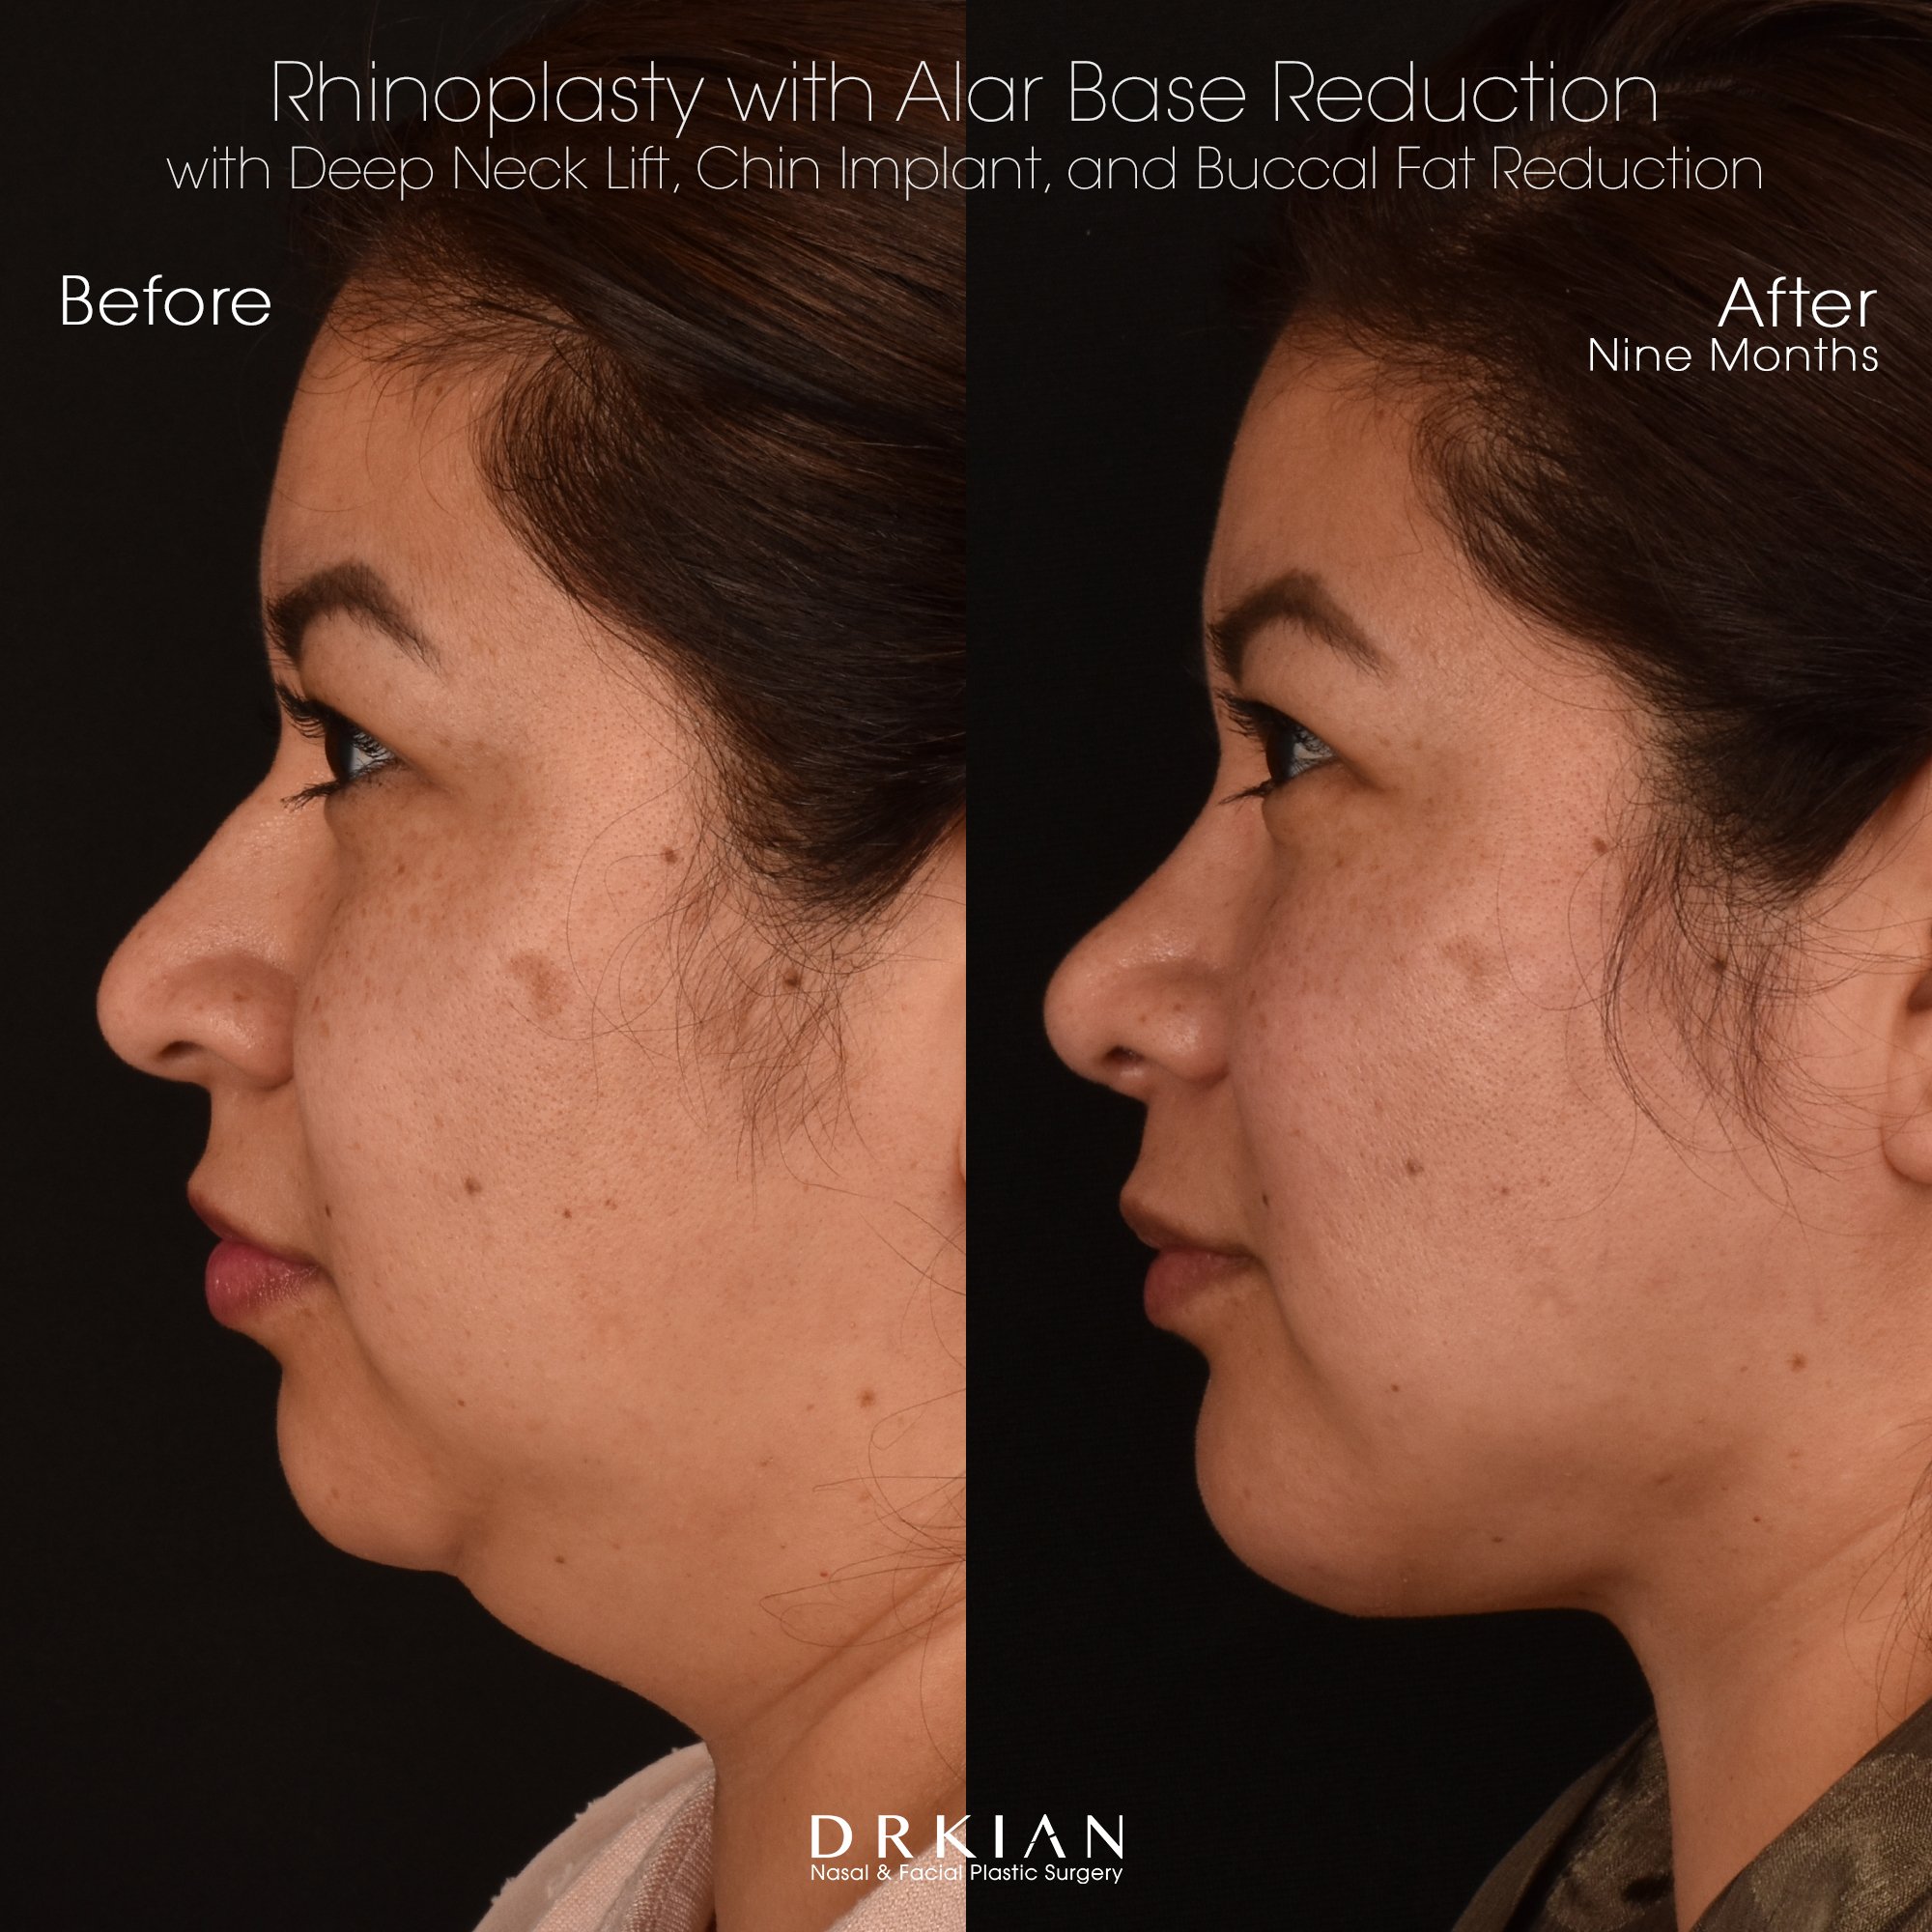
Rhinoplasty with Alar Base Reduction, Bilateral Turbinoplasty, Chin Implant, Deep Neck Lift and Buccal Fat Reduction: Before & After Nine Months

Rhinoplasty with Alar Base Reduction, Bilateral Turbinoplasty, Chin Implant, Deep Neck Lift and Buccal Fat Reduction: Before & After Nine Months

Rhinoplasty with Alar Base Reduction, Bilateral Turbinoplasty, Chin Implant, Deep Neck Lift and Buccal Fat Reduction: Before & After Nine Months

Rhinoplasty with Alar Base Reduction, Bilateral Turbinoplasty, Chin Implant, Deep Neck Lift and Buccal Fat Reduction: Before & After Nine Months

Rhinoplasty with Alar Base Reduction, Bilateral Turbinoplasty, Chin Implant, Deep Neck Lift and Buccal Fat Reduction: Before & After Nine Months

Rhinoplasty with Alar Base Reduction, Bilateral Turbinoplasty, Chin Implant, Deep Neck Lift and Buccal Fat Reduction: Before & After Nine Months
Rhinoplasty with Alar Base Reduction, Bilateral Turbinoplasty, Chin Implant, Deep Neck Lift and Buccal Fat Reduction: Before & After Nine Months

Rhinoplasty with Alar Base Reduction, Bilateral Turbinoplasty, Chin Implant, Deep Neck Lift and Buccal Fat Reduction: Before & After Nine Months

Rhinoplasty with Alar Base Reduction, Bilateral Turbinoplasty, Chin Implant, Deep Neck Lift and Buccal Fat Reduction: Before & After Nine Months

Rhinoplasty with Alar Base Reduction, Bilateral Turbinoplasty, Chin Implant, Deep Neck Lift and Buccal Fat Reduction: Before & After Nine Months

Rhinoplasty with Alar Base Reduction, Bilateral Turbinoplasty, Chin Implant, Deep Neck Lift and Buccal Fat Reduction: Before & After Nine Months

Rhinoplasty with Alar Base Reduction, Bilateral Turbinoplasty, Chin Implant, Deep Neck Lift and Buccal Fat Reduction: Before & After Nine Months
Rhinoplasty with Alar Base Reduction, Bilateral Turbinoplasty, Chin Implant, Deep Neck Lift and Buccal Fat Reduction: Before & After Nine Months

Rhinoplasty with Alar Base Reduction, Bilateral Turbinoplasty, Chin Implant, Deep Neck Lift and Buccal Fat Reduction: Before & After Nine Months
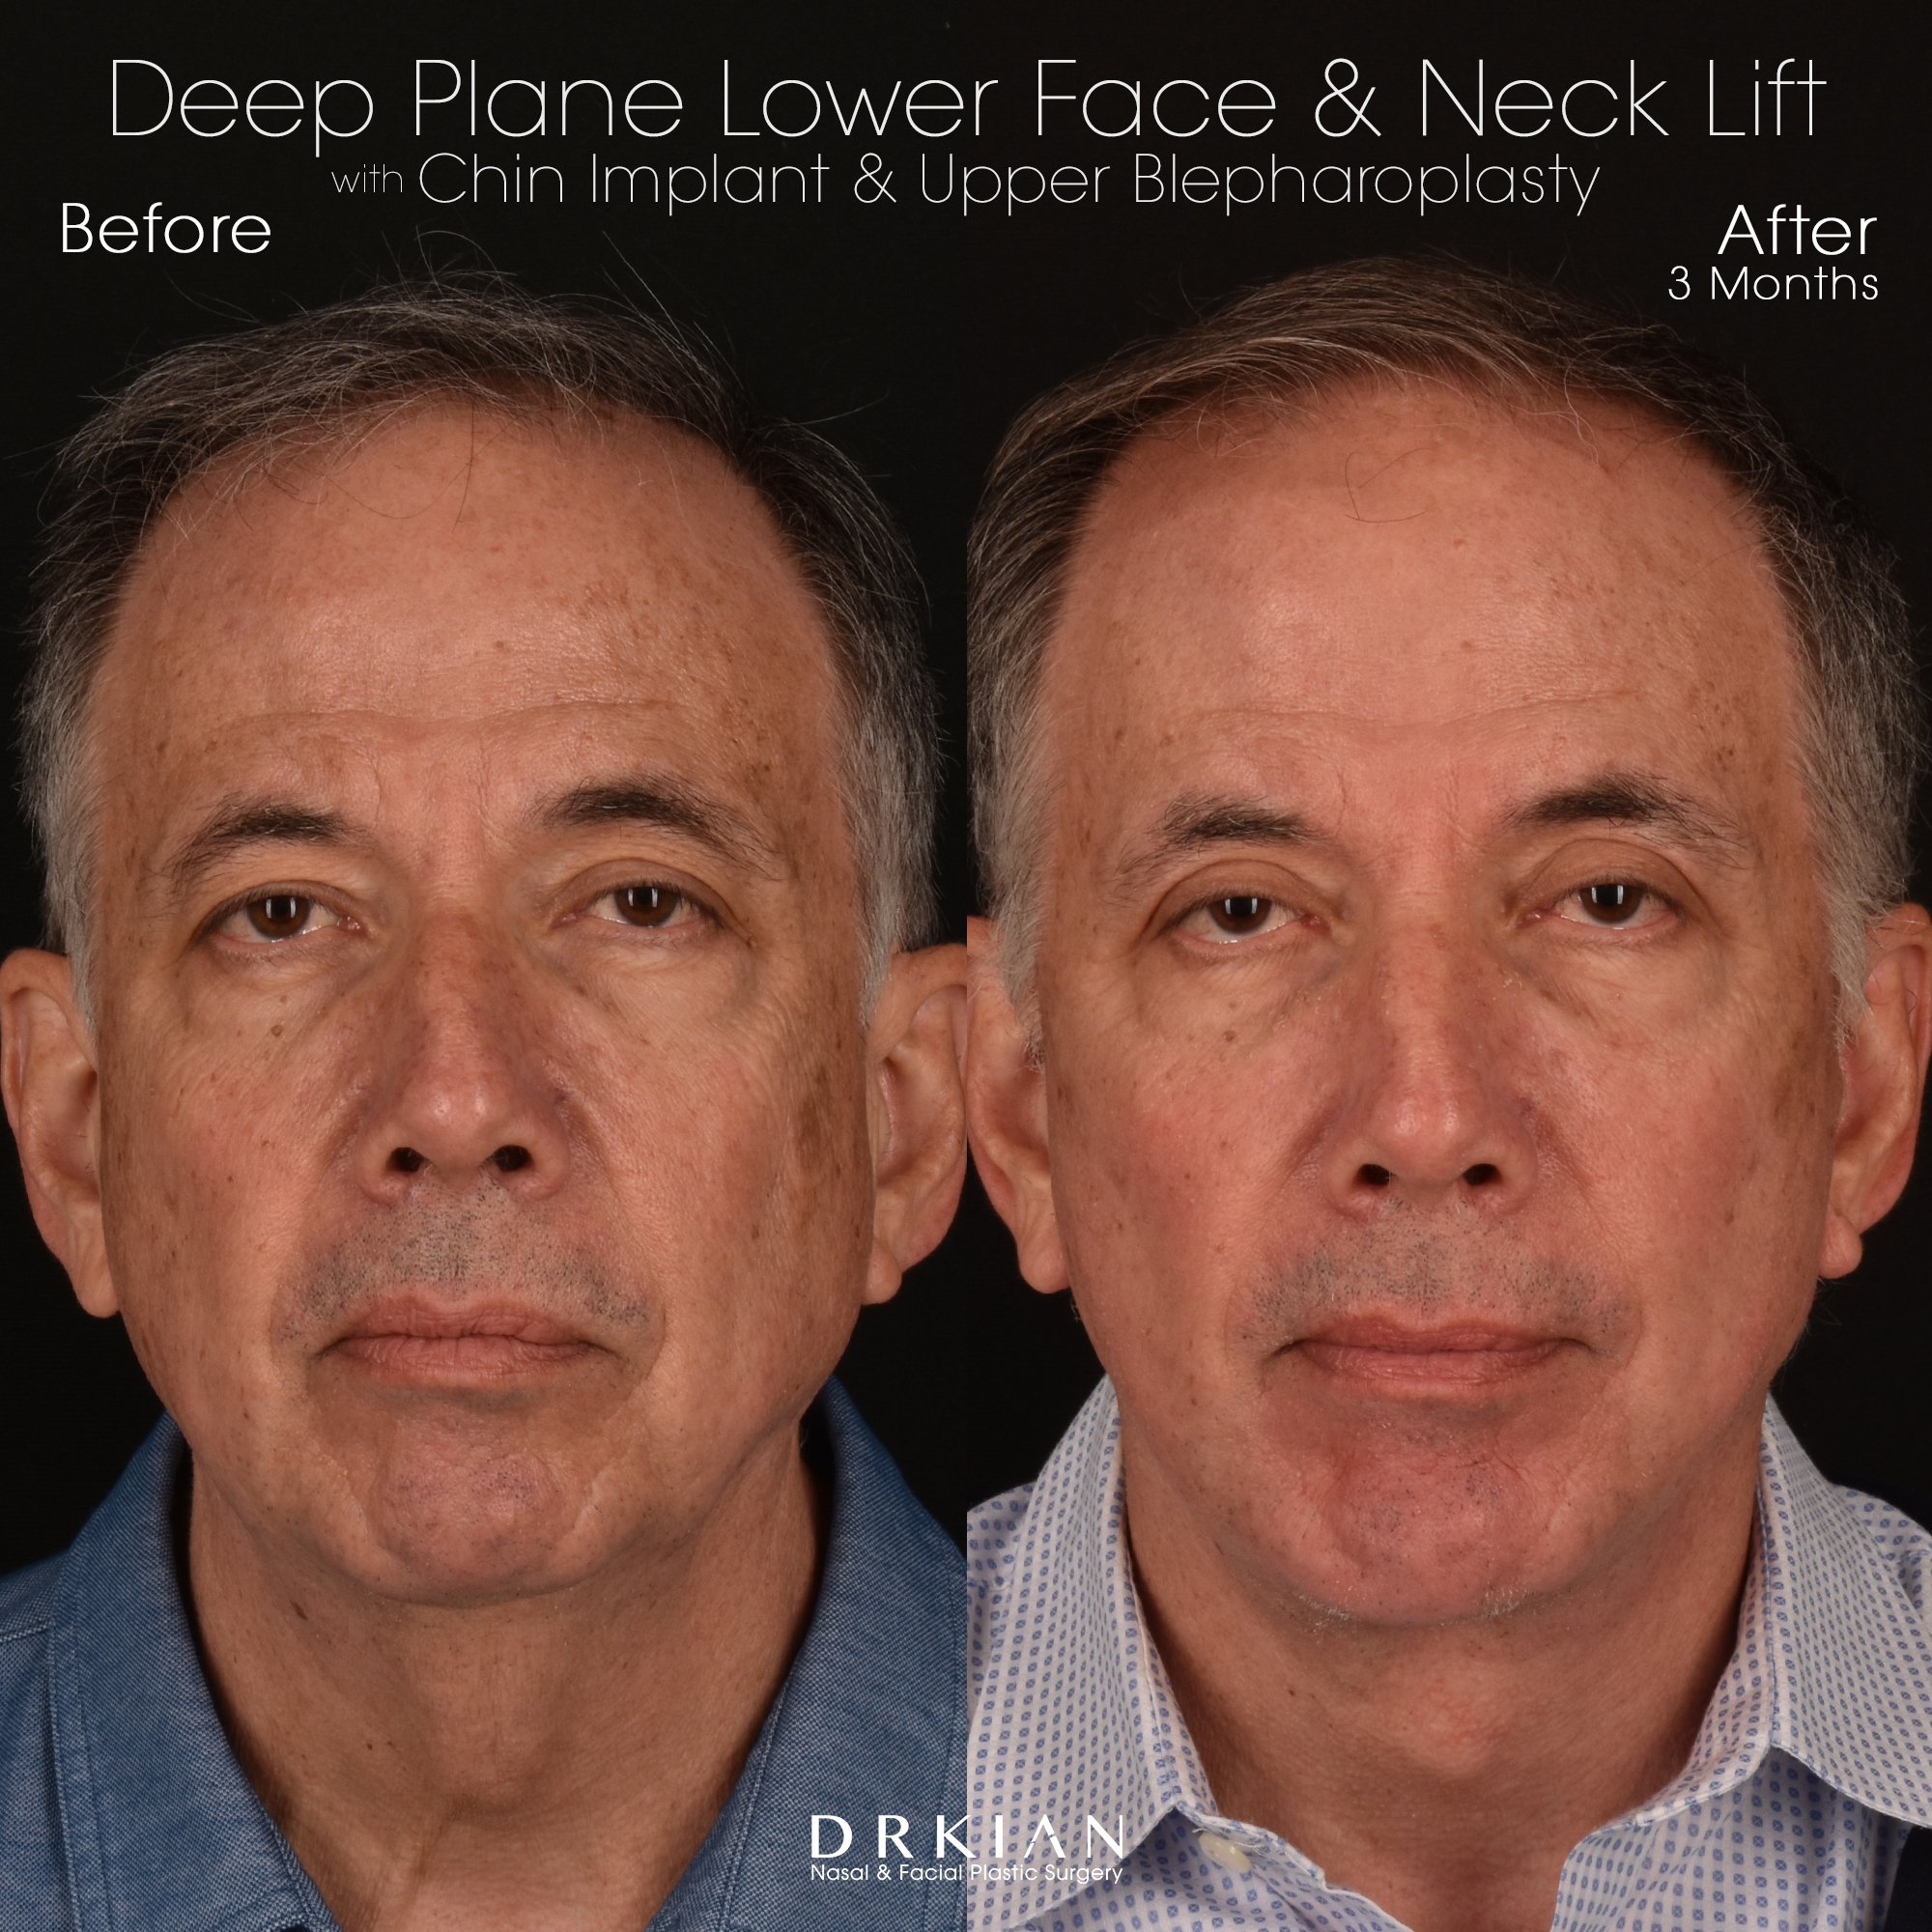
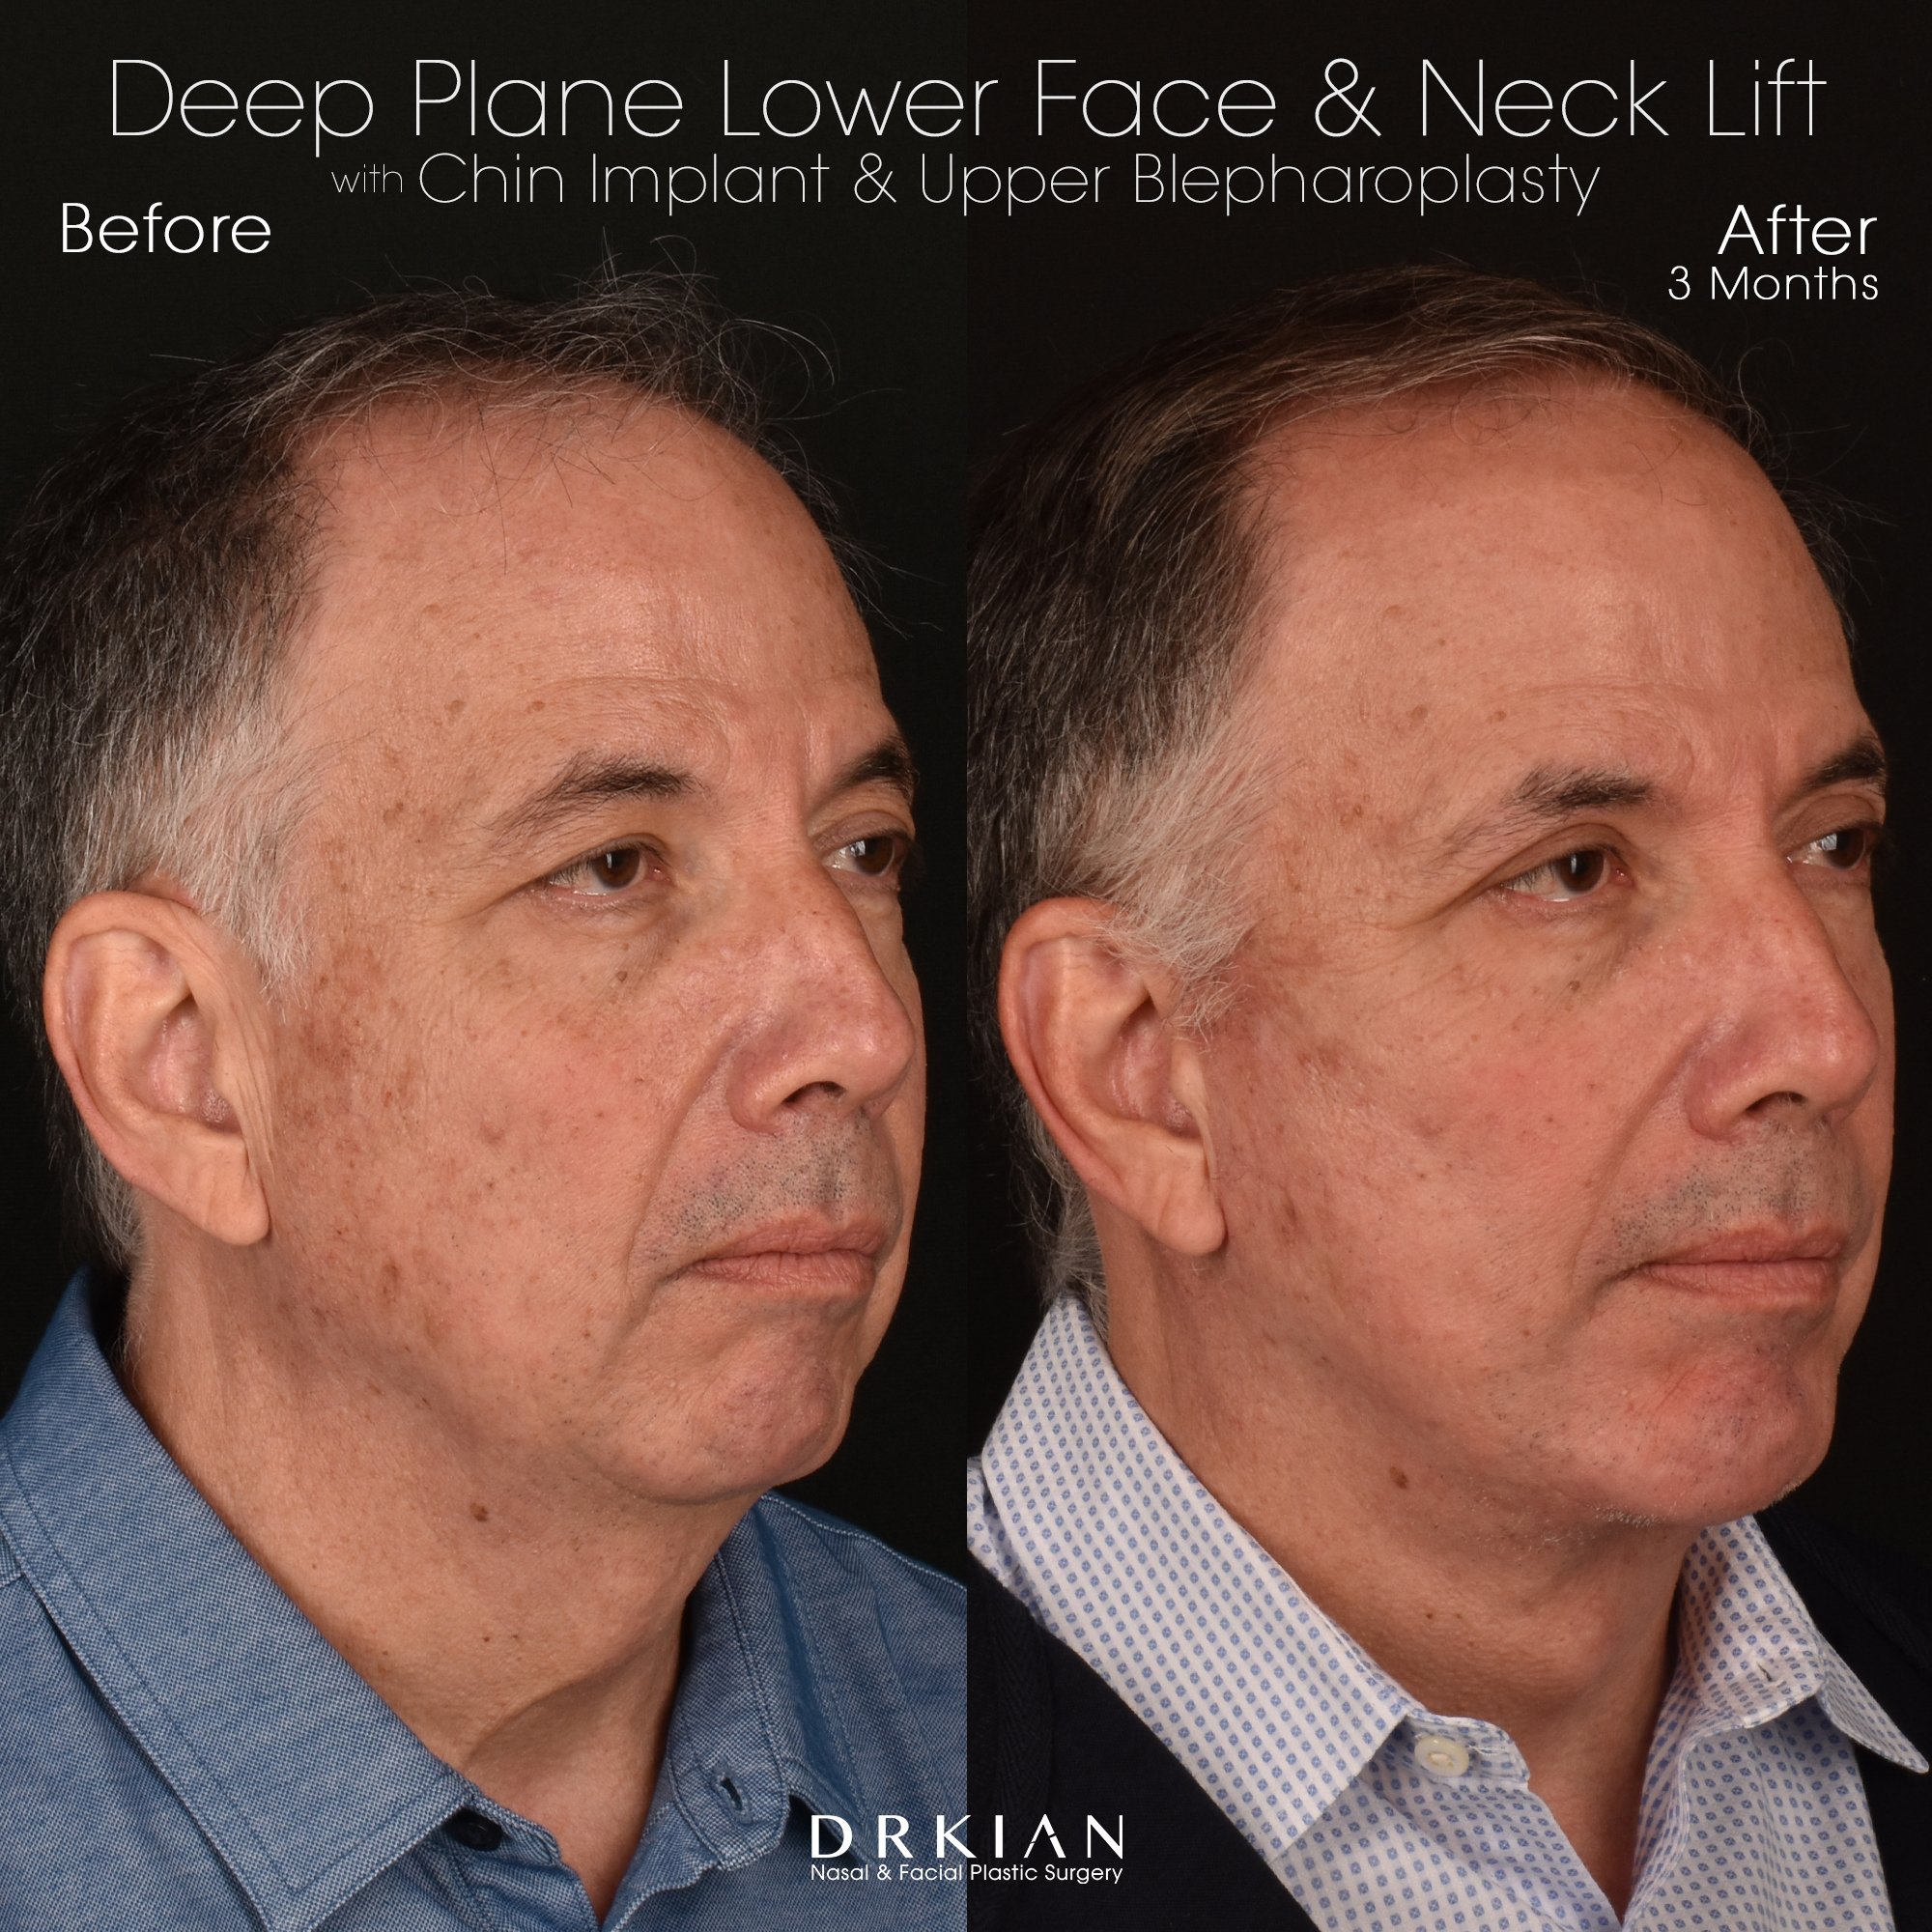
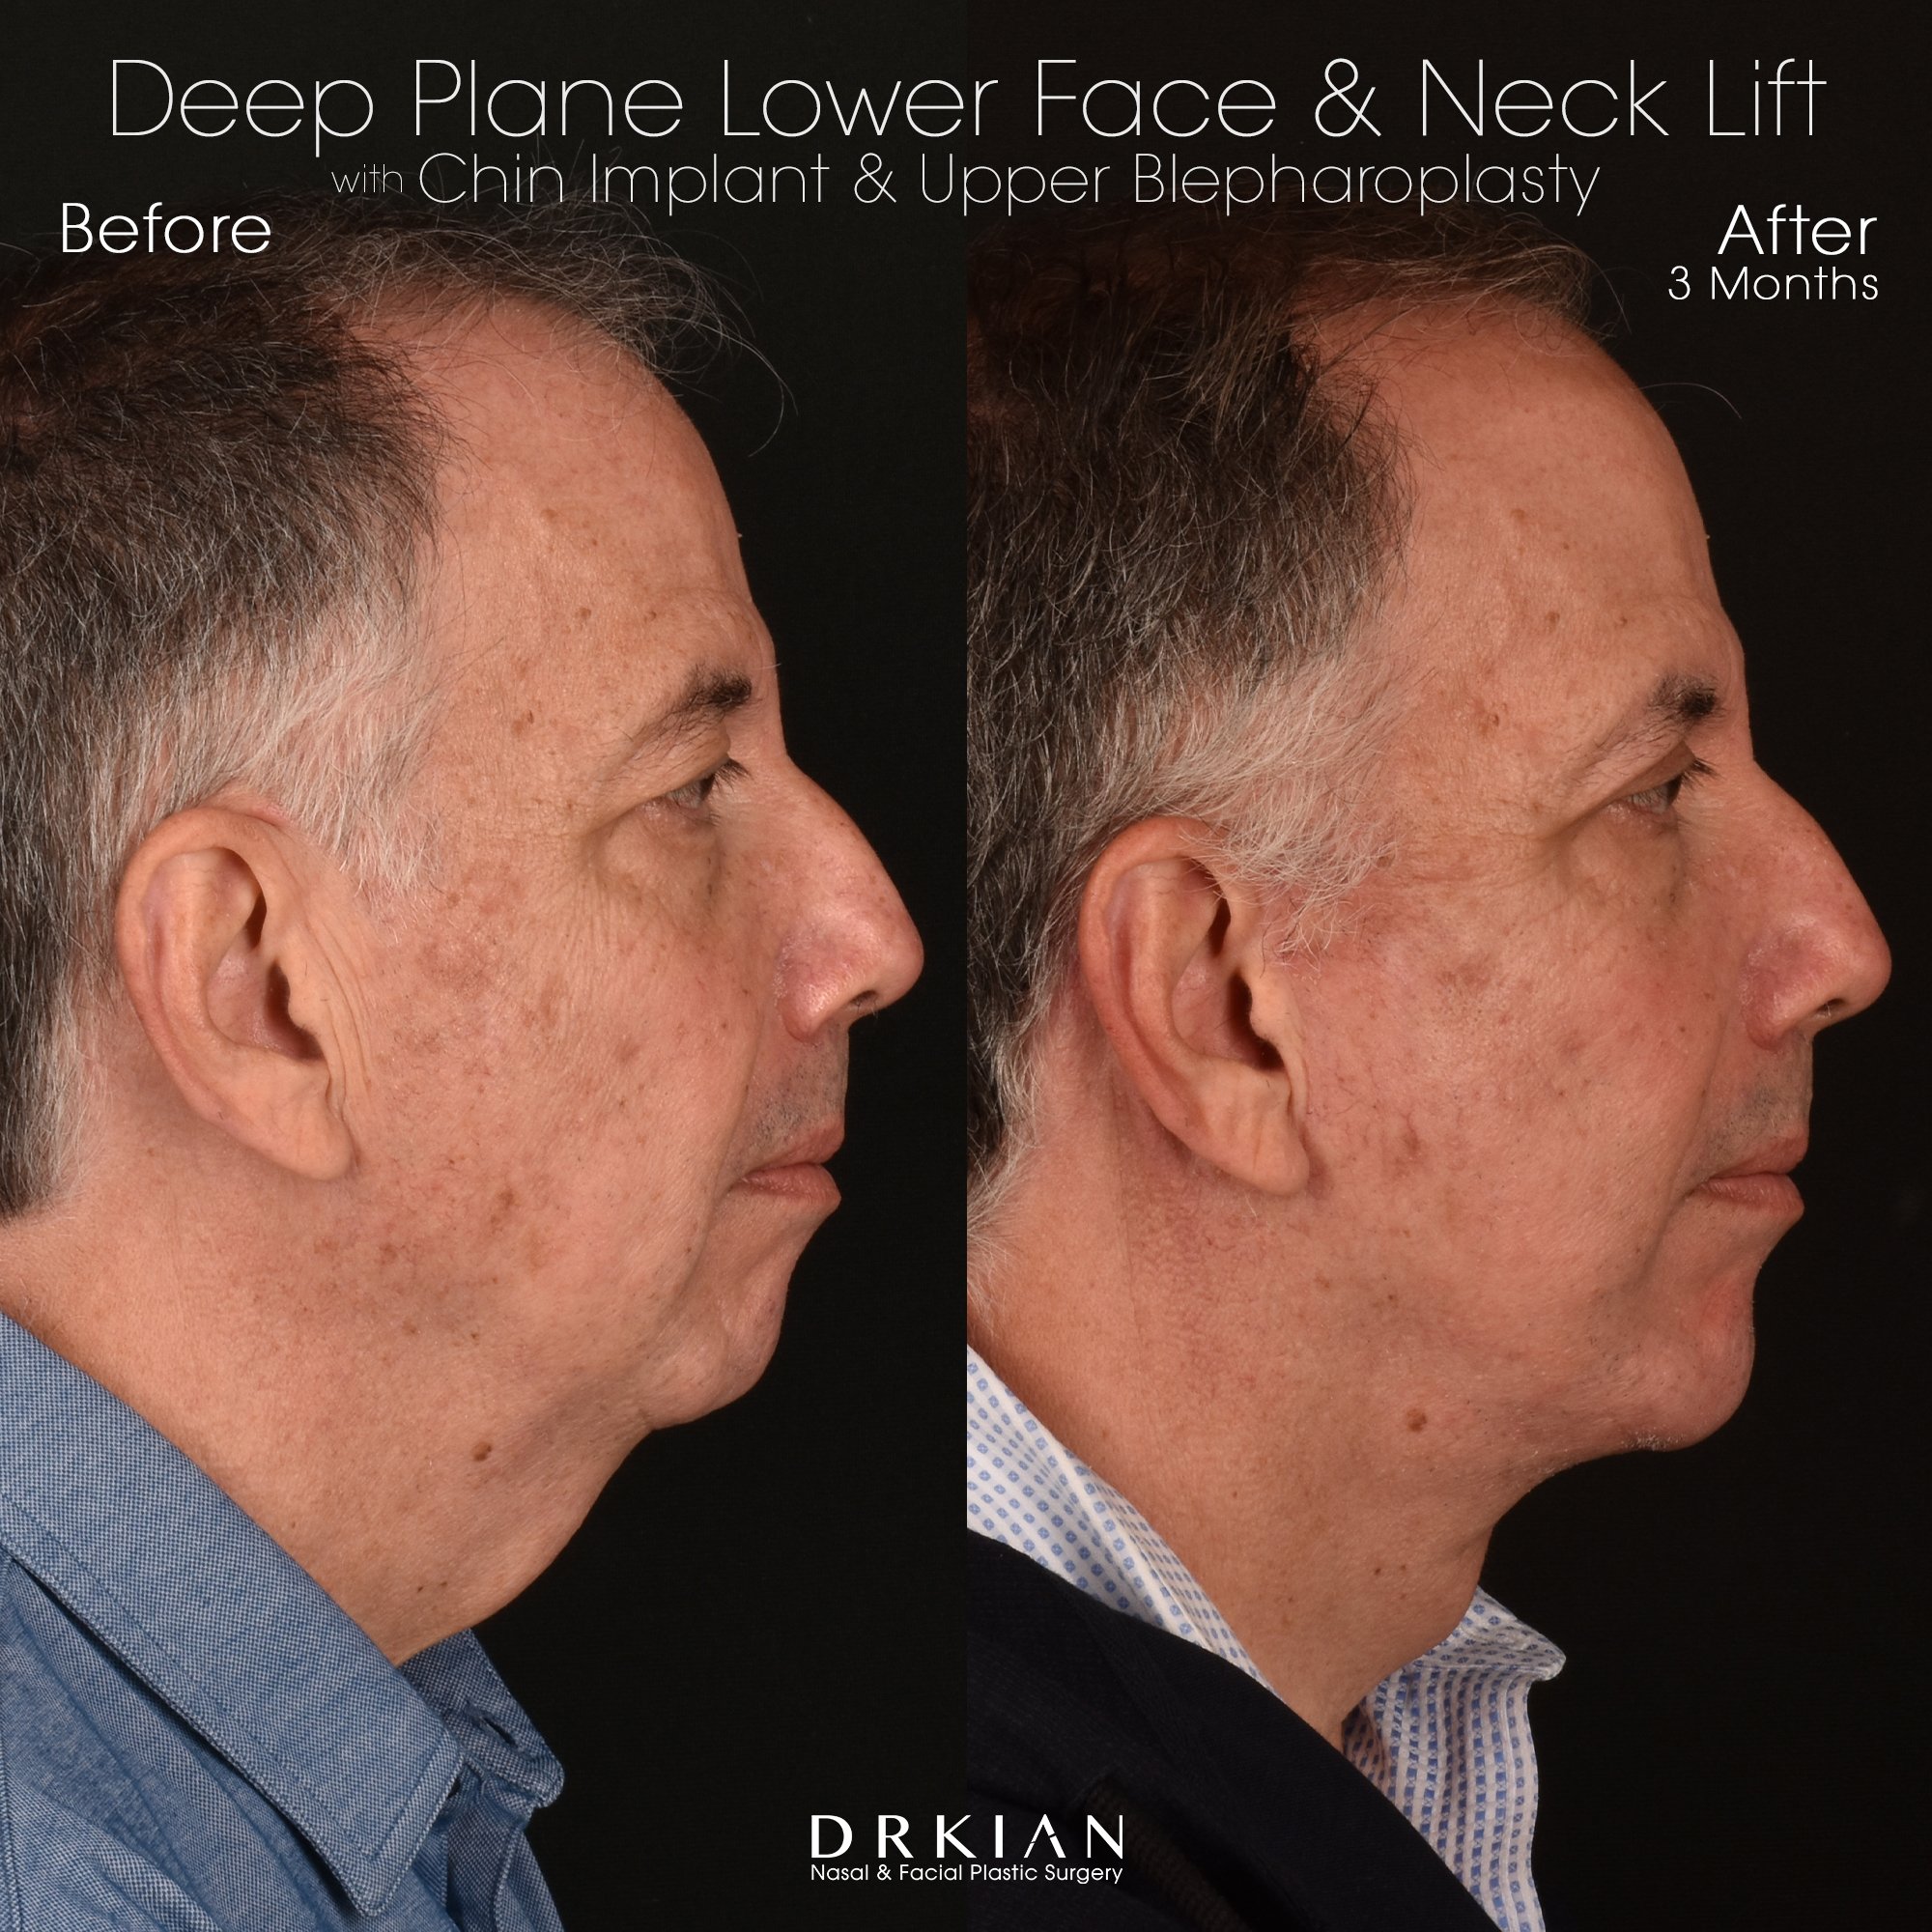
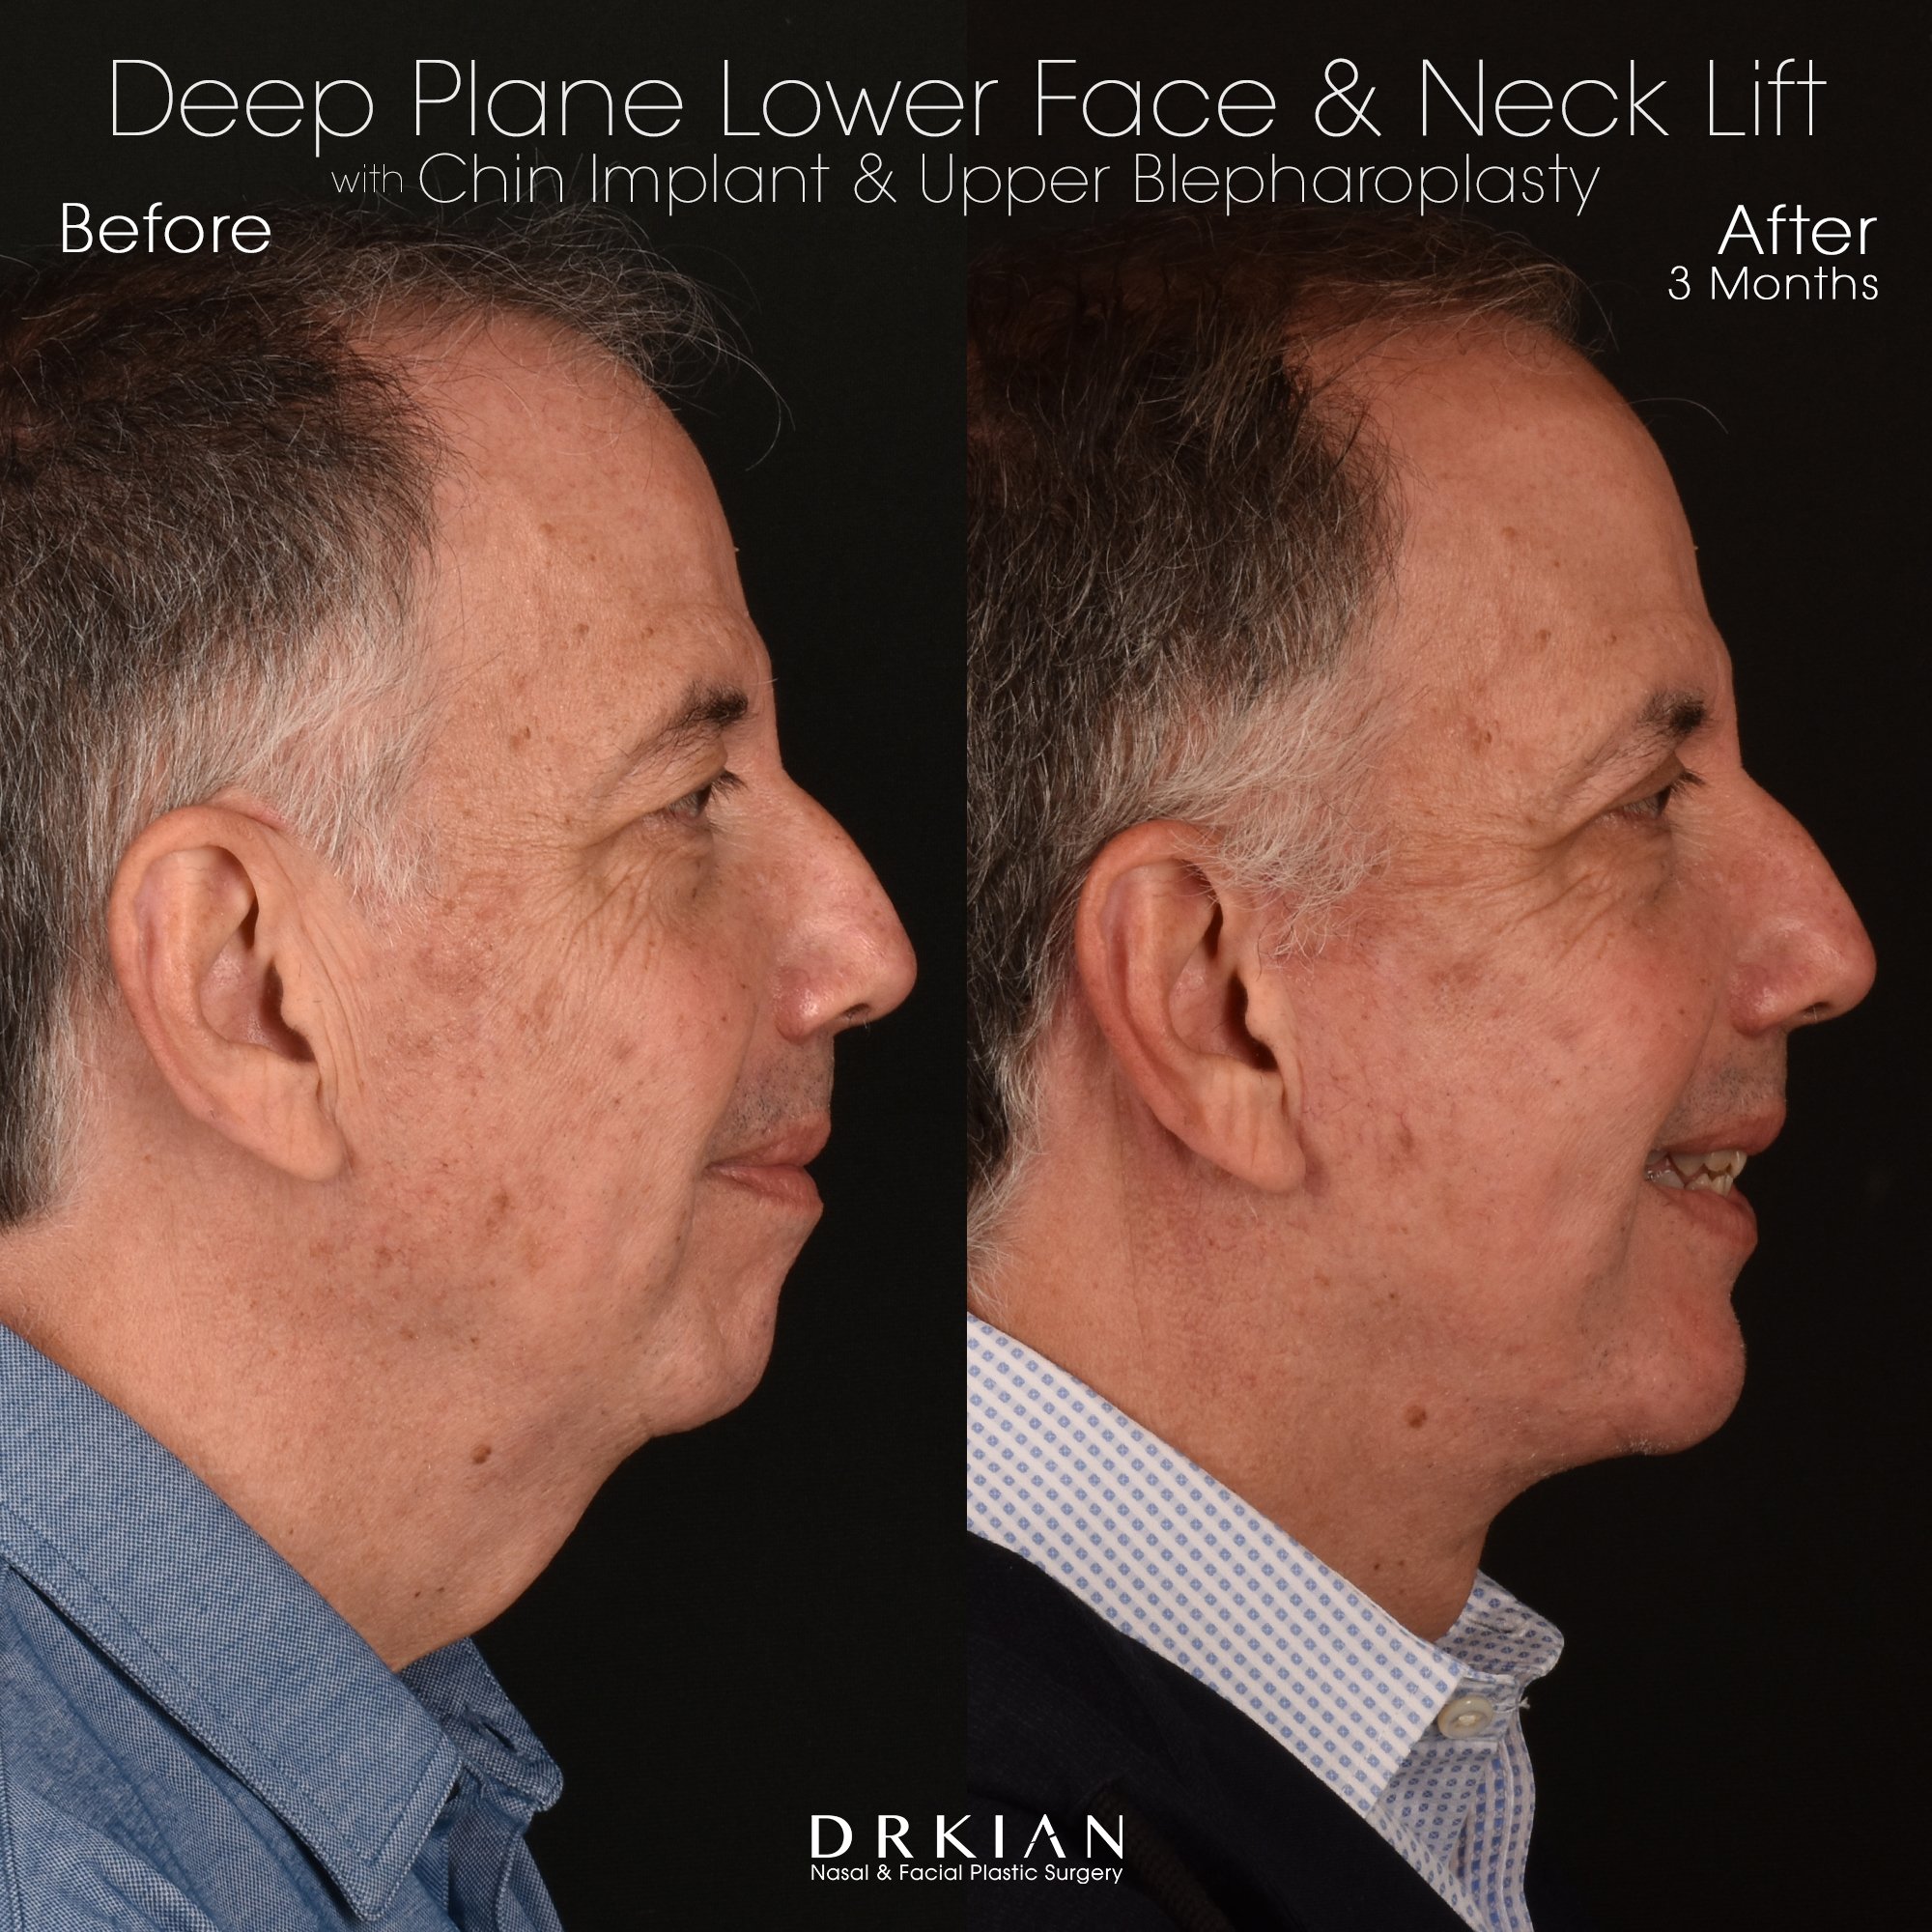
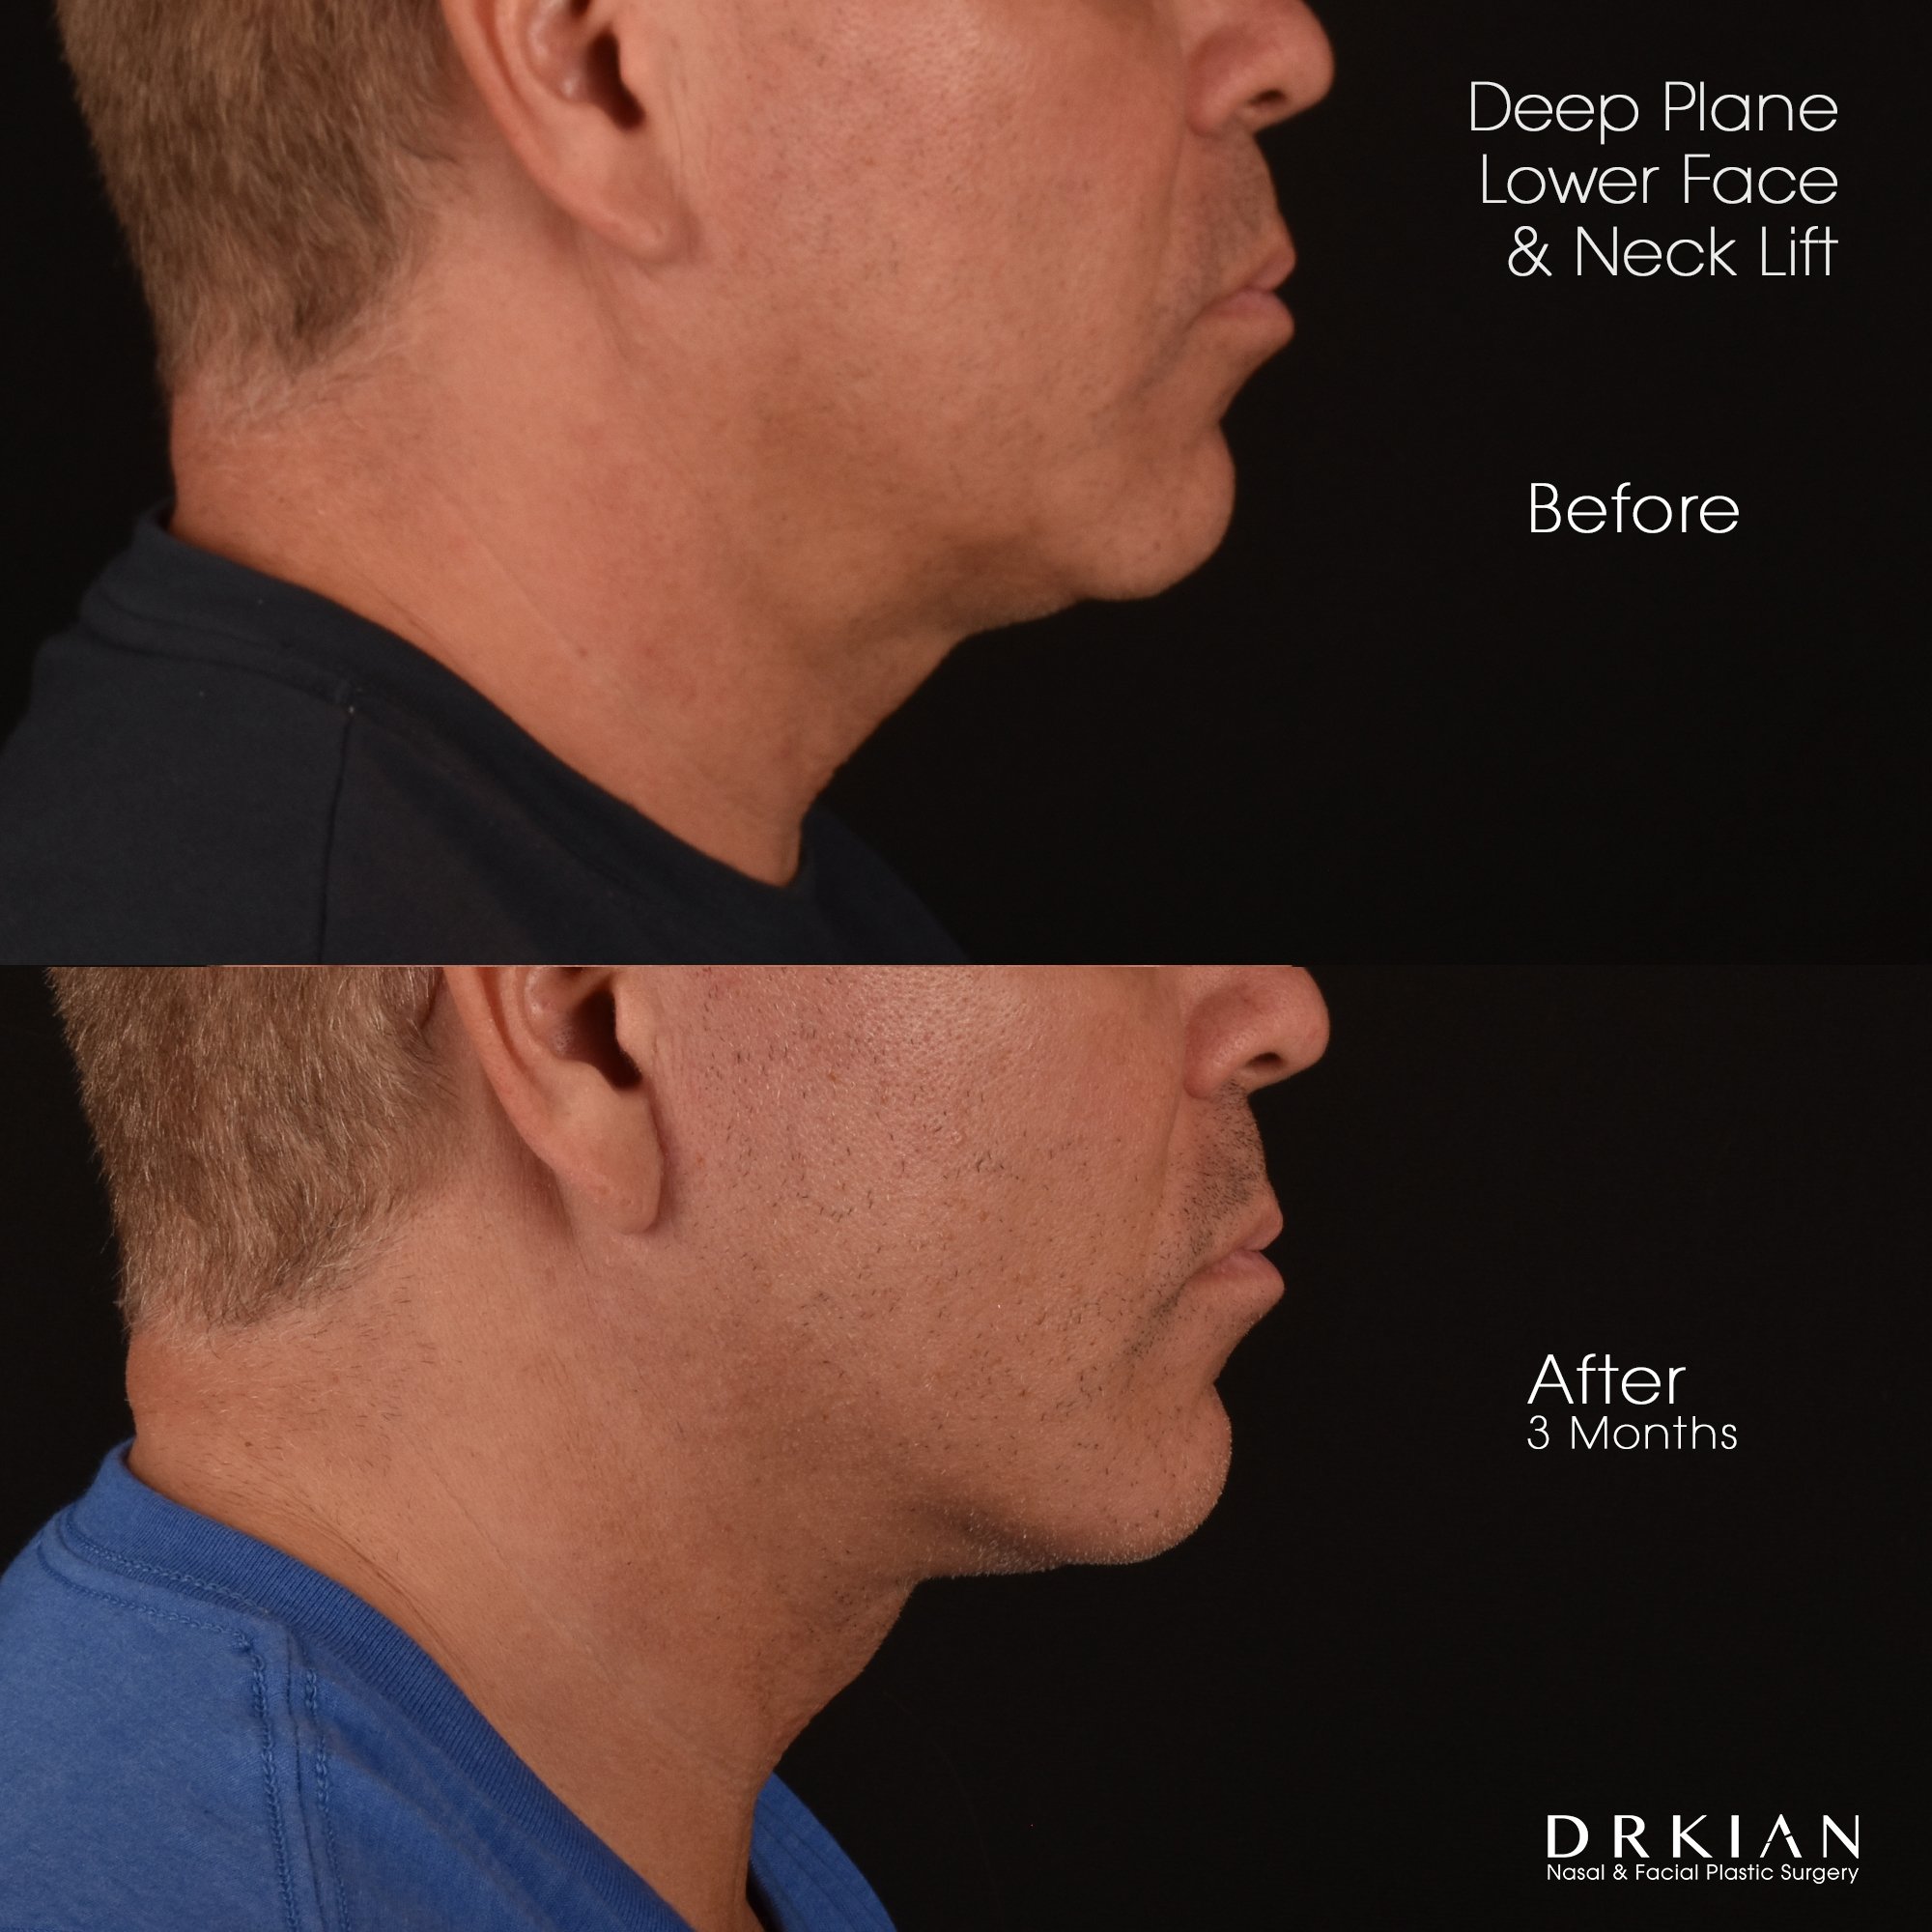
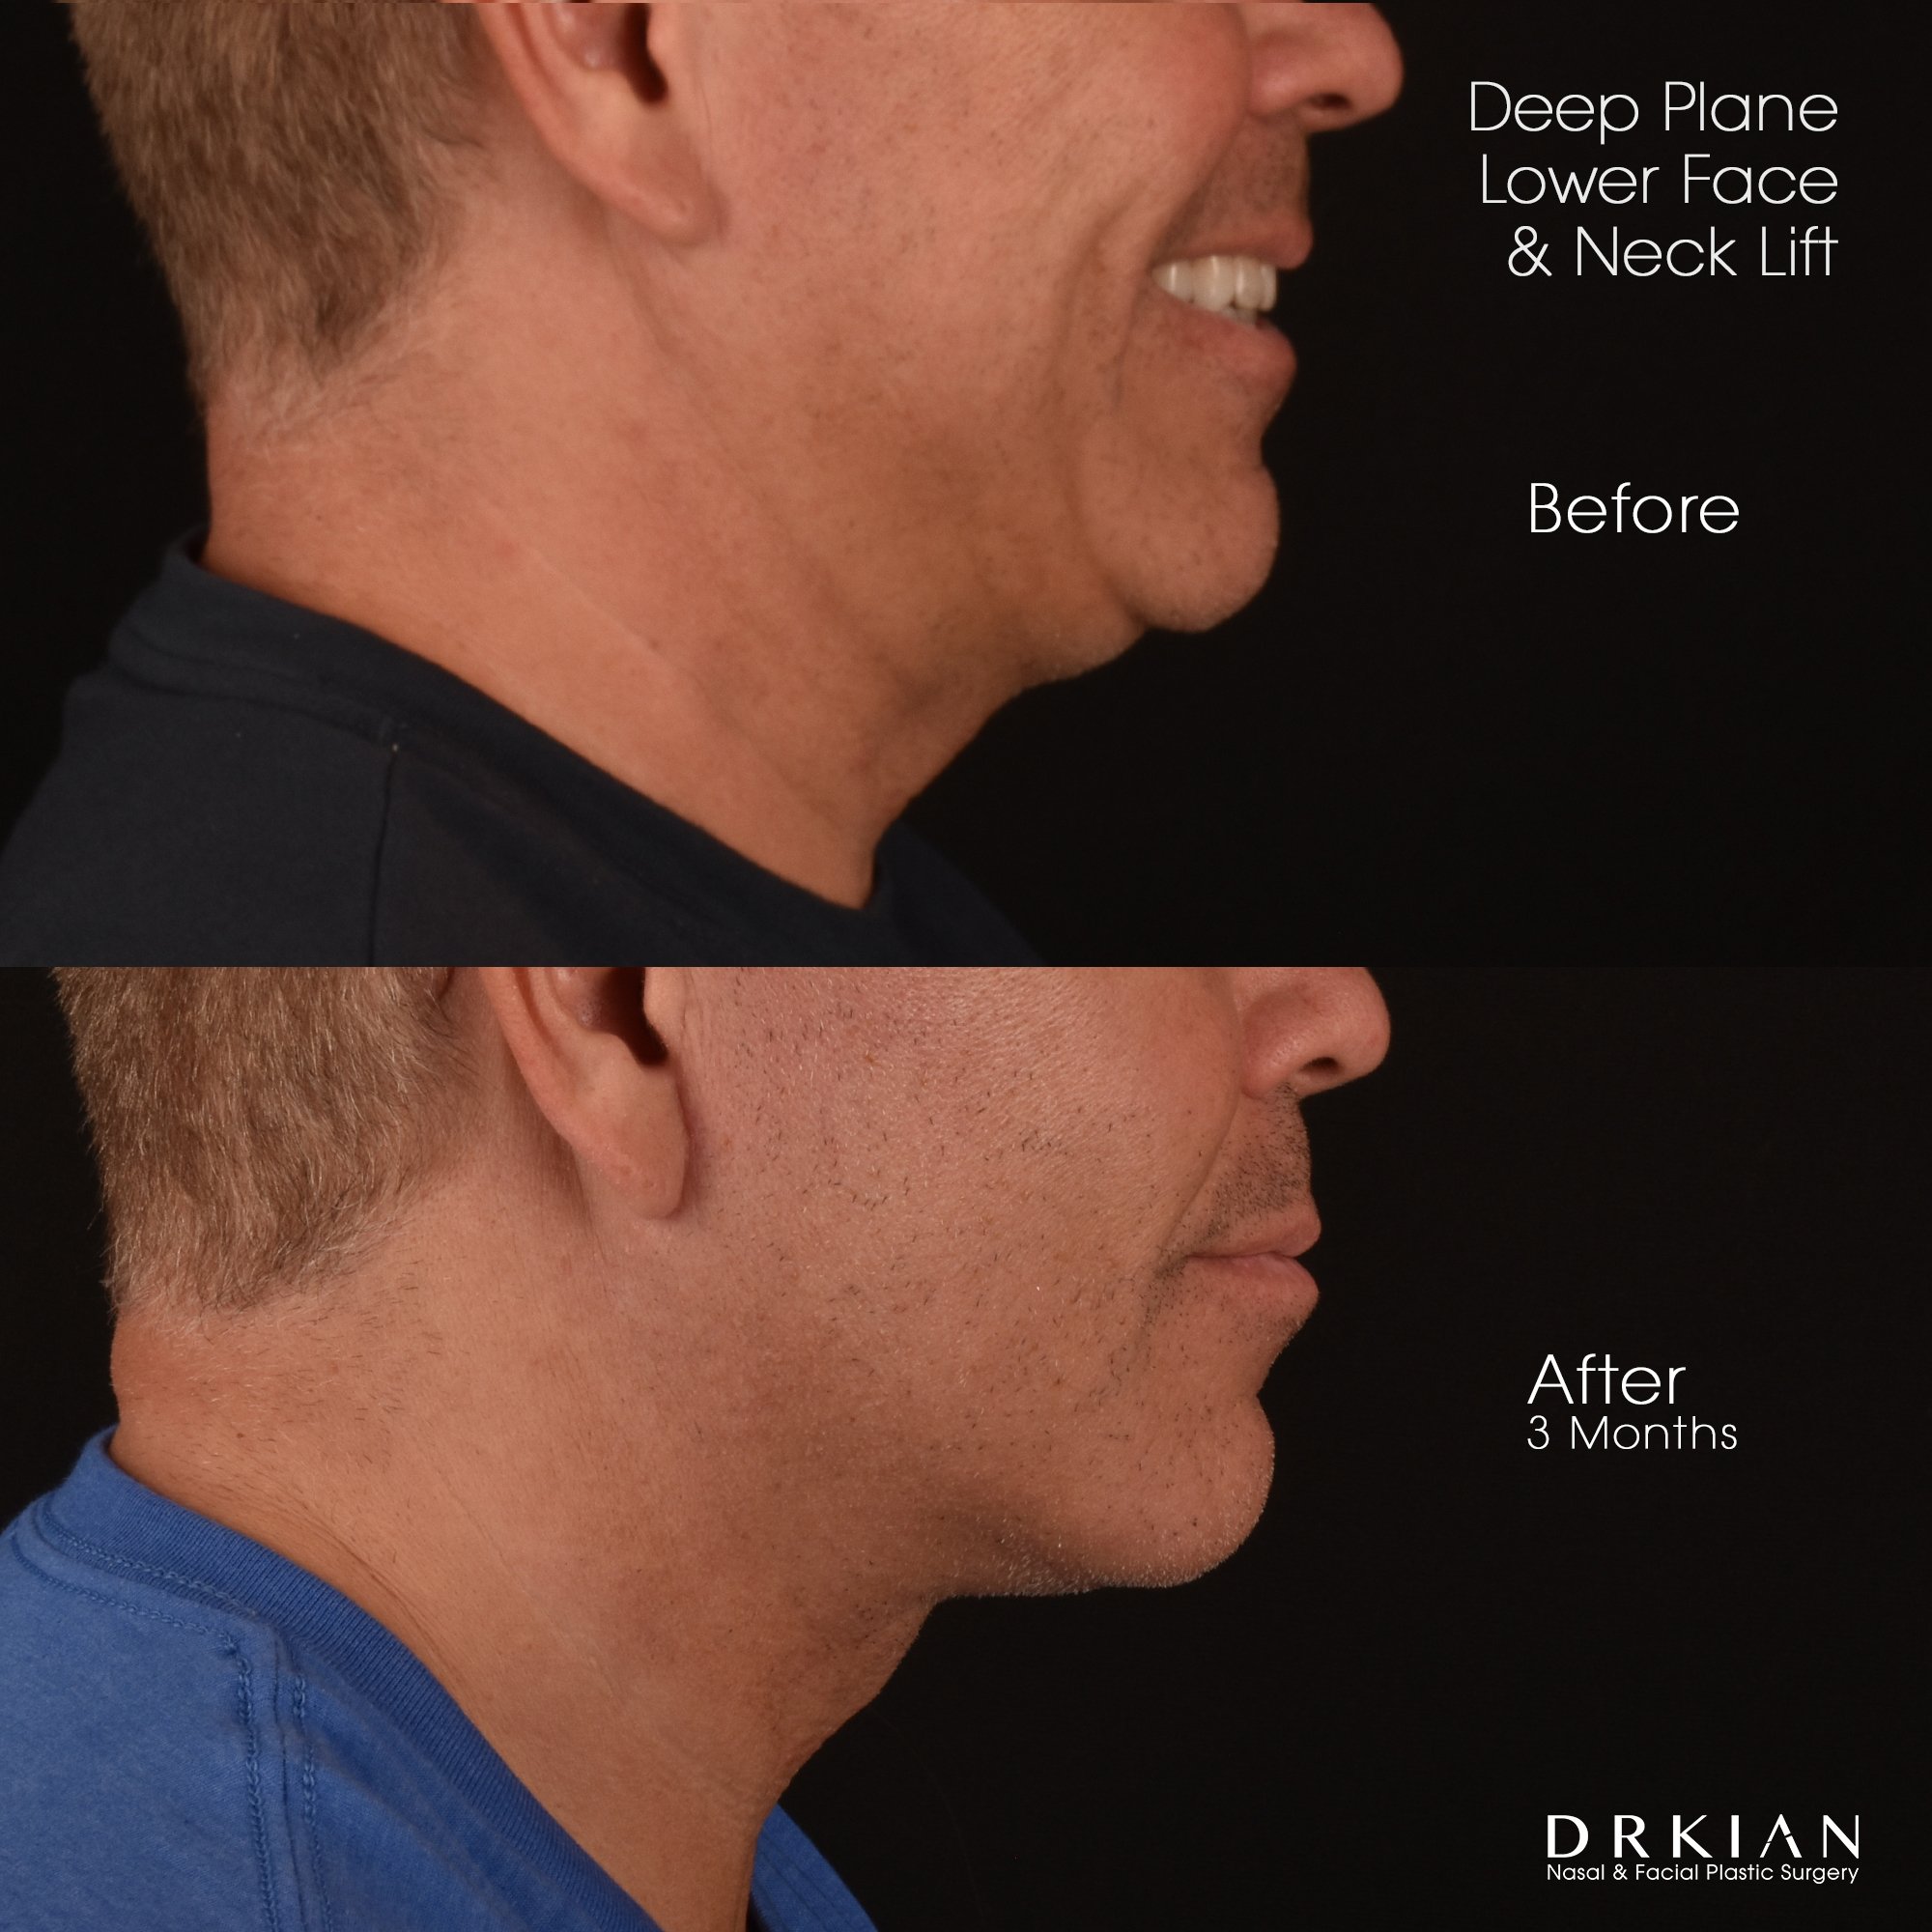
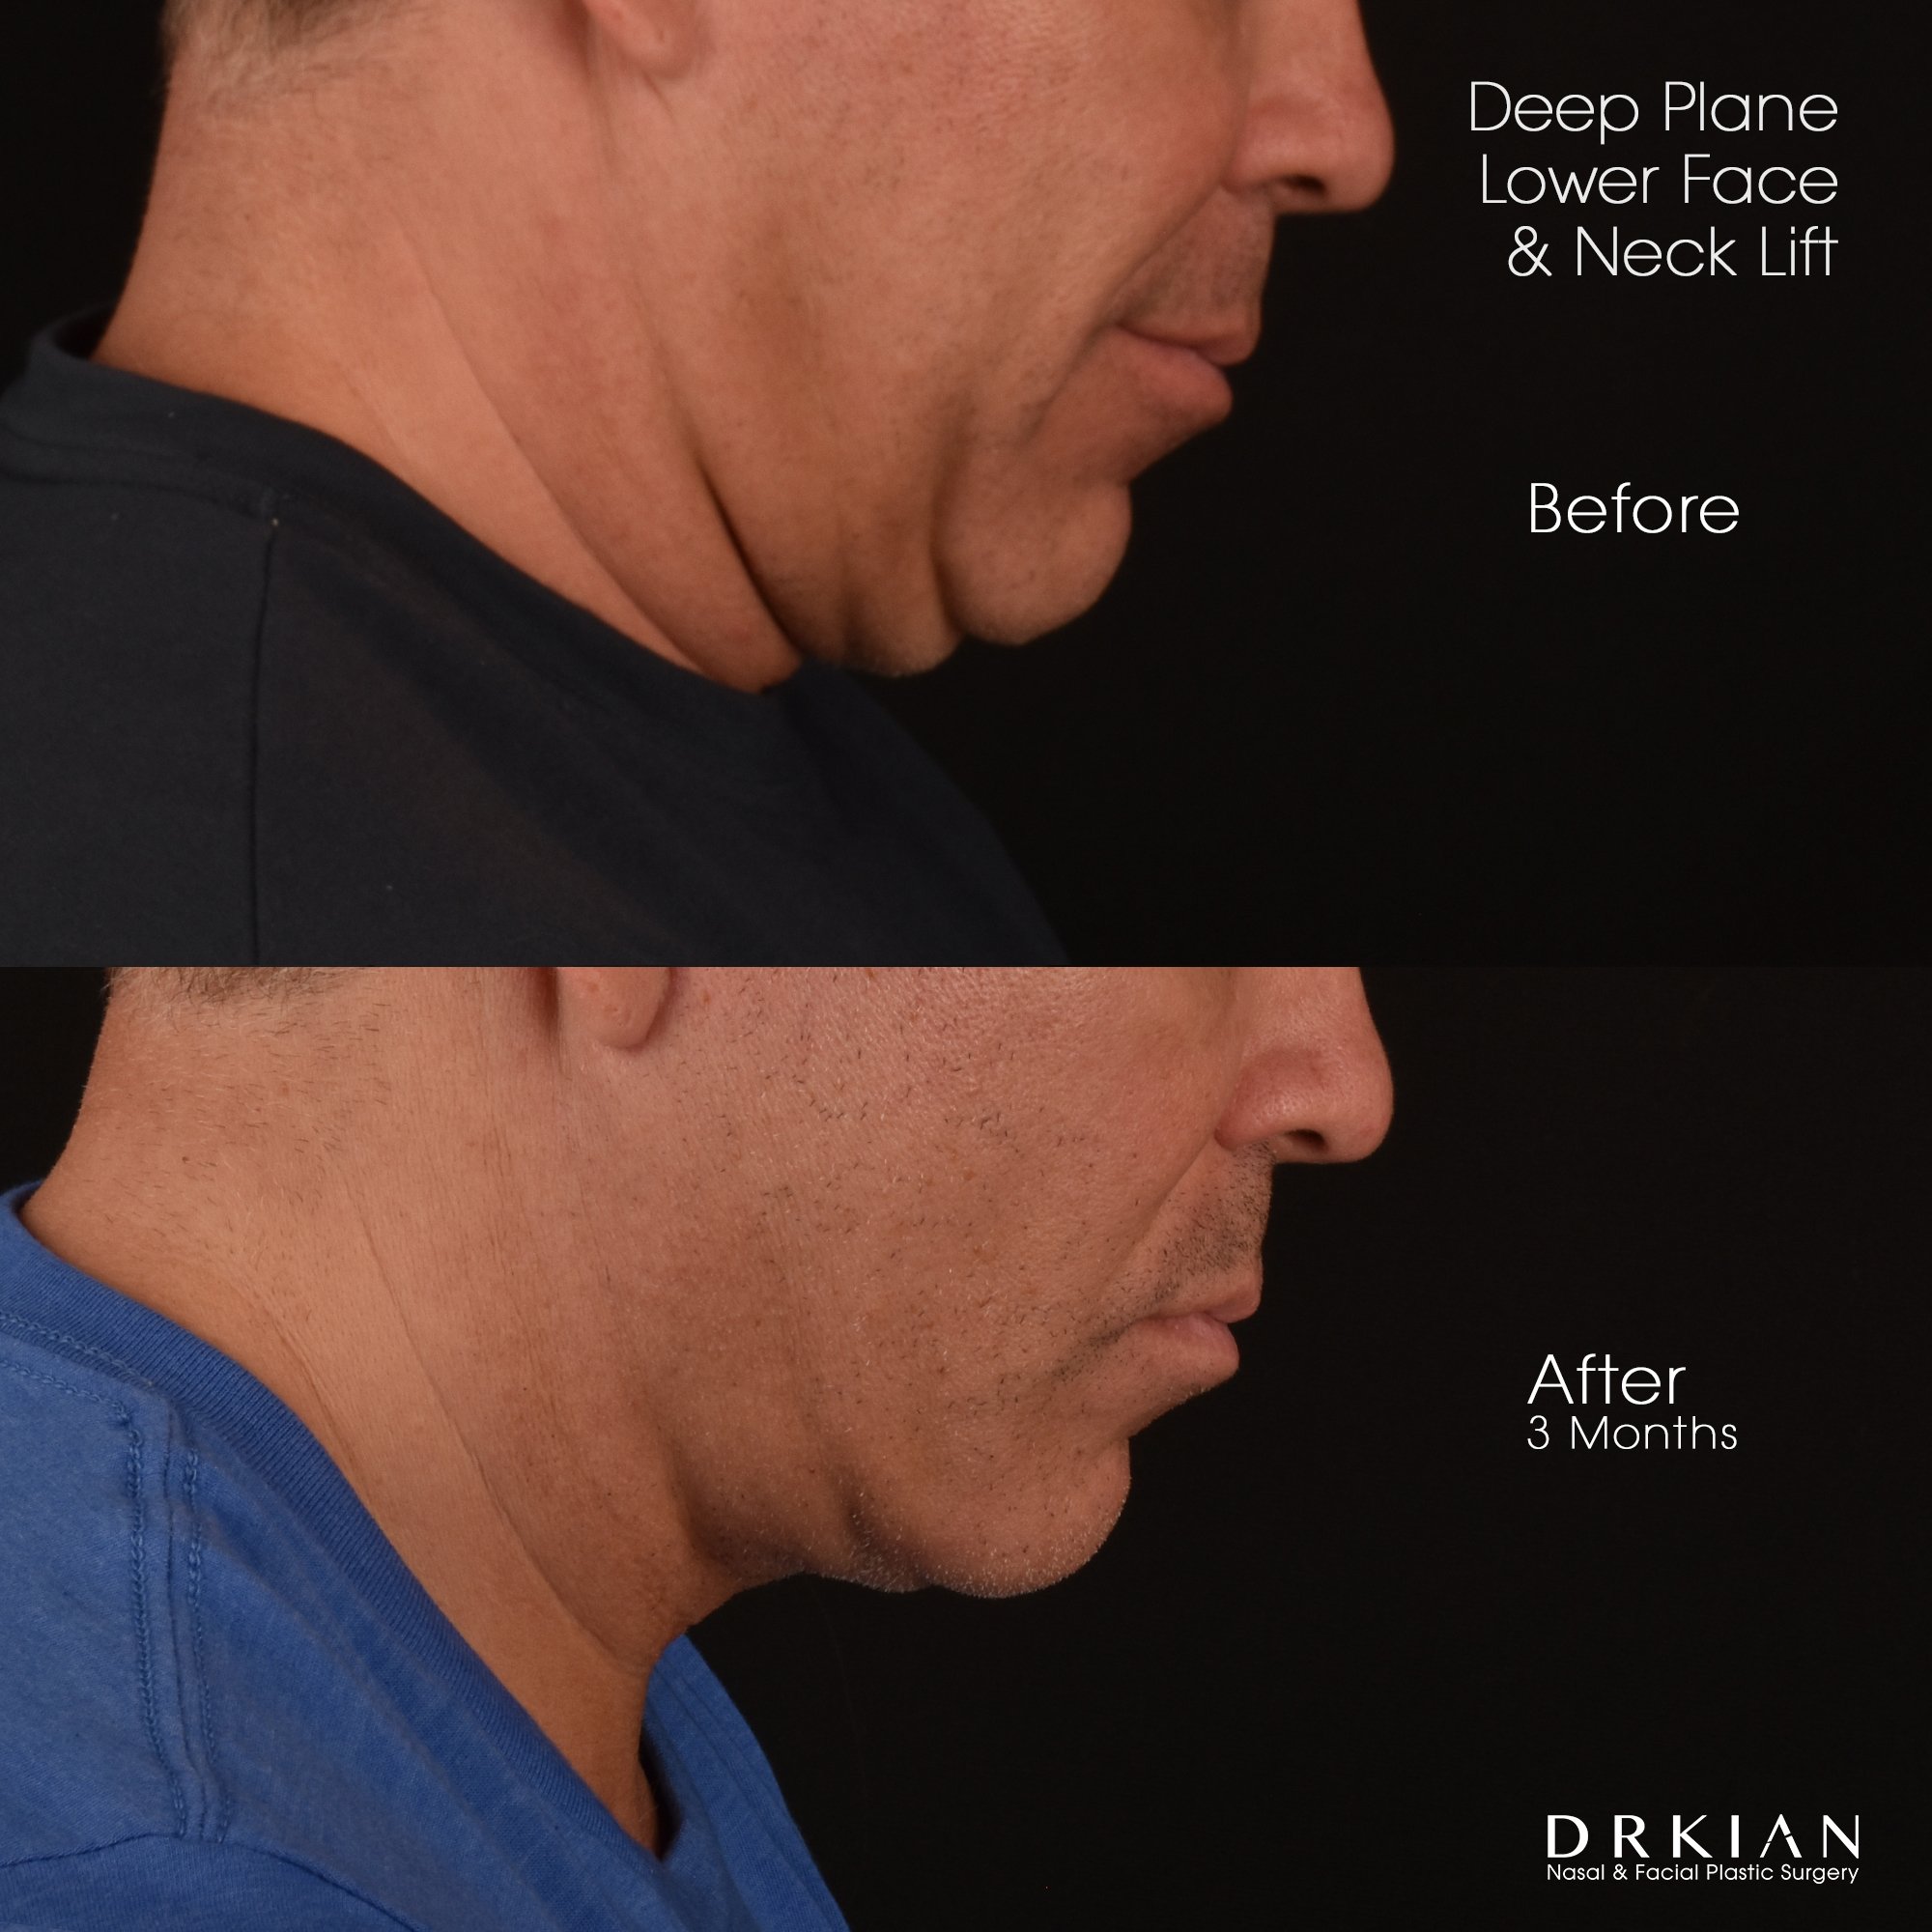
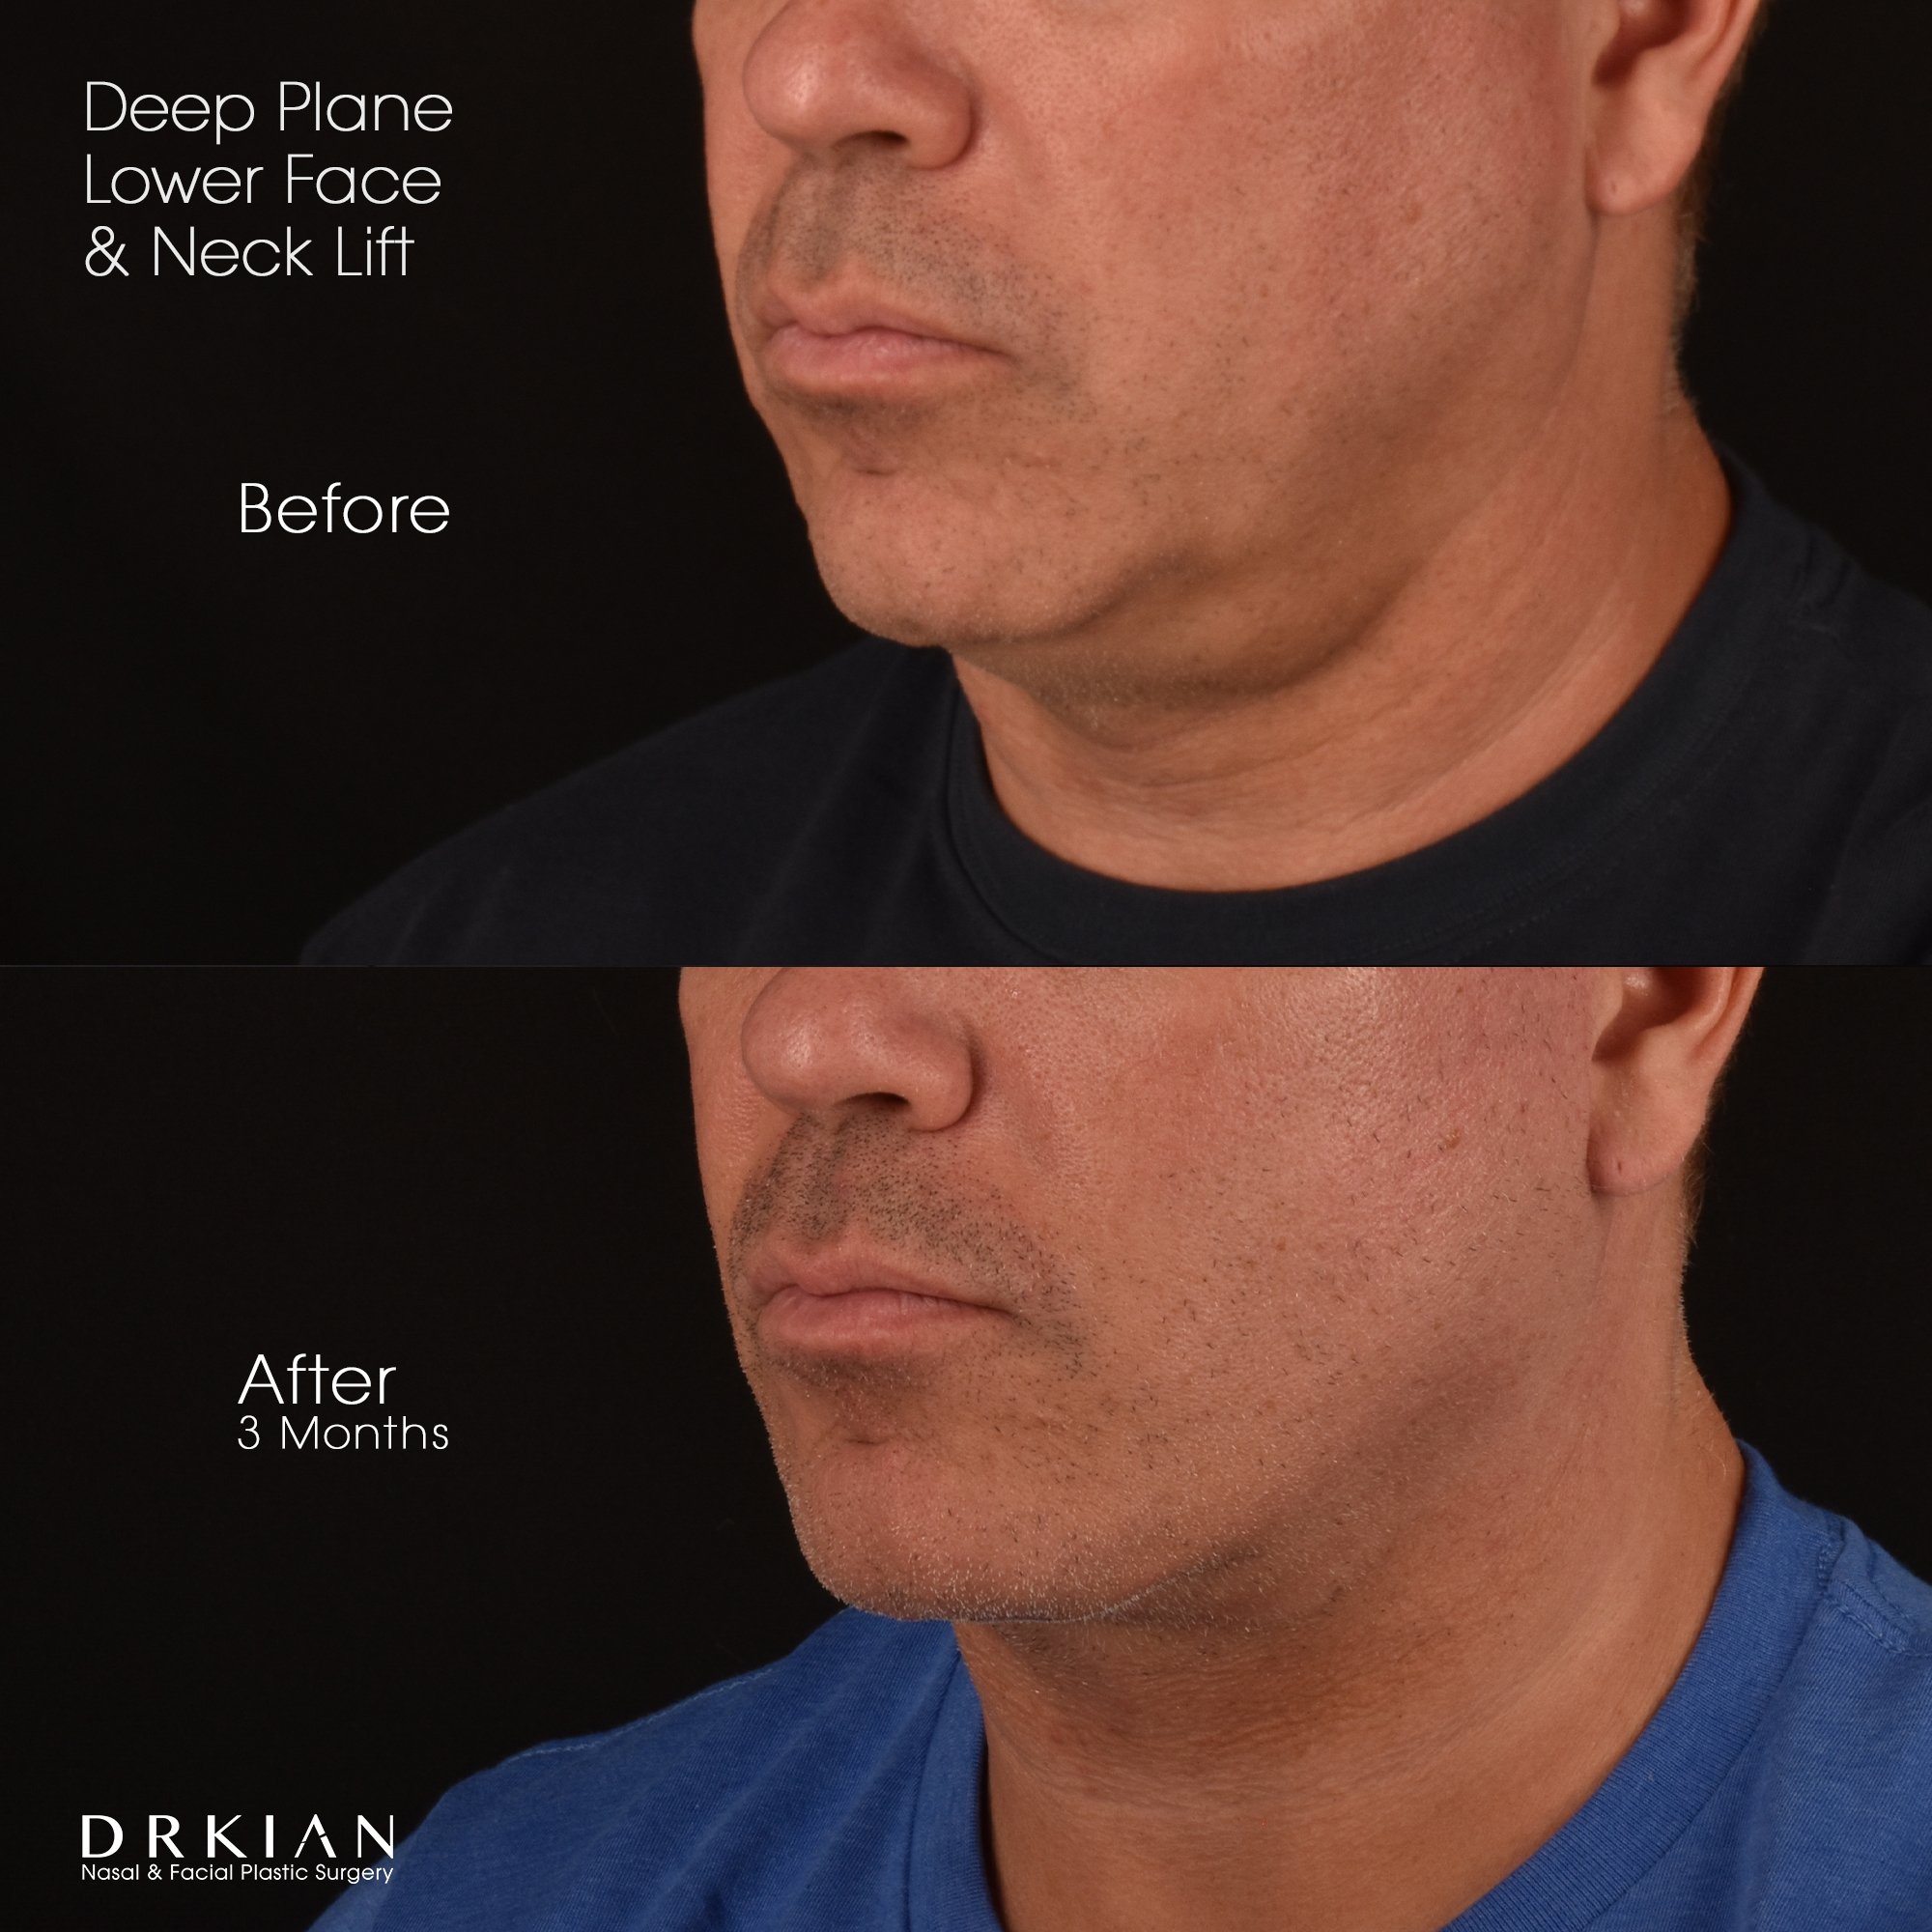
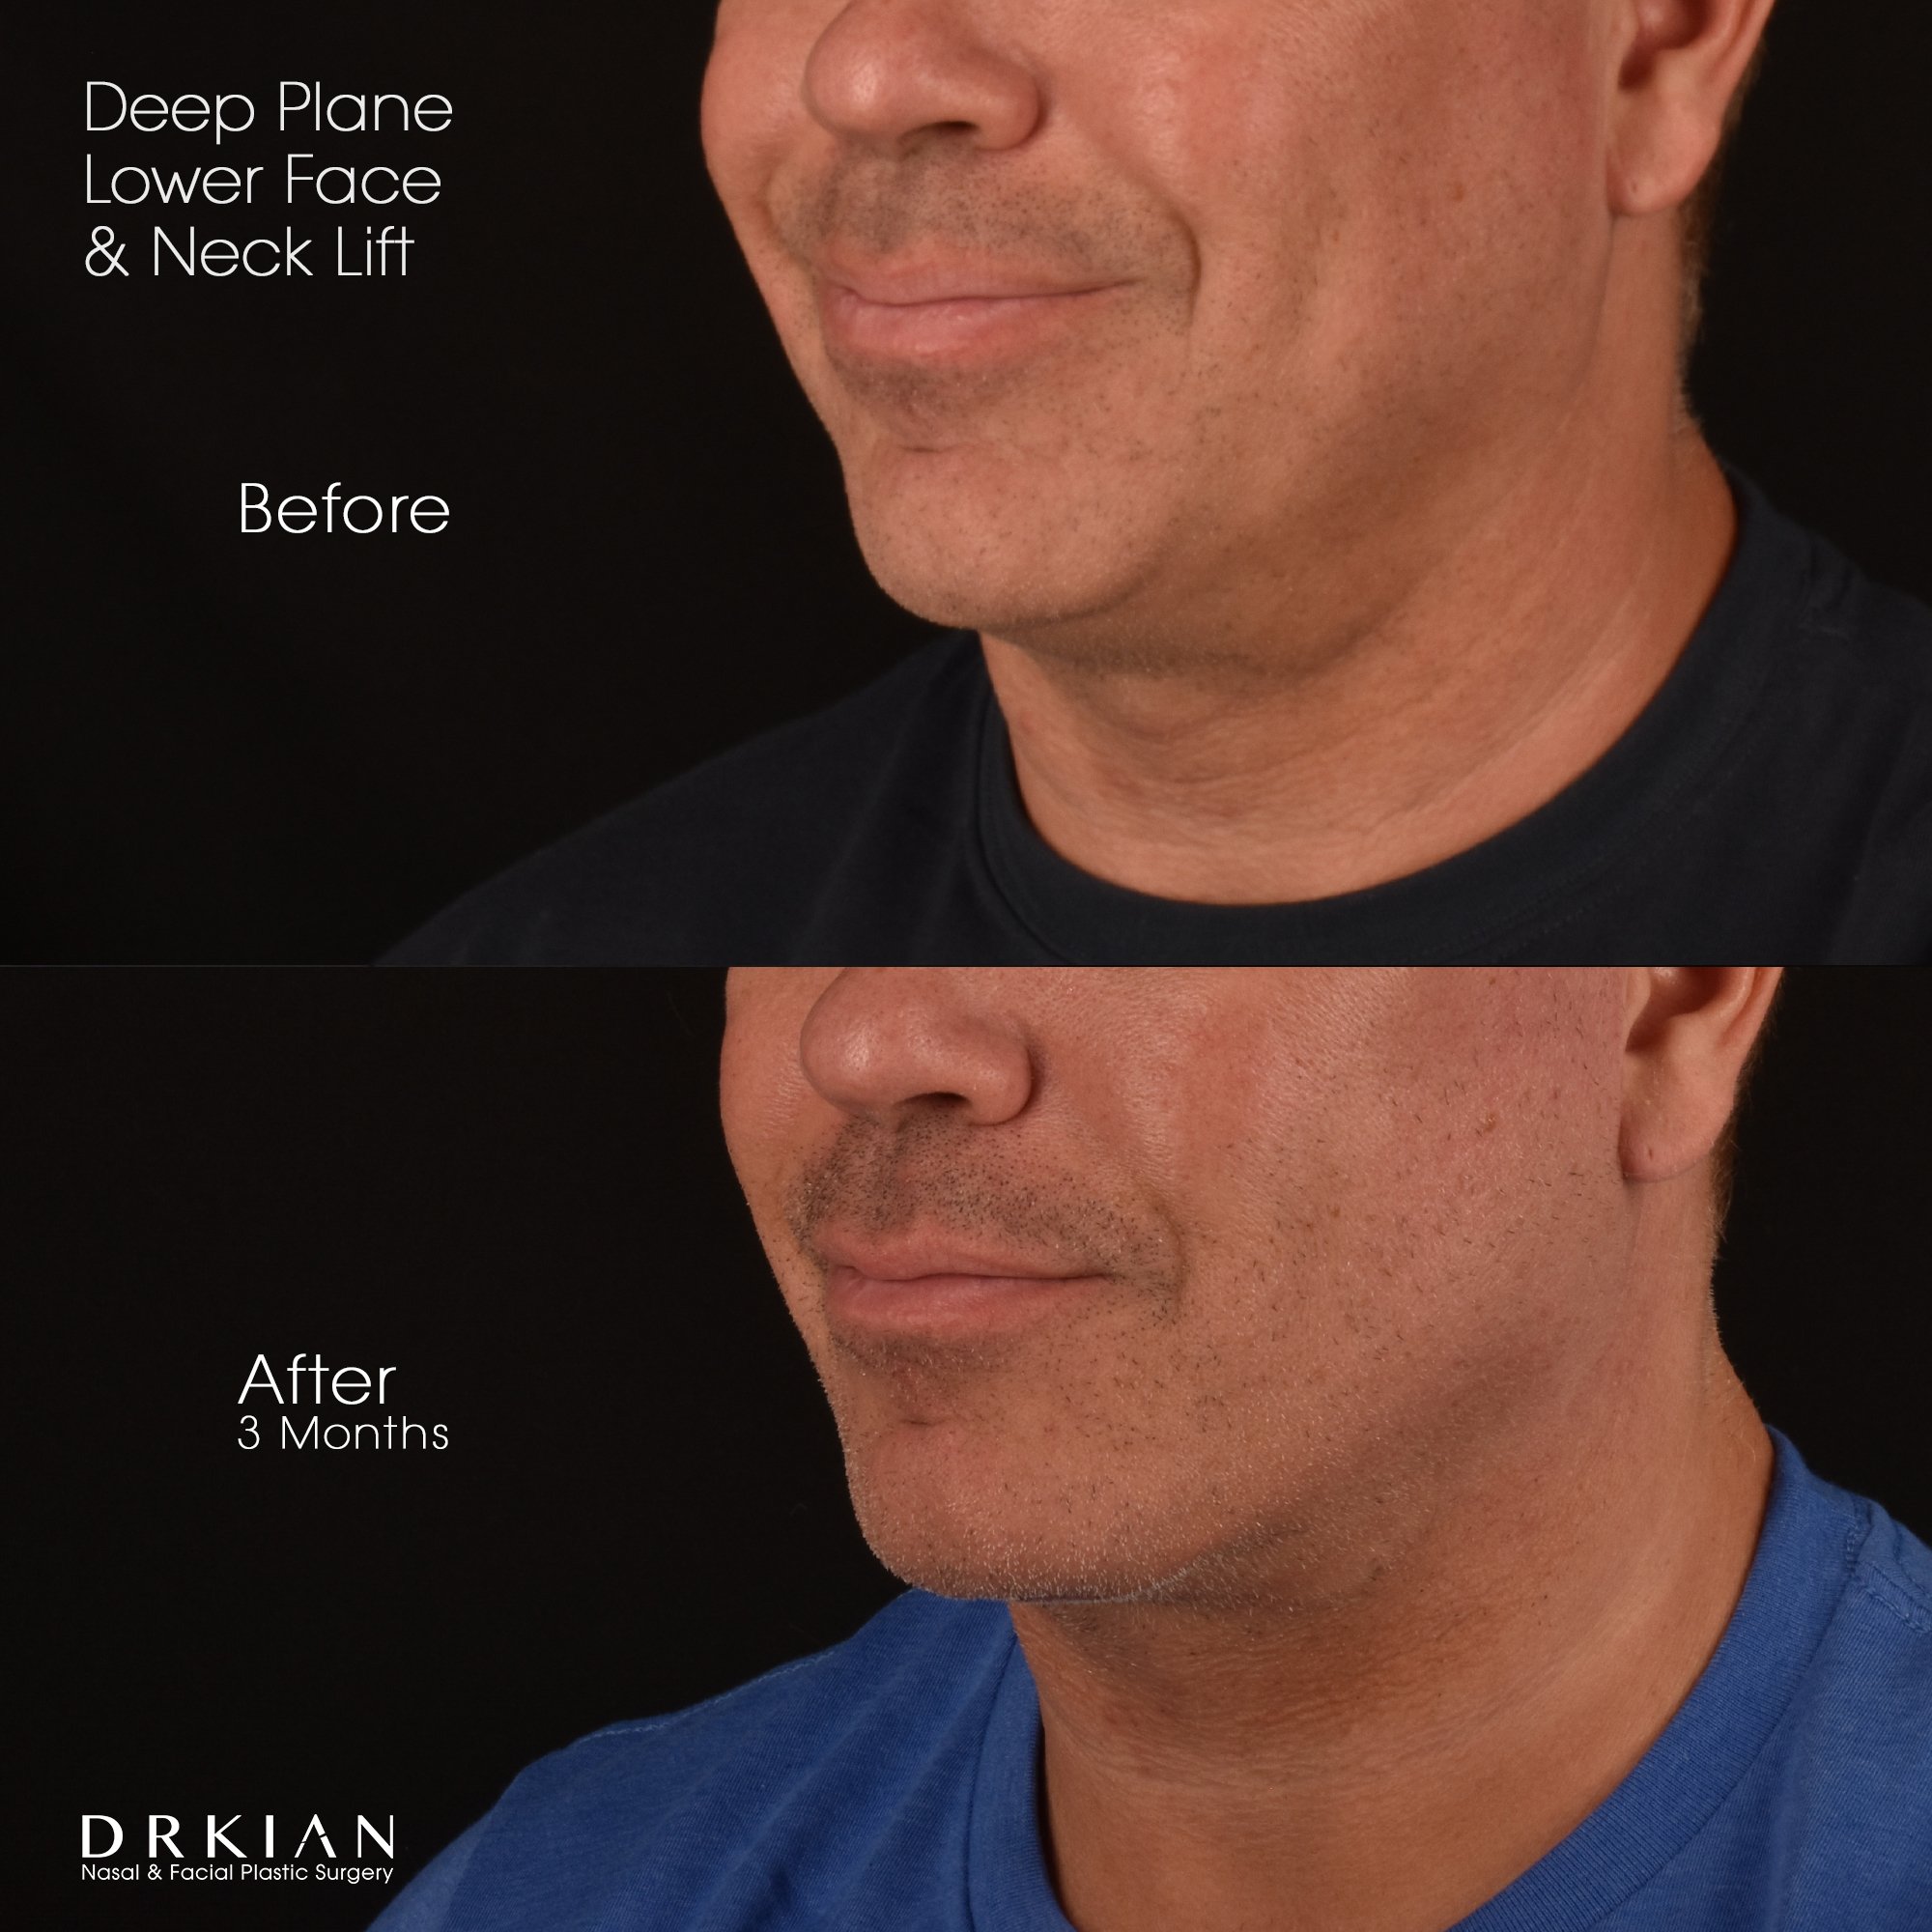
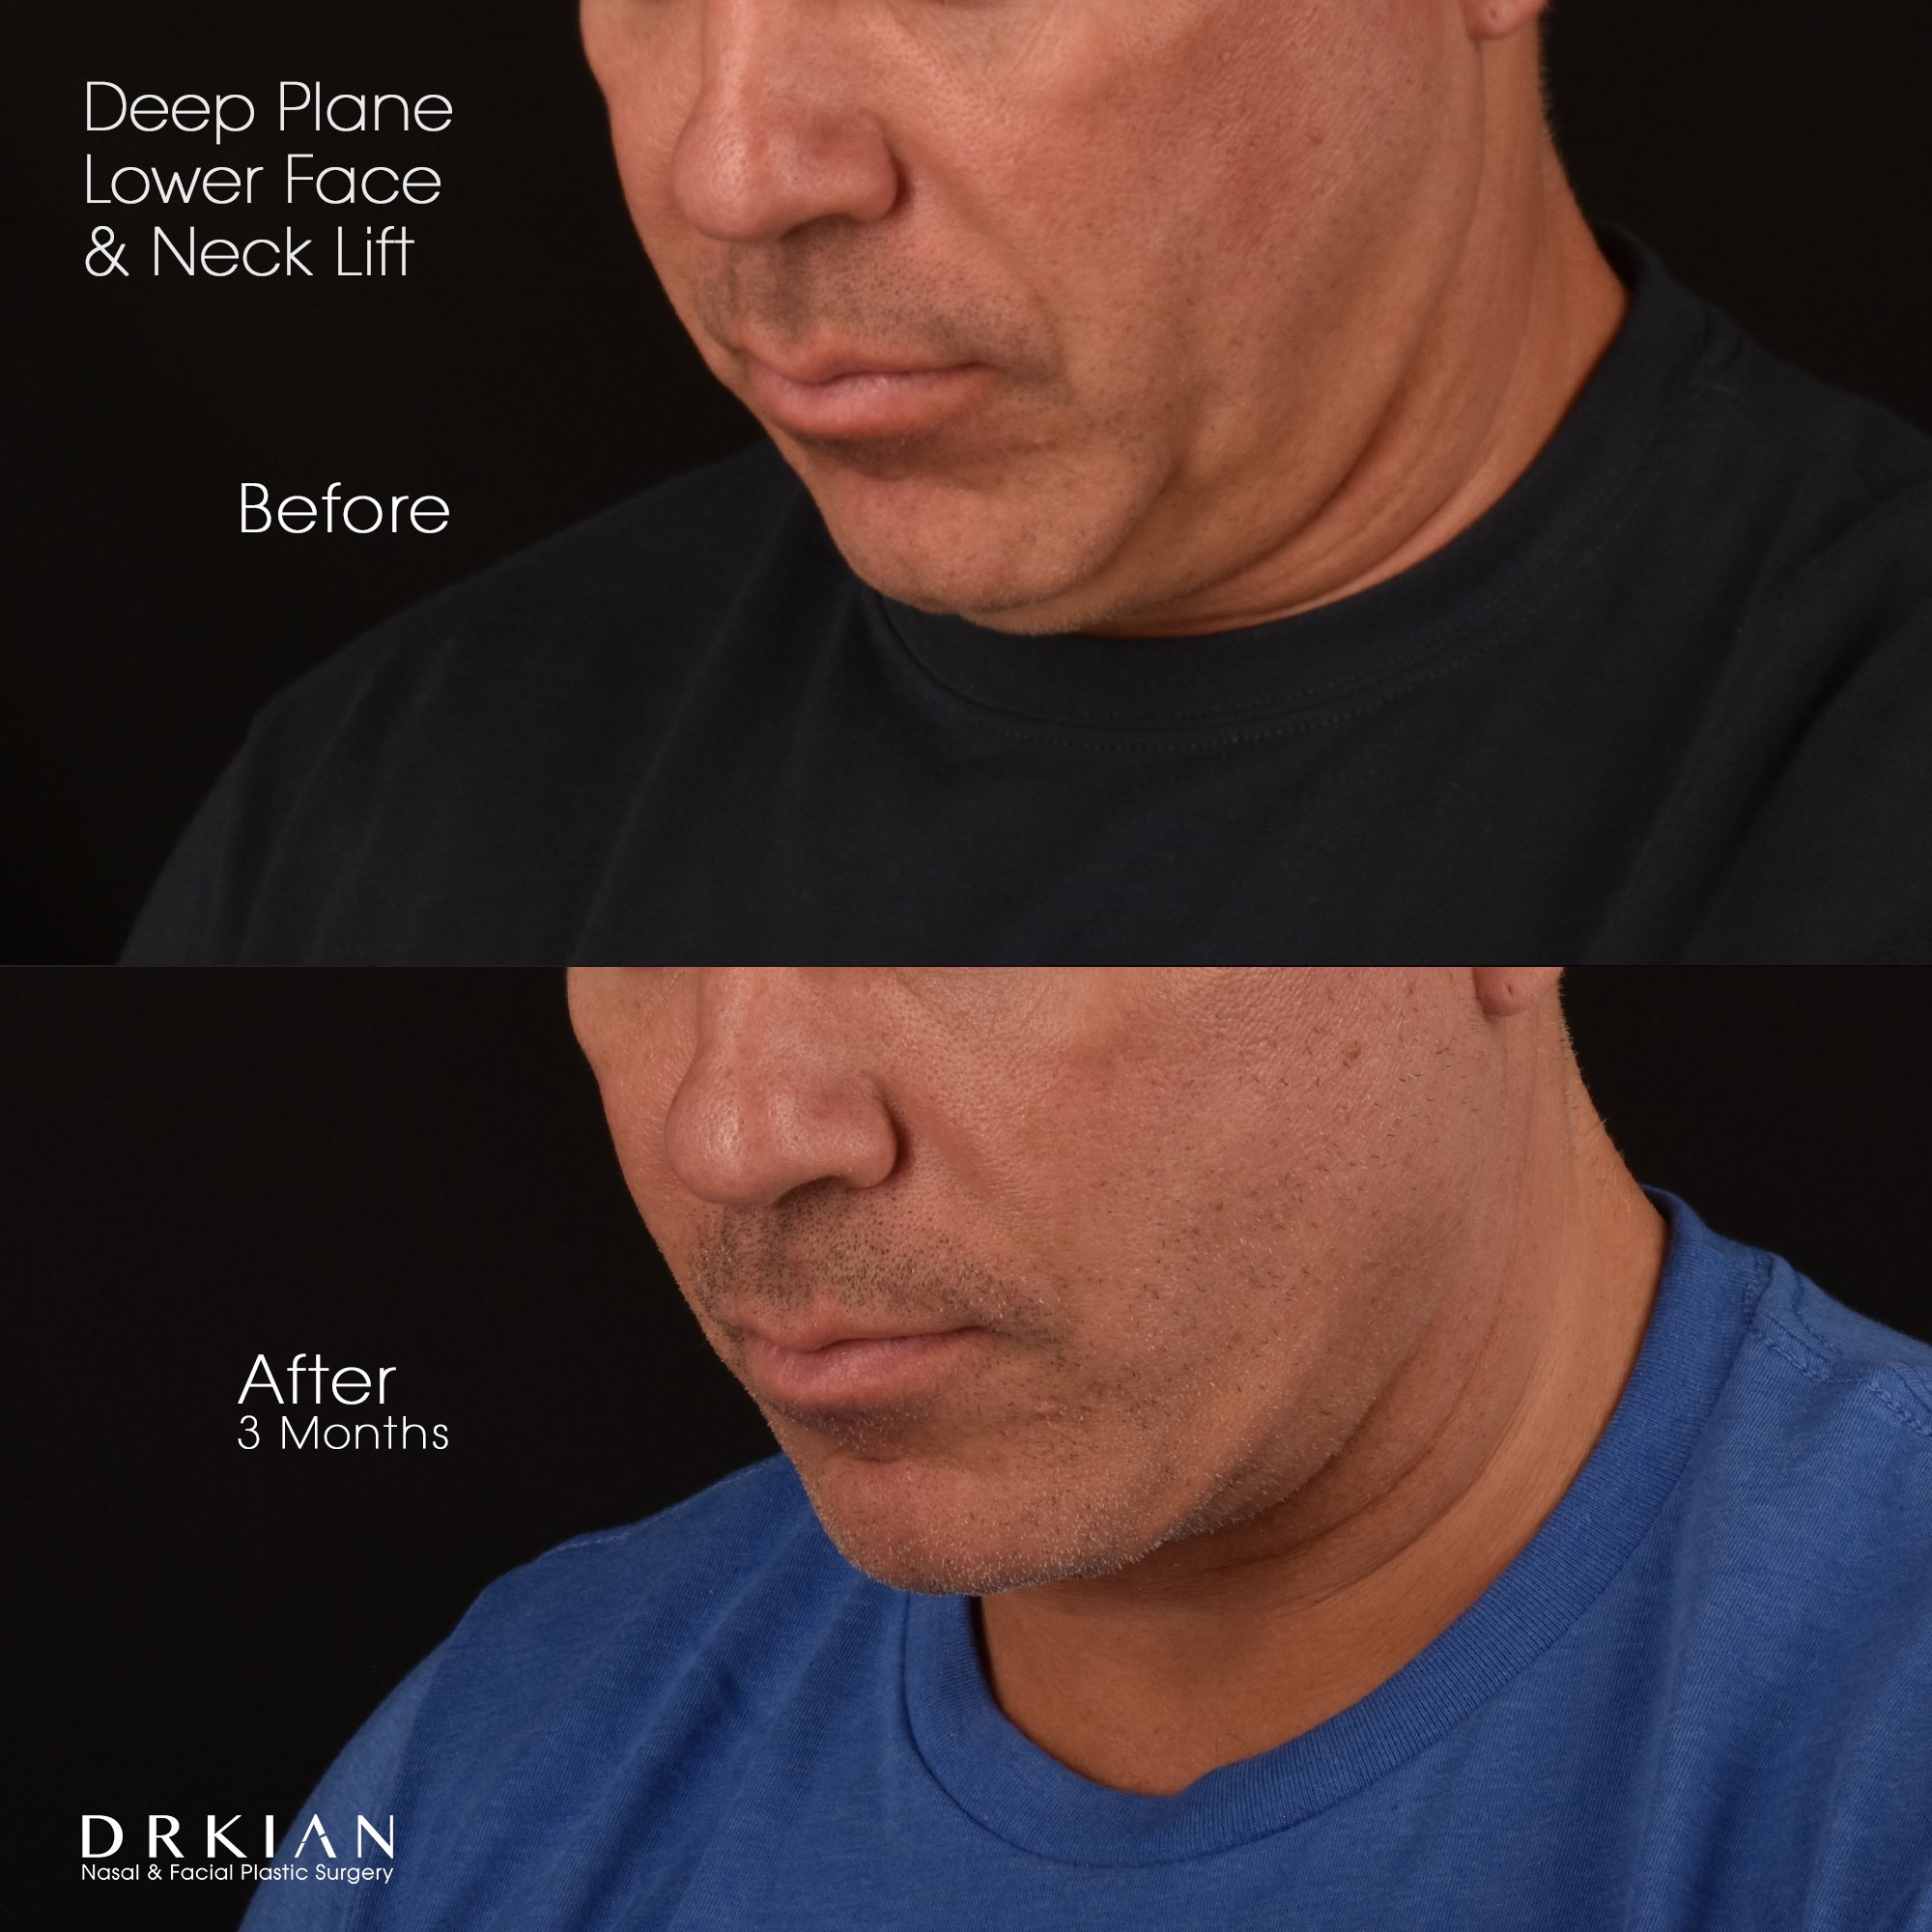
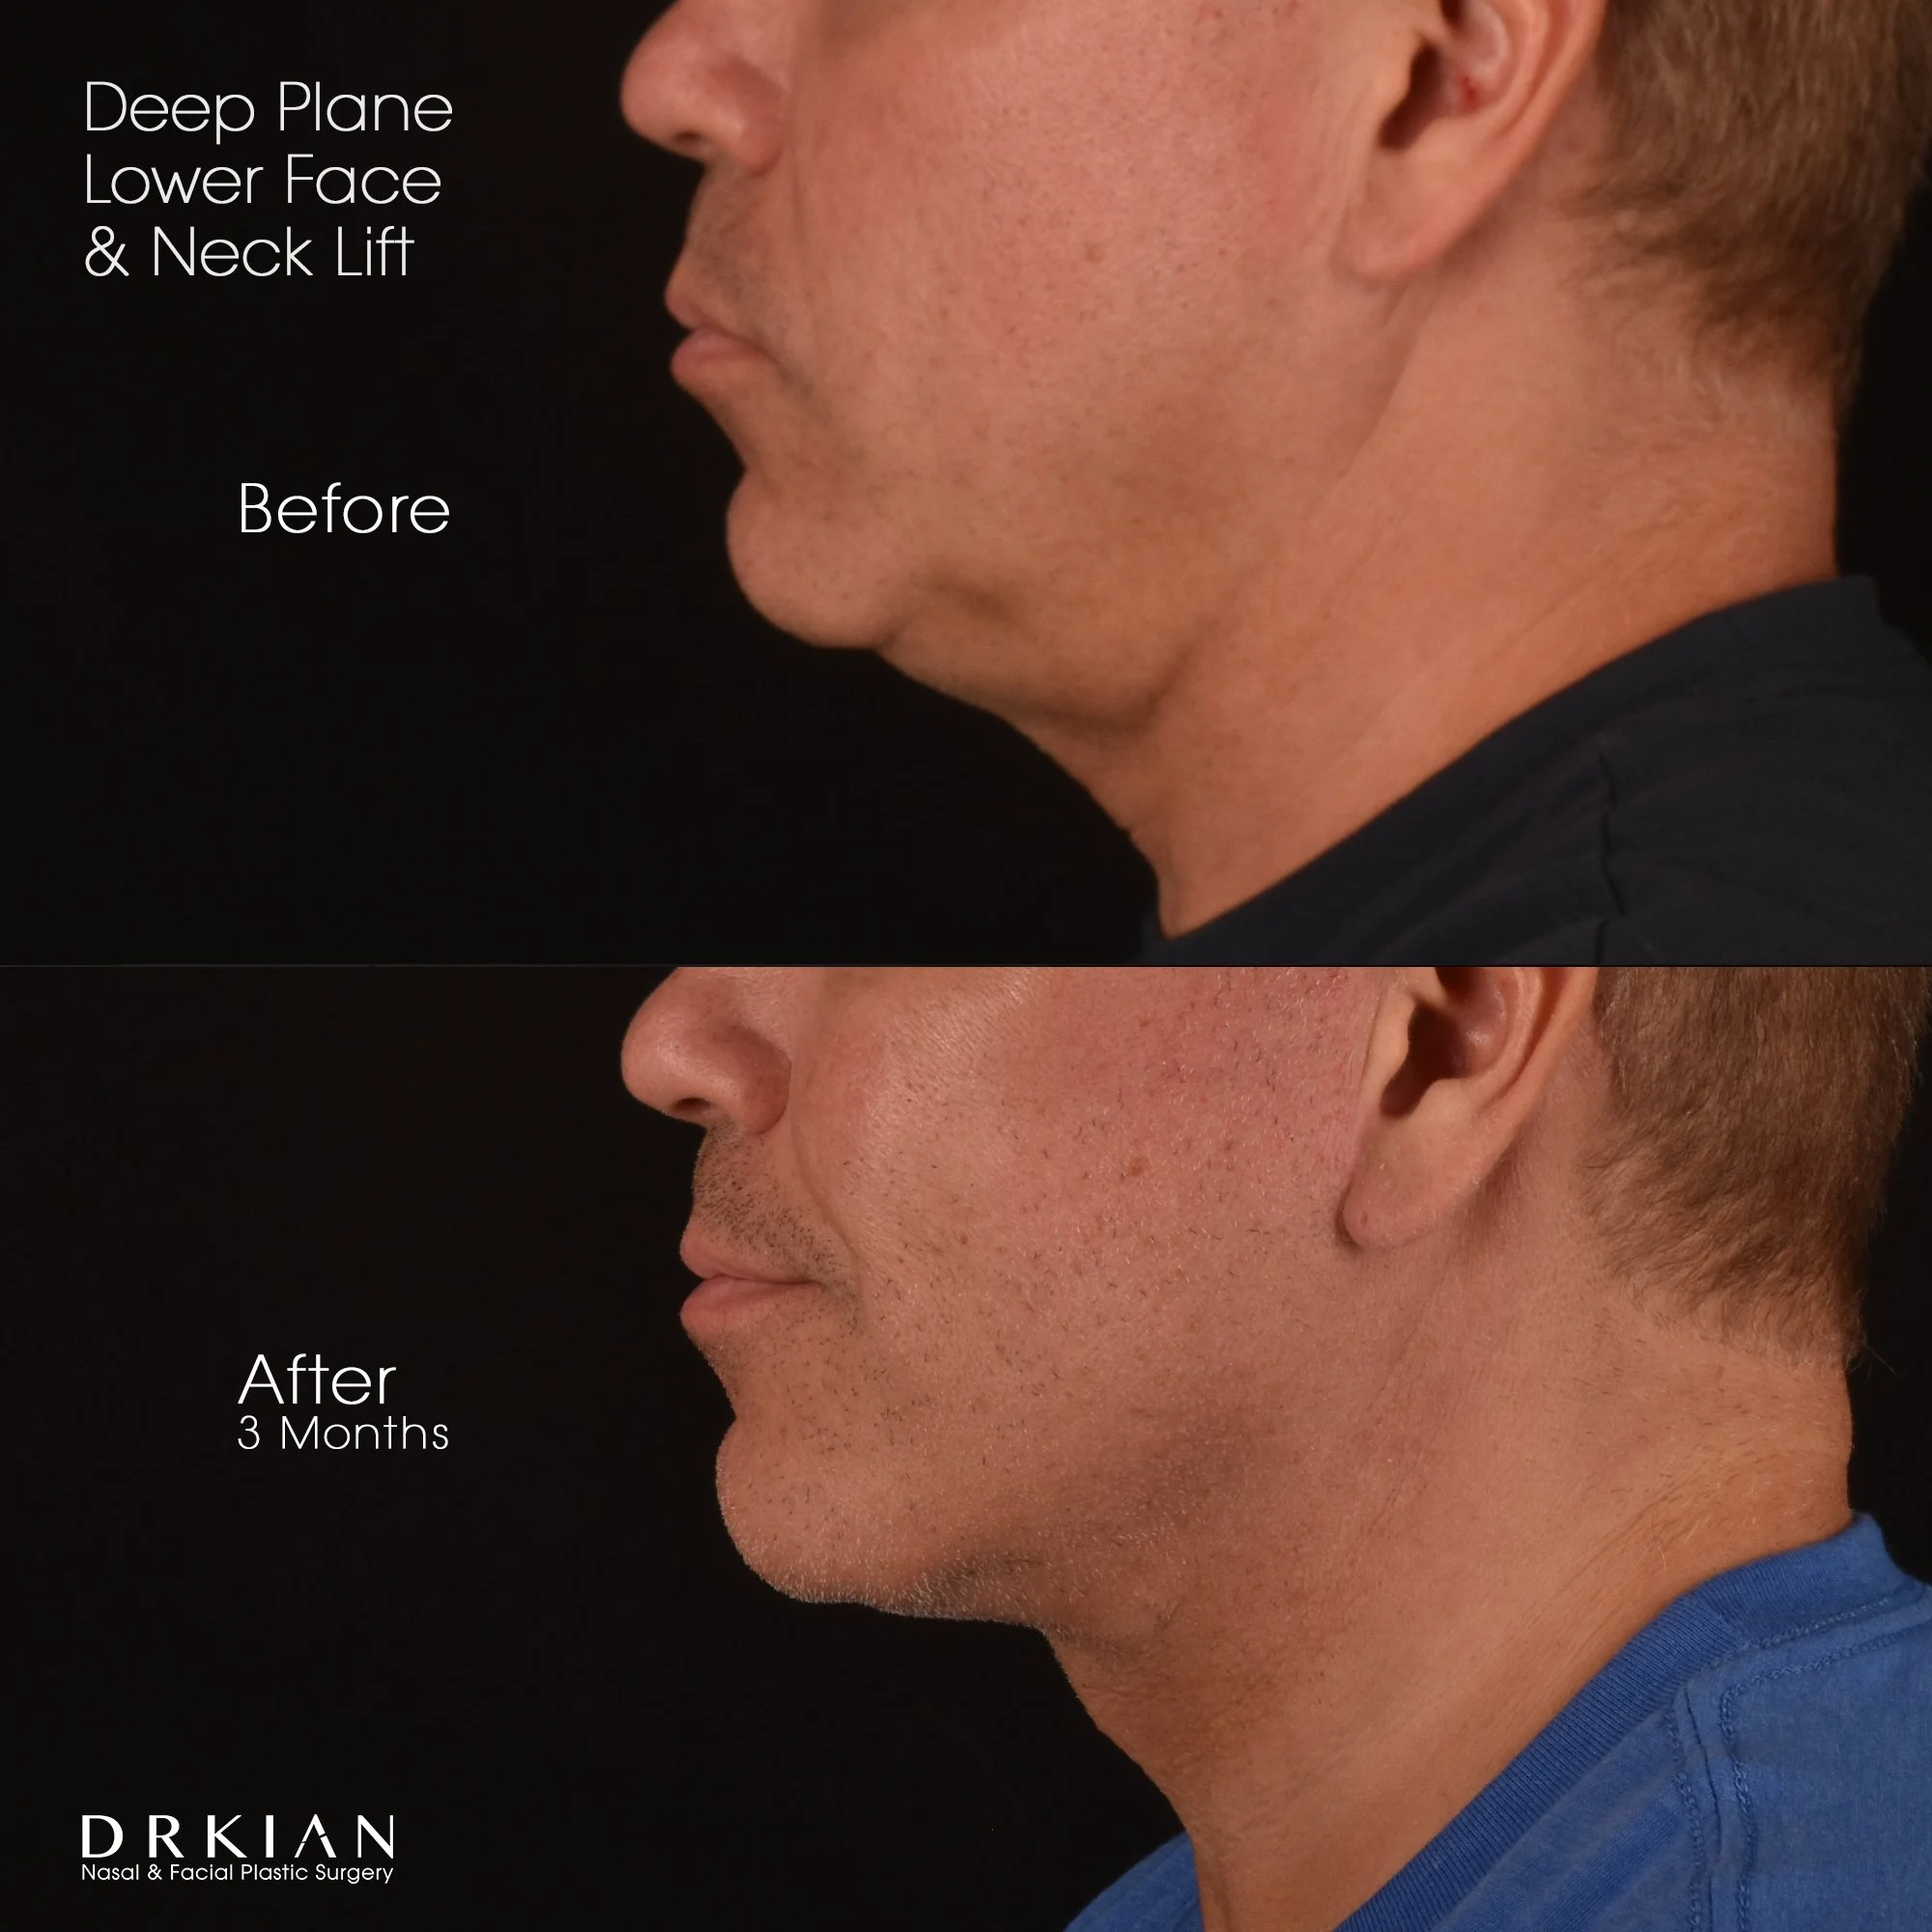
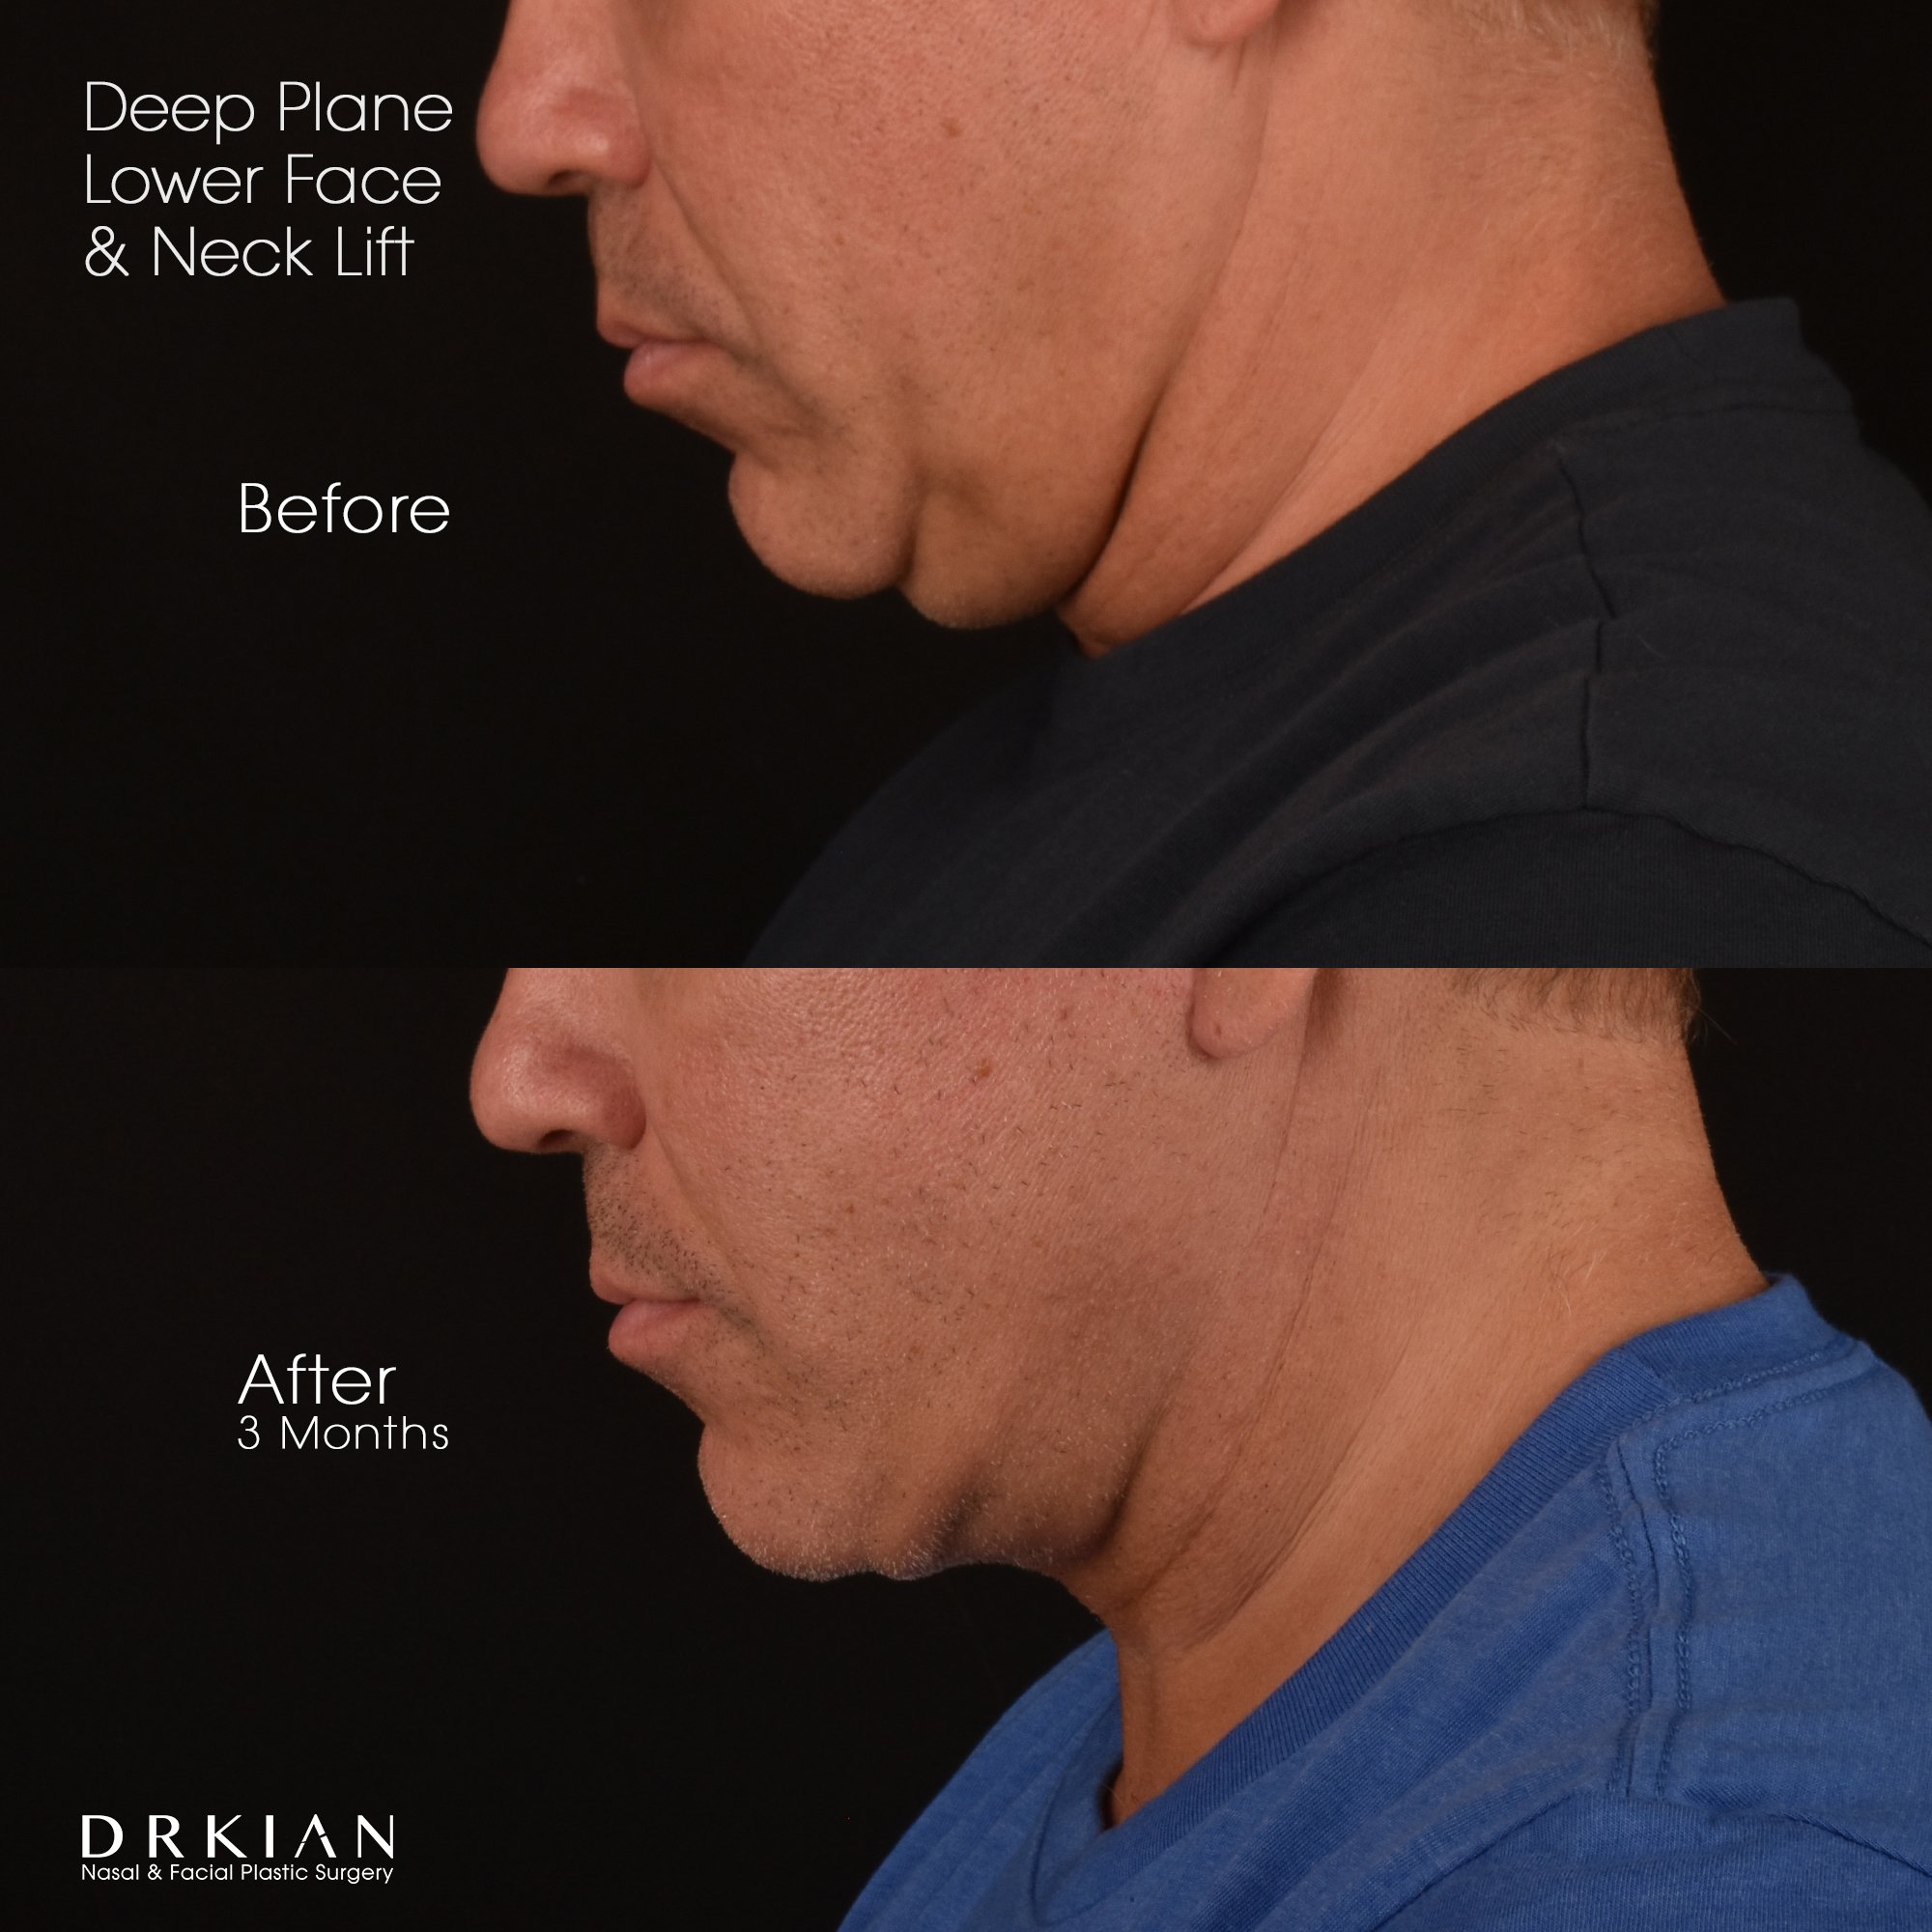
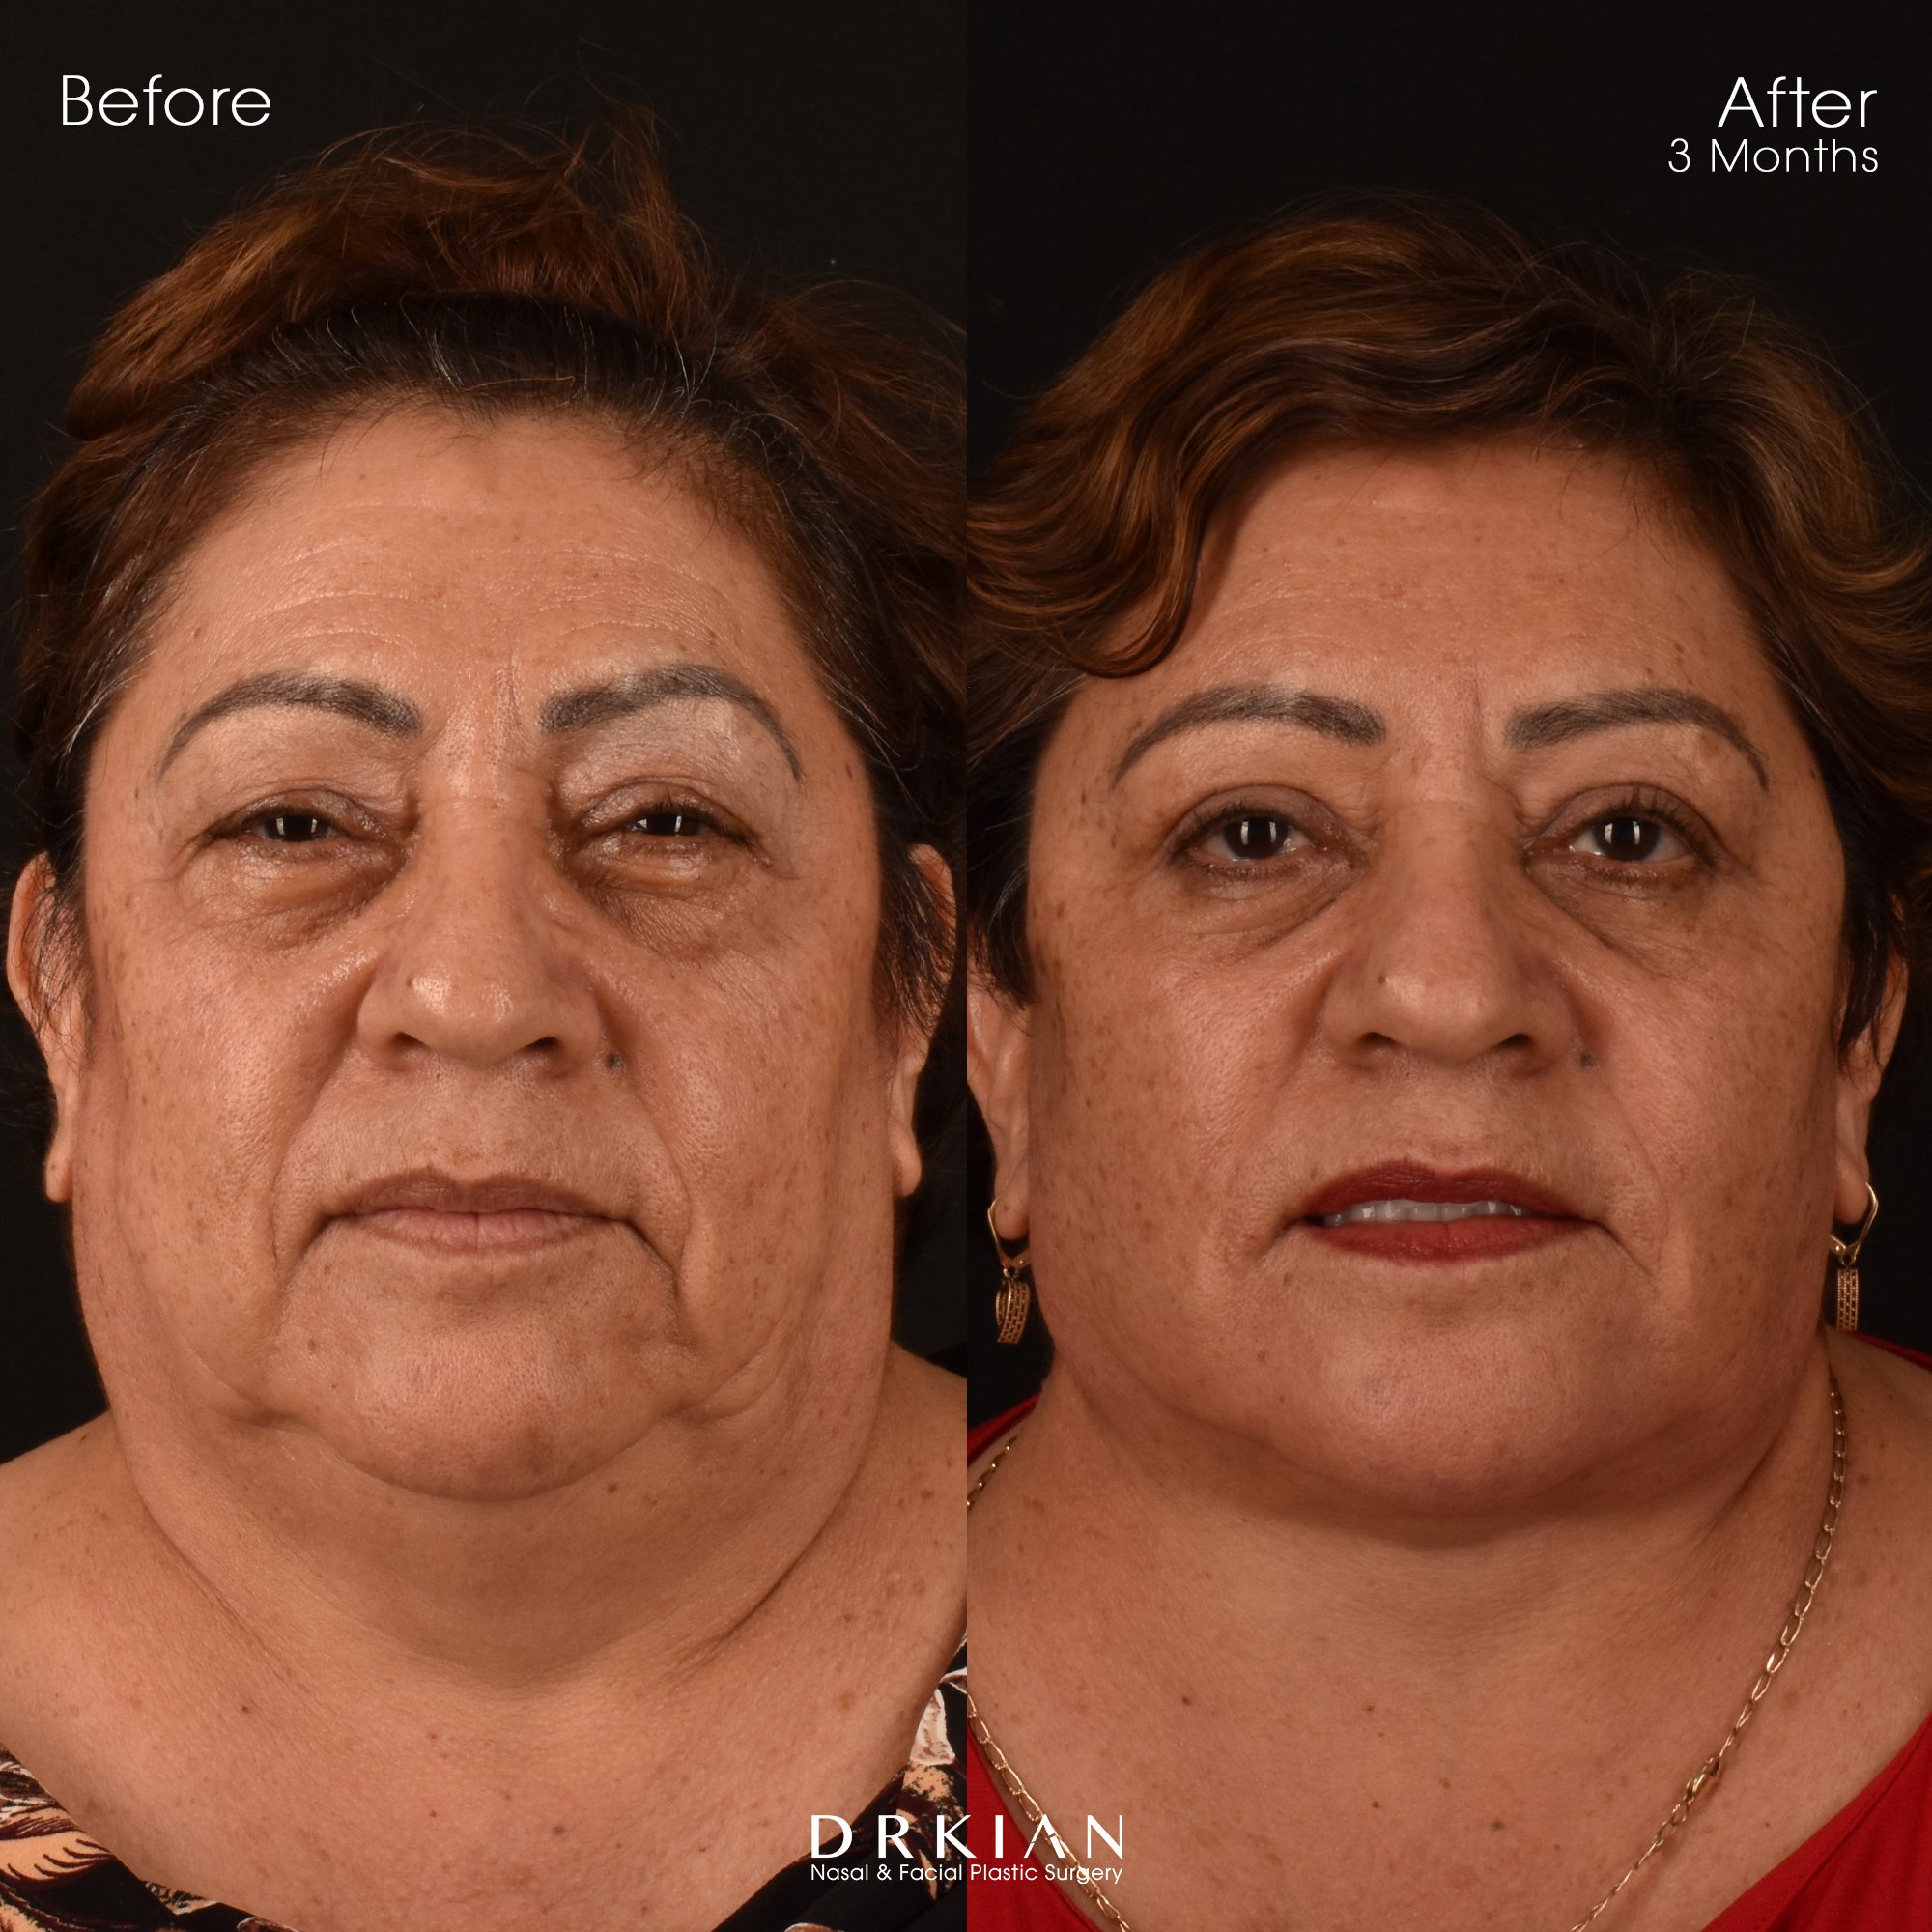
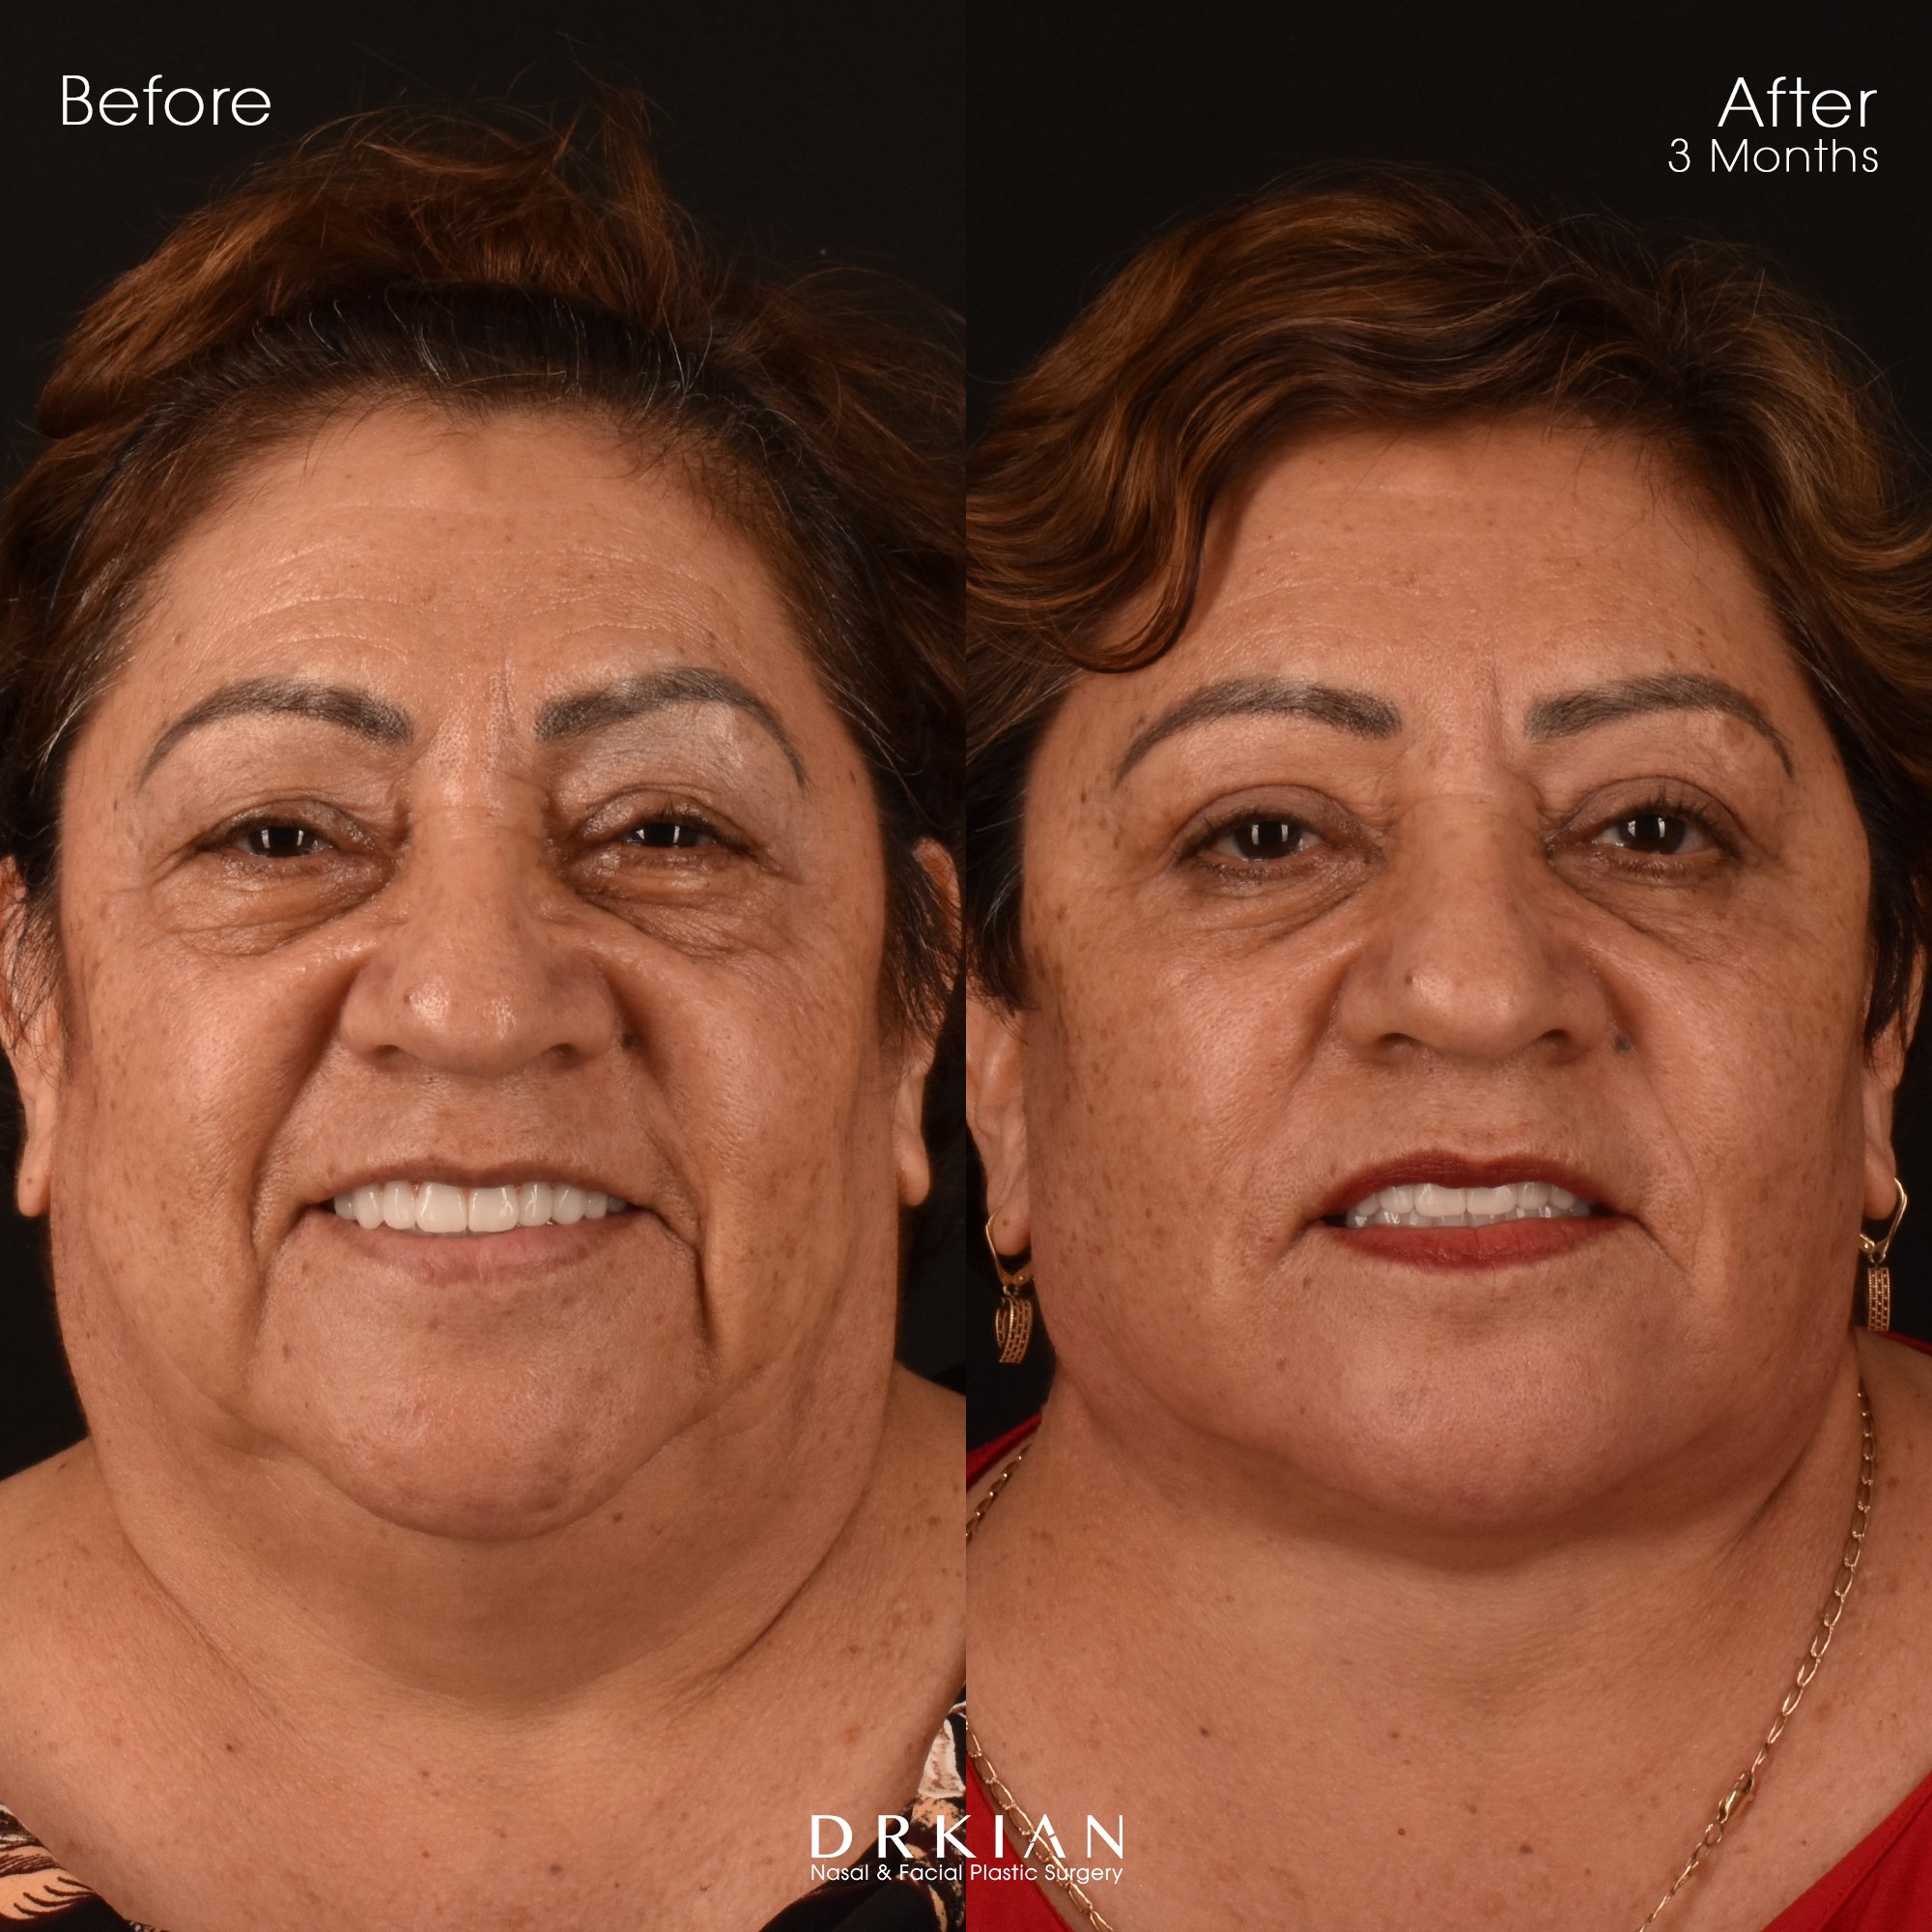
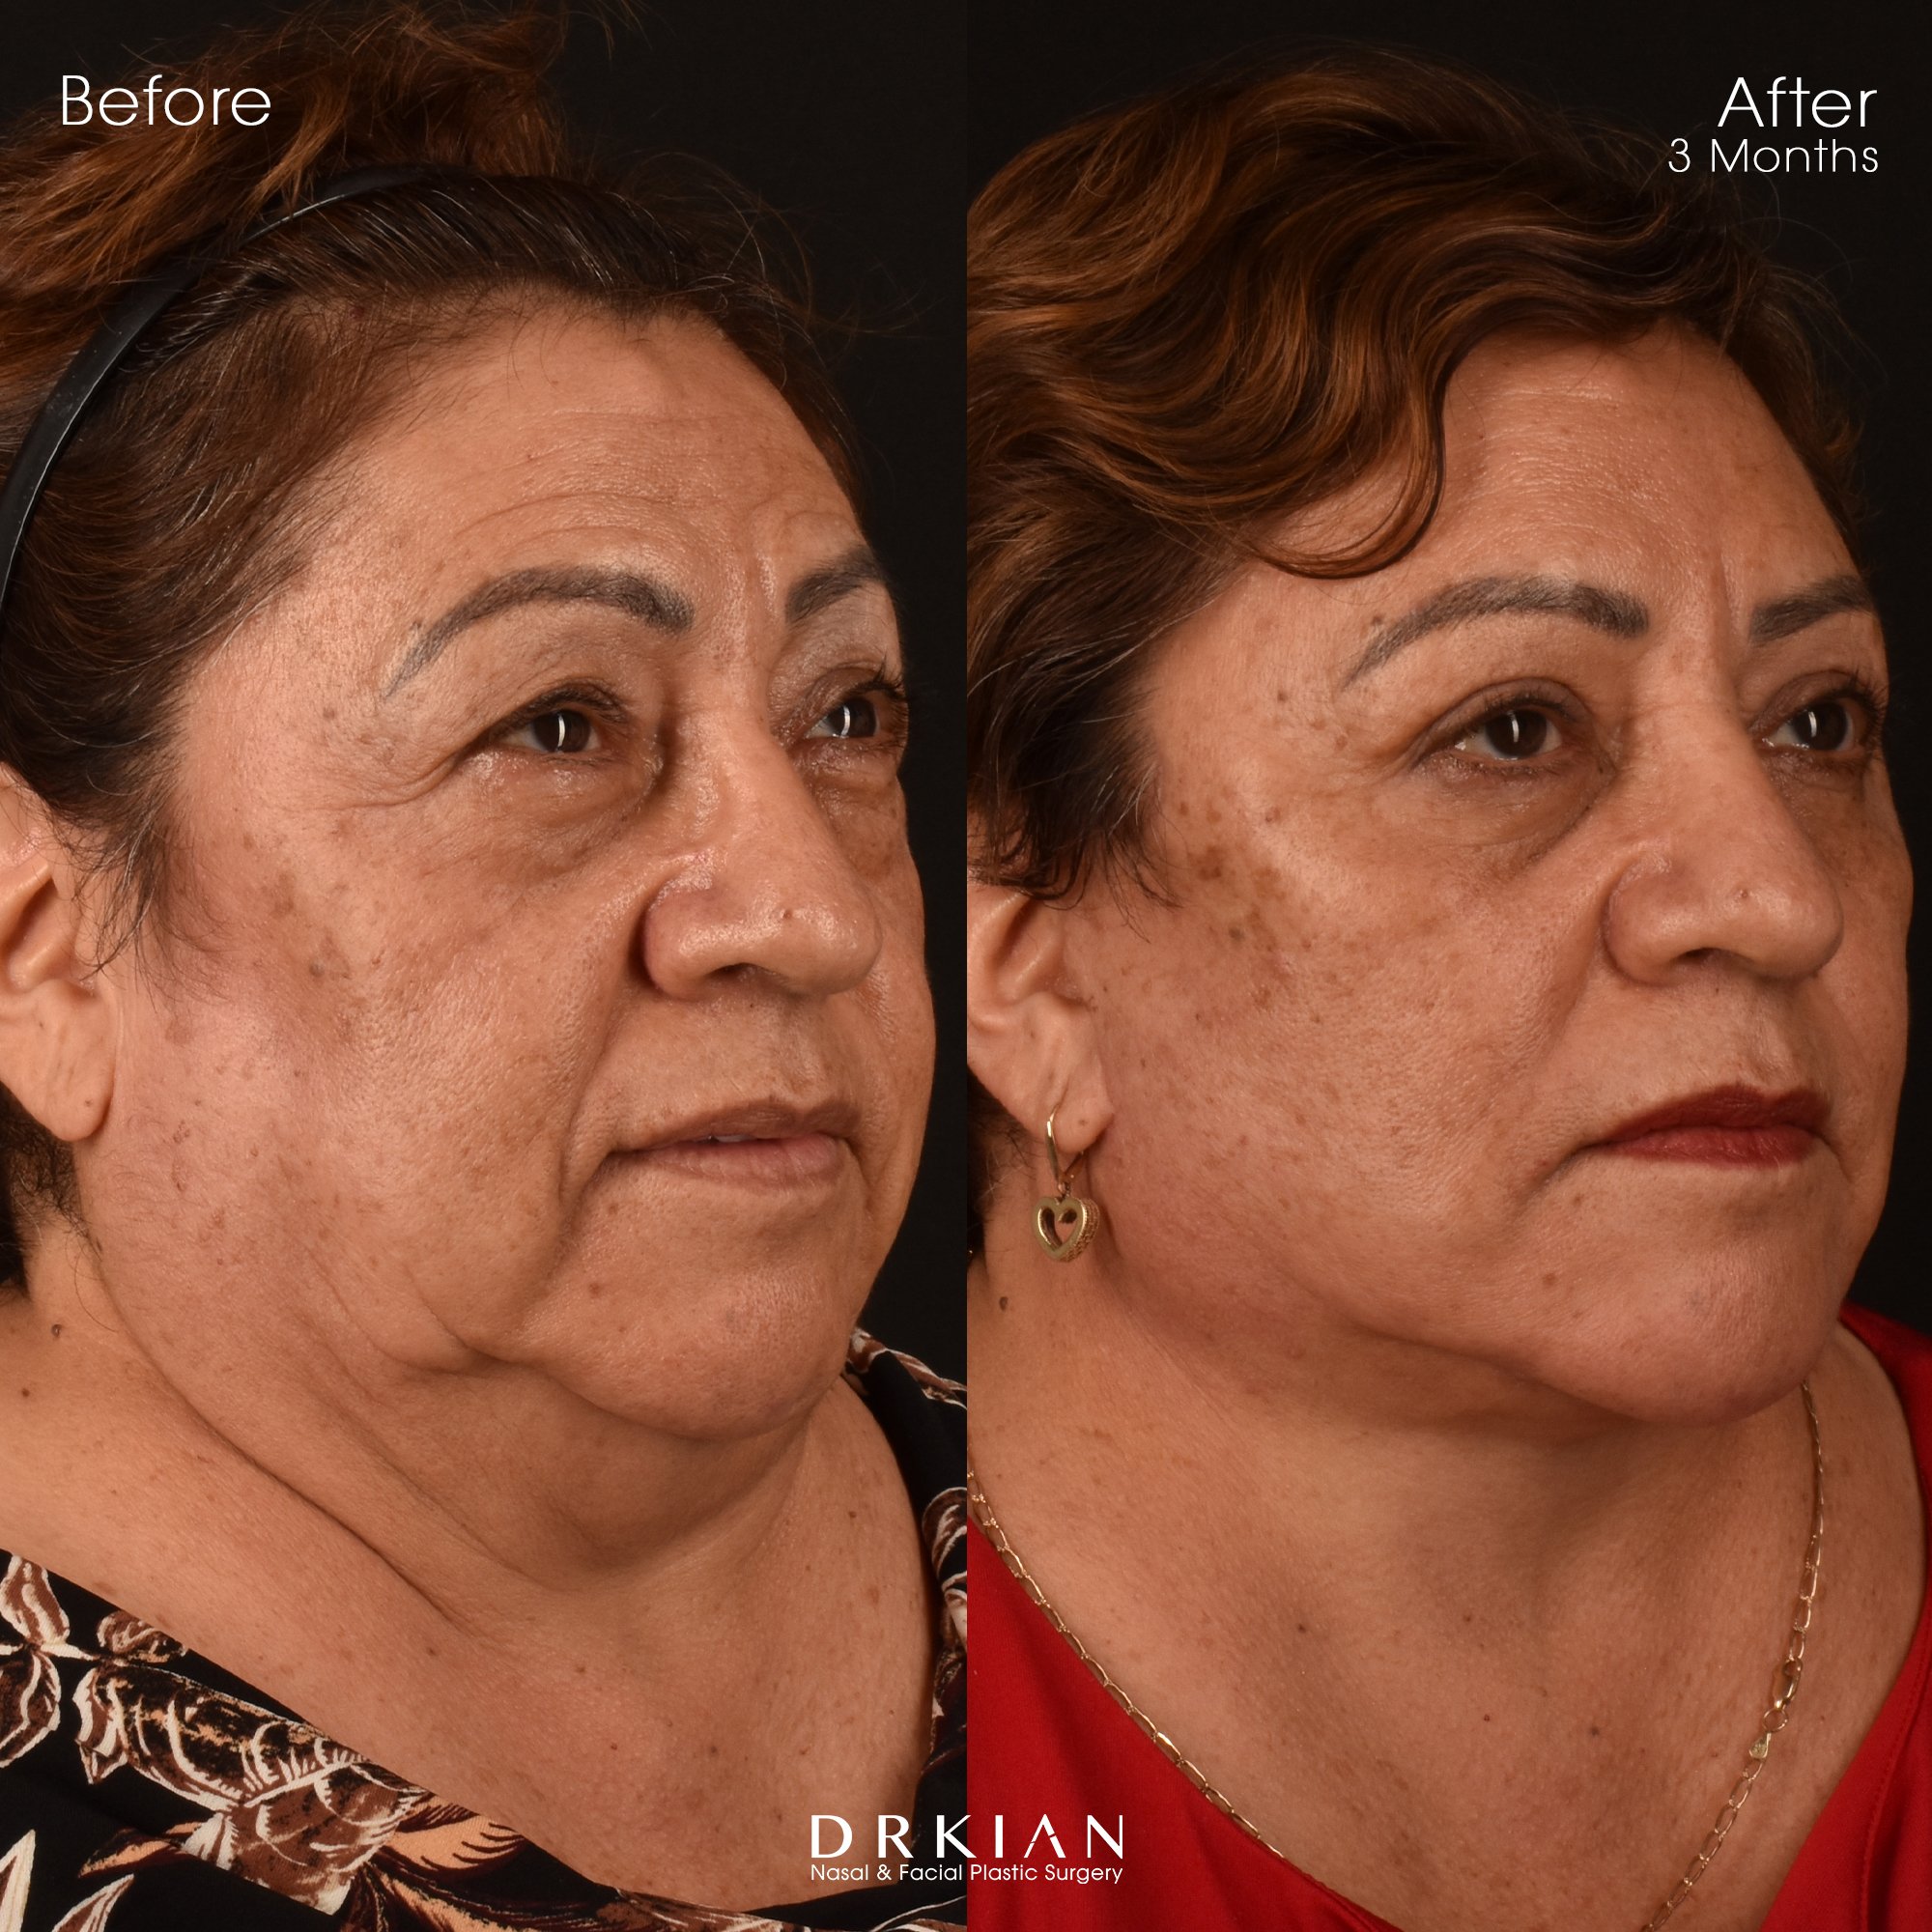
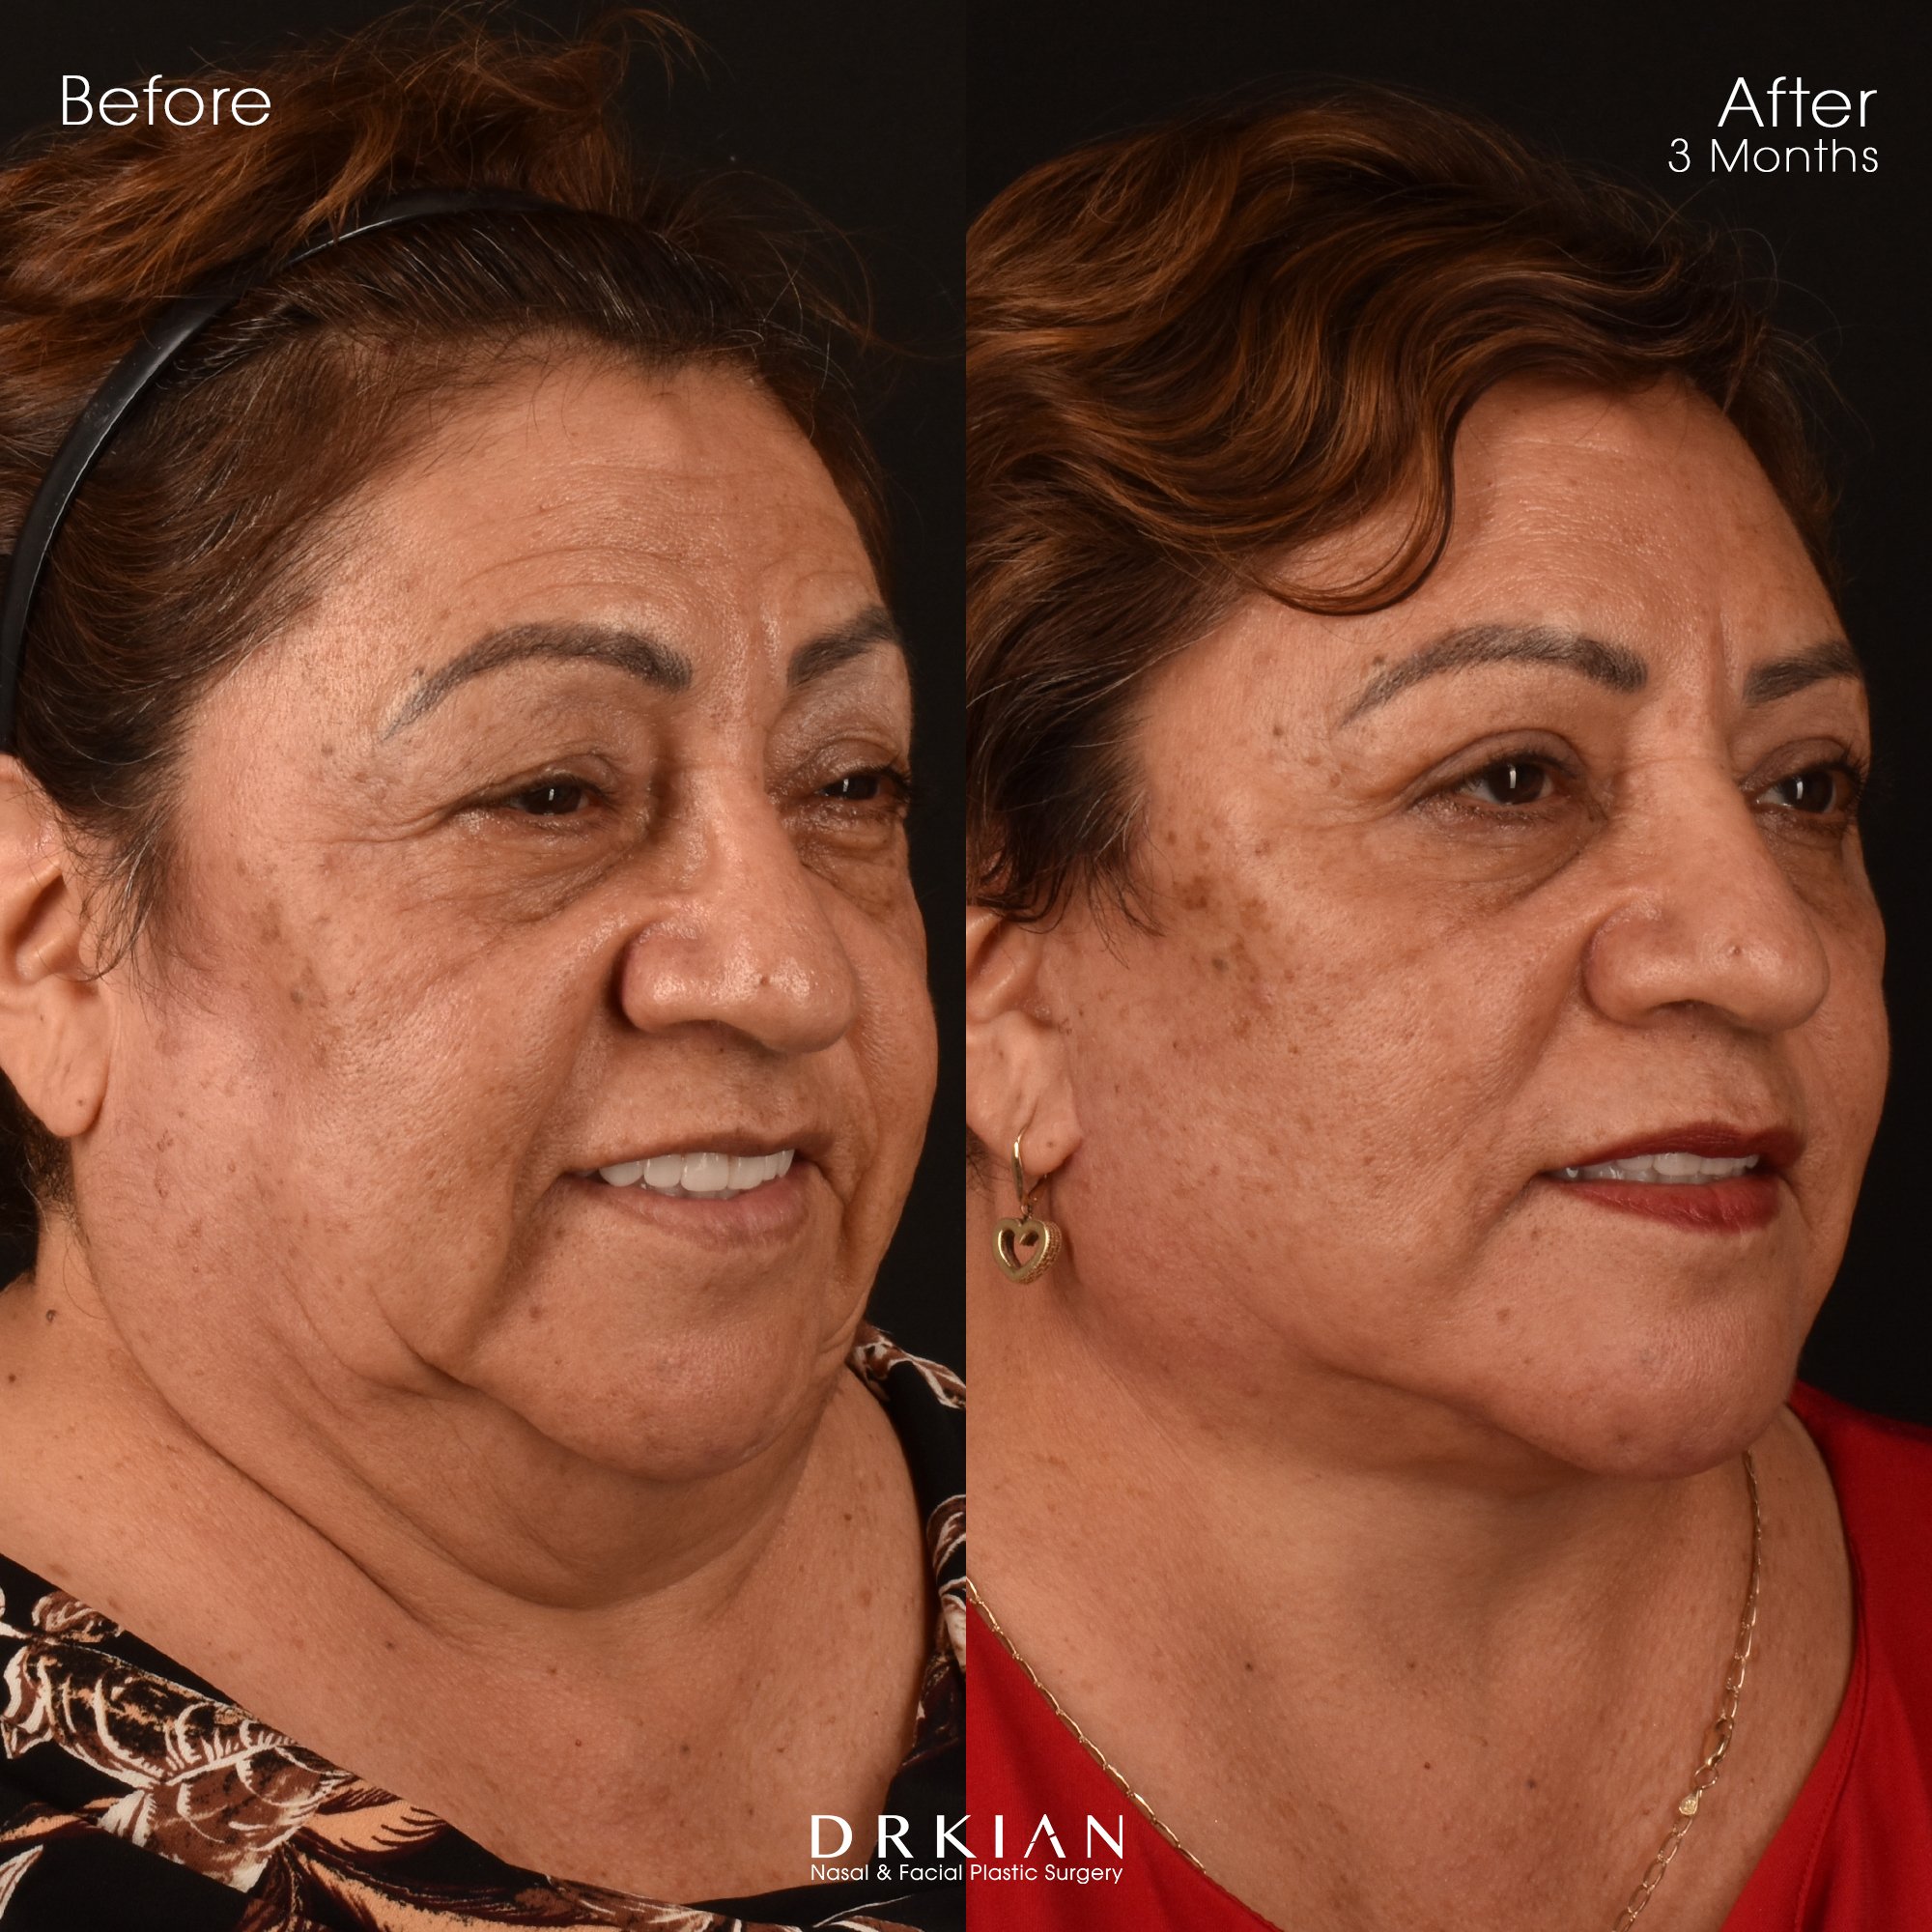
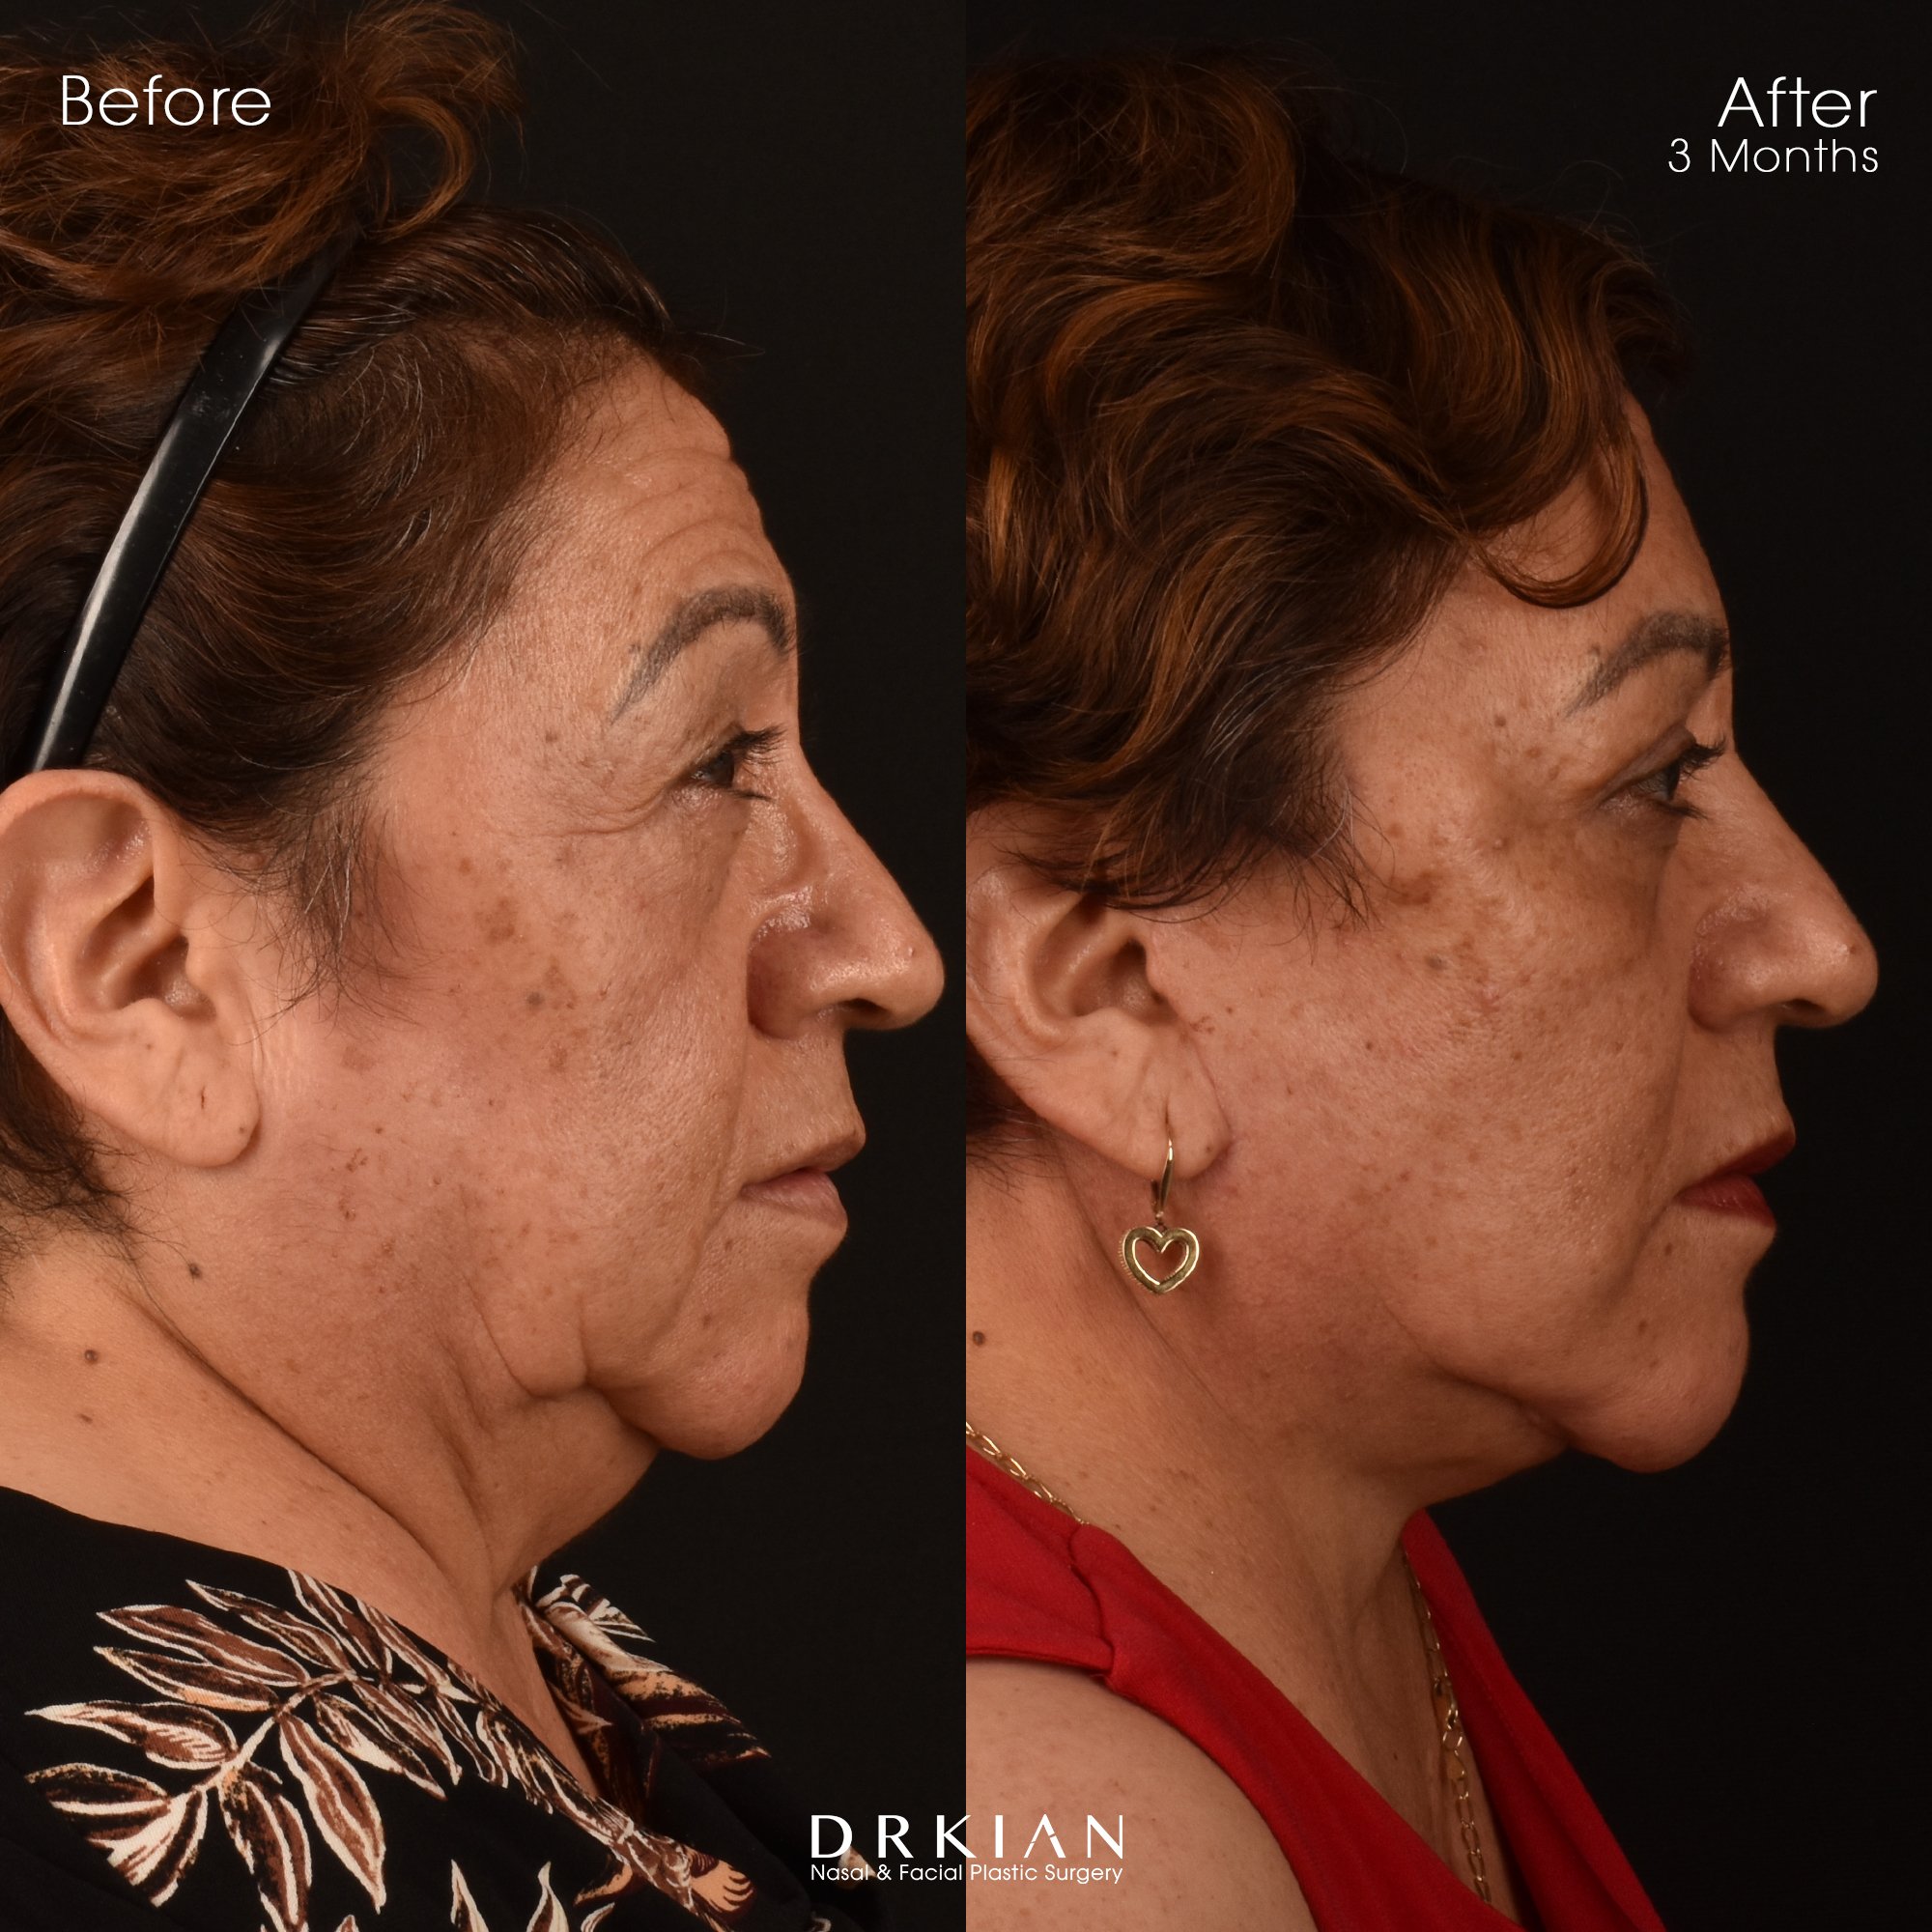
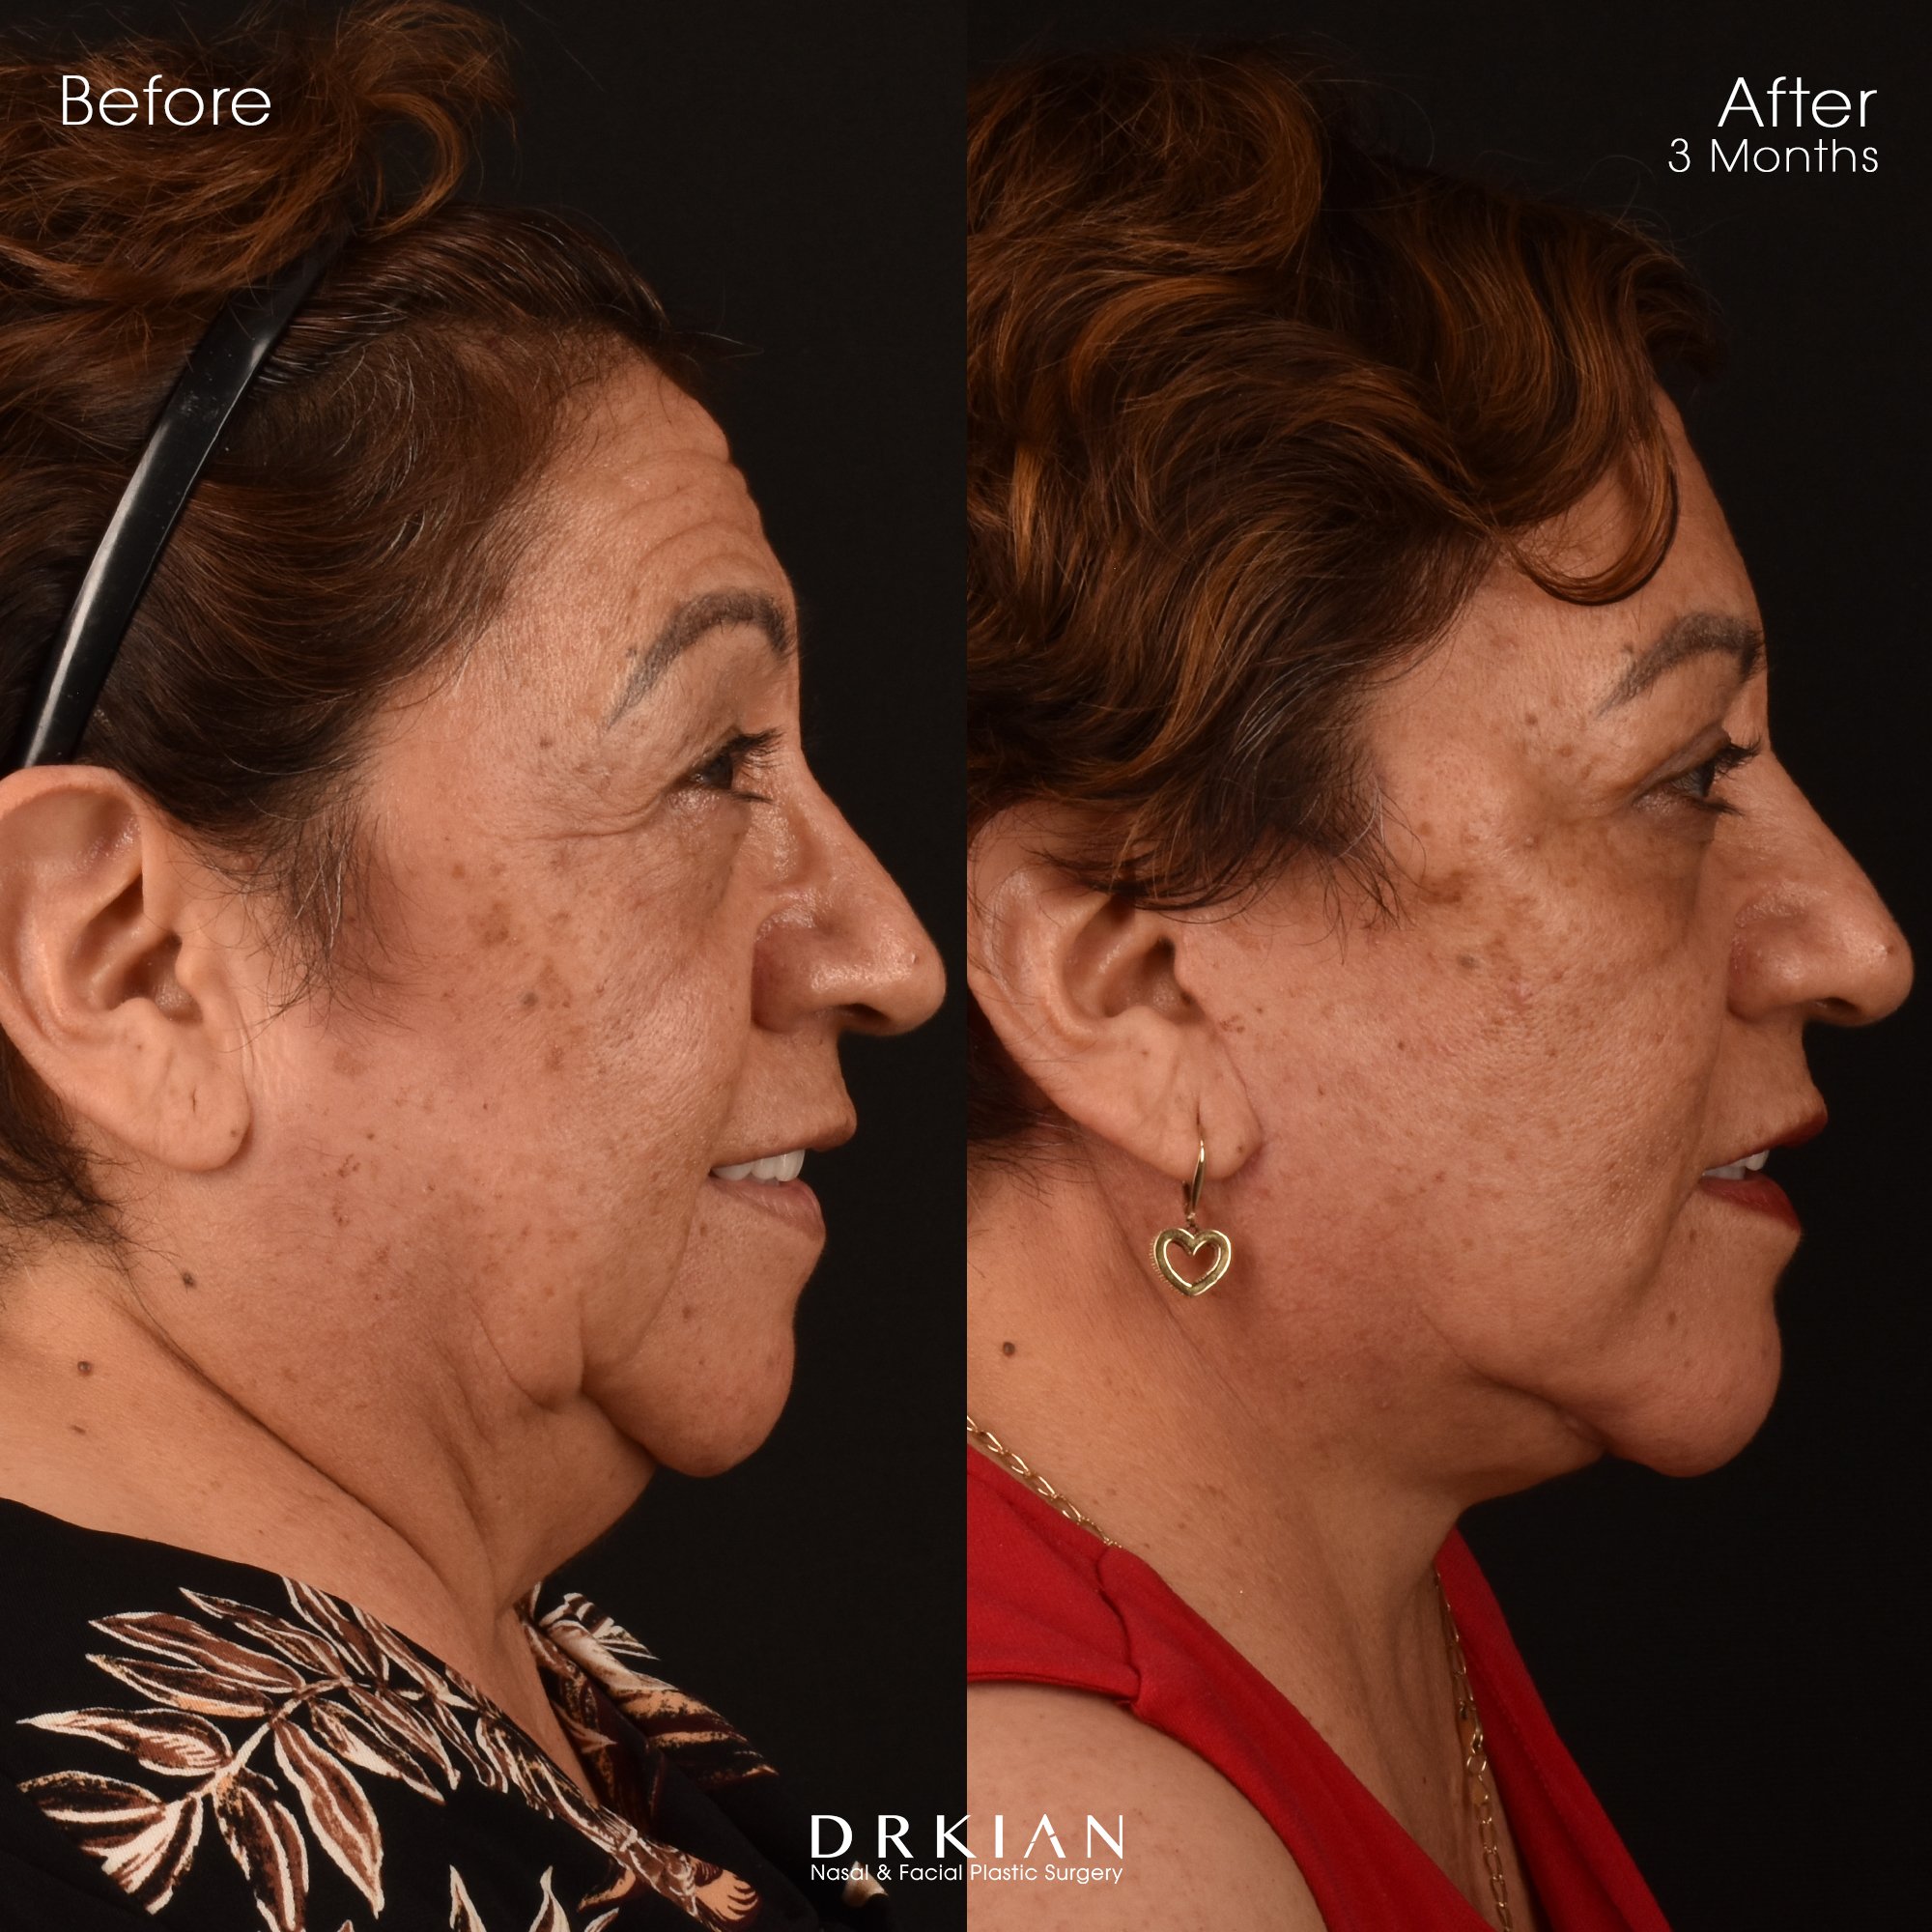
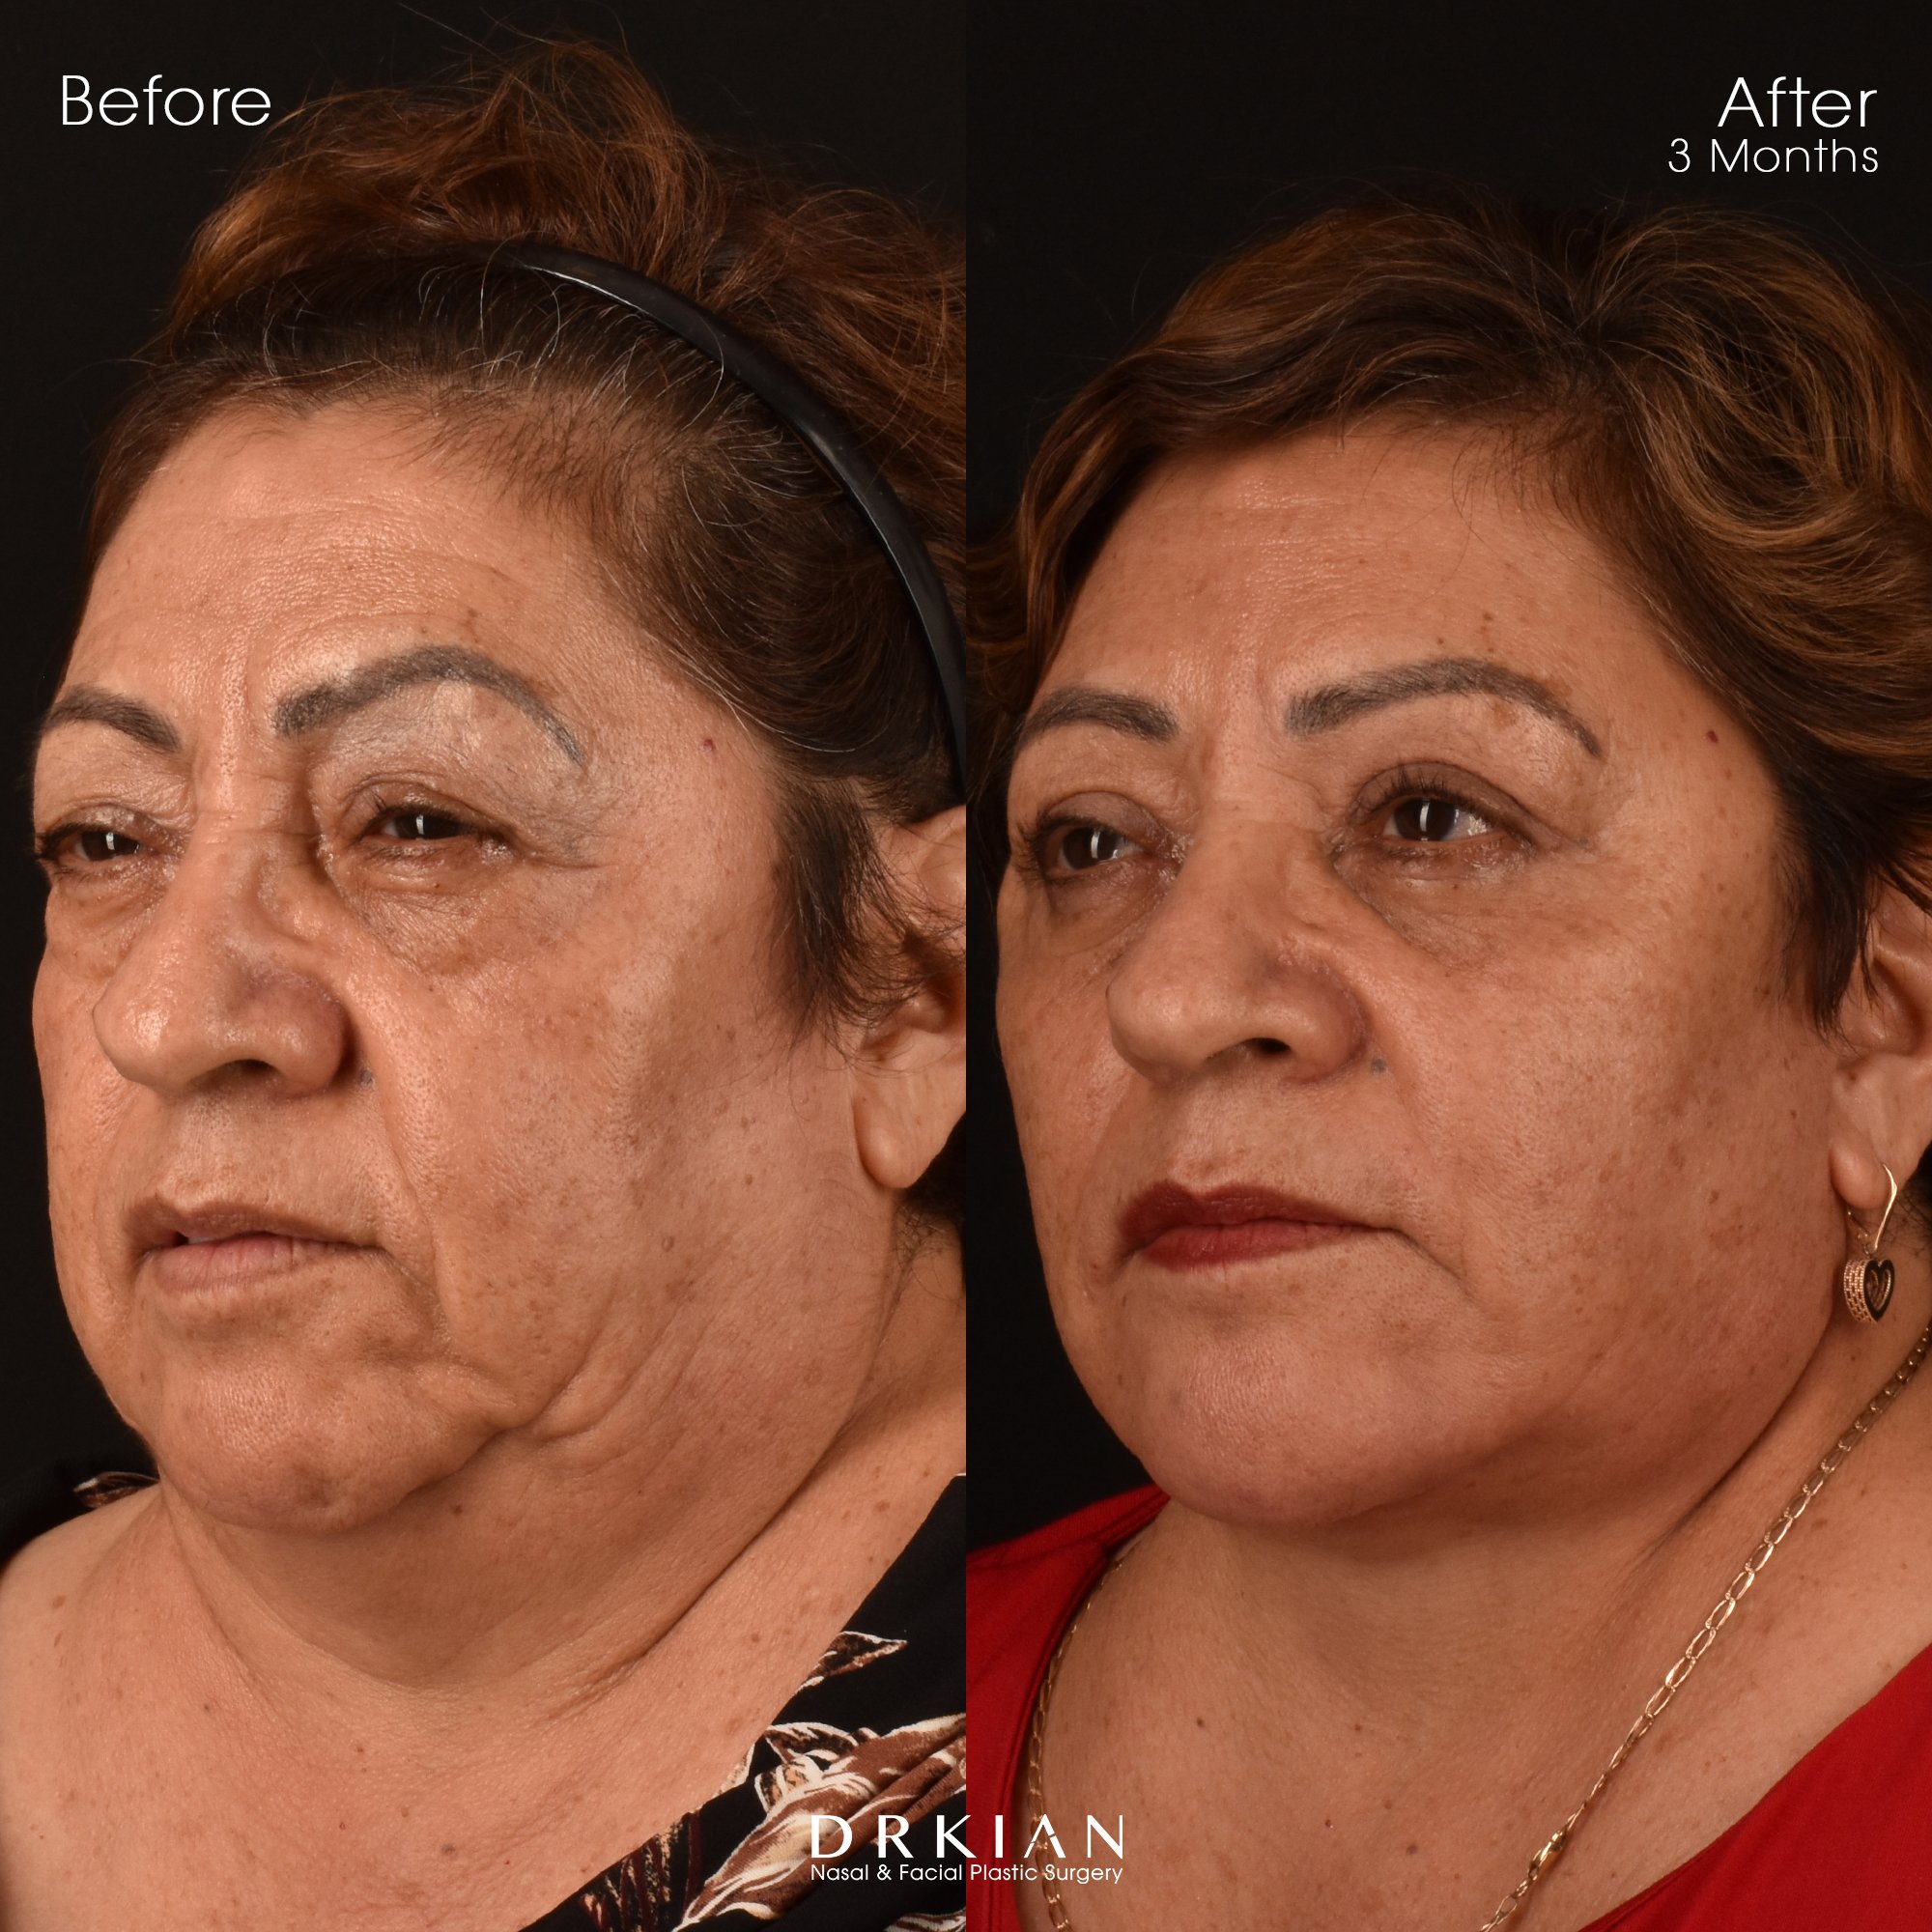
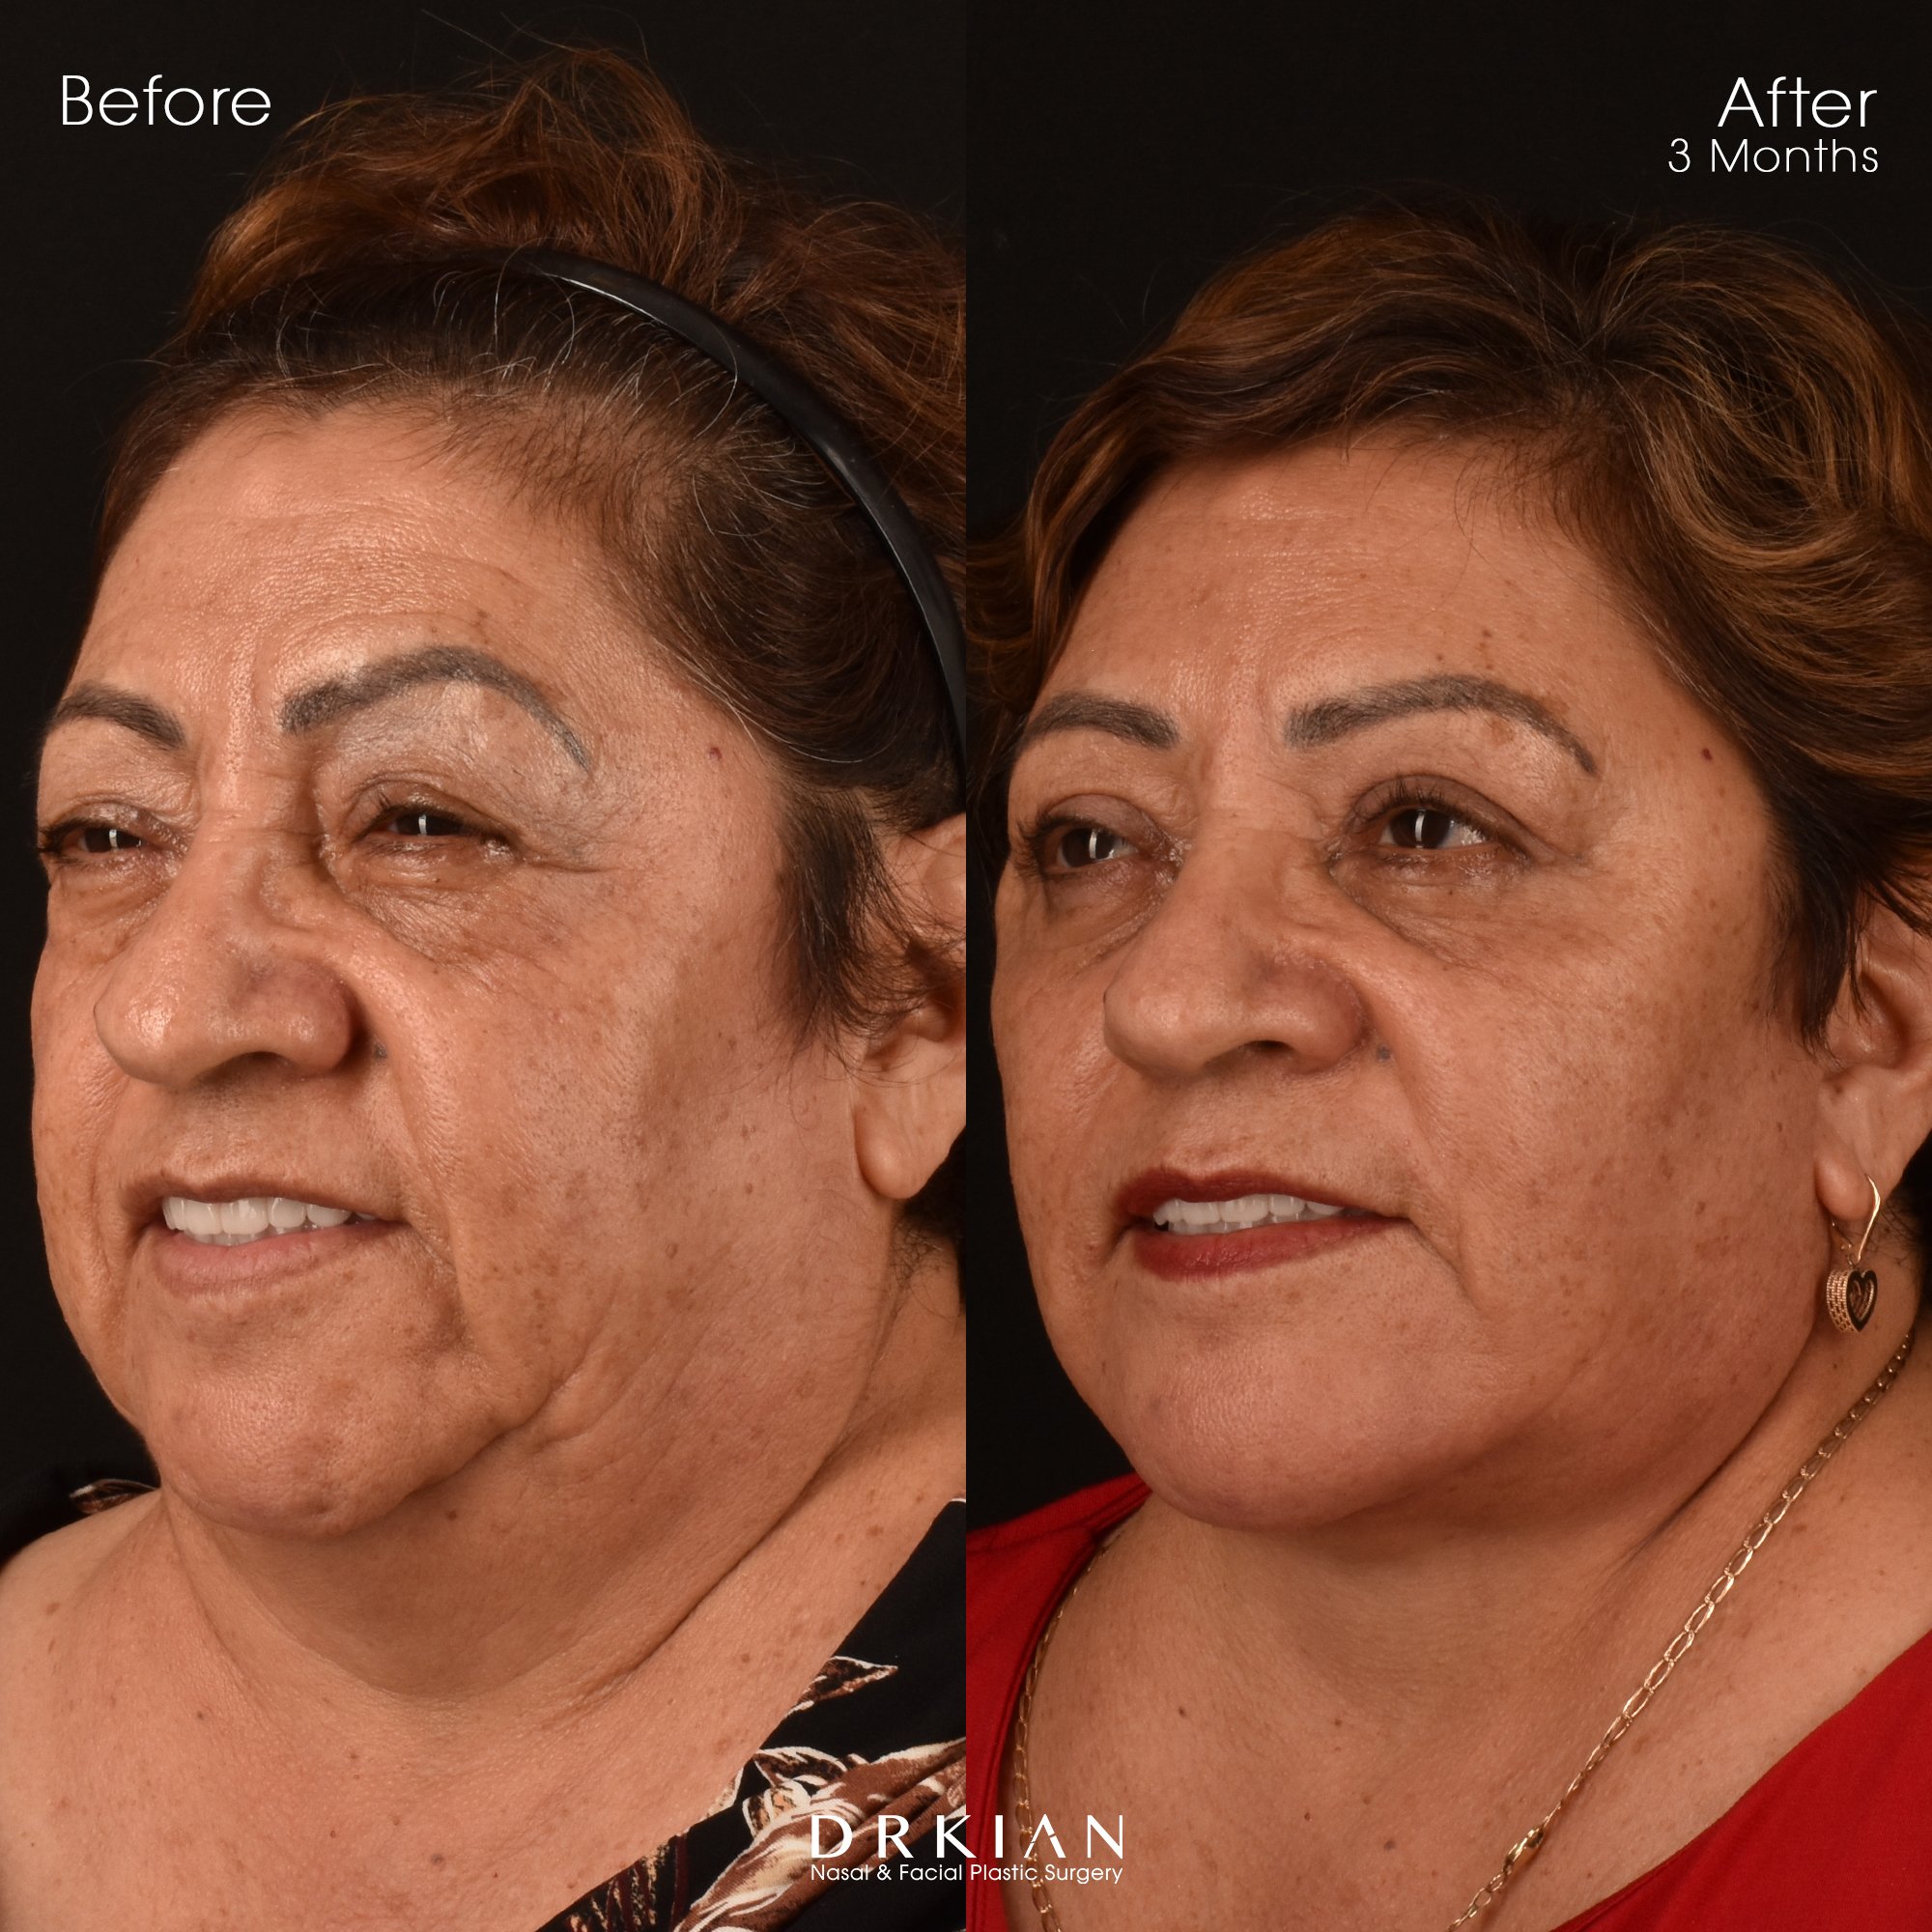
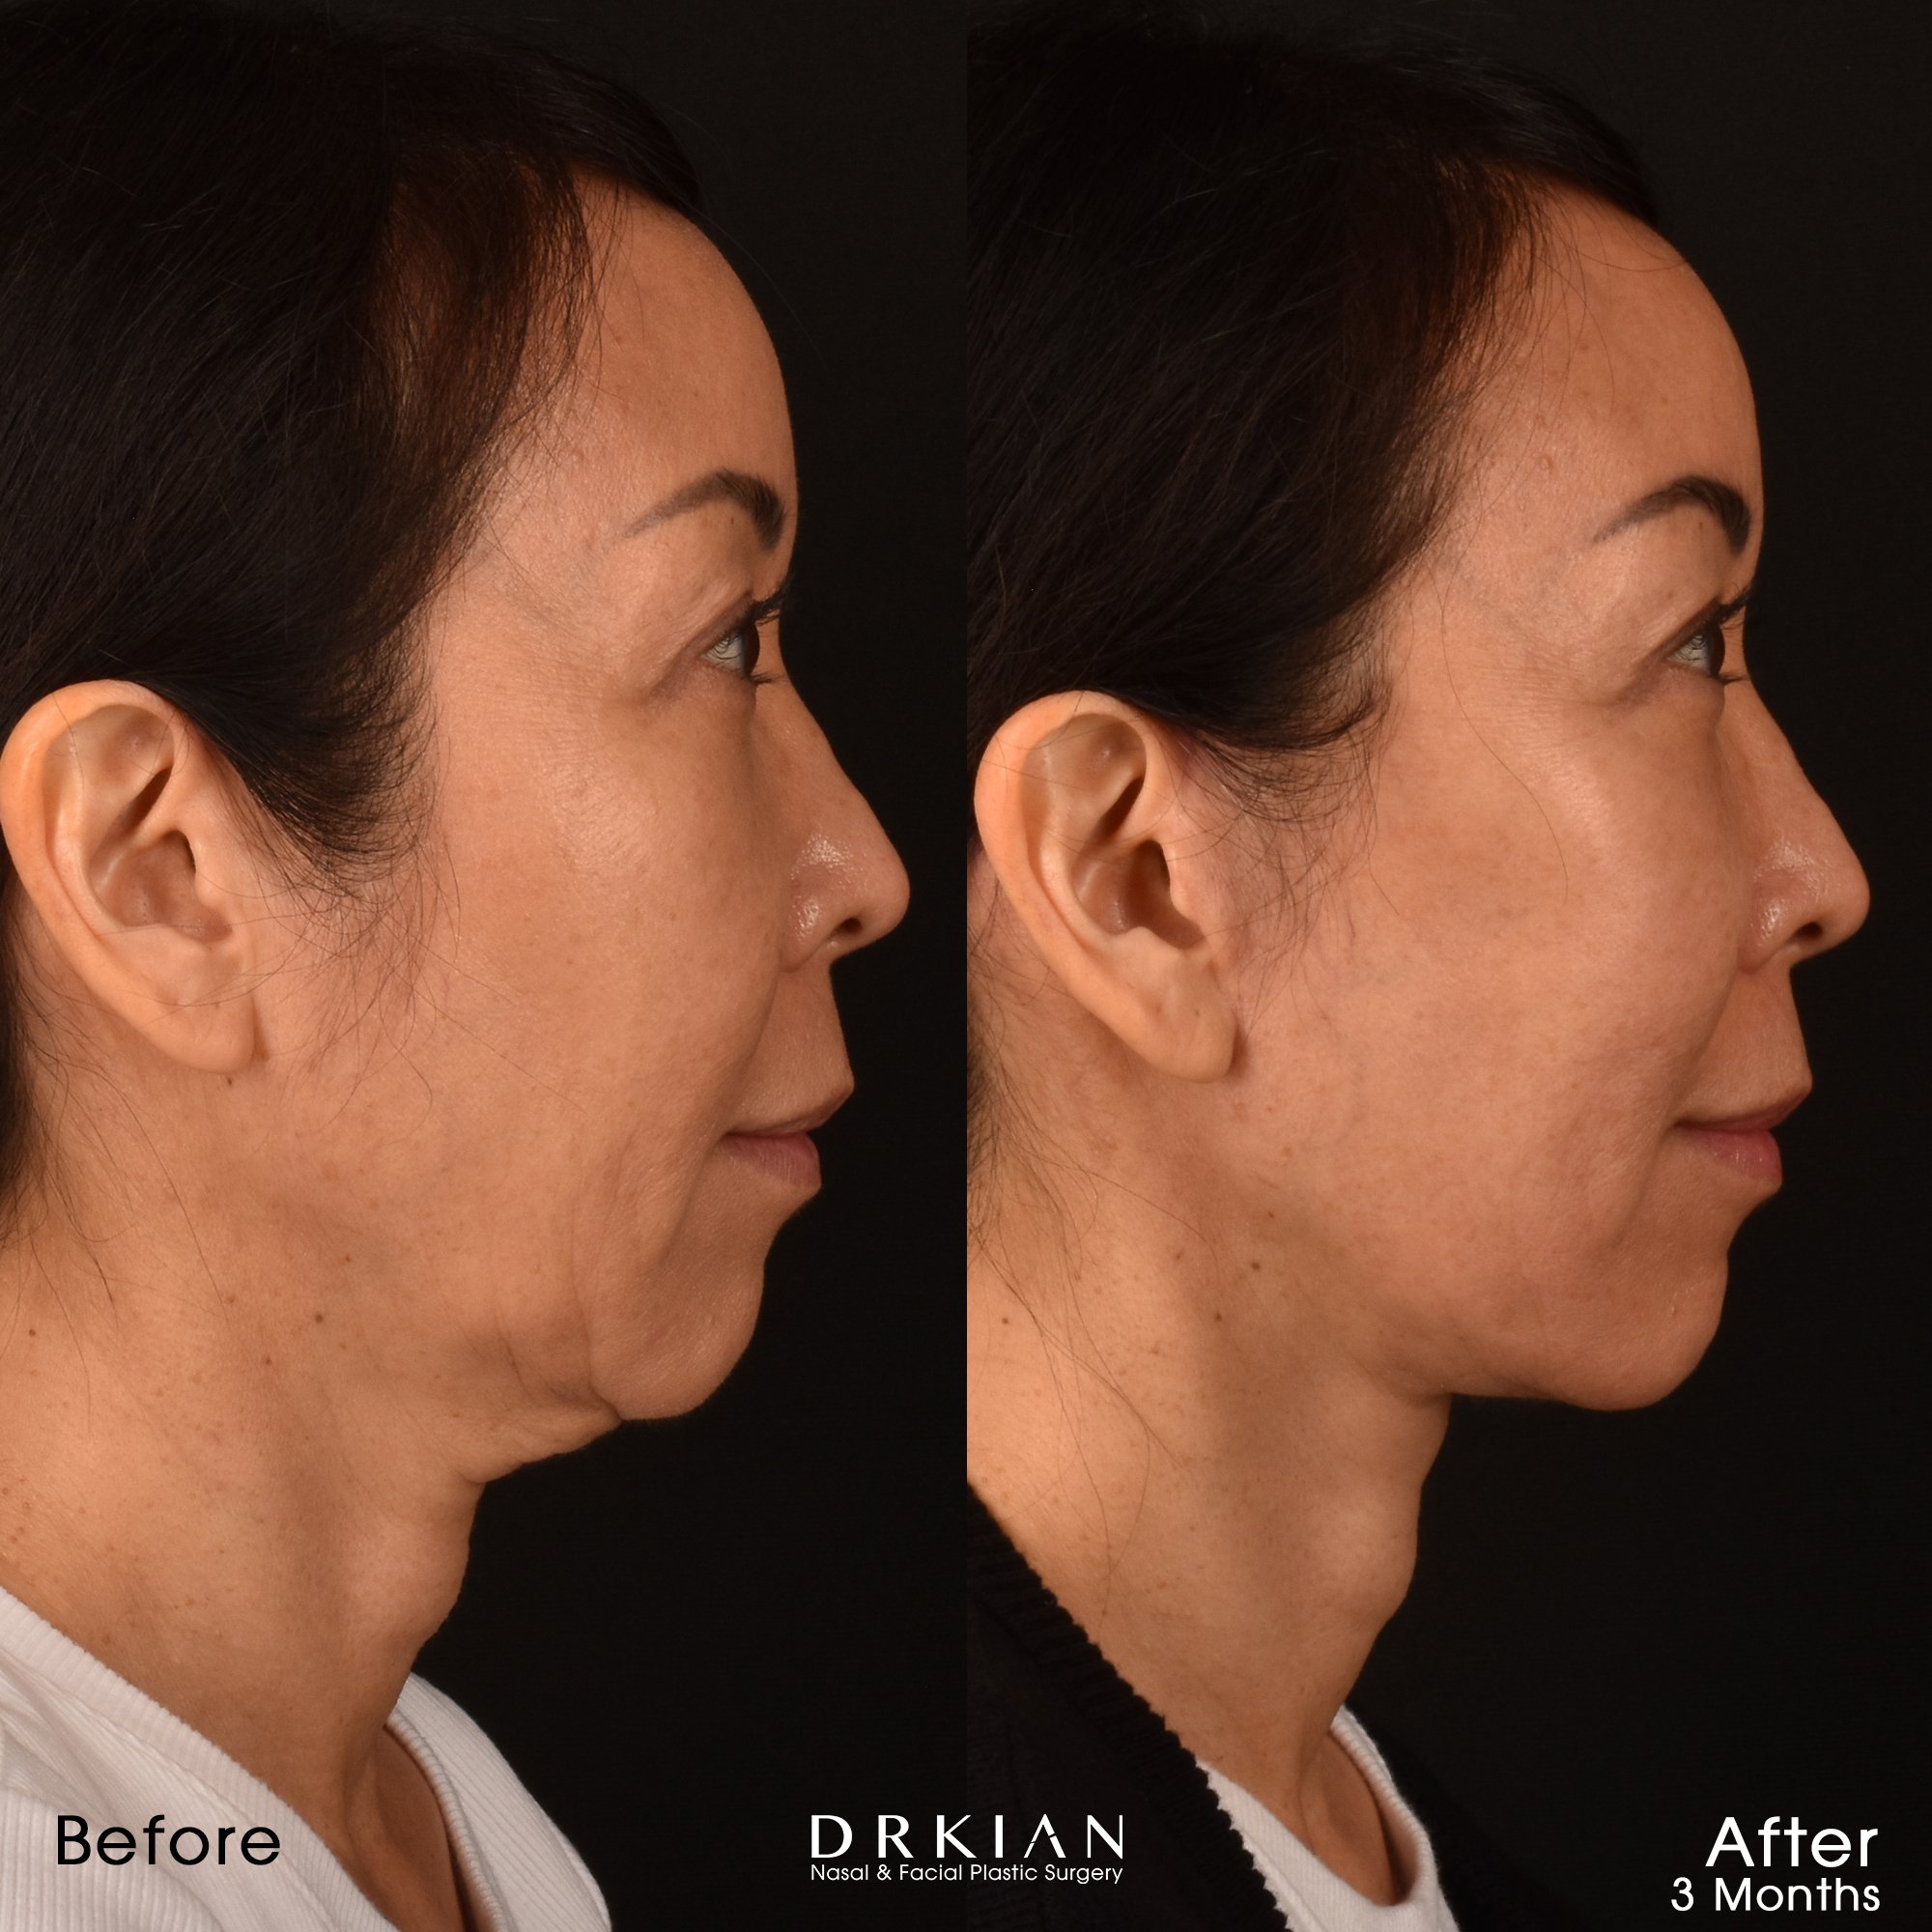
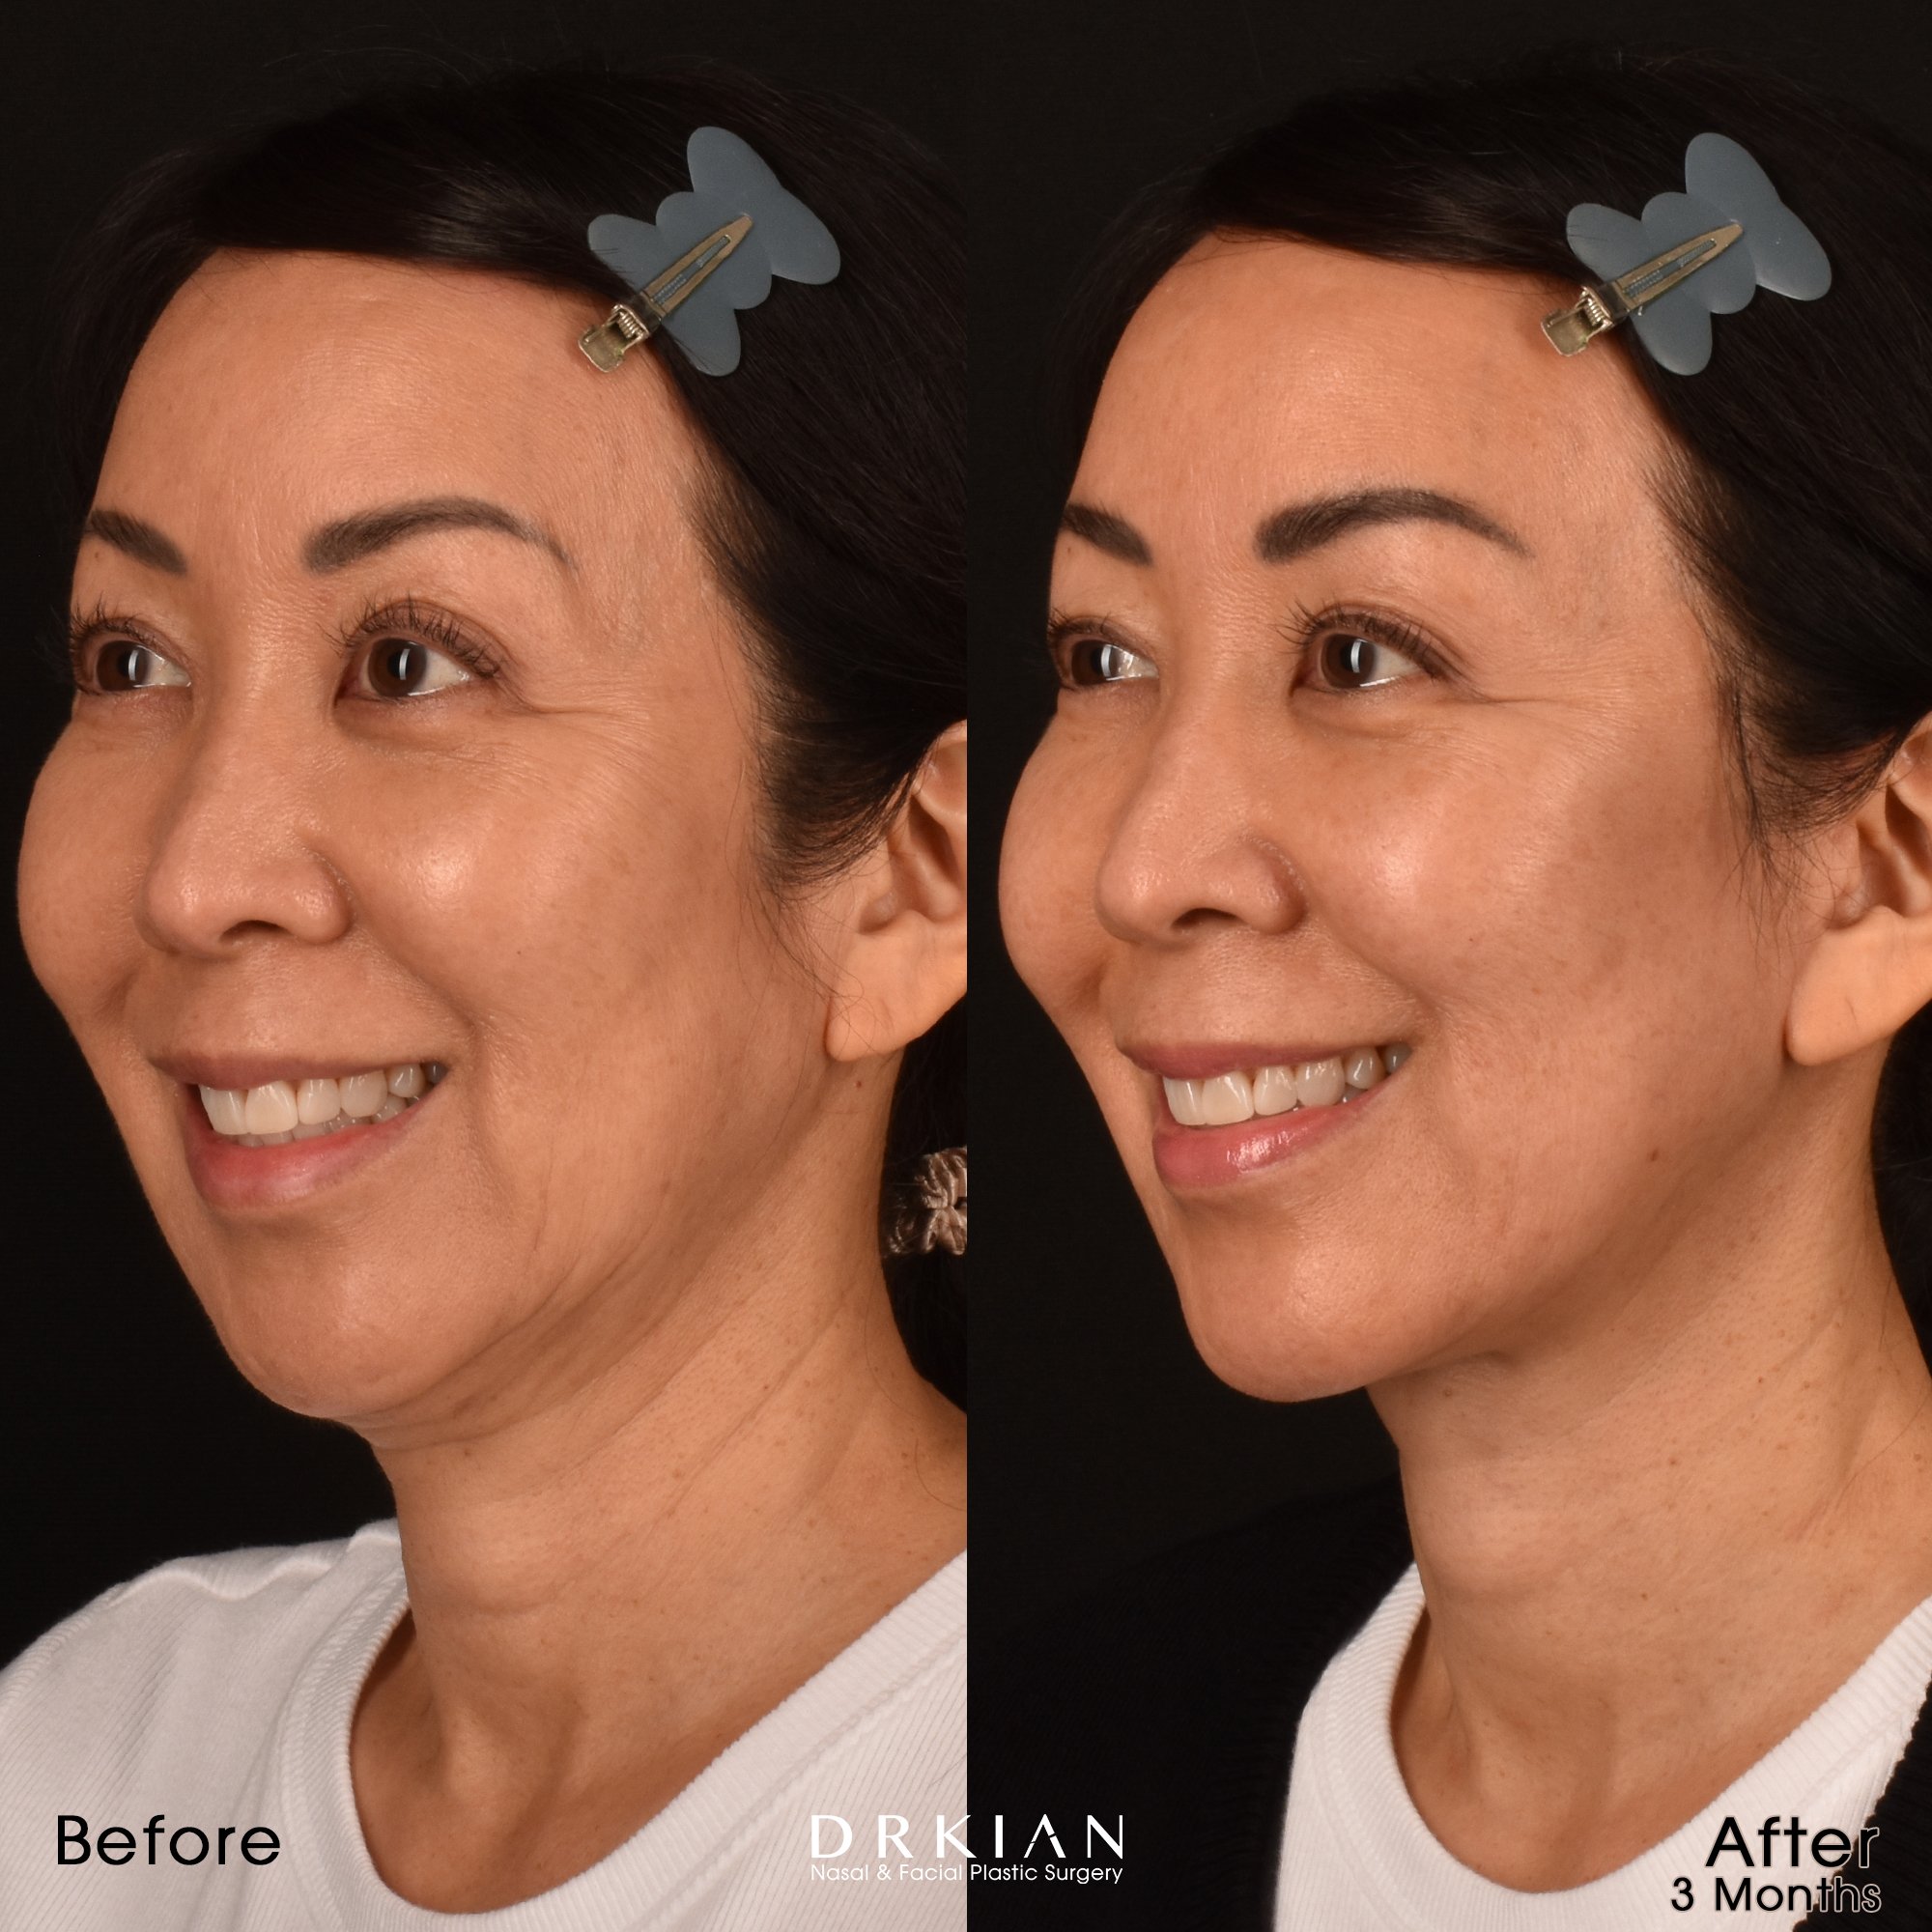
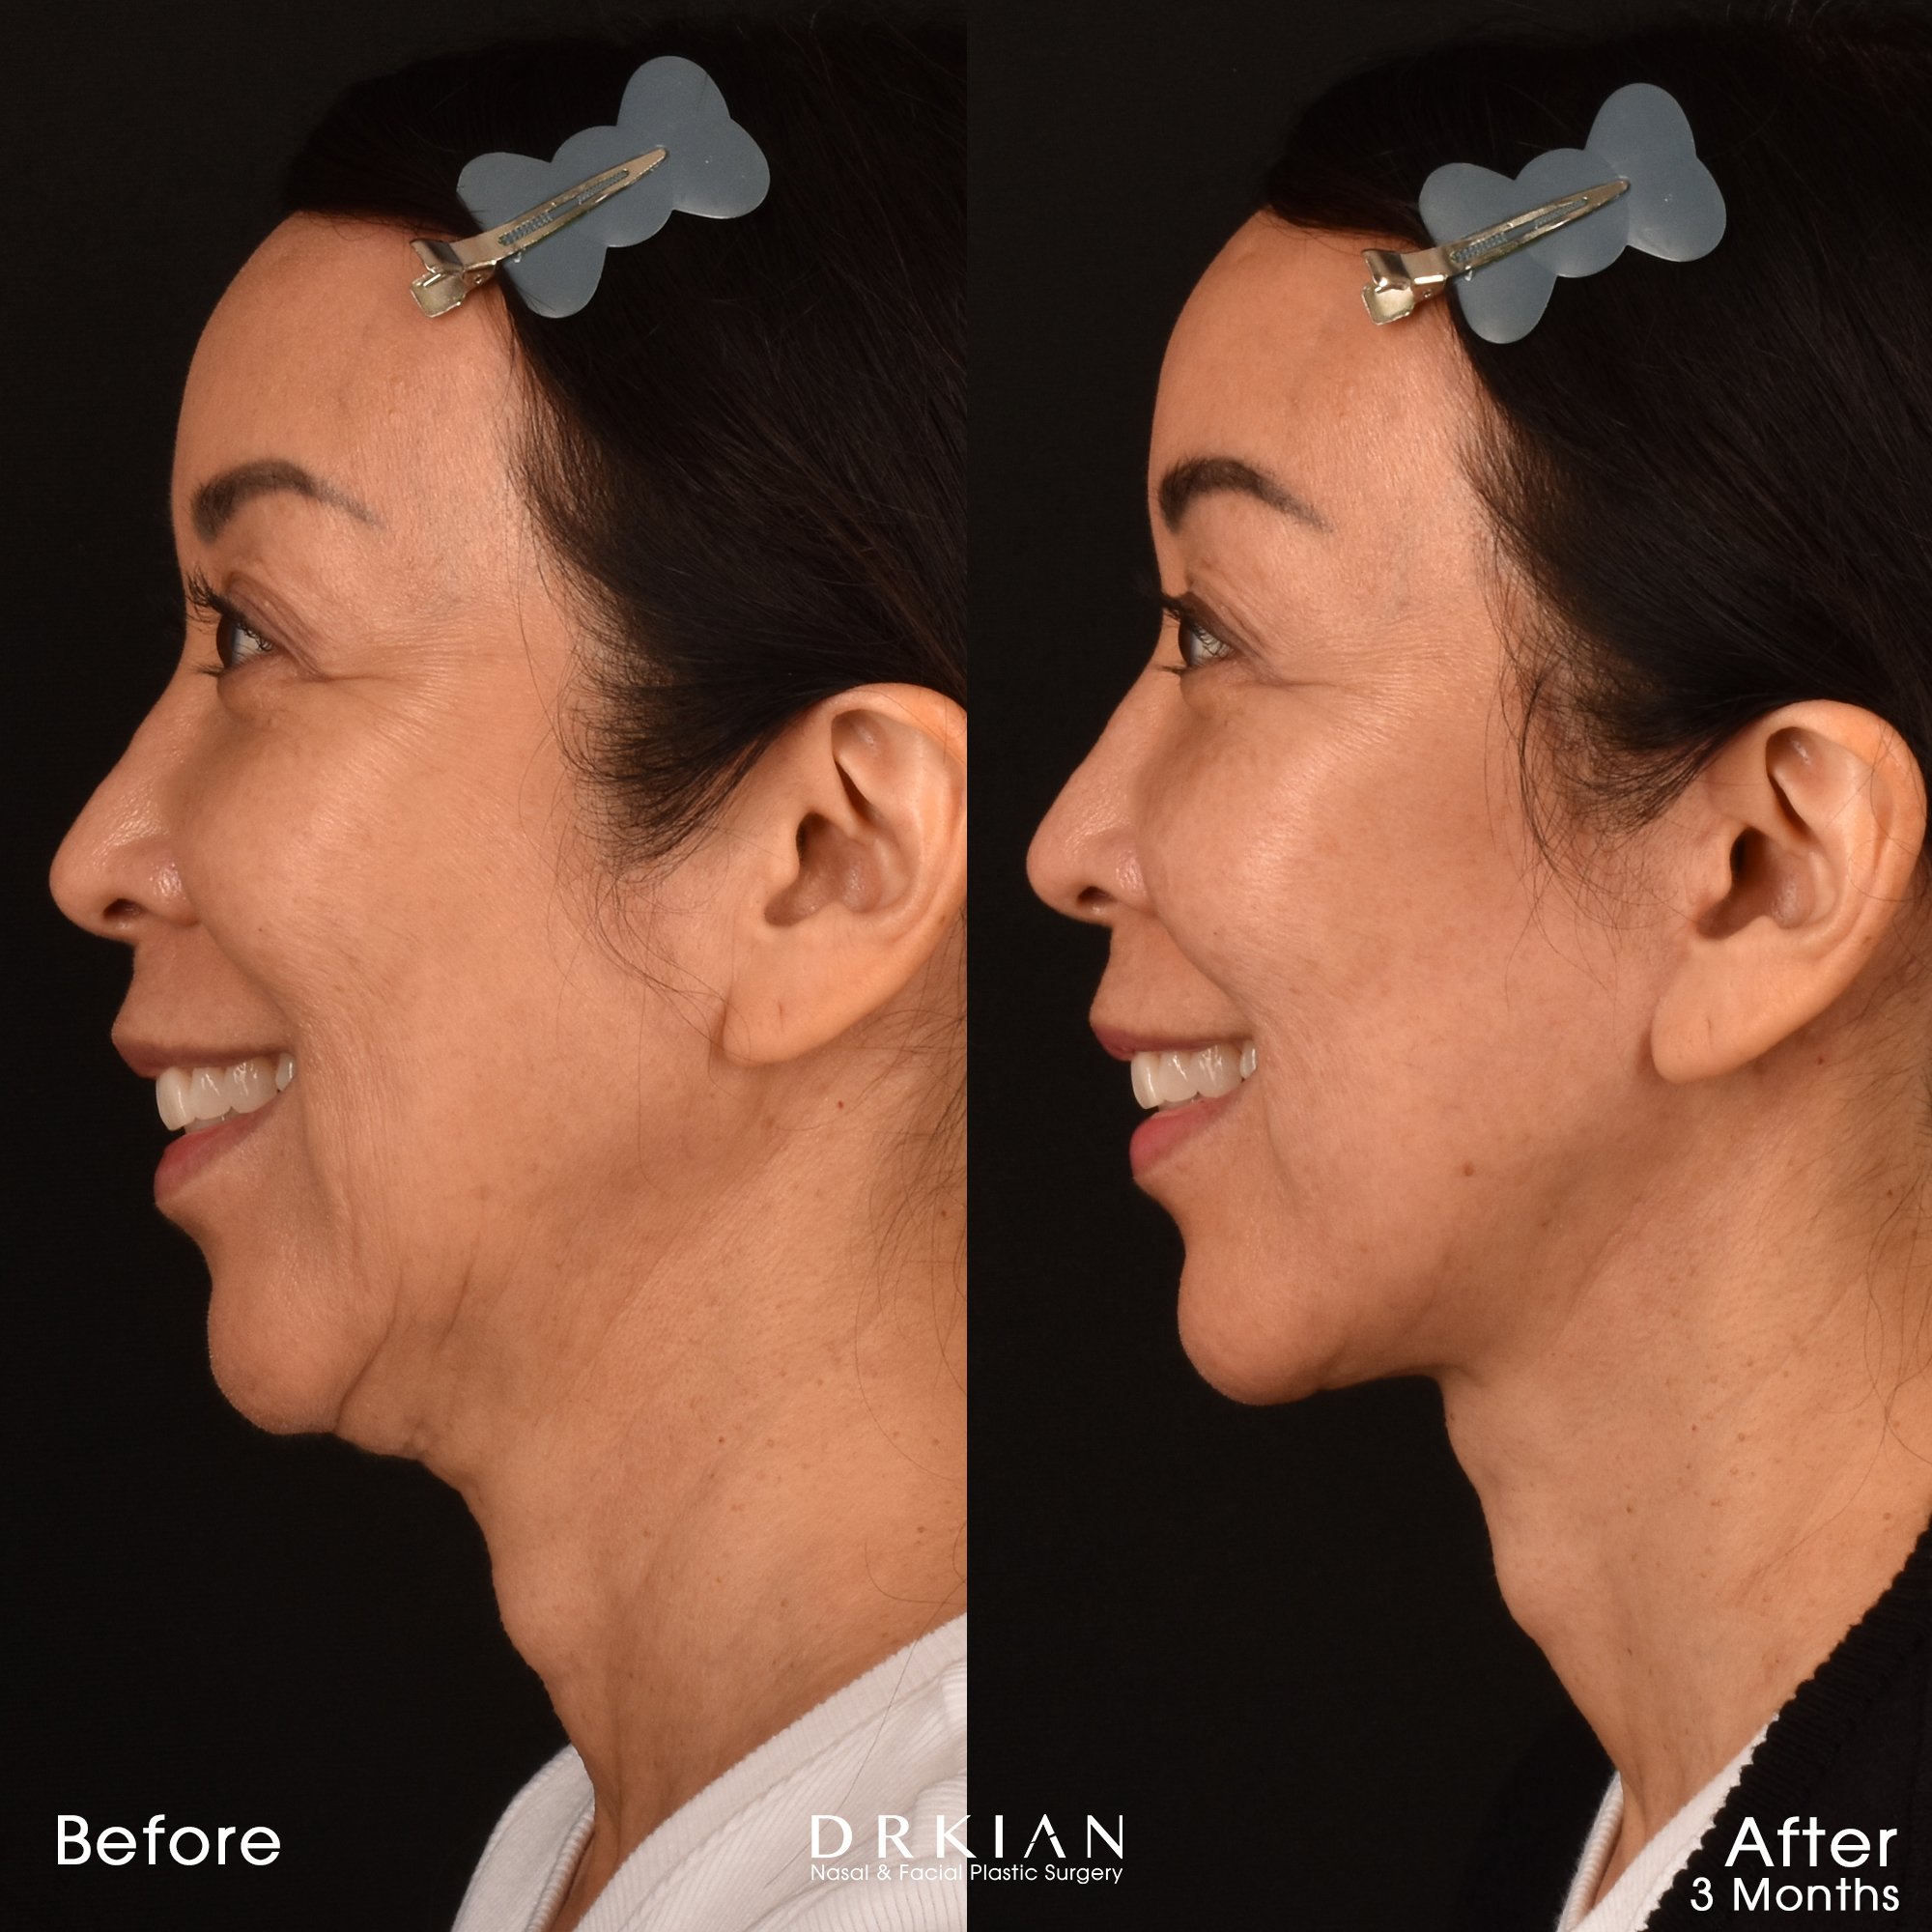
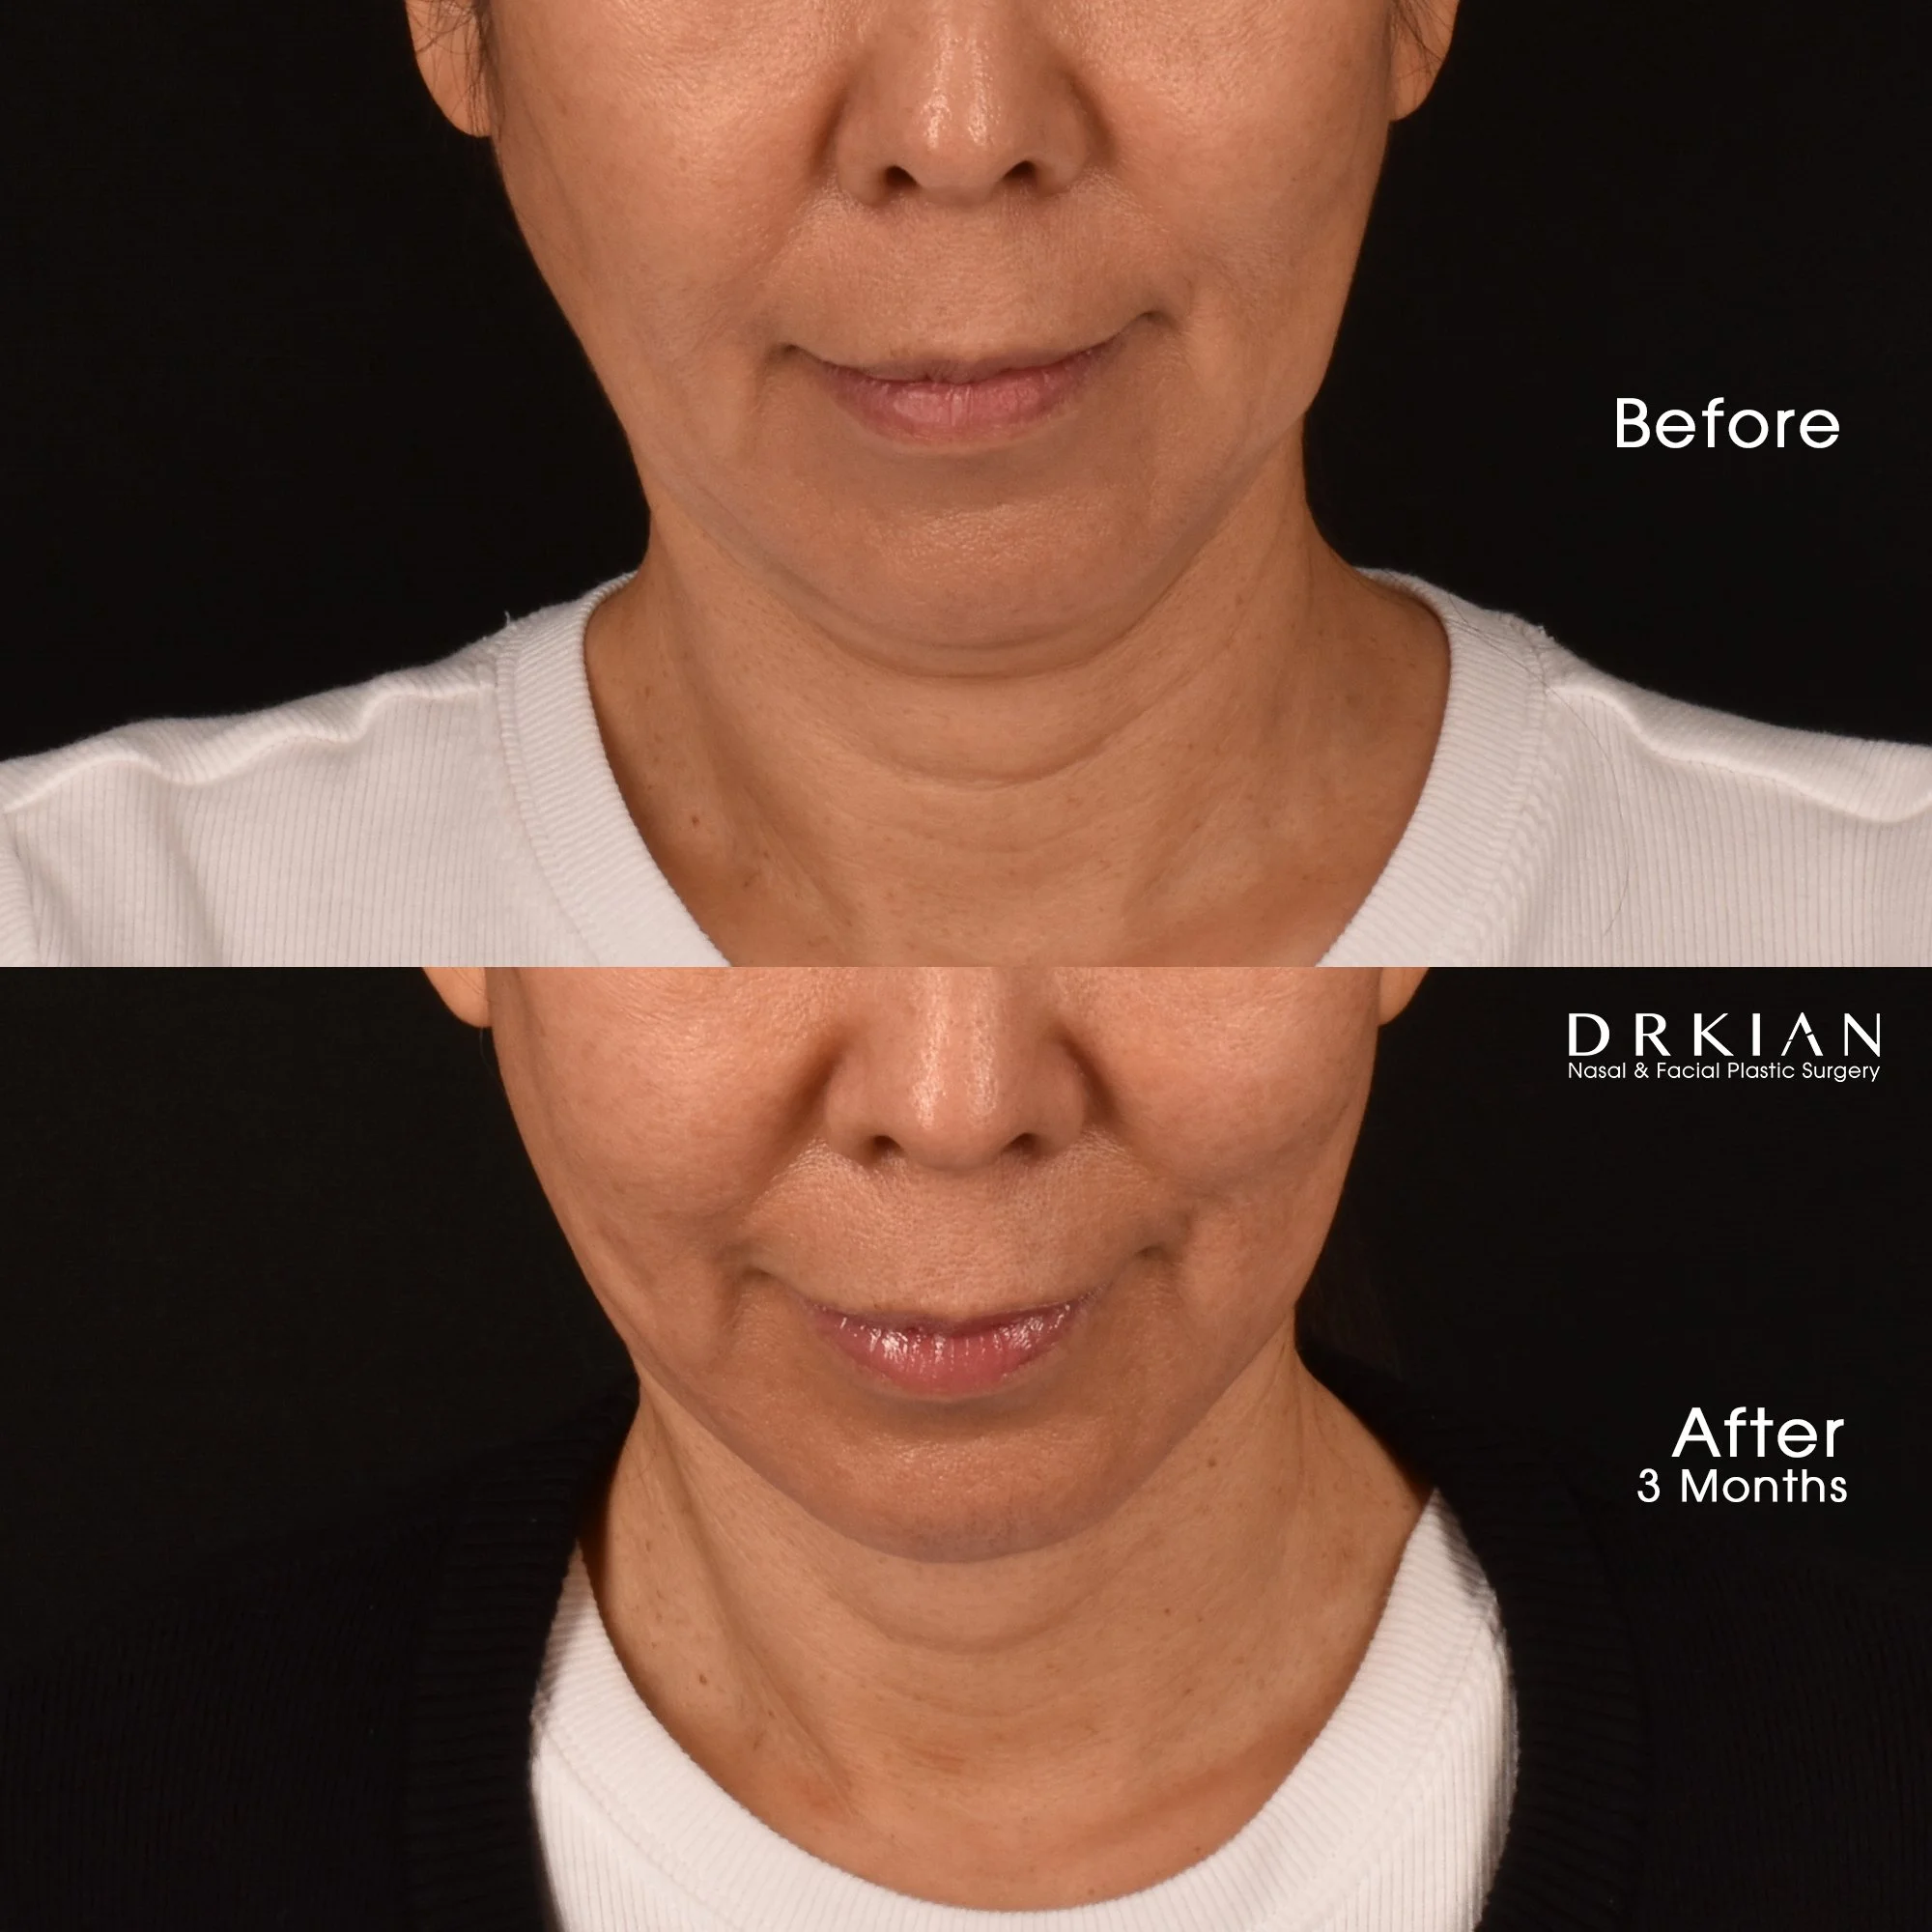
Deep Plane Lower Face & Neck Lift with Chin Implant & Upper Blepharoplasty: Before & After Three Months
Deep Plane Lower Face & Neck Lift with Chin Implant & Upper Blepharoplasty: Before & After Three Months
Deep Plane Lower Face & Neck Lift with Chin Implant & Upper Blepharoplasty: Before & After Three Months
Deep Plane Lower Face & Neck Lift with Chin Implant & Upper Blepharoplasty: Before & After Three Months

Deep Plane Lower Face & Neck Lift with Chin Implant & Upper Blepharoplasty: Before & After Three Months

Deep Plane Lower Face & Neck Lift with Chin Implant & Upper Blepharoplasty: Before & After Three Months
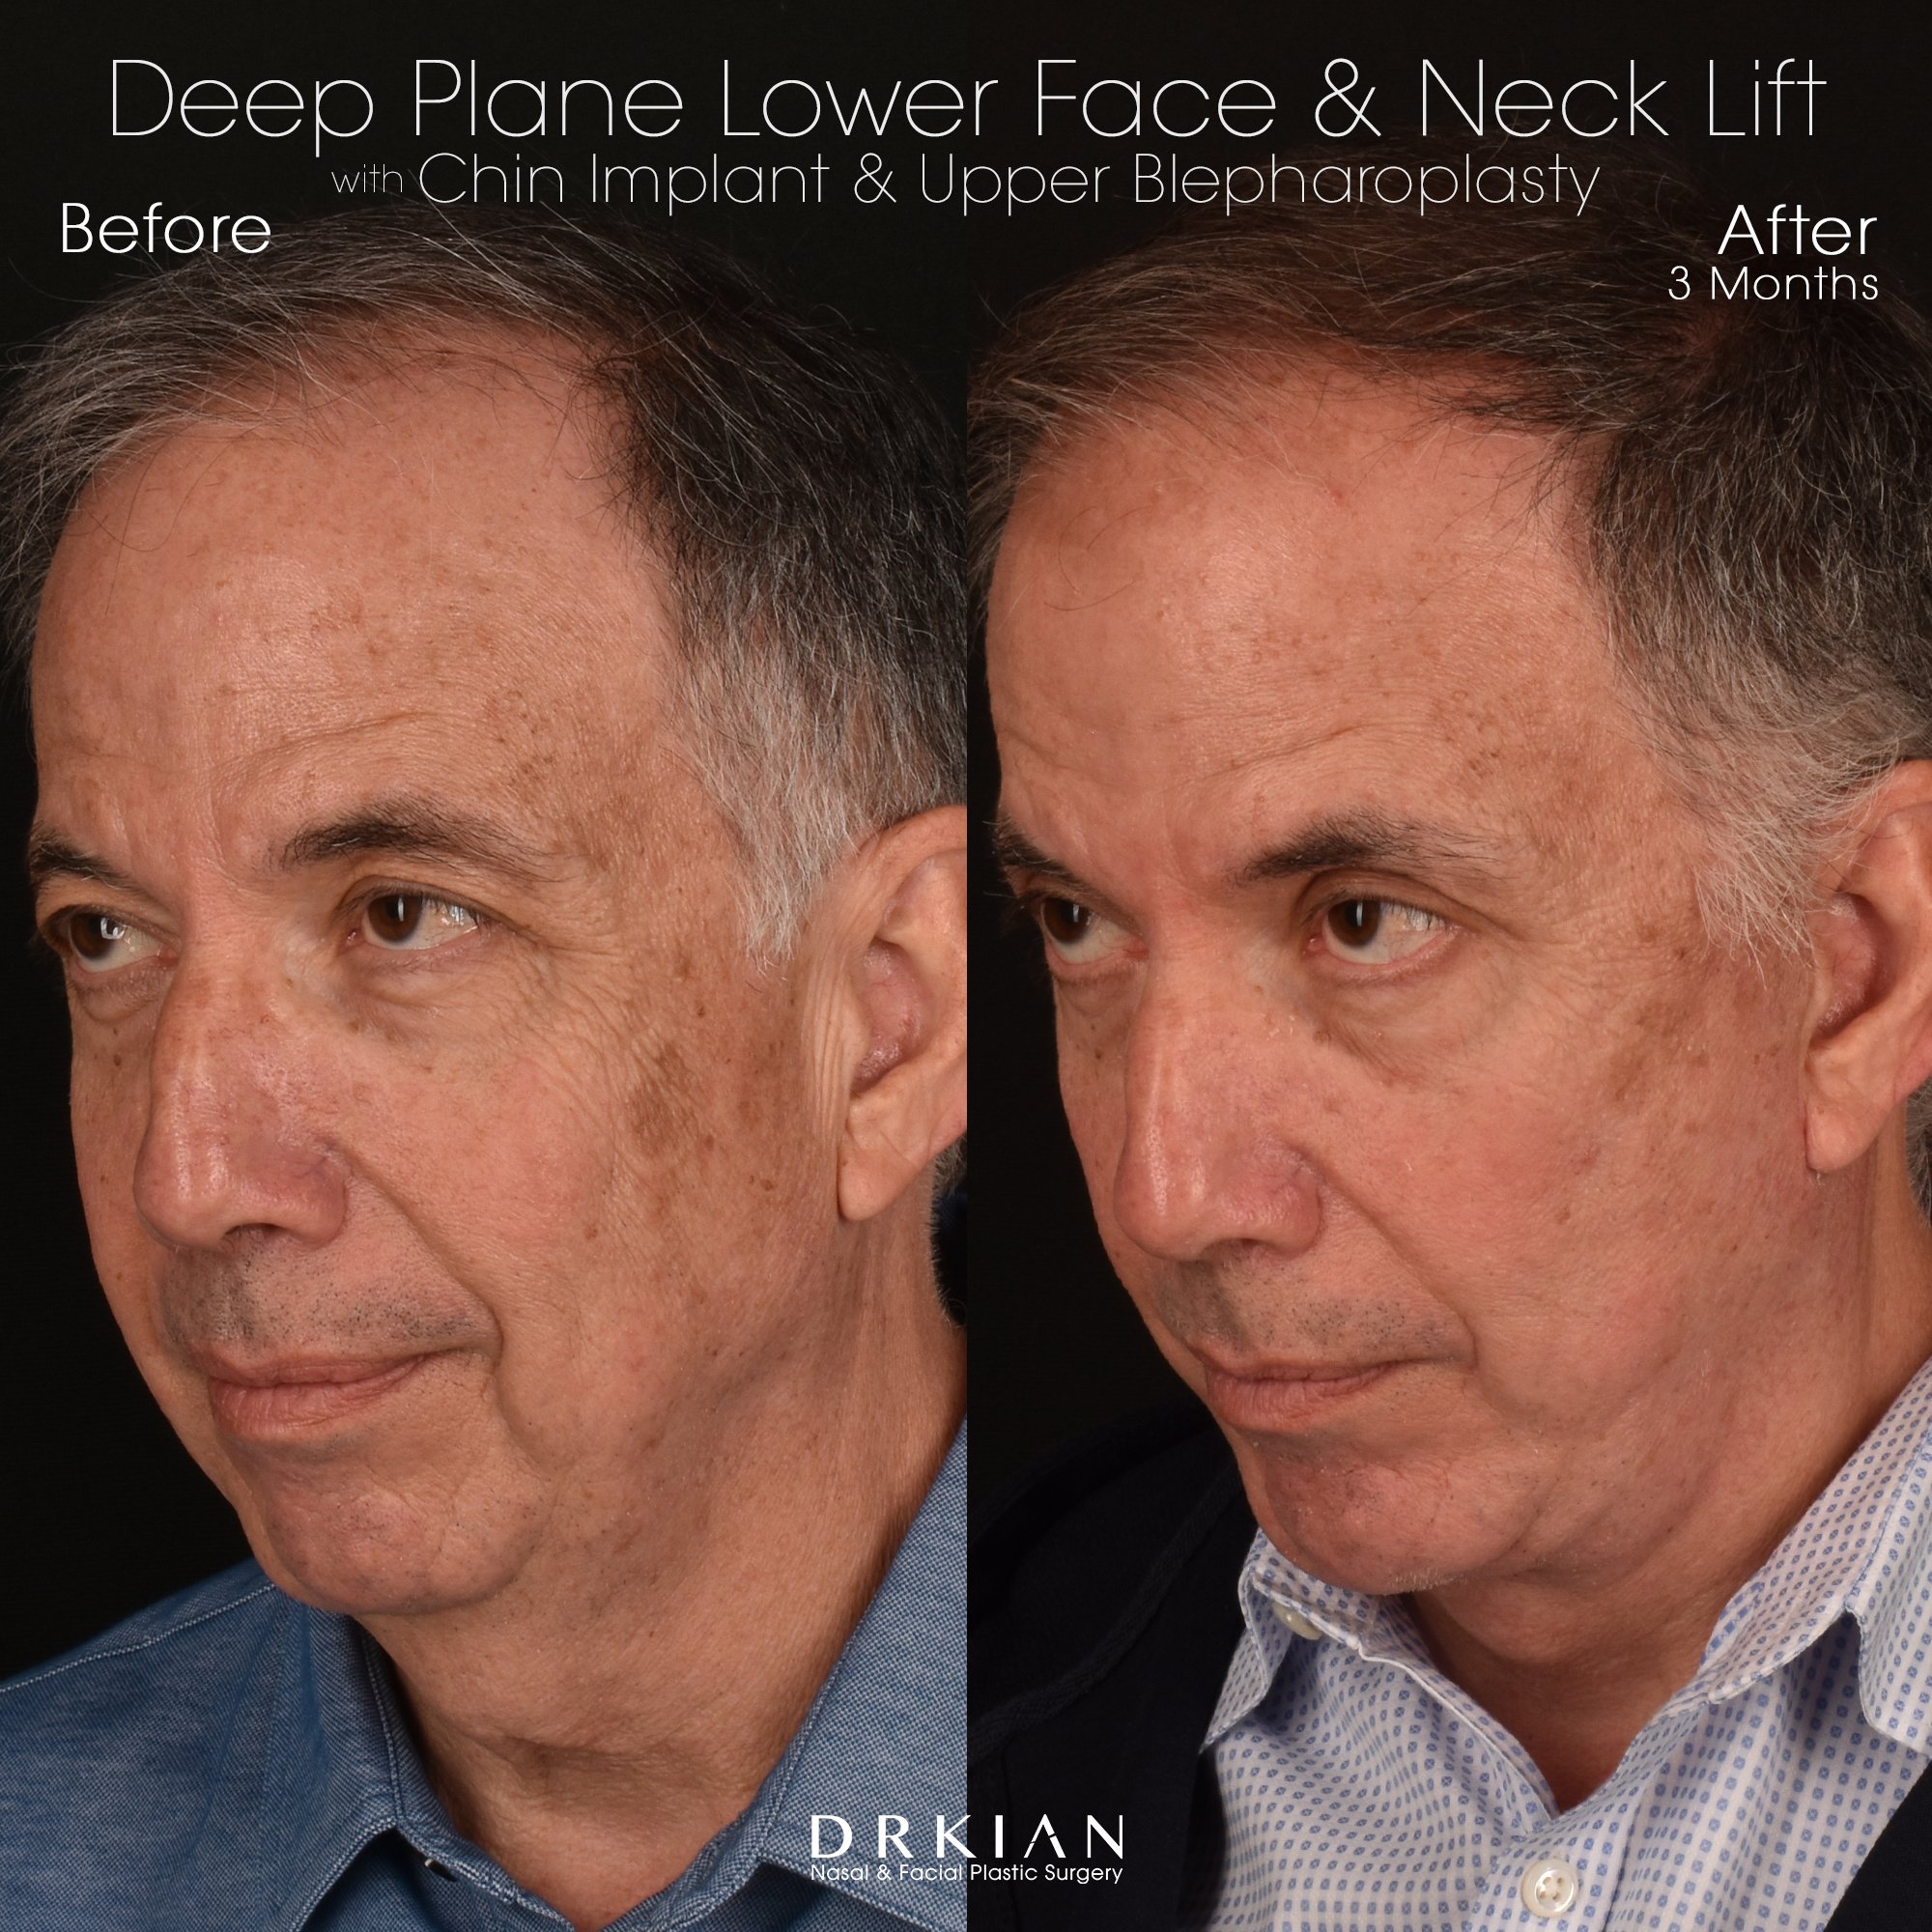
Deep Plane Lower Face & Neck Lift with Chin Implant & Upper Blepharoplasty: Before & After Three Months
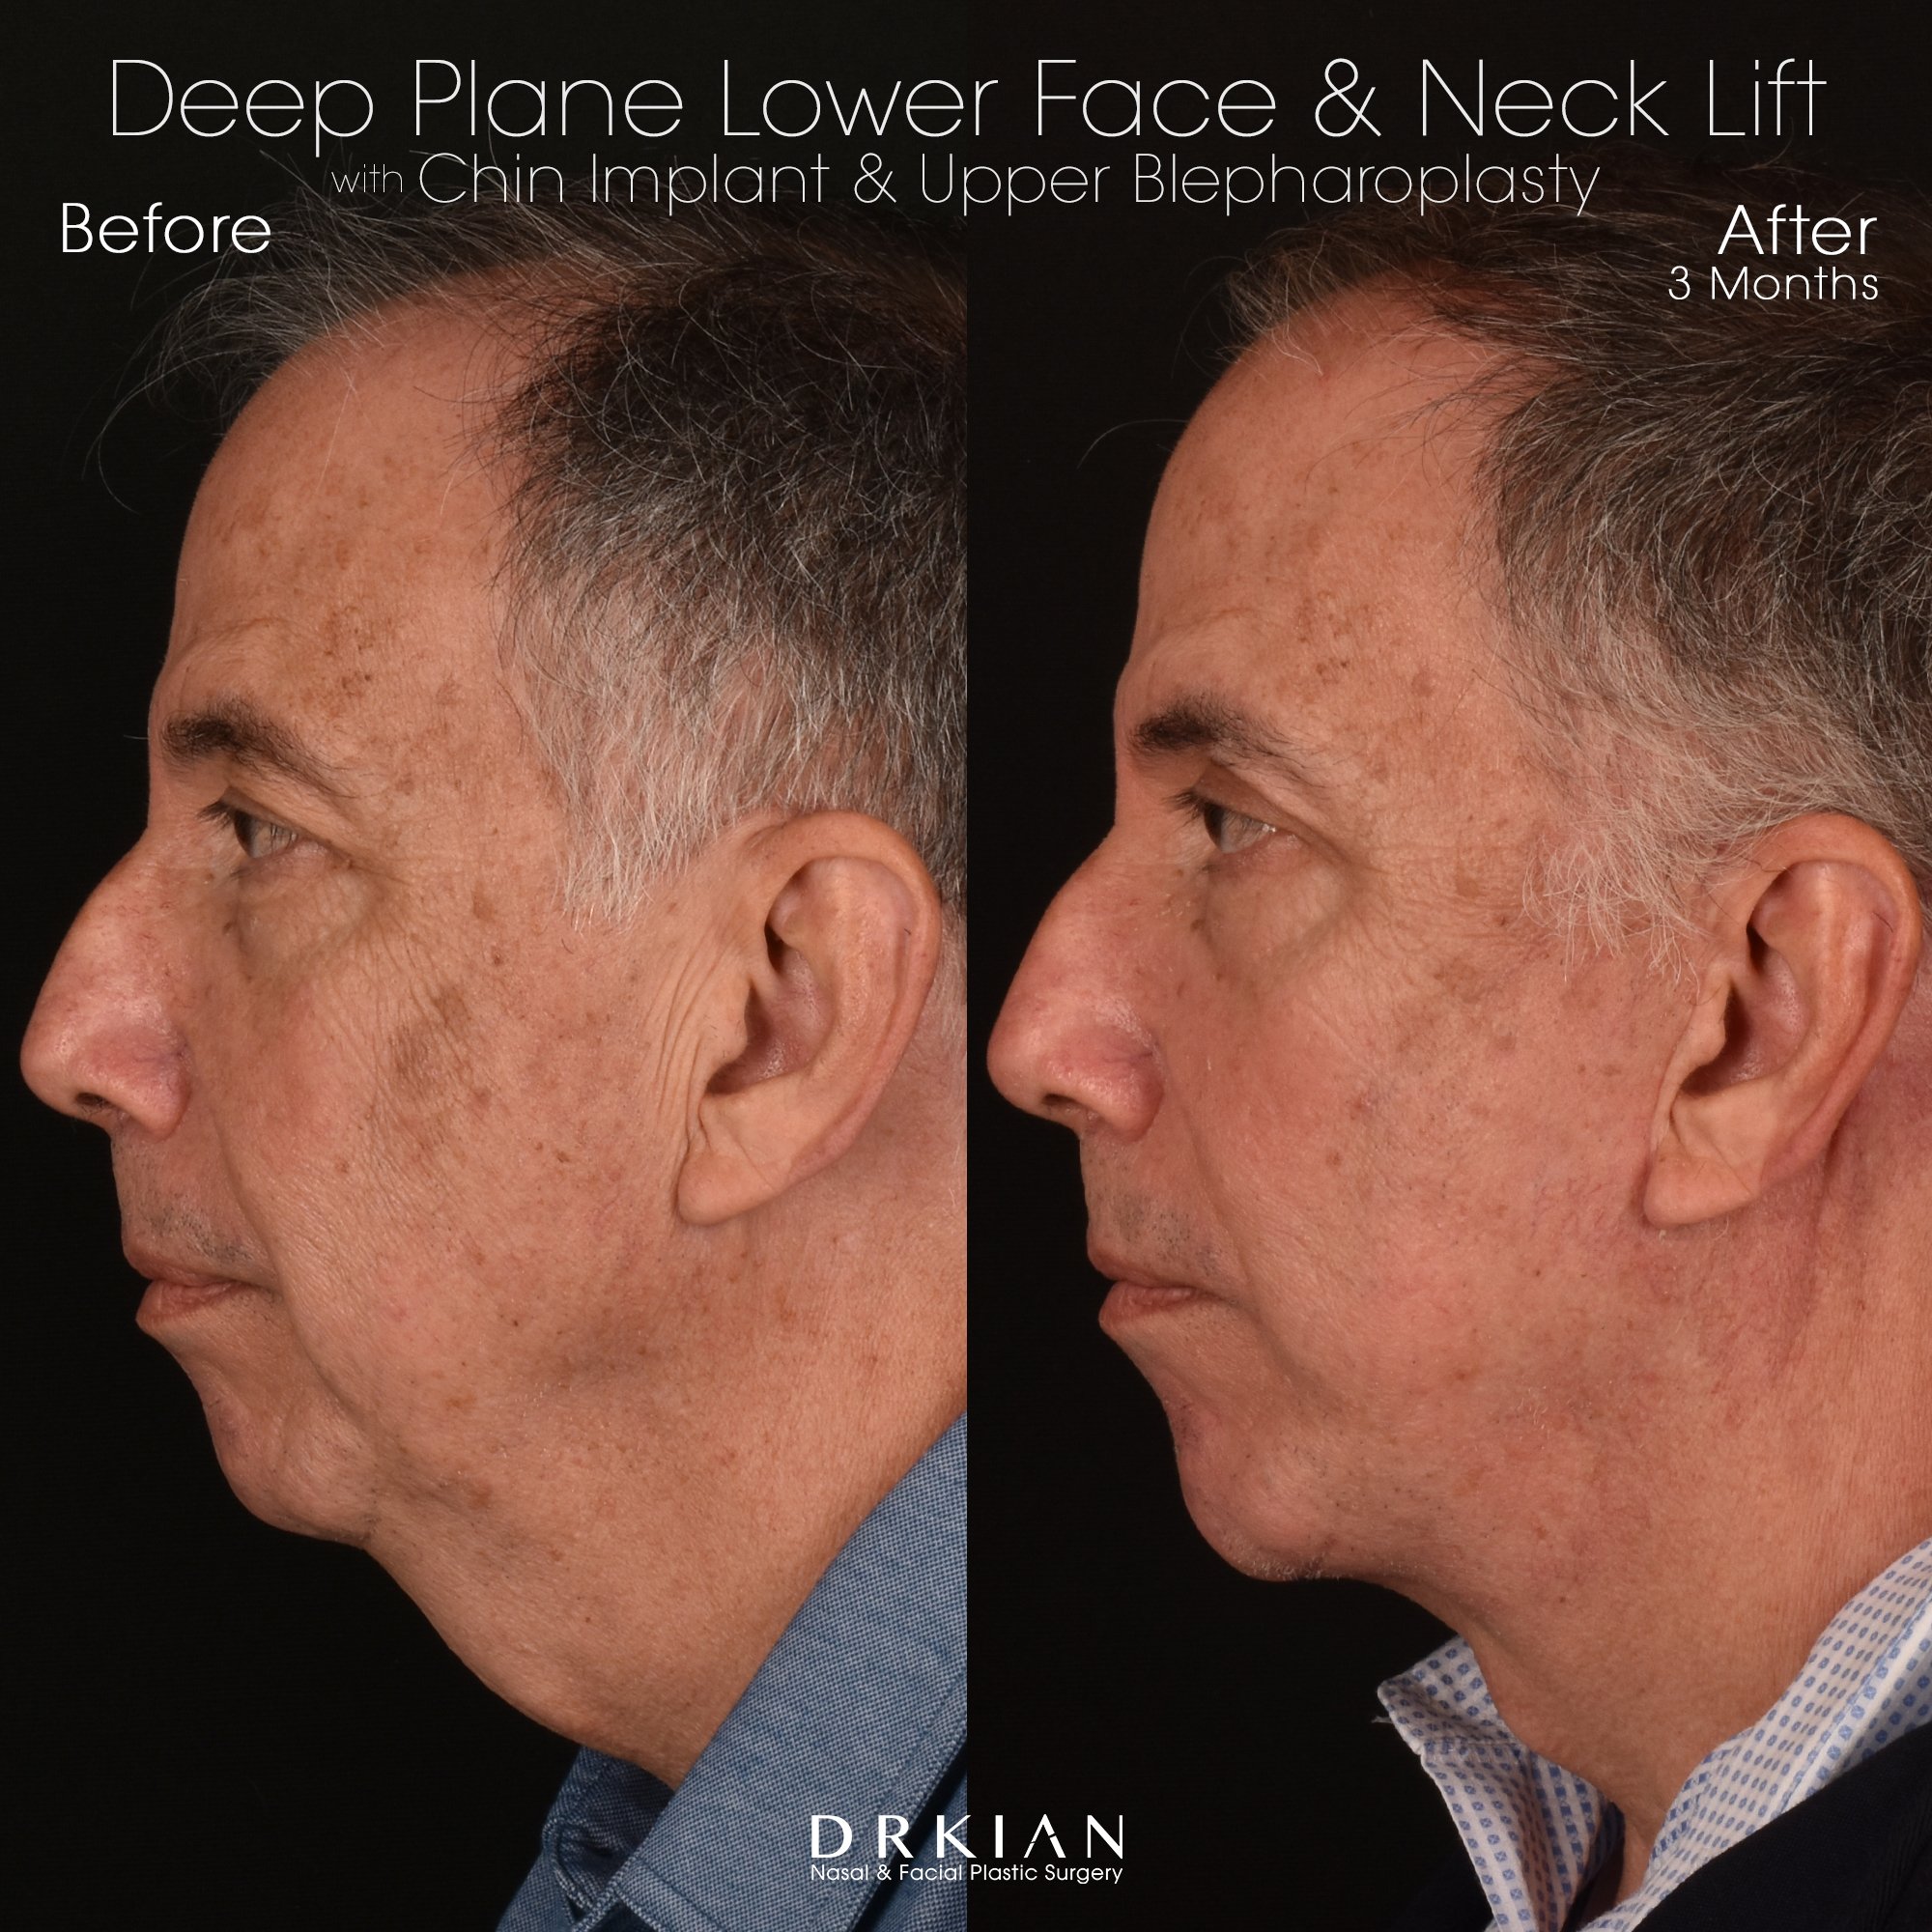
Deep Plane Lower Face & Neck Lift with Chin Implant & Upper Blepharoplasty: Before & After Three Months
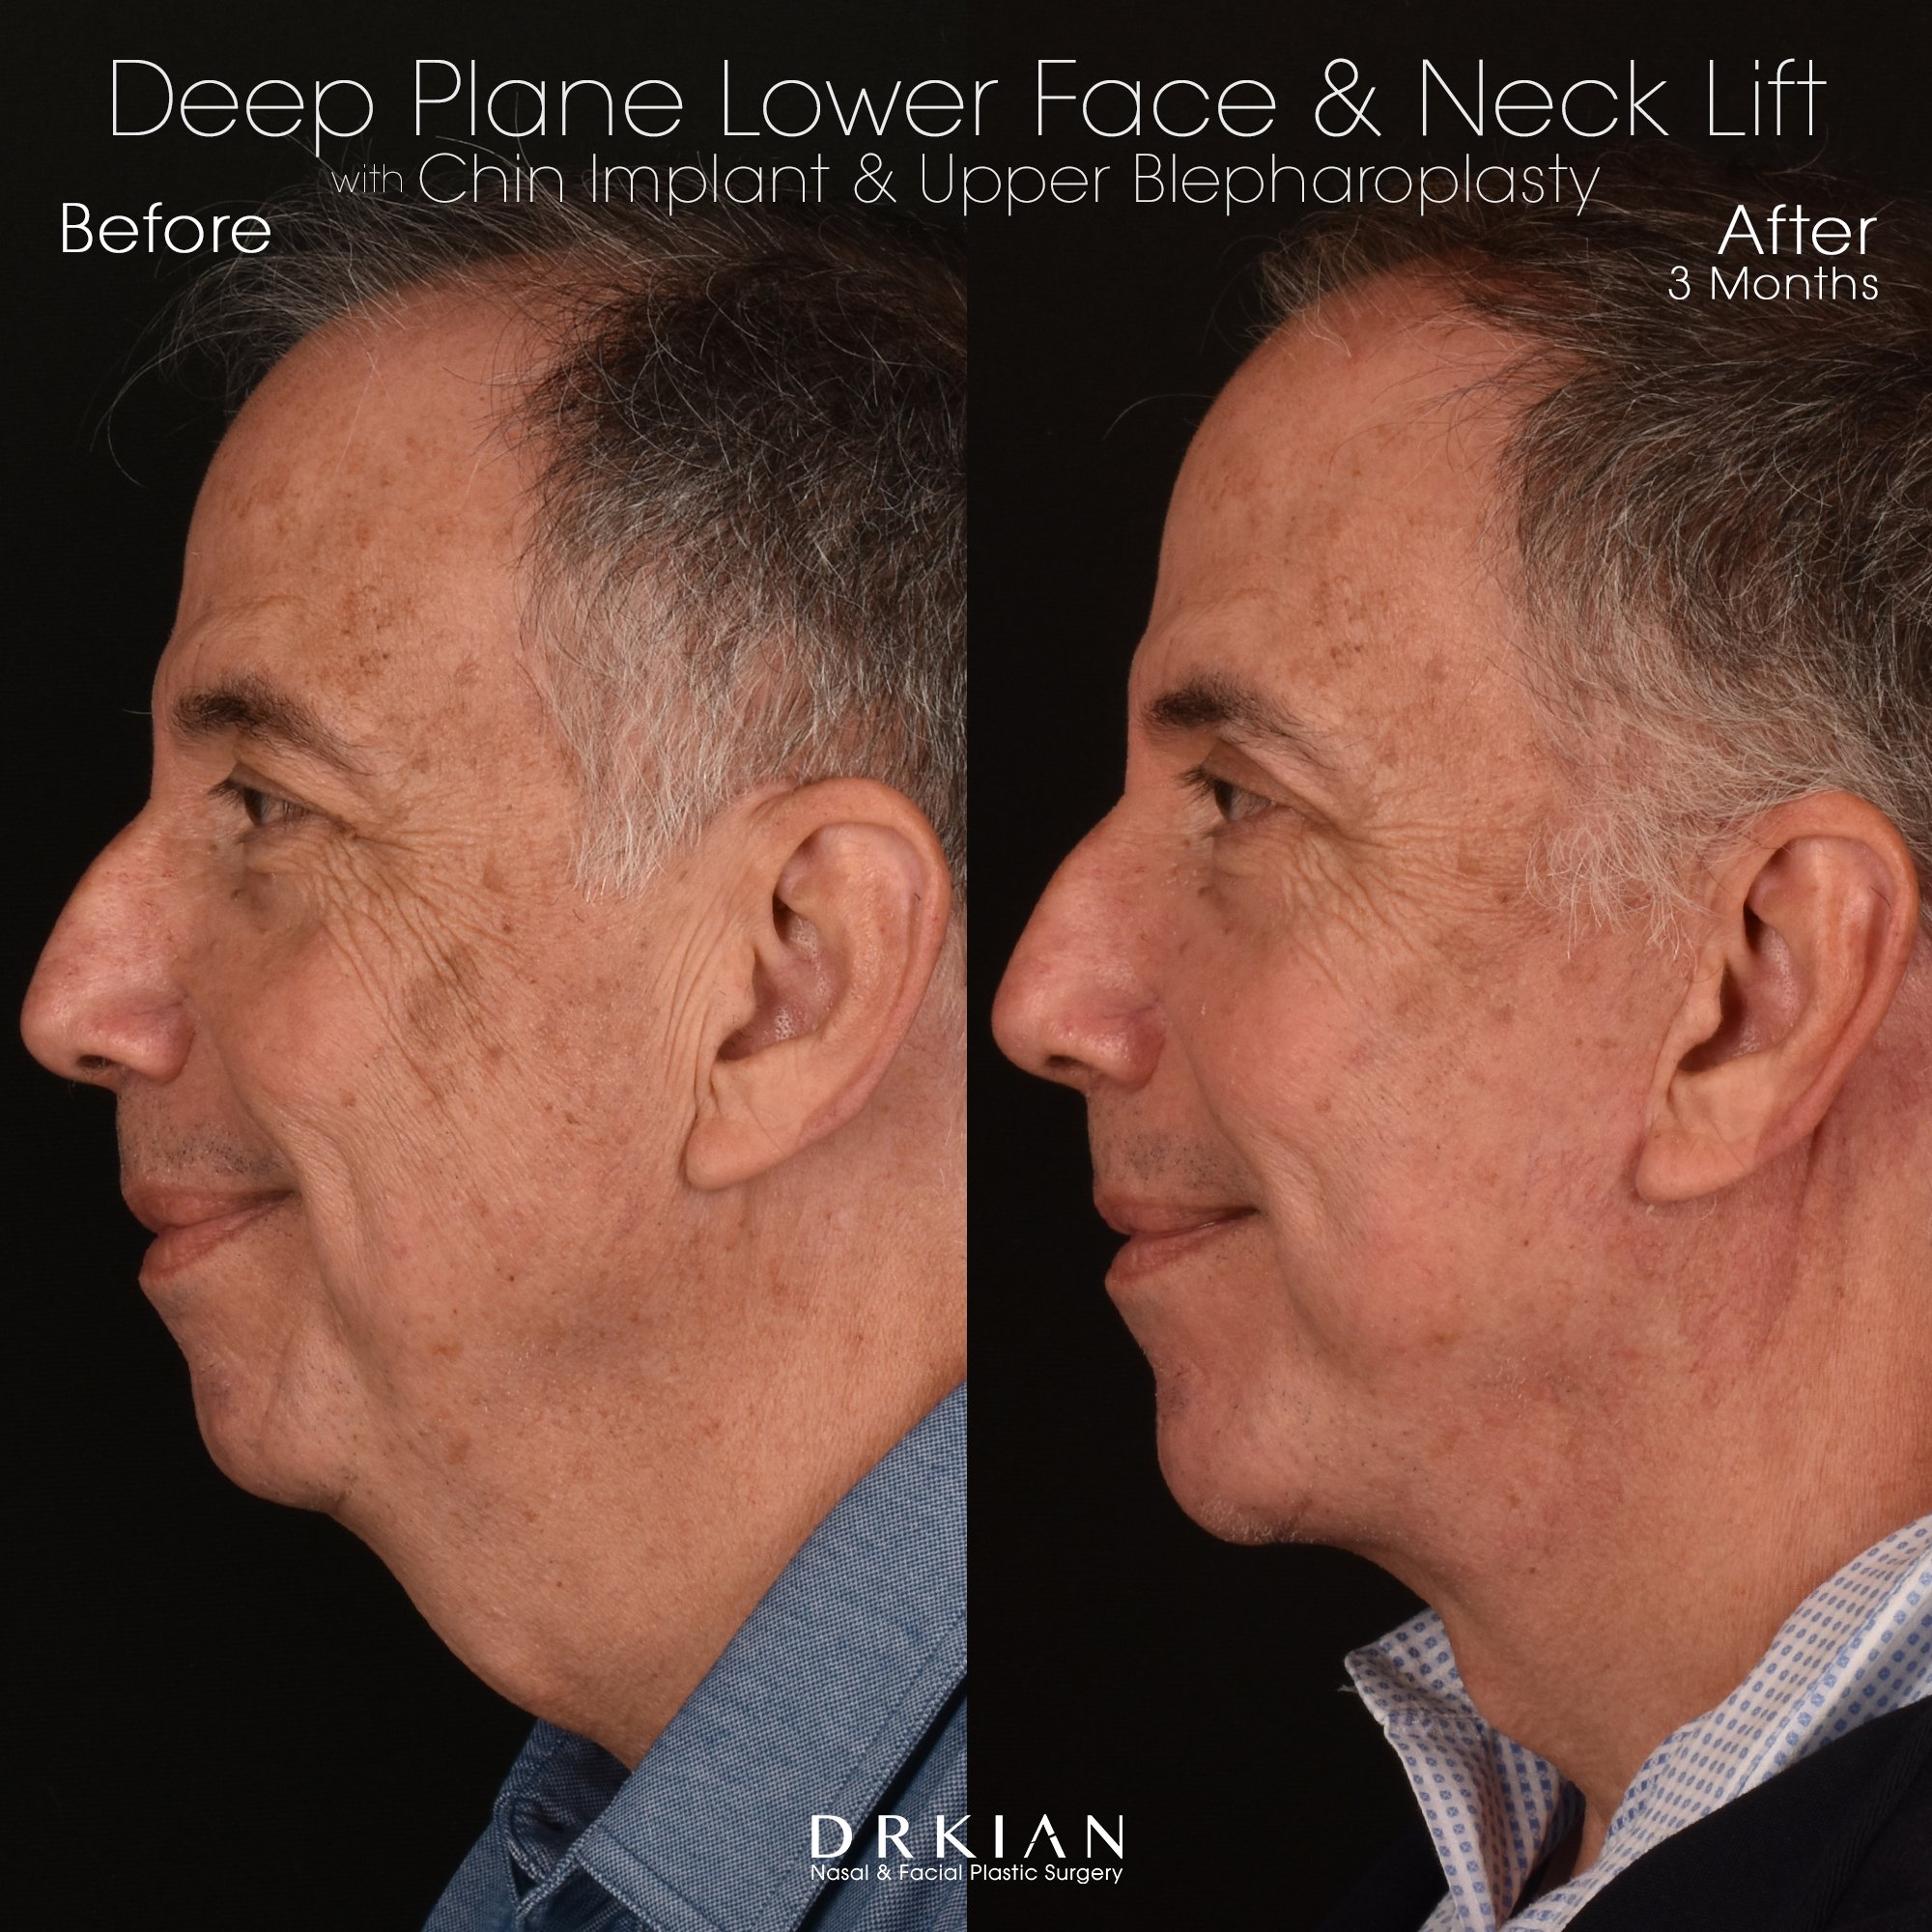
Deep Plane Lower Face & Neck Lift with Chin Implant & Upper Blepharoplasty: Before & After Three Months

Deep Plane Lower Face & Neck Lift with Chin Implant & Upper Blepharoplasty: Before & After Three Months
Secondary Deep Plane Lower, Mid-Face and Neck Lift, Endoscopic Brow Lift, Full-Face Fat Transfer, Periocular and Perioral Rejuvenation with Tunable Resurfacing Laser (TRL): Before & After Four Months

Secondary Deep Plane Lower, Mid-Face and Neck Lift, Endoscopic Brow Lift, Full-Face Fat Transfer, Periocular and Perioral Rejuvenation with Tunable Resurfacing Laser (TRL): Before & After Four Months

Secondary Deep Plane Lower, Mid-Face and Neck Lift, Endoscopic Brow Lift, Full-Face Fat Transfer, Periocular and Perioral Rejuvenation with Tunable Resurfacing Laser (TRL): Before & After Four Months

Secondary Deep Plane Lower, Mid-Face and Neck Lift, Endoscopic Brow Lift, Full-Face Fat Transfer, Periocular and Perioral Rejuvenation with Tunable Resurfacing Laser (TRL): Before & After Four Months

Secondary Deep Plane Lower, Mid-Face and Neck Lift, Endoscopic Brow Lift, Full-Face Fat Transfer, Periocular and Perioral Rejuvenation with Tunable Resurfacing Laser (TRL): Before & After Four Months
Secondary Deep Plane Lower, Mid-Face and Neck Lift, Endoscopic Brow Lift, Full-Face Fat Transfer, Periocular and Perioral Rejuvenation with Tunable Resurfacing Laser (TRL): Before & After Four Months
Secondary Deep Plane Lower, Mid-Face and Neck Lift, Endoscopic Brow Lift, Full-Face Fat Transfer, Periocular and Perioral Rejuvenation with Tunable Resurfacing Laser (TRL): Before & After Four Months
Secondary Deep Plane Lower, Mid-Face and Neck Lift, Endoscopic Brow Lift, Full-Face Fat Transfer, Periocular and Perioral Rejuvenation with Tunable Resurfacing Laser (TRL): Before & After Four Months
Secondary Deep Plane Lower, Mid-Face and Neck Lift, Endoscopic Brow Lift, Full-Face Fat Transfer, Periocular and Perioral Rejuvenation with Tunable Resurfacing Laser (TRL): Before & After Four Months
Secondary Deep Plane Lower, Mid-Face and Neck Lift, Endoscopic Brow Lift, Full-Face Fat Transfer, Periocular and Perioral Rejuvenation with Tunable Resurfacing Laser (TRL): Before & After Four Months

Secondary Deep Plane Lower, Mid-Face and Neck Lift, Endoscopic Brow Lift, Full-Face Fat Transfer, Periocular and Perioral Rejuvenation with Tunable Resurfacing Laser (TRL): Before & After Four Months
Secondary Deep Plane Lower, Mid-Face and Neck Lift, Endoscopic Brow Lift, Full-Face Fat Transfer, Periocular and Perioral Rejuvenation with Tunable Resurfacing Laser (TRL): Before & After Four Months

Secondary Deep Plane Lower, Mid-Face and Neck Lift, Endoscopic Brow Lift, Full-Face Fat Transfer, Periocular and Perioral Rejuvenation with Tunable Resurfacing Laser (TRL): Before & After Four Months
Secondary Deep Plane Lower, Mid-Face and Neck Lift, Endoscopic Brow Lift, Full-Face Fat Transfer, Periocular and Perioral Rejuvenation with Tunable Resurfacing Laser (TRL): Before & After Four Months
Secondary Deep Plane Lower, Mid-Face and Neck Lift, Endoscopic Brow Lift, Full-Face Fat Transfer, Periocular and Perioral Rejuvenation with Tunable Resurfacing Laser (TRL): Before & After Four Months

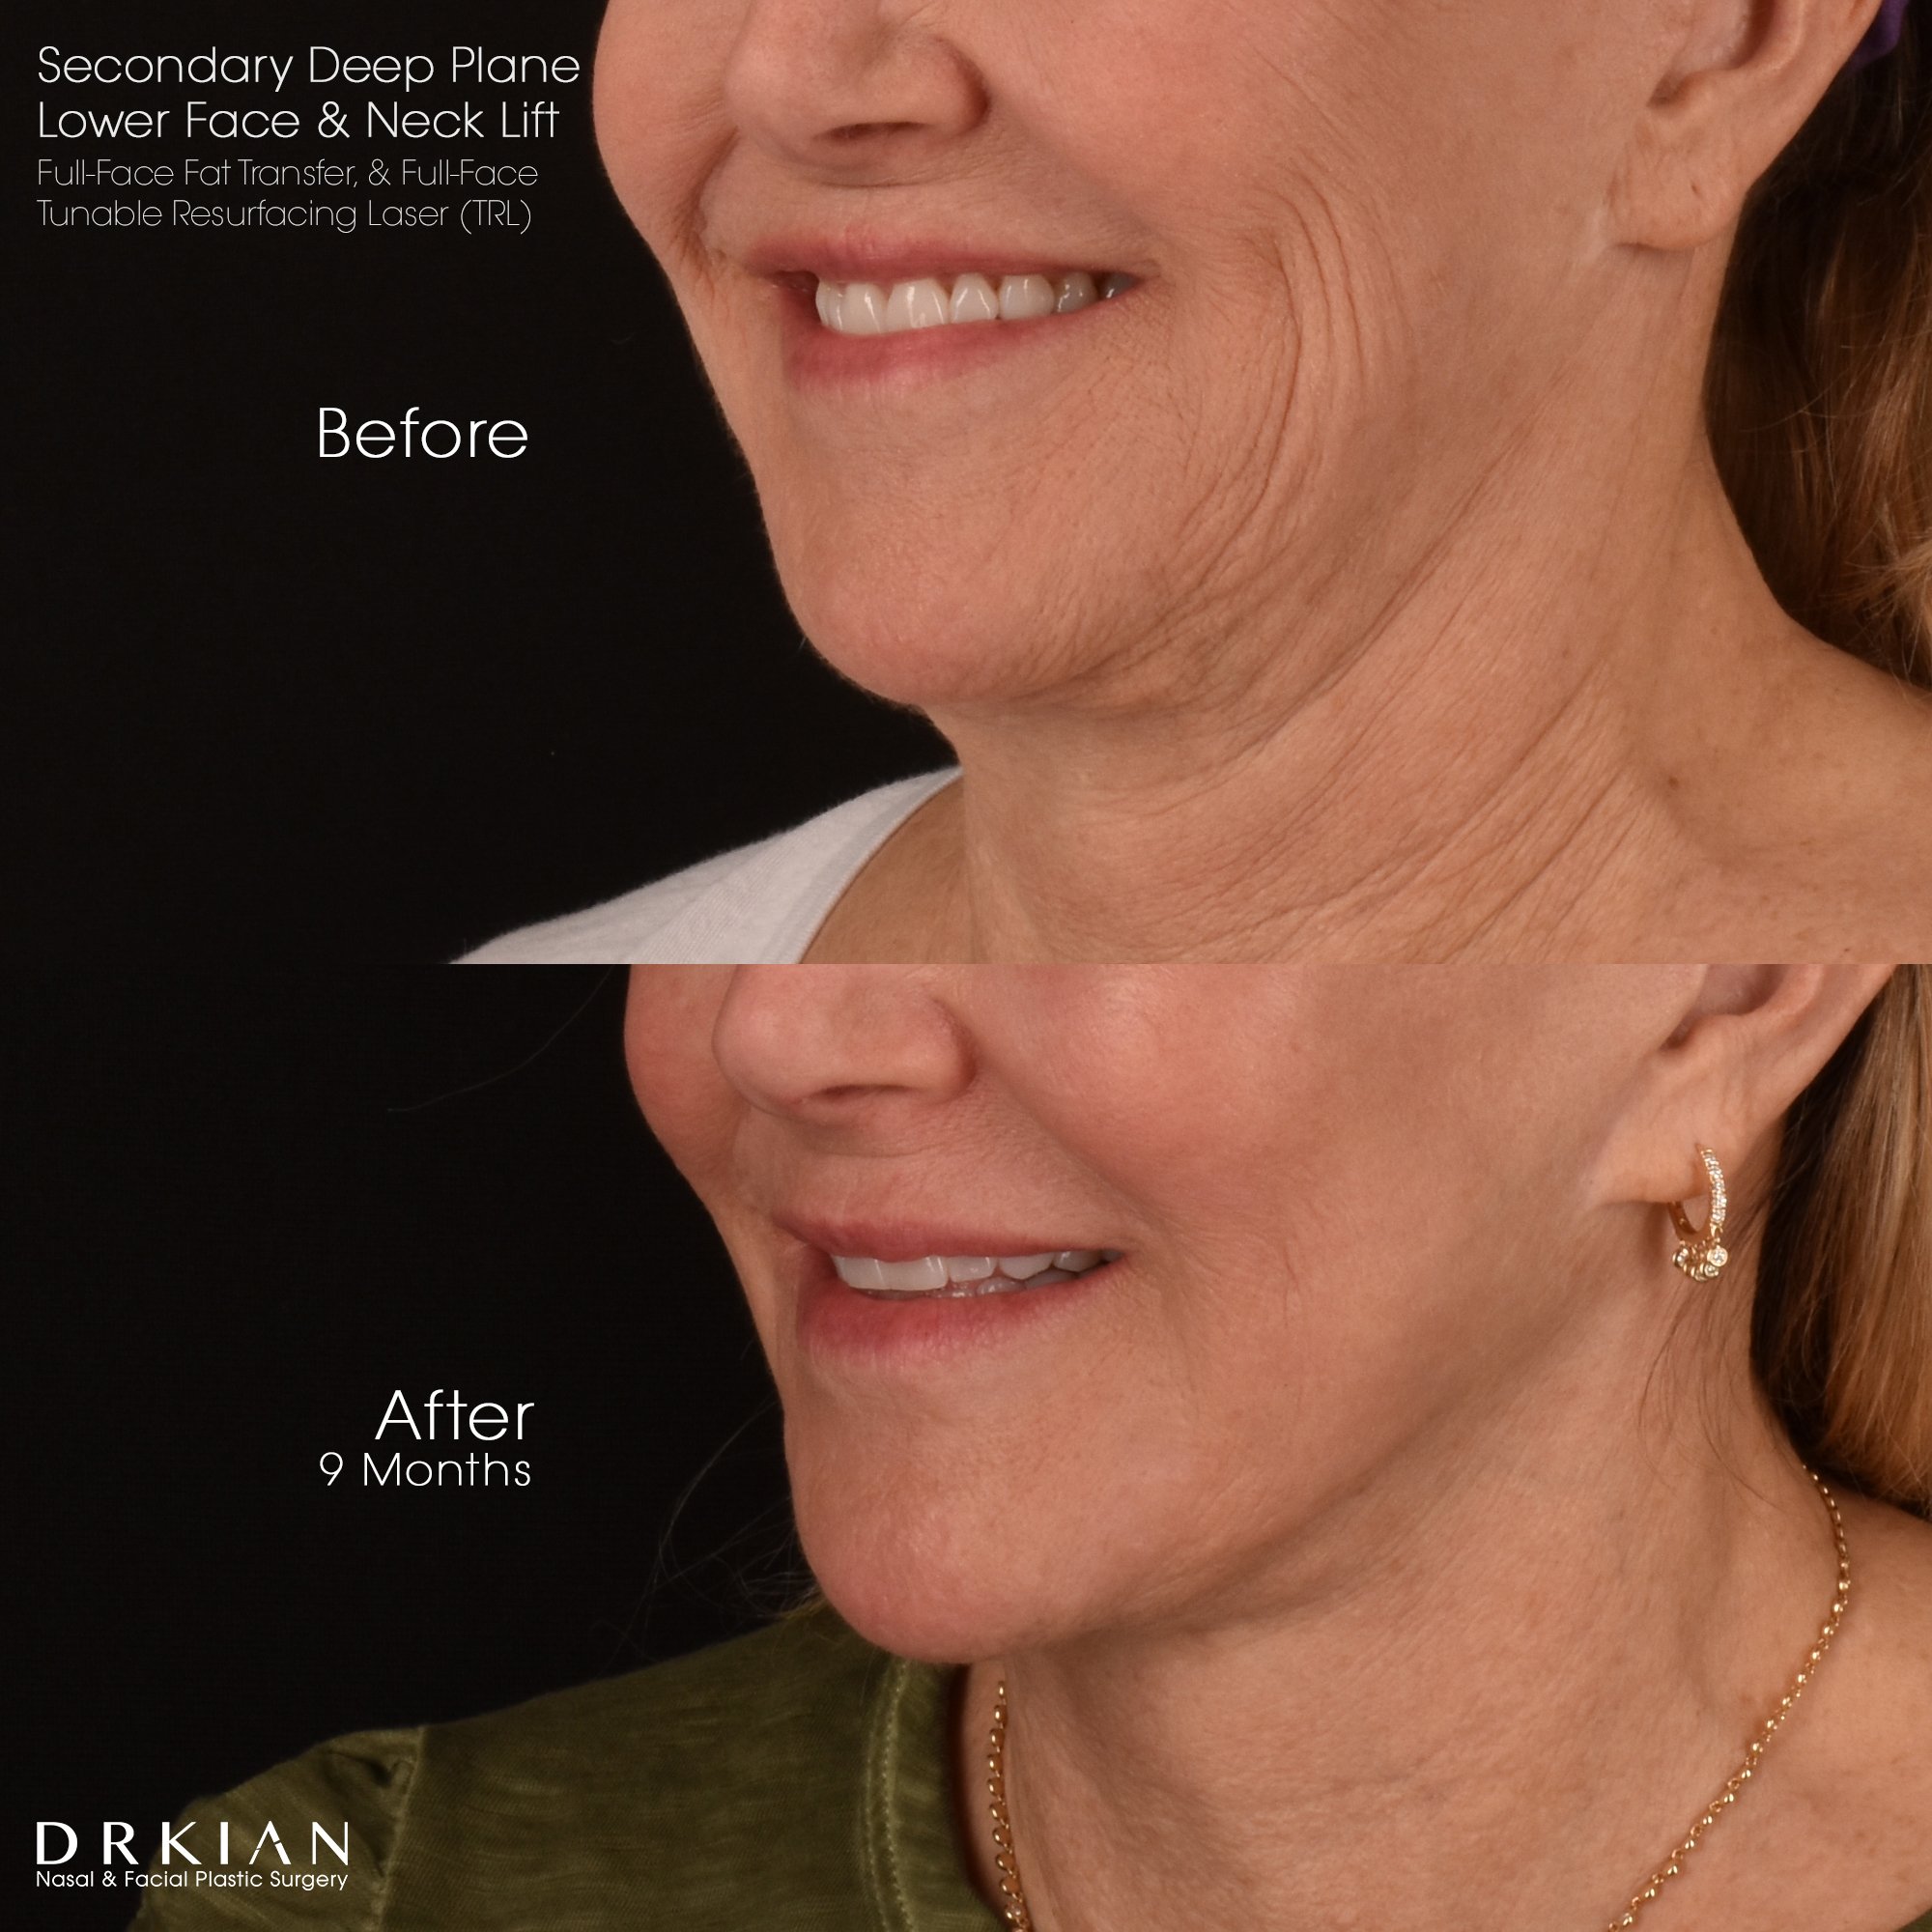
Secondary Deep Plane Lower Face & Neck Lift, Full-Face Fat Transfer, and Full-Face Tunable Resurfacing Laser (TRL): Before & After Nine Months

Secondary Deep Plane Lower Face & Neck Lift, Full-Face Fat Transfer, and Full-Face Tunable Resurfacing Laser (TRL): Before & After Nine Months

Secondary Deep Plane Lower Face & Neck Lift, Full-Face Fat Transfer, and Full-Face Tunable Resurfacing Laser (TRL): Before & After Nine Months

Secondary Deep Plane Lower Face & Neck Lift, Full-Face Fat Transfer, and Full-Face Tunable Resurfacing Laser (TRL): Before & After Nine Months

Secondary Deep Plane Lower Face & Neck Lift, Full-Face Fat Transfer, and Full-Face Tunable Resurfacing Laser (TRL): Before & After Nine Months

Secondary Deep Plane Lower Face & Neck Lift, Full-Face Fat Transfer, and Full-Face Tunable Resurfacing Laser (TRL): Before & After Nine Months
Secondary Deep Plane Lower Face & Neck Lift, Full-Face Fat Transfer, and Full-Face Tunable Resurfacing Laser (TRL): Before & After Nine Months
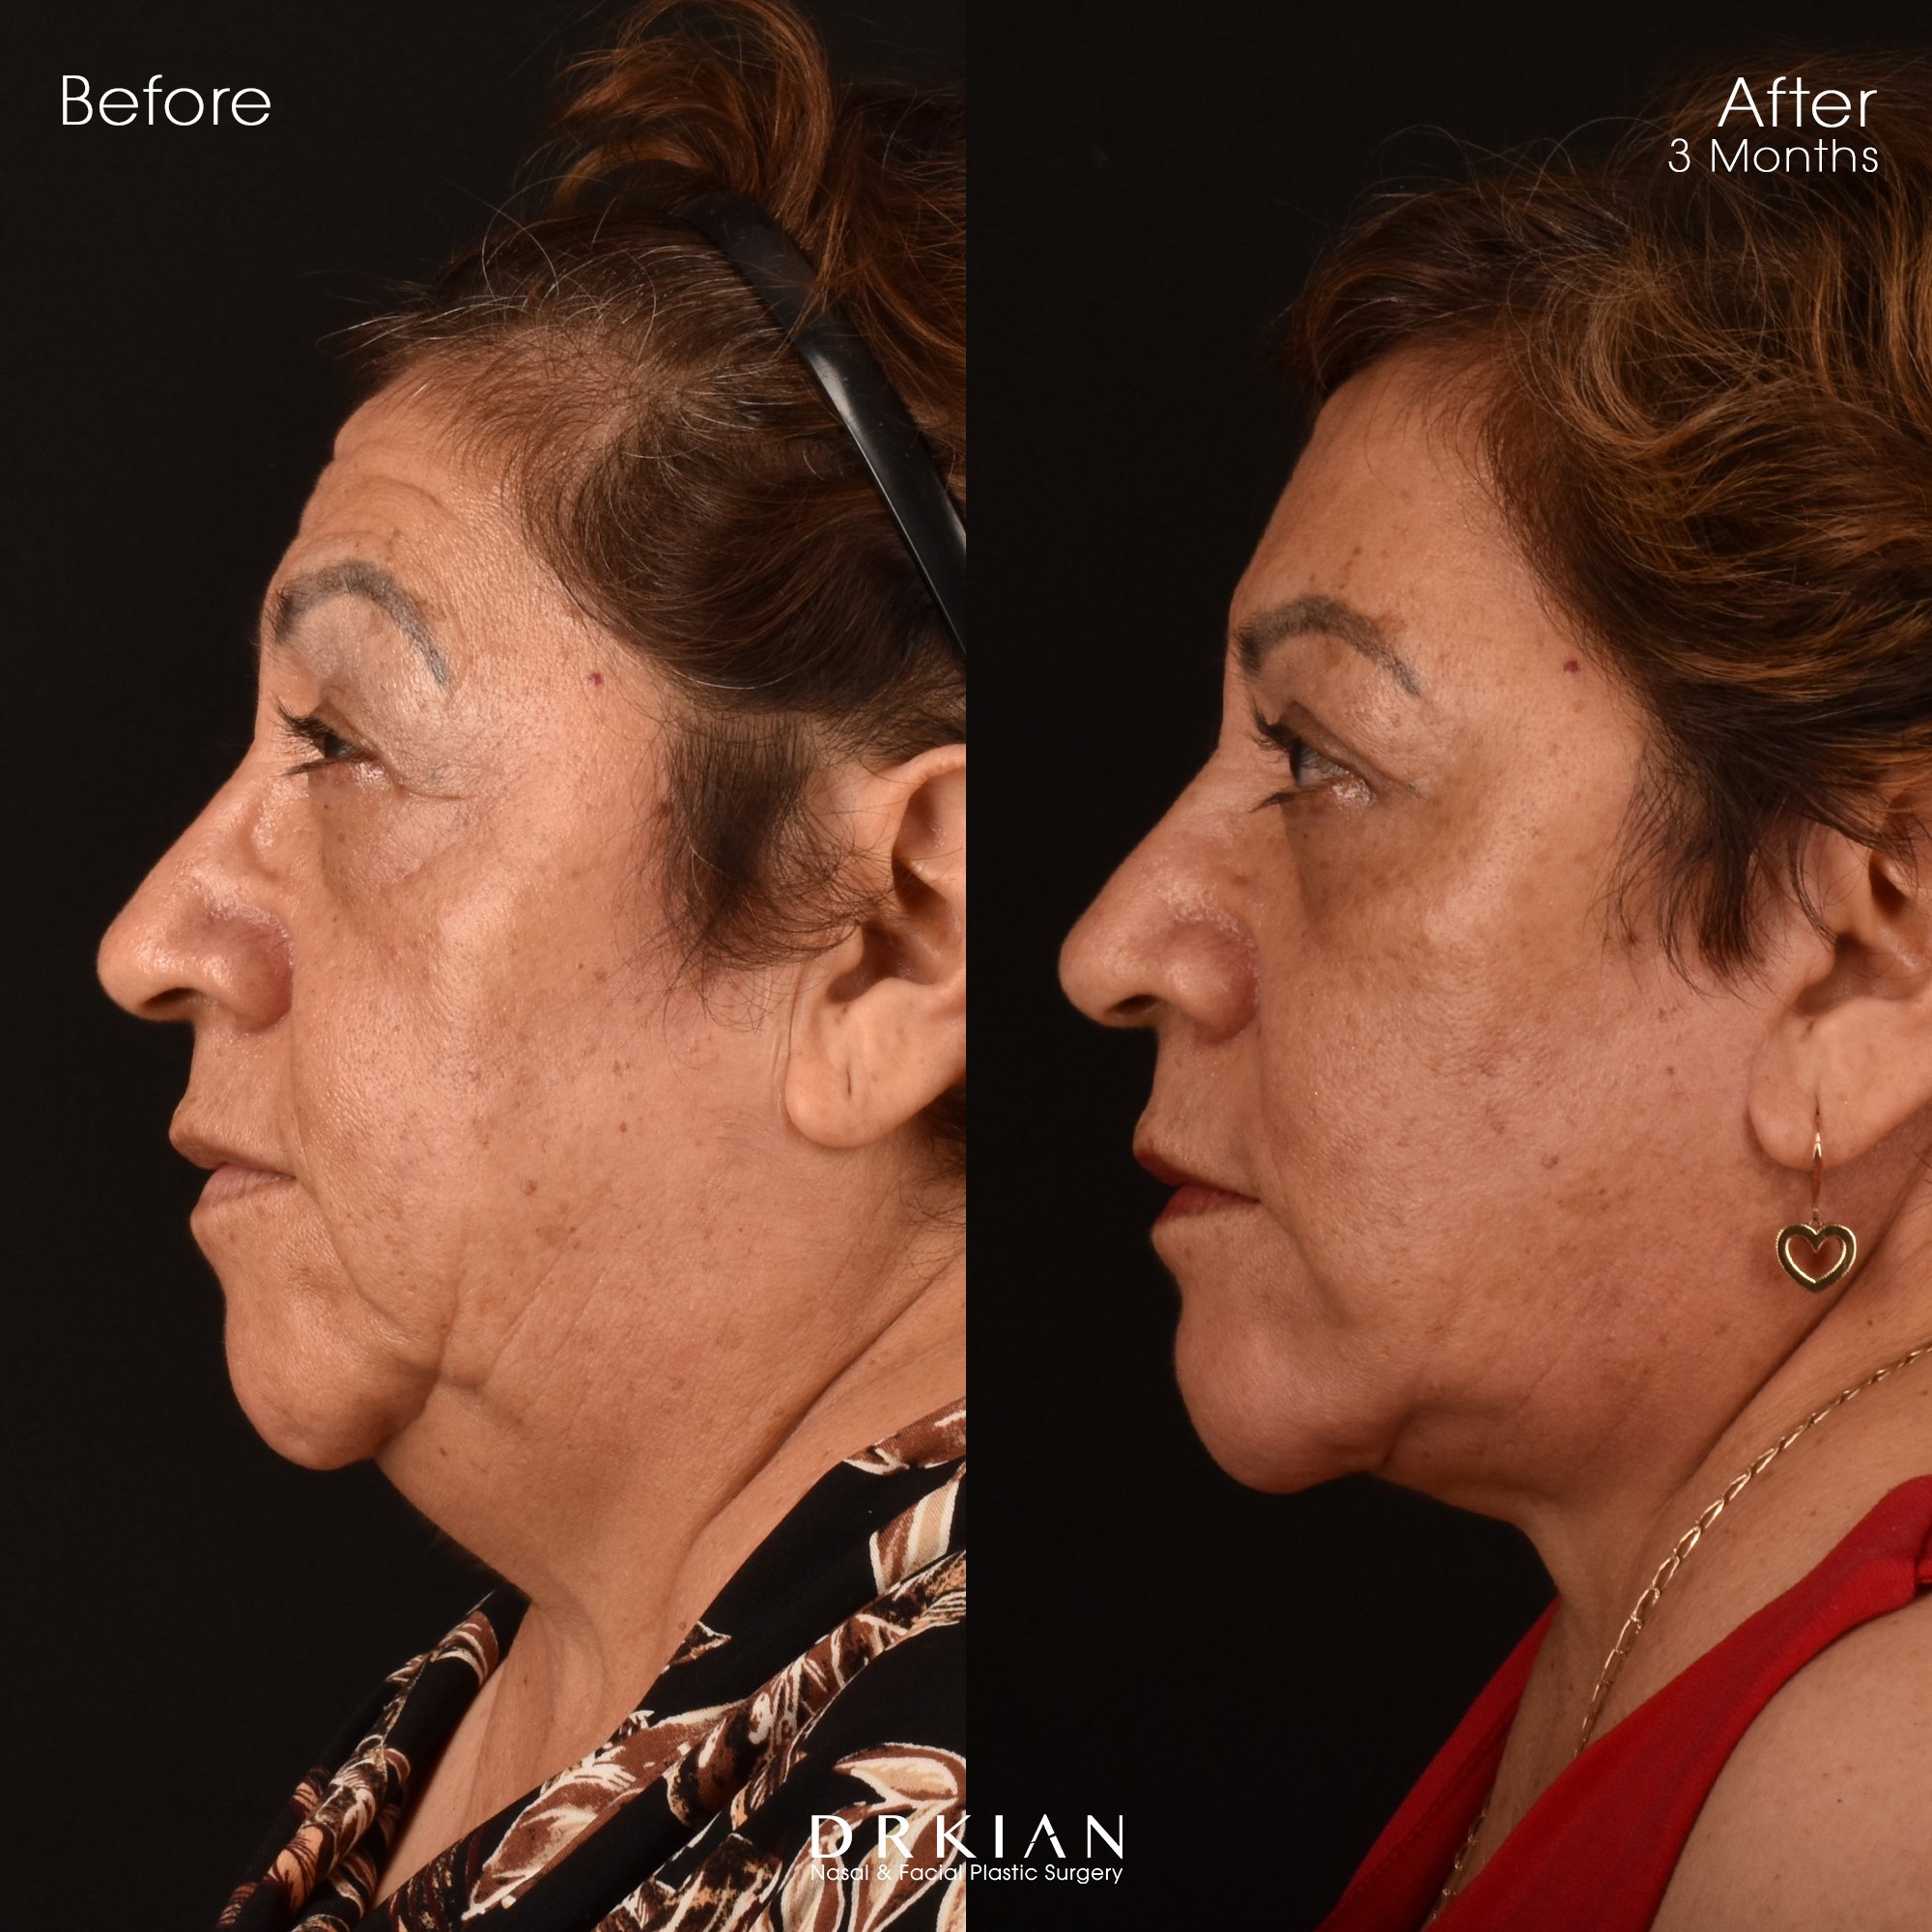
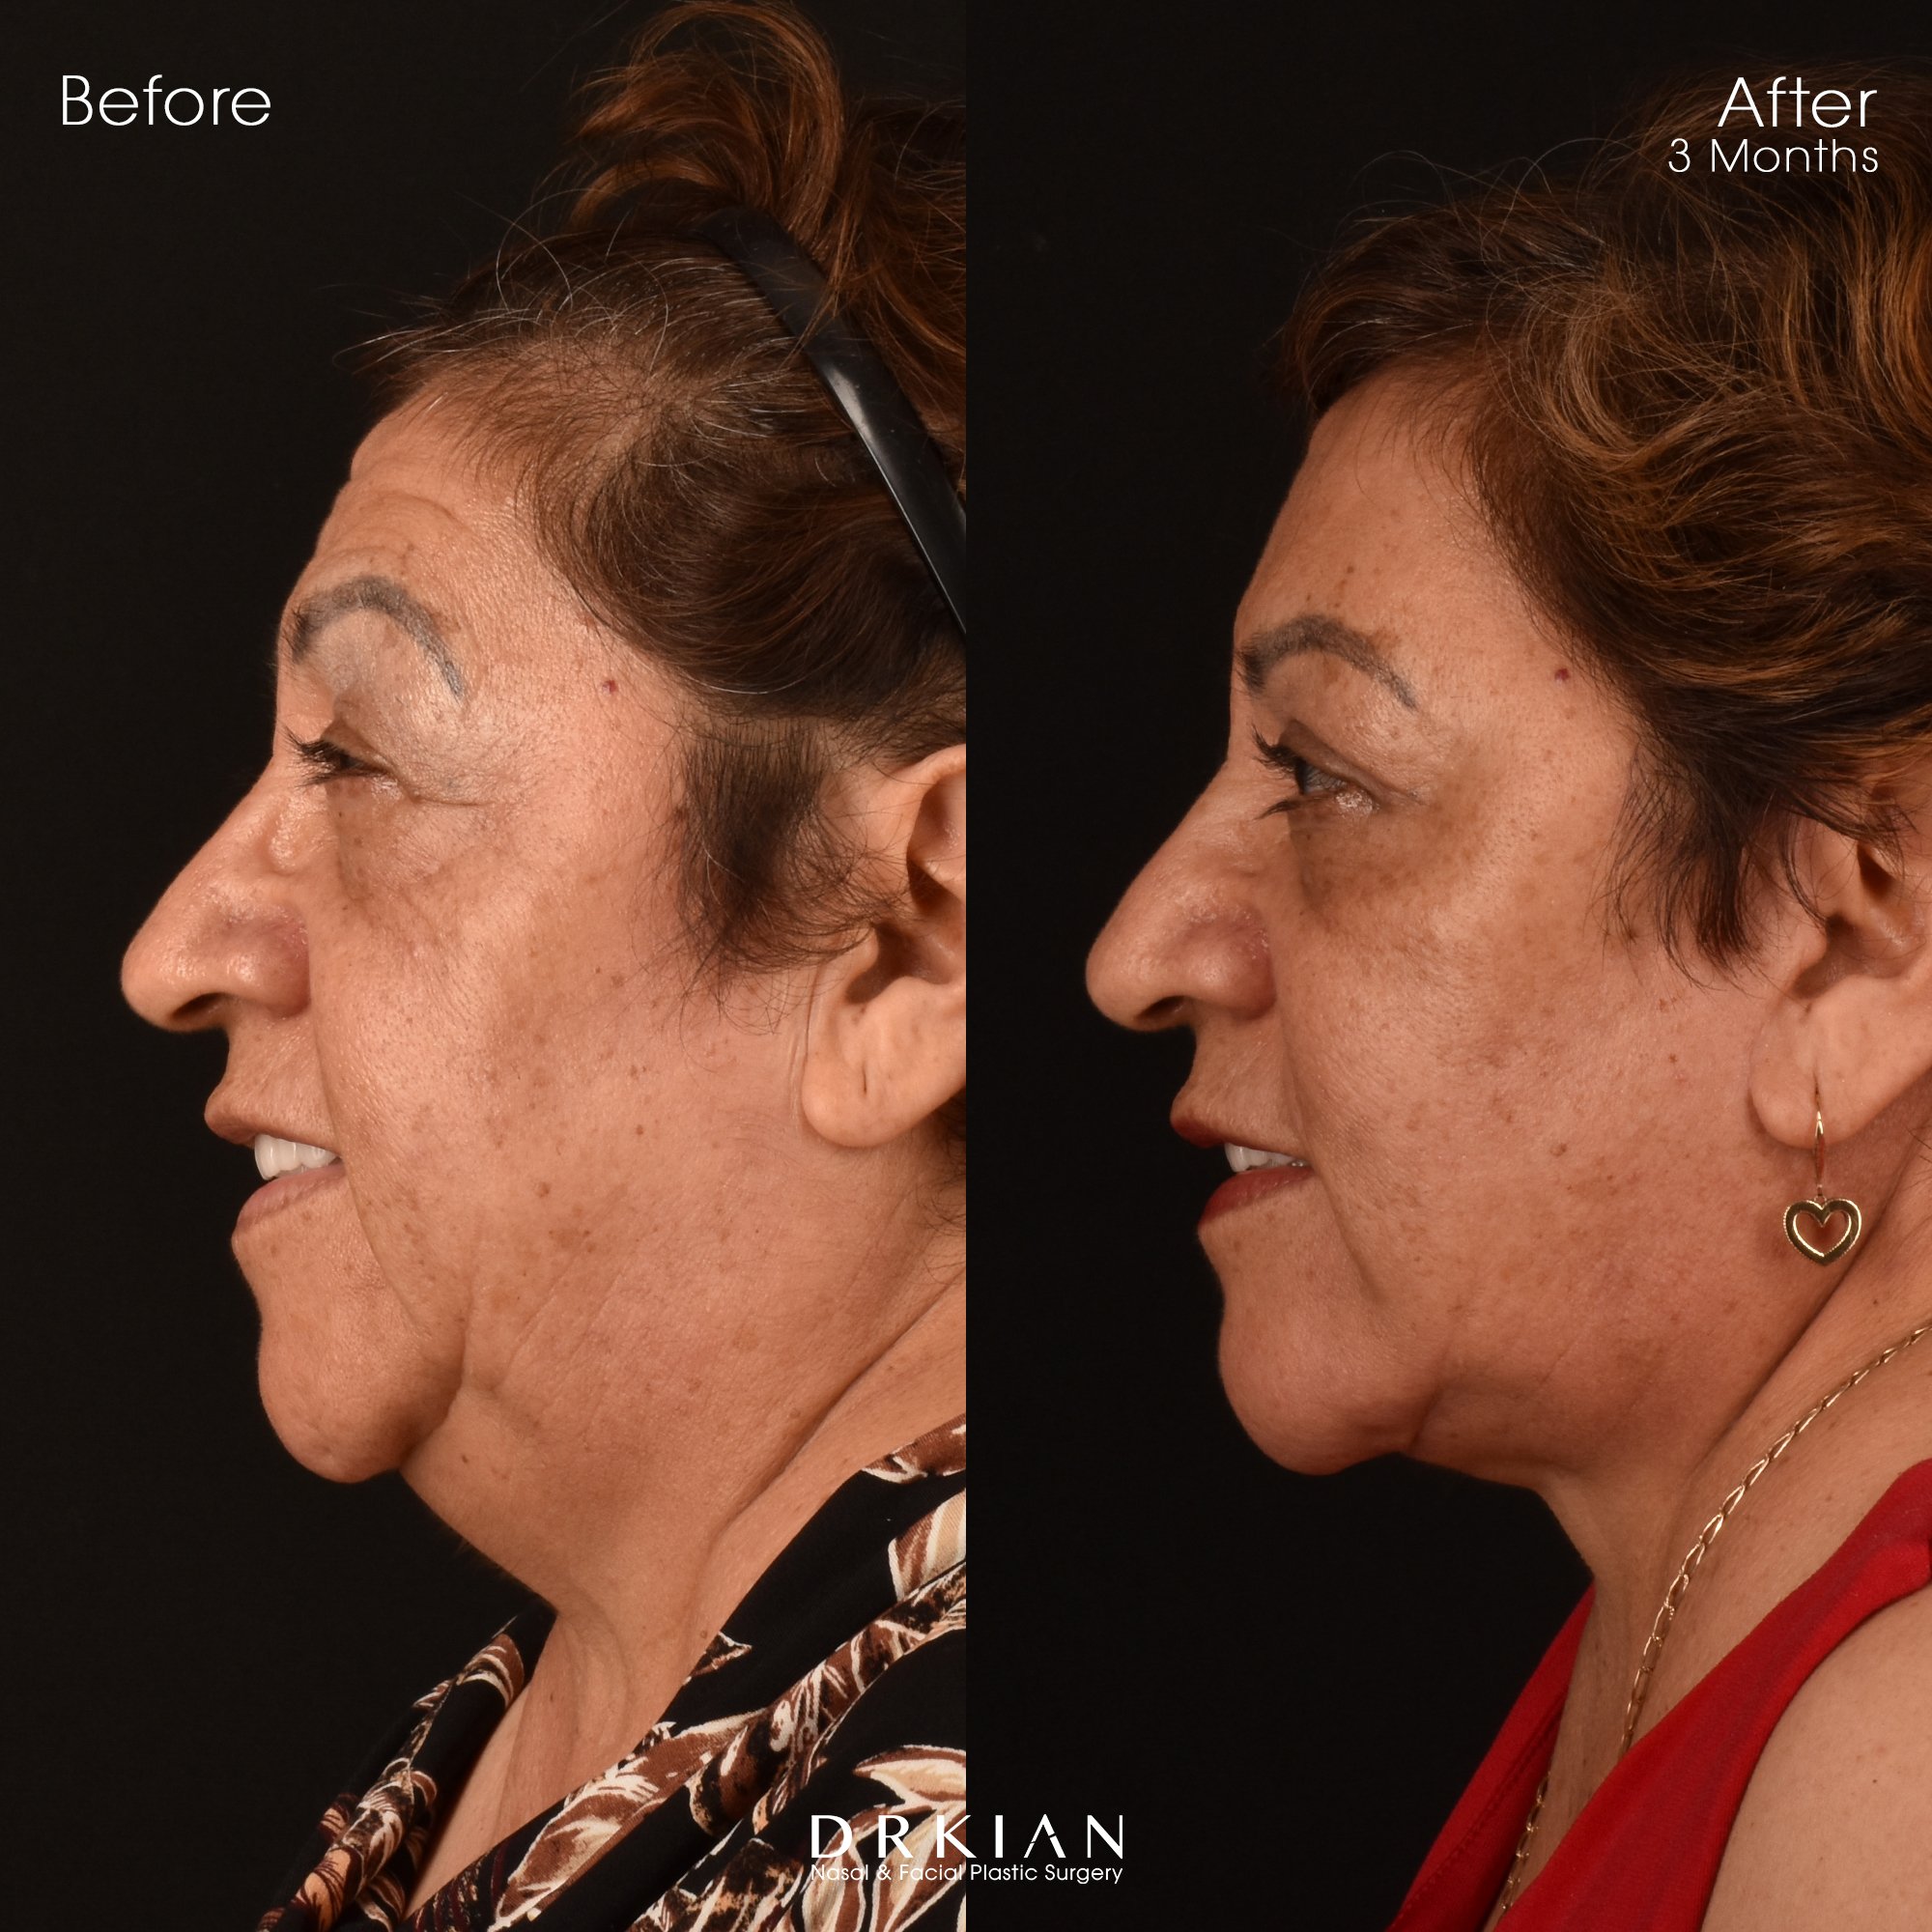
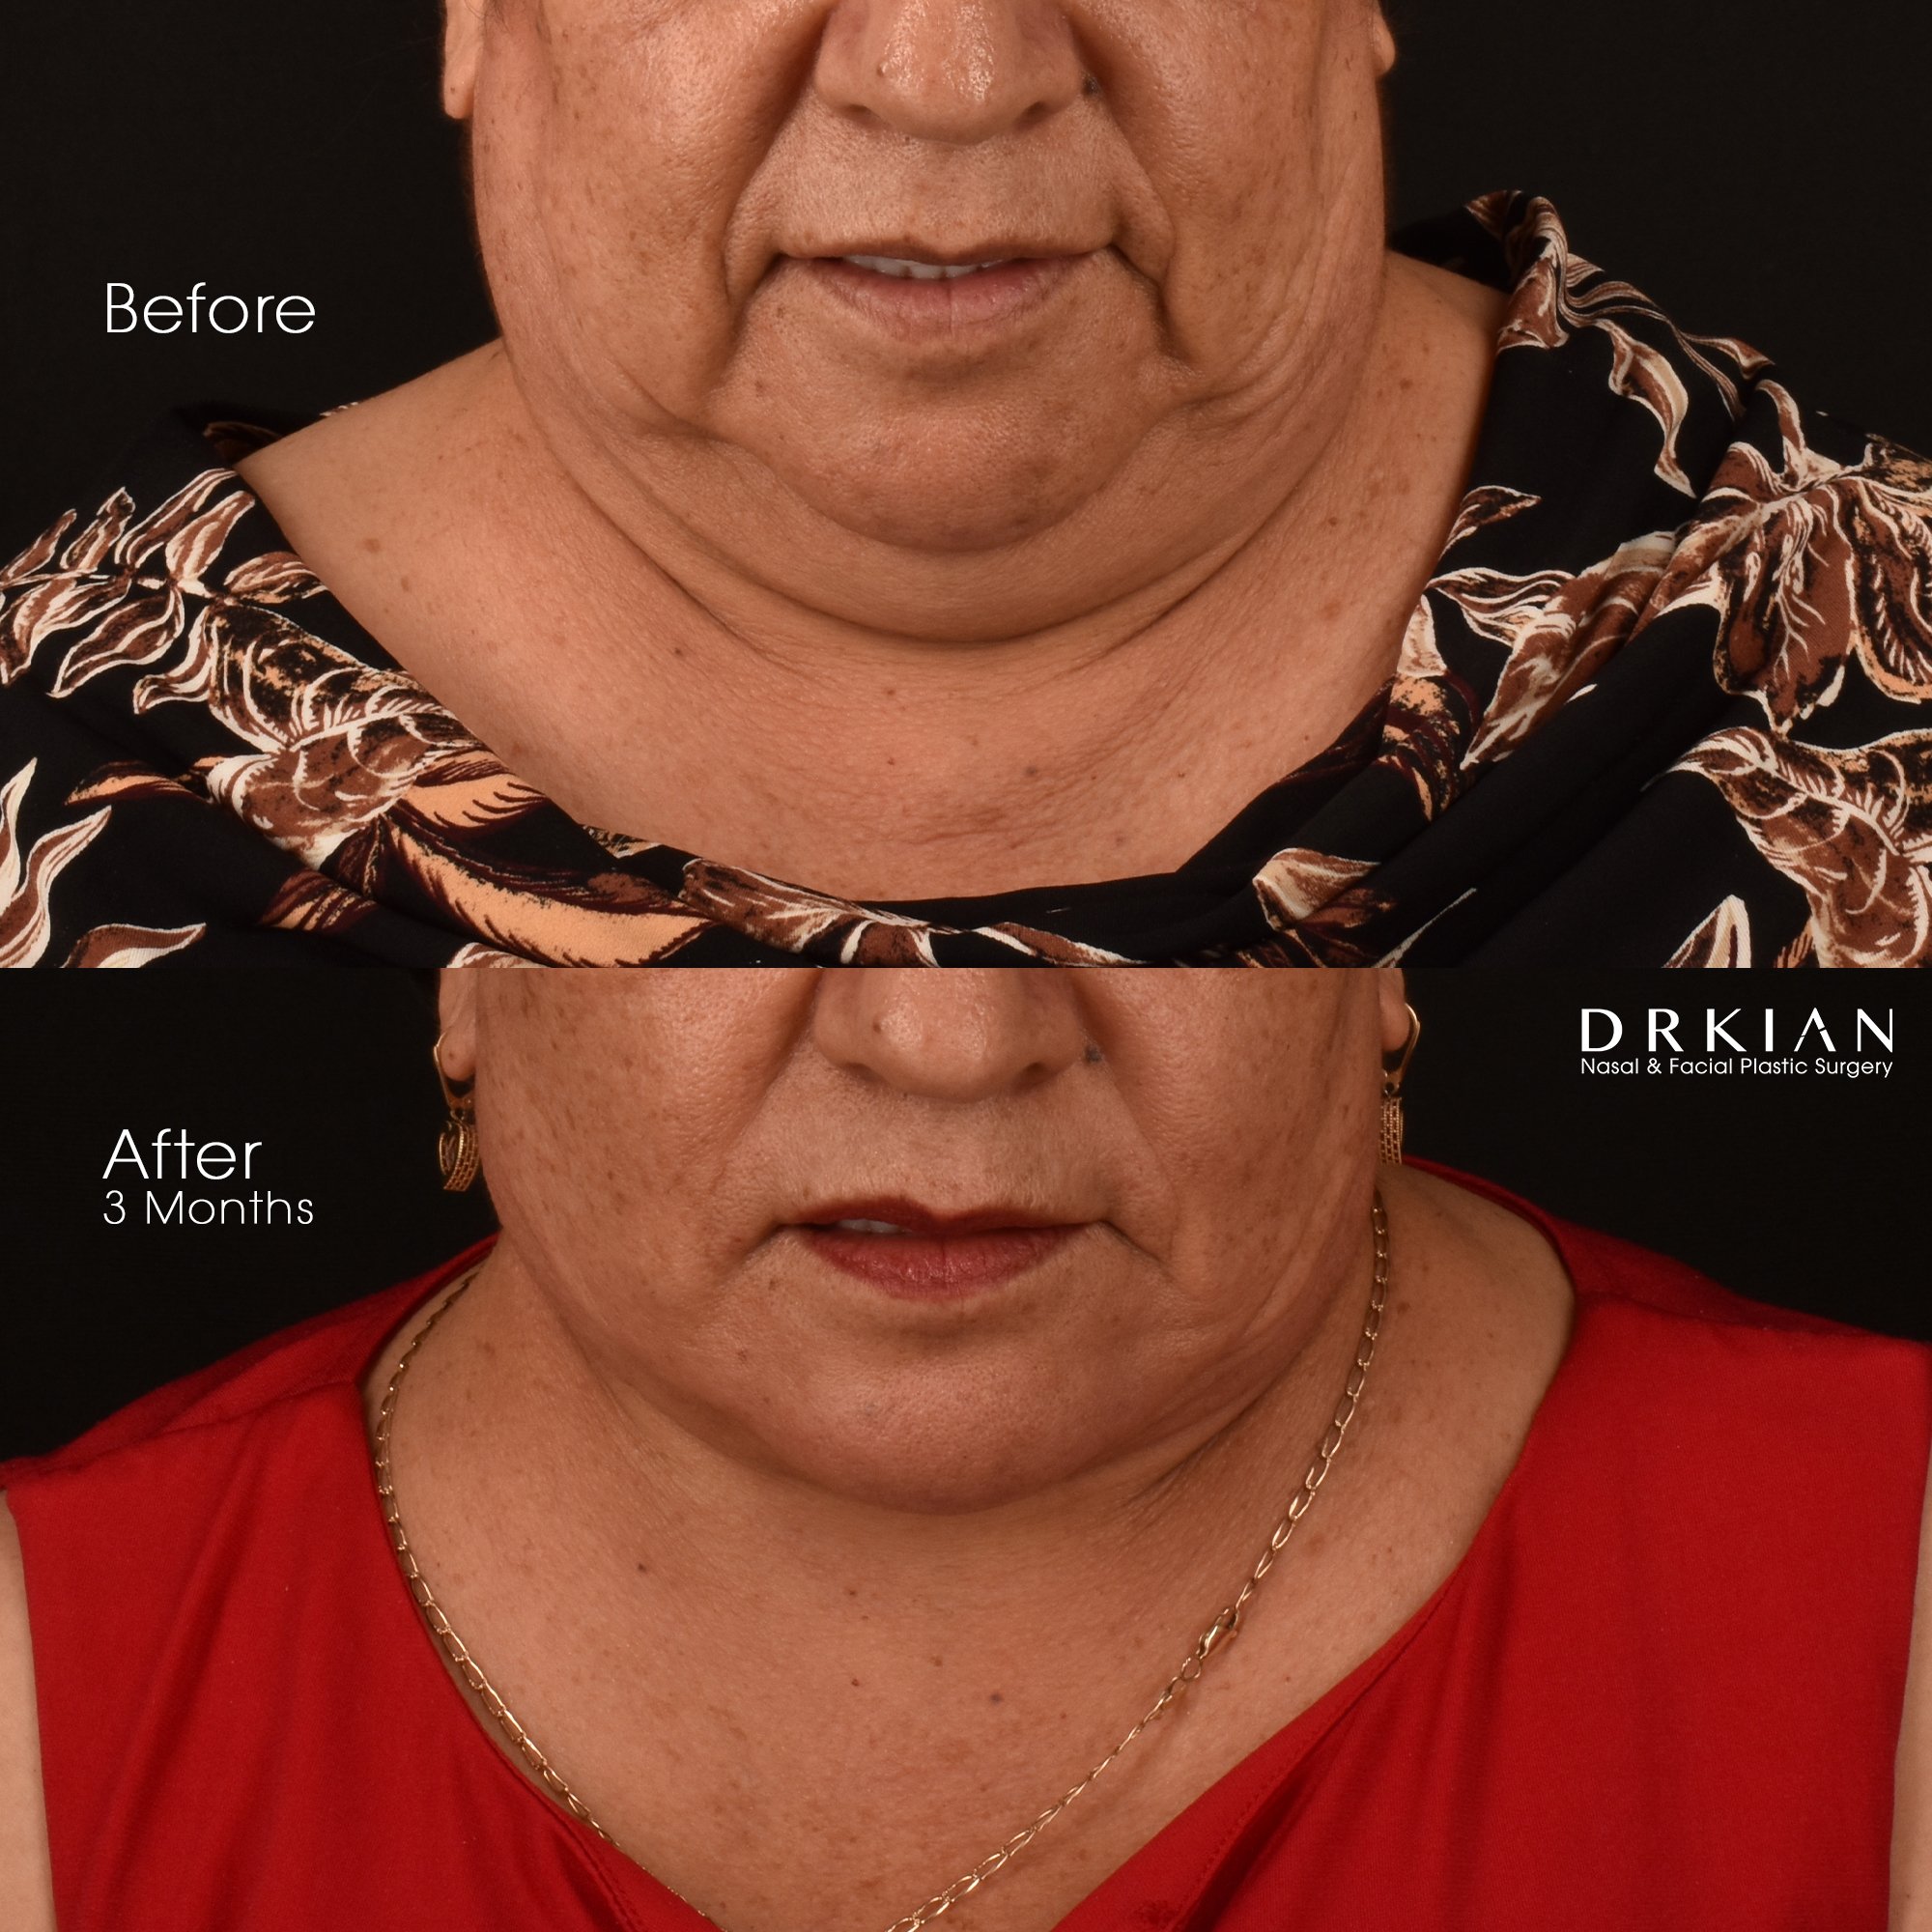
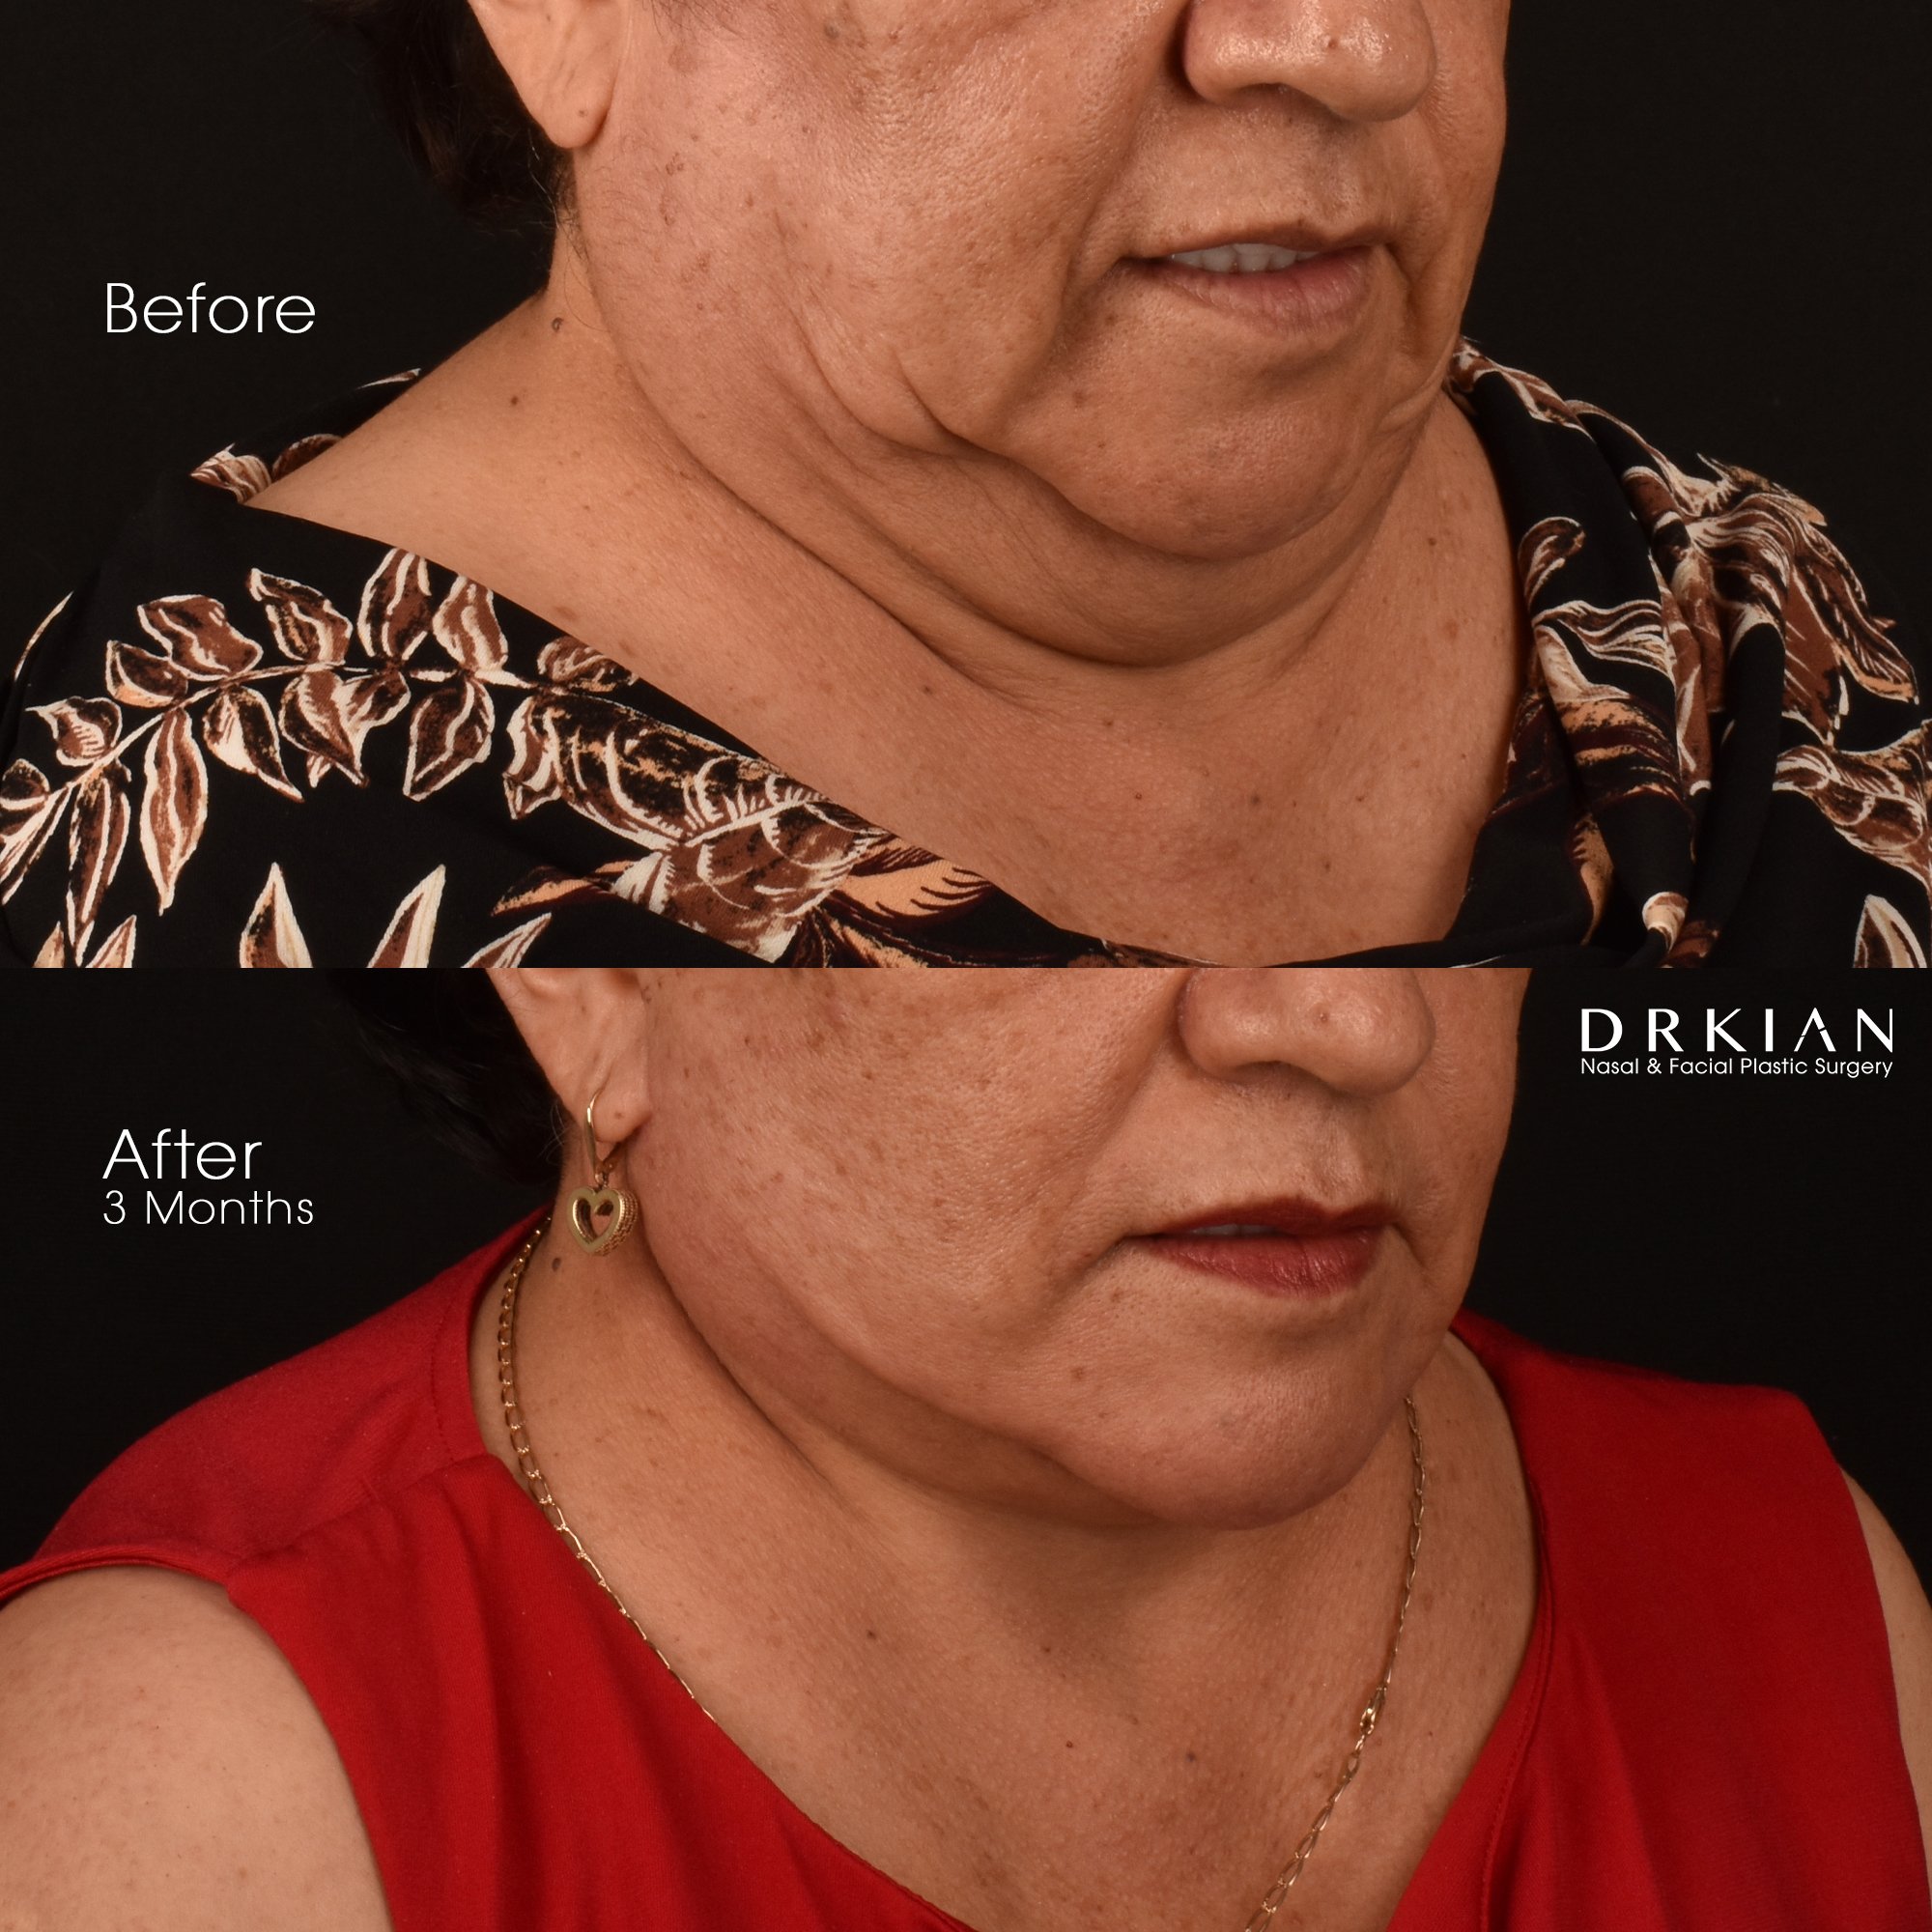
Deep Plane Lower Face & Neck Lift with Partial Submandibular Gland Reduction: Before & After Three Months

Deep Plane Lower Face & Neck Lift with Partial Submandibular Gland Reduction: Before & After Three Months
Deep Plane Lower Face & Neck Lift with Partial Submandibular Gland Reduction: Before & After Three Months
Deep Plane Lower Face & Neck Lift with Partial Submandibular Gland Reduction: Before & After Three Months
Deep Plane Lower Face & Neck Lift with Partial Submandibular Gland Reduction: Before & After Three Months
Deep Plane Lower Face & Neck Lift with Partial Submandibular Gland Reduction: Before & After Three Months
Deep Plane Lower Face & Neck Lift with Partial Submandibular Gland Reduction: Before & After Three Months
Deep Plane Lower Face & Neck Lift with Partial Submandibular Gland Reduction: Before & After Three Months
Deep Plane Lower Face & Neck Lift with Partial Submandibular Gland Reduction: Before & After Three Months
Deep Plane Lower Face & Neck Lift with Partial Submandibular Gland Reduction: Before & After Three Months
Deep Plane Lower Face & Neck Lift with Partial Submandibular Gland Reduction: Before & After Three Months
Deep Plane Lower Face & Neck Lift with Partial Submandibular Gland Reduction: Before & After Three Months

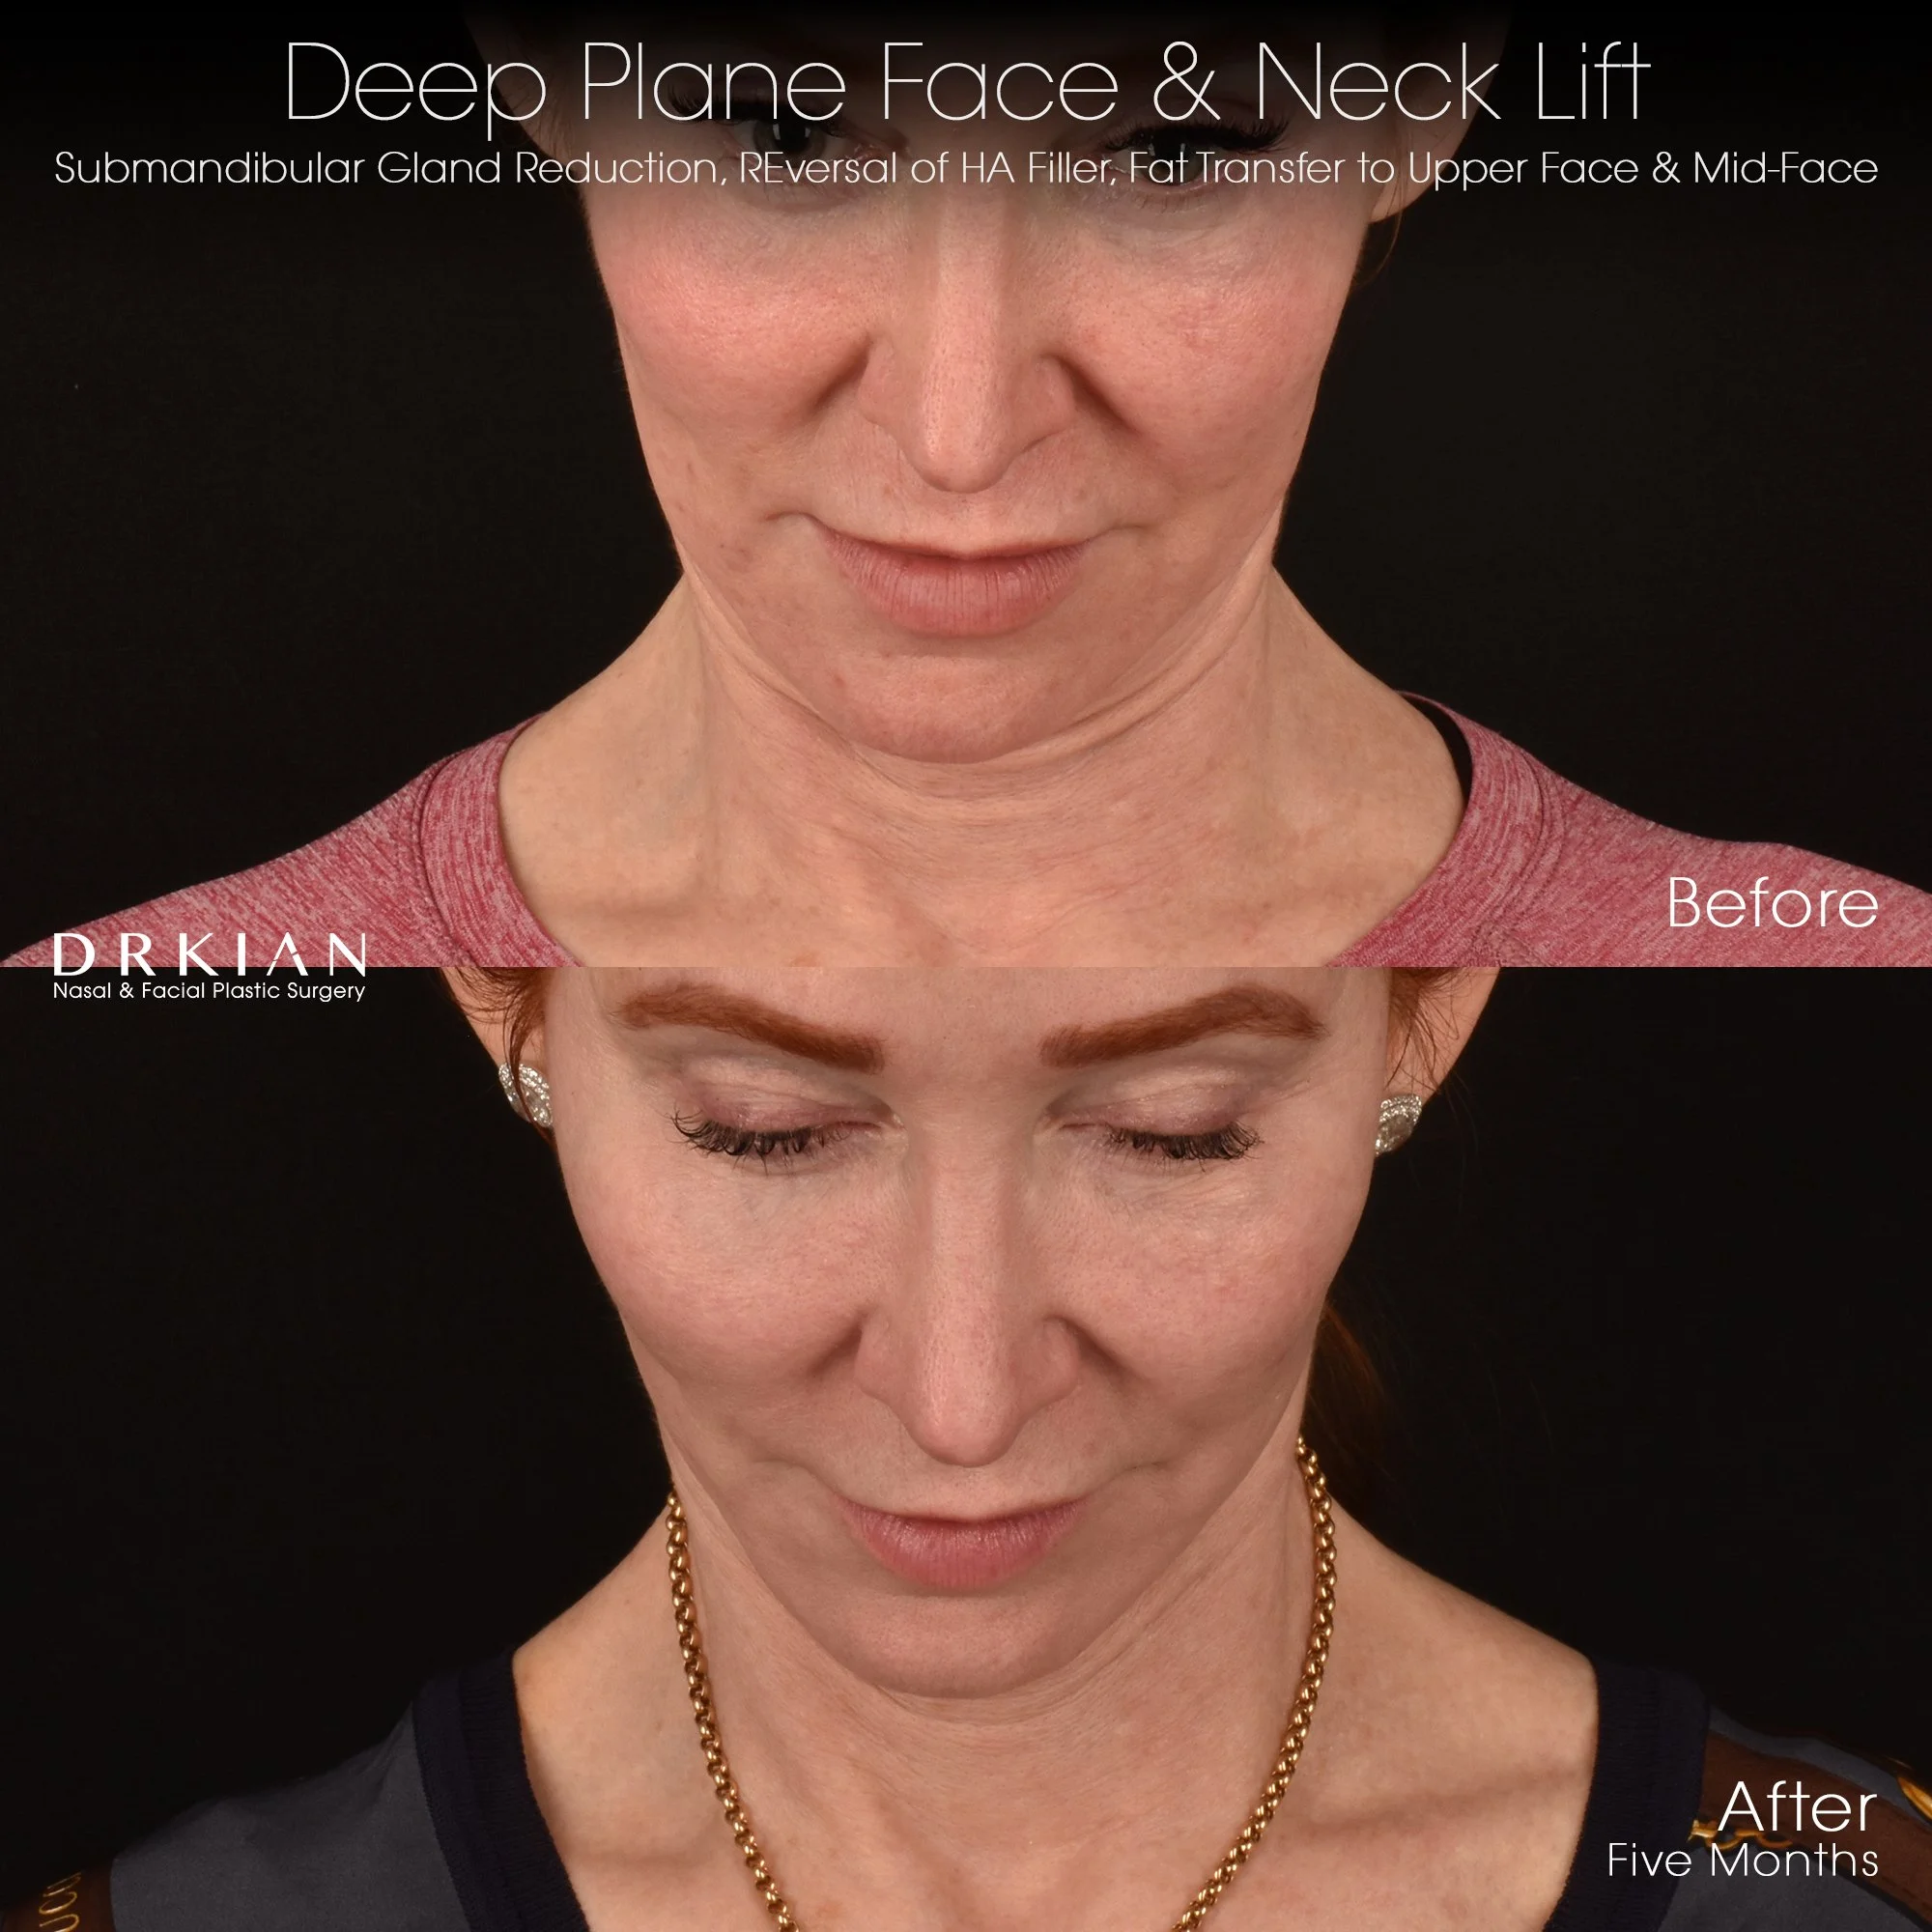
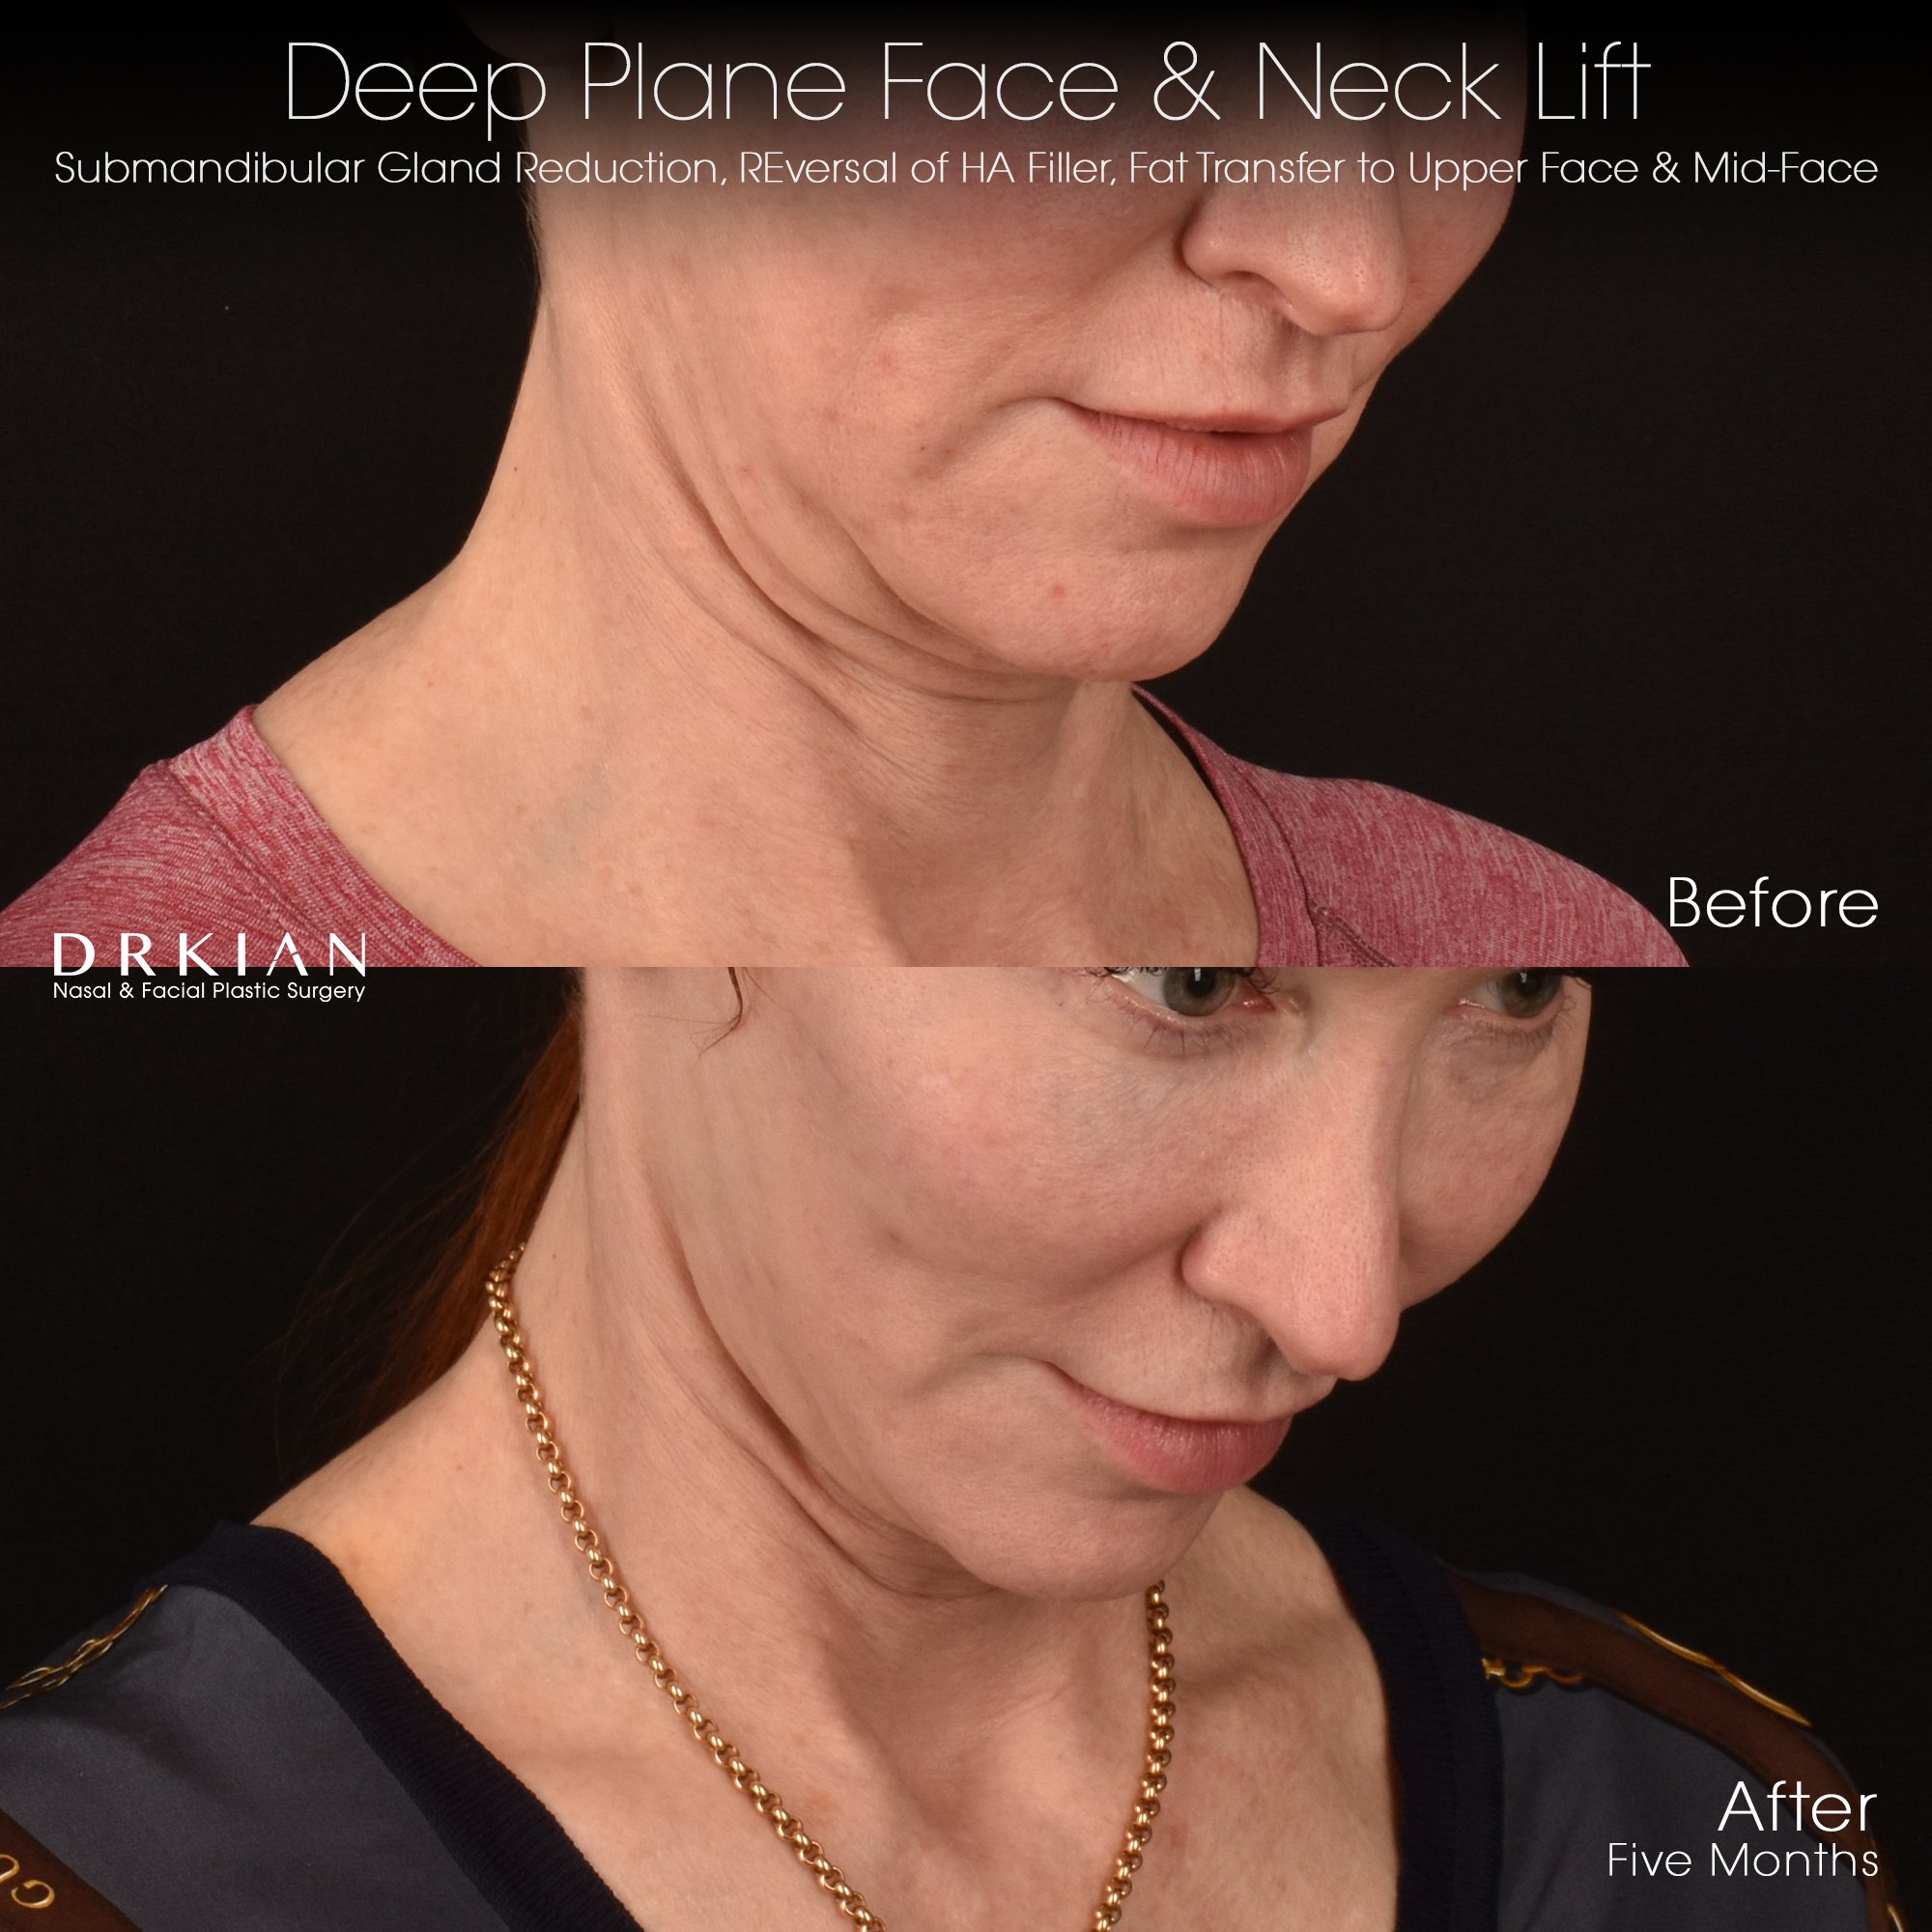
Deep Plane Lower Face & Neck Lift, Submandibular Gland Reduction, Reversal of HA Filler, Fat Transfer to Upper Face & Mid-Face: Before & After 5 Months

Deep Plane Lower Face & Neck Lift, Submandibular Gland Reduction, Reversal of HA Filler, Fat Transfer to Upper Face & Mid-Face: Before & After 5 Months

Deep Plane Lower Face & Neck Lift, Submandibular Gland Reduction, Reversal of HA Filler, Fat Transfer to Upper Face & Mid-Face: Before & After 5 Months

Deep Plane Lower Face & Neck Lift, Submandibular Gland Reduction, Reversal of HA Filler, Fat Transfer to Upper Face & Mid-Face: Before & After 5 Months

Deep Plane Lower Face & Neck Lift, Submandibular Gland Reduction, Reversal of HA Filler, Fat Transfer to Upper Face & Mid-Face: Before & After 5 Months

Deep Plane Lower Face & Neck Lift, Submandibular Gland Reduction, Reversal of HA Filler, Fat Transfer to Upper Face & Mid-Face: Before & After 5 Months
Deep Plane Lower Face & Neck Lift, Submandibular Gland Reduction, Reversal of HA Filler, Fat Transfer to Upper Face & Mid-Face: Before & After 5 Months
Deep Plane Lower Face & Neck Lift, Submandibular Gland Reduction, Reversal of HA Filler, Fat Transfer to Upper Face & Mid-Face: Before & After 5 Months

Deep Plane Lower Face & Neck Lift, Submandibular Gland Reduction, Reversal of HA Filler, Fat Transfer to Upper Face & Mid-Face: Before & After 5 Months

Deep Plane Lower Face & Neck Lift, Submandibular Gland Reduction, Reversal of HA Filler, Fat Transfer to Upper Face & Mid-Face: Before & After 5 Months
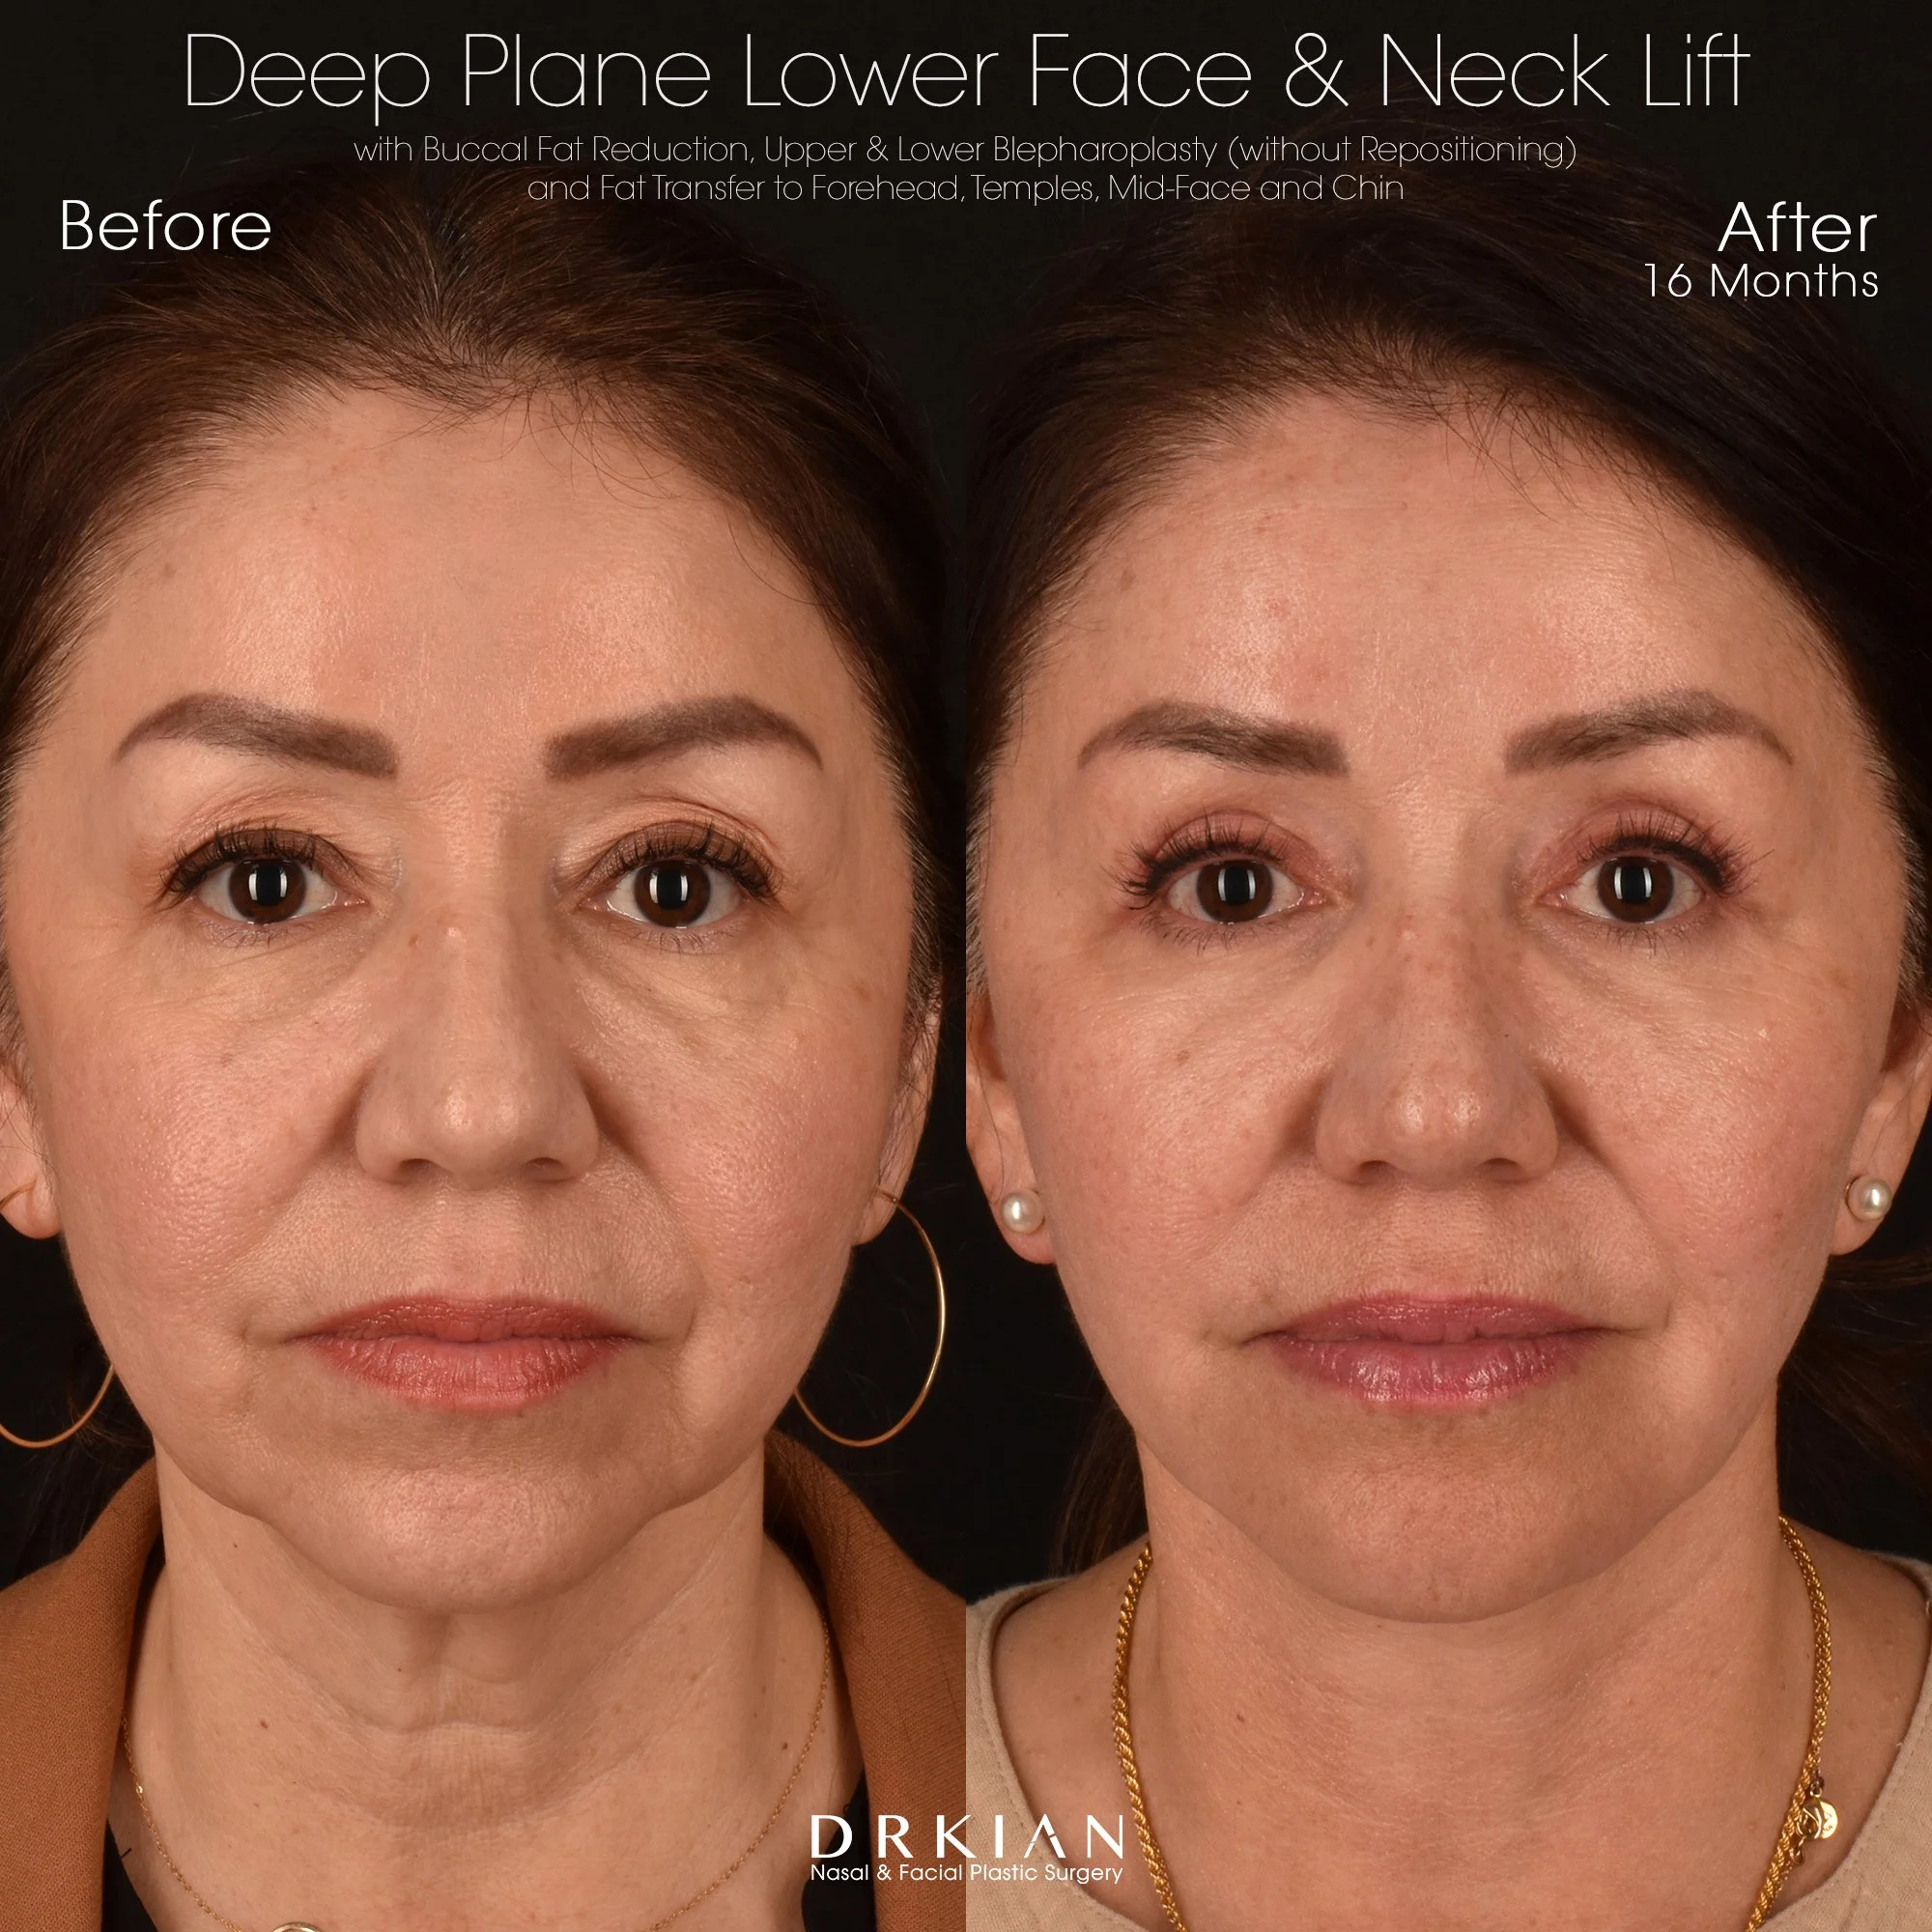
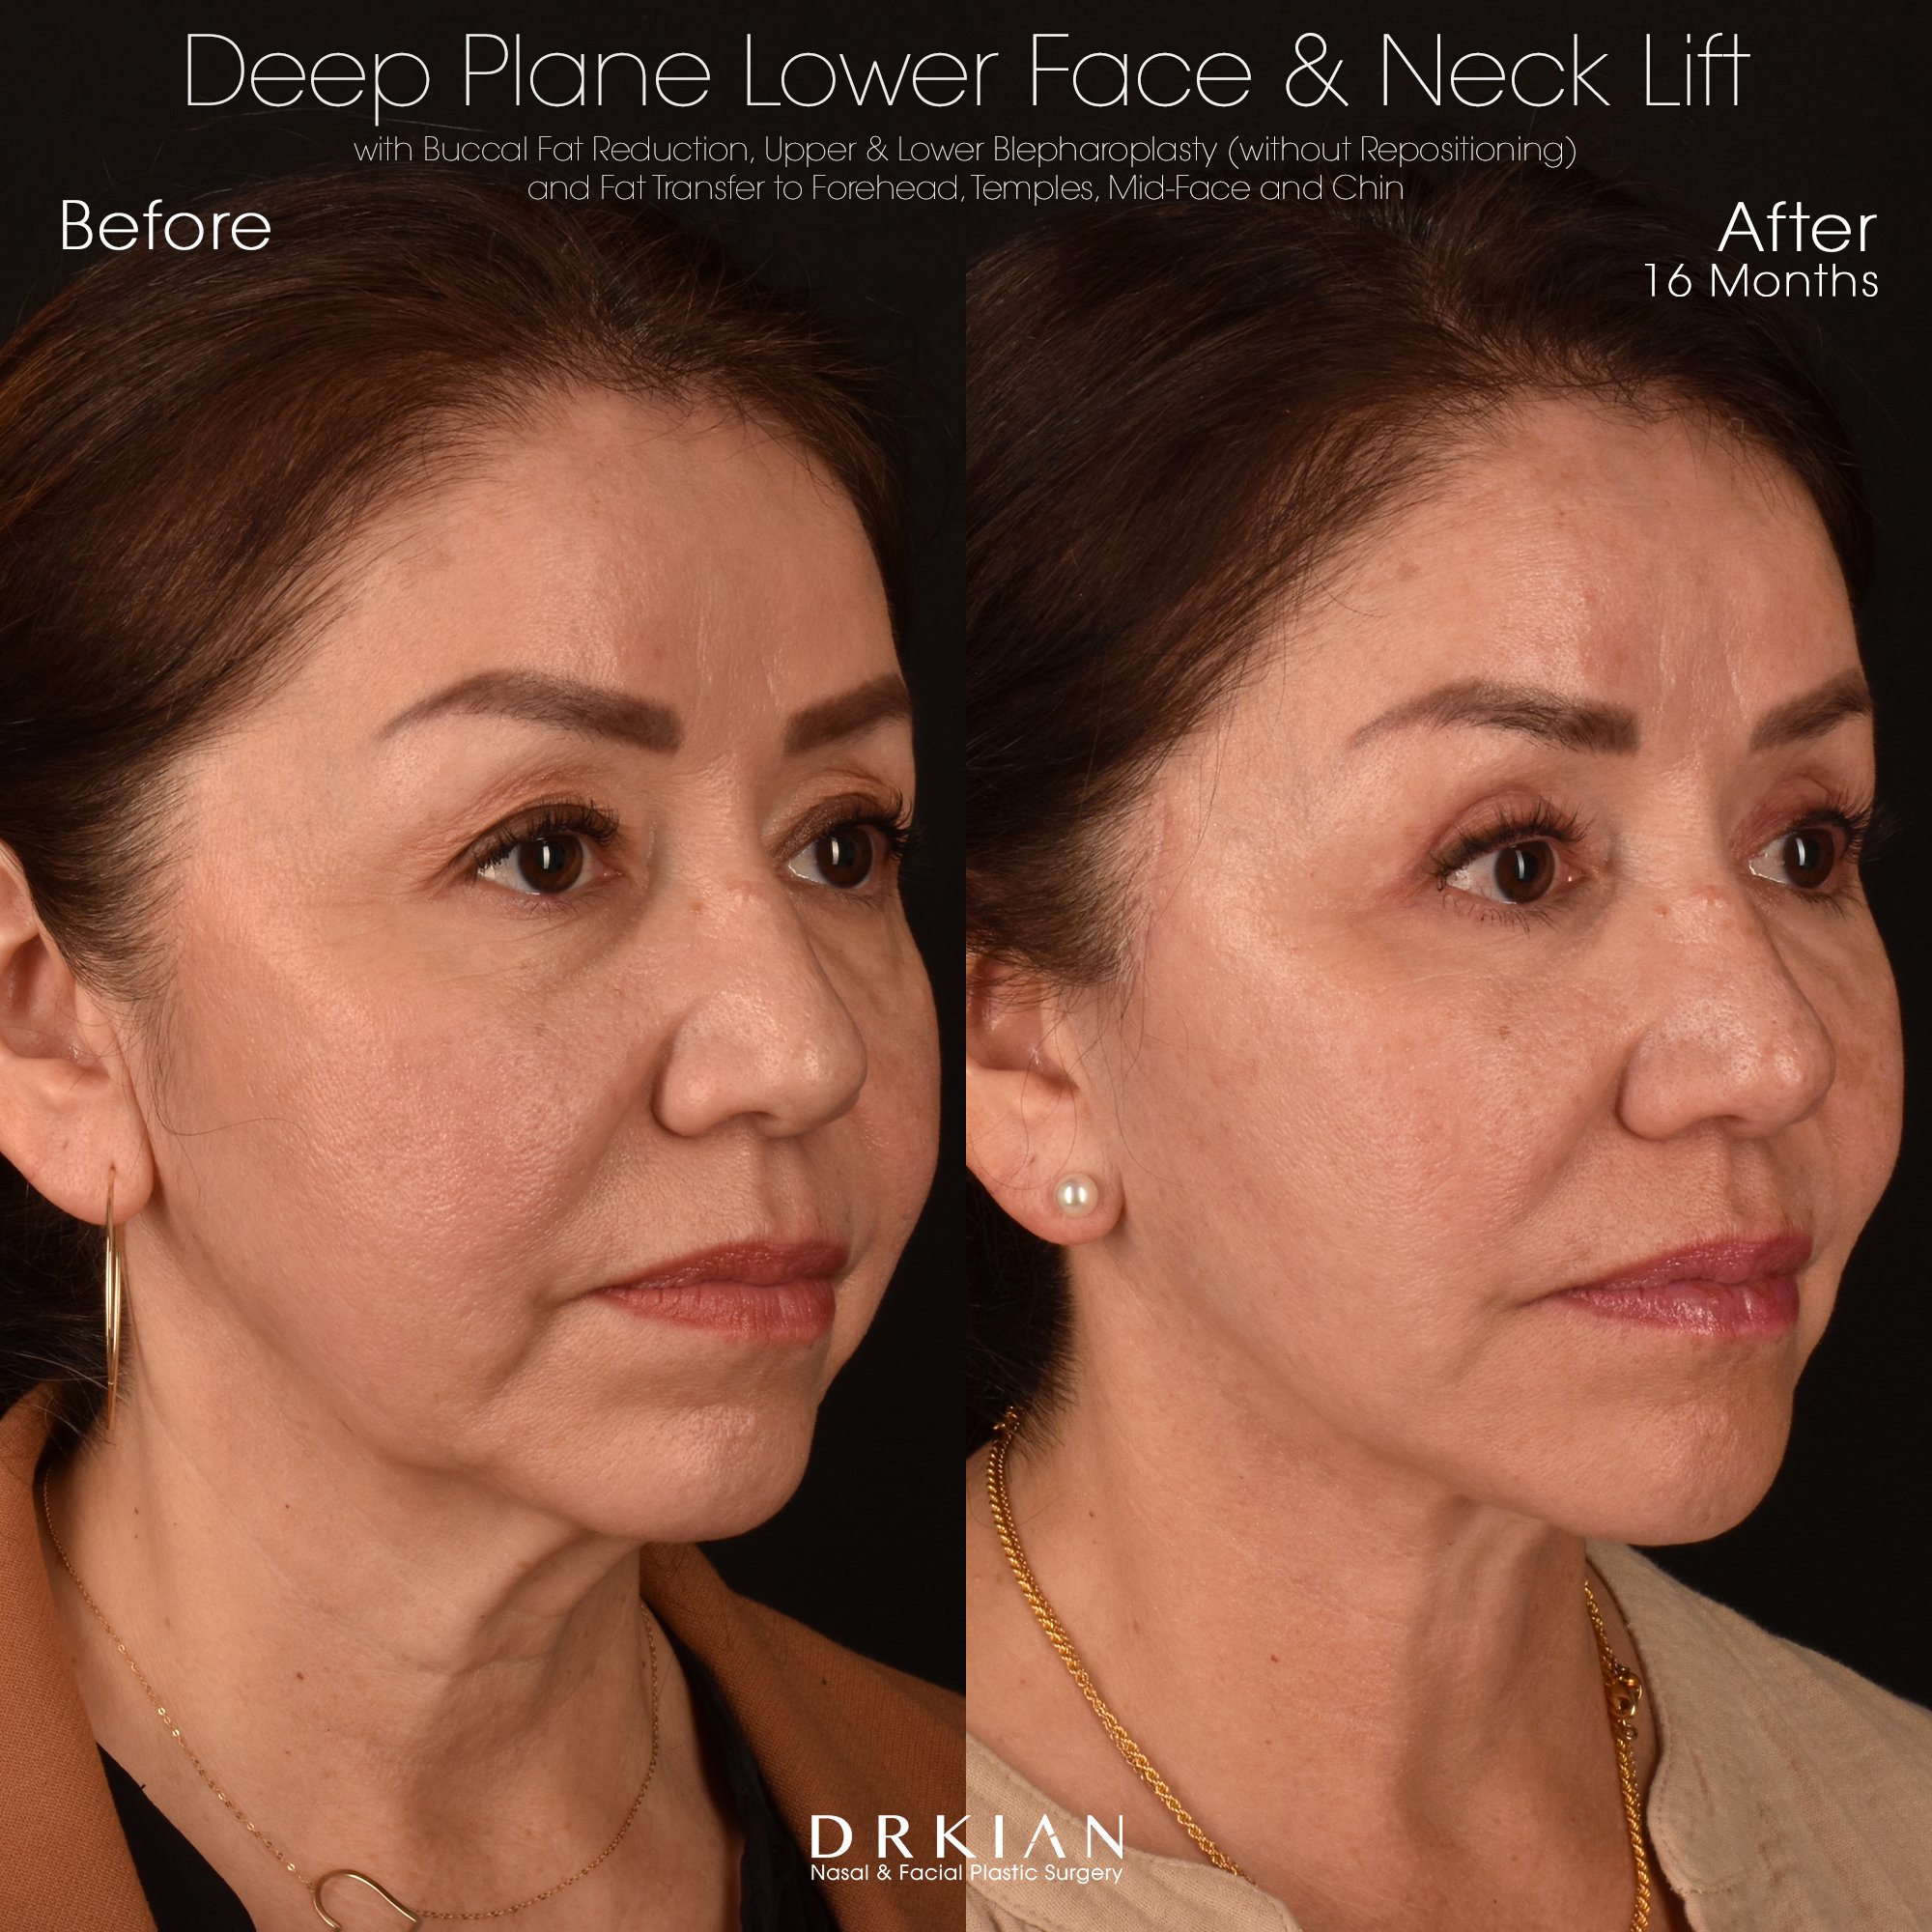
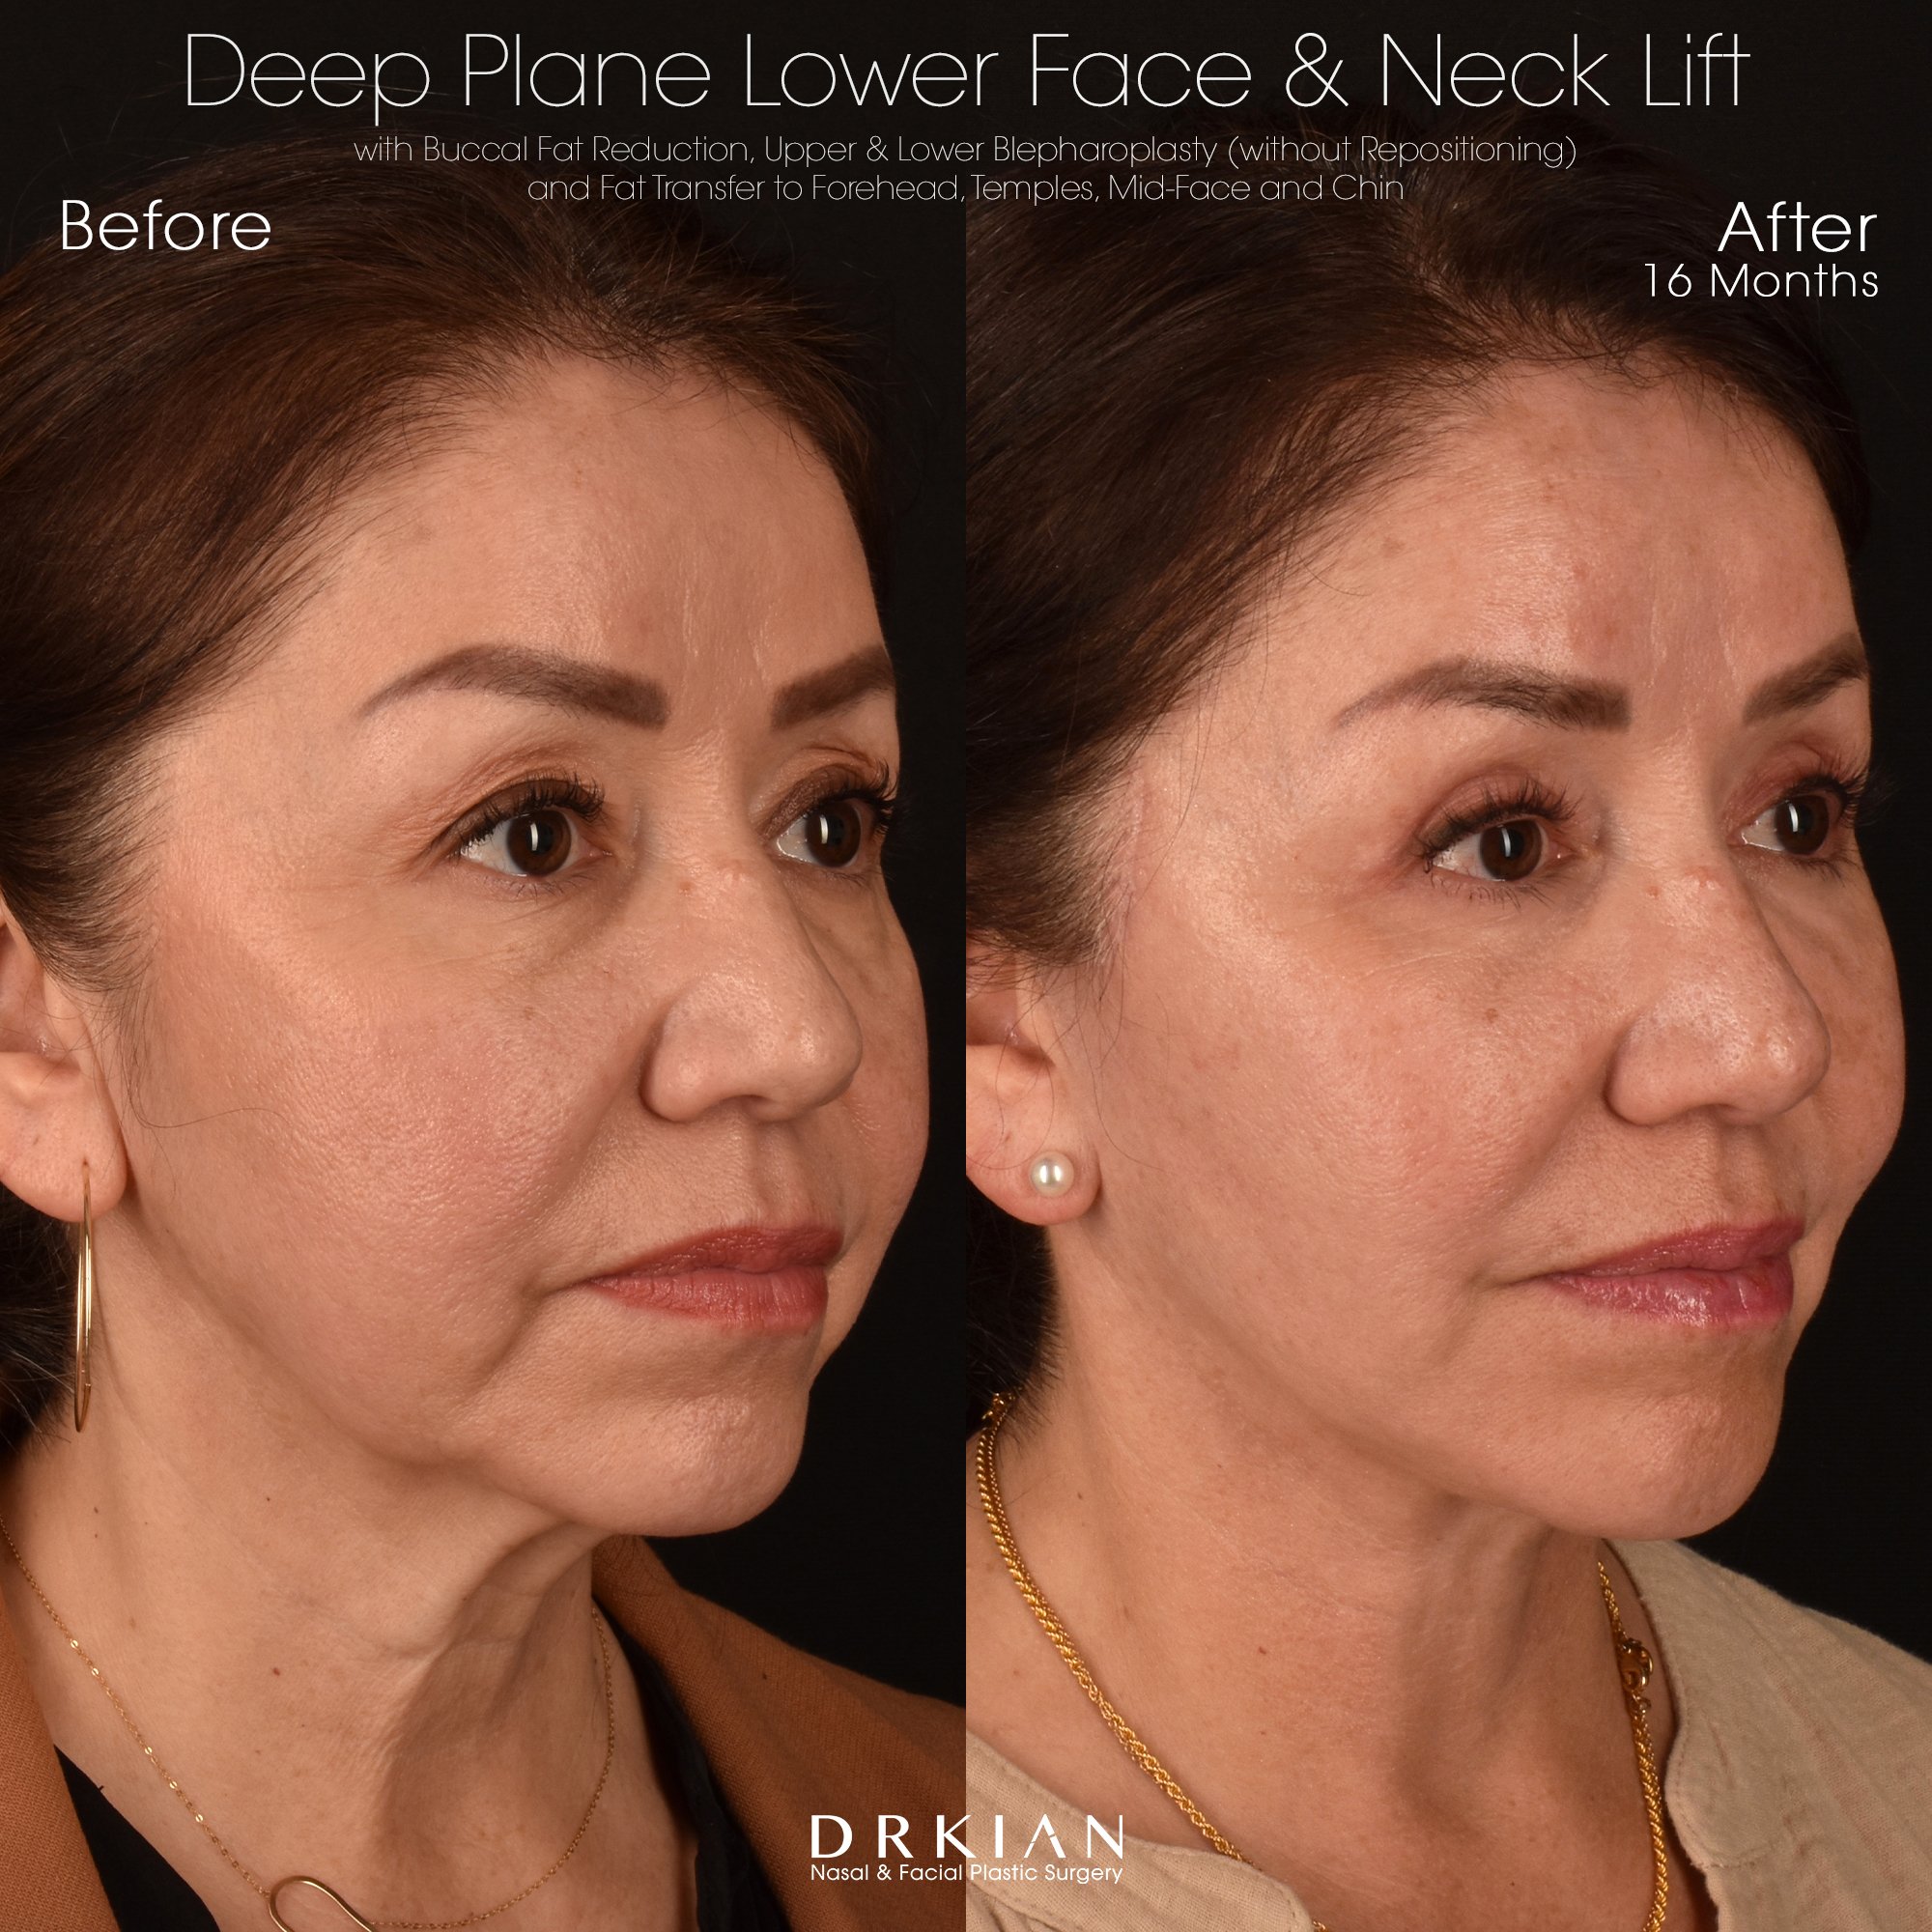
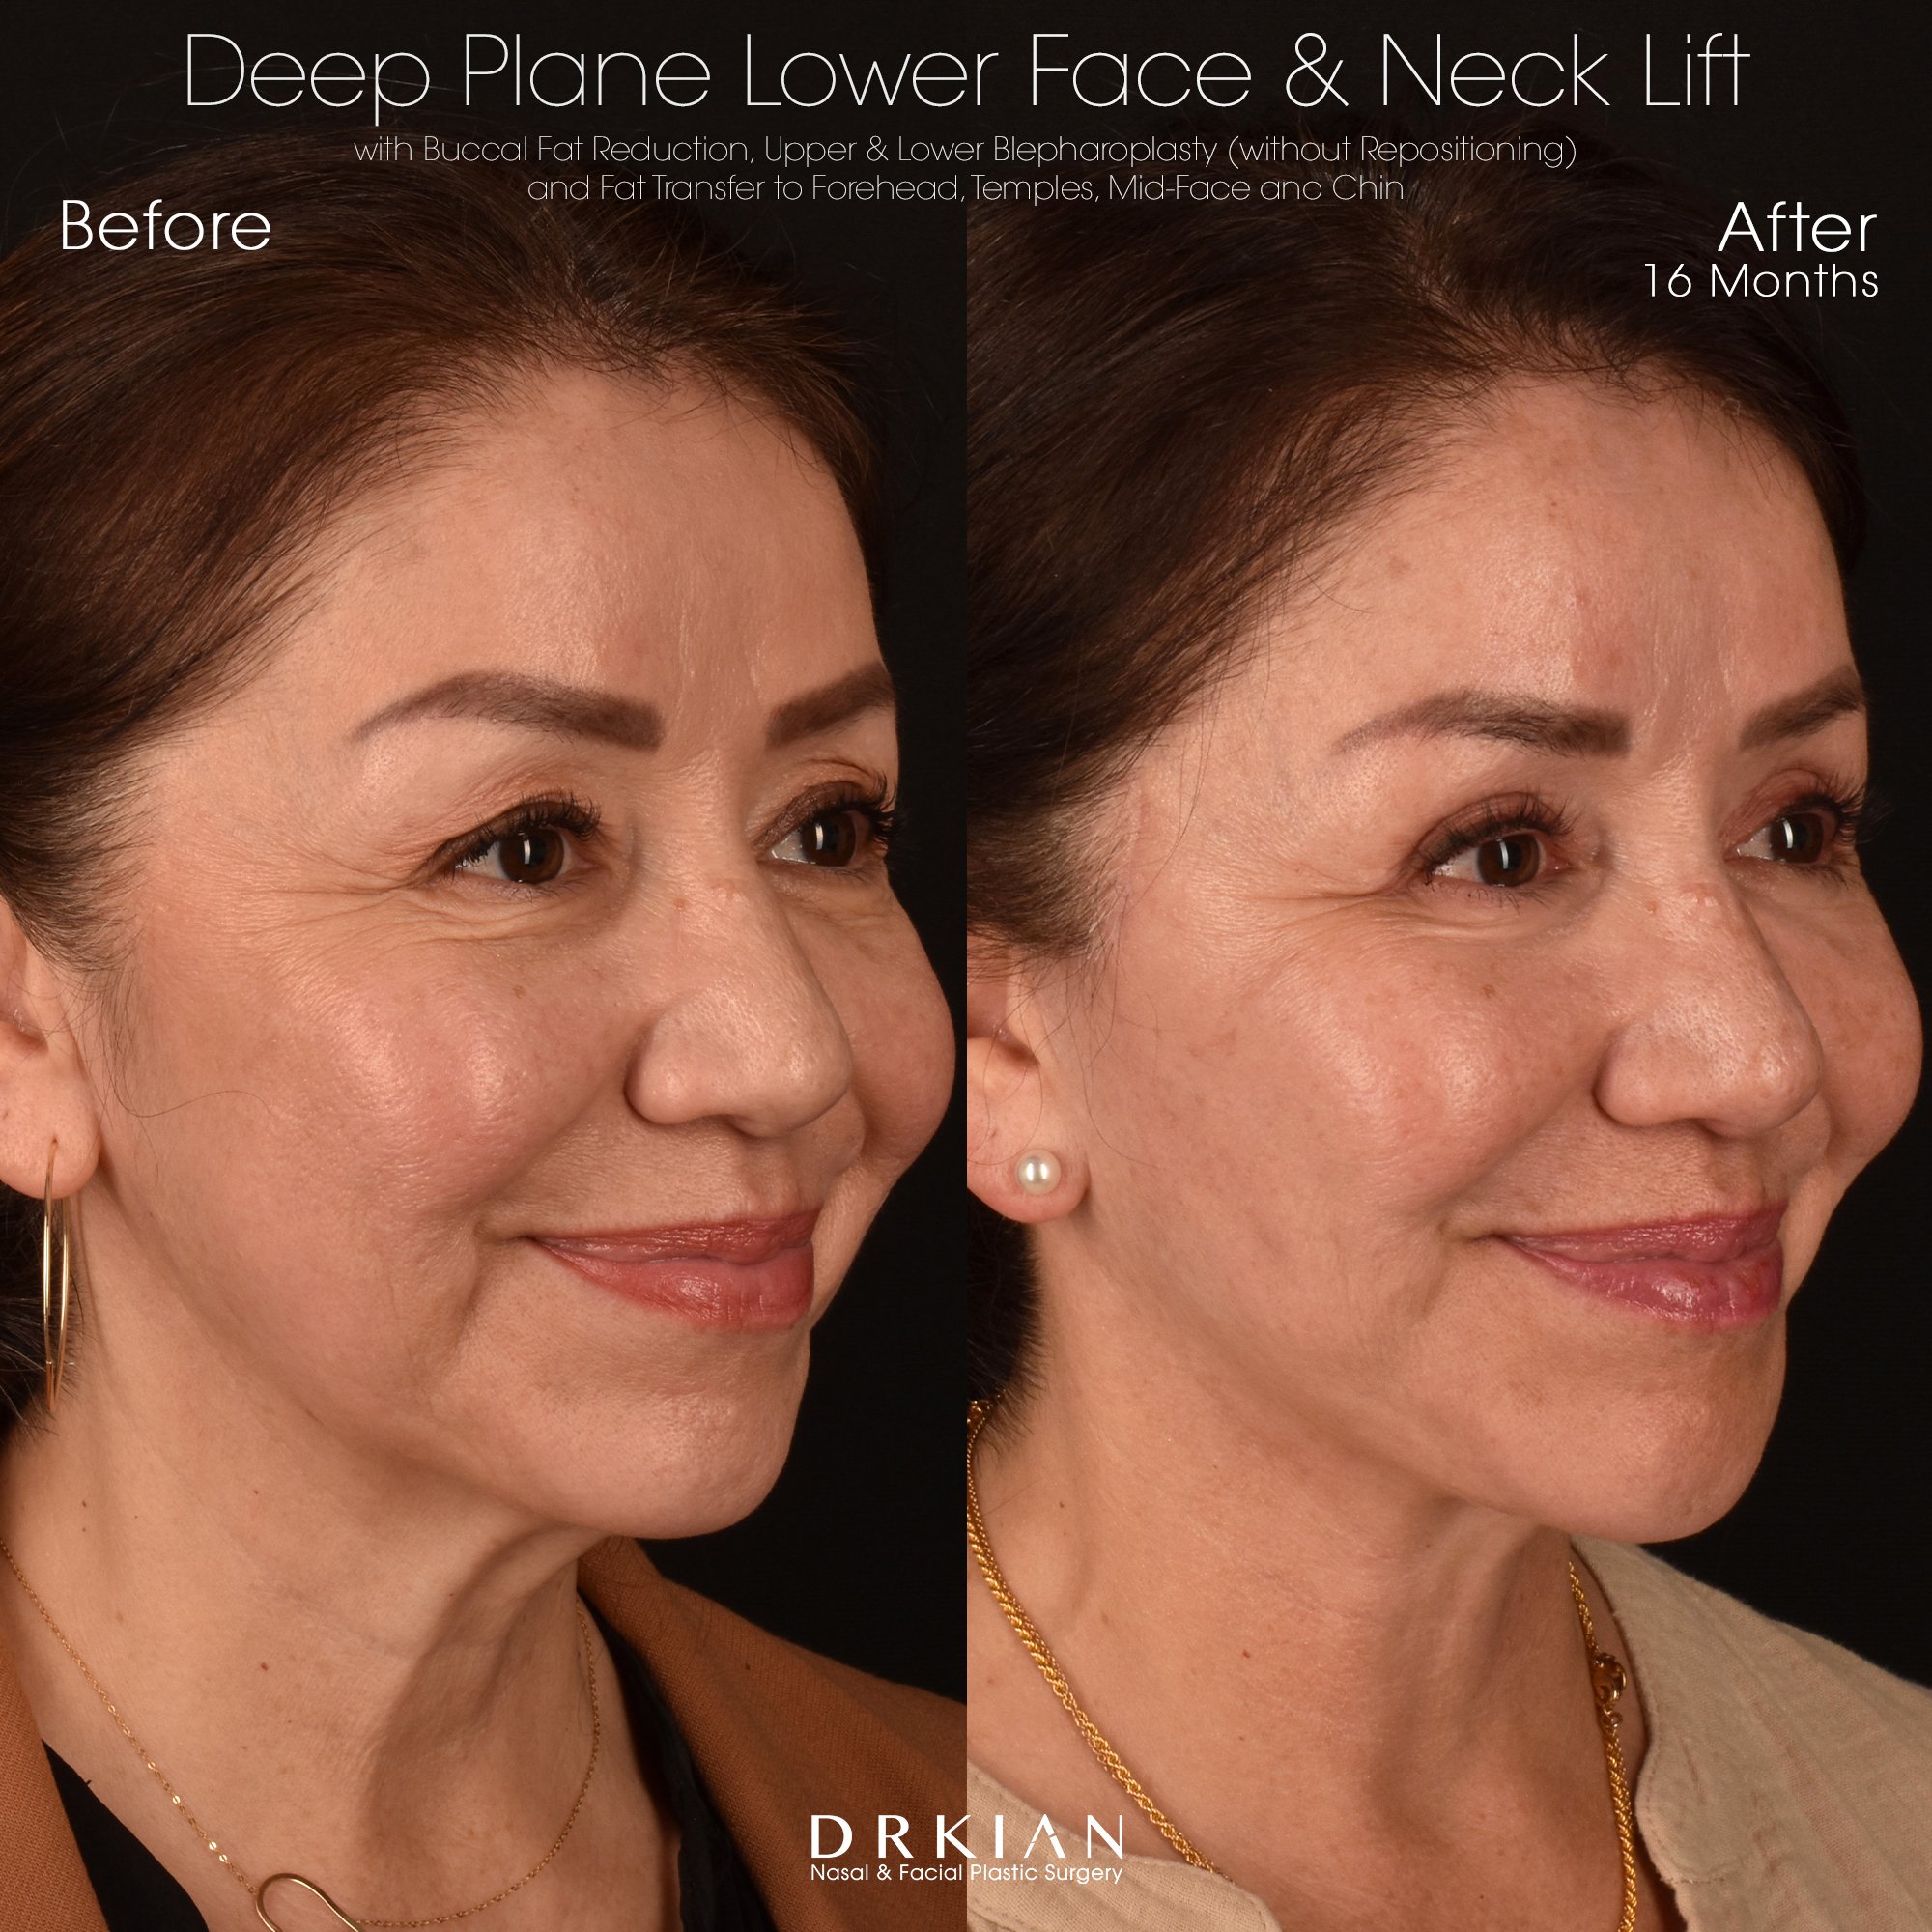
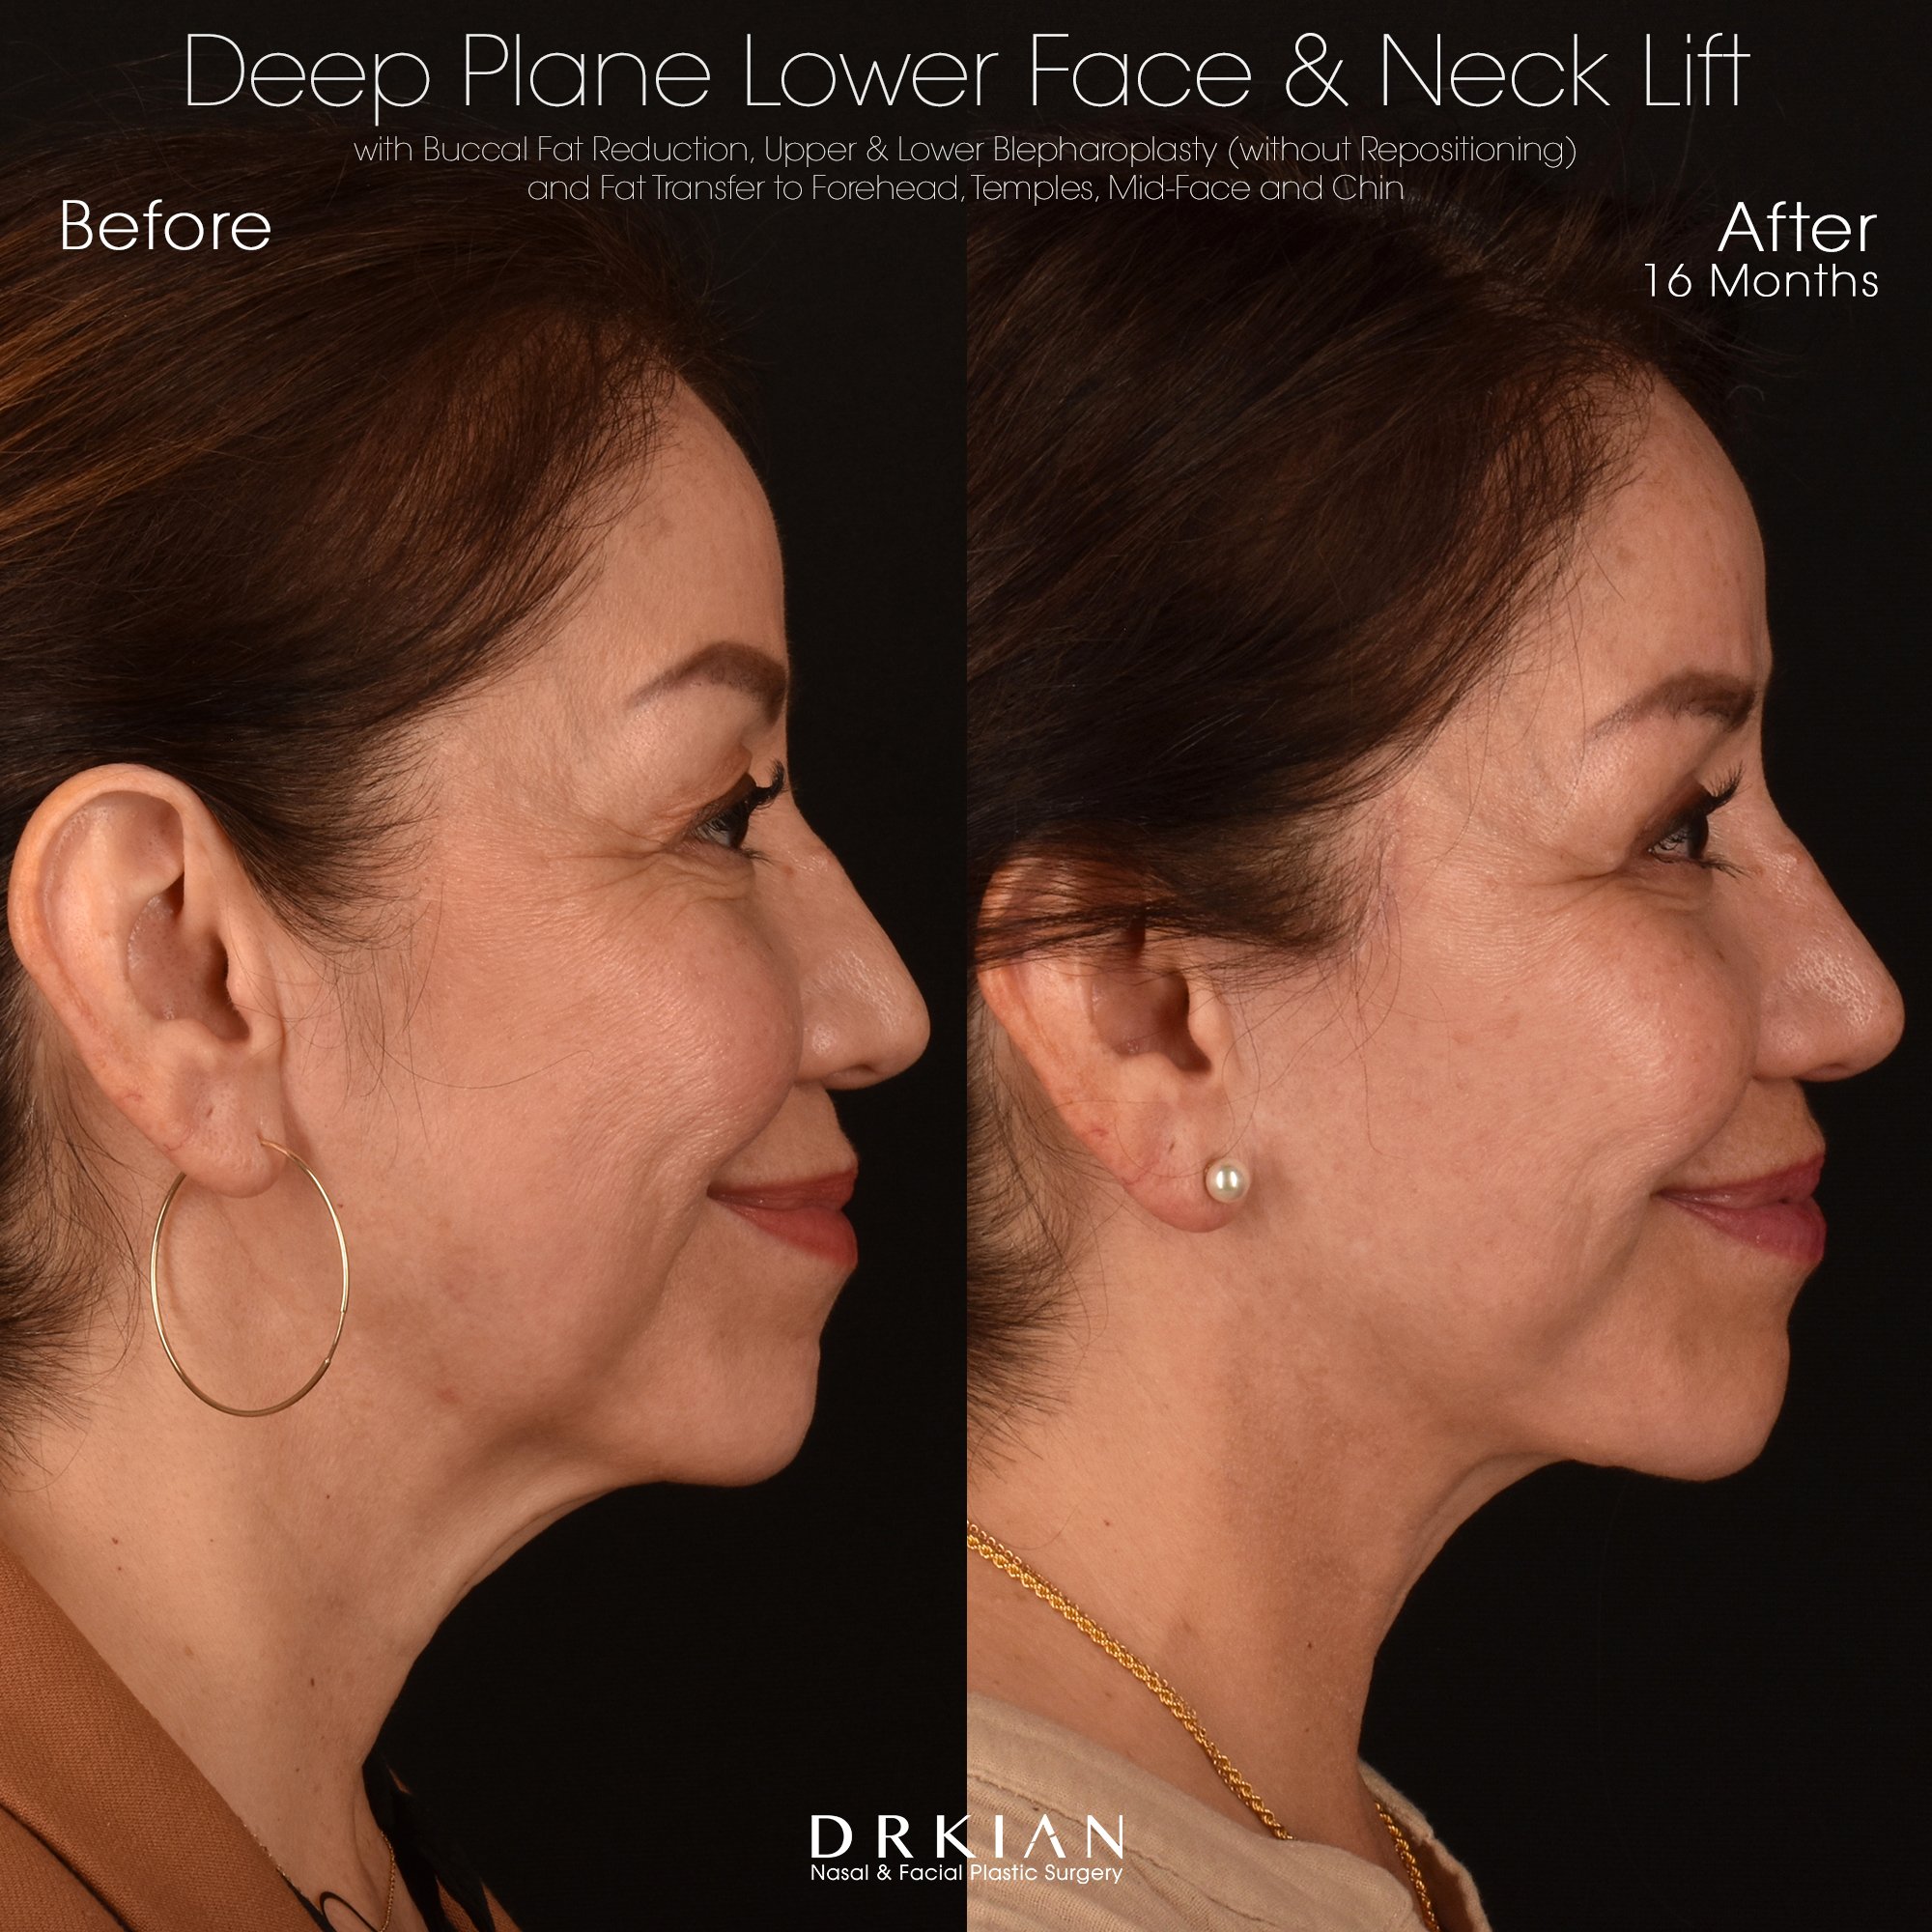
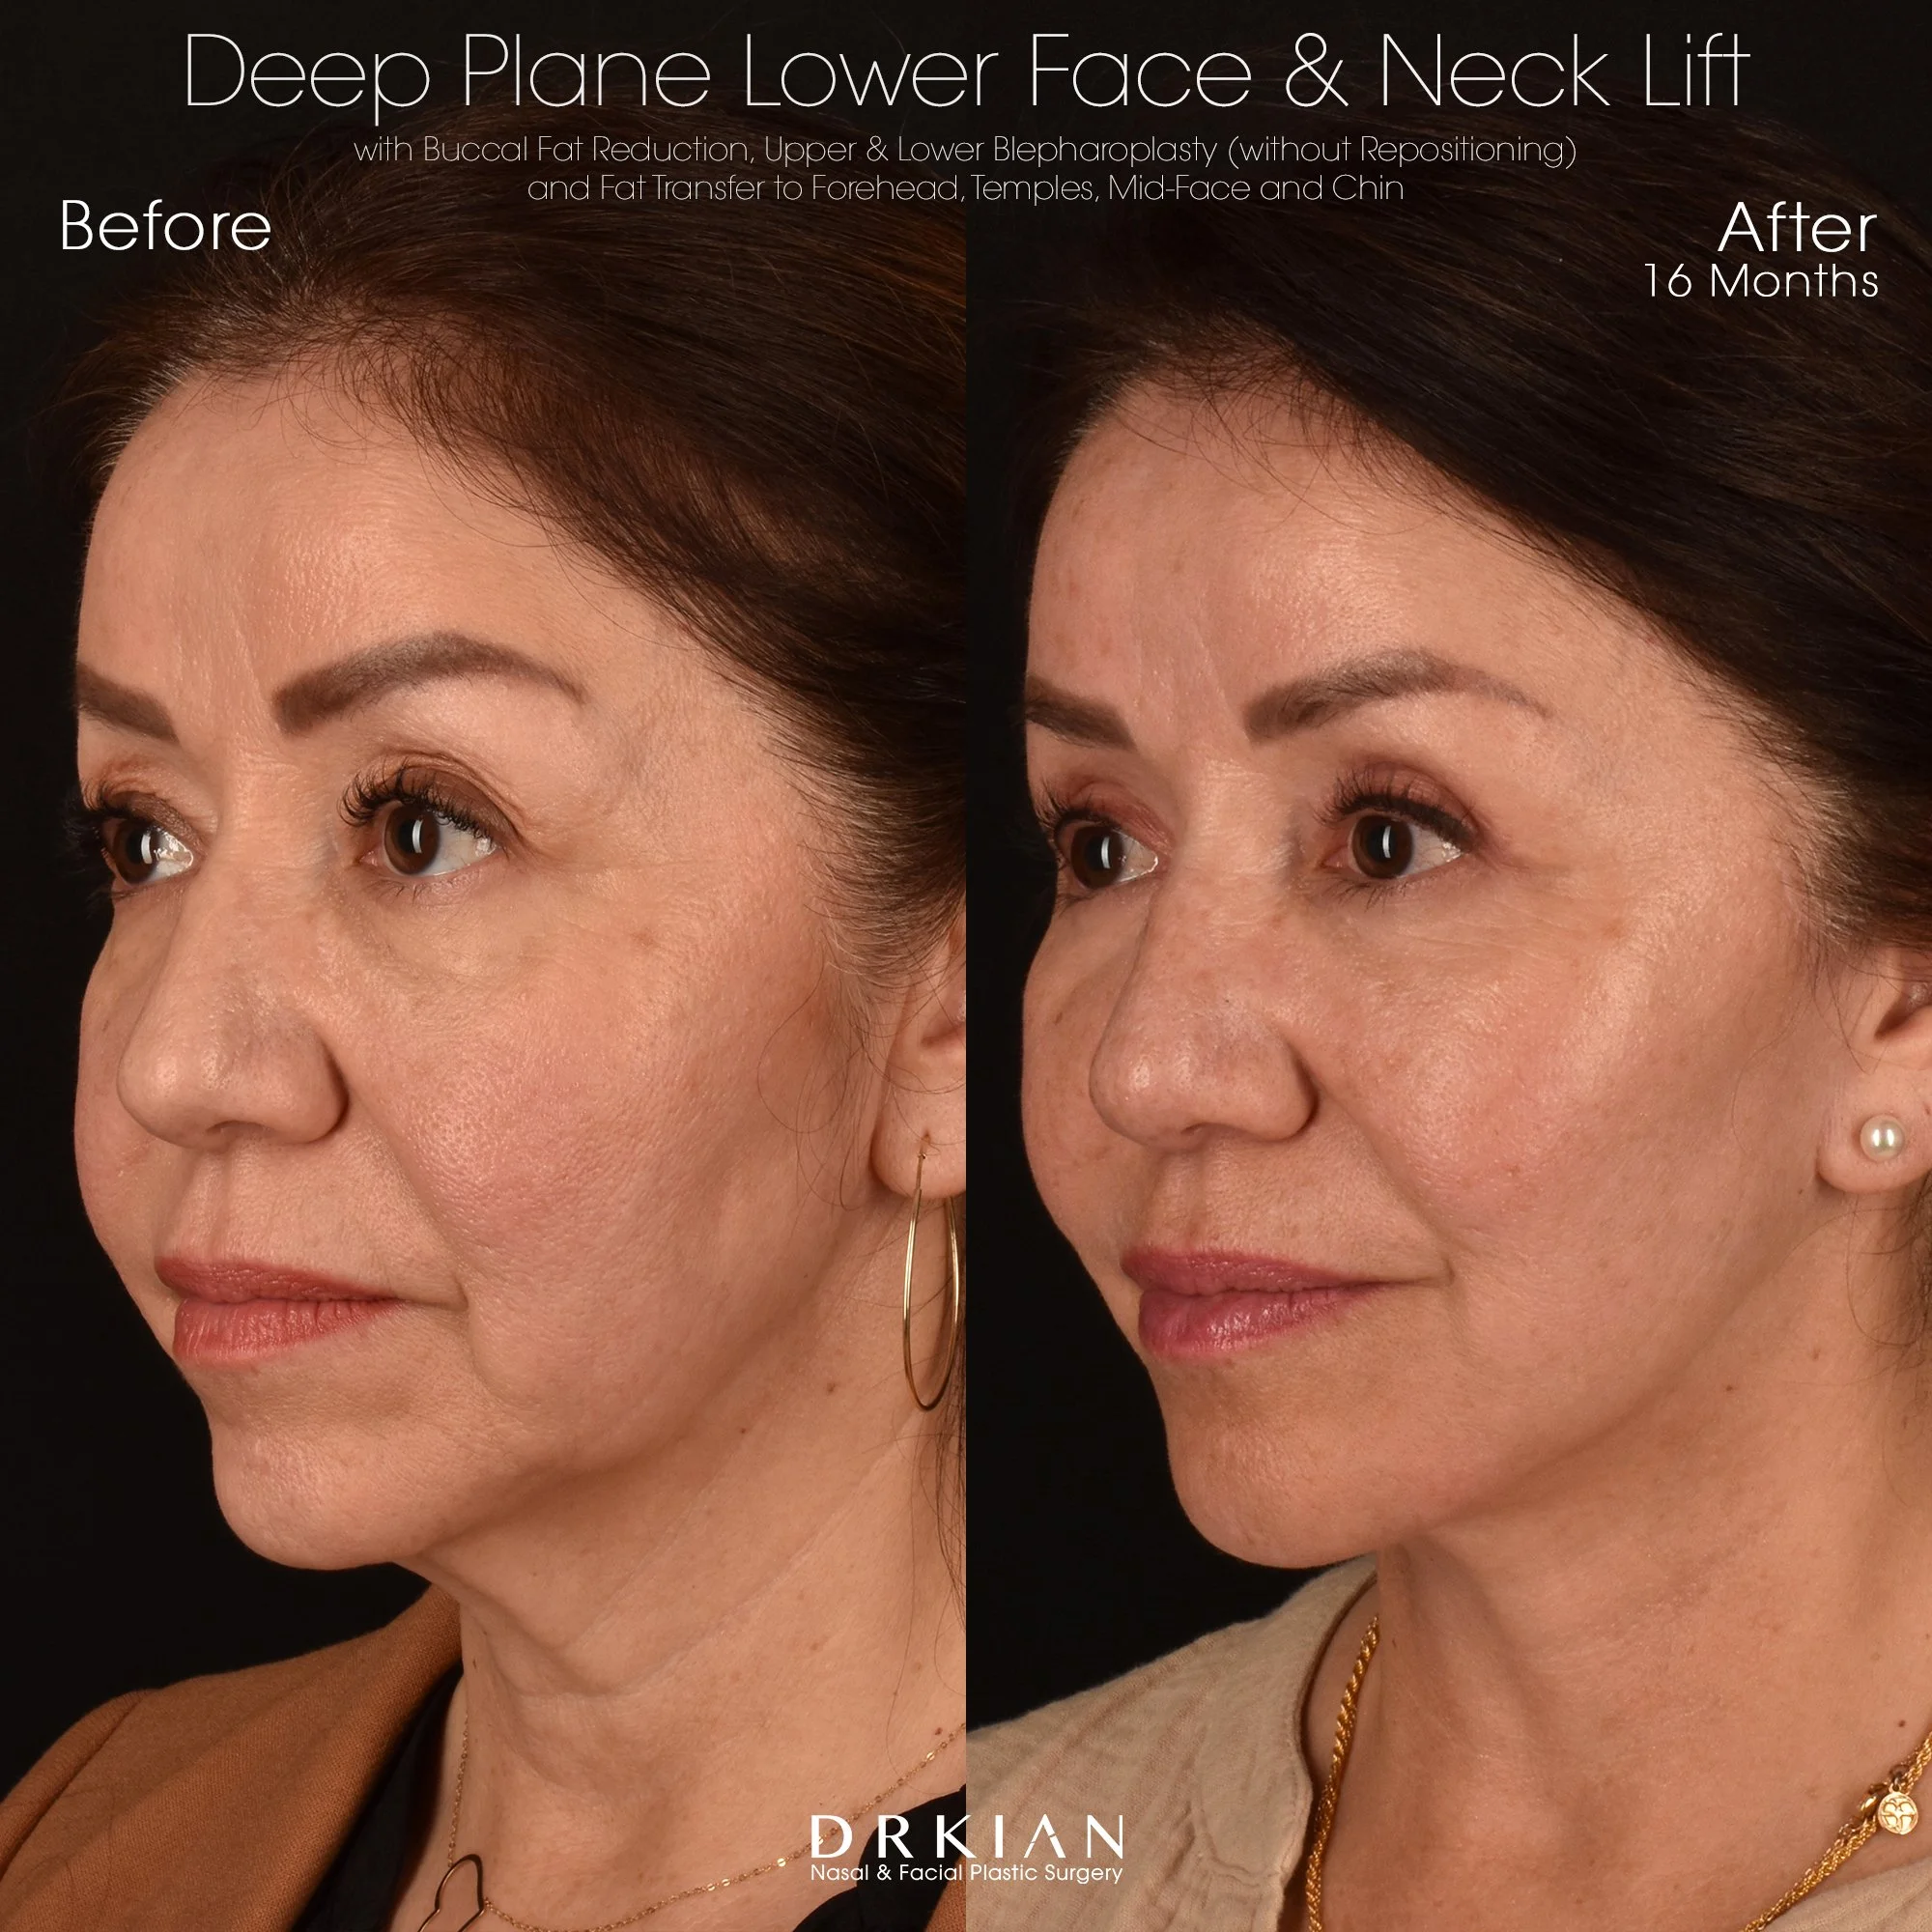
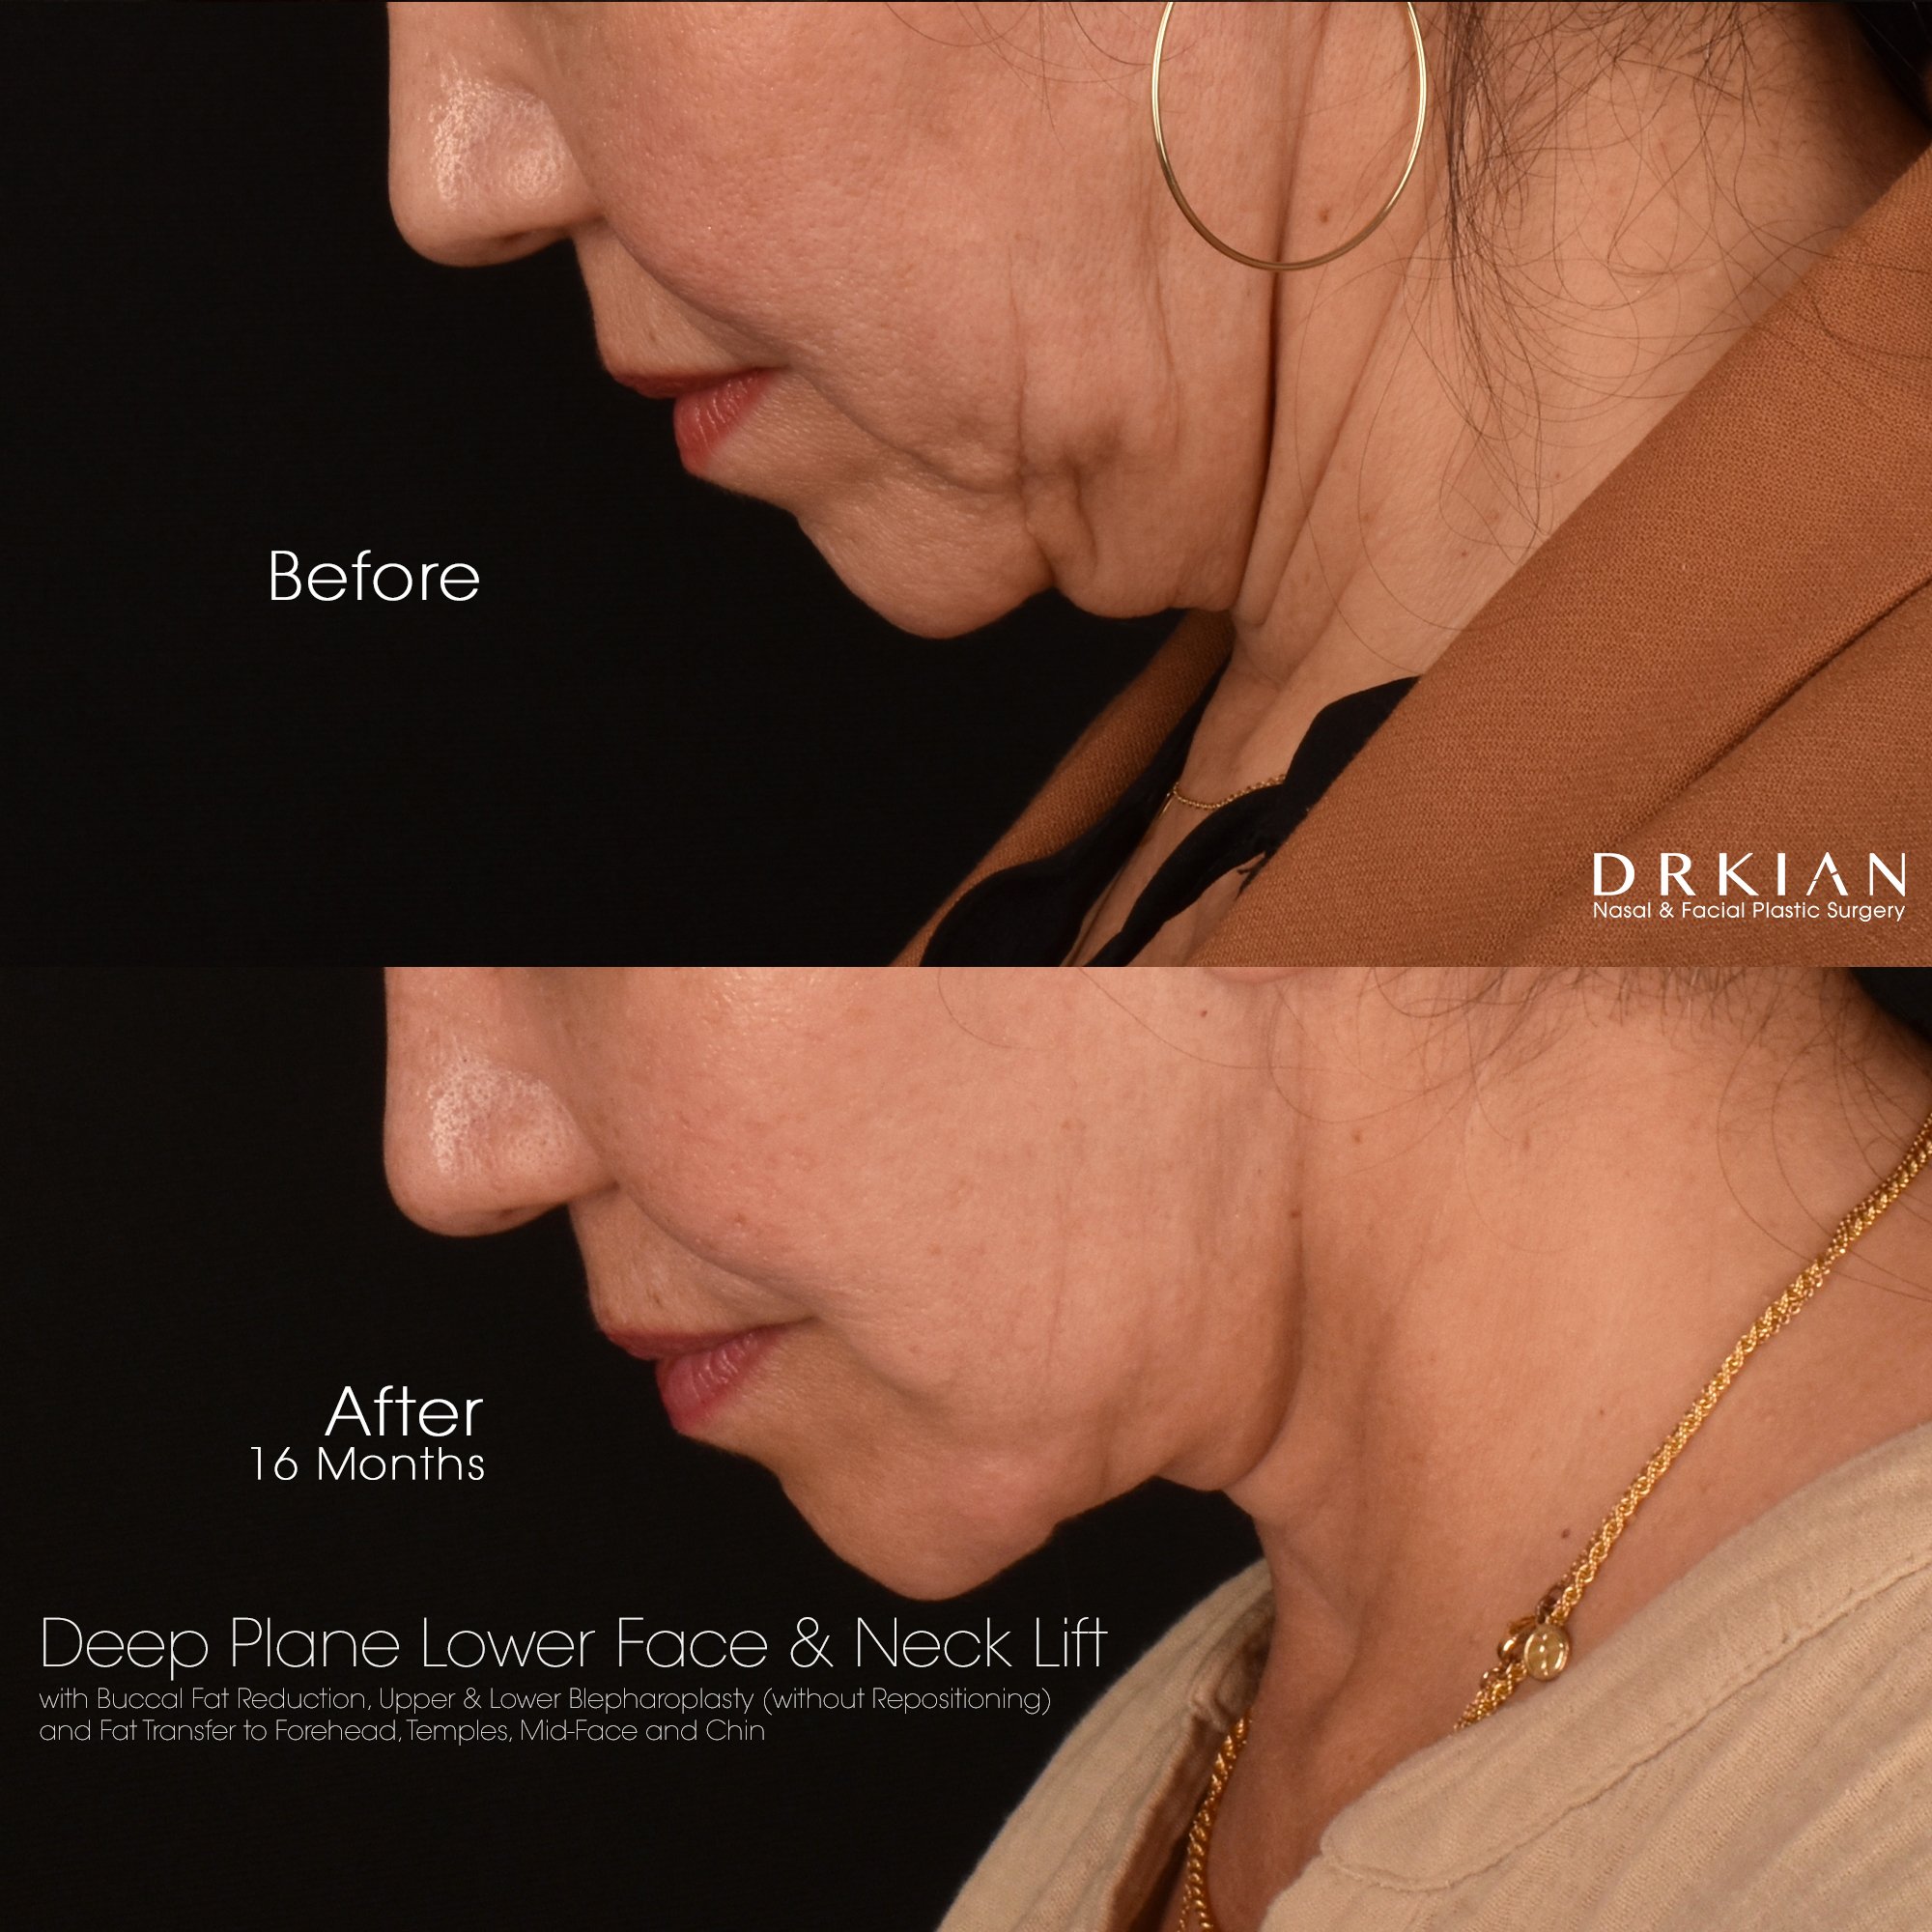
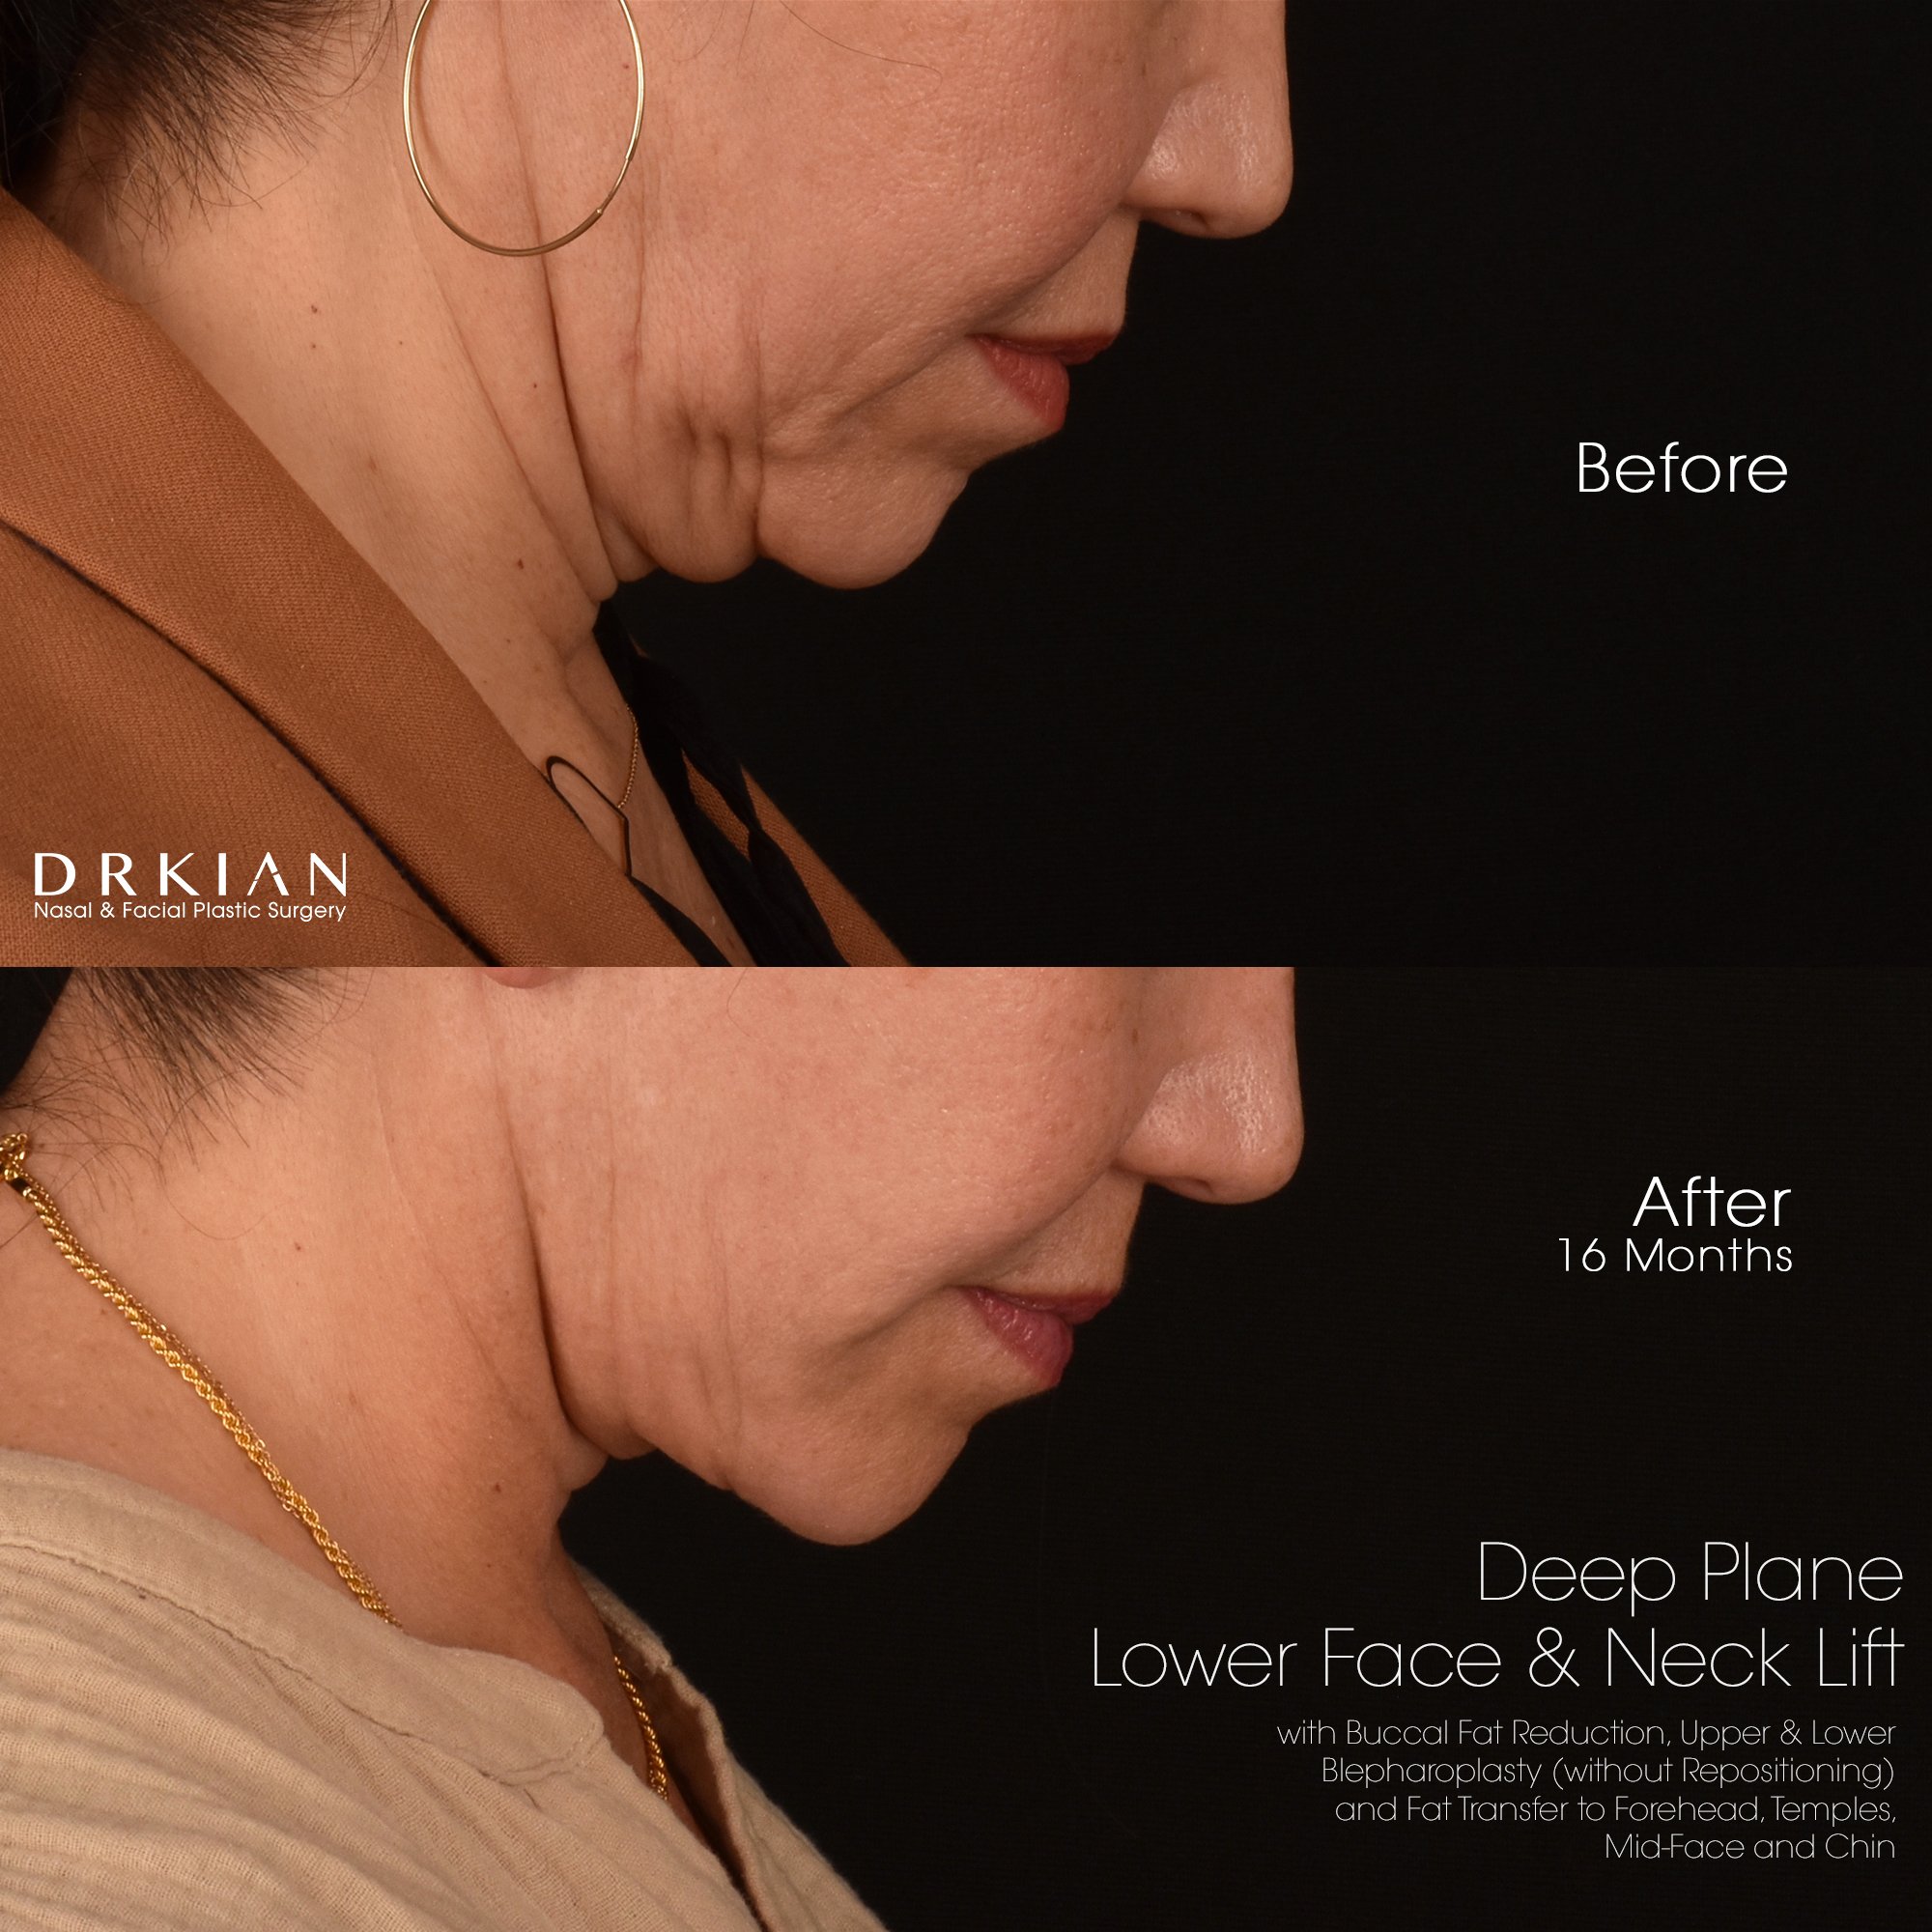
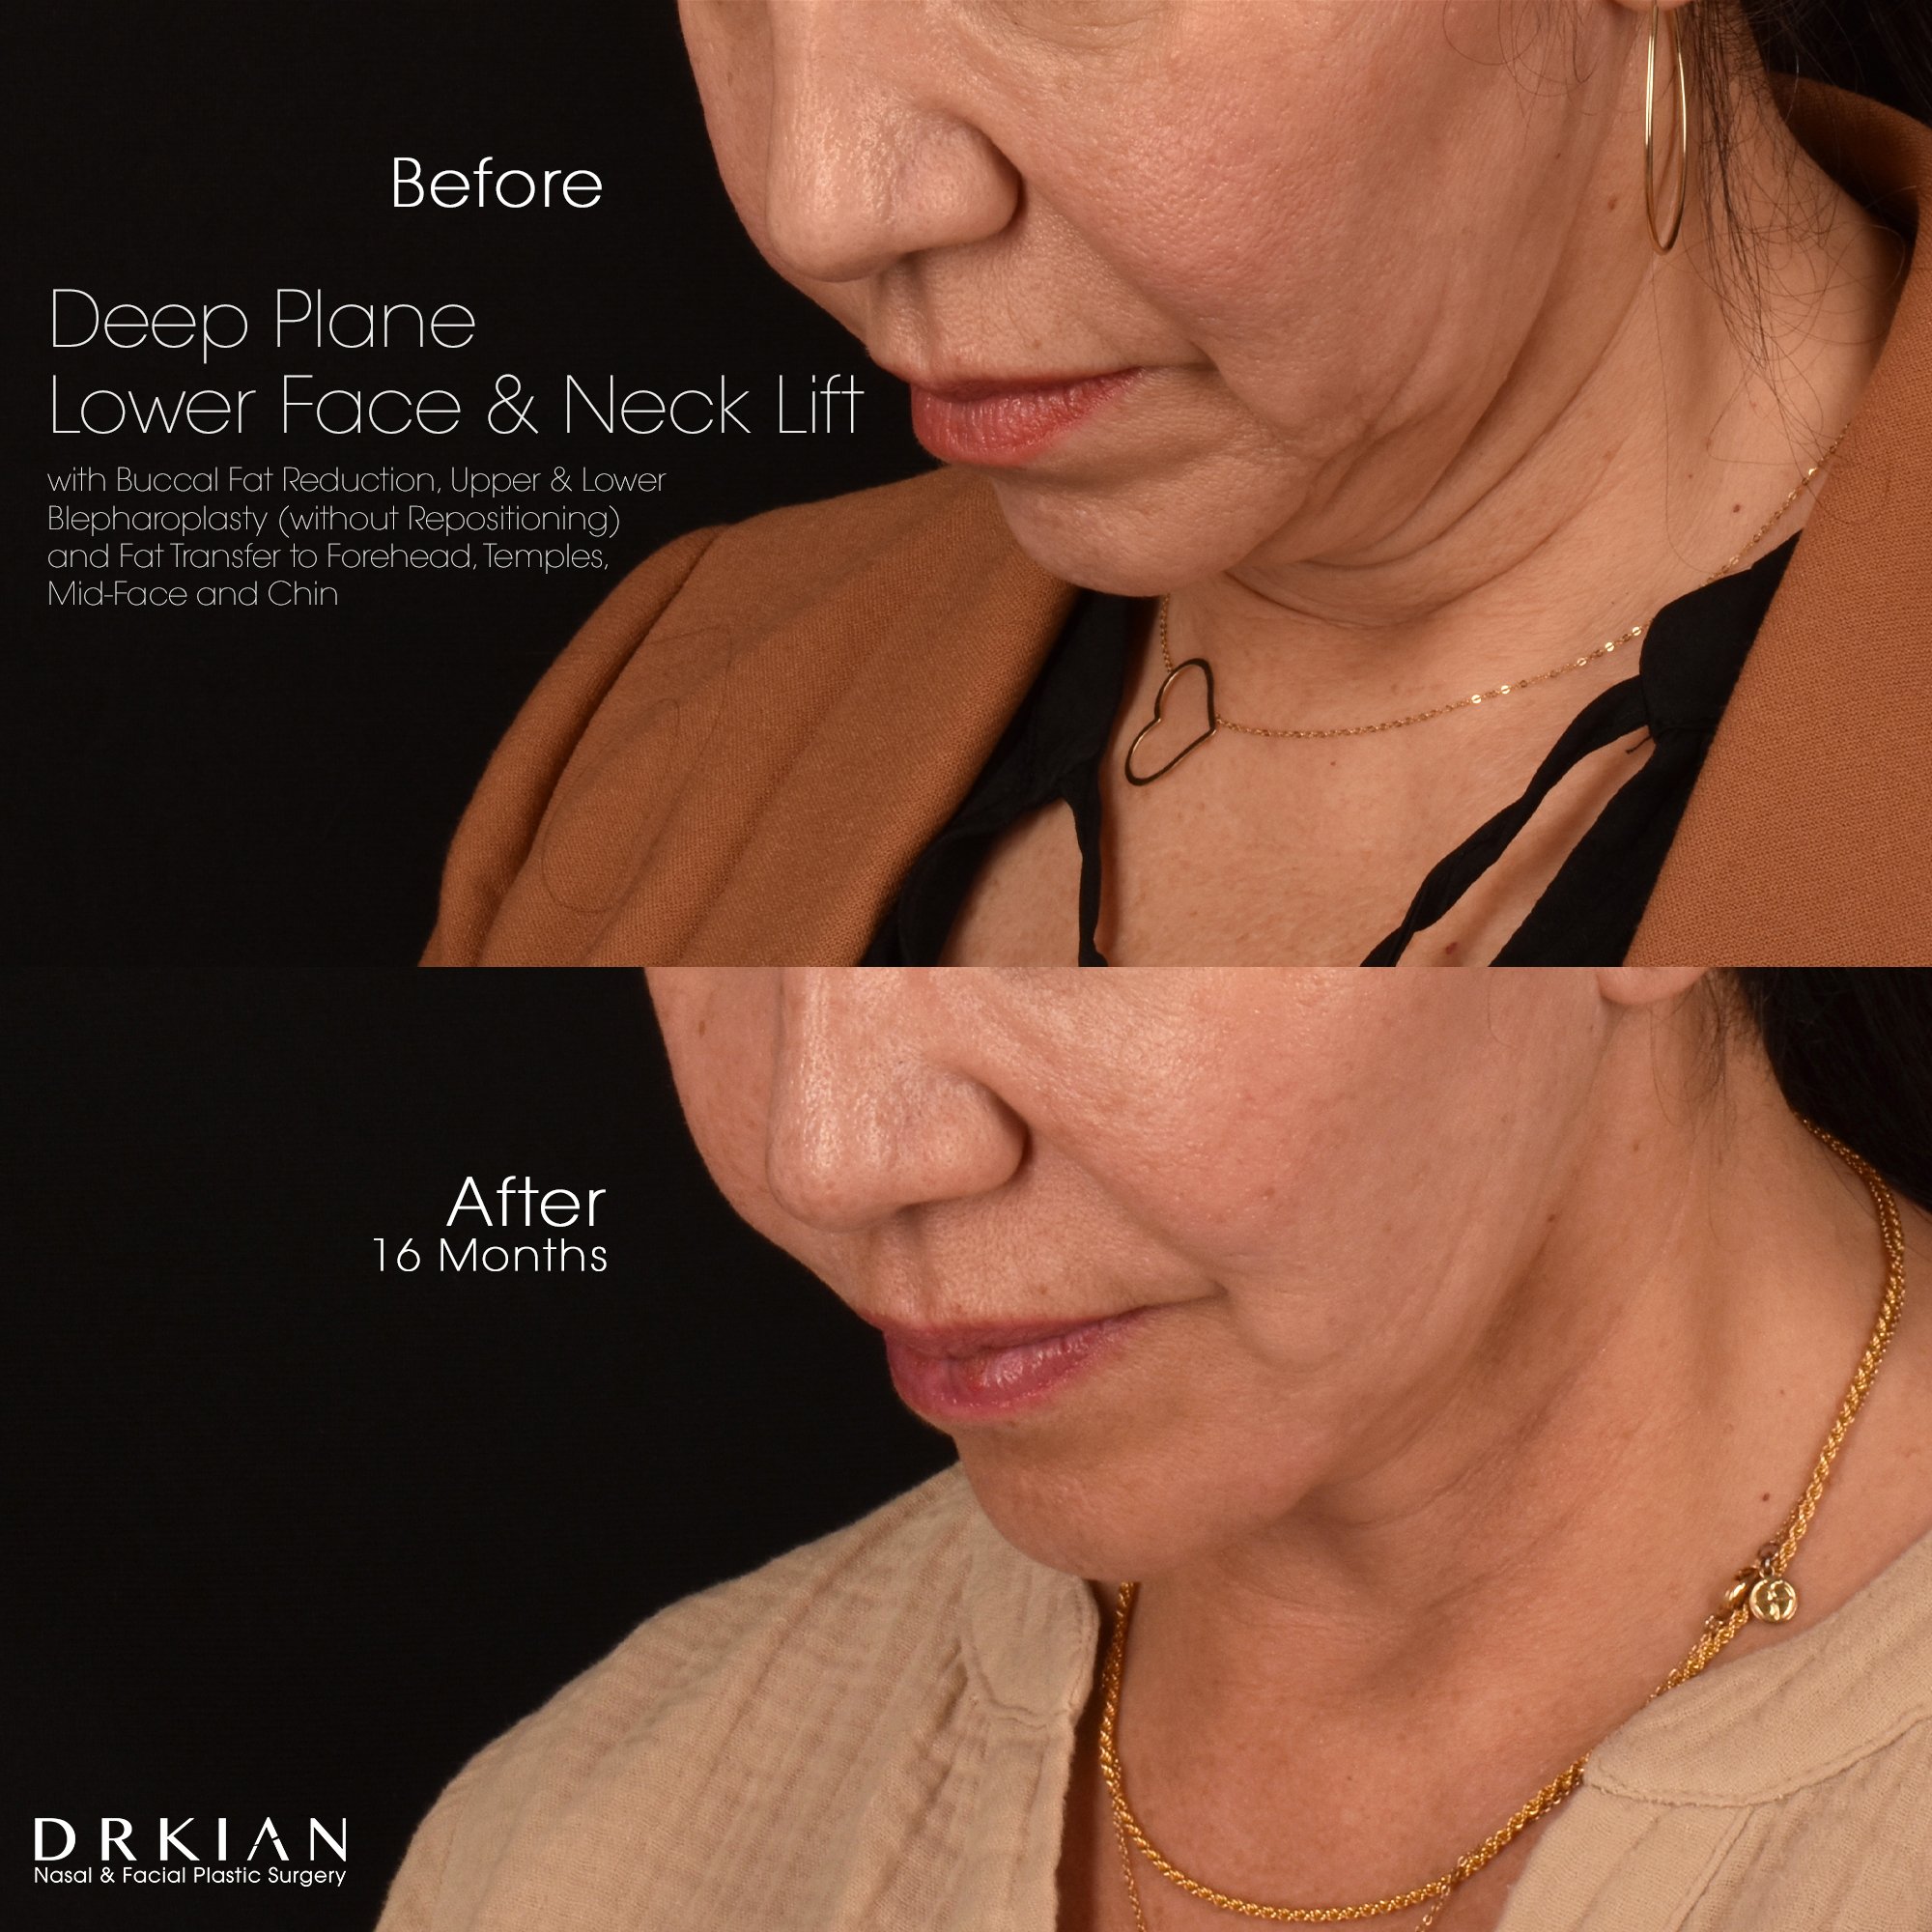
Deep Plane Lower Face & Neck Lift with Buccal Fat Reduction, Upper & Lower Blepharoplasty (without Repositioning), and Fat Transfer to Forehead, Temples, Mid-Face and Chin: Before & After 16 Months
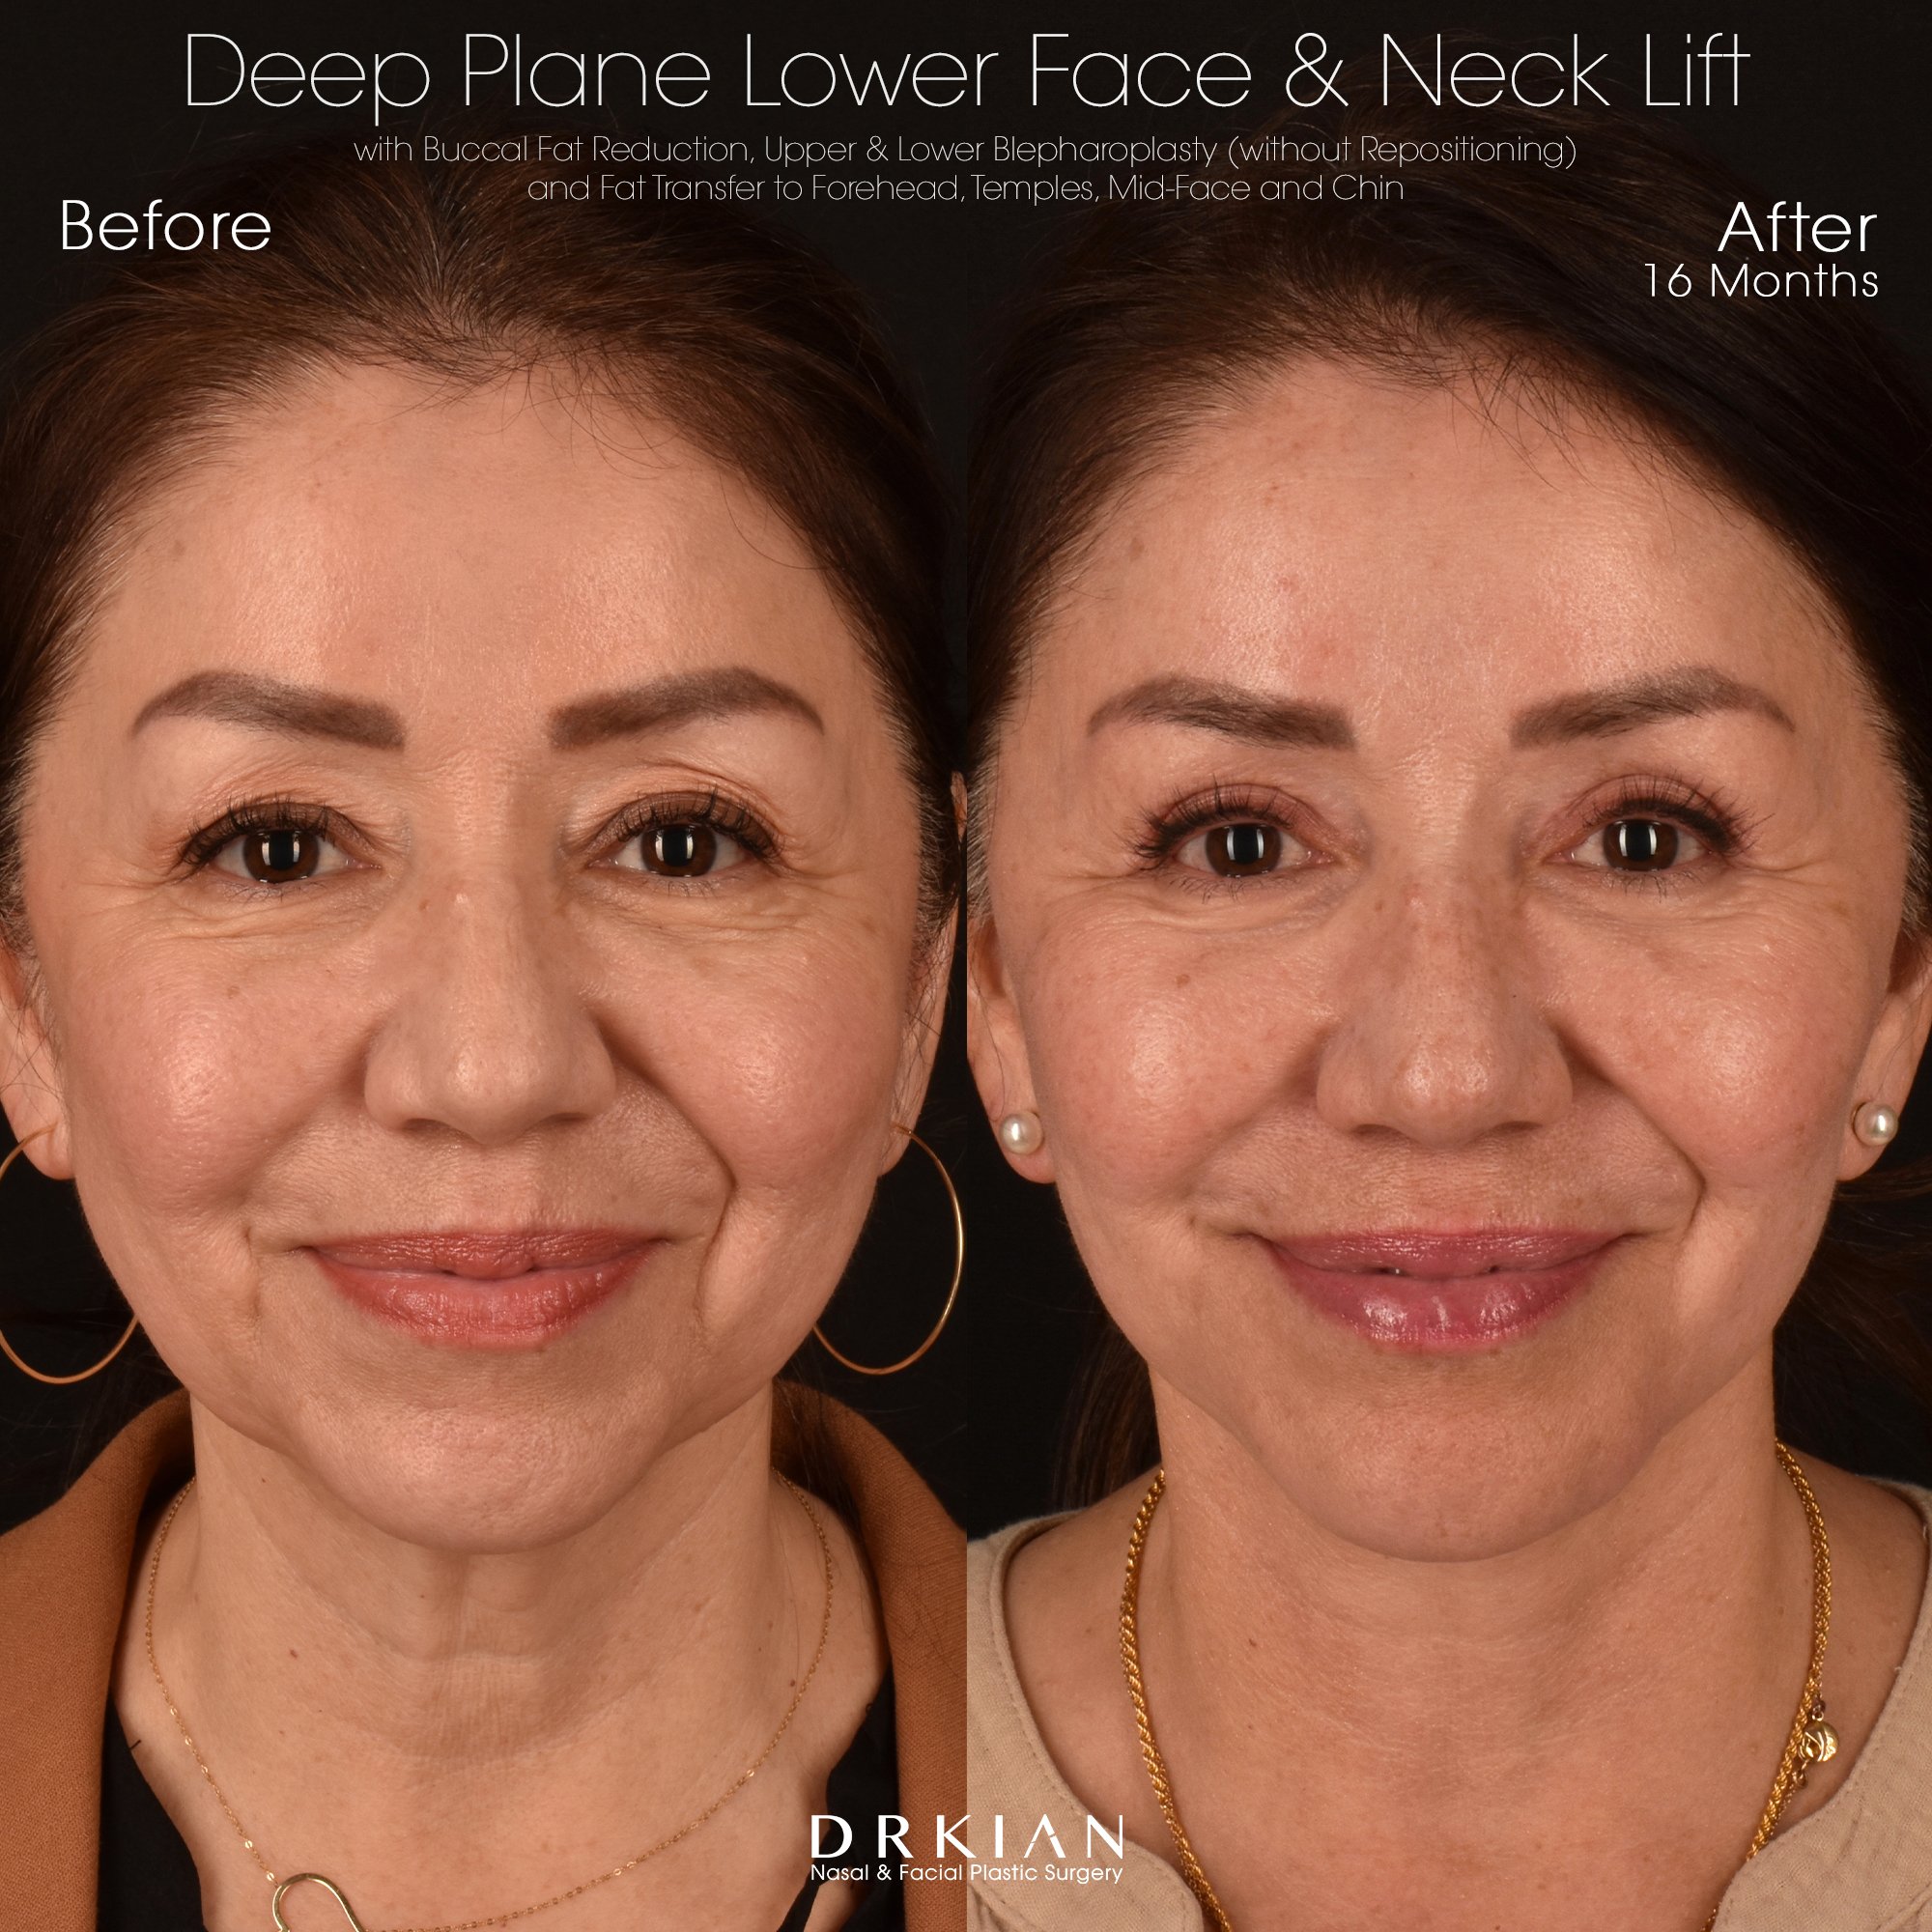
Deep Plane Lower Face & Neck Lift with Buccal Fat Reduction, Upper & Lower Blepharoplasty (without Repositioning), and Fat Transfer to Forehead, Temples, Mid-Face and Chin: Before & After 16 Months
Deep Plane Lower Face & Neck Lift with Buccal Fat Reduction, Upper & Lower Blepharoplasty (without Repositioning), and Fat Transfer to Forehead, Temples, Mid-Face and Chin: Before & After 16 Months
Deep Plane Lower Face & Neck Lift with Buccal Fat Reduction, Upper & Lower Blepharoplasty (without Repositioning), and Fat Transfer to Forehead, Temples, Mid-Face and Chin: Before & After 16 Months
Deep Plane Lower Face & Neck Lift with Buccal Fat Reduction, Upper & Lower Blepharoplasty (without Repositioning), and Fat Transfer to Forehead, Temples, Mid-Face and Chin: Before & After 16 Months

Deep Plane Lower Face & Neck Lift with Buccal Fat Reduction, Upper & Lower Blepharoplasty (without Repositioning), and Fat Transfer to Forehead, Temples, Mid-Face and Chin: Before & After 16 Months
Deep Plane Lower Face & Neck Lift with Buccal Fat Reduction, Upper & Lower Blepharoplasty (without Repositioning), and Fat Transfer to Forehead, Temples, Mid-Face and Chin: Before & After 16 Months
Deep Plane Lower Face & Neck Lift with Buccal Fat Reduction, Upper & Lower Blepharoplasty (without Repositioning), and Fat Transfer to Forehead, Temples, Mid-Face and Chin: Before & After 16 Months

Deep Plane Lower Face & Neck Lift with Buccal Fat Reduction, Upper & Lower Blepharoplasty (without Repositioning), and Fat Transfer to Forehead, Temples, Mid-Face and Chin: Before & After 16 Months

Deep Plane Lower Face & Neck Lift with Buccal Fat Reduction, Upper & Lower Blepharoplasty (without Repositioning), and Fat Transfer to Forehead, Temples, Mid-Face and Chin: Before & After 16 Months

Deep Plane Lower Face & Neck Lift with Buccal Fat Reduction, Upper & Lower Blepharoplasty (without Repositioning), and Fat Transfer to Forehead, Temples, Mid-Face and Chin: Before & After 16 Months
Deep Plane Lower Face & Neck Lift with Buccal Fat Reduction, Upper & Lower Blepharoplasty (without Repositioning), and Fat Transfer to Forehead, Temples, Mid-Face and Chin: Before & After 16 Months

Deep Plane Lower Face & Neck Lift with Buccal Fat Reduction, Upper & Lower Blepharoplasty (without Repositioning), and Fat Transfer to Forehead, Temples, Mid-Face and Chin: Before & After 16 Months

Deep Plane Lower Face & Neck Lift with Buccal Fat Reduction, Upper & Lower Blepharoplasty (without Repositioning), and Fat Transfer to Forehead, Temples, Mid-Face and Chin: Before & After 16 Months
Deep Plane Lower Face & Neck Lift with Buccal Fat Reduction, Upper & Lower Blepharoplasty (without Repositioning), and Fat Transfer to Forehead, Temples, Mid-Face and Chin: Before & After 16 Months
Deep Plane Lower Face & Neck Lift with Buccal Fat Reduction, Upper & Lower Blepharoplasty (without Repositioning), and Fat Transfer to Forehead, Temples, Mid-Face and Chin: Before & After 16 Months
Deep Plane Lower Face & Neck Lift, Upper & Lower Blepharoplasty (without Repositioning), Full-Face Fat Transfer: Before & After Three Months
Deep Plane Lower Face & Neck Lift, Upper & Lower Blepharoplasty (without Repositioning), Full-Face Fat Transfer: Before & After Three Months
Deep Plane Lower Face & Neck Lift, Upper & Lower Blepharoplasty (without Repositioning), Full-Face Fat Transfer: Before & After Three Months
Deep Plane Lower Face & Neck Lift, Upper & Lower Blepharoplasty (without Repositioning), Full-Face Fat Transfer: Before & After Three Months
Deep Plane Lower Face & Neck Lift, Upper & Lower Blepharoplasty (without Repositioning), Full-Face Fat Transfer: Before & After Three Months
Deep Plane Lower Face & Neck Lift, Upper & Lower Blepharoplasty (without Repositioning), Full-Face Fat Transfer: Before & After Three Months
Deep Plane Lower Face & Neck Lift, Upper & Lower Blepharoplasty (without Repositioning), Full-Face Fat Transfer: Before & After Three Months
Deep Plane Lower Face & Neck Lift, Upper & Lower Blepharoplasty (without Repositioning), Full-Face Fat Transfer: Before & After Three Months
Deep Plane Lower Face & Neck Lift, Upper & Lower Blepharoplasty (without Repositioning), Full-Face Fat Transfer: Before & After Three Months
Deep Plane Lower Face & Neck Lift, Upper & Lower Blepharoplasty (without Repositioning), Full-Face Fat Transfer: Before & After Three Months
Deep Plane Lower Face & Neck Lift, Upper & Lower Blepharoplasty (without Repositioning), Full-Face Fat Transfer: Before & After Three Months
Deep Plane Lower Face & Neck Lift, Upper & Lower Blepharoplasty (without Repositioning), Full-Face Fat Transfer: Before & After Three Months
Deep Plane Lower Face & Neck Lift, Upper & Lower Blepharoplasty (without Repositioning), Full-Face Fat Transfer: Before & After Three Months
Deep Plane Lower Face & Neck Lift, Upper & Lower Blepharoplasty (without Repositioning), Full-Face Fat Transfer: Before & After Three Months
Deep Plane Lower Face & Neck Lift, Upper & Lower Blepharoplasty (without Repositioning), Full-Face Fat Transfer: Before & After Three Months

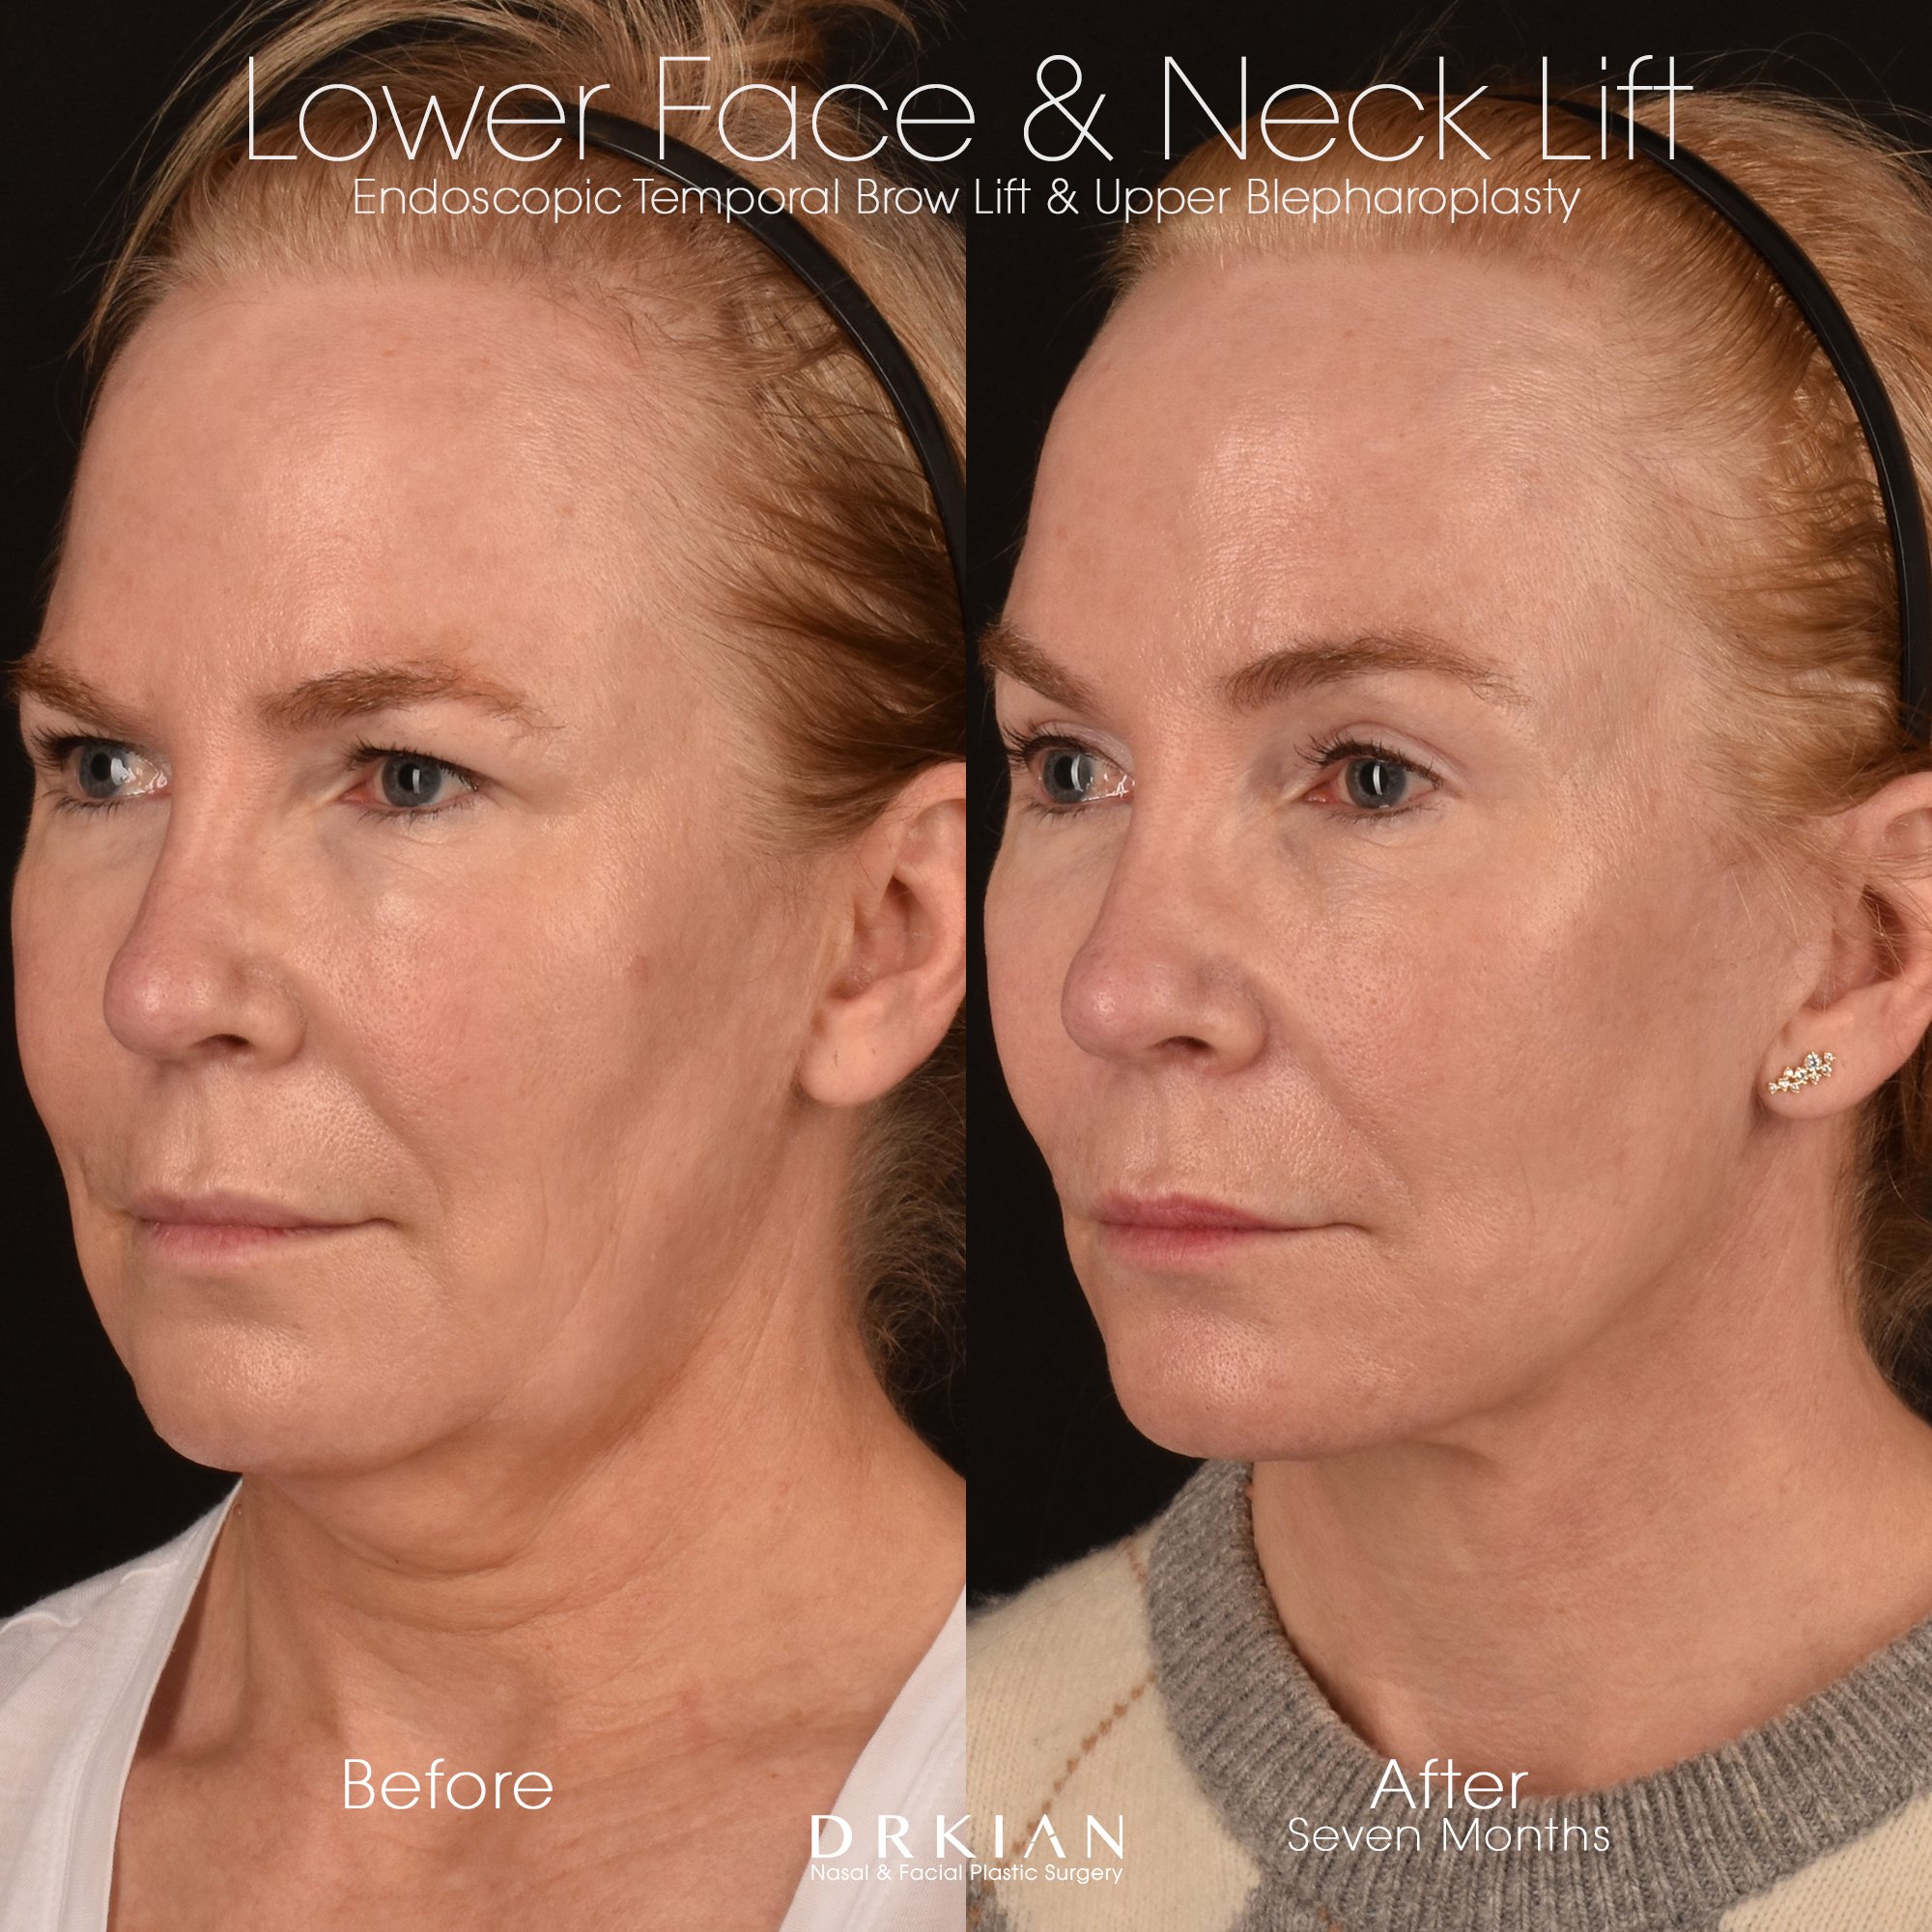
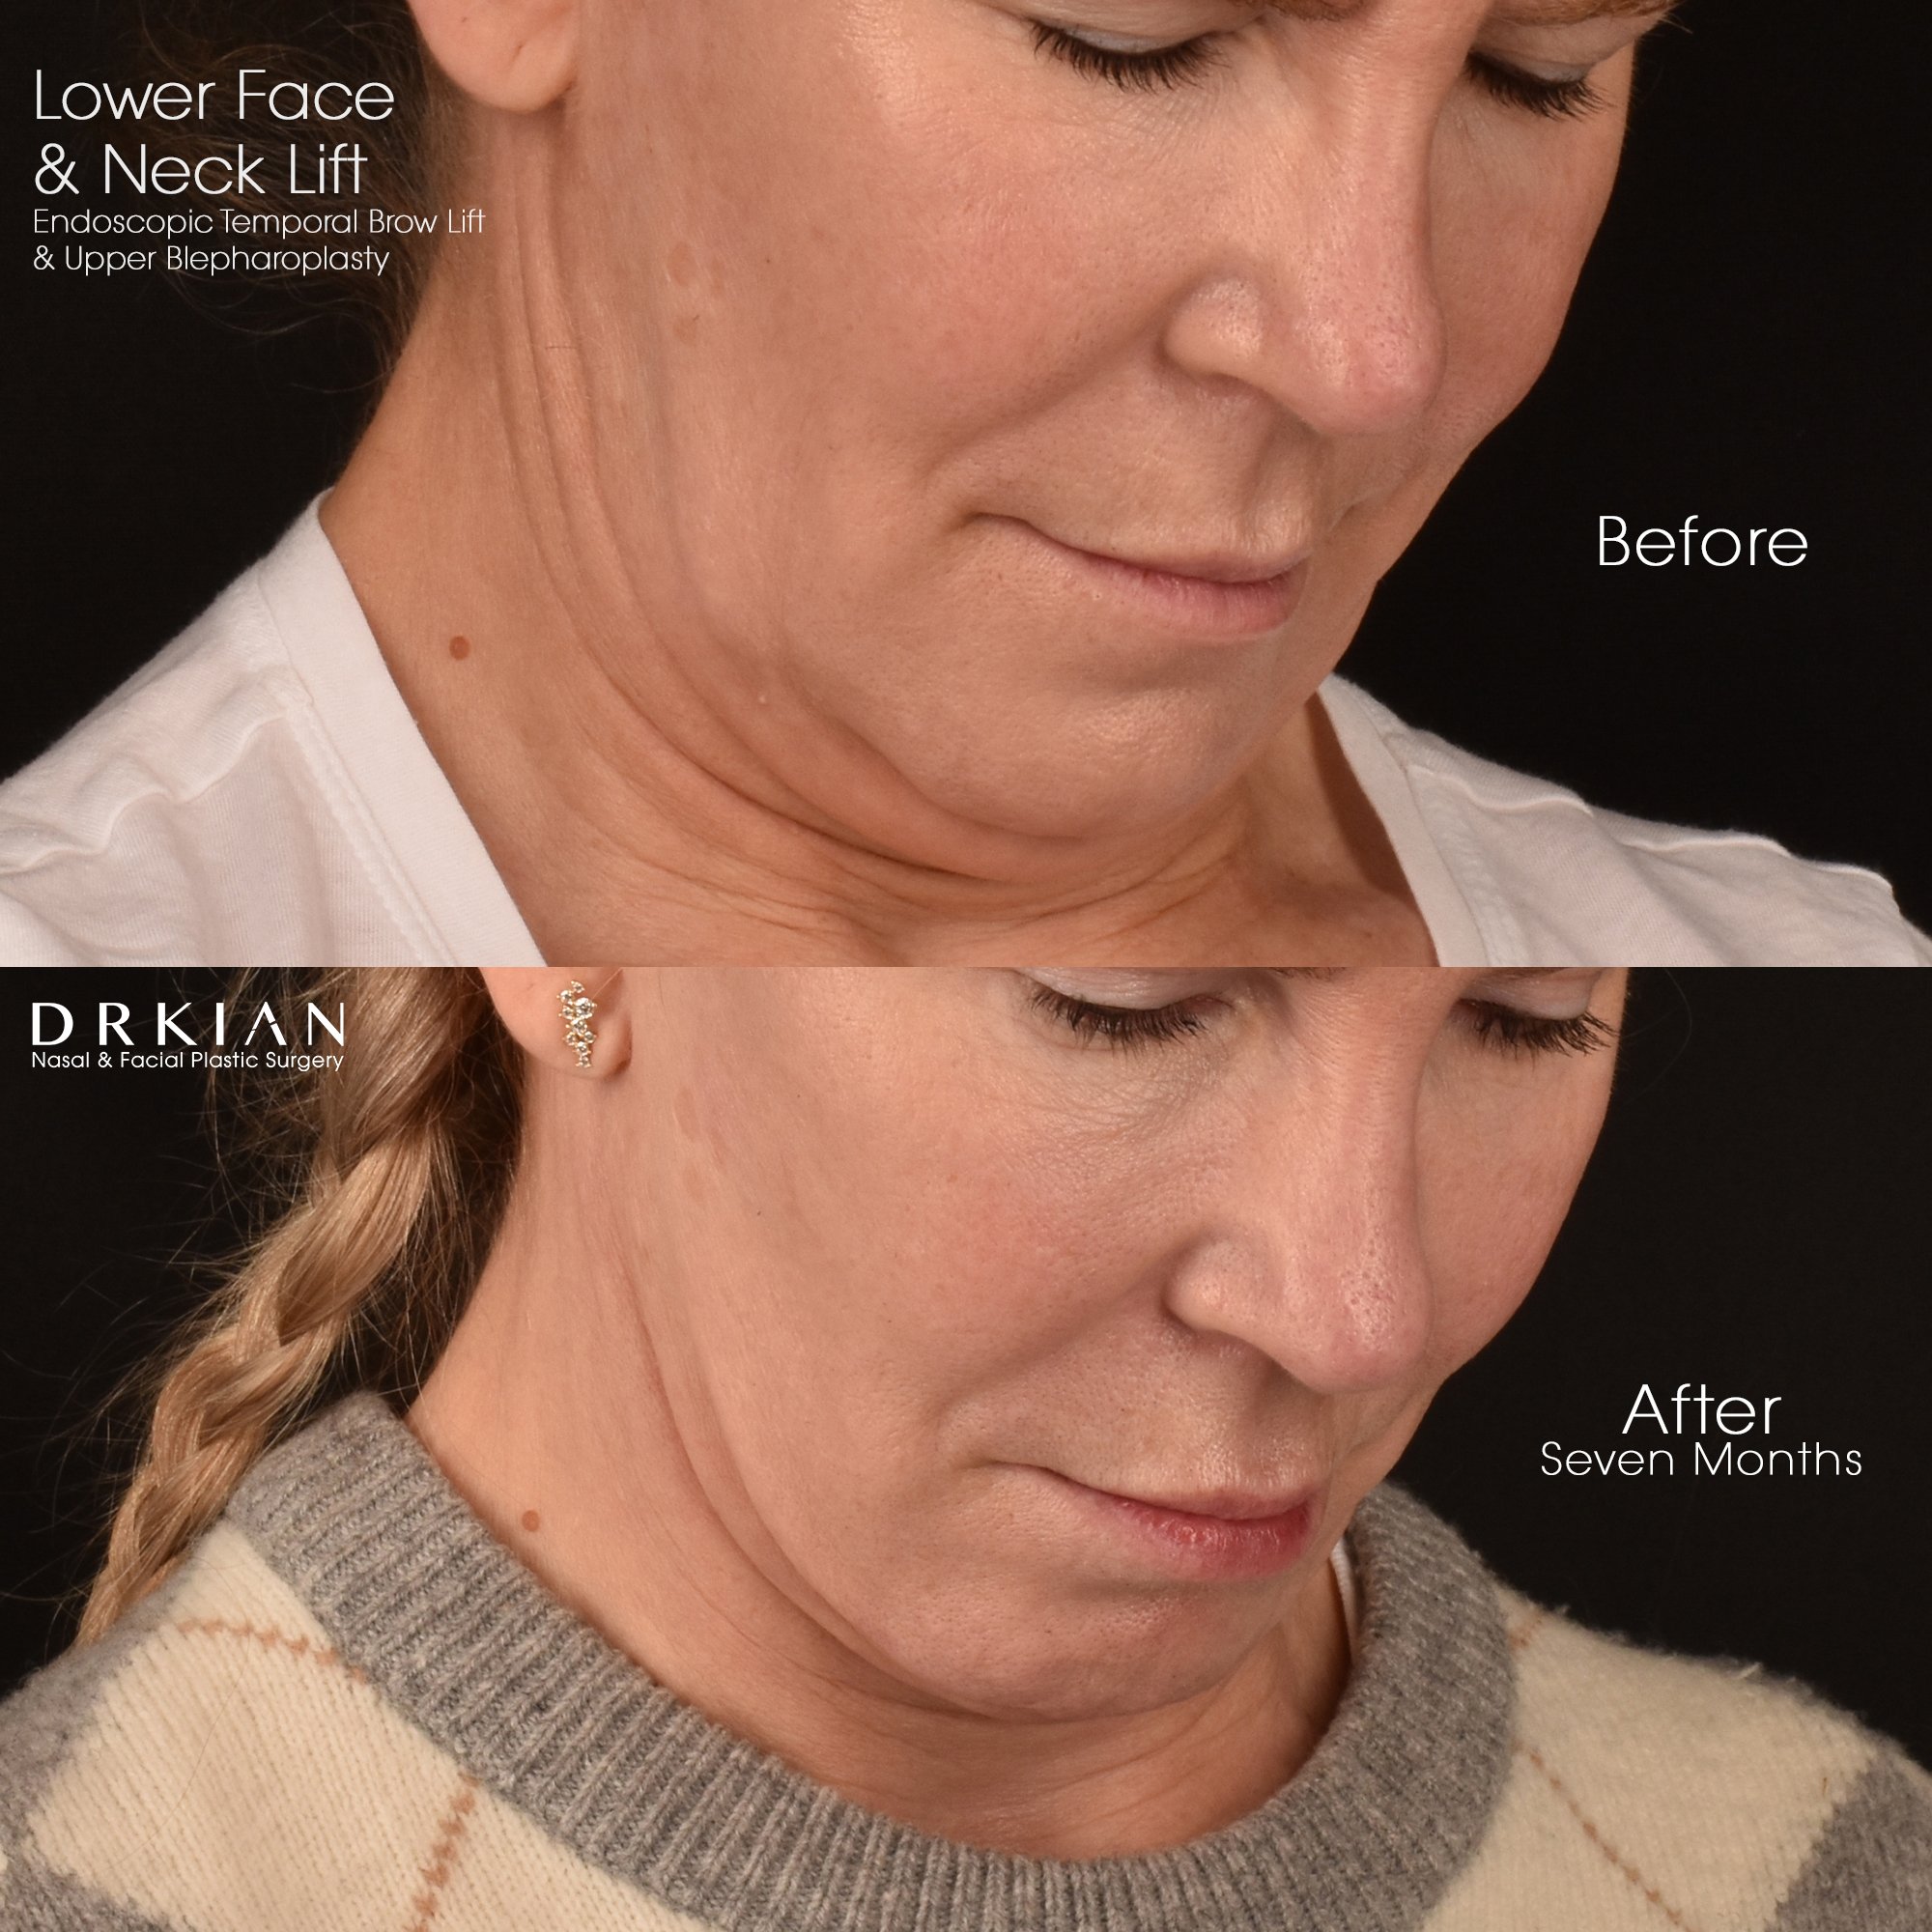
Lower Face & Neck Lift, Endoscopic Temporal Brow Lift, Upper Blepharoplasty: Before & After Seven Months

Lower Face & Neck Lift, Endoscopic Temporal Brow Lift, Upper Blepharoplasty: Before & After Seven Months

Lower Face & Neck Lift, Endoscopic Temporal Brow Lift, Upper Blepharoplasty: Before & After Seven Months

Lower Face & Neck Lift, Endoscopic Temporal Brow Lift, Upper Blepharoplasty: Before & After Seven Months
Lower Face & Neck Lift, Endoscopic Temporal Brow Lift, Upper Blepharoplasty: Before & After Seven Months

Lower Face & Neck Lift, Endoscopic Temporal Brow Lift, Upper Blepharoplasty: Before & After Seven Months
Lower Face & Neck Lift, Endoscopic Temporal Brow Lift, Upper Blepharoplasty: Before & After Seven Months

Lower Face & Neck Lift, Endoscopic Temporal Brow Lift, Upper Blepharoplasty: Before & After Seven Months

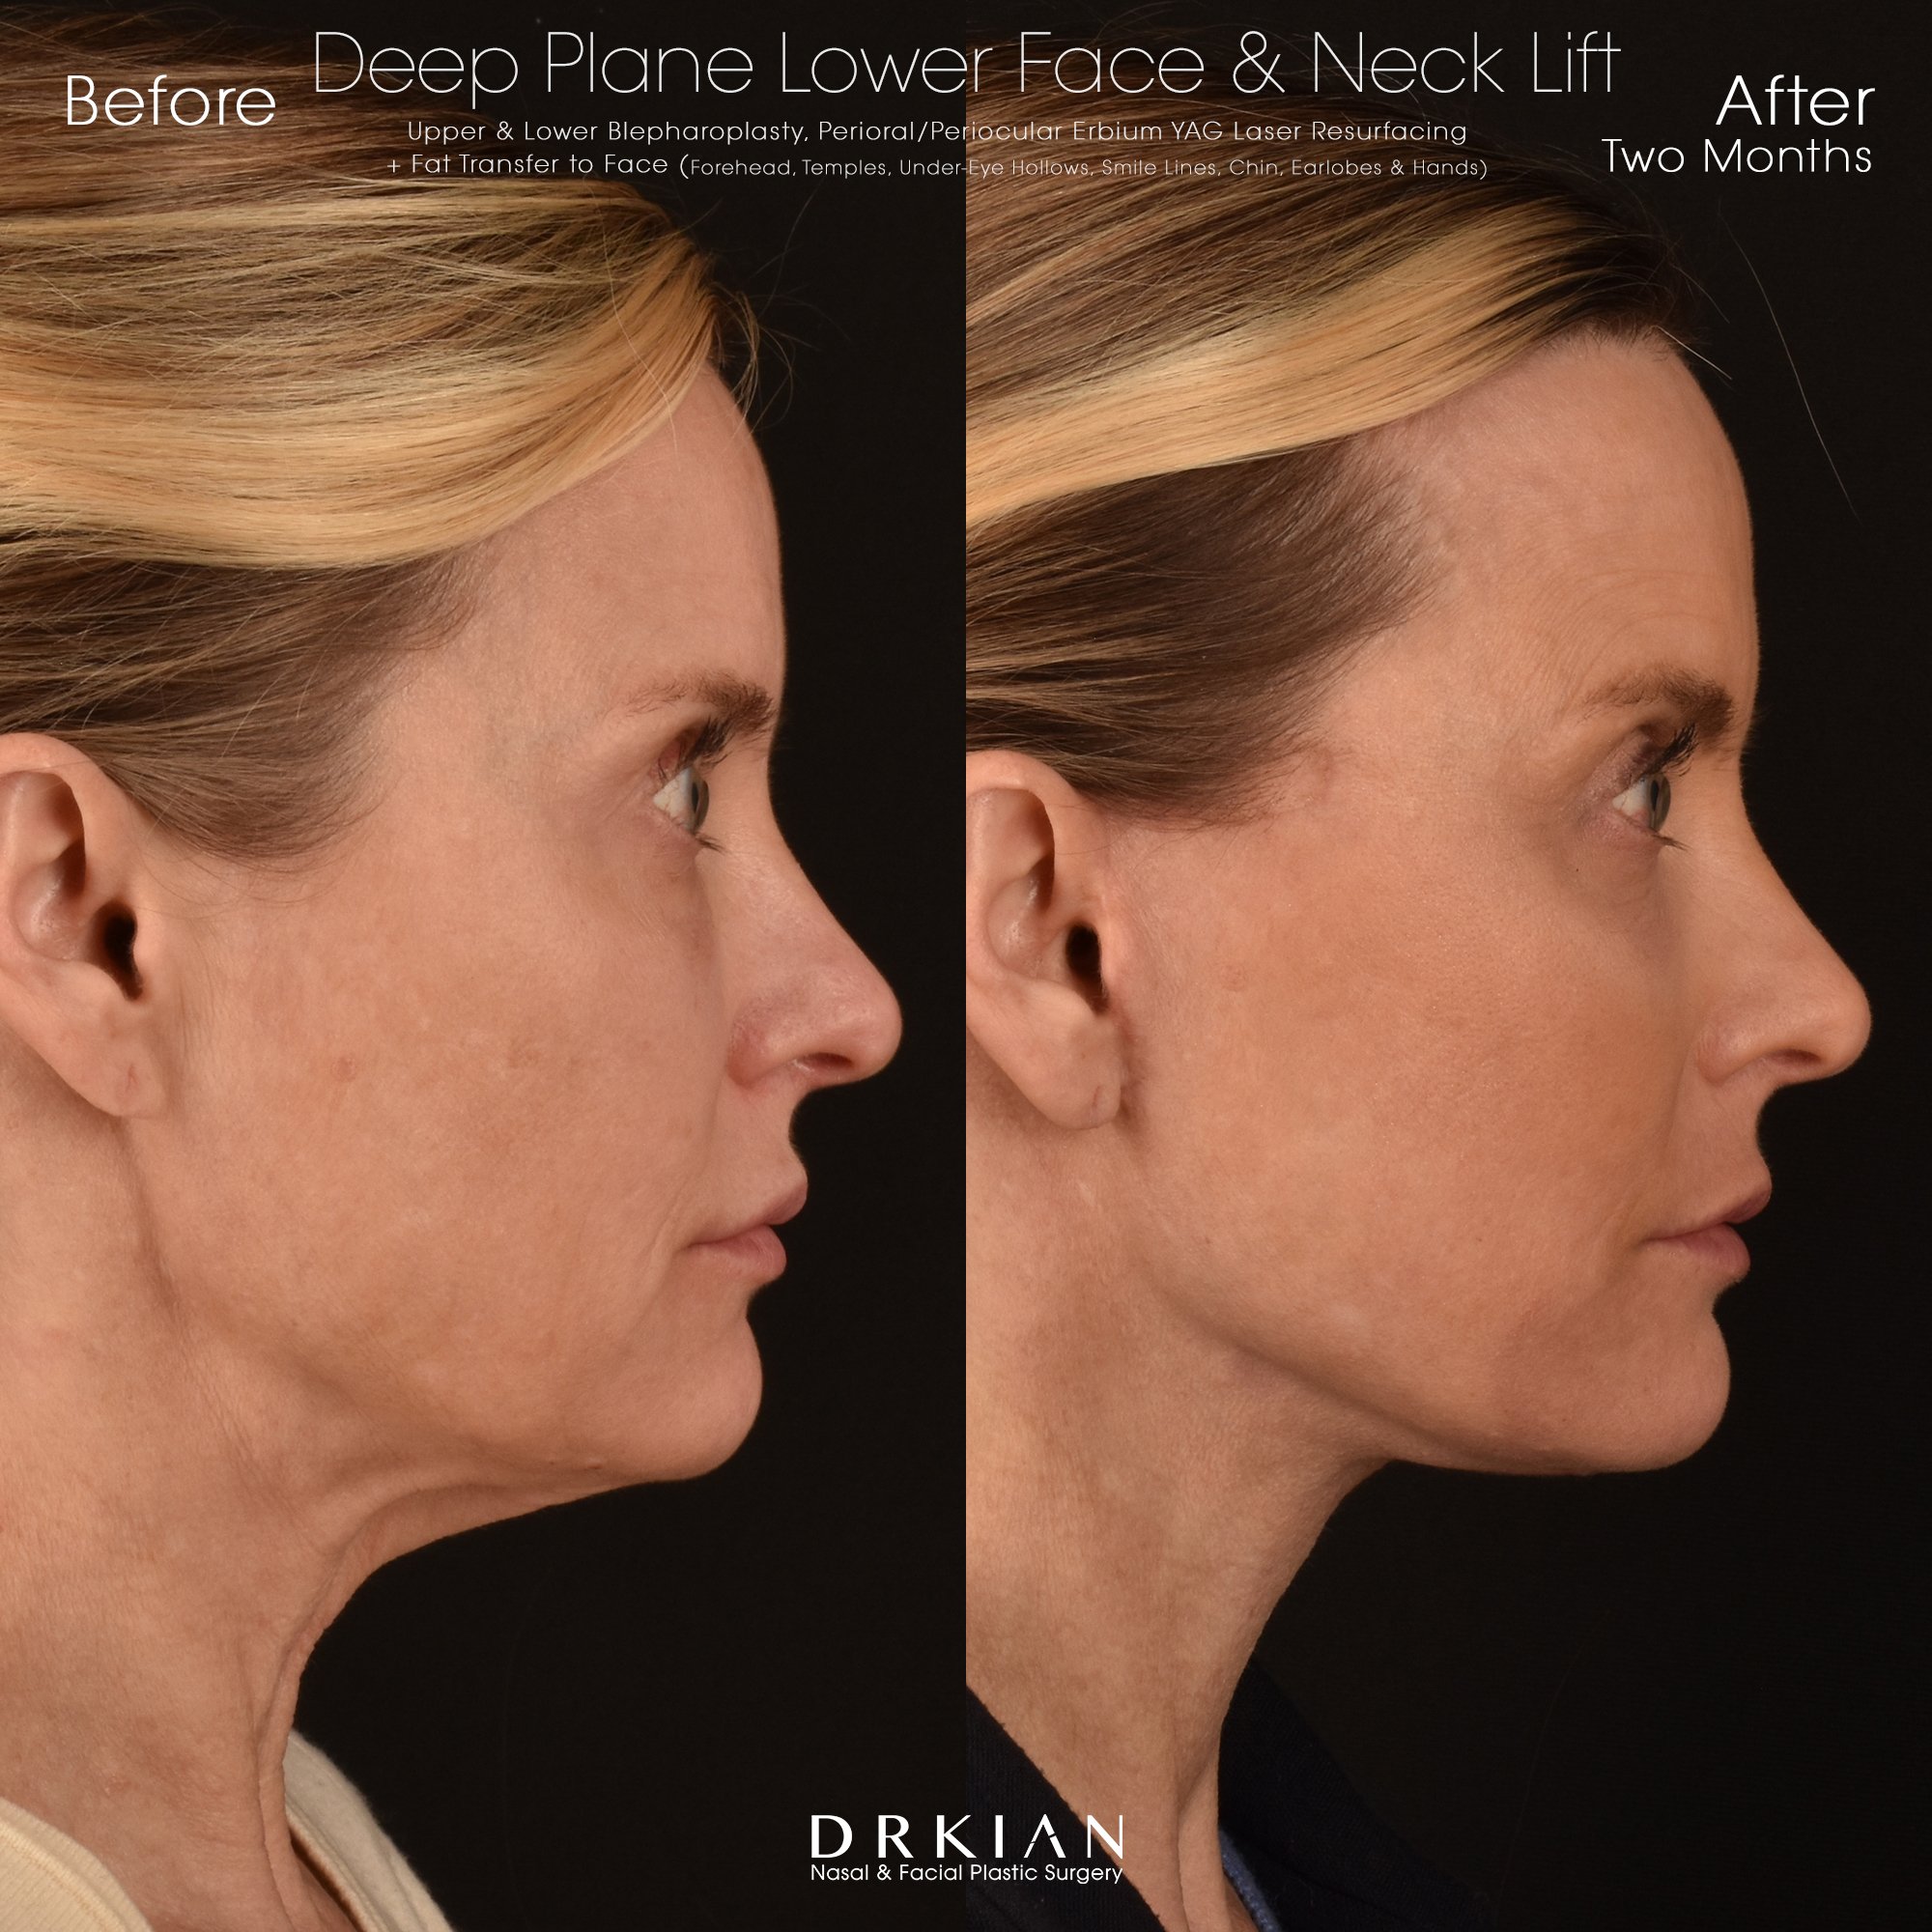
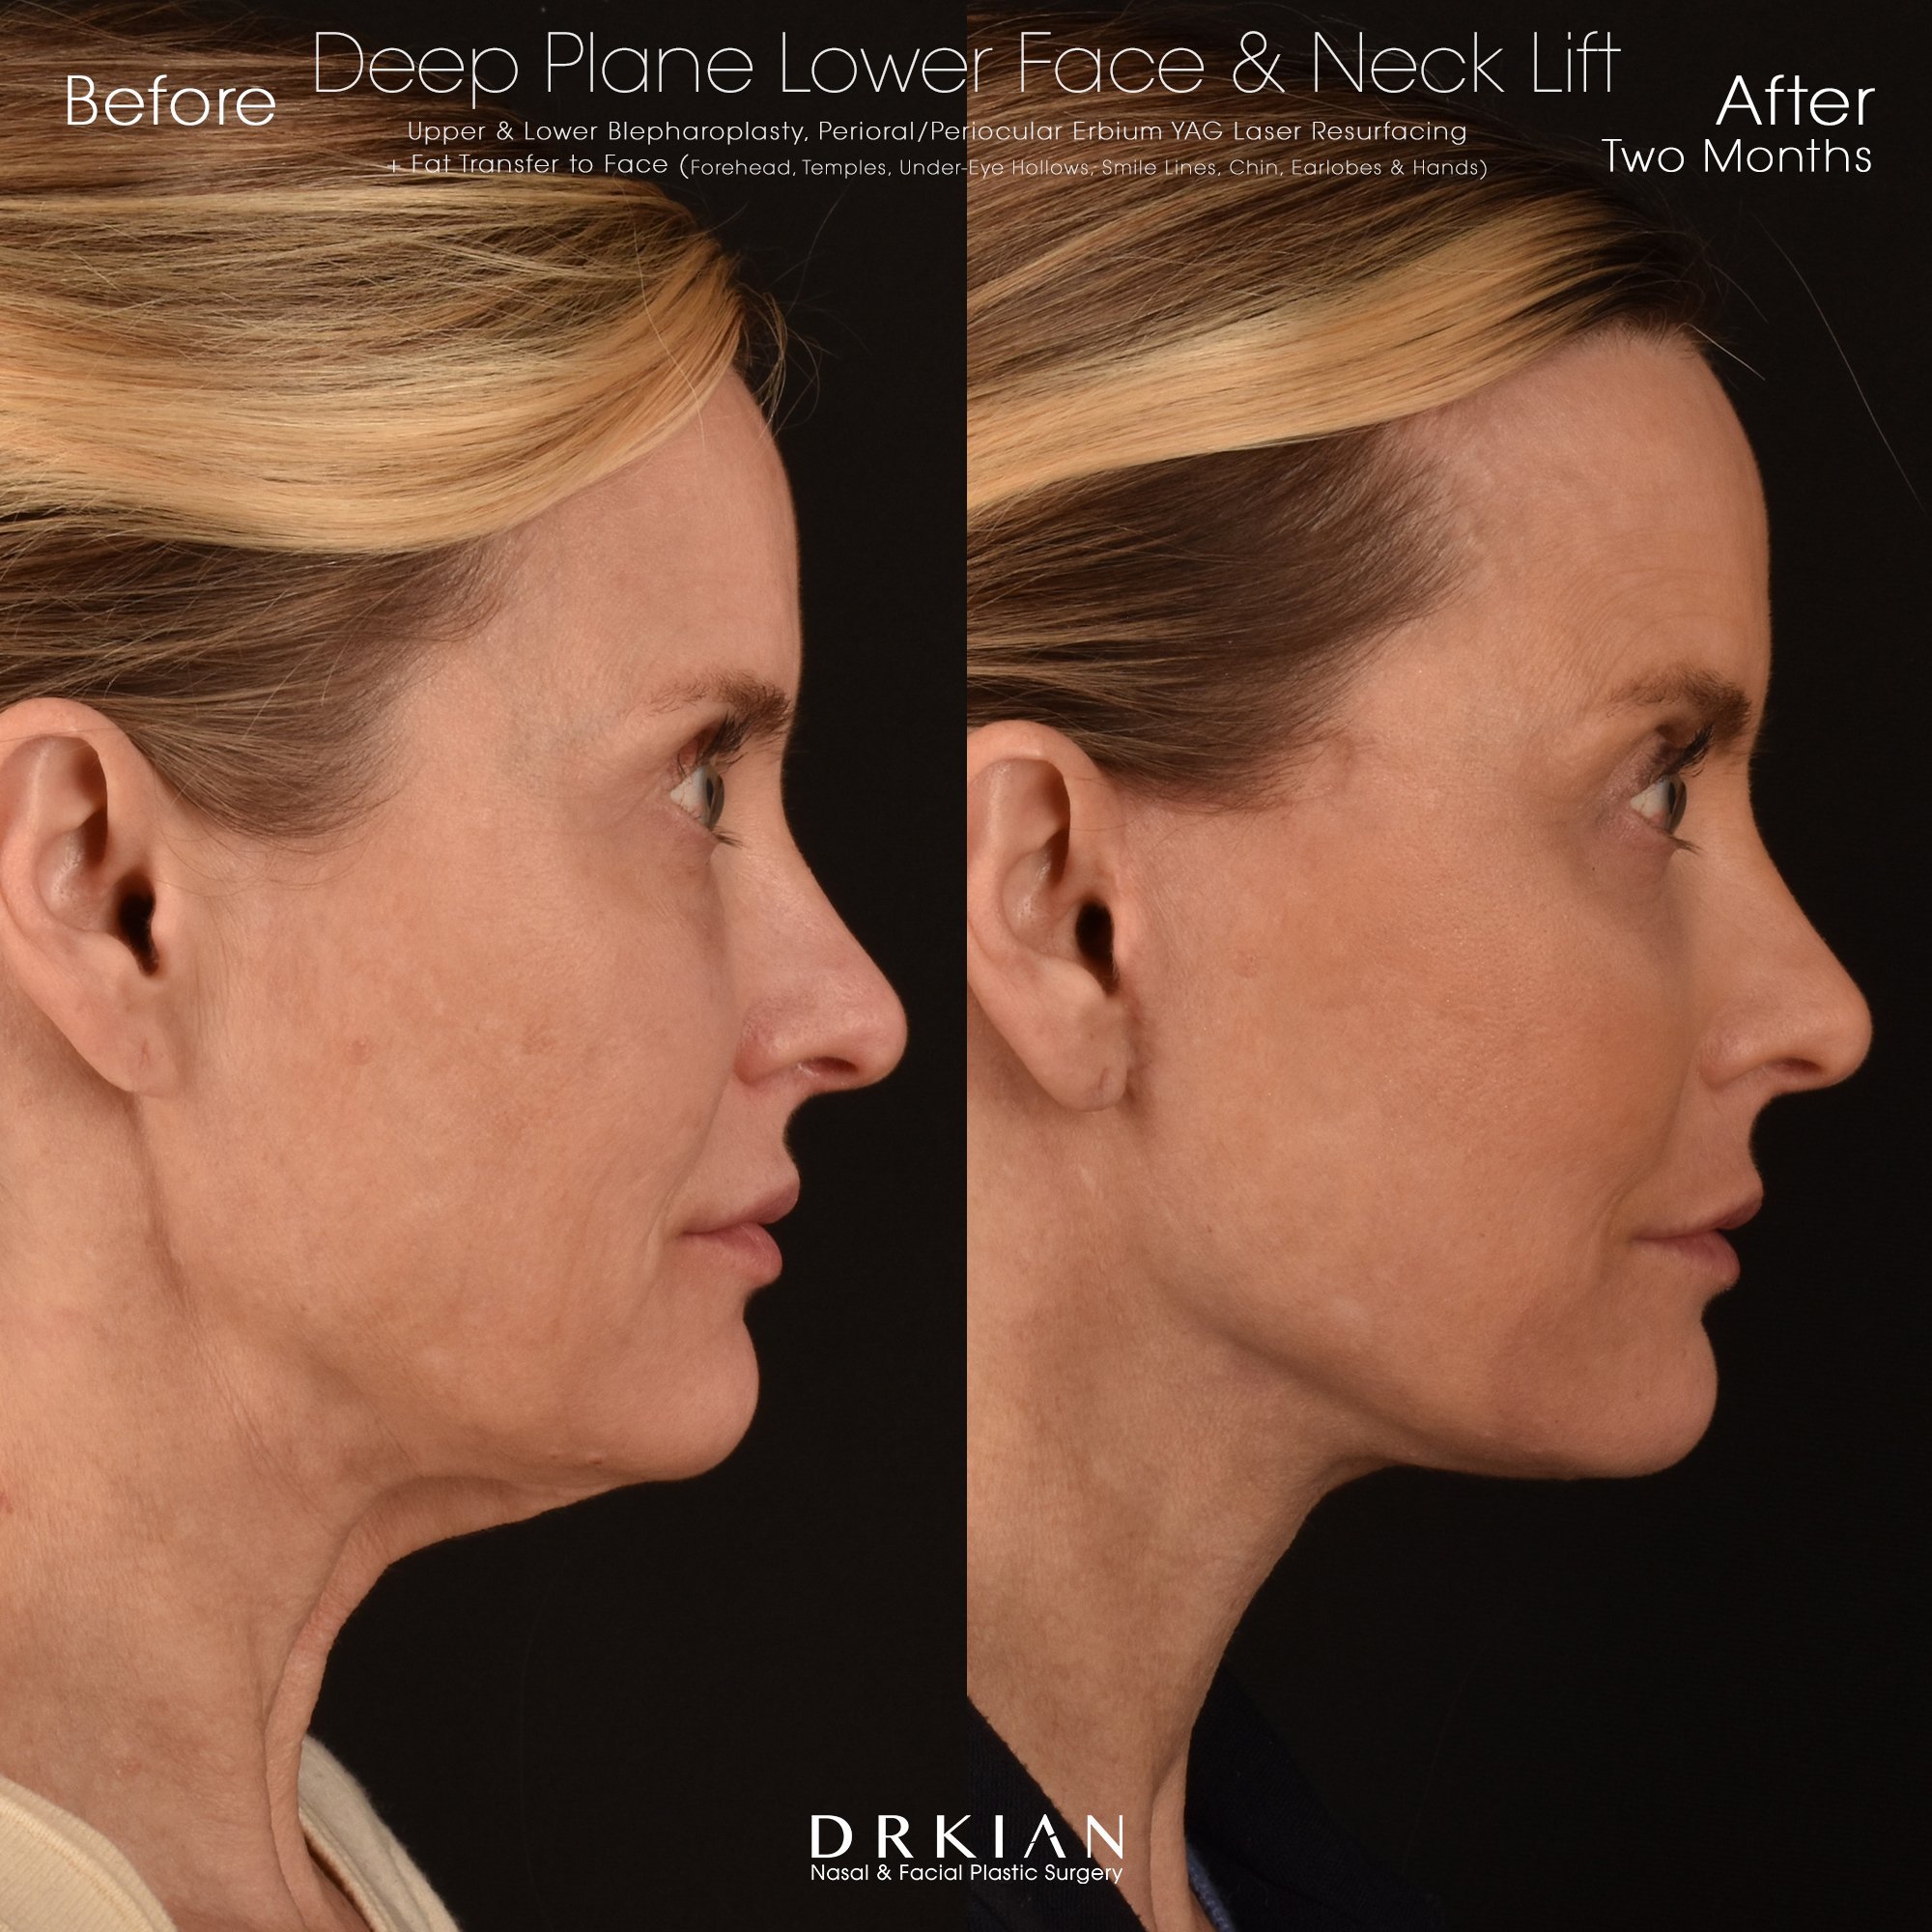
Deep Plane Lower Face & Neck Lift, Upper & Lower Blepharoplasty, Fat Transfer to Forehead, Temples, Under-Eye Hollows, Smile Lines (Nasolabial Folds), Chin, Earlobes & Hands, and Perioral/Periocular Erbium YAG Laser Resurfacing: Before & After Two Months

Deep Plane Lower Face & Neck Lift, Upper & Lower Blepharoplasty, Fat Transfer to Forehead, Temples, Under-Eye Hollows, Smile Lines (Nasolabial Folds), Chin, Earlobes & Hands, and Perioral/Periocular Erbium YAG Laser Resurfacing: Before & After Two Months

Deep Plane Lower Face & Neck Lift, Upper & Lower Blepharoplasty, Fat Transfer to Forehead, Temples, Under-Eye Hollows, Smile Lines (Nasolabial Folds), Chin, Earlobes & Hands, and Perioral/Periocular Erbium YAG Laser Resurfacing: Before & After Two Months

Deep Plane Lower Face & Neck Lift, Upper & Lower Blepharoplasty, Fat Transfer to Forehead, Temples, Under-Eye Hollows, Smile Lines (Nasolabial Folds), Chin, Earlobes & Hands, and Perioral/Periocular Erbium YAG Laser Resurfacing: Before & After Two Months
Deep Plane Lower Face & Neck Lift, Upper & Lower Blepharoplasty, Fat Transfer to Forehead, Temples, Under-Eye Hollows, Smile Lines (Nasolabial Folds), Chin, Earlobes & Hands, and Perioral/Periocular Erbium YAG Laser Resurfacing: Before & After Two Months
Deep Plane Lower Face & Neck Lift, Upper & Lower Blepharoplasty, Fat Transfer to Forehead, Temples, Under-Eye Hollows, Smile Lines (Nasolabial Folds), Chin, Earlobes & Hands, and Perioral/Periocular Erbium YAG Laser Resurfacing: Before & After Two Months

Deep Plane Lower Face & Neck Lift, Upper & Lower Blepharoplasty, Fat Transfer to Forehead, Temples, Under-Eye Hollows, Smile Lines (Nasolabial Folds), Chin, Earlobes & Hands, and Perioral/Periocular Erbium YAG Laser Resurfacing: Before & After Two Months

Deep Plane Lower Face & Neck Lift, Upper & Lower Blepharoplasty, Fat Transfer to Forehead, Temples, Under-Eye Hollows, Smile Lines (Nasolabial Folds), Chin, Earlobes & Hands, and Perioral/Periocular Erbium YAG Laser Resurfacing: Before & After Two Months

Deep Plane Lower Face & Neck Lift, Upper & Lower Blepharoplasty, Fat Transfer to Forehead, Temples, Under-Eye Hollows, Smile Lines (Nasolabial Folds), Chin, Earlobes & Hands, and Perioral/Periocular Erbium YAG Laser Resurfacing: Before & After Two Months

Deep Plane Lower Face & Neck Lift, Upper & Lower Blepharoplasty, Fat Transfer to Forehead, Temples, Under-Eye Hollows, Smile Lines (Nasolabial Folds), Chin, Earlobes & Hands, and Perioral/Periocular Erbium YAG Laser Resurfacing: Before & After Two Months

Deep Plane Lower Face & Neck Lift, Upper & Lower Blepharoplasty, Fat Transfer to Forehead, Temples, Under-Eye Hollows, Smile Lines (Nasolabial Folds), Chin, Earlobes & Hands, and Perioral/Periocular Erbium YAG Laser Resurfacing: Before & After Two Months

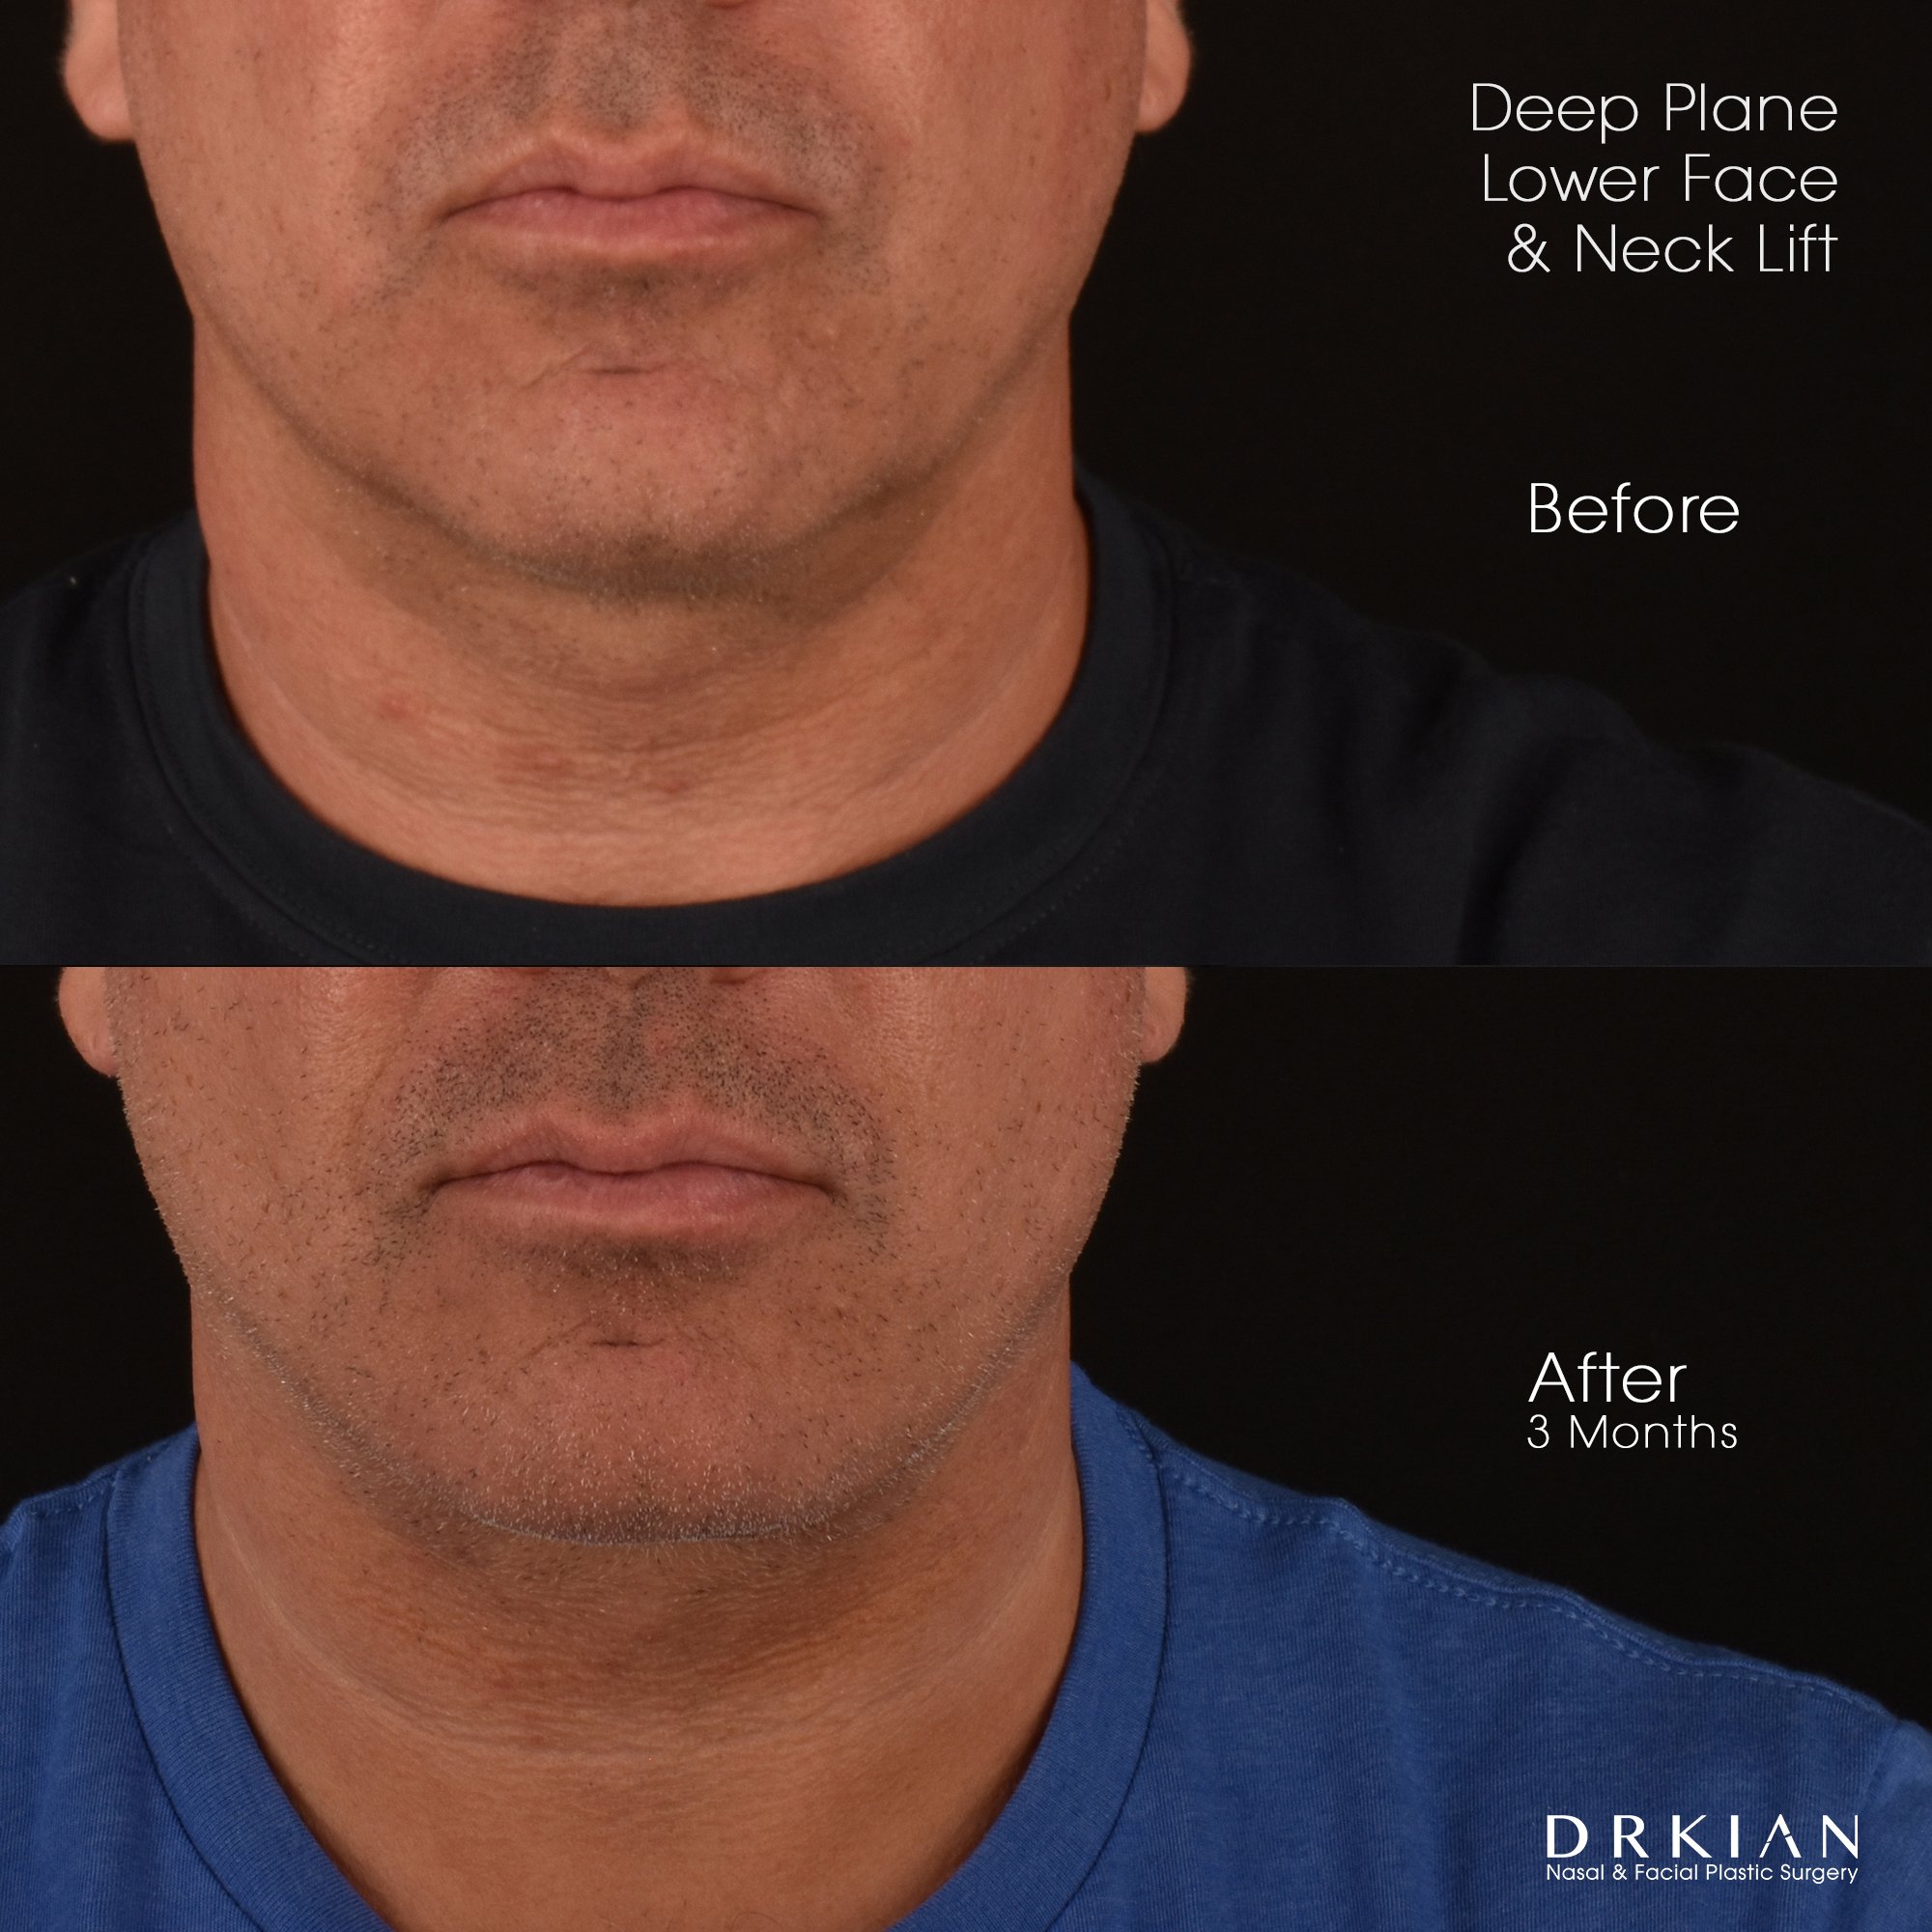
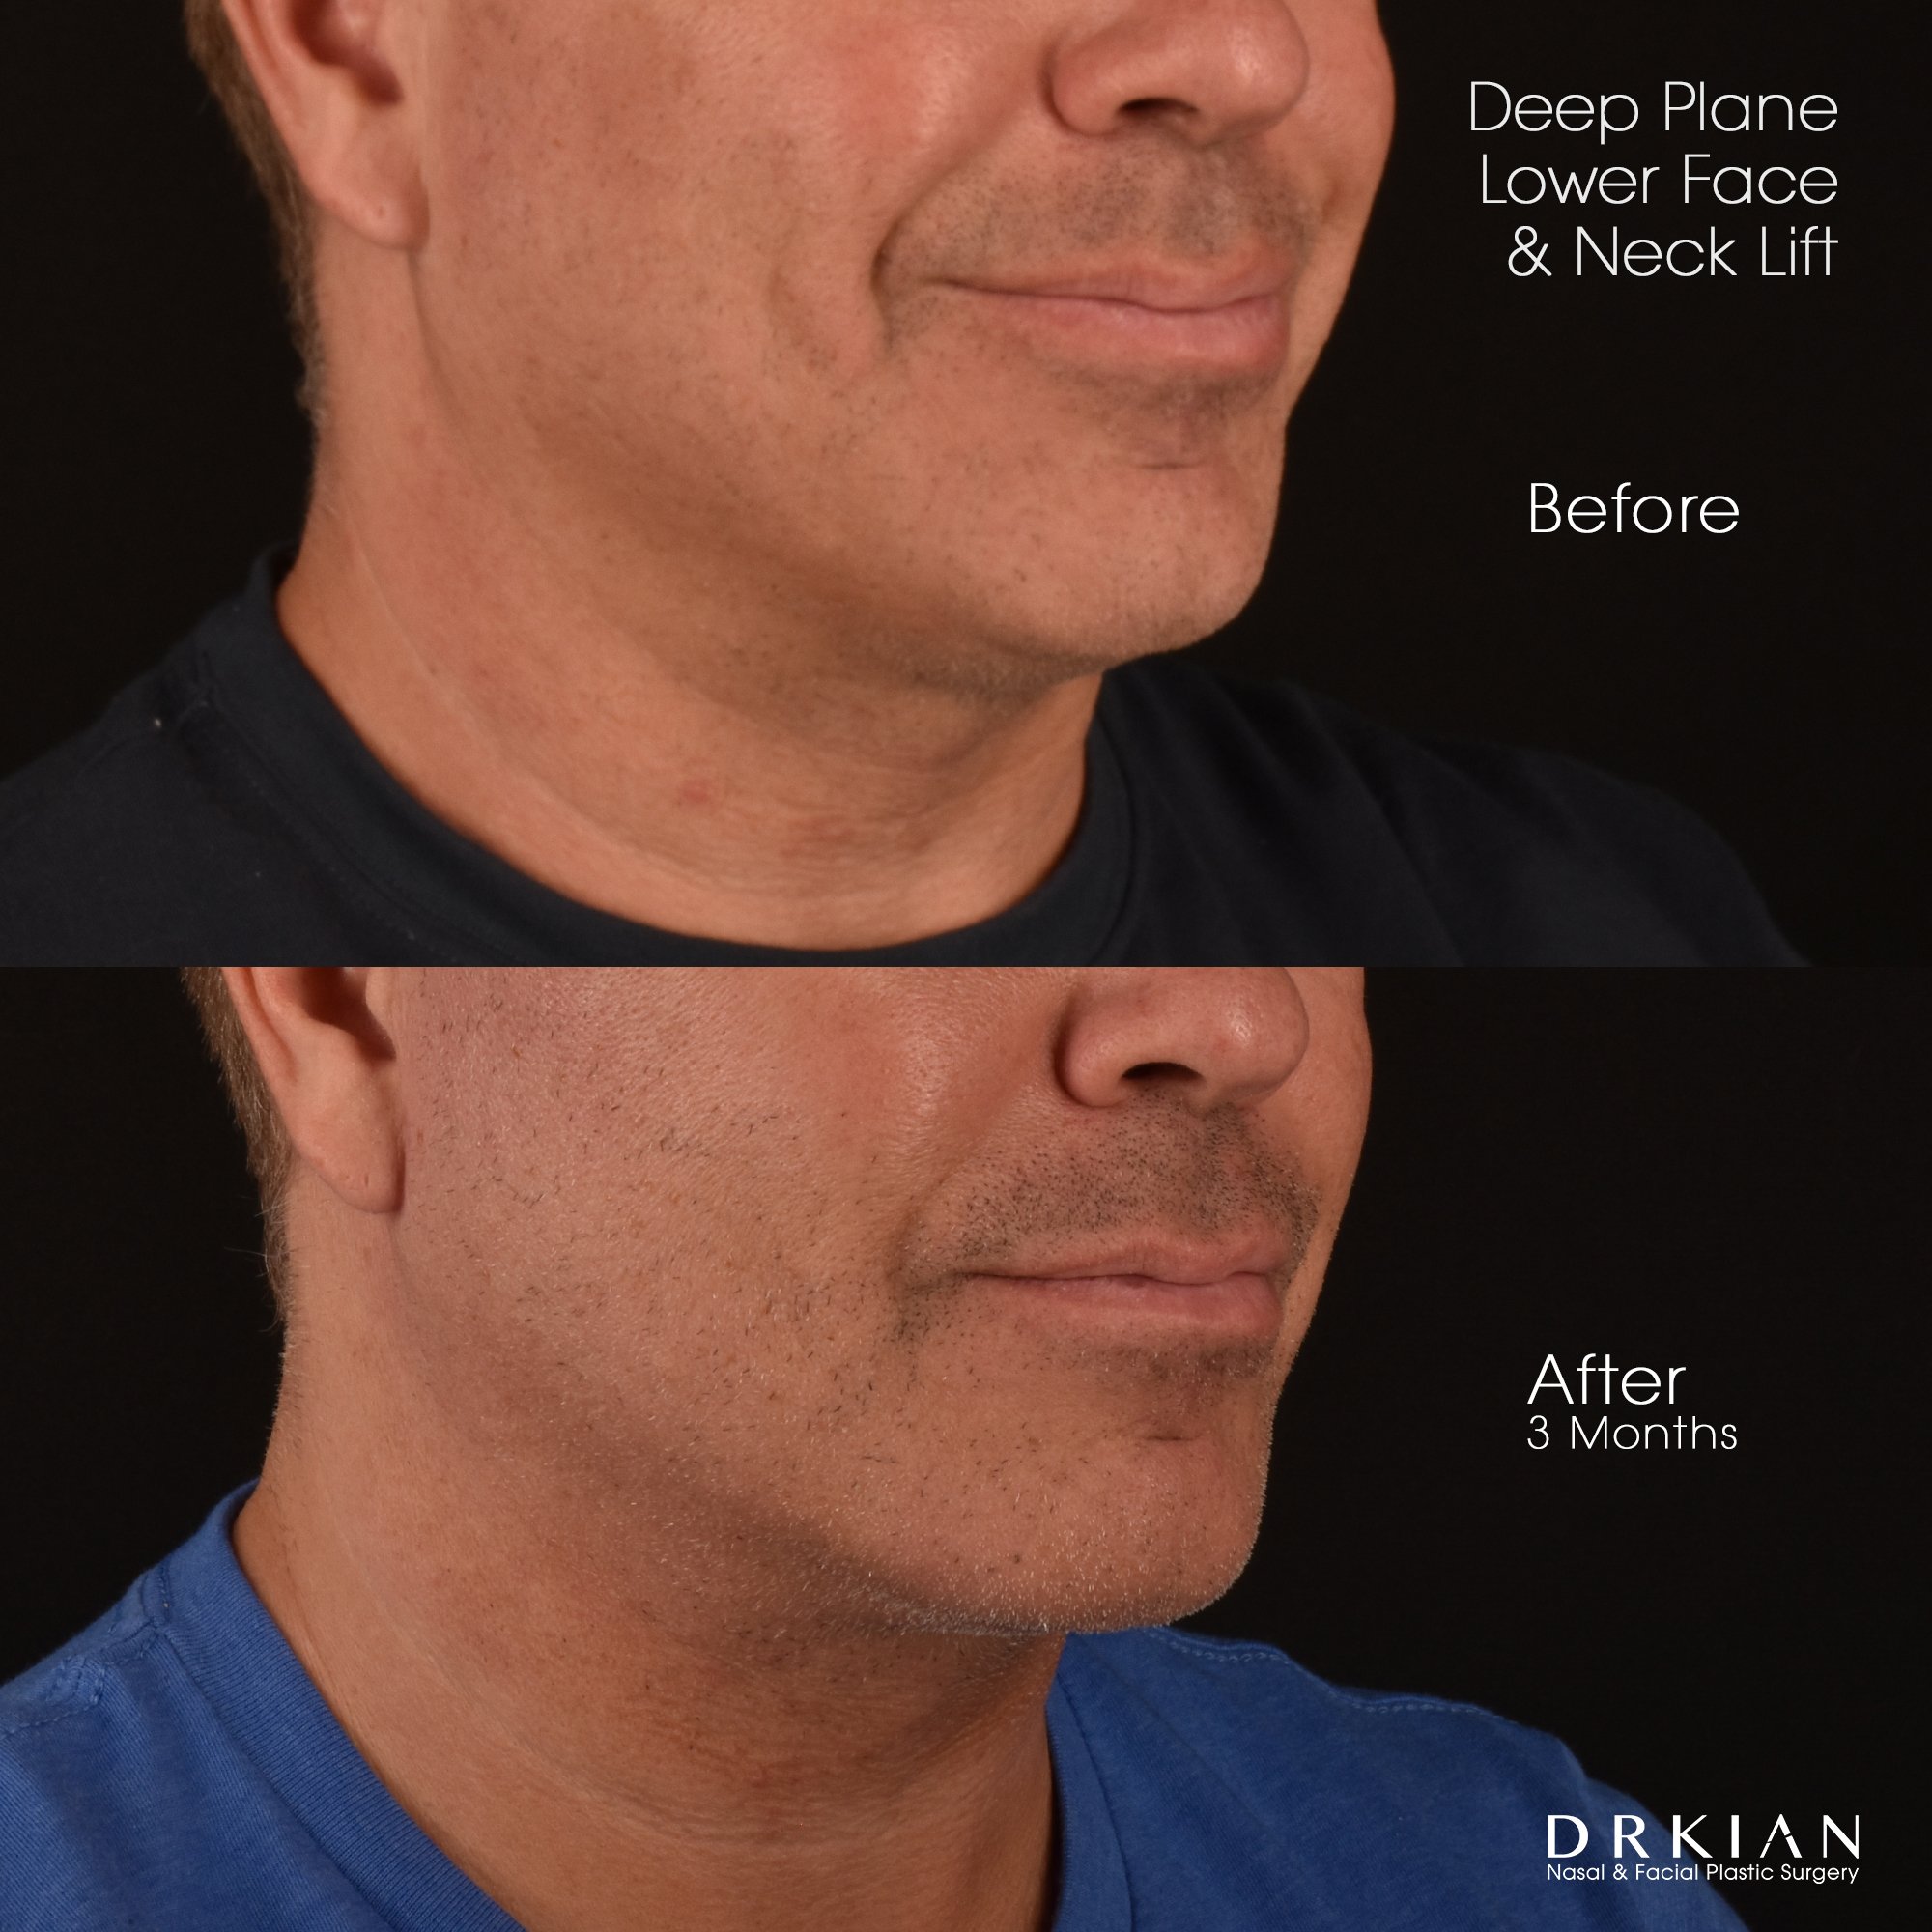
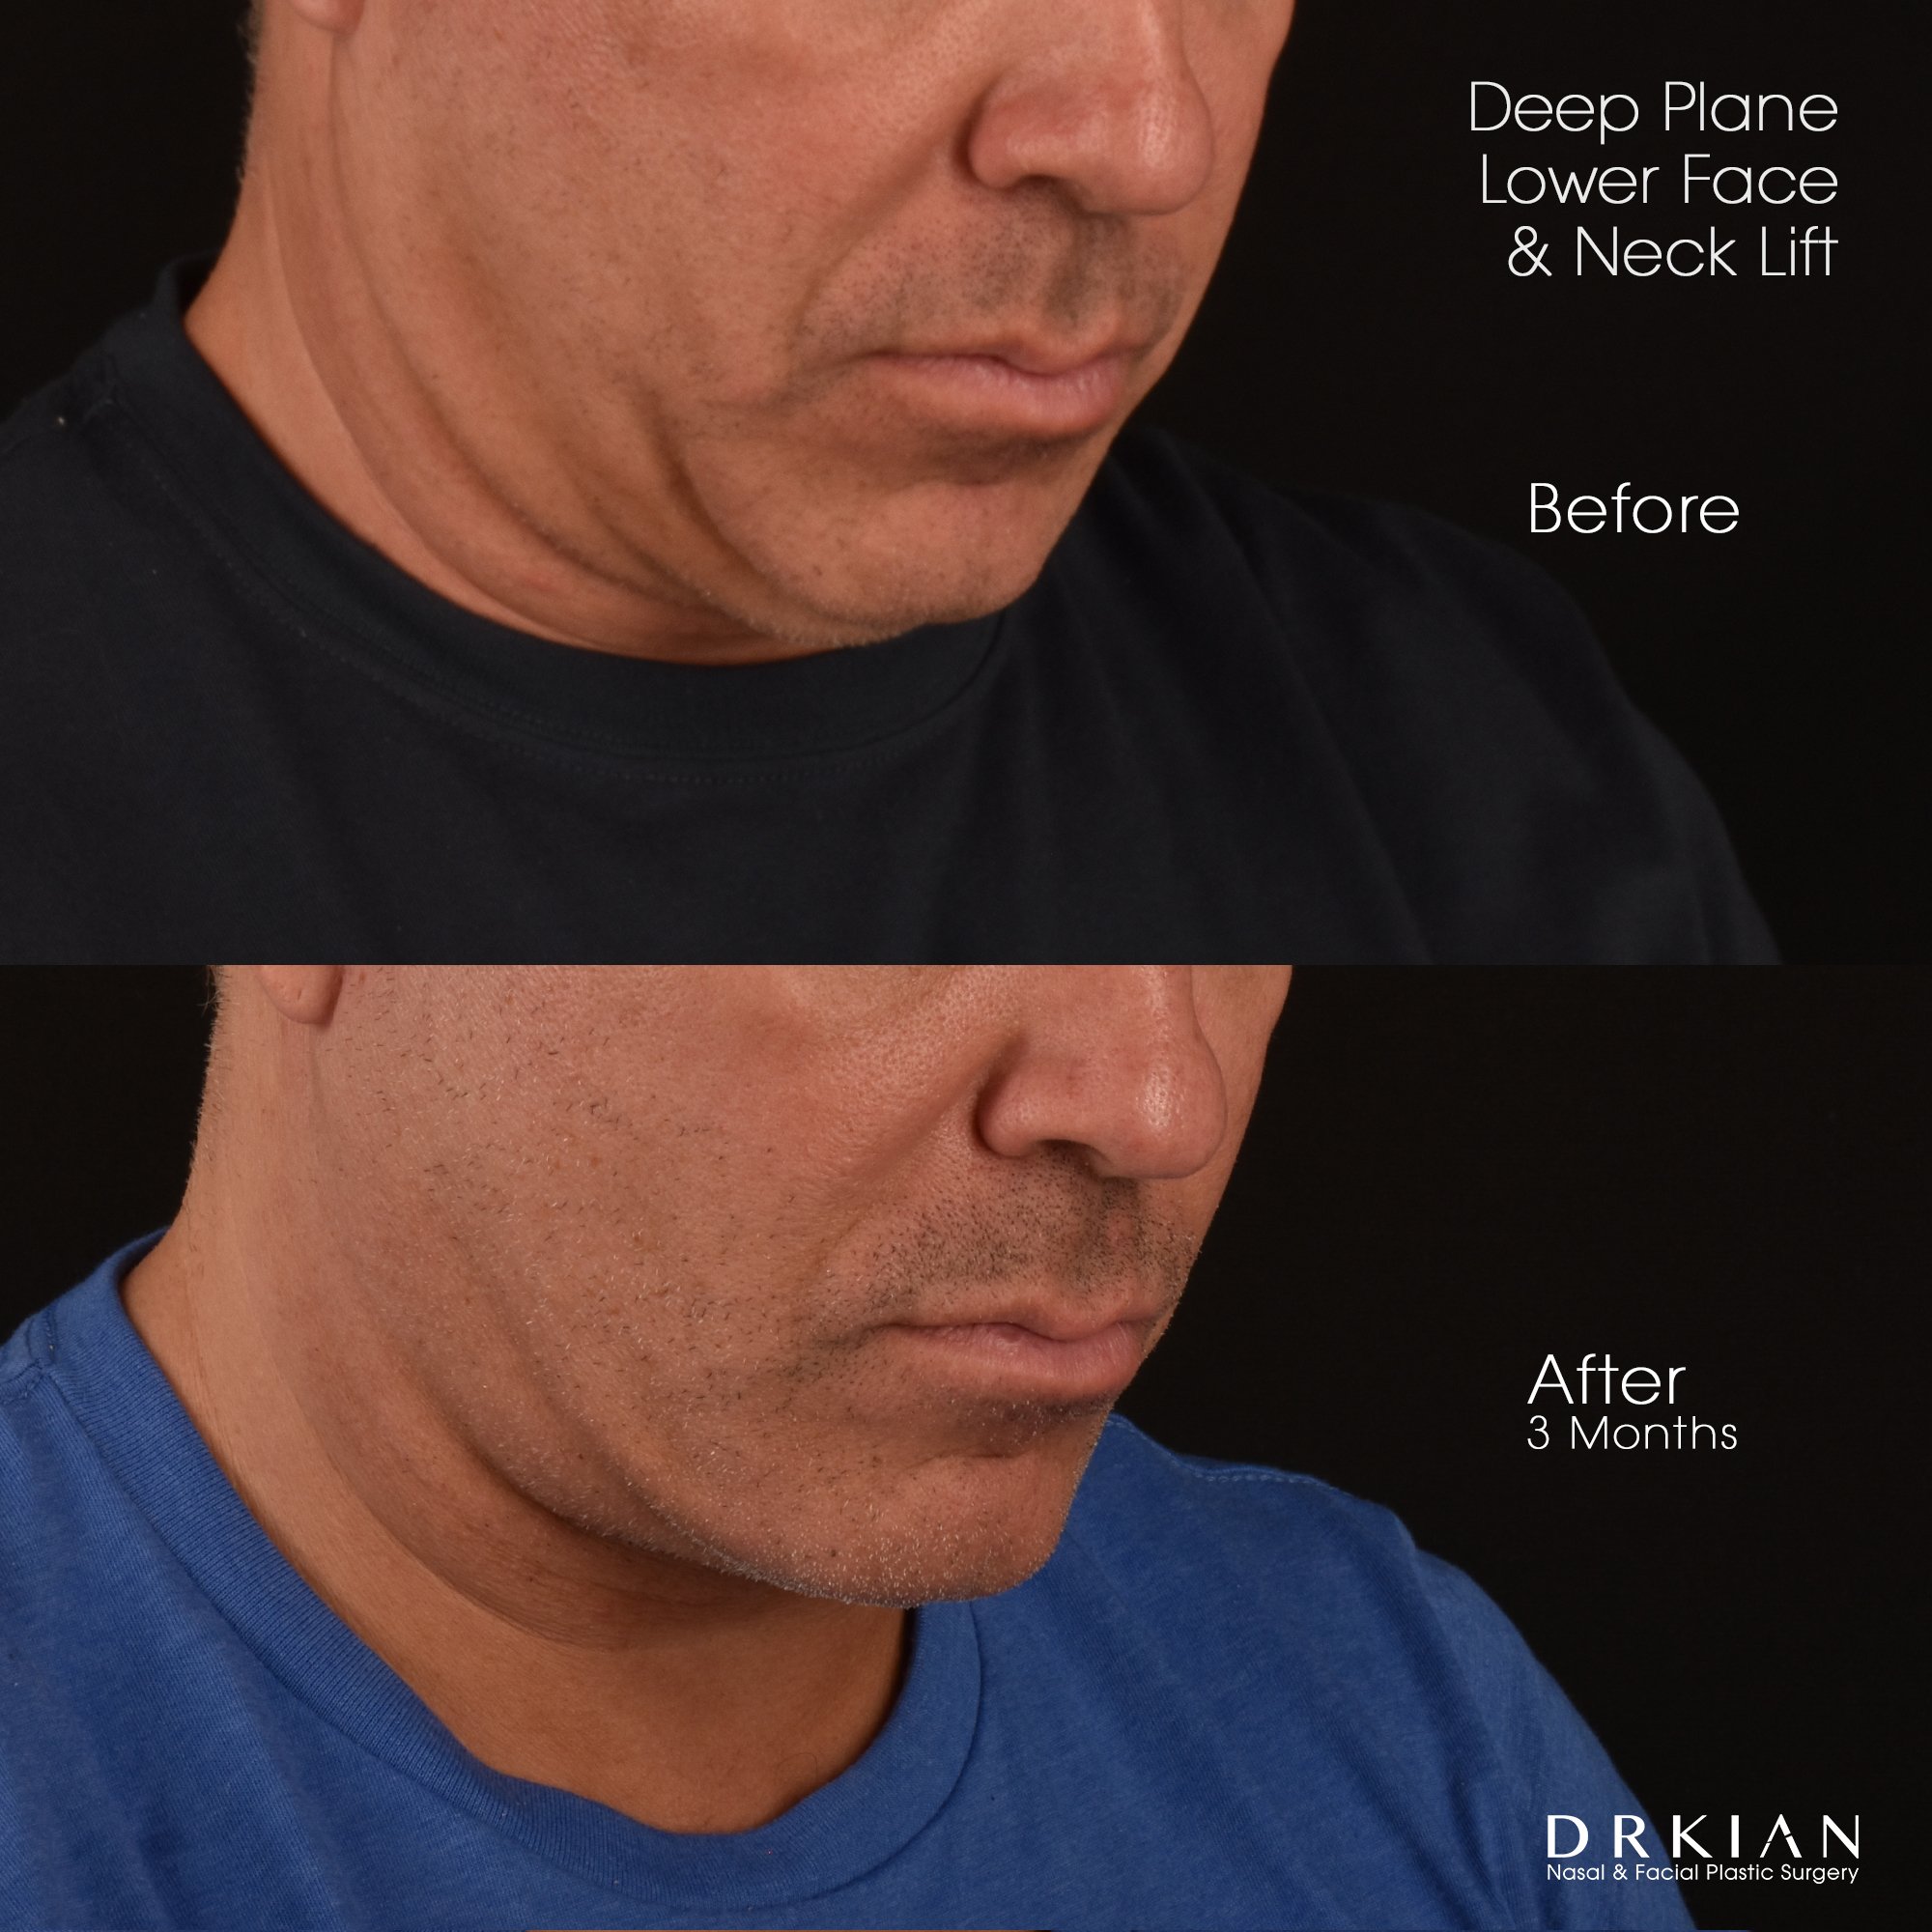
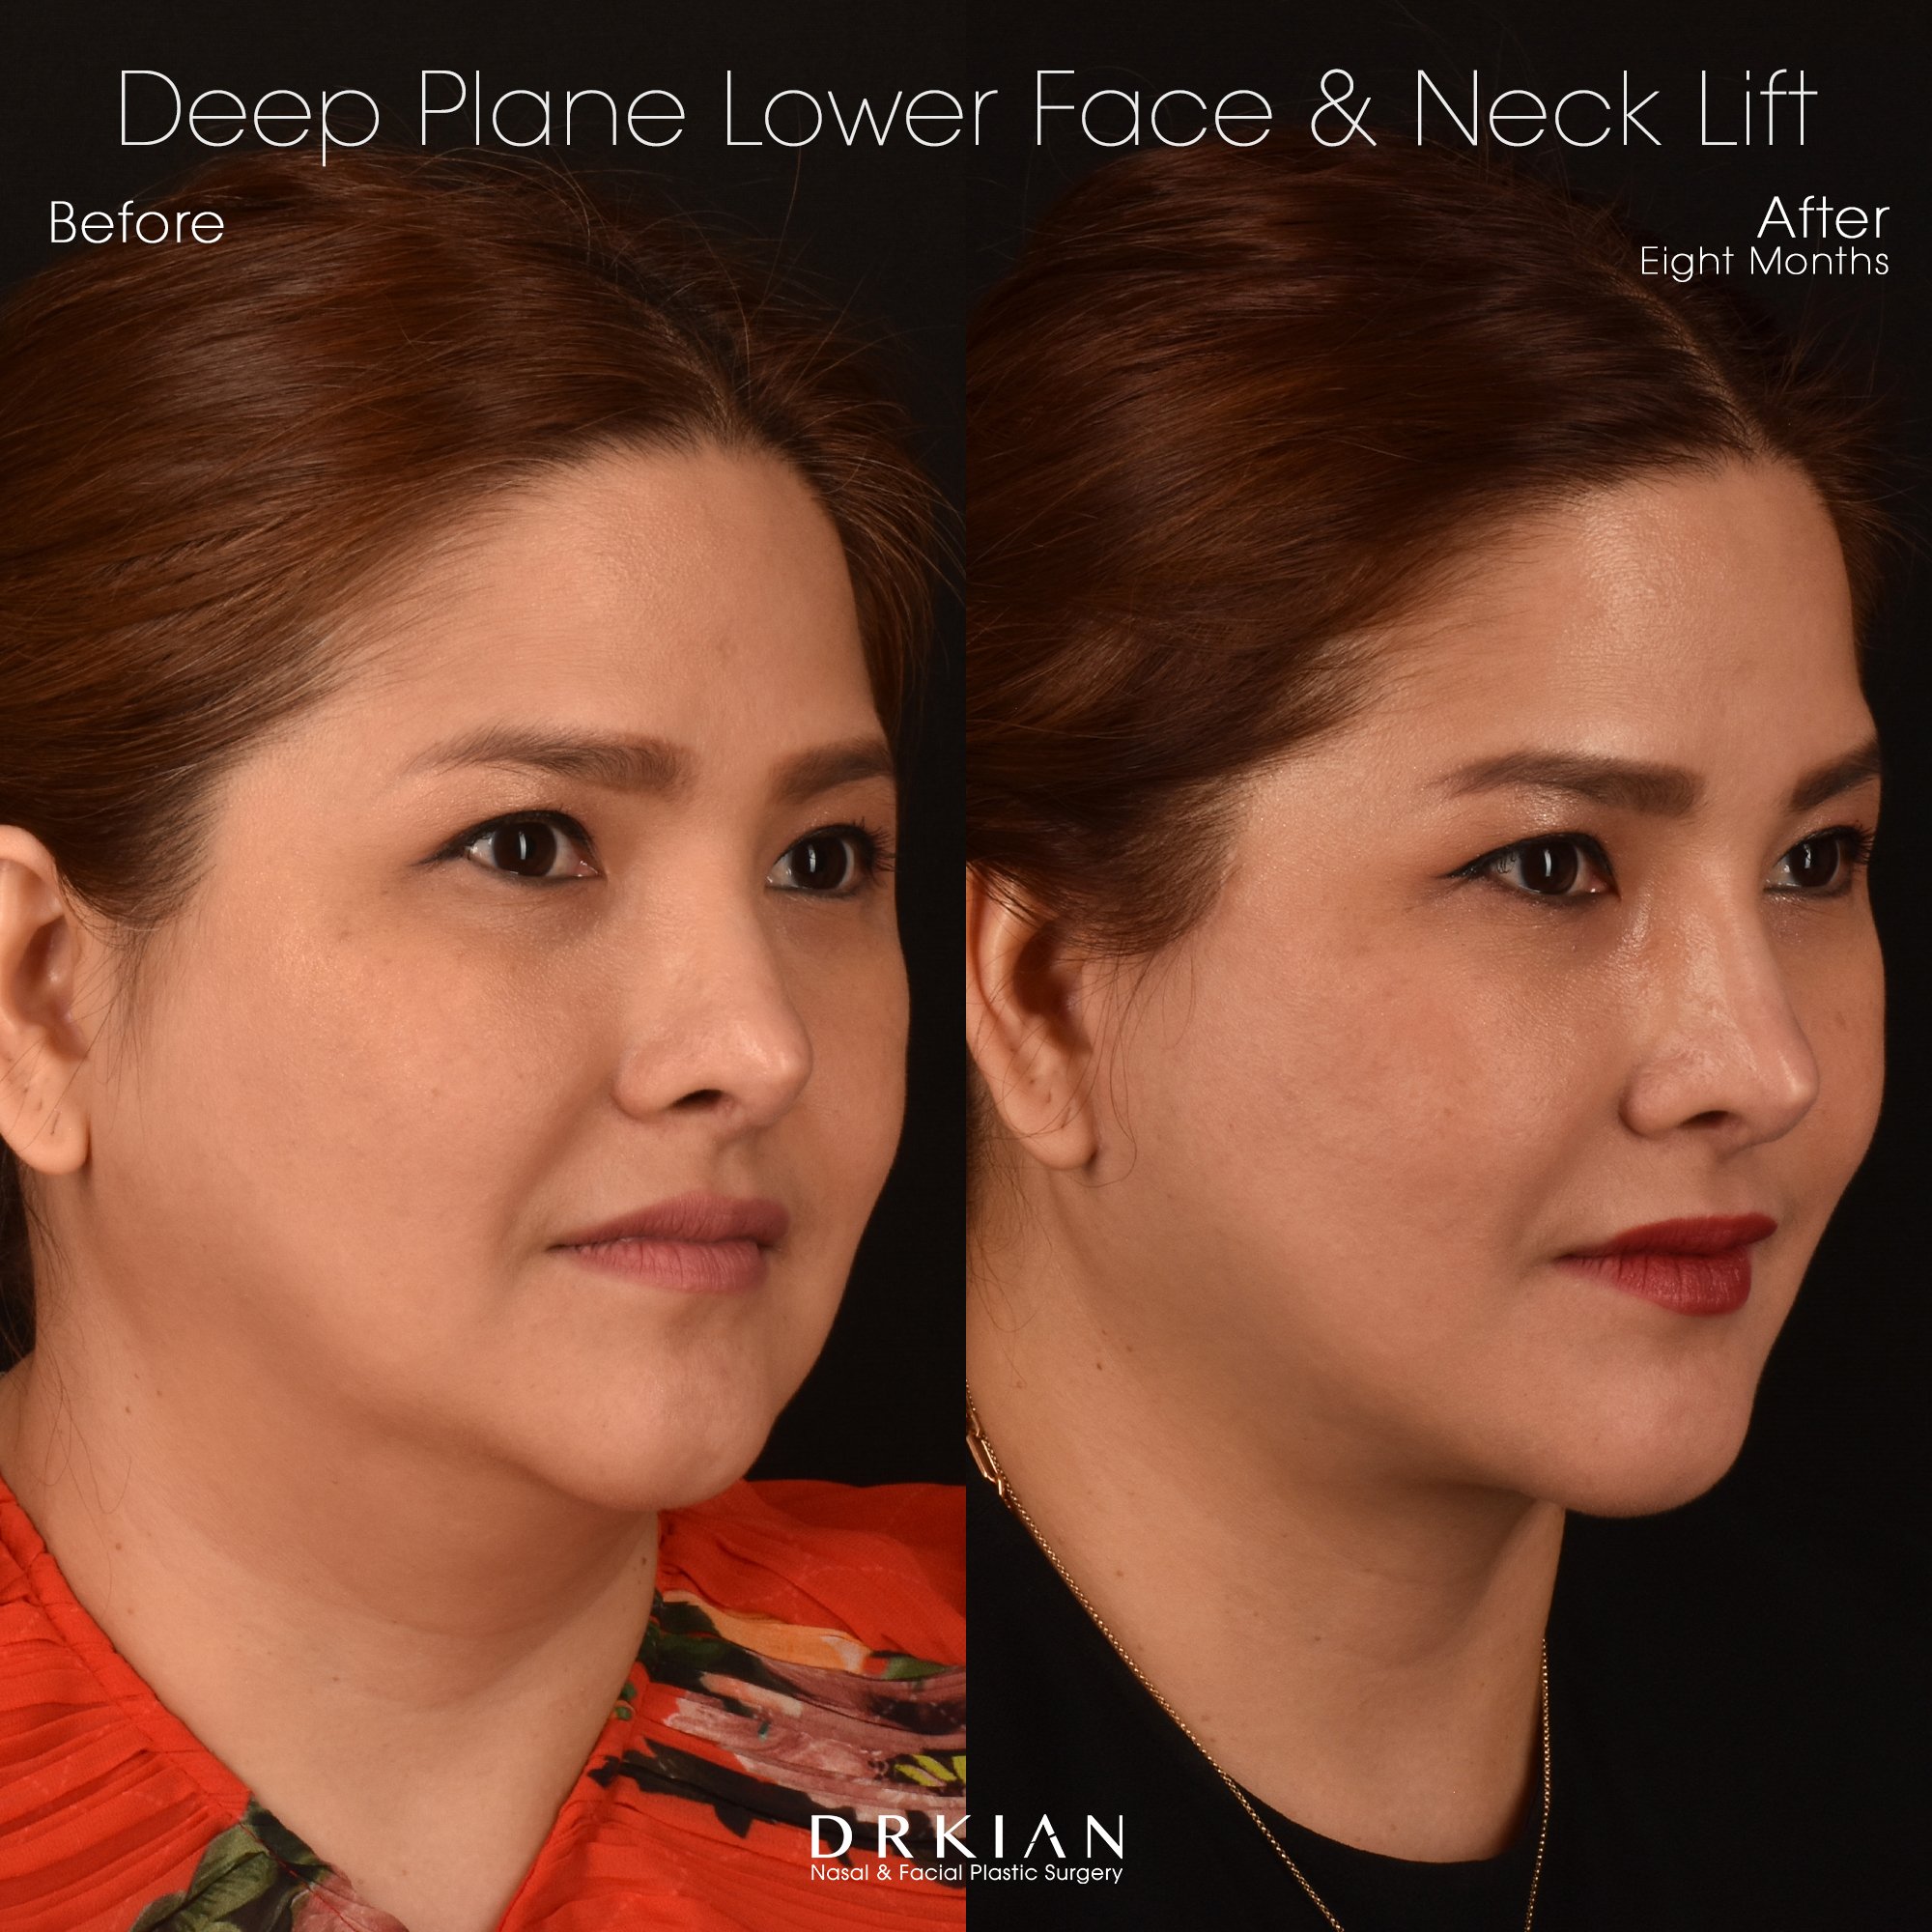
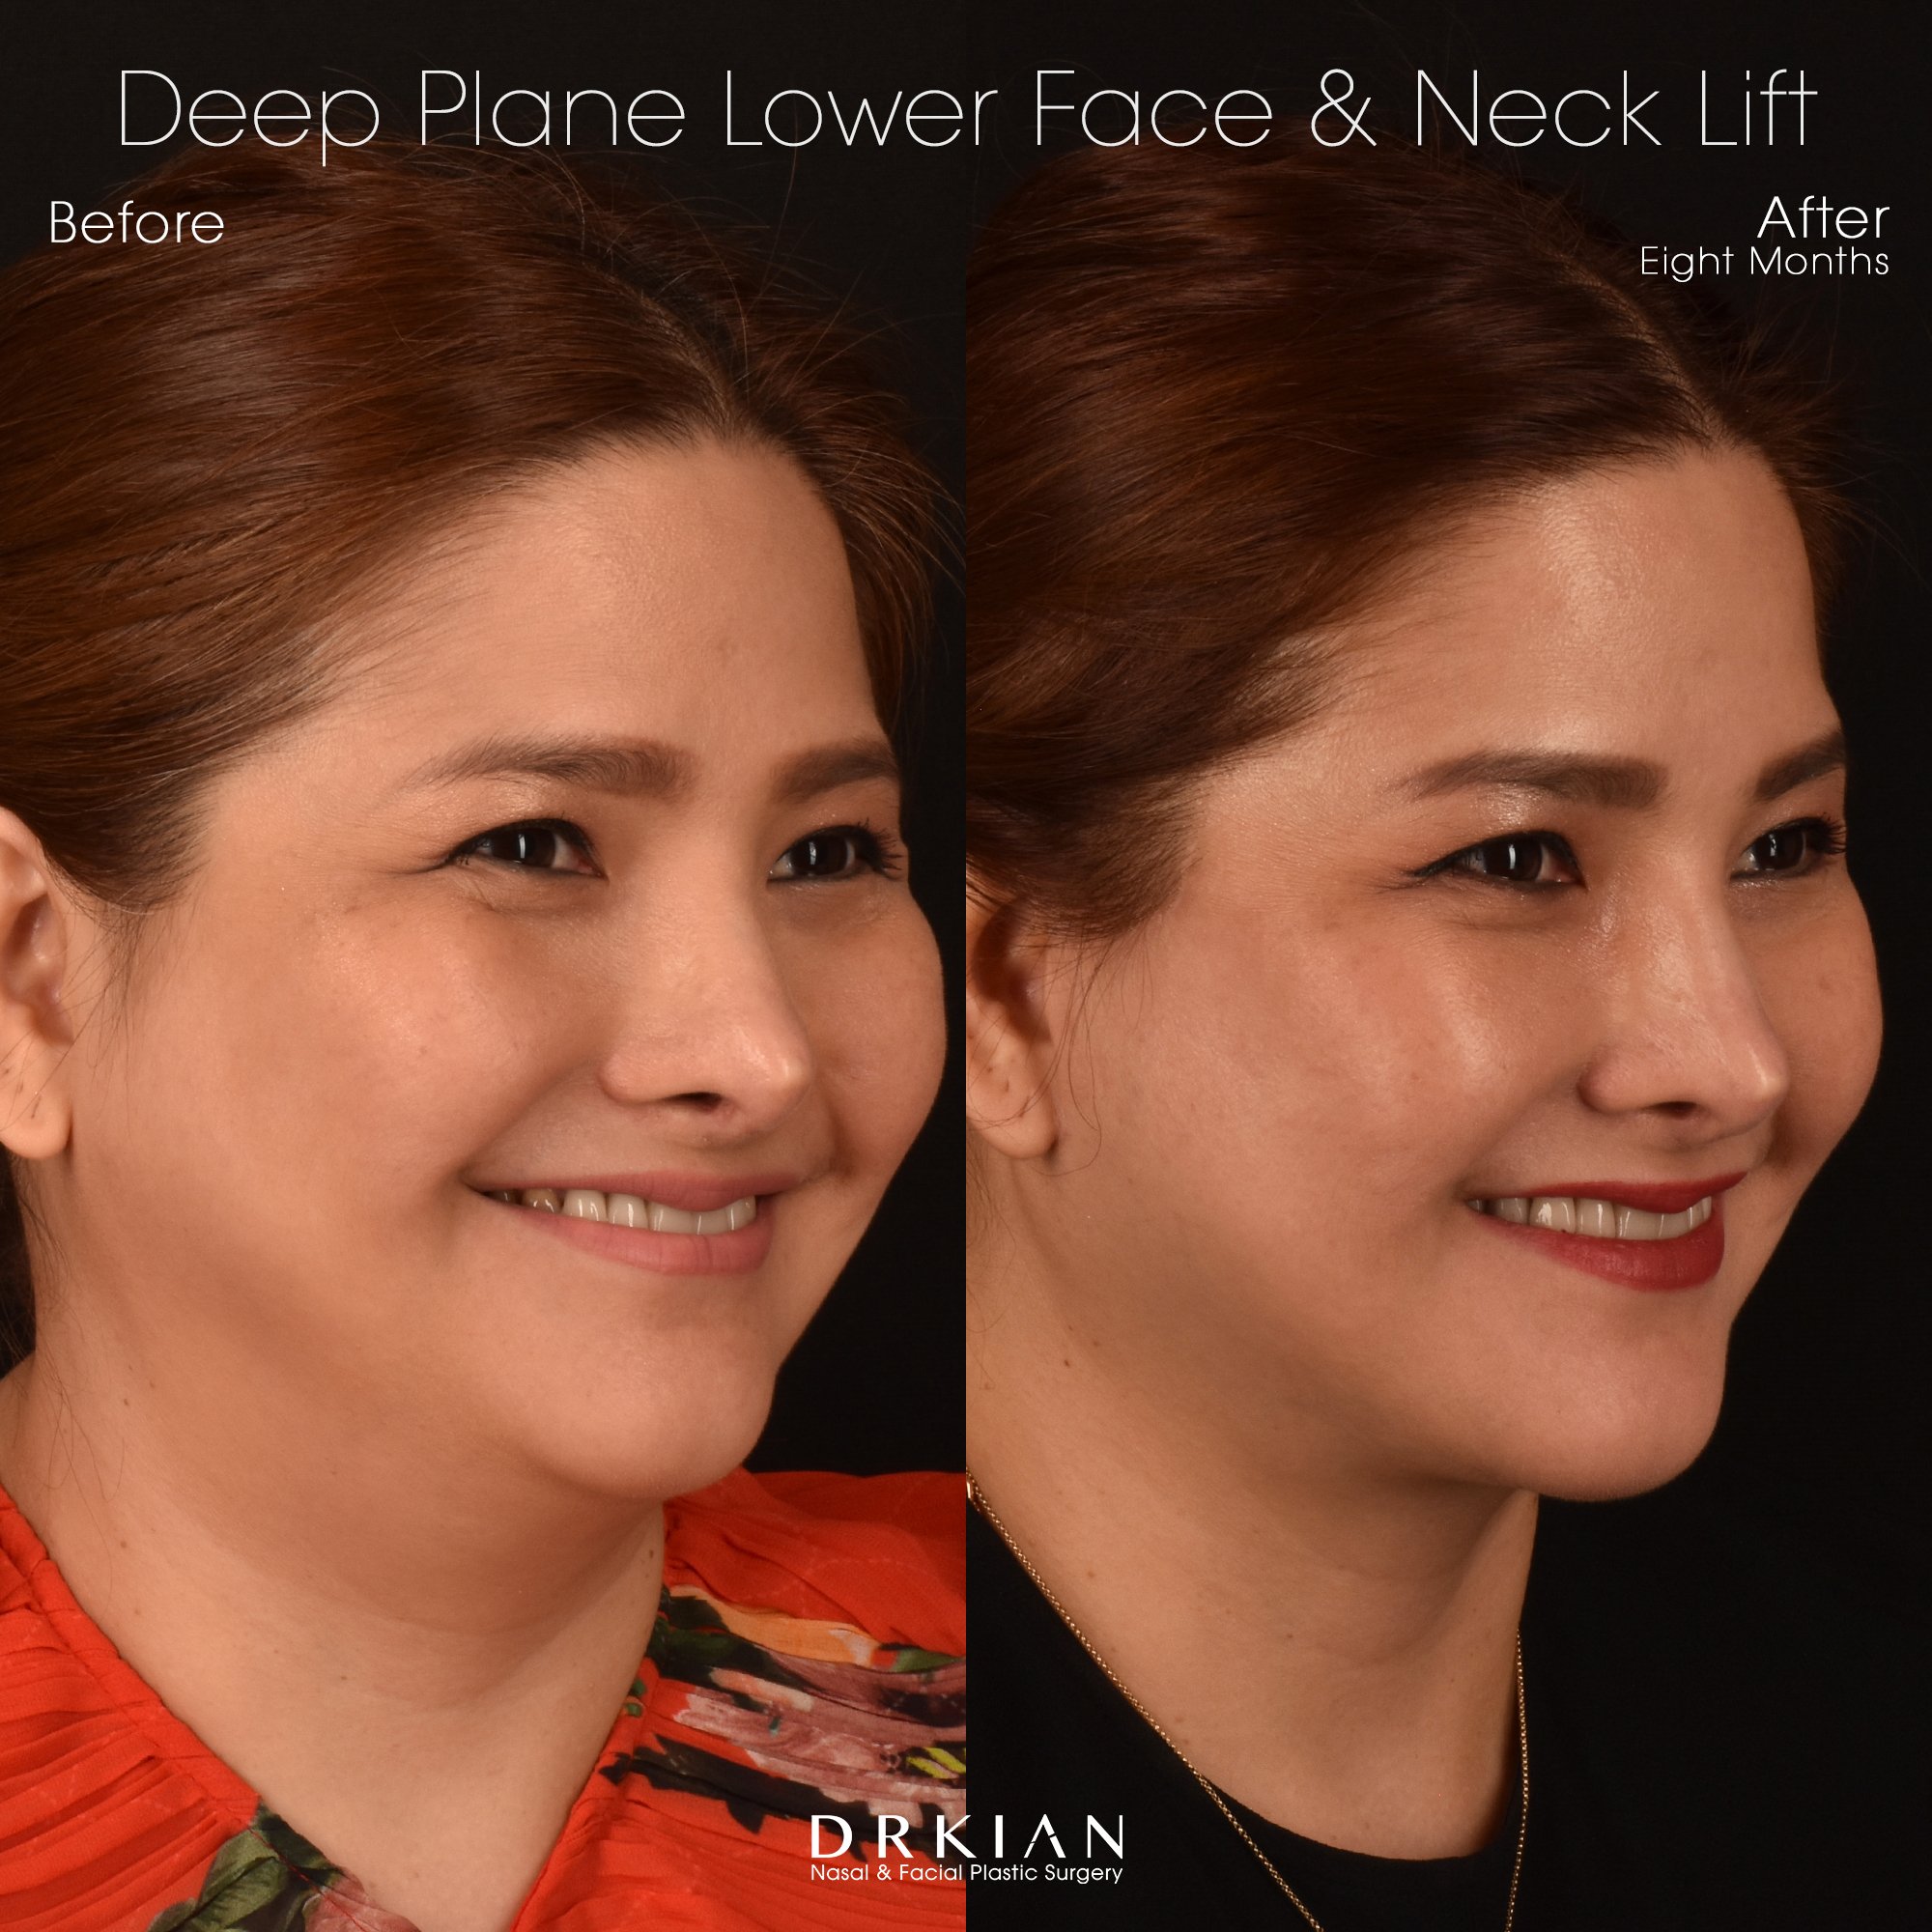
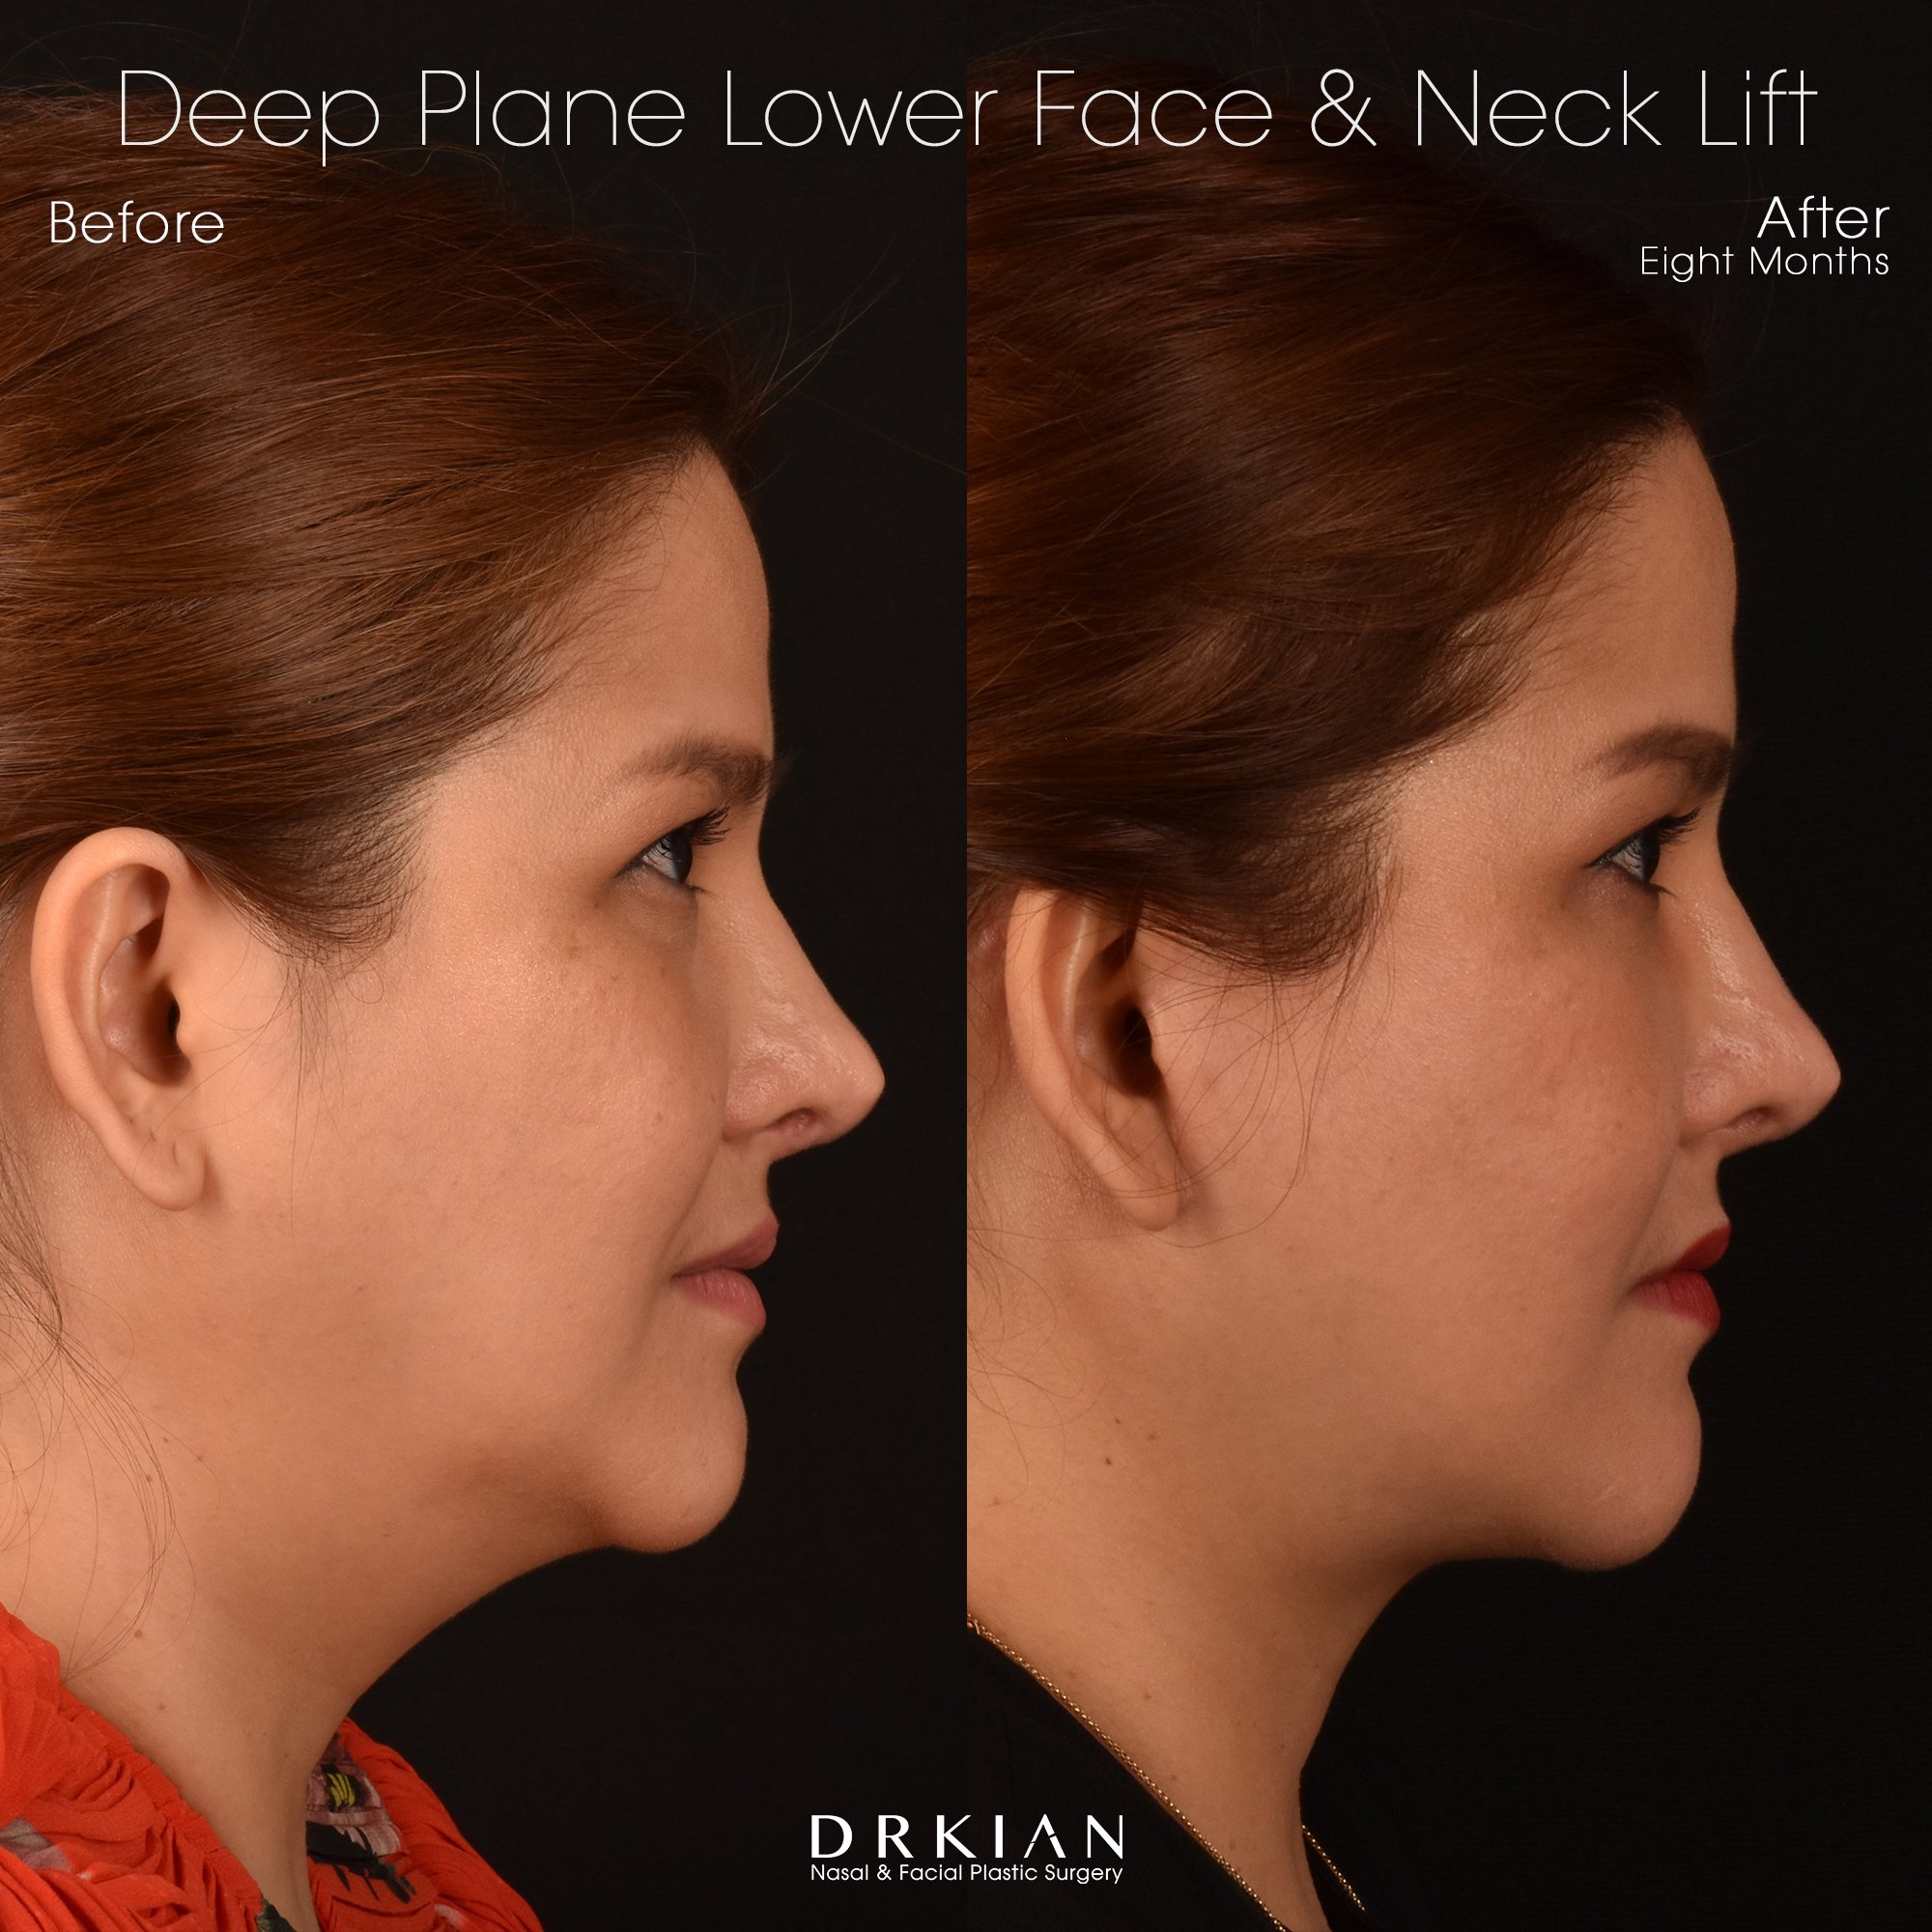
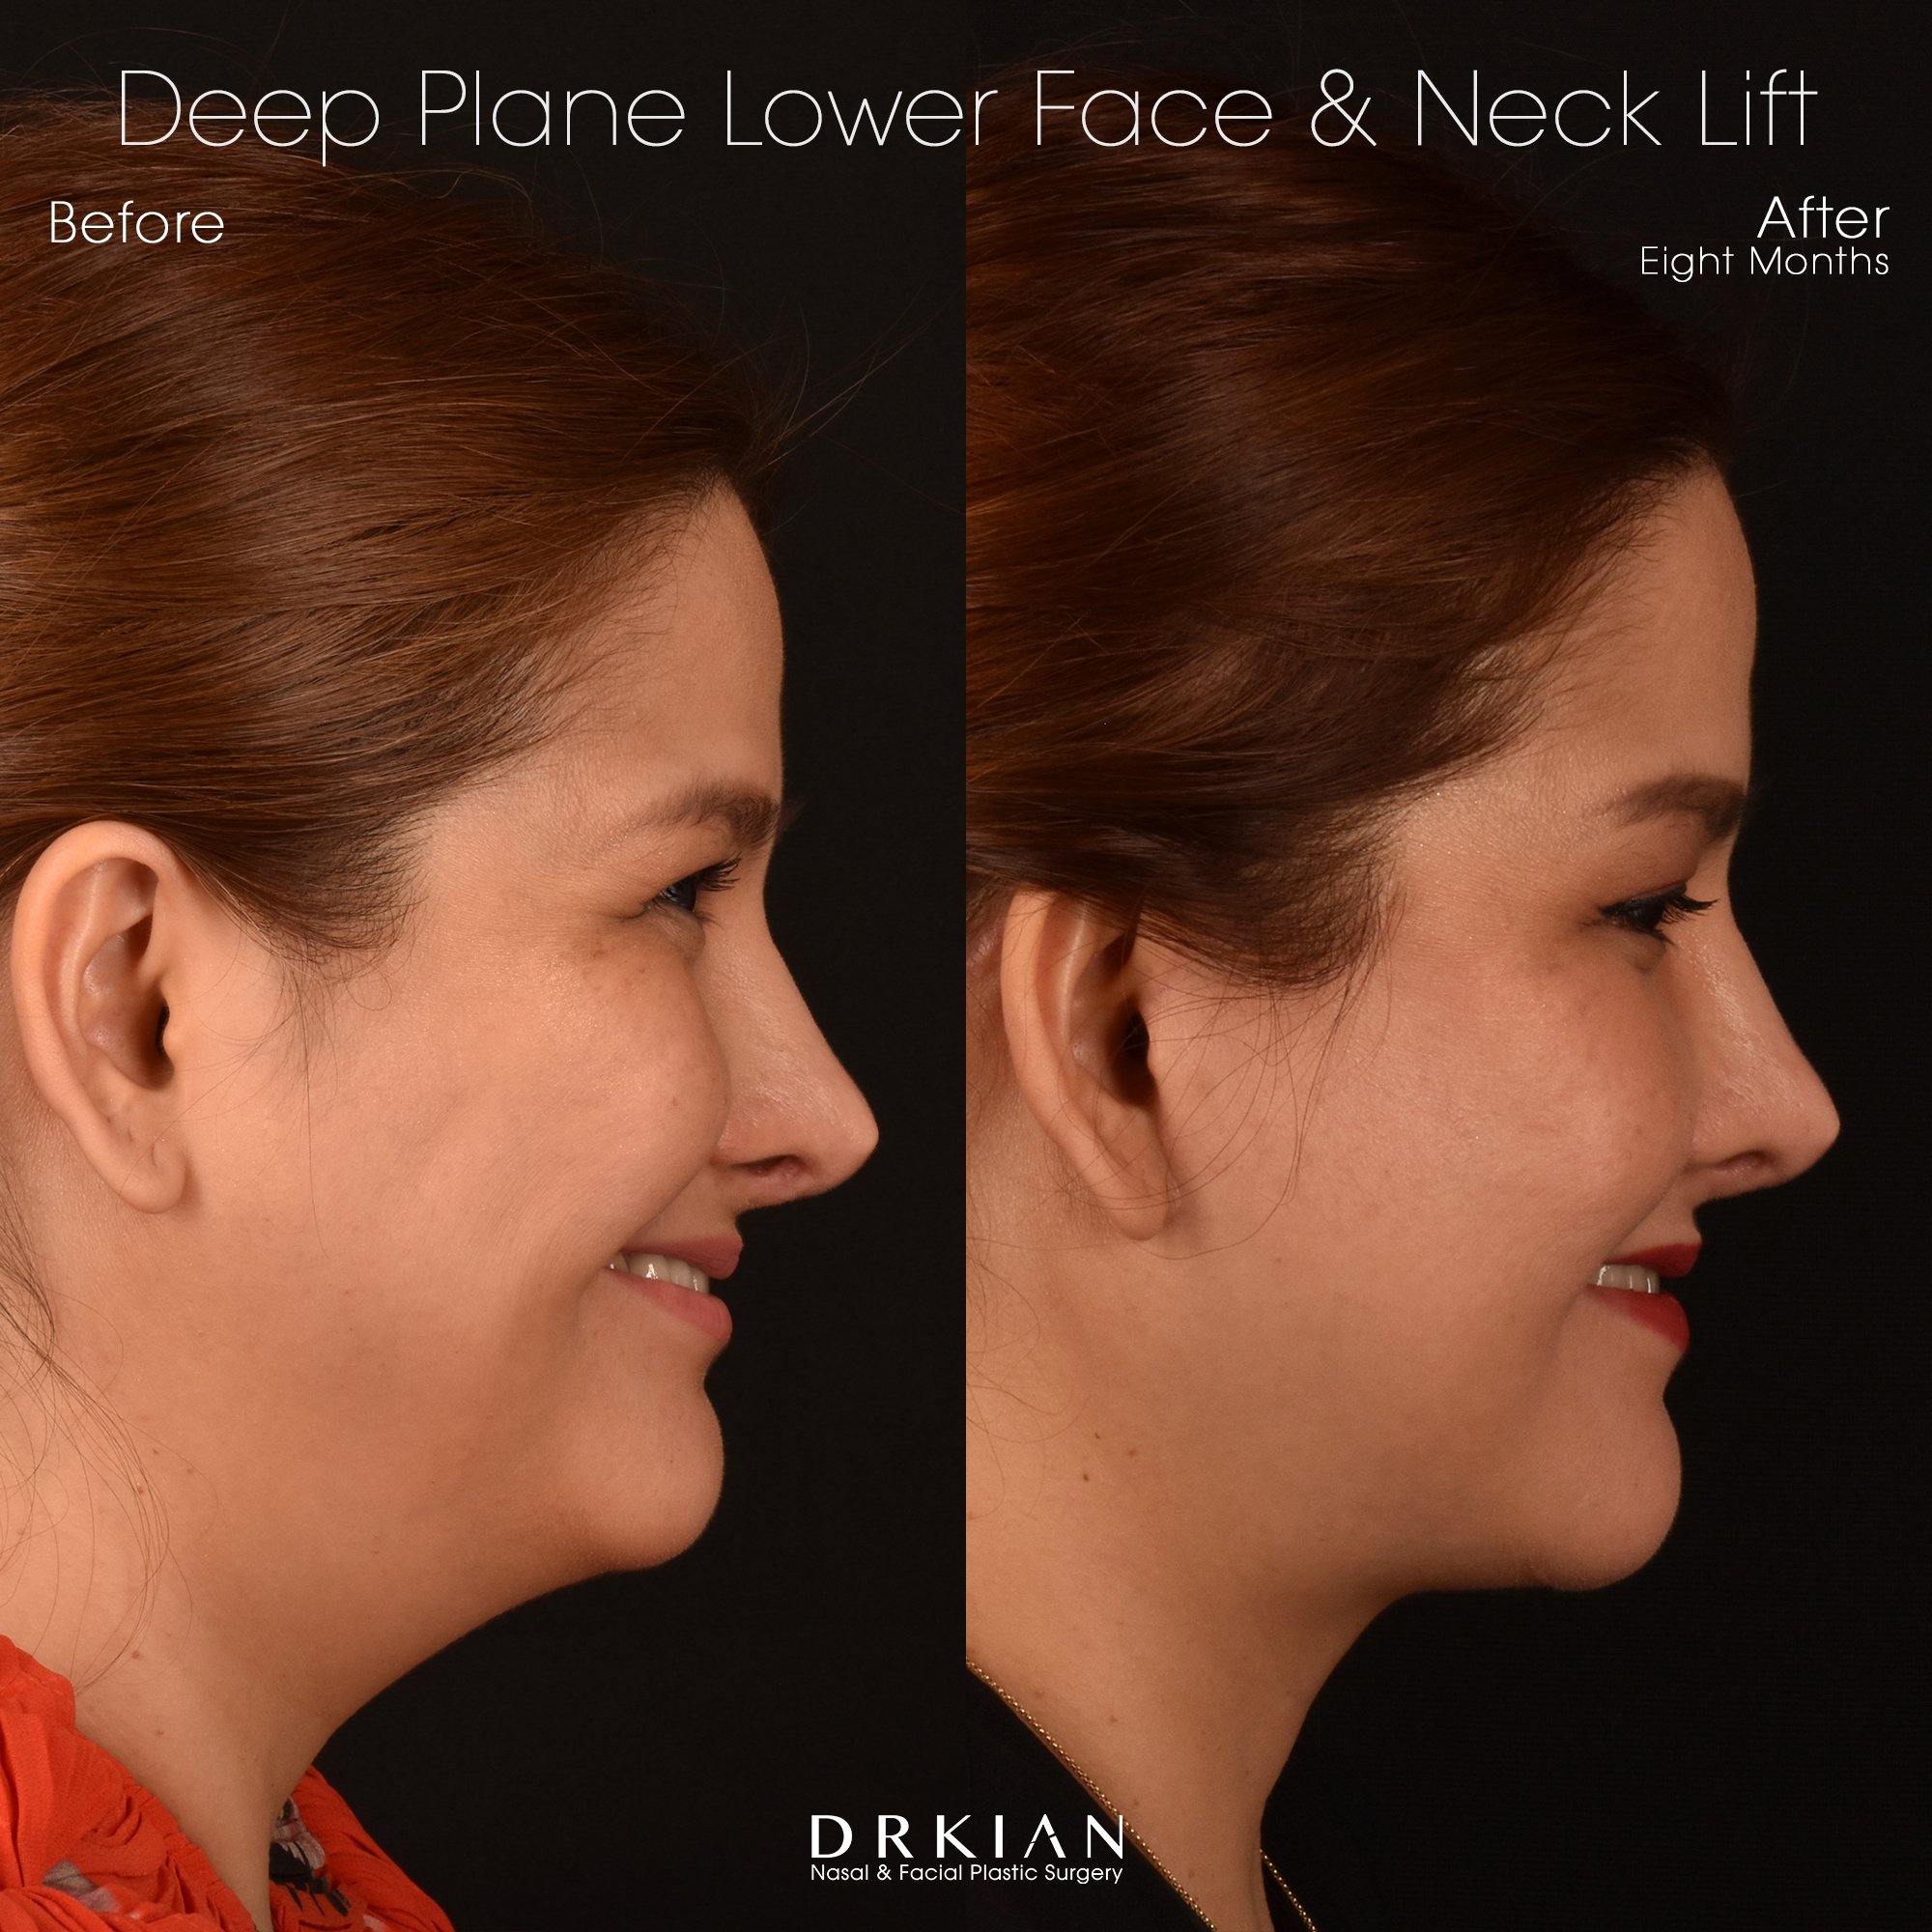
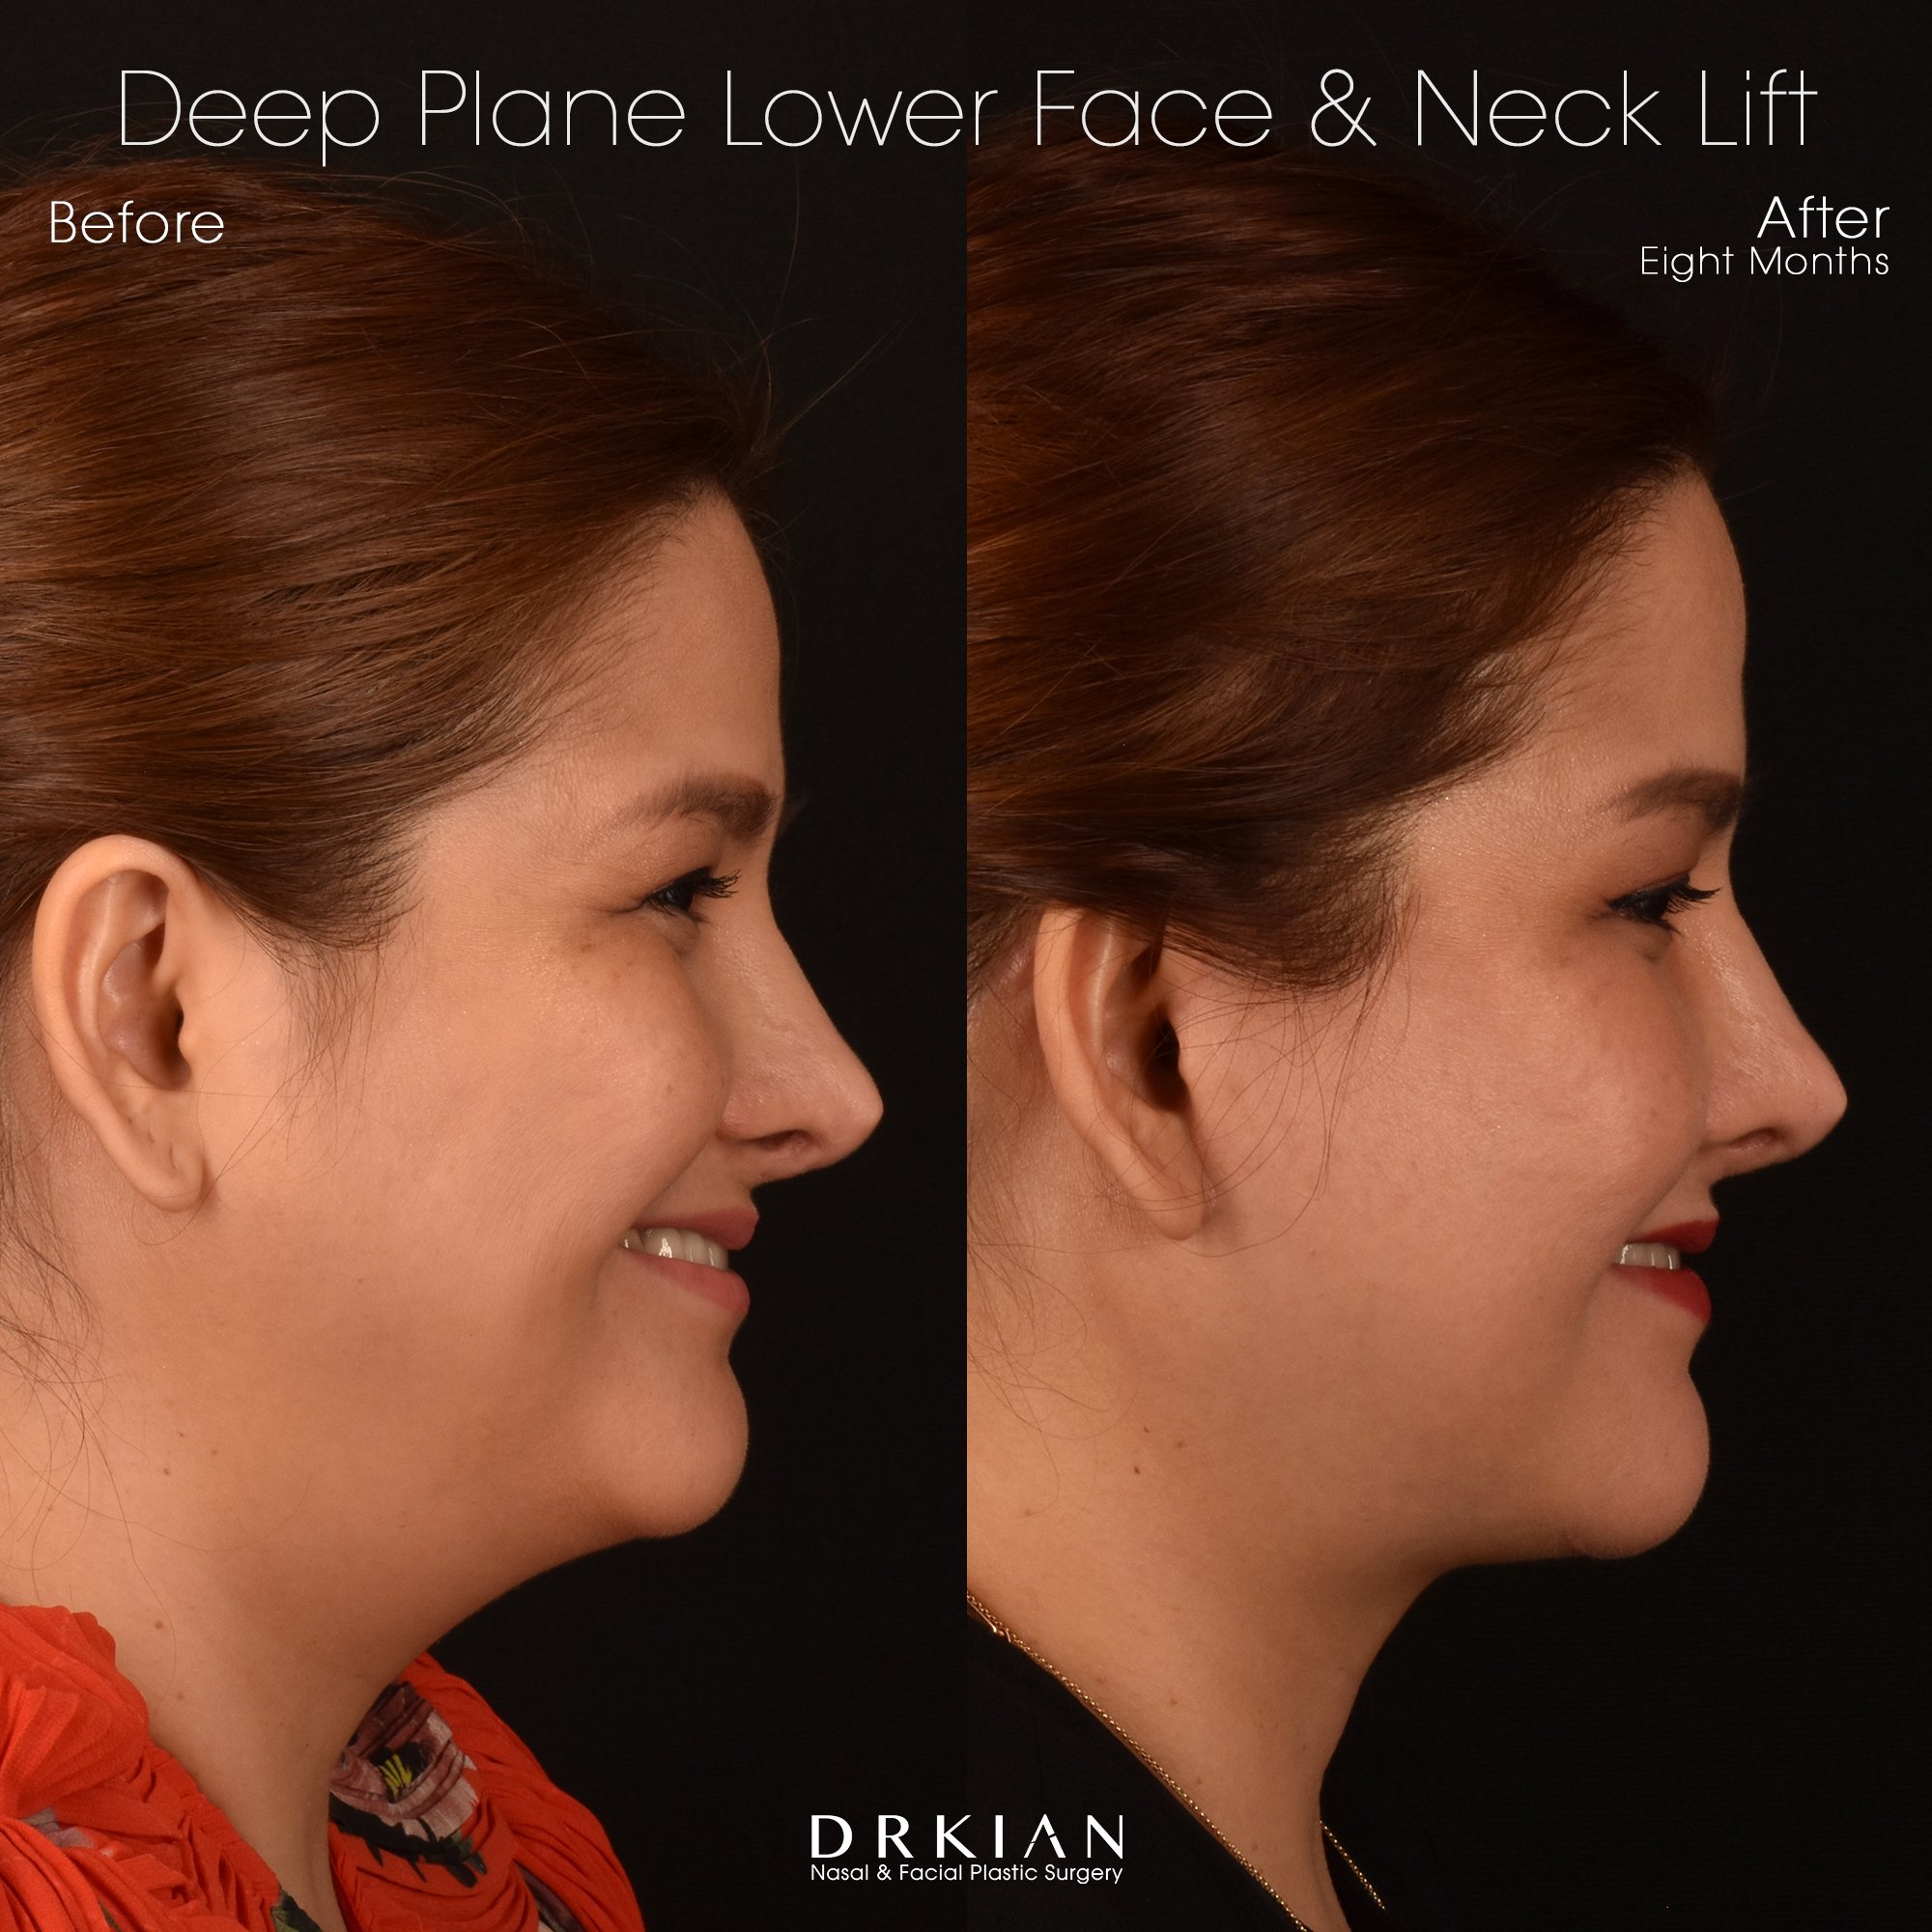
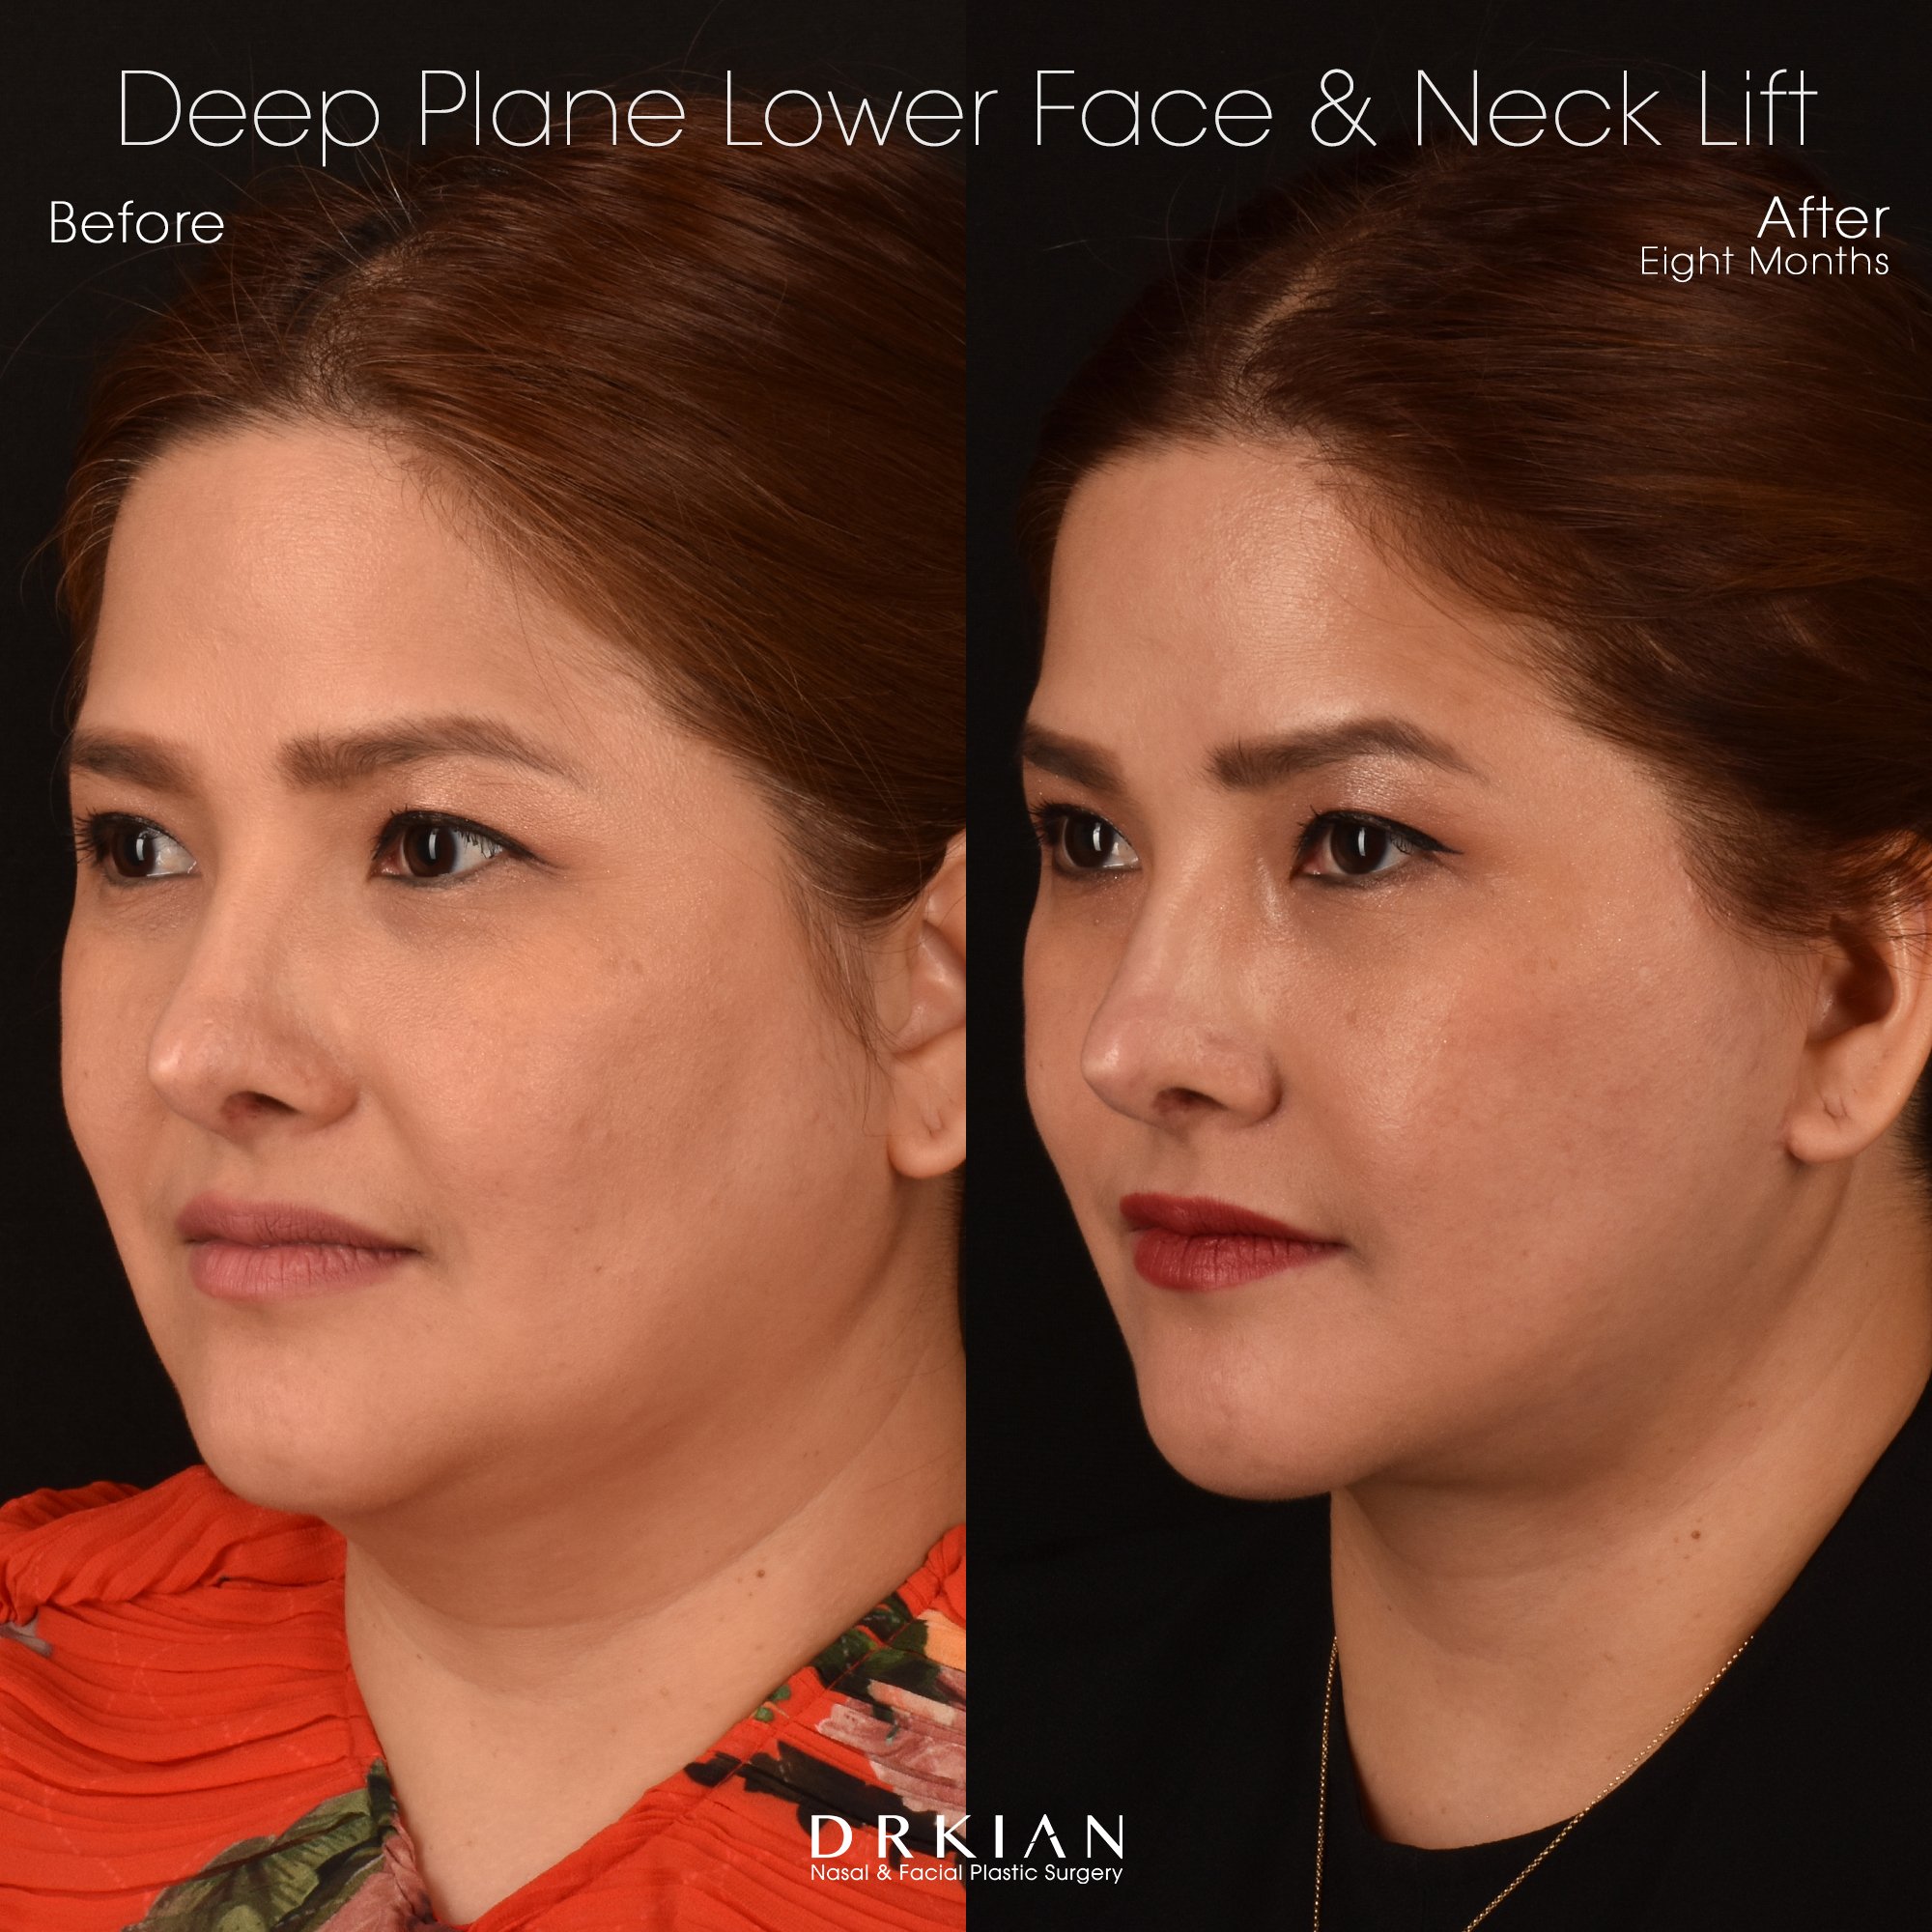
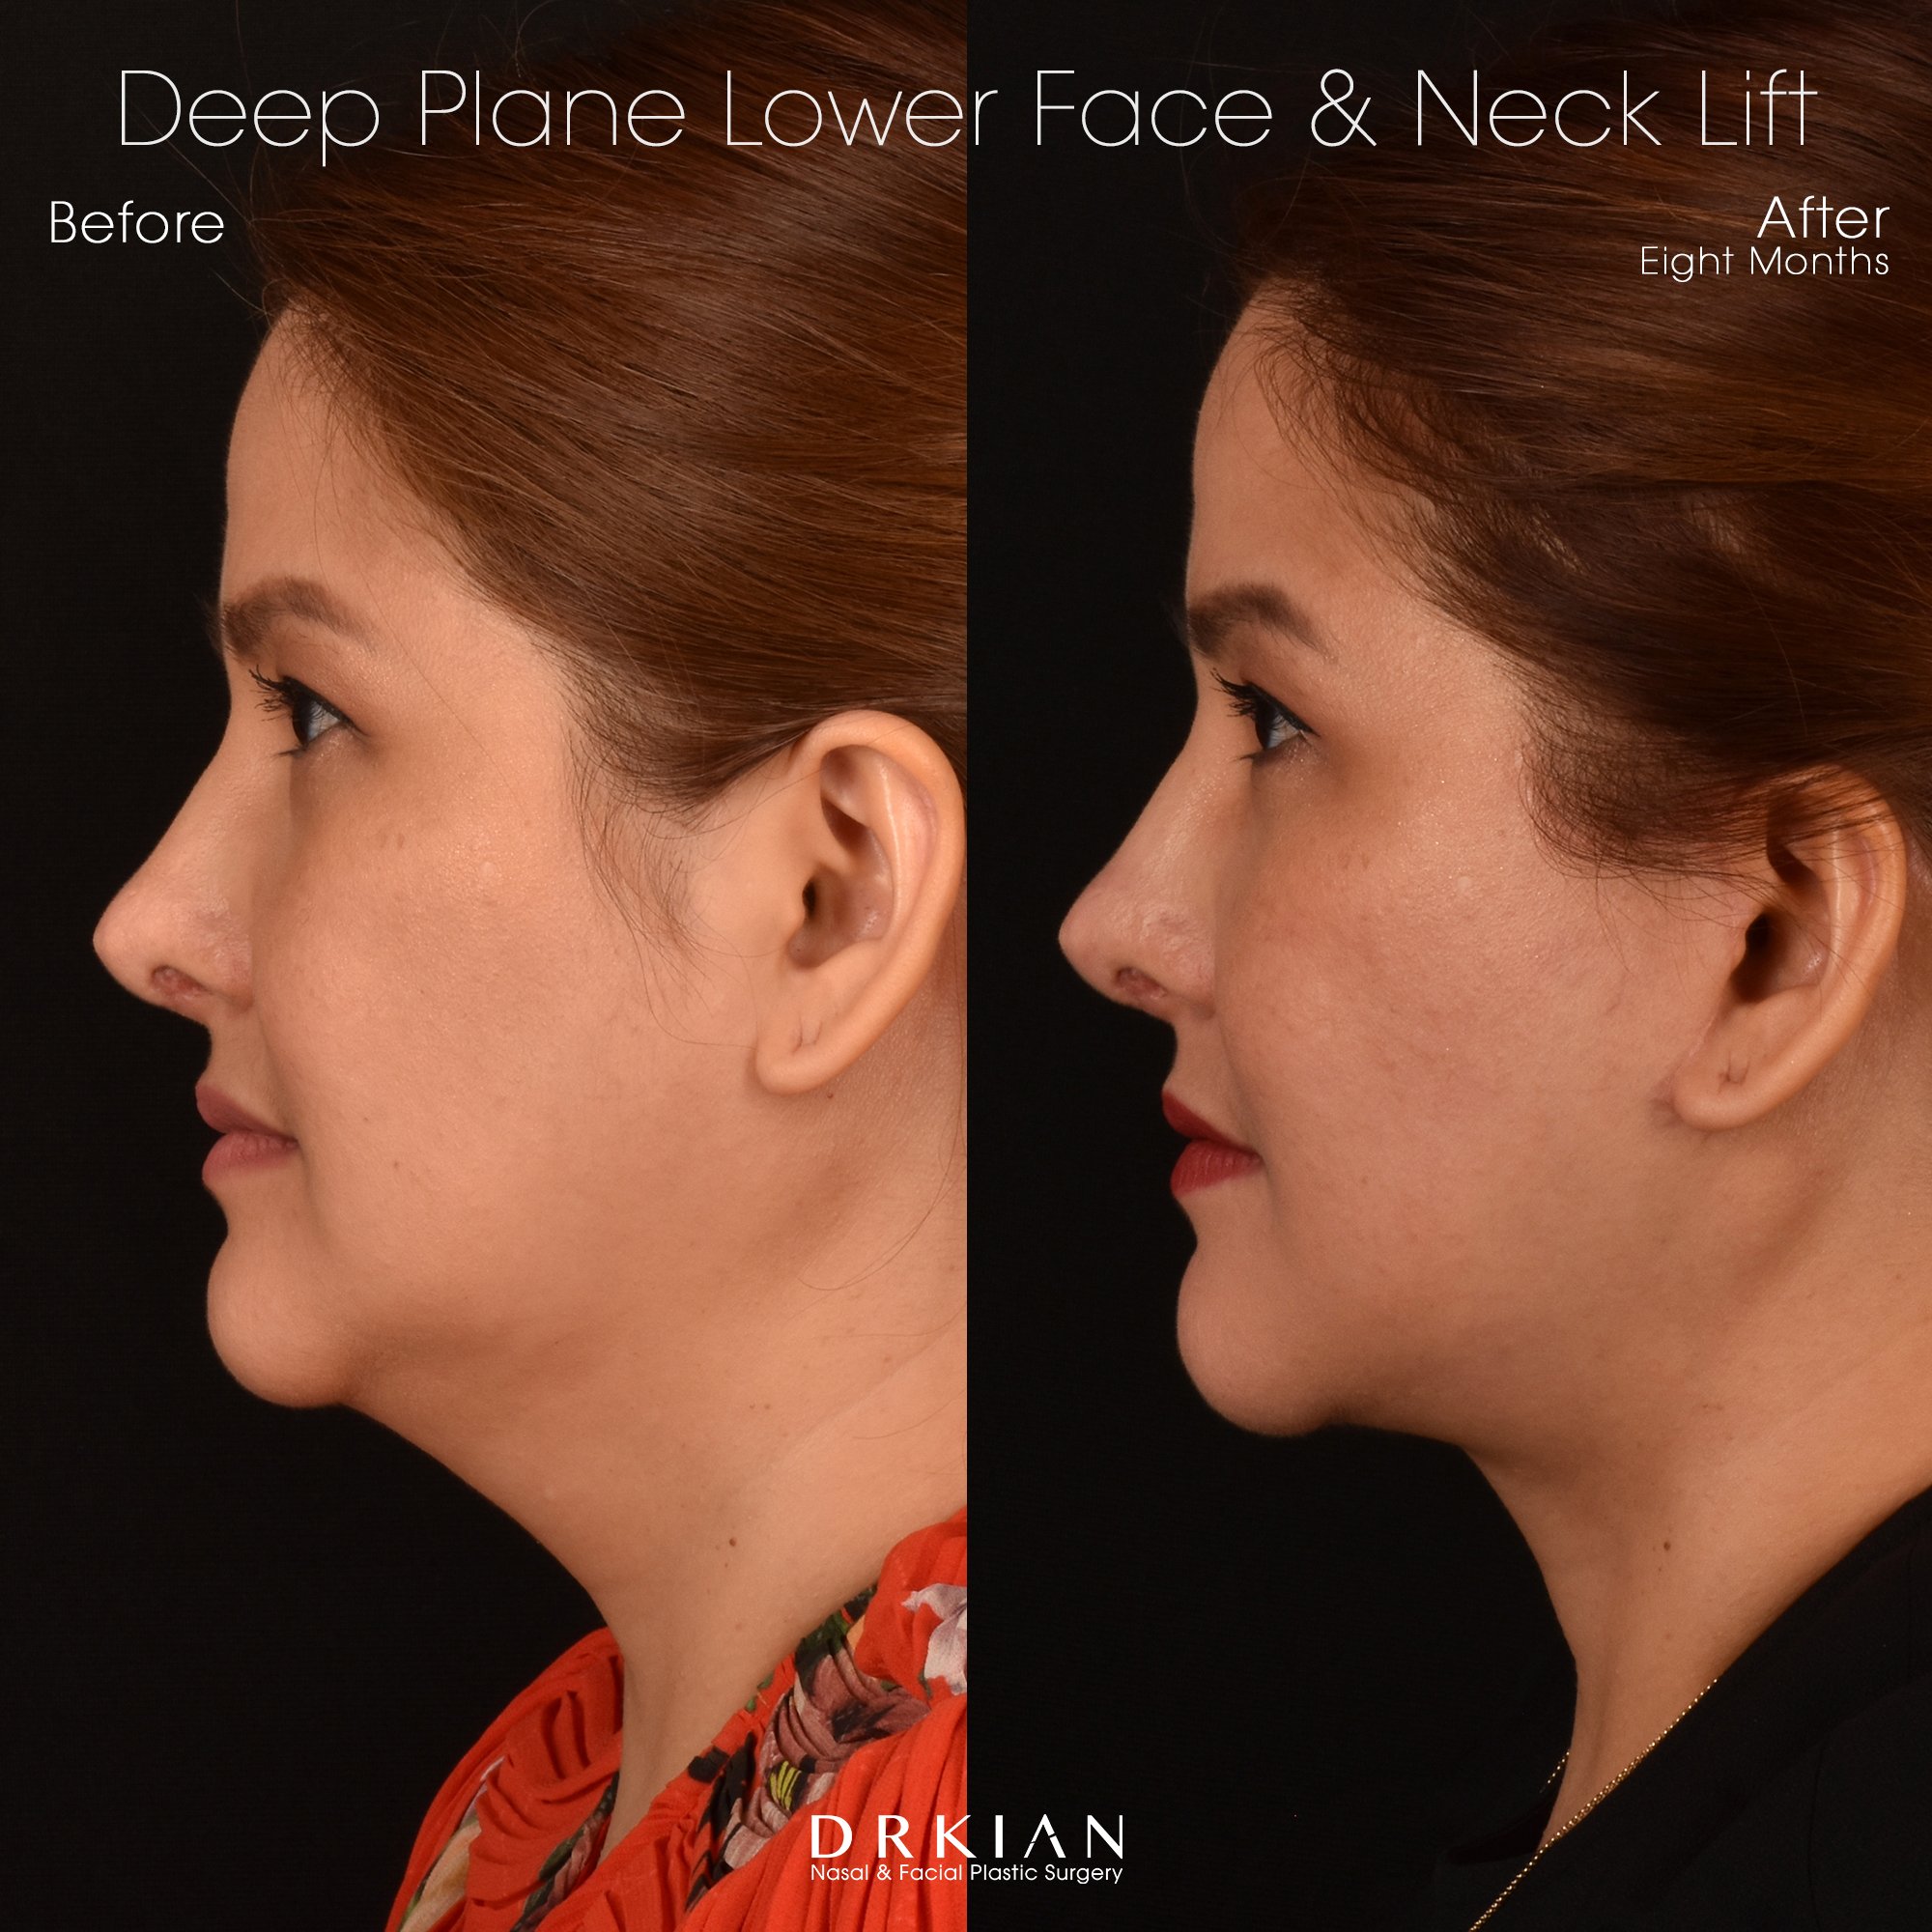
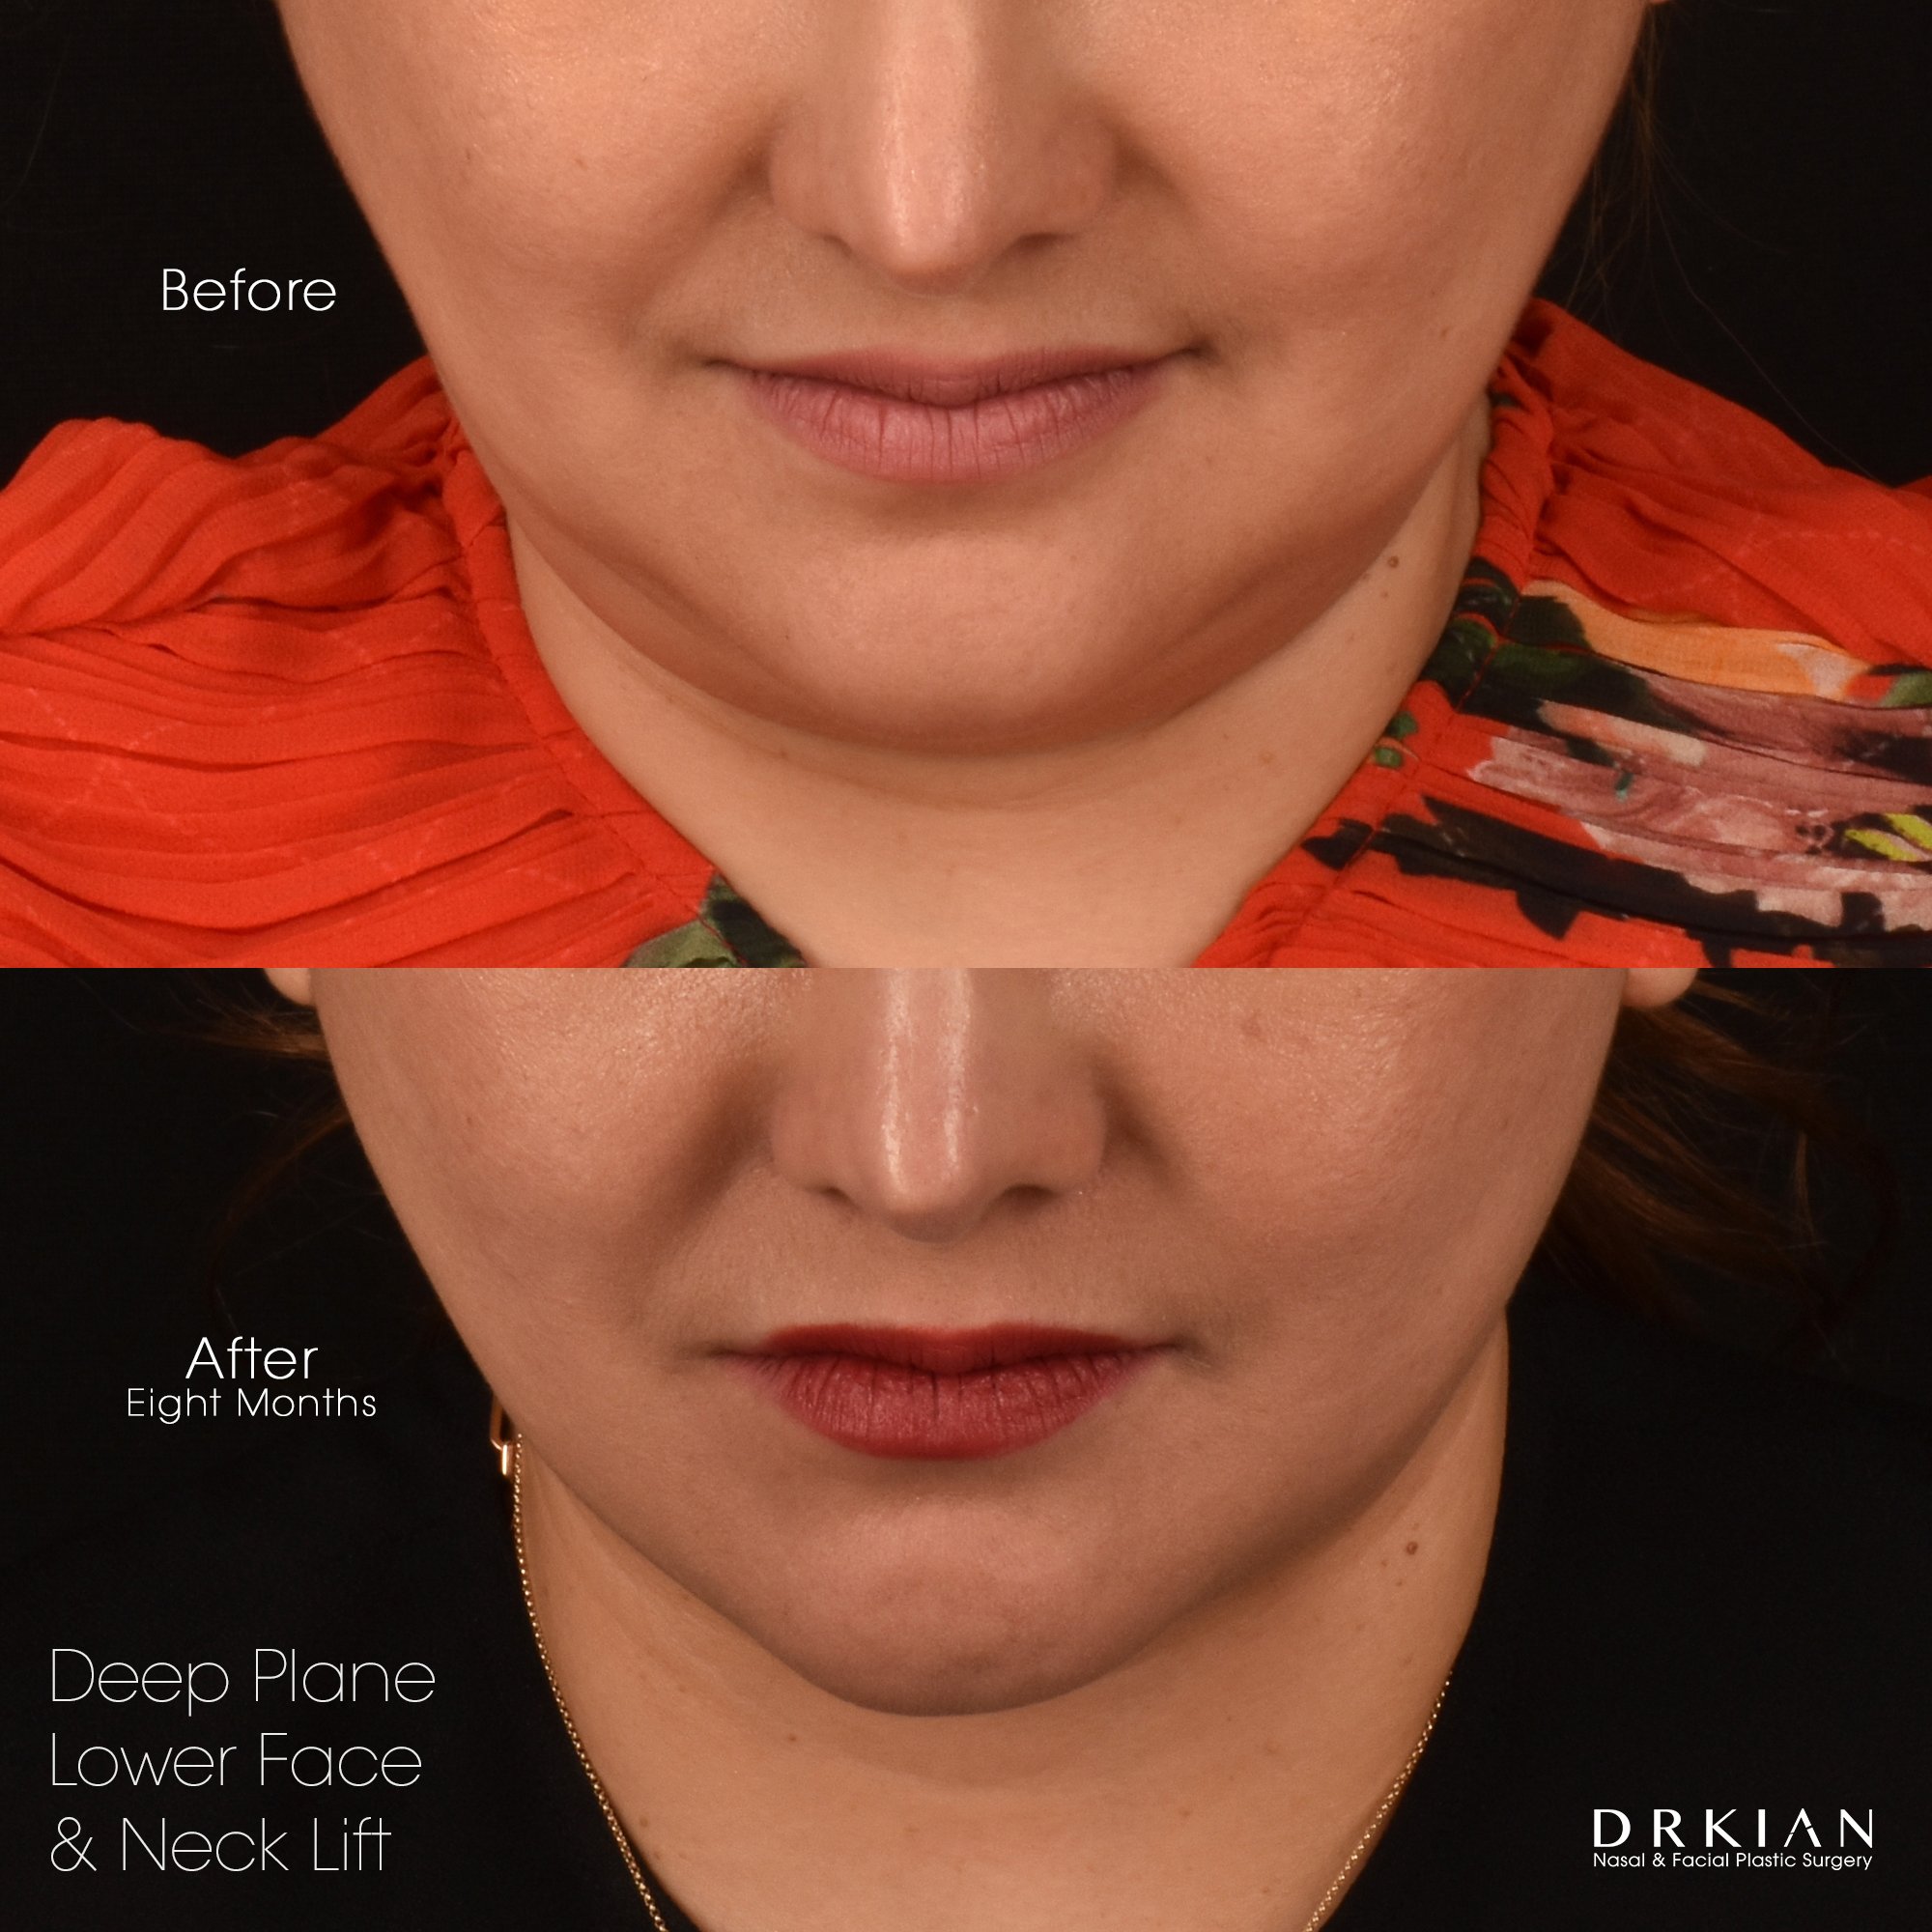
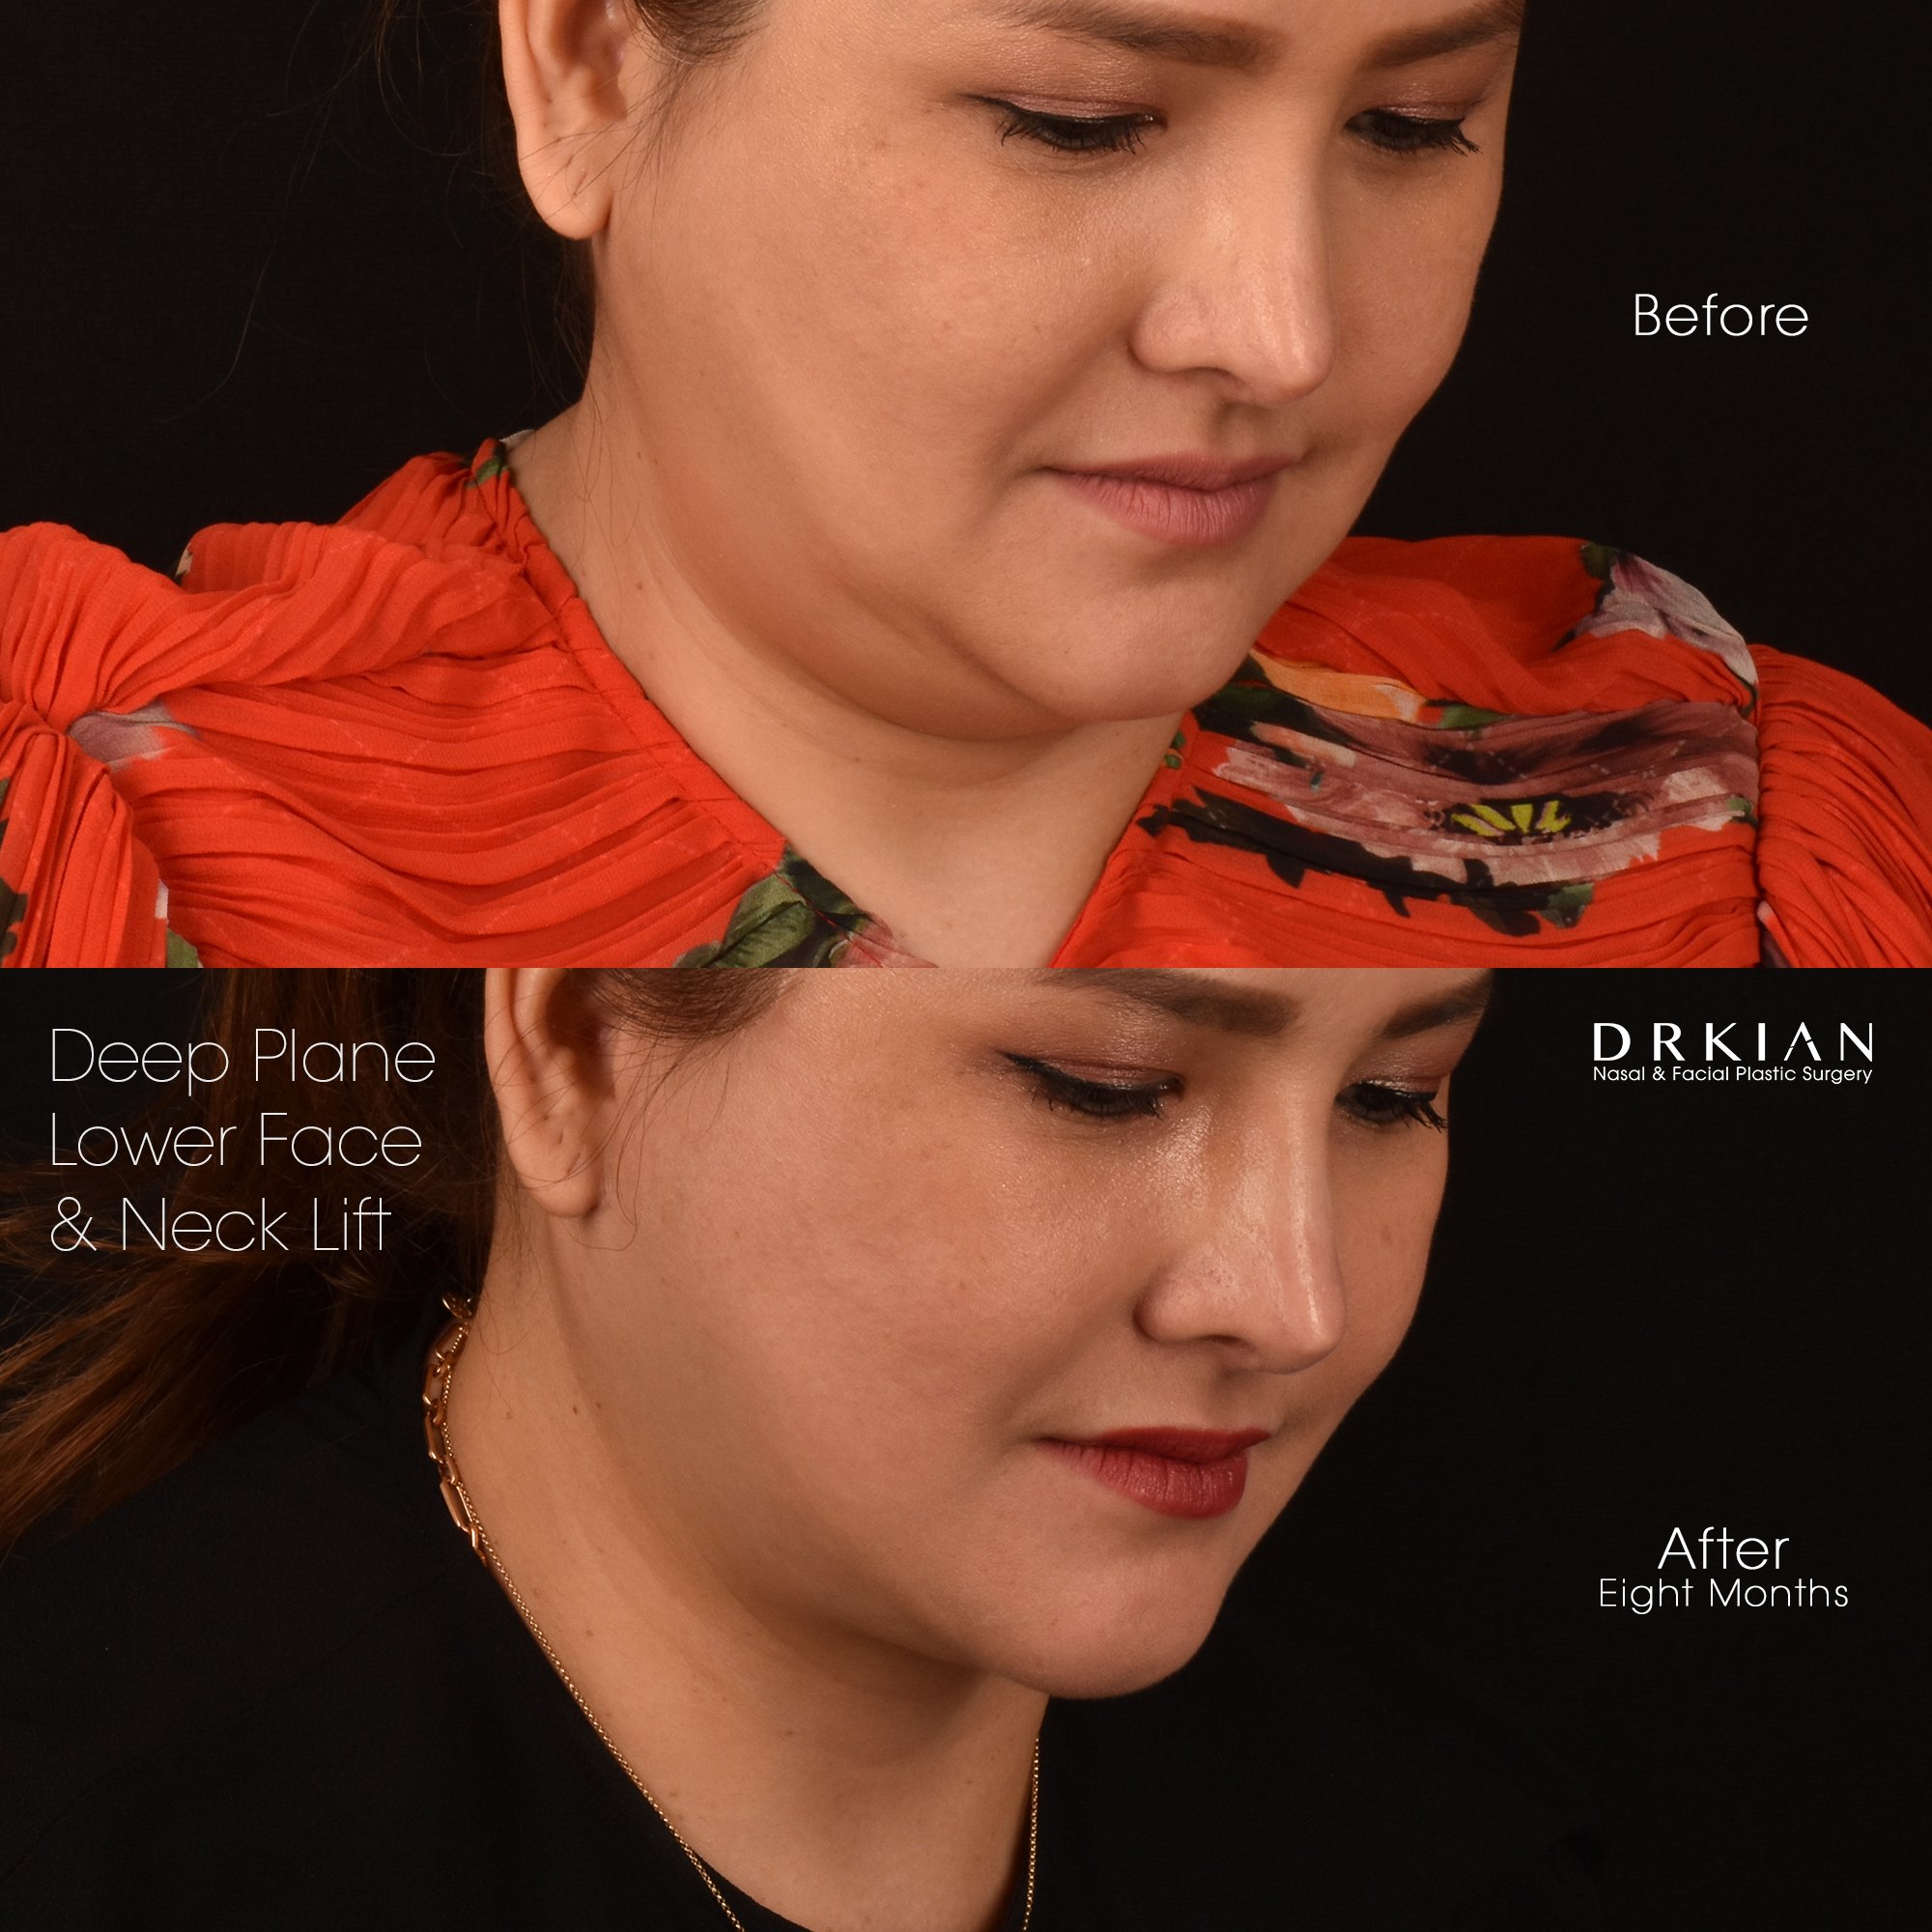
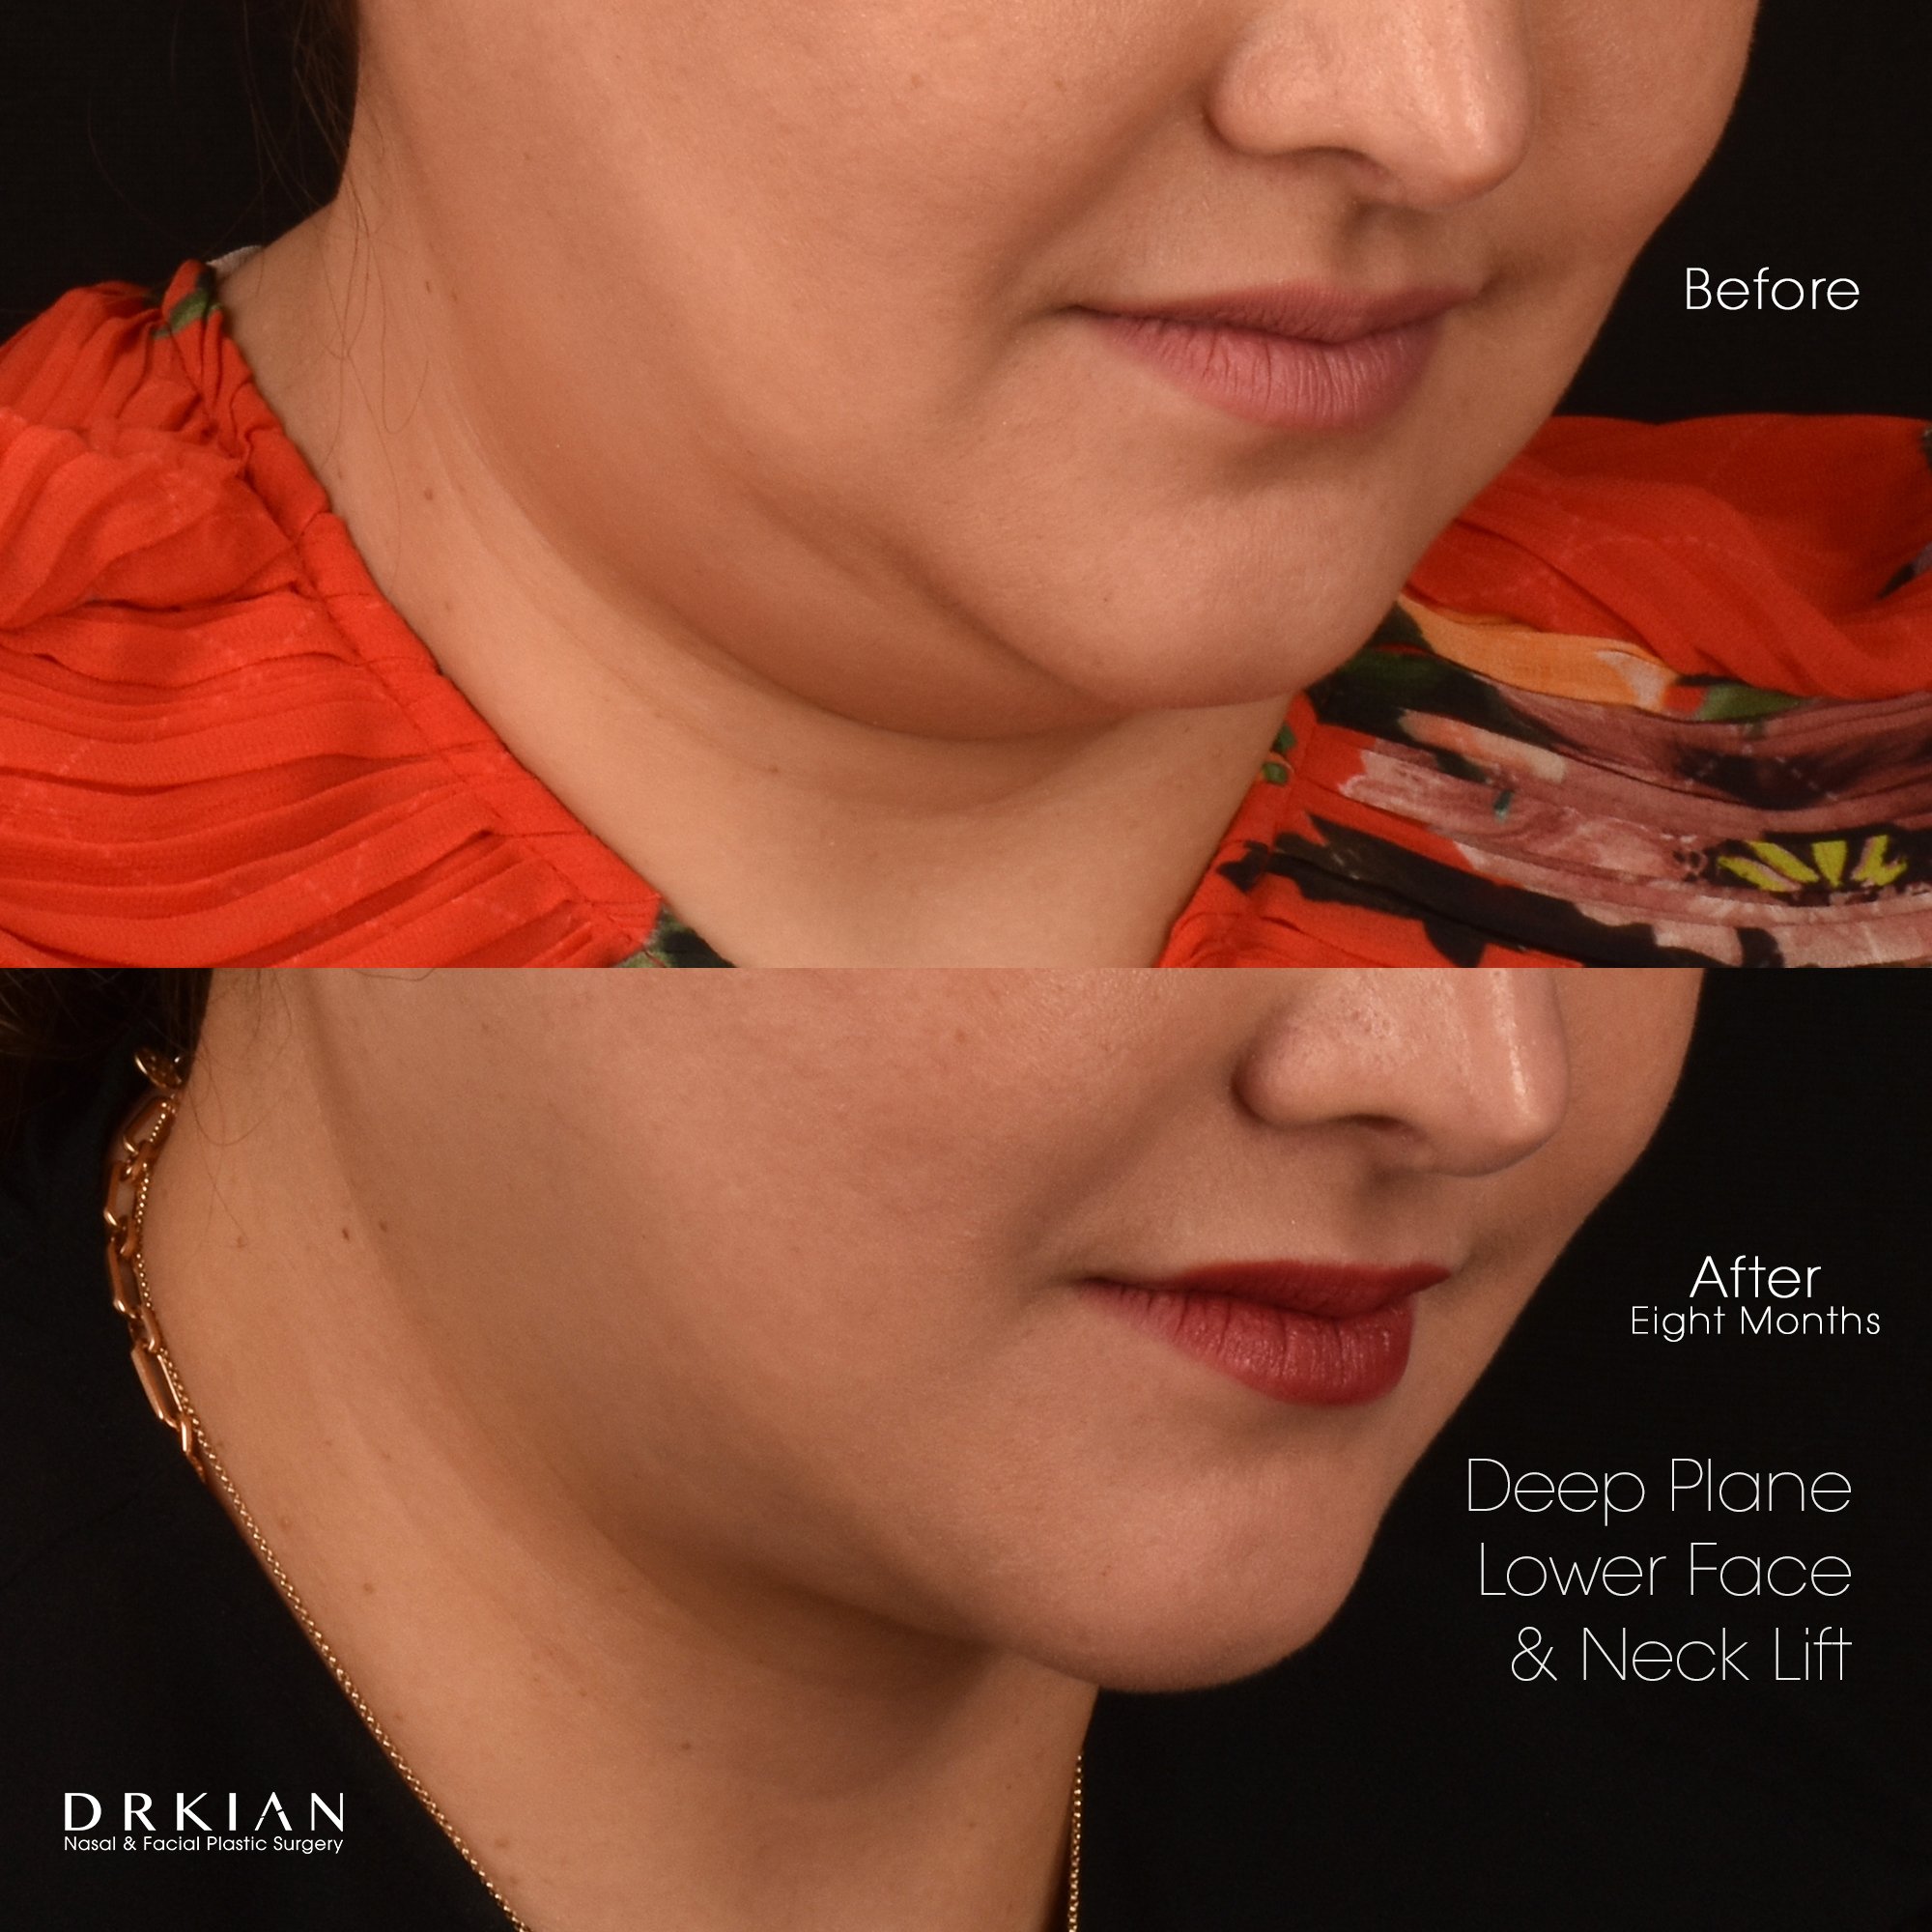
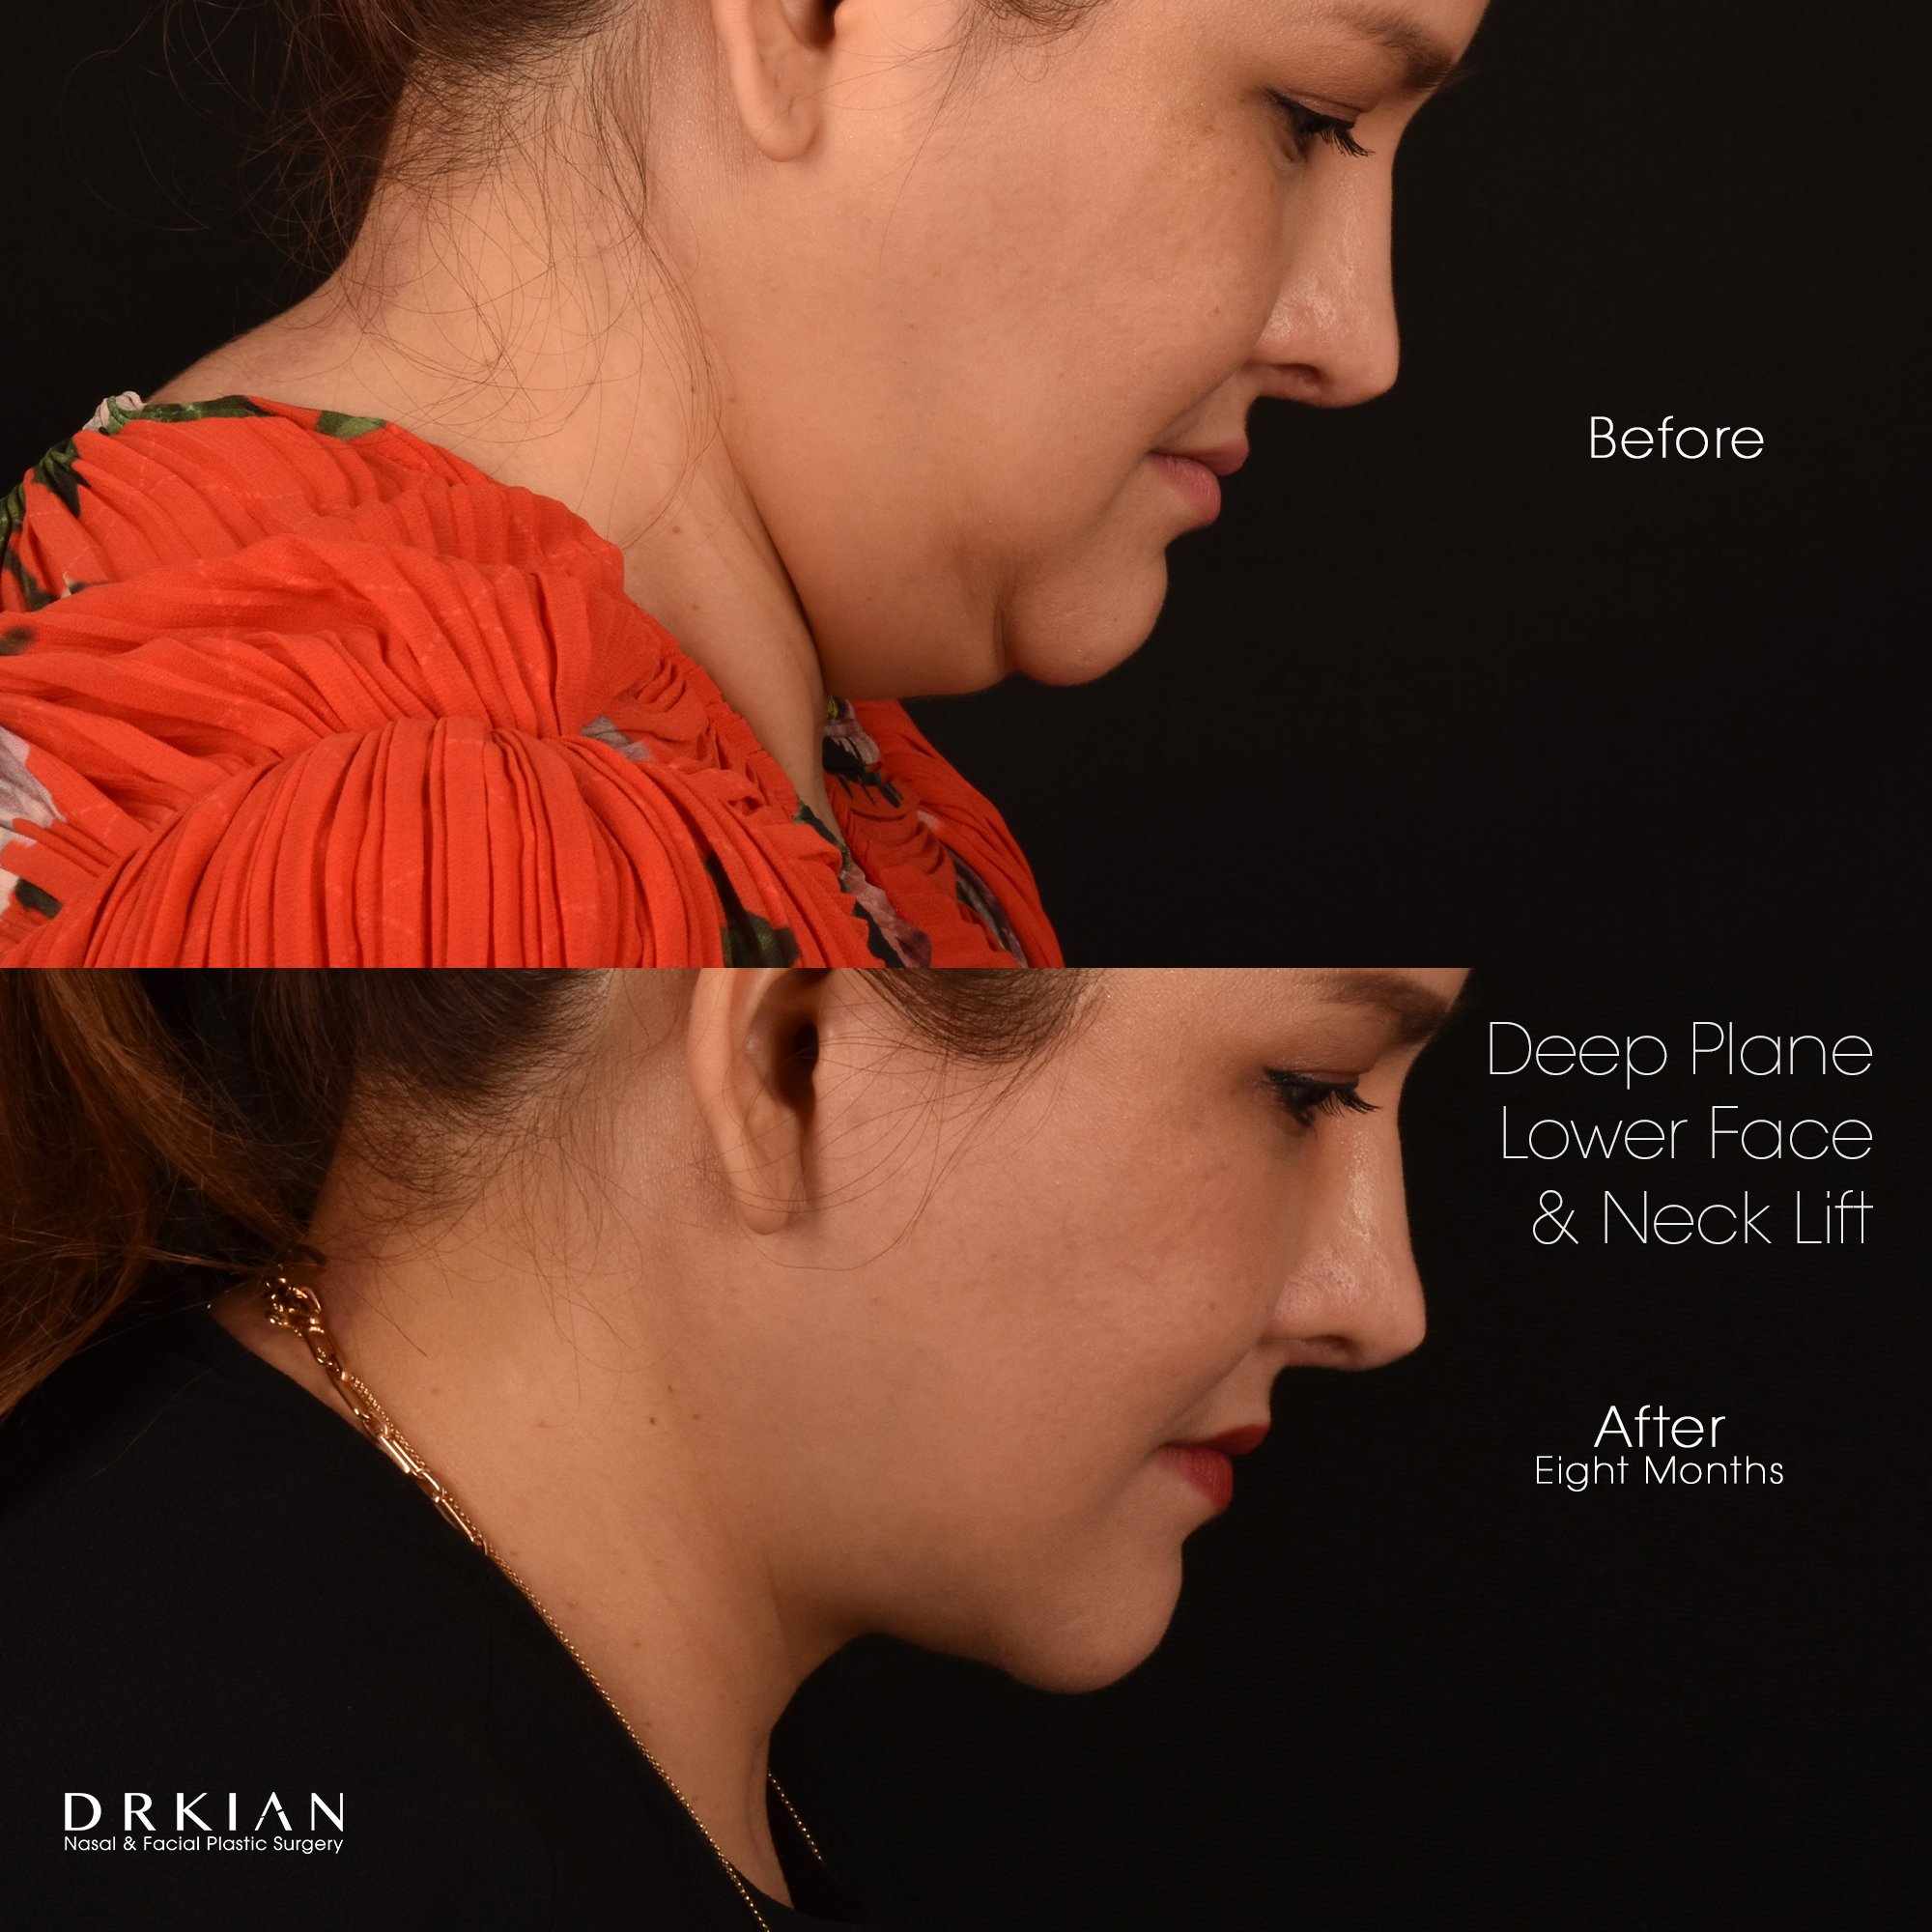
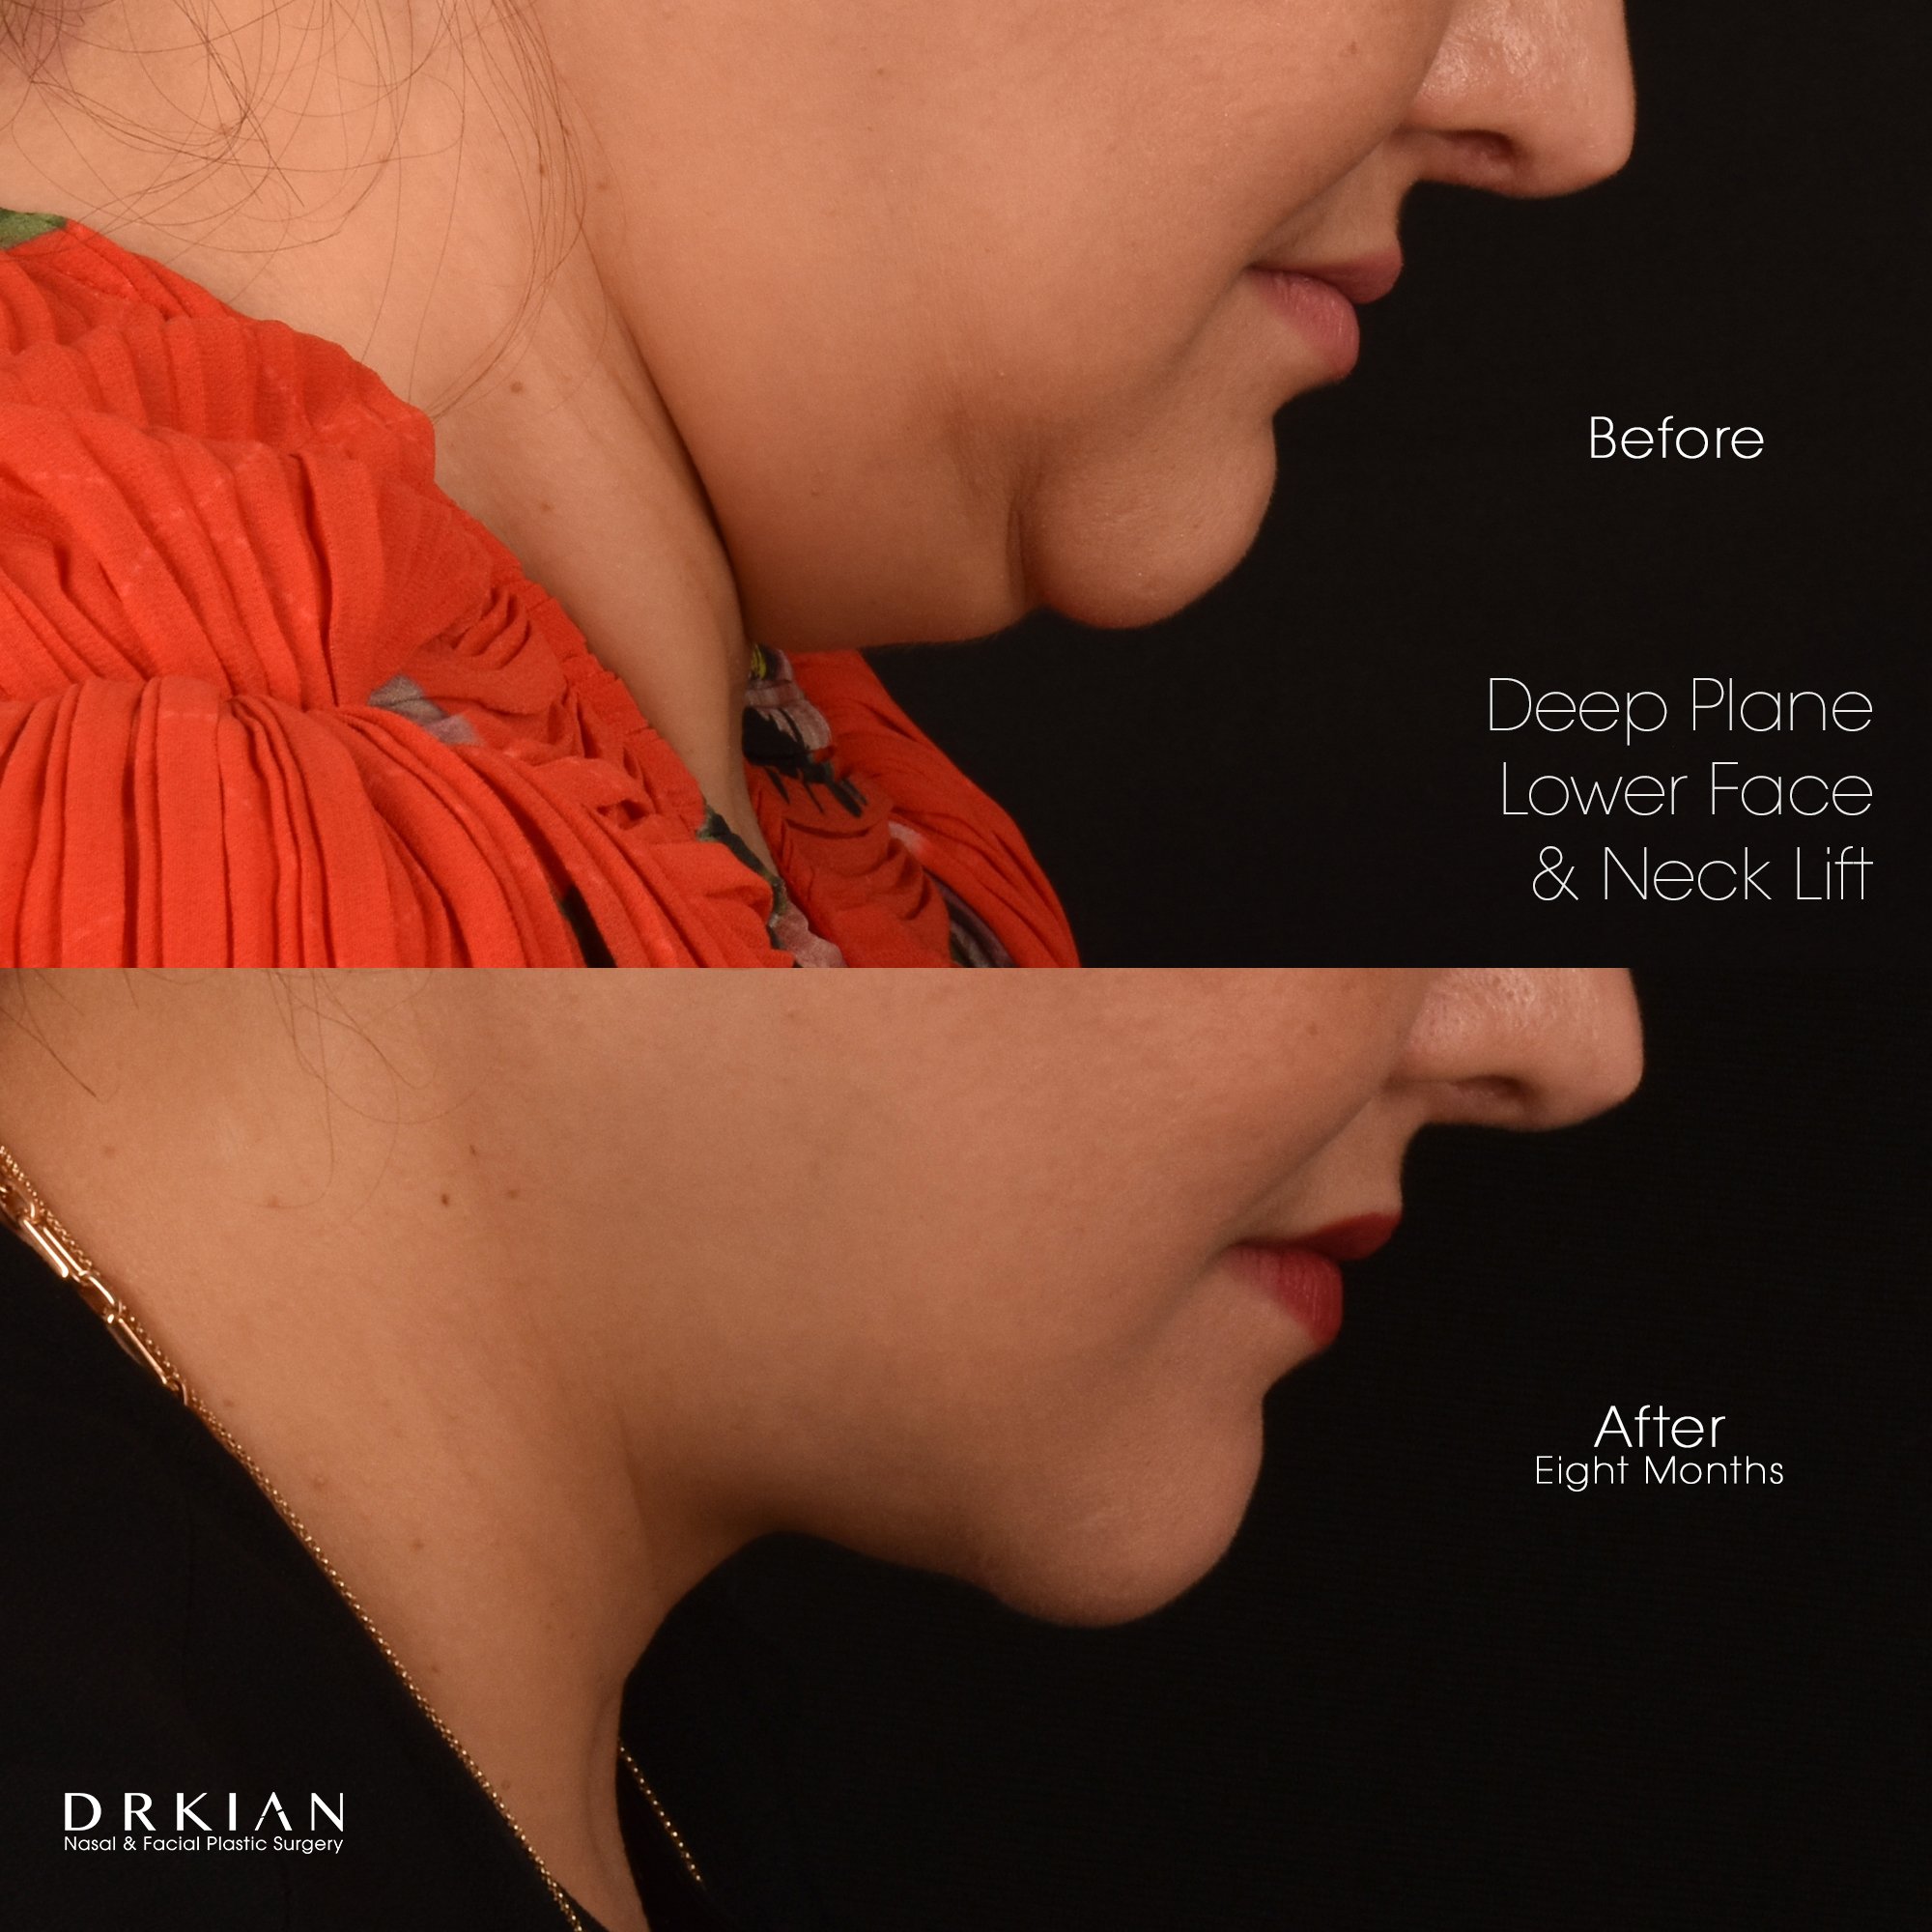
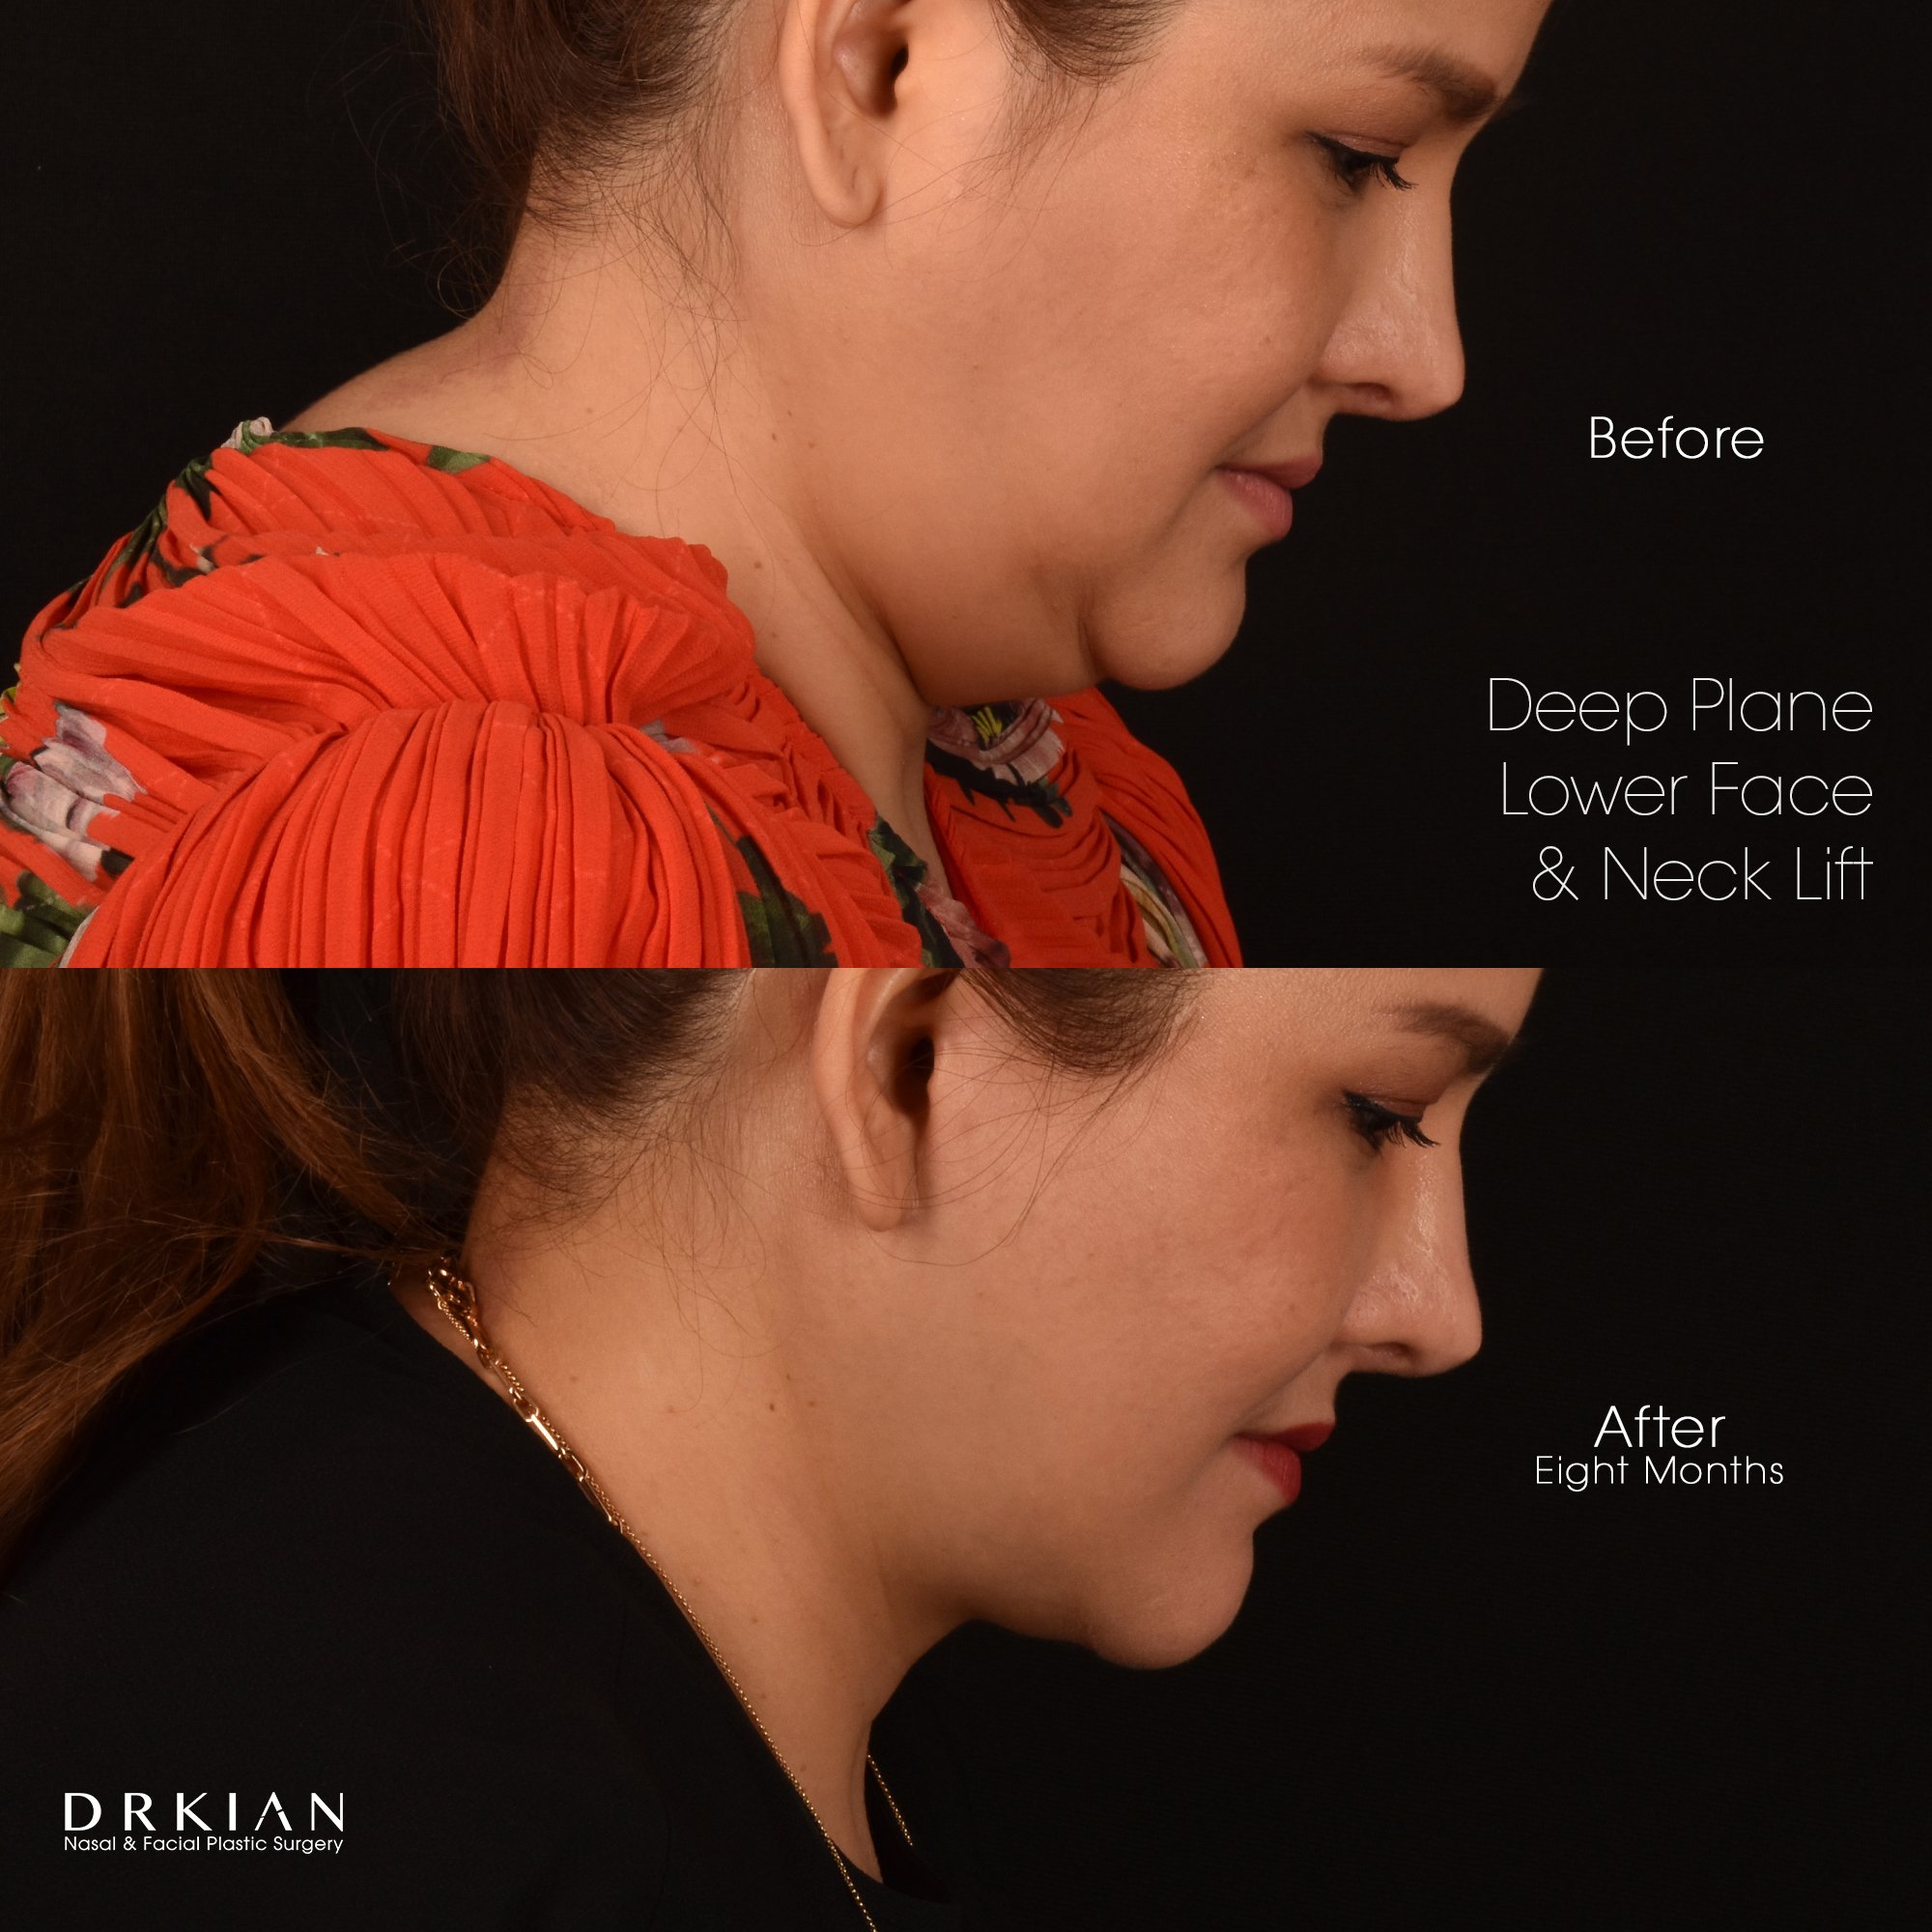
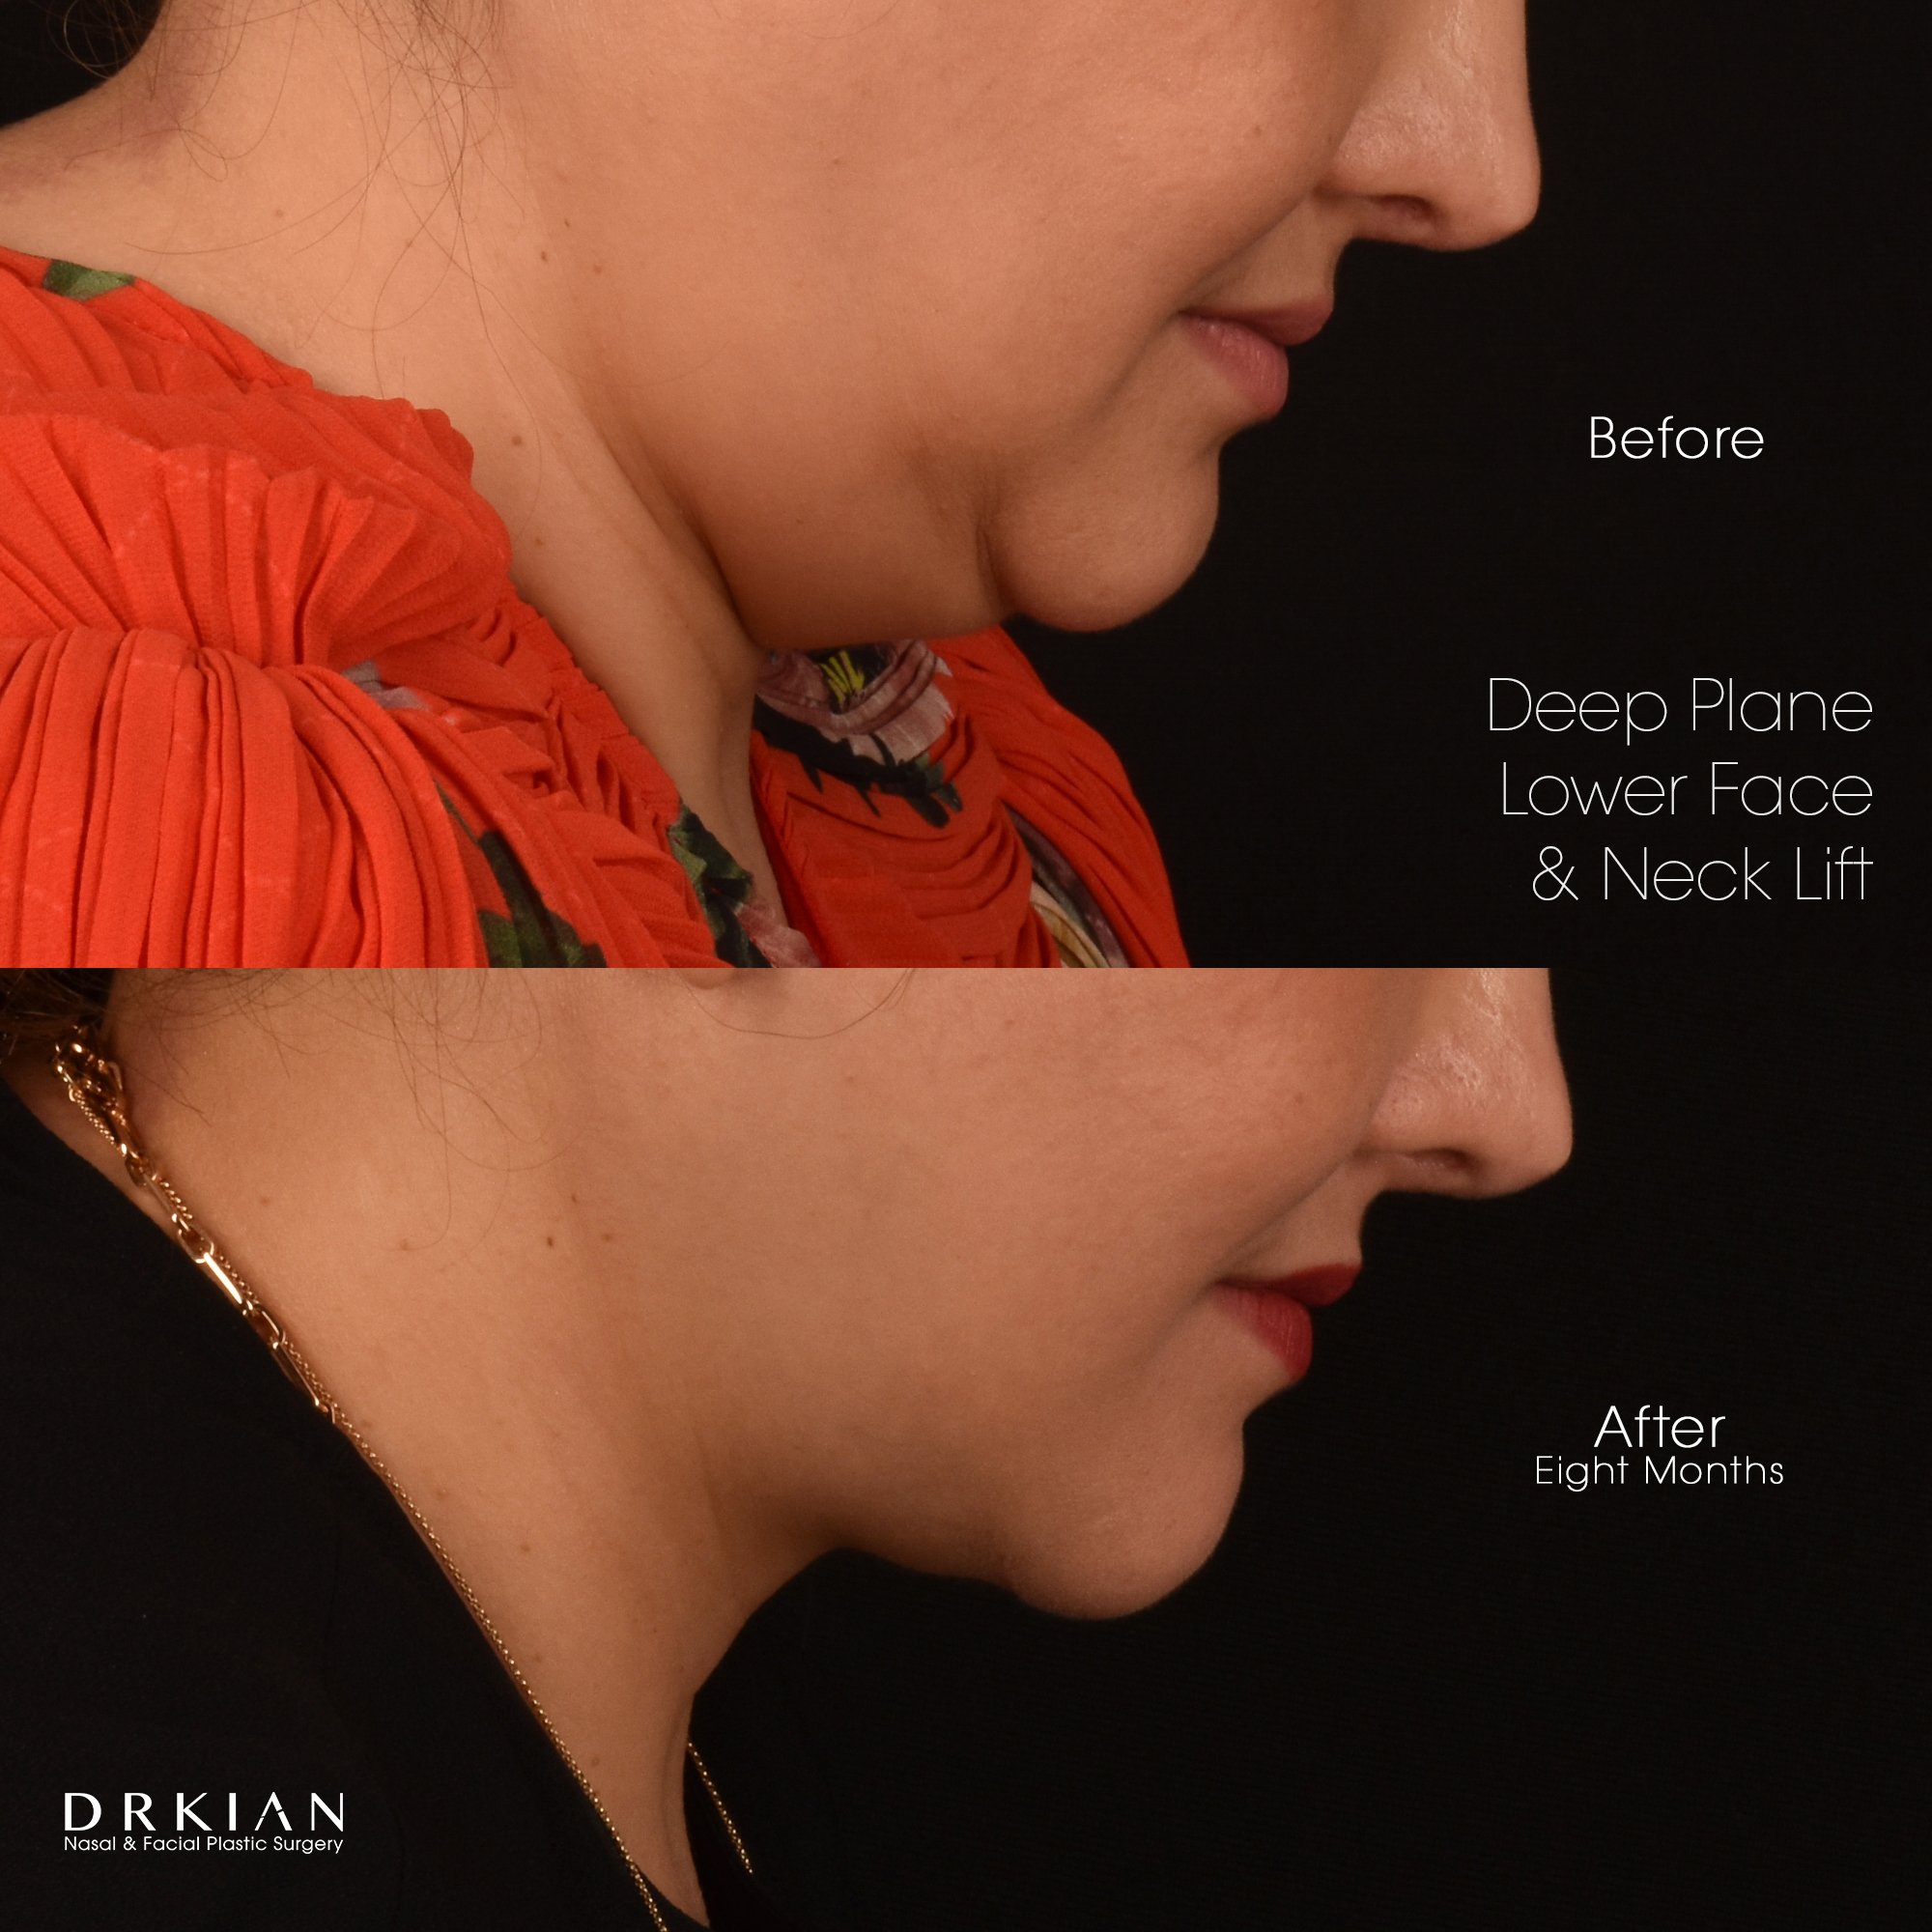
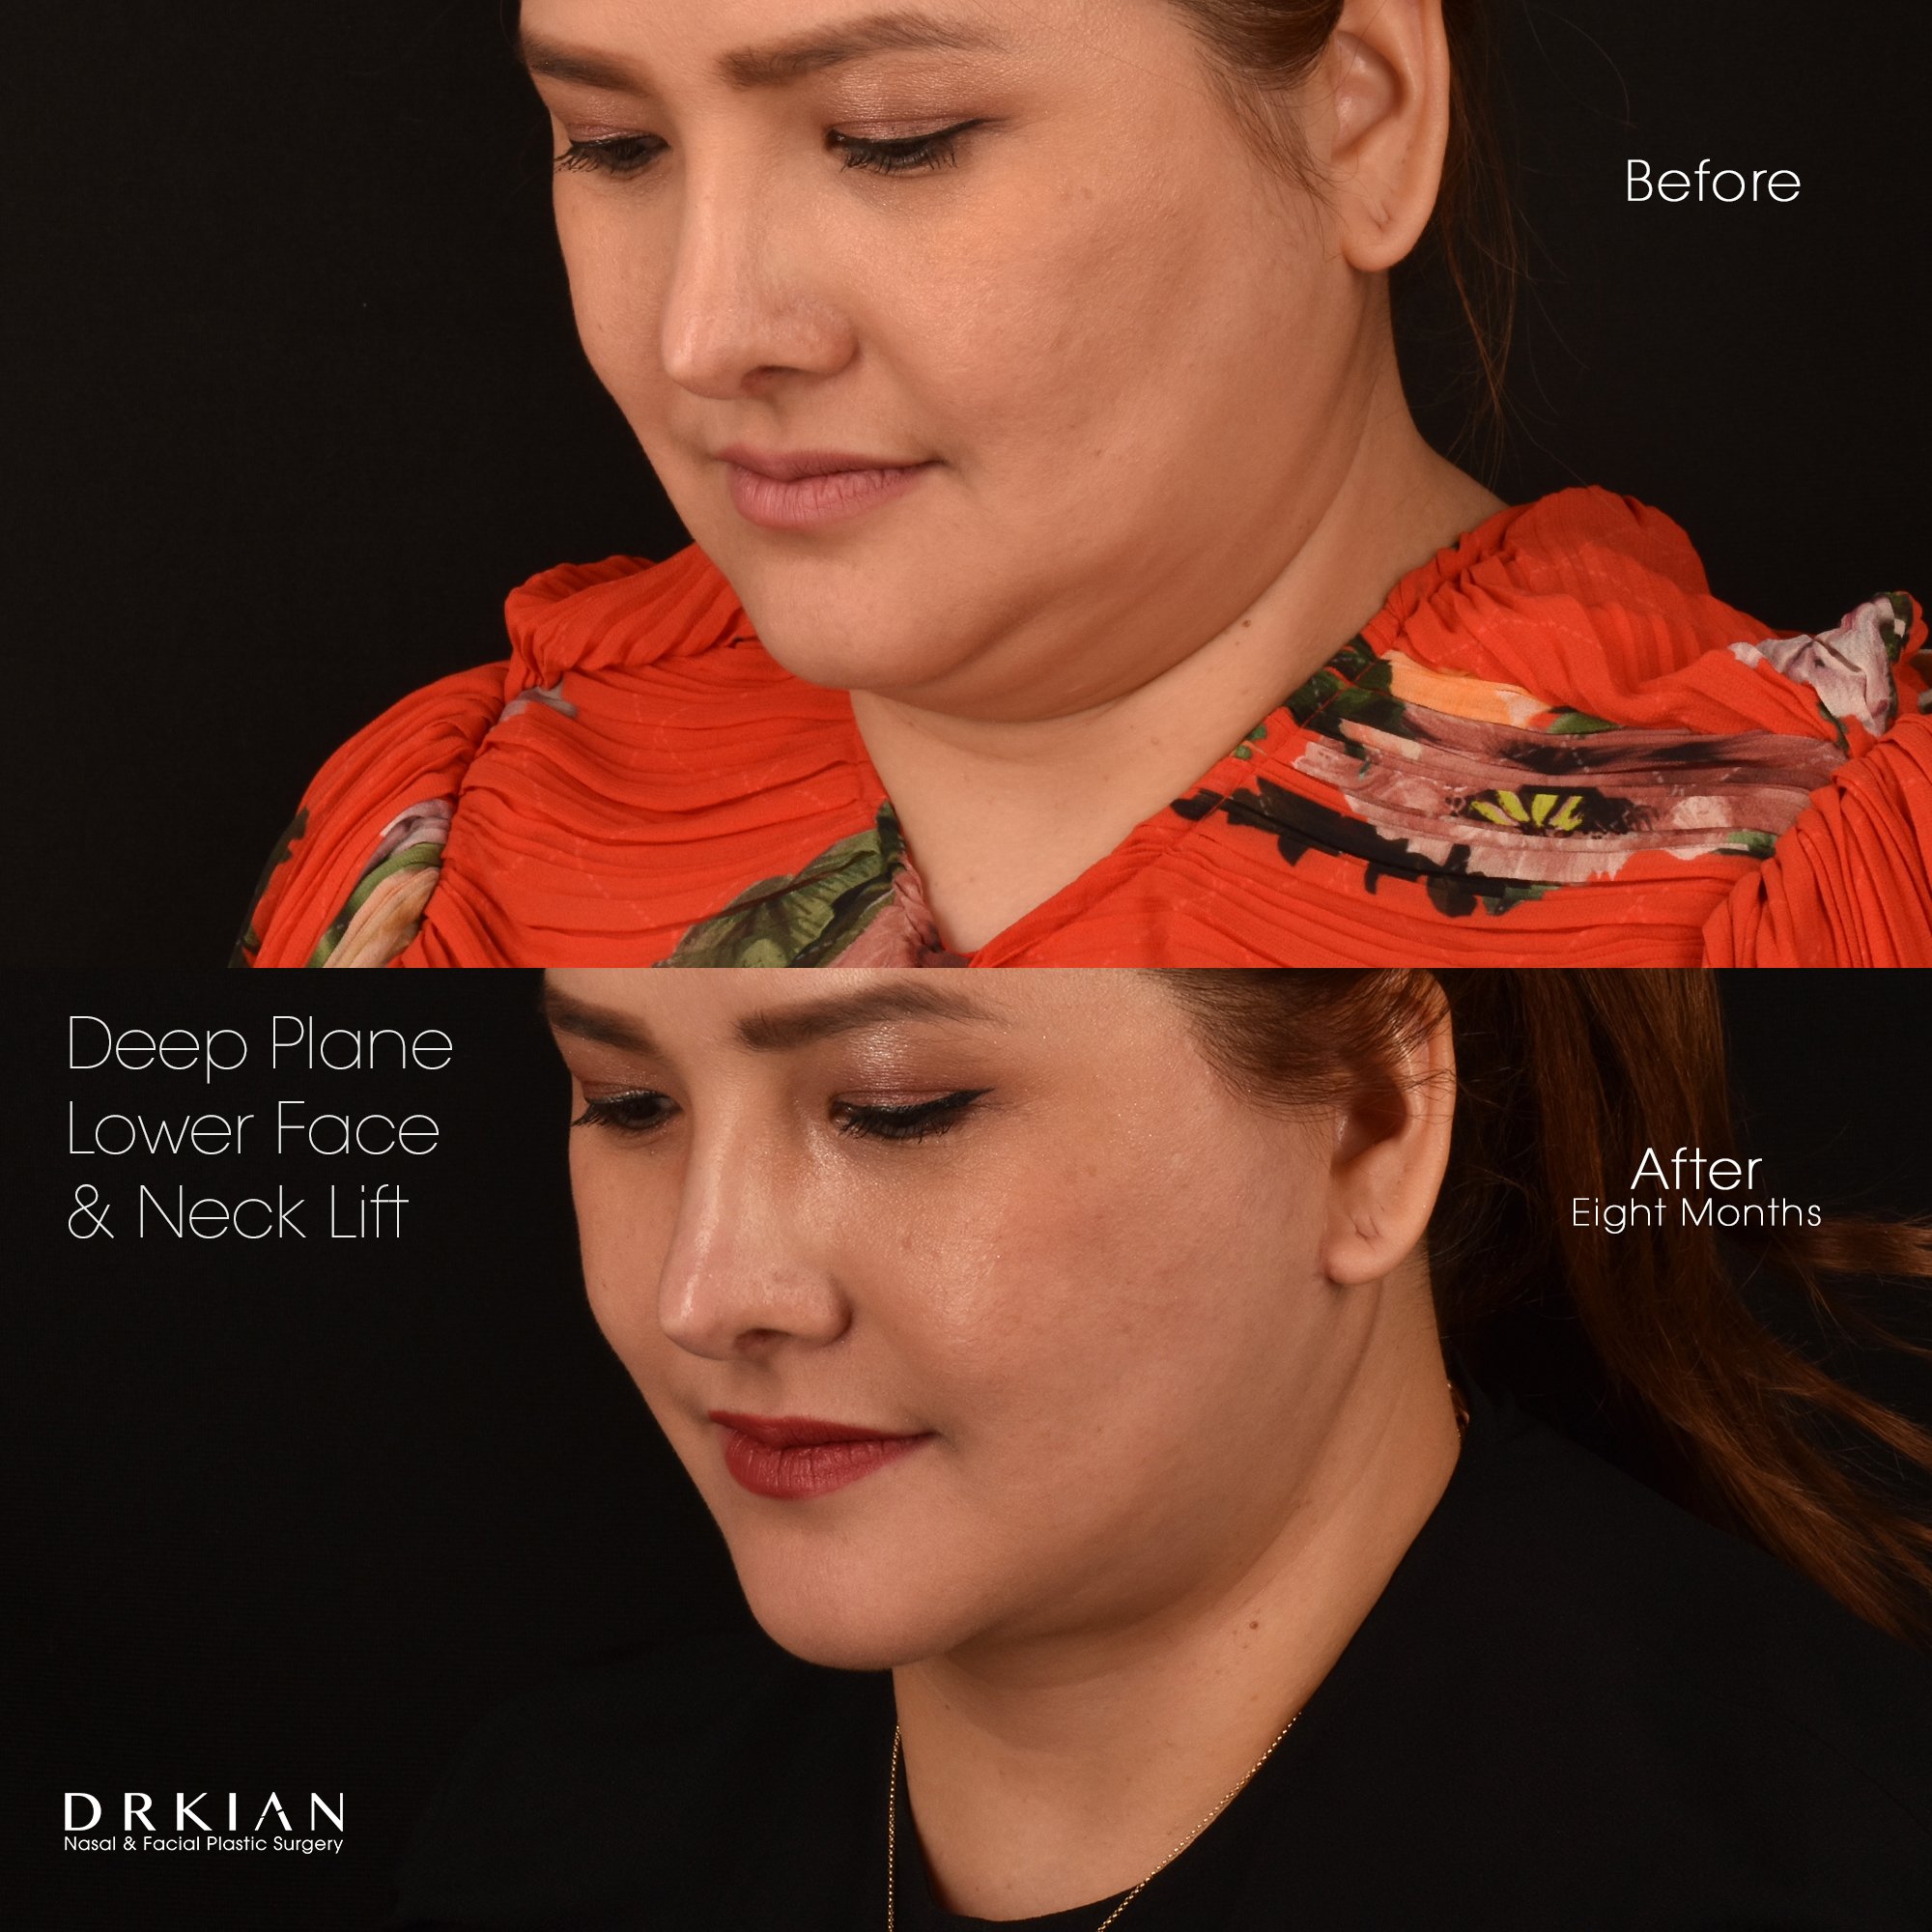
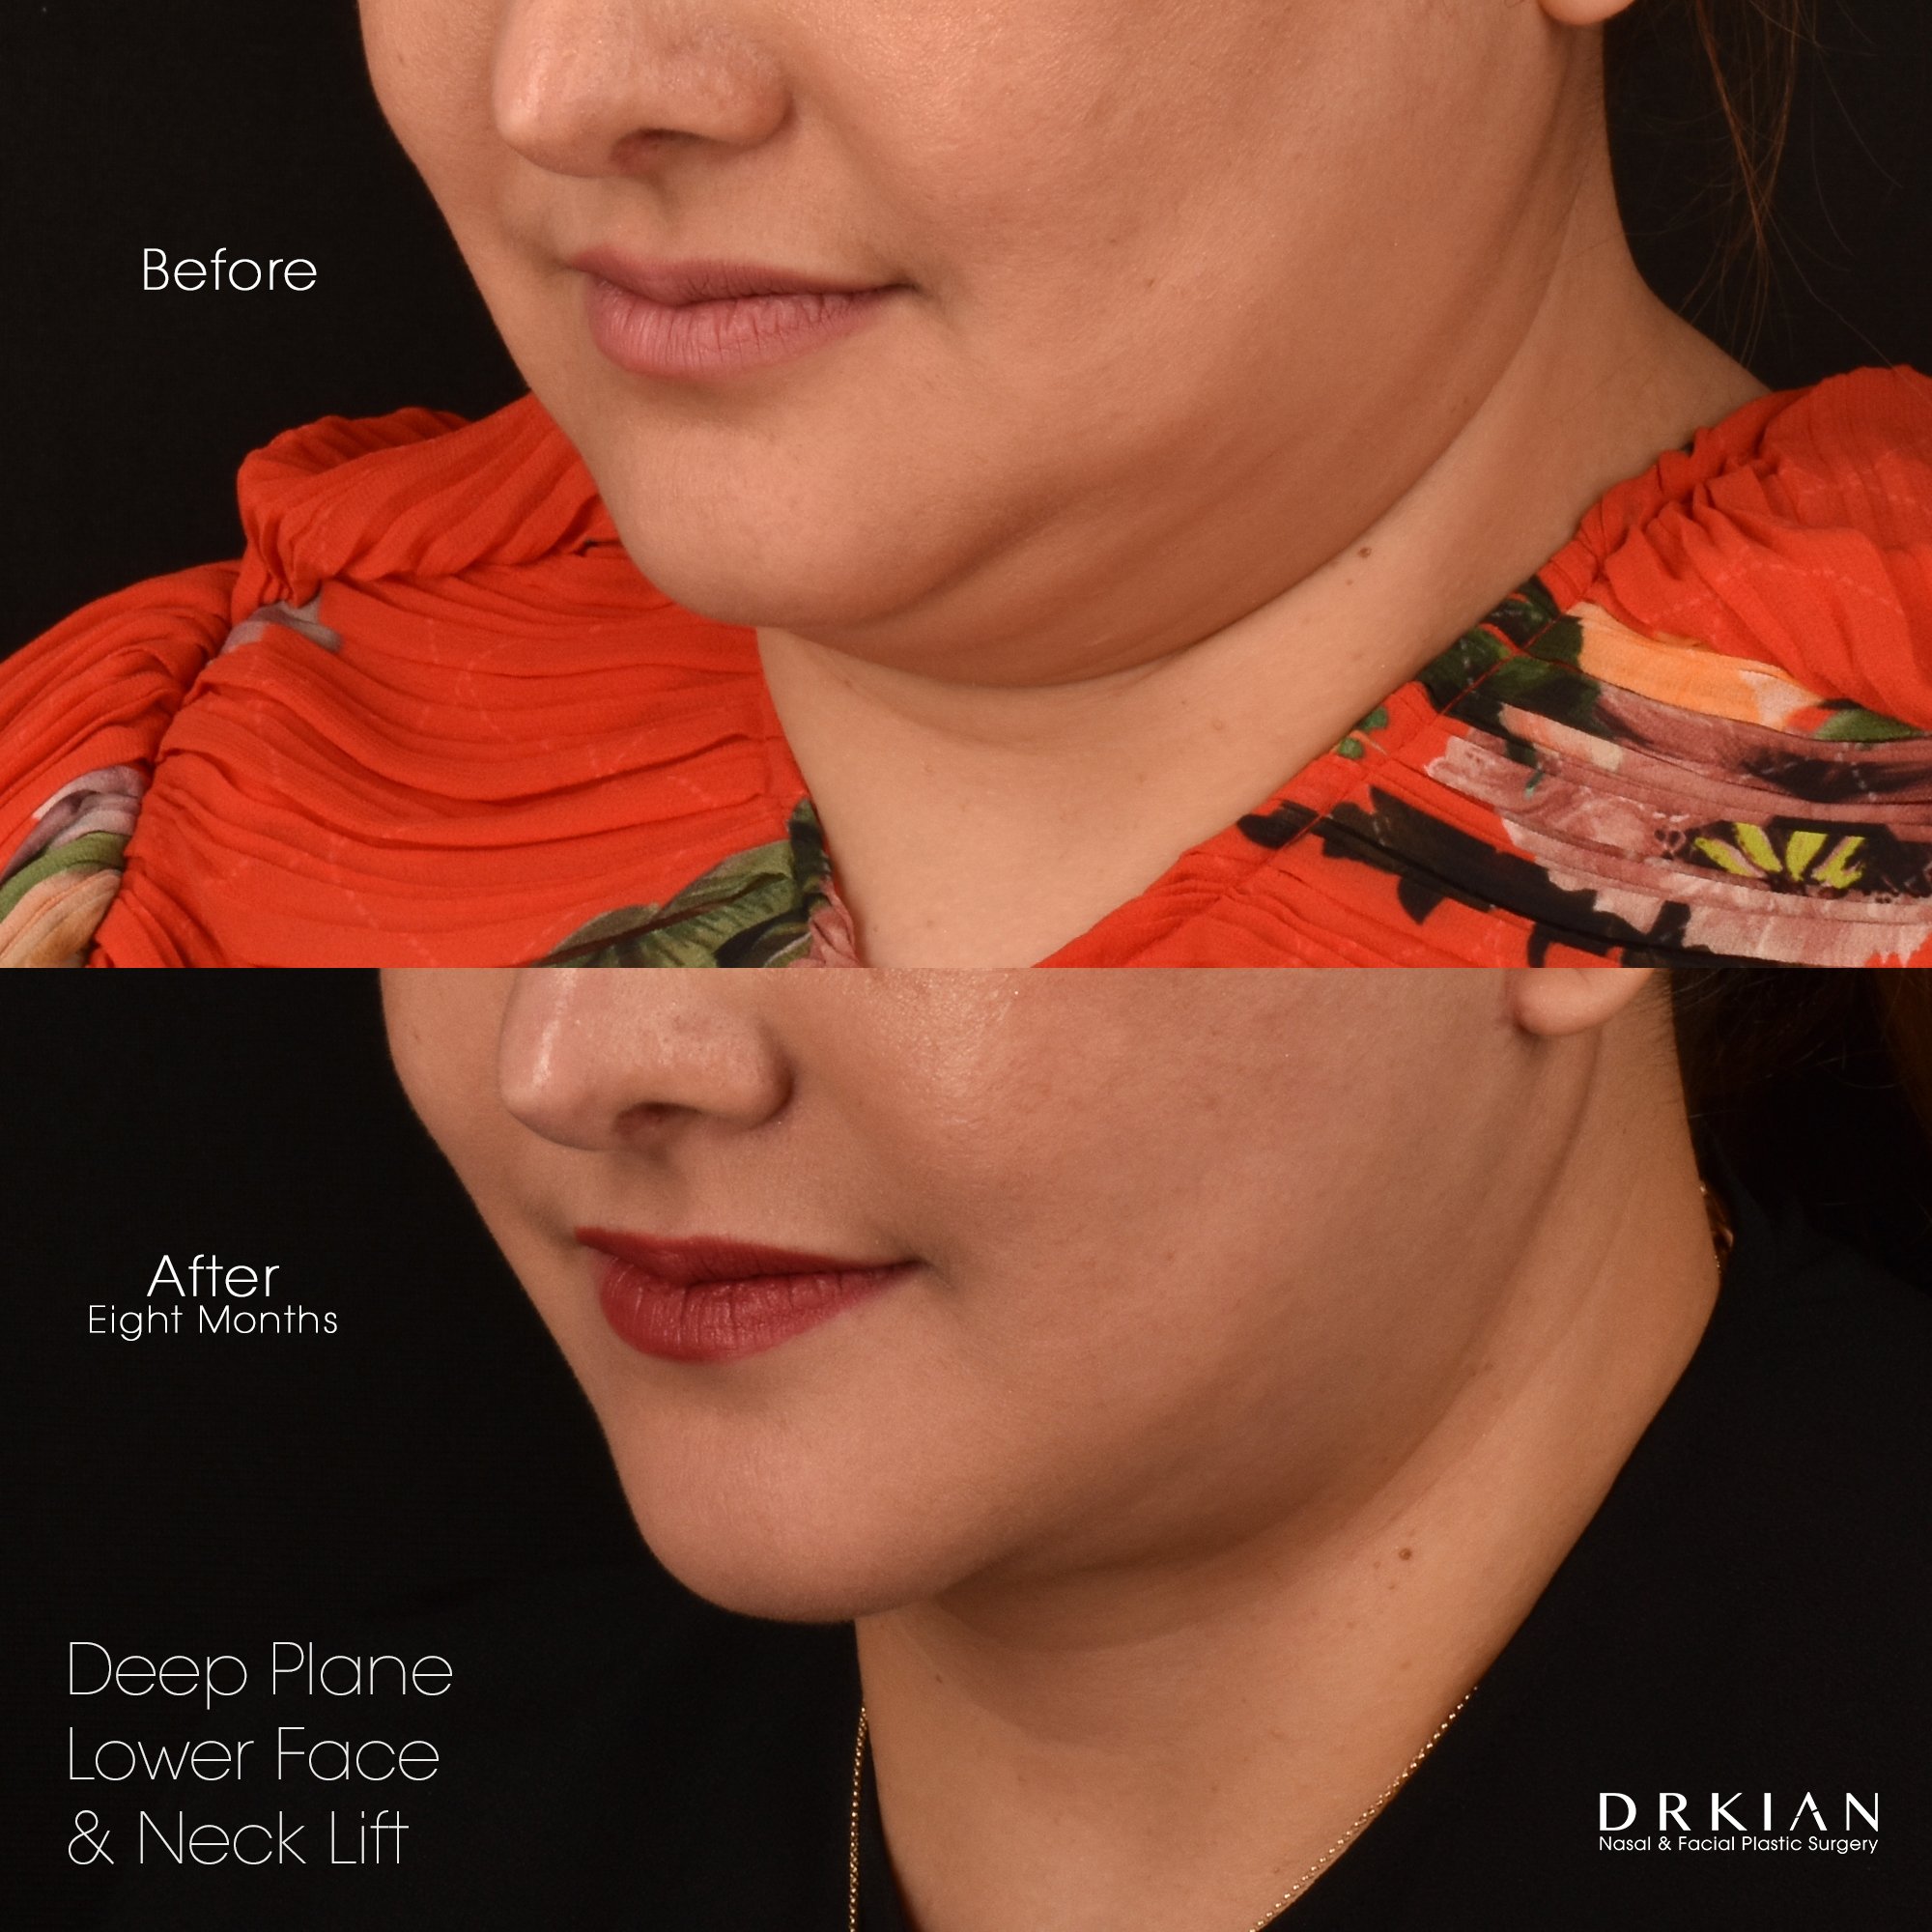
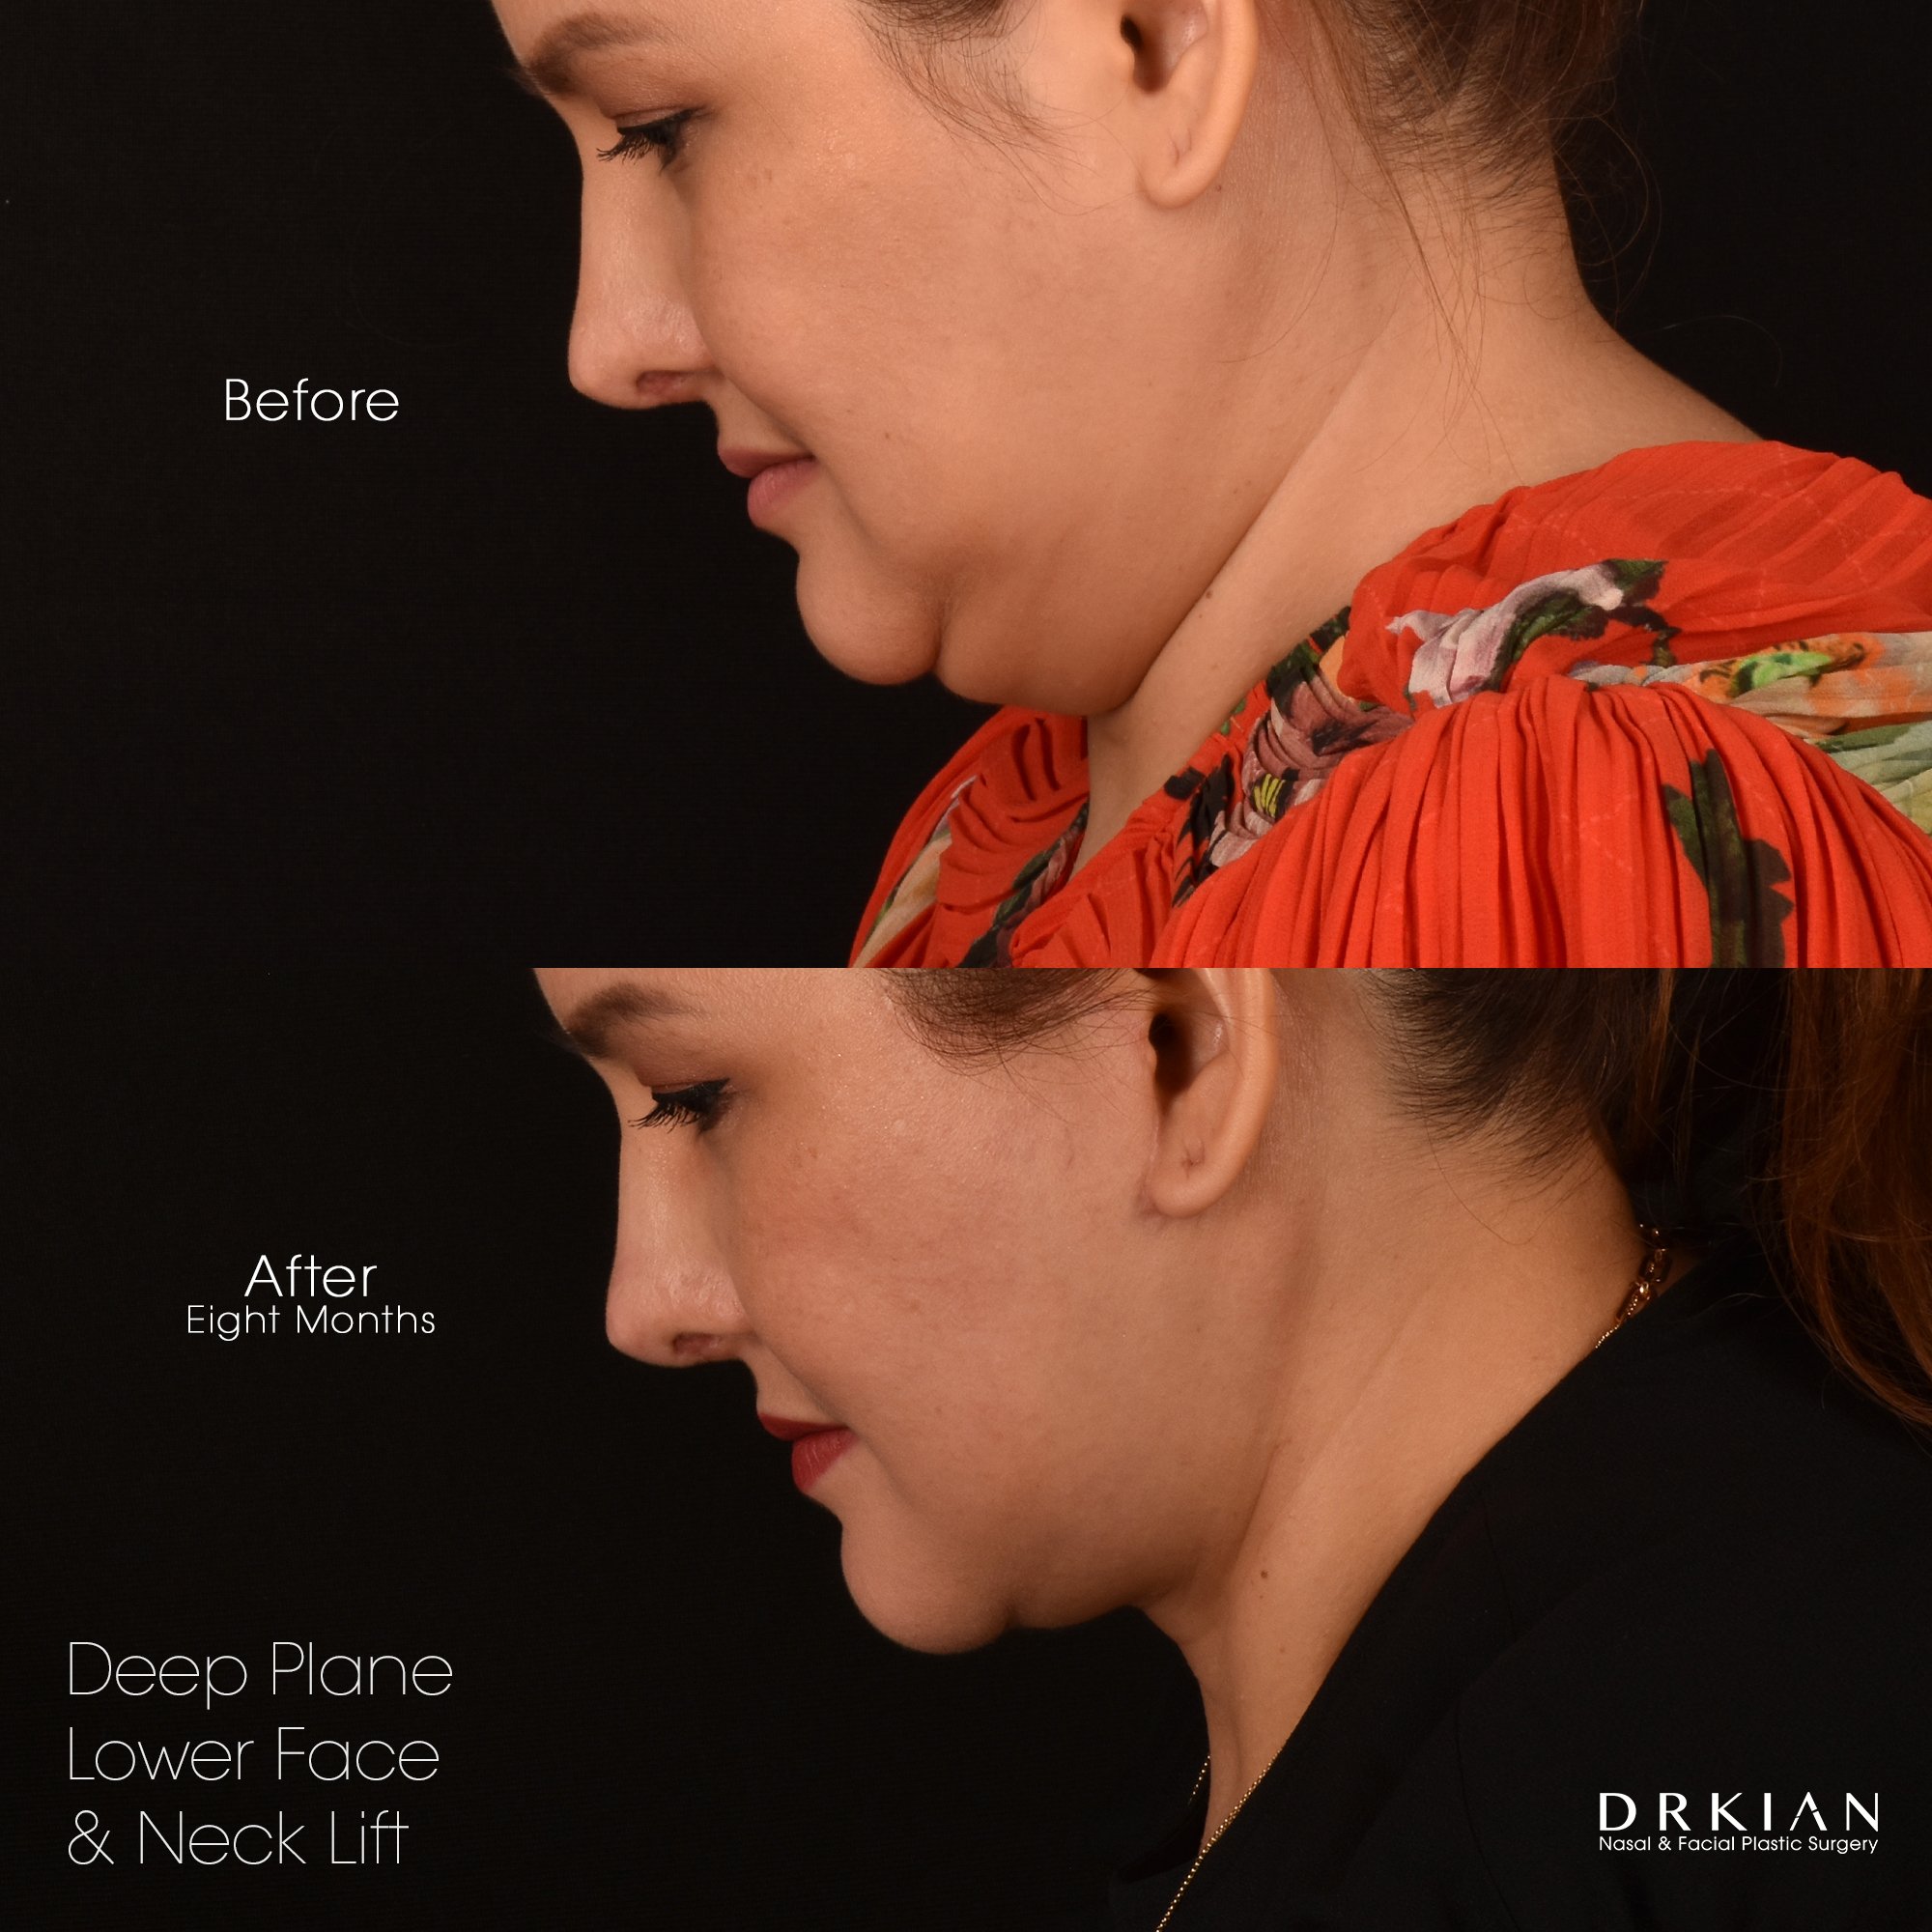
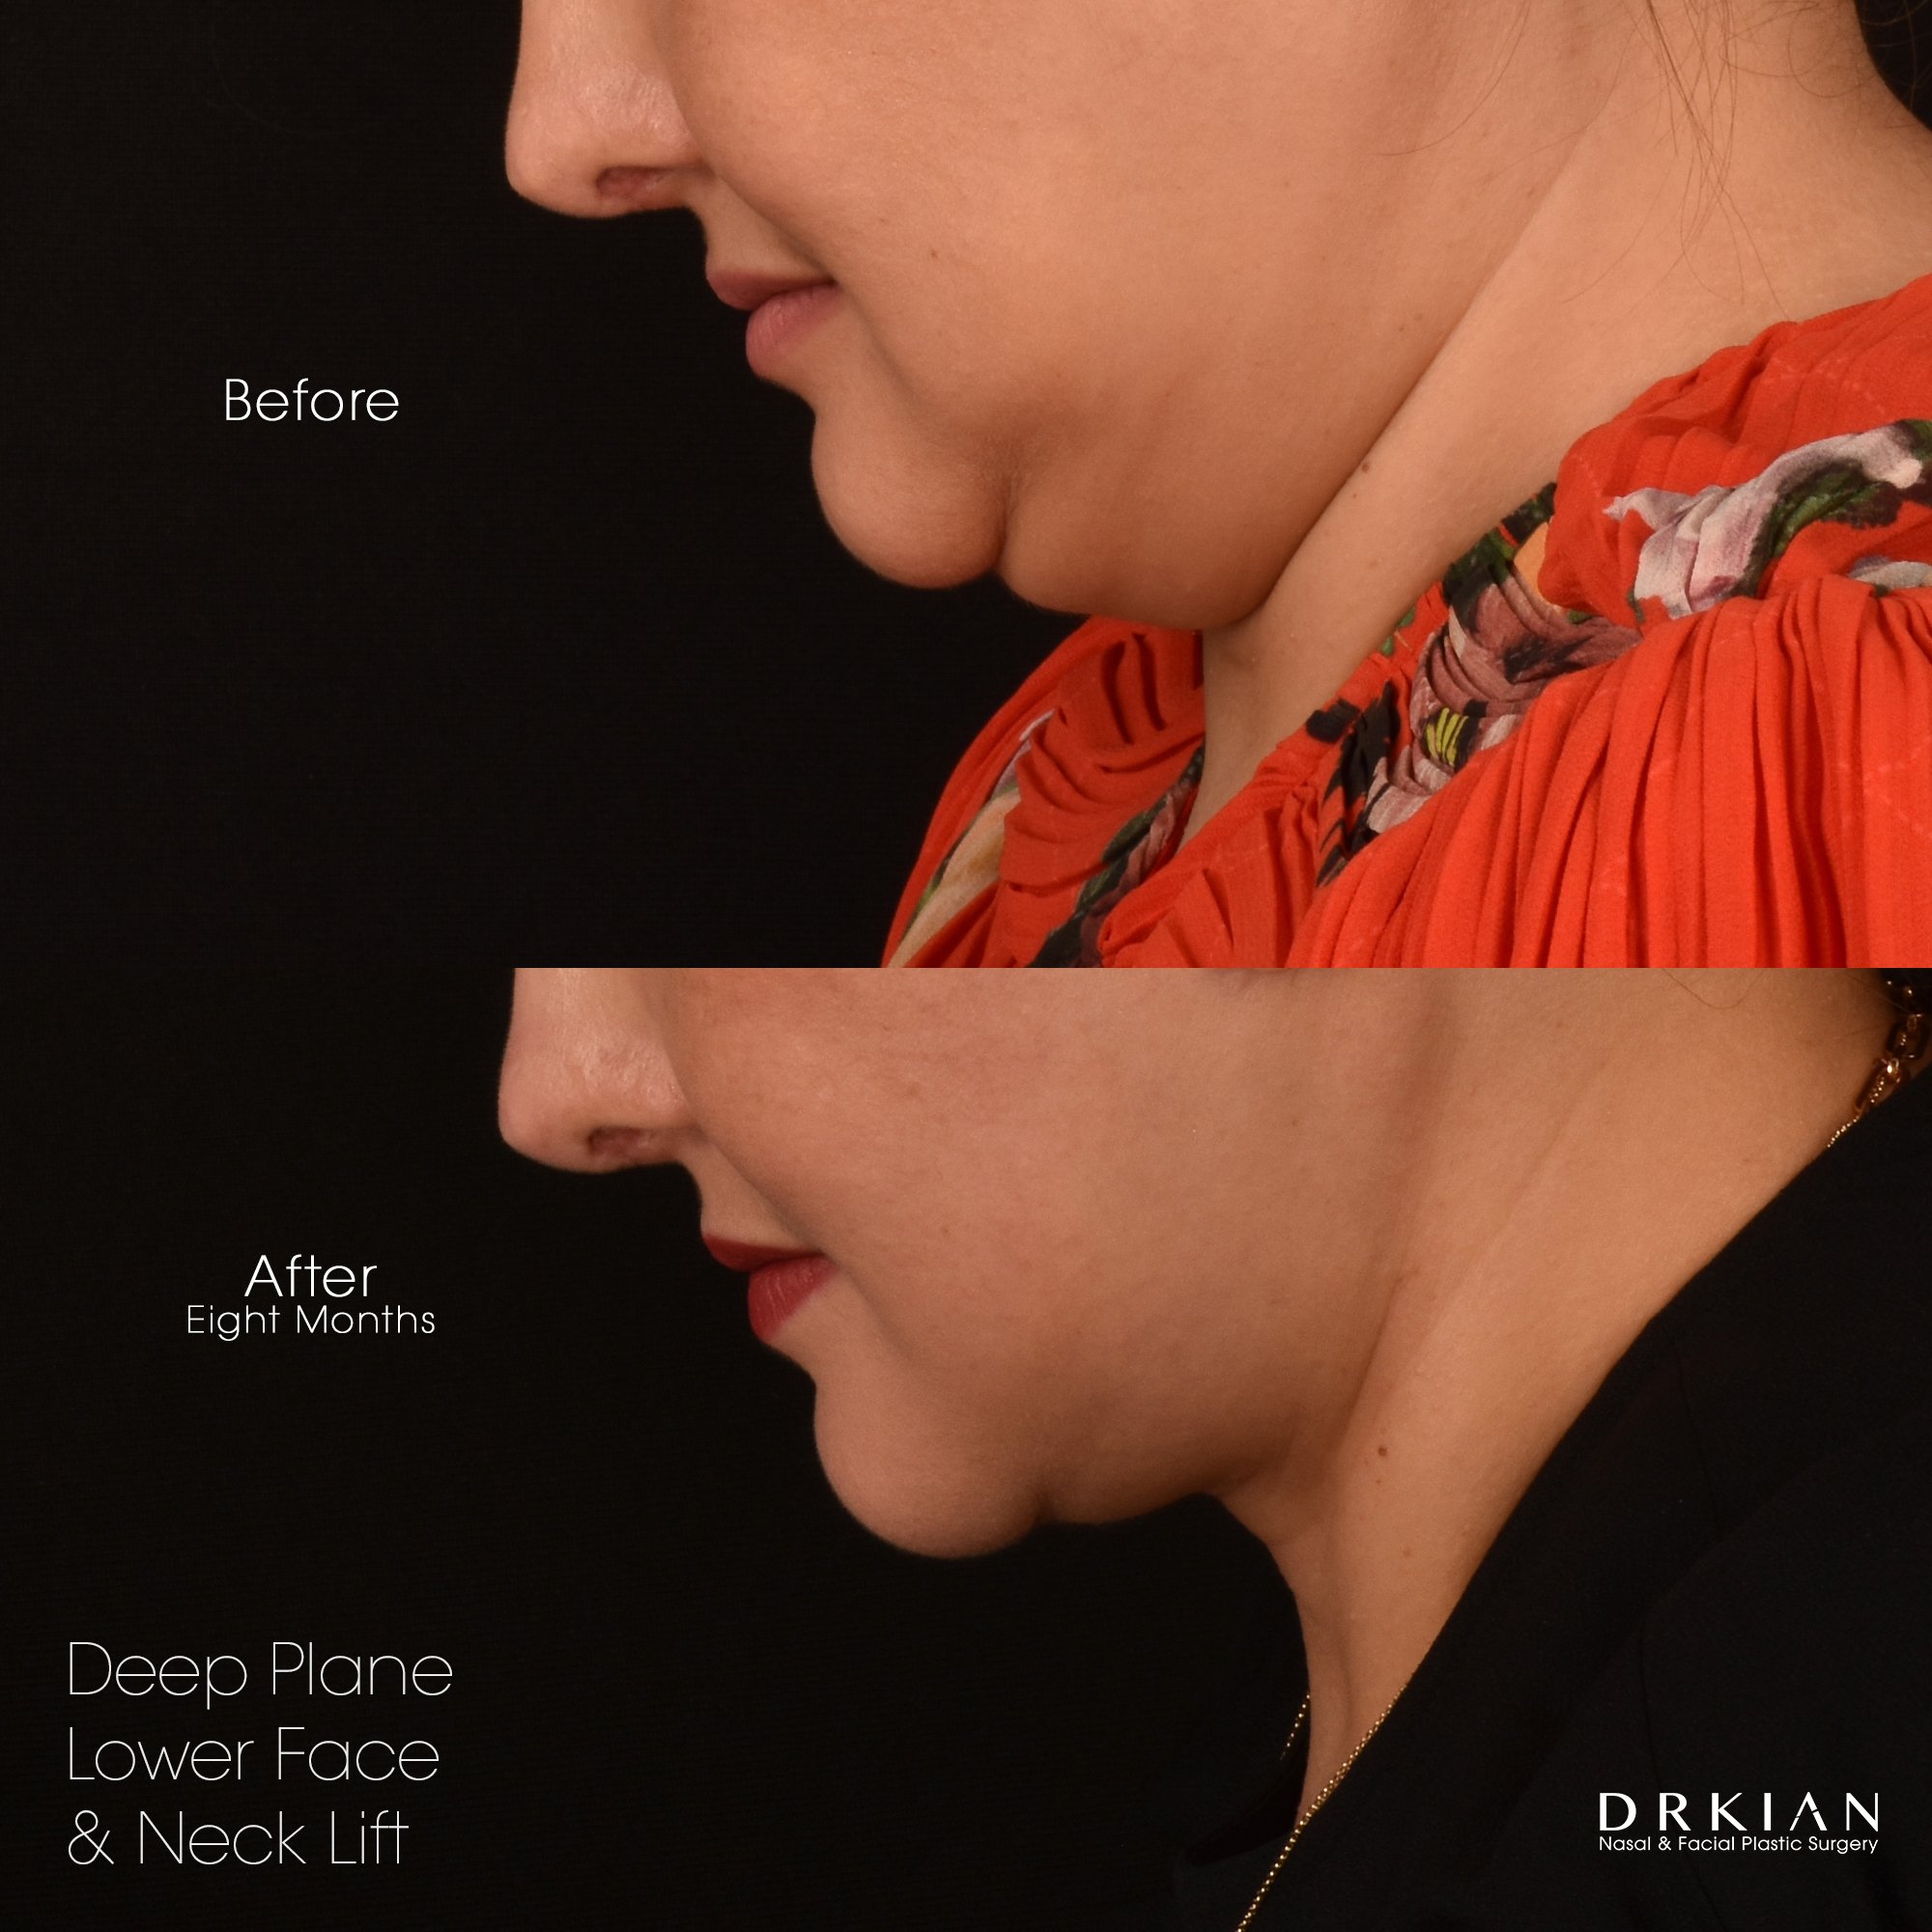
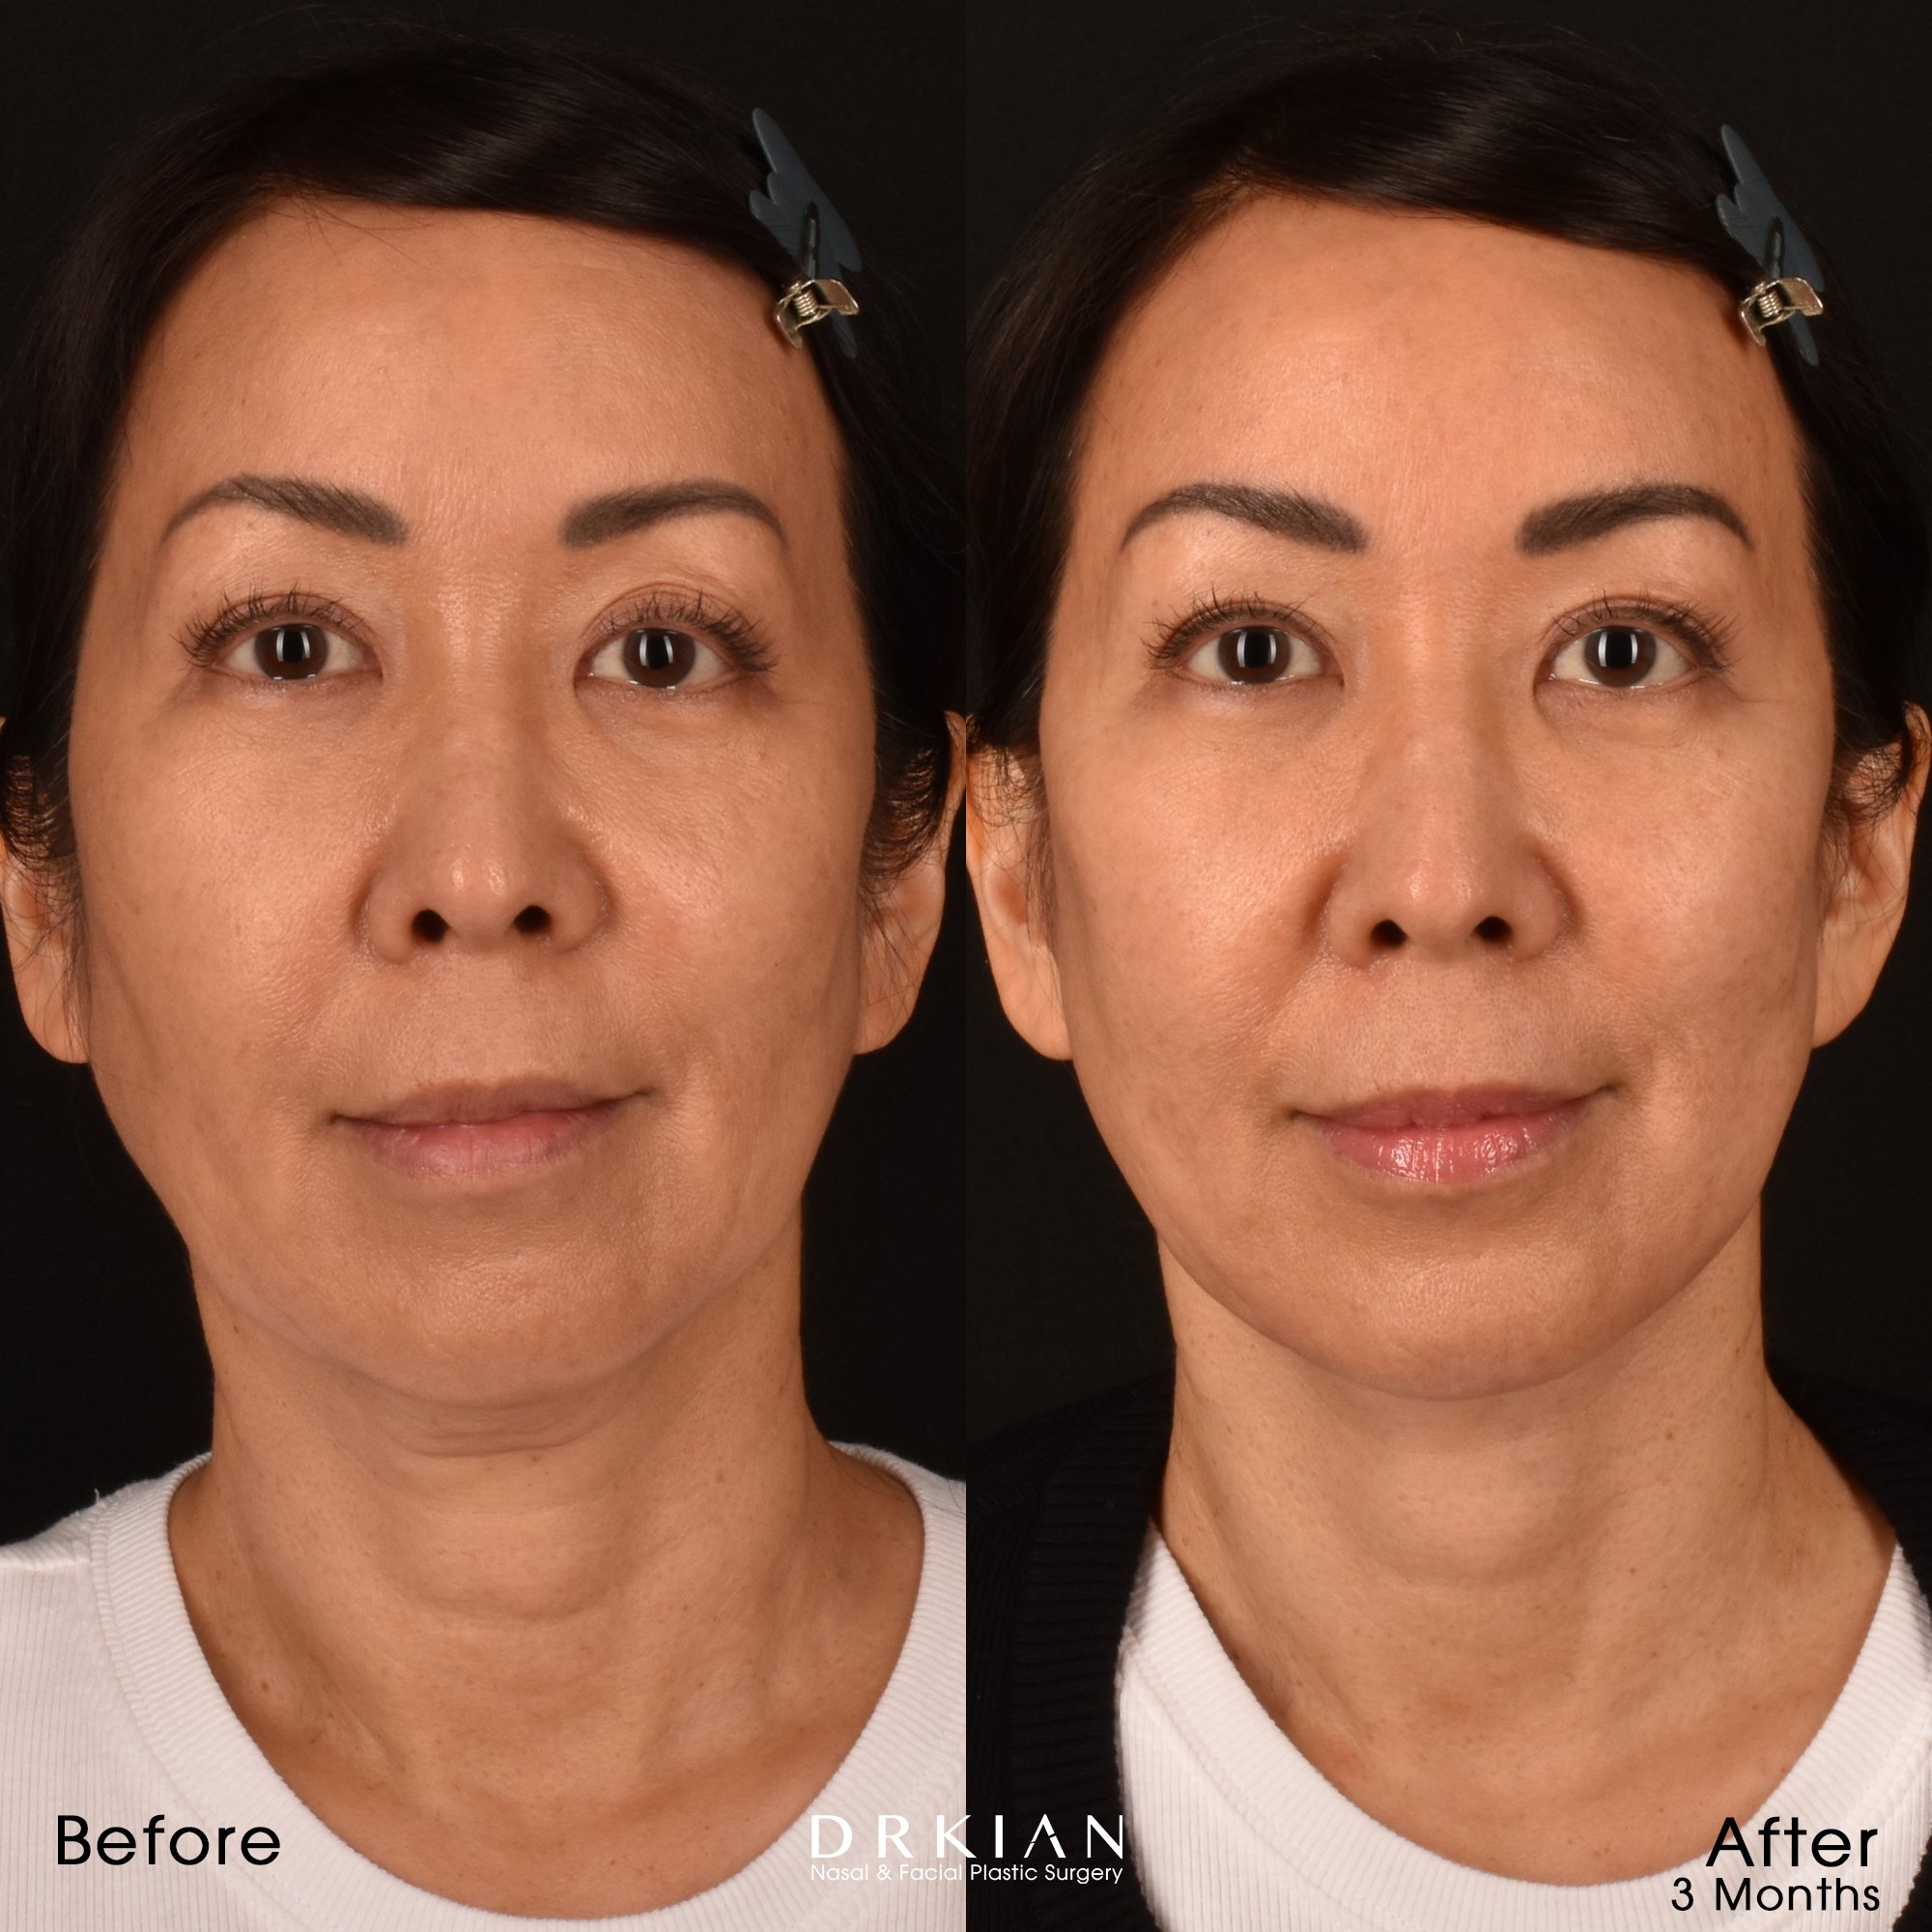
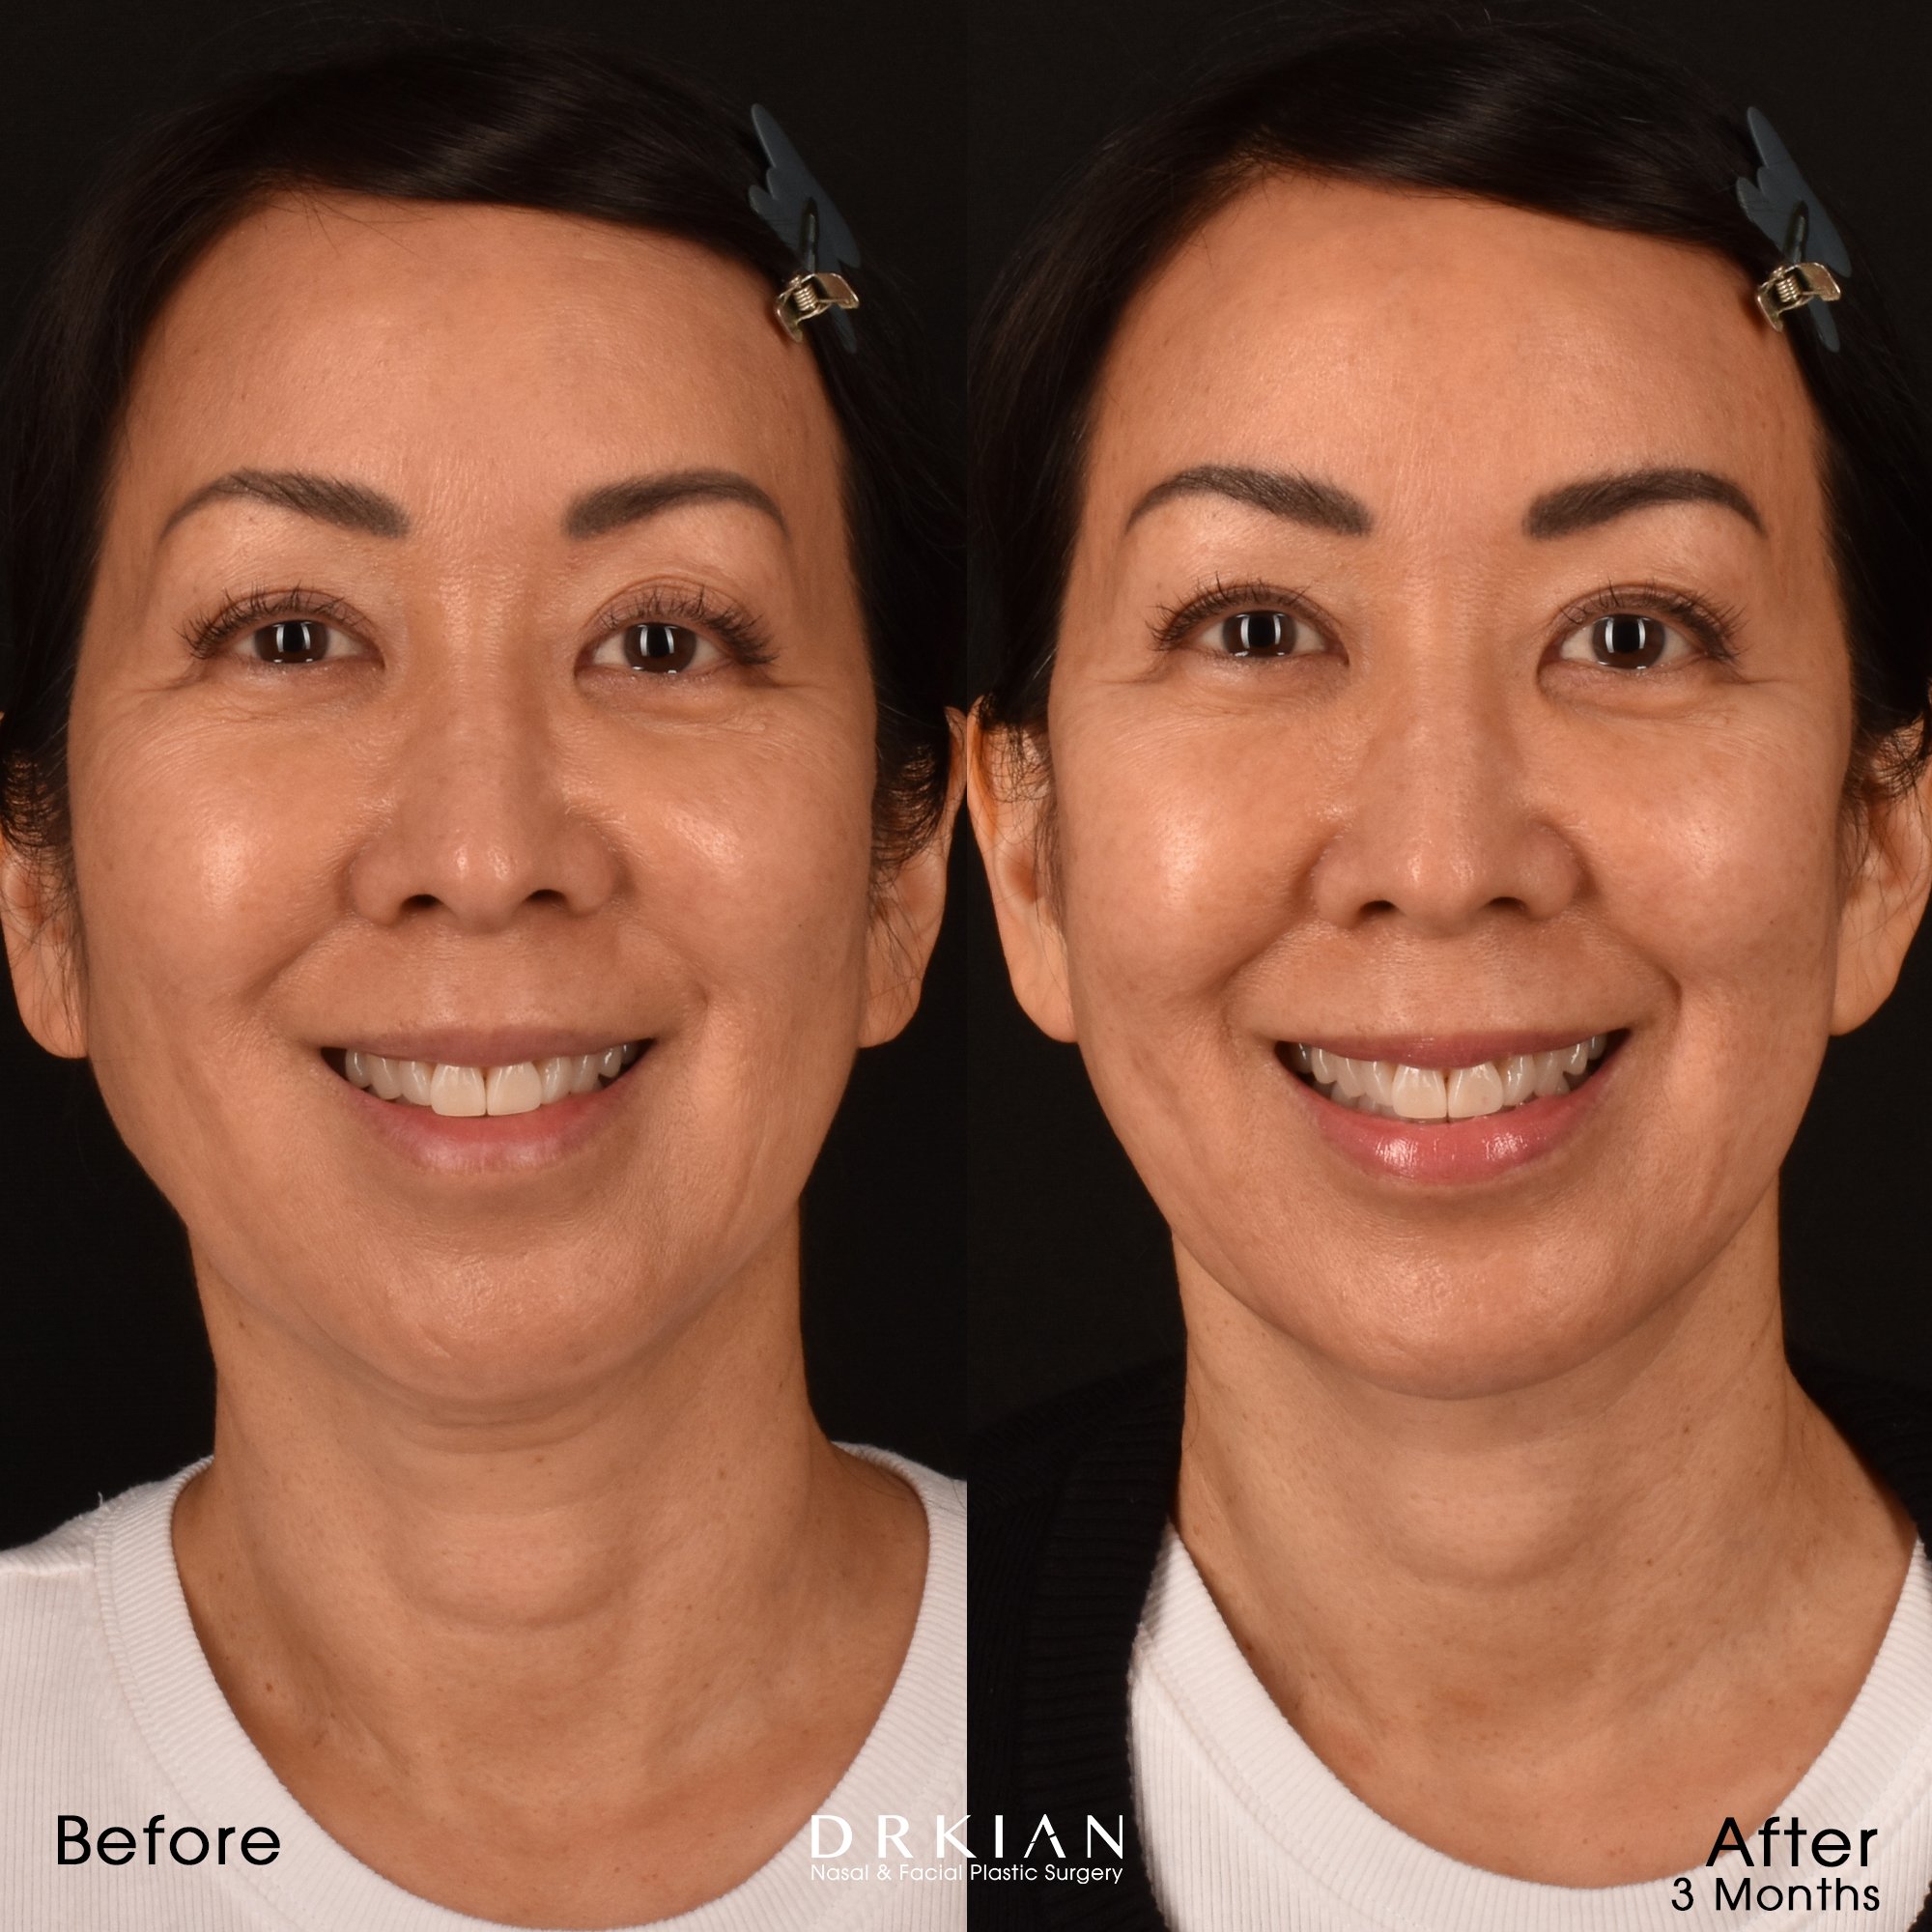
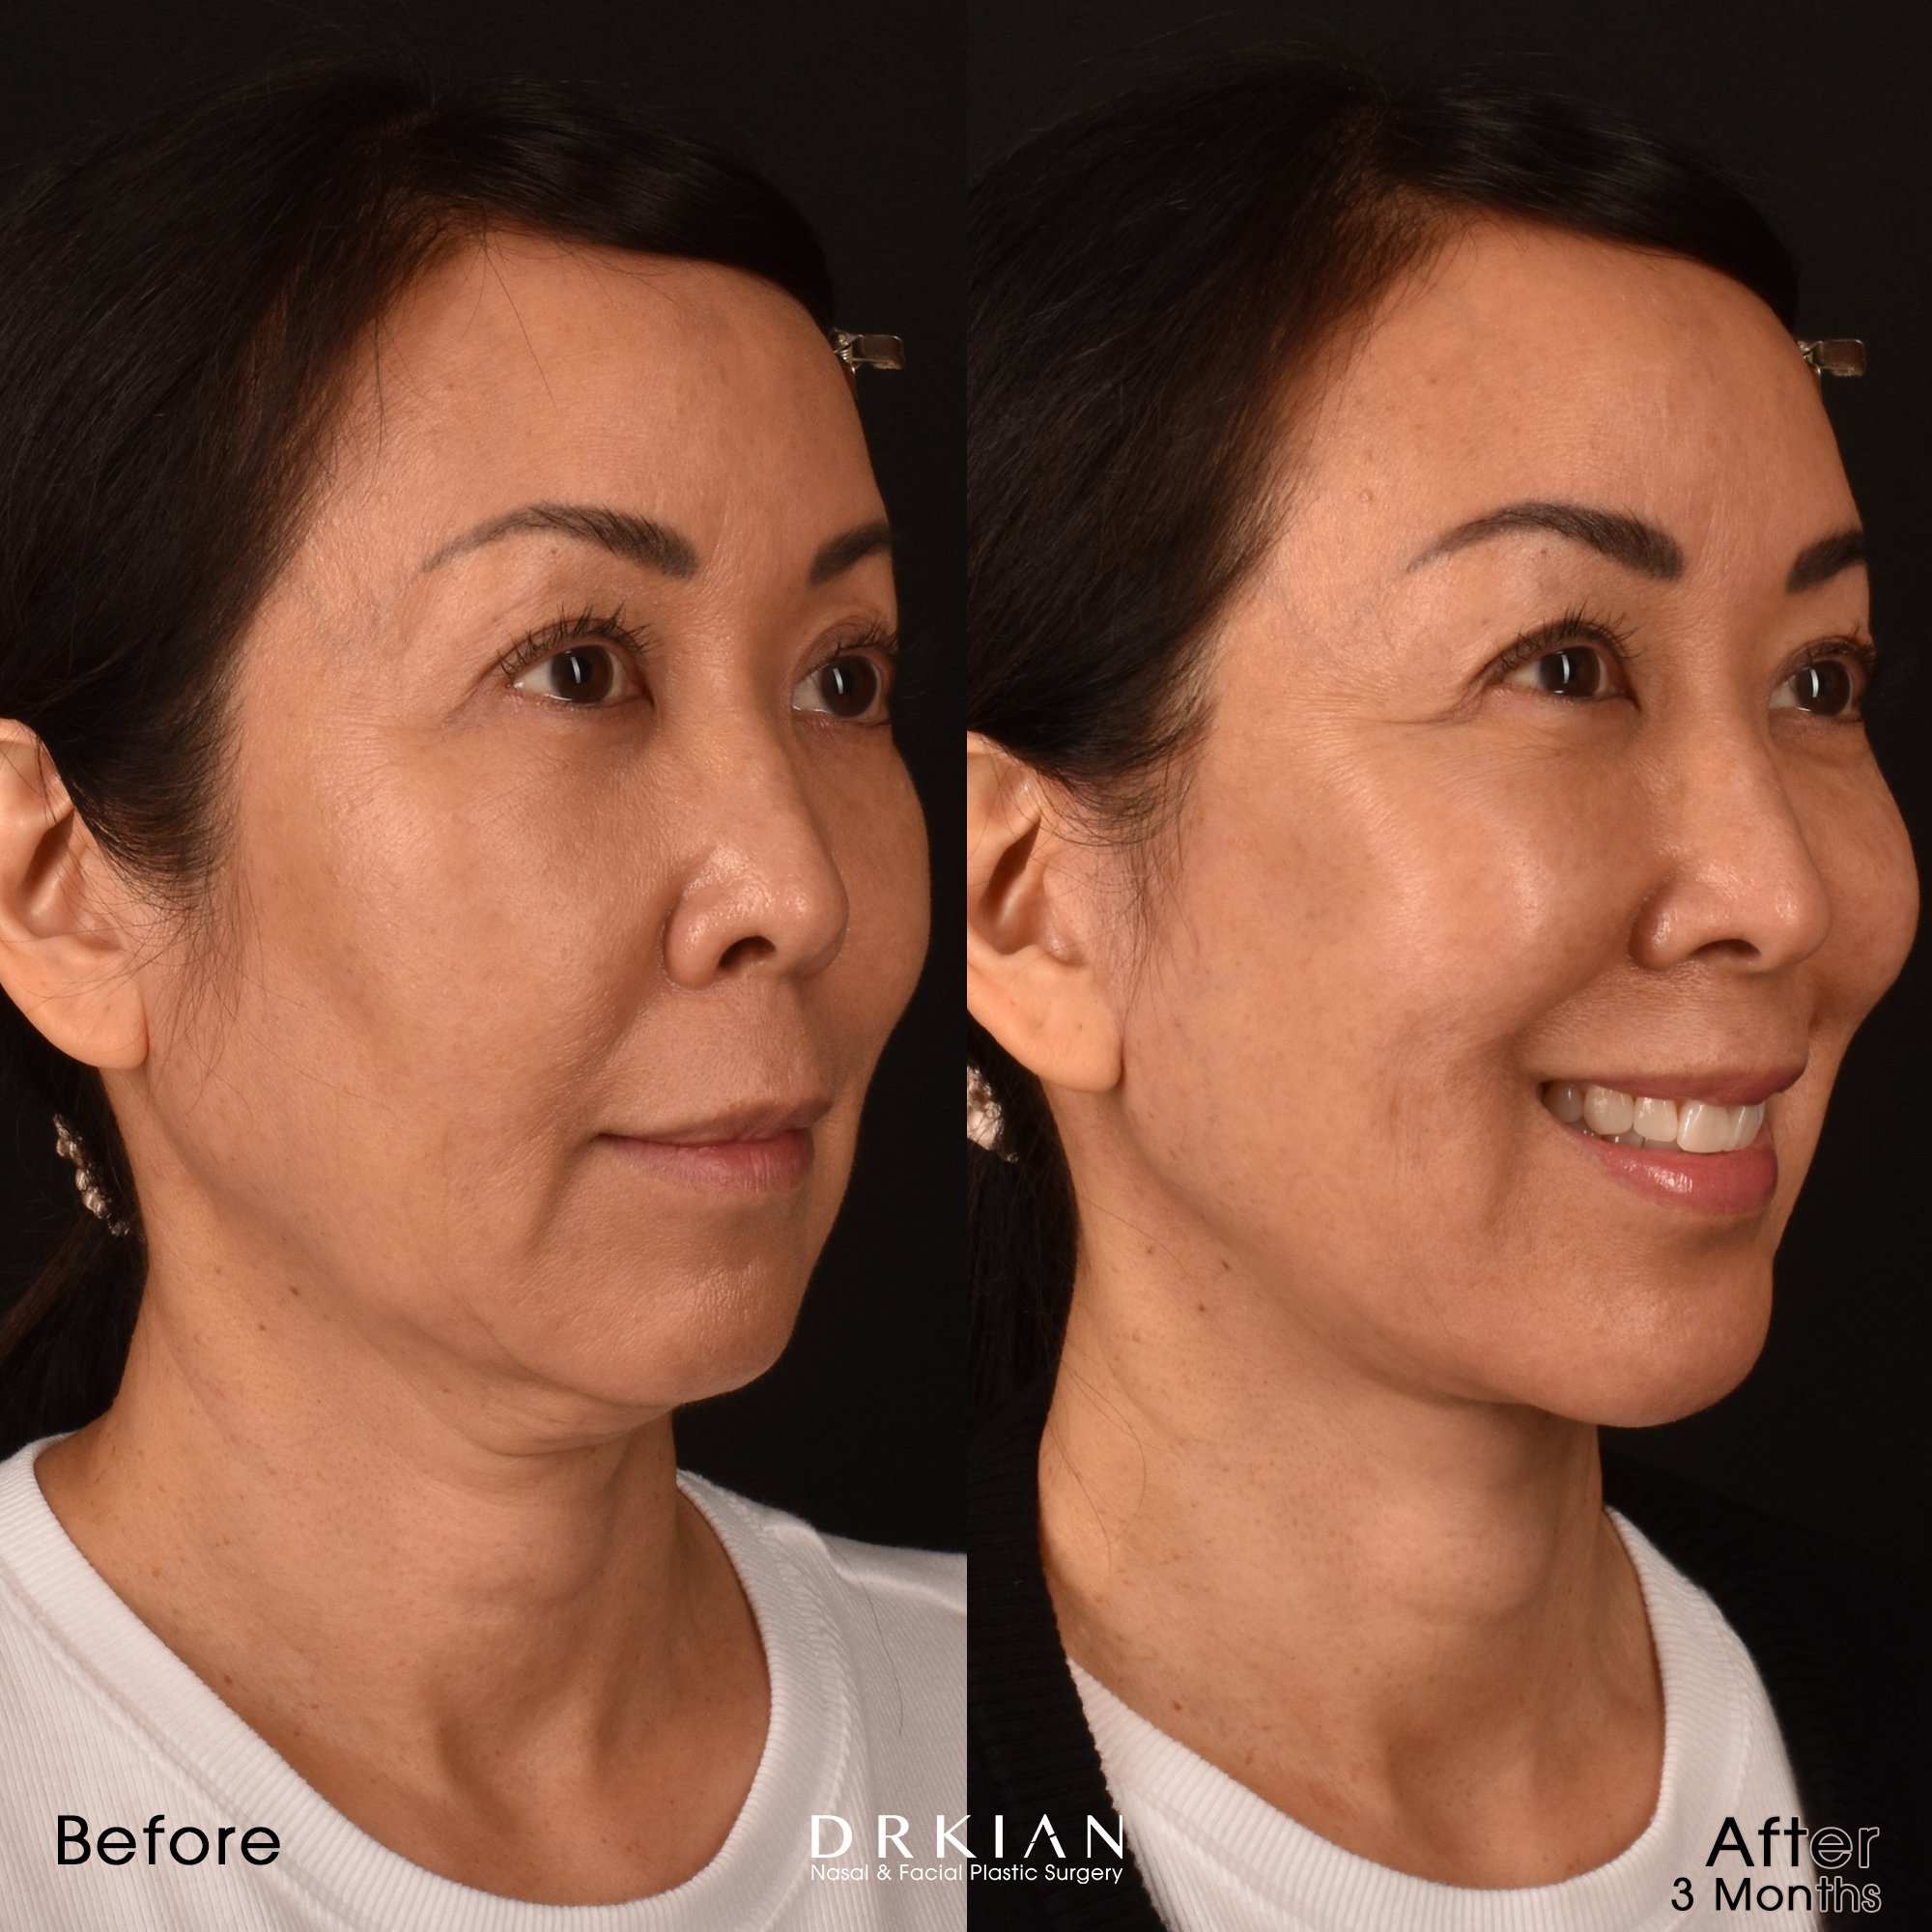
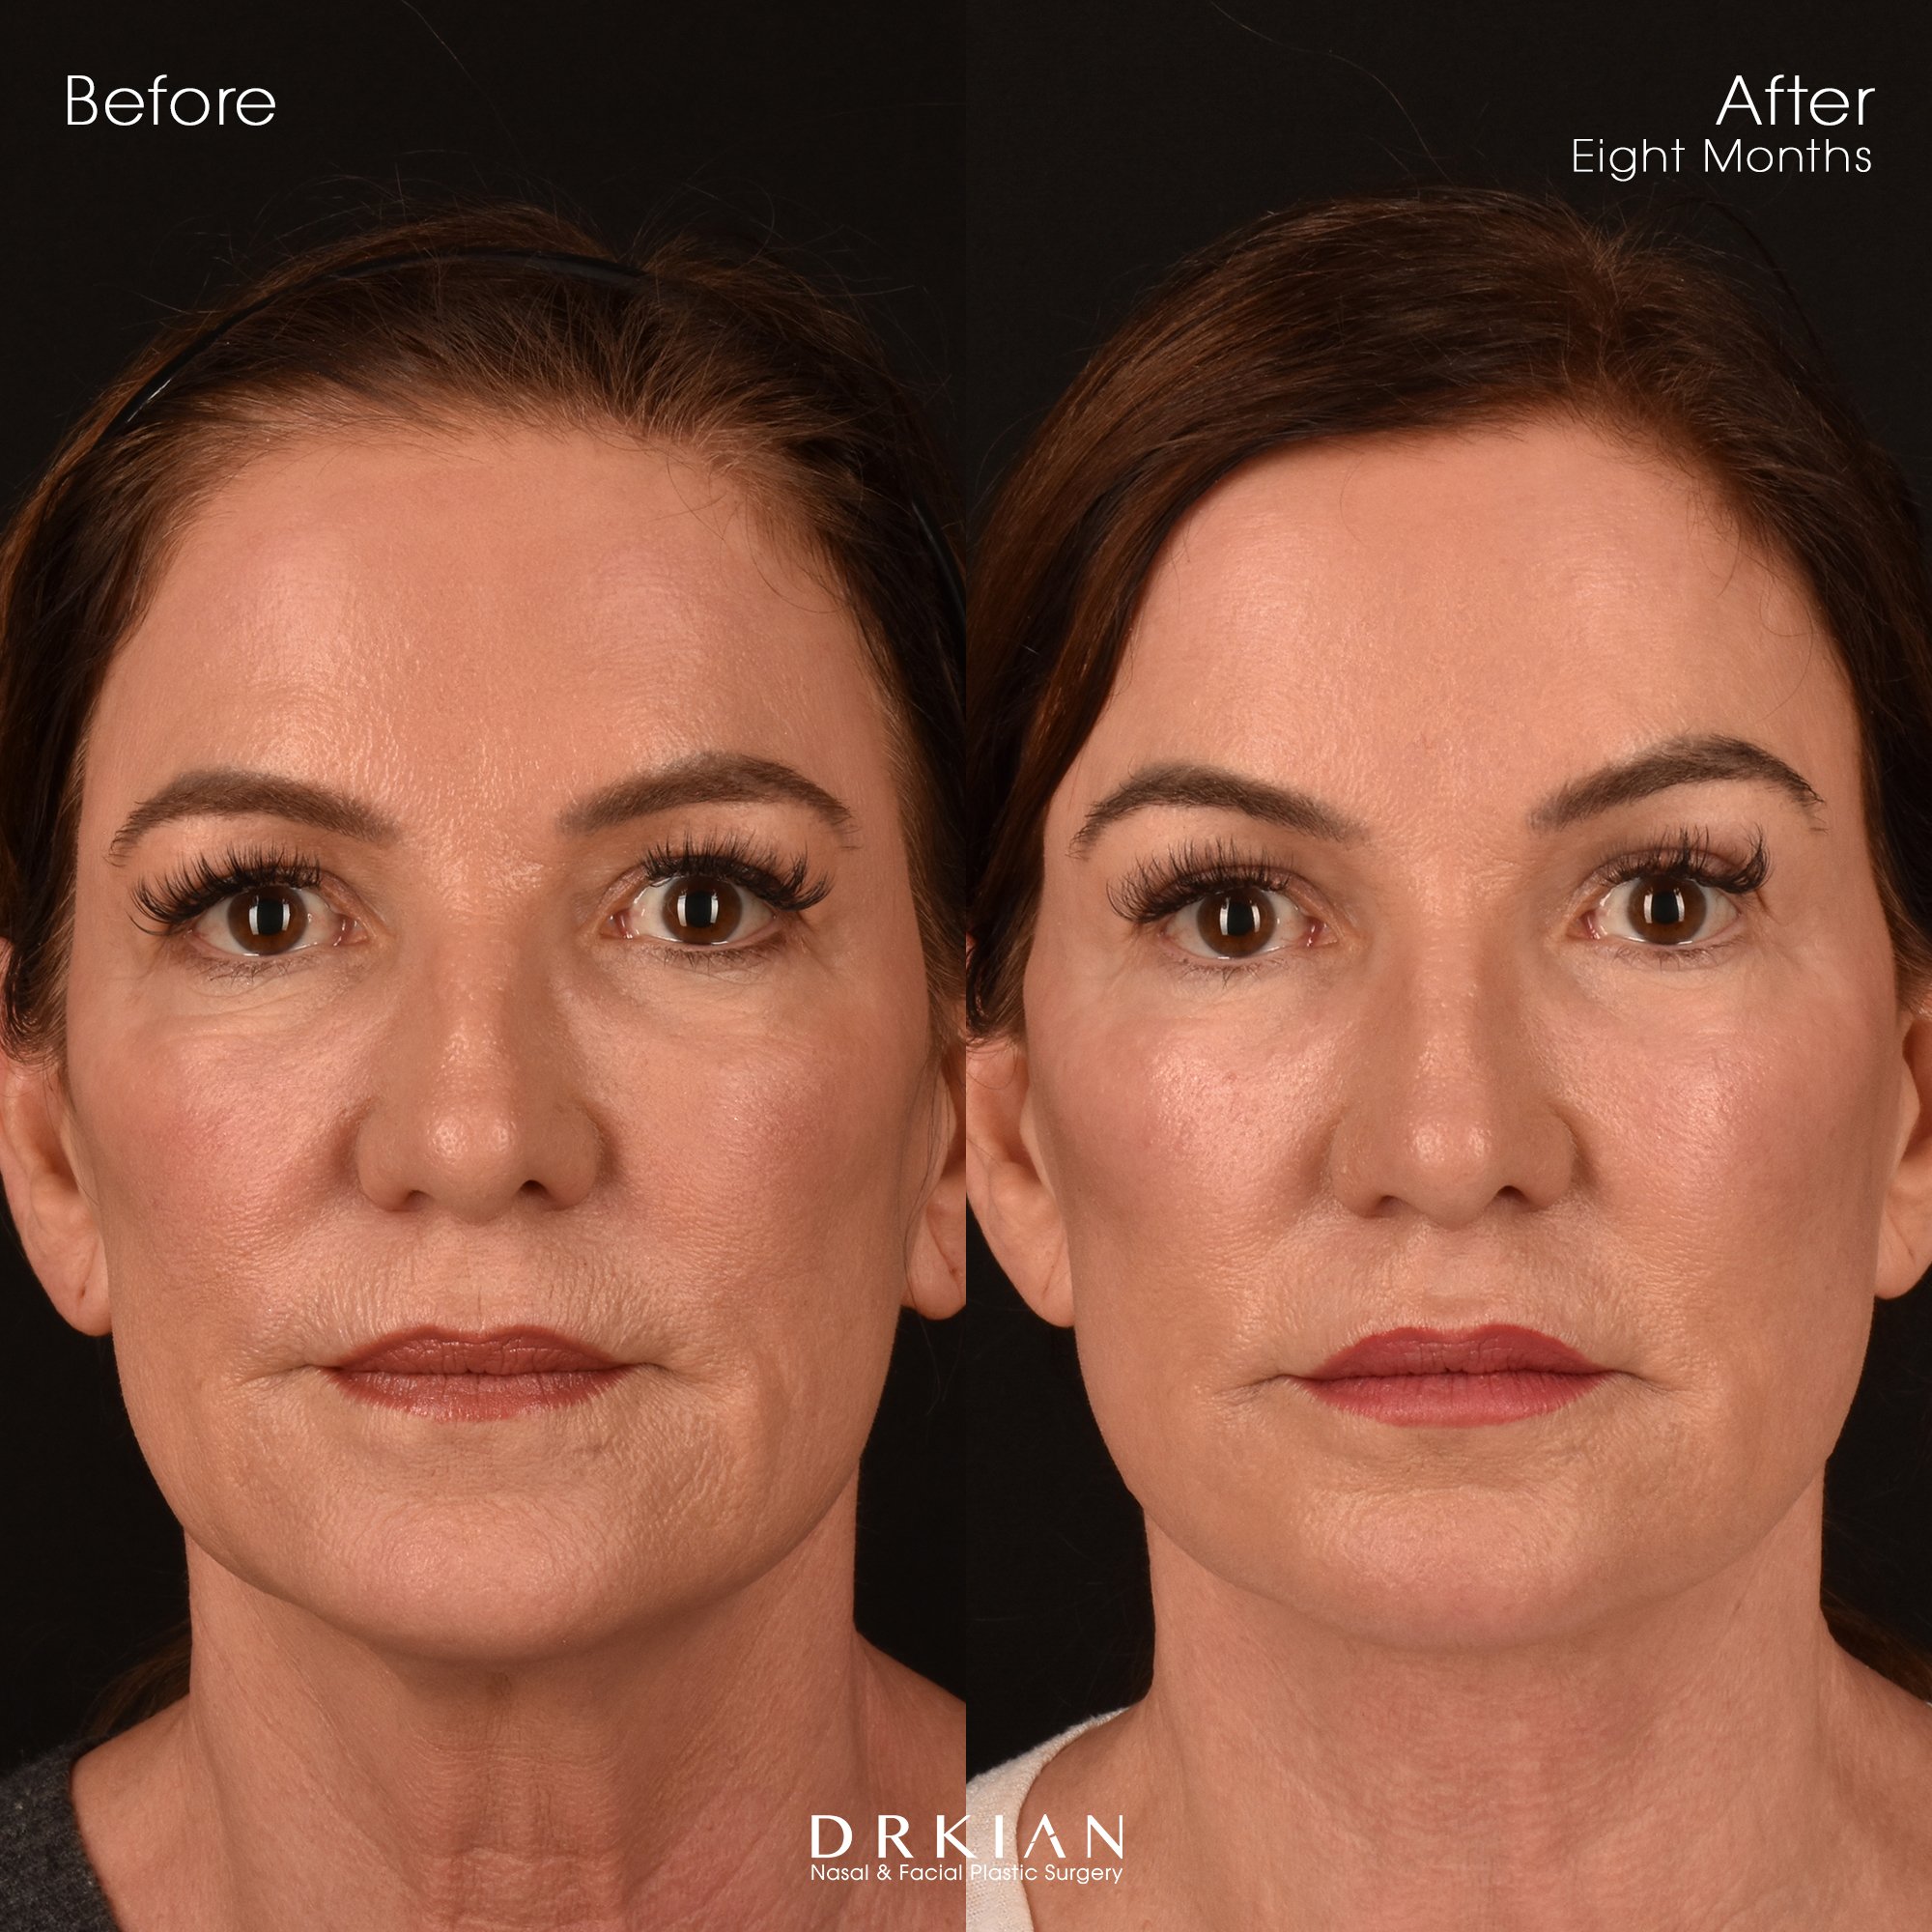
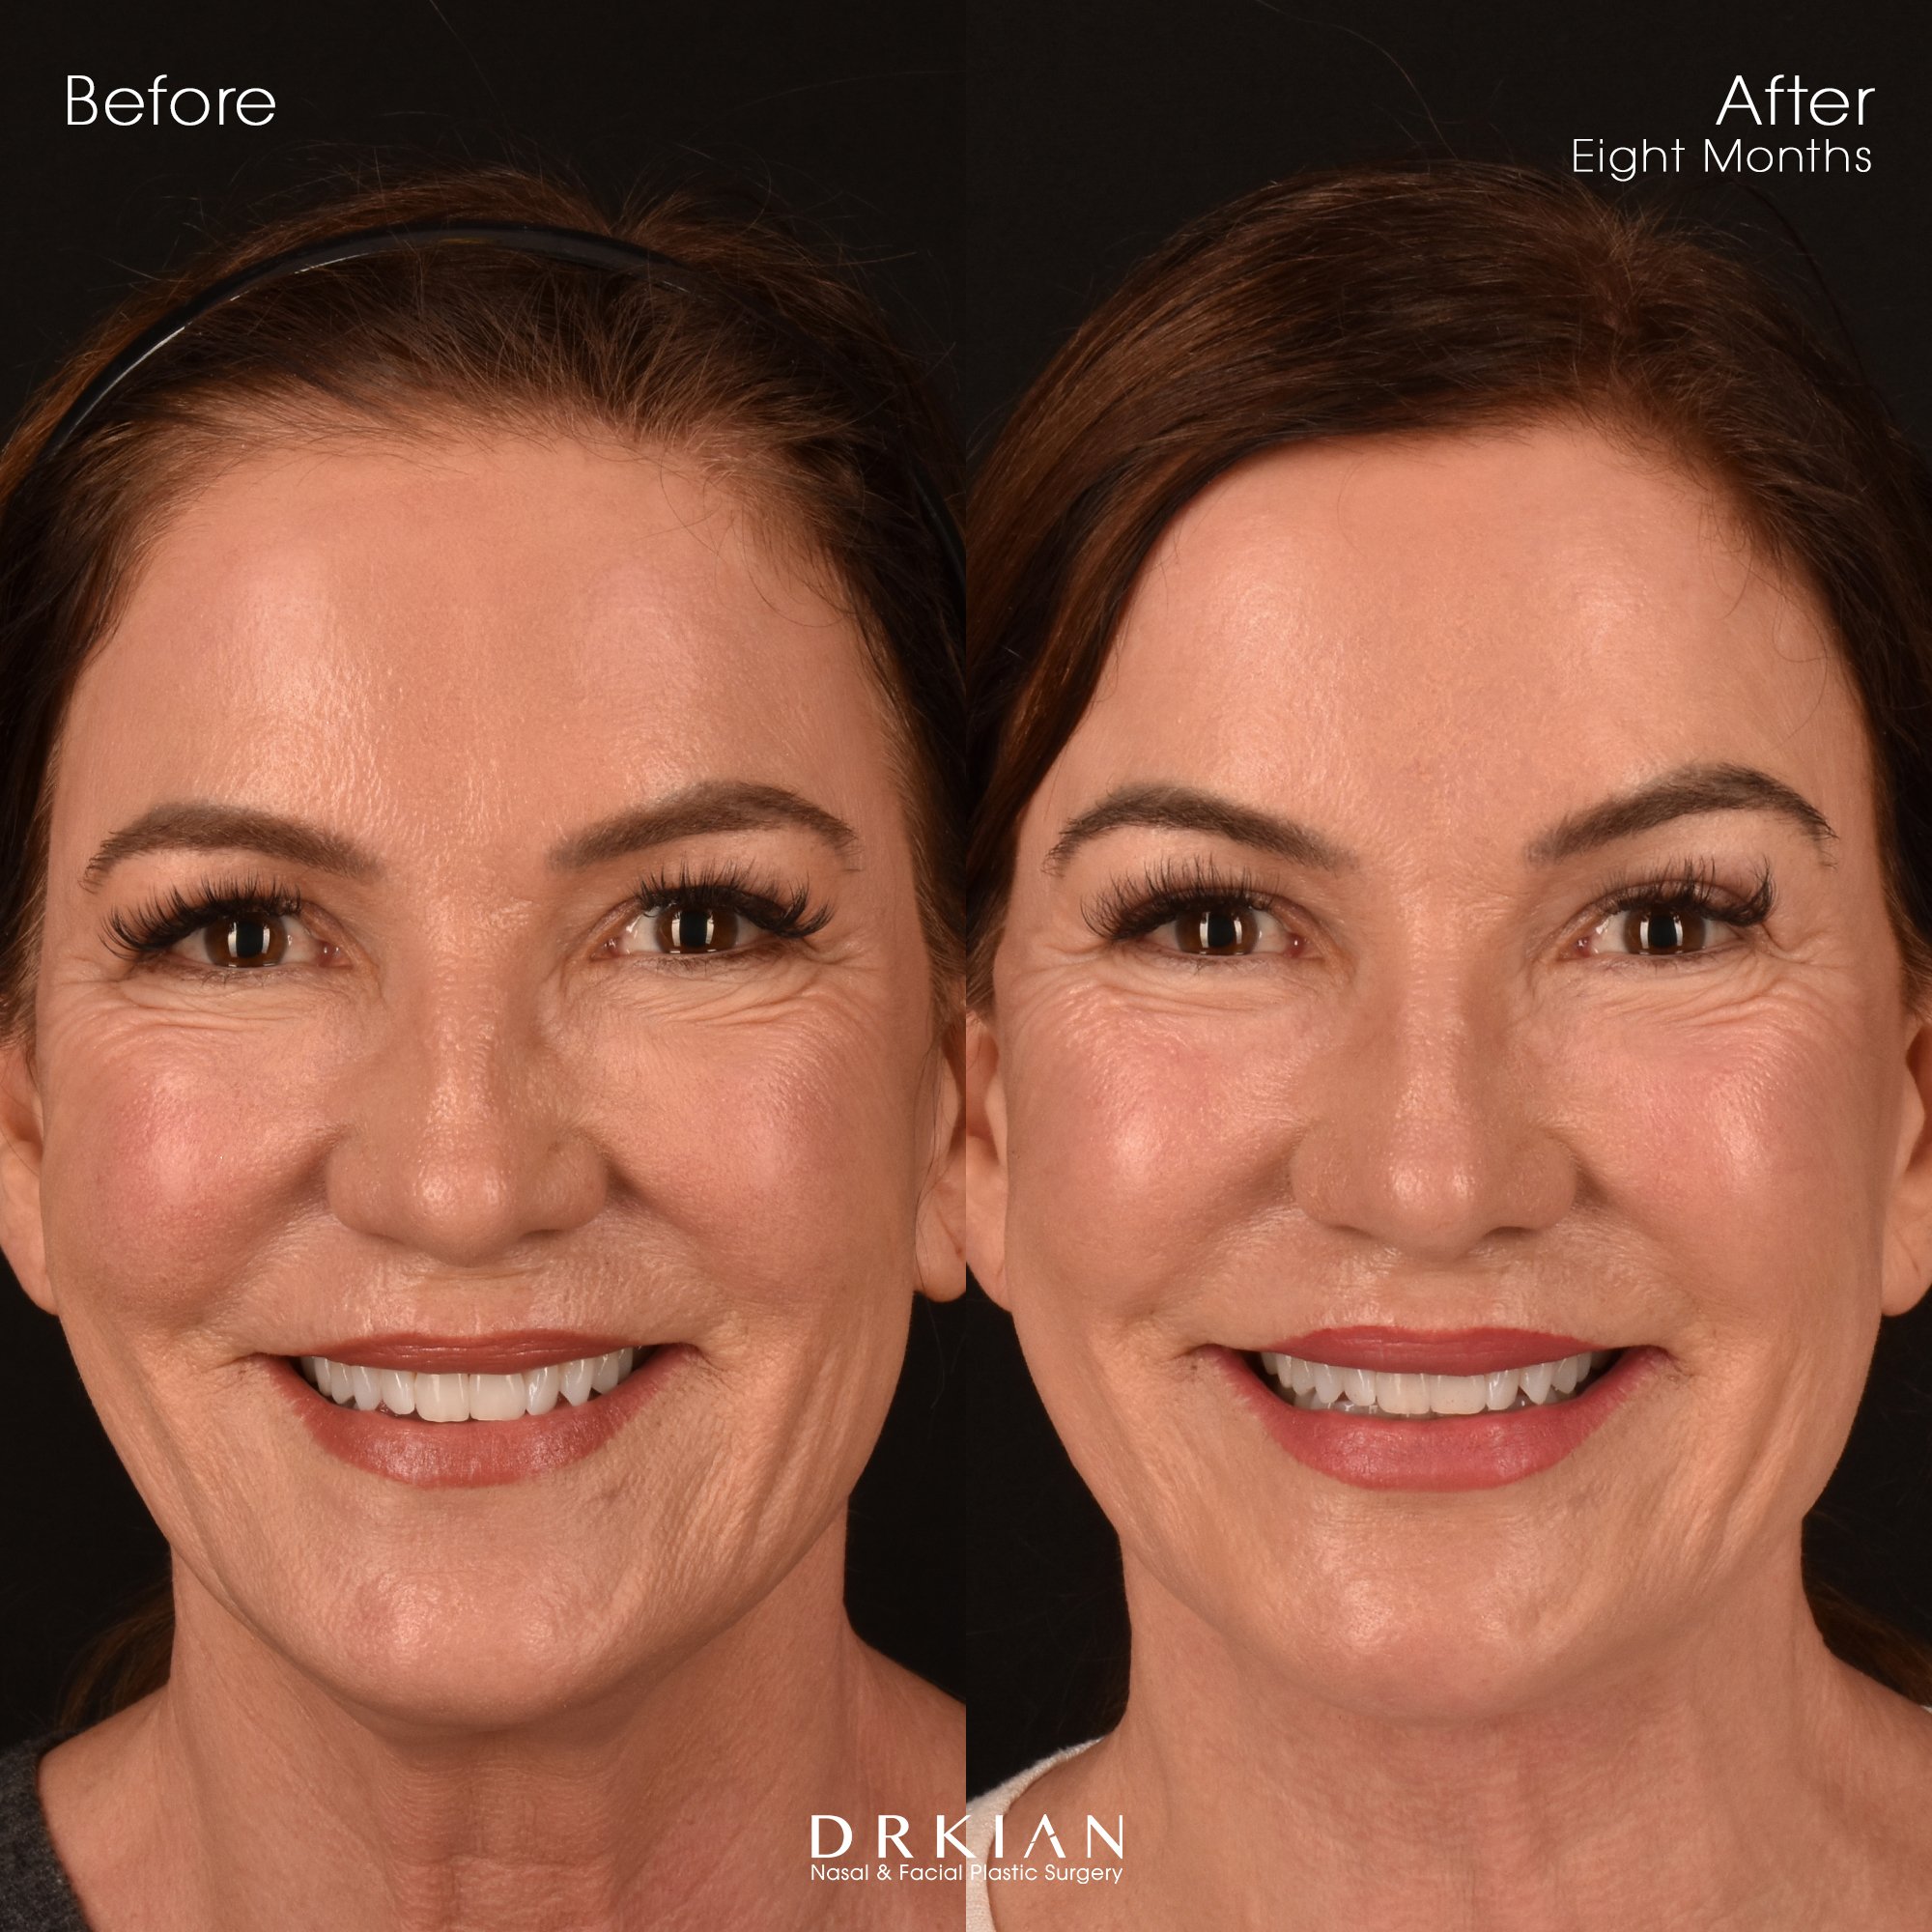
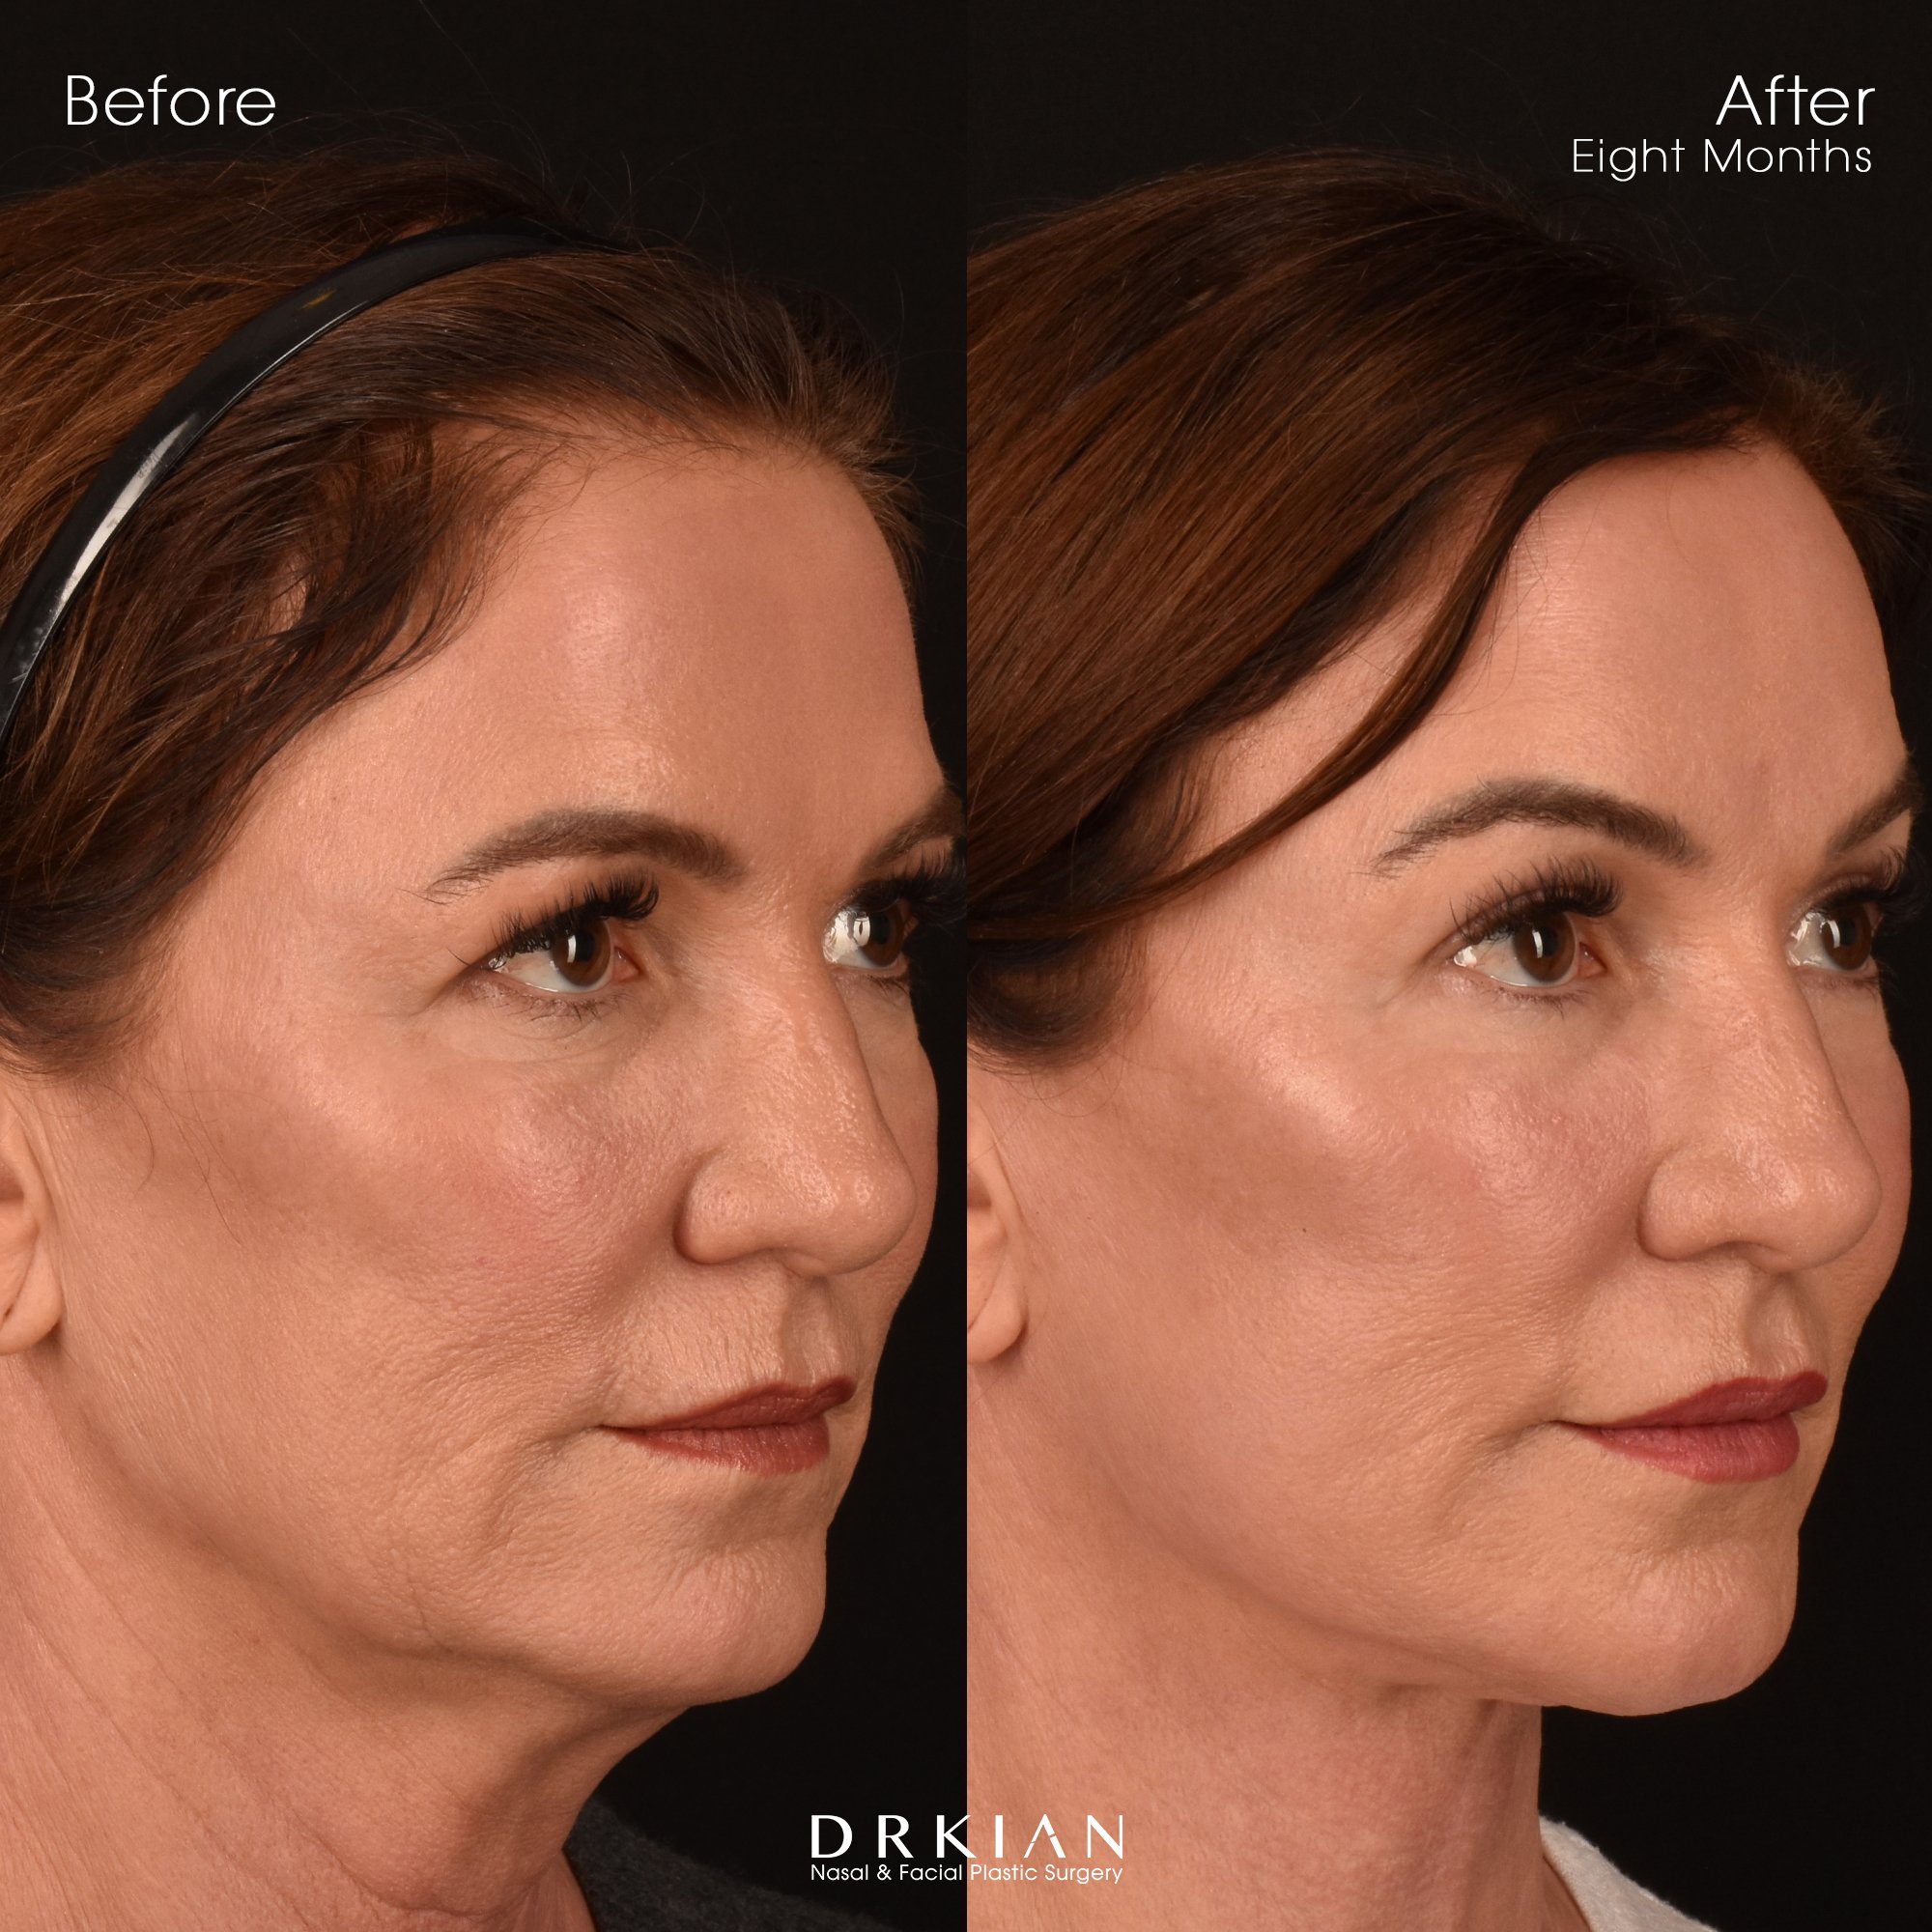
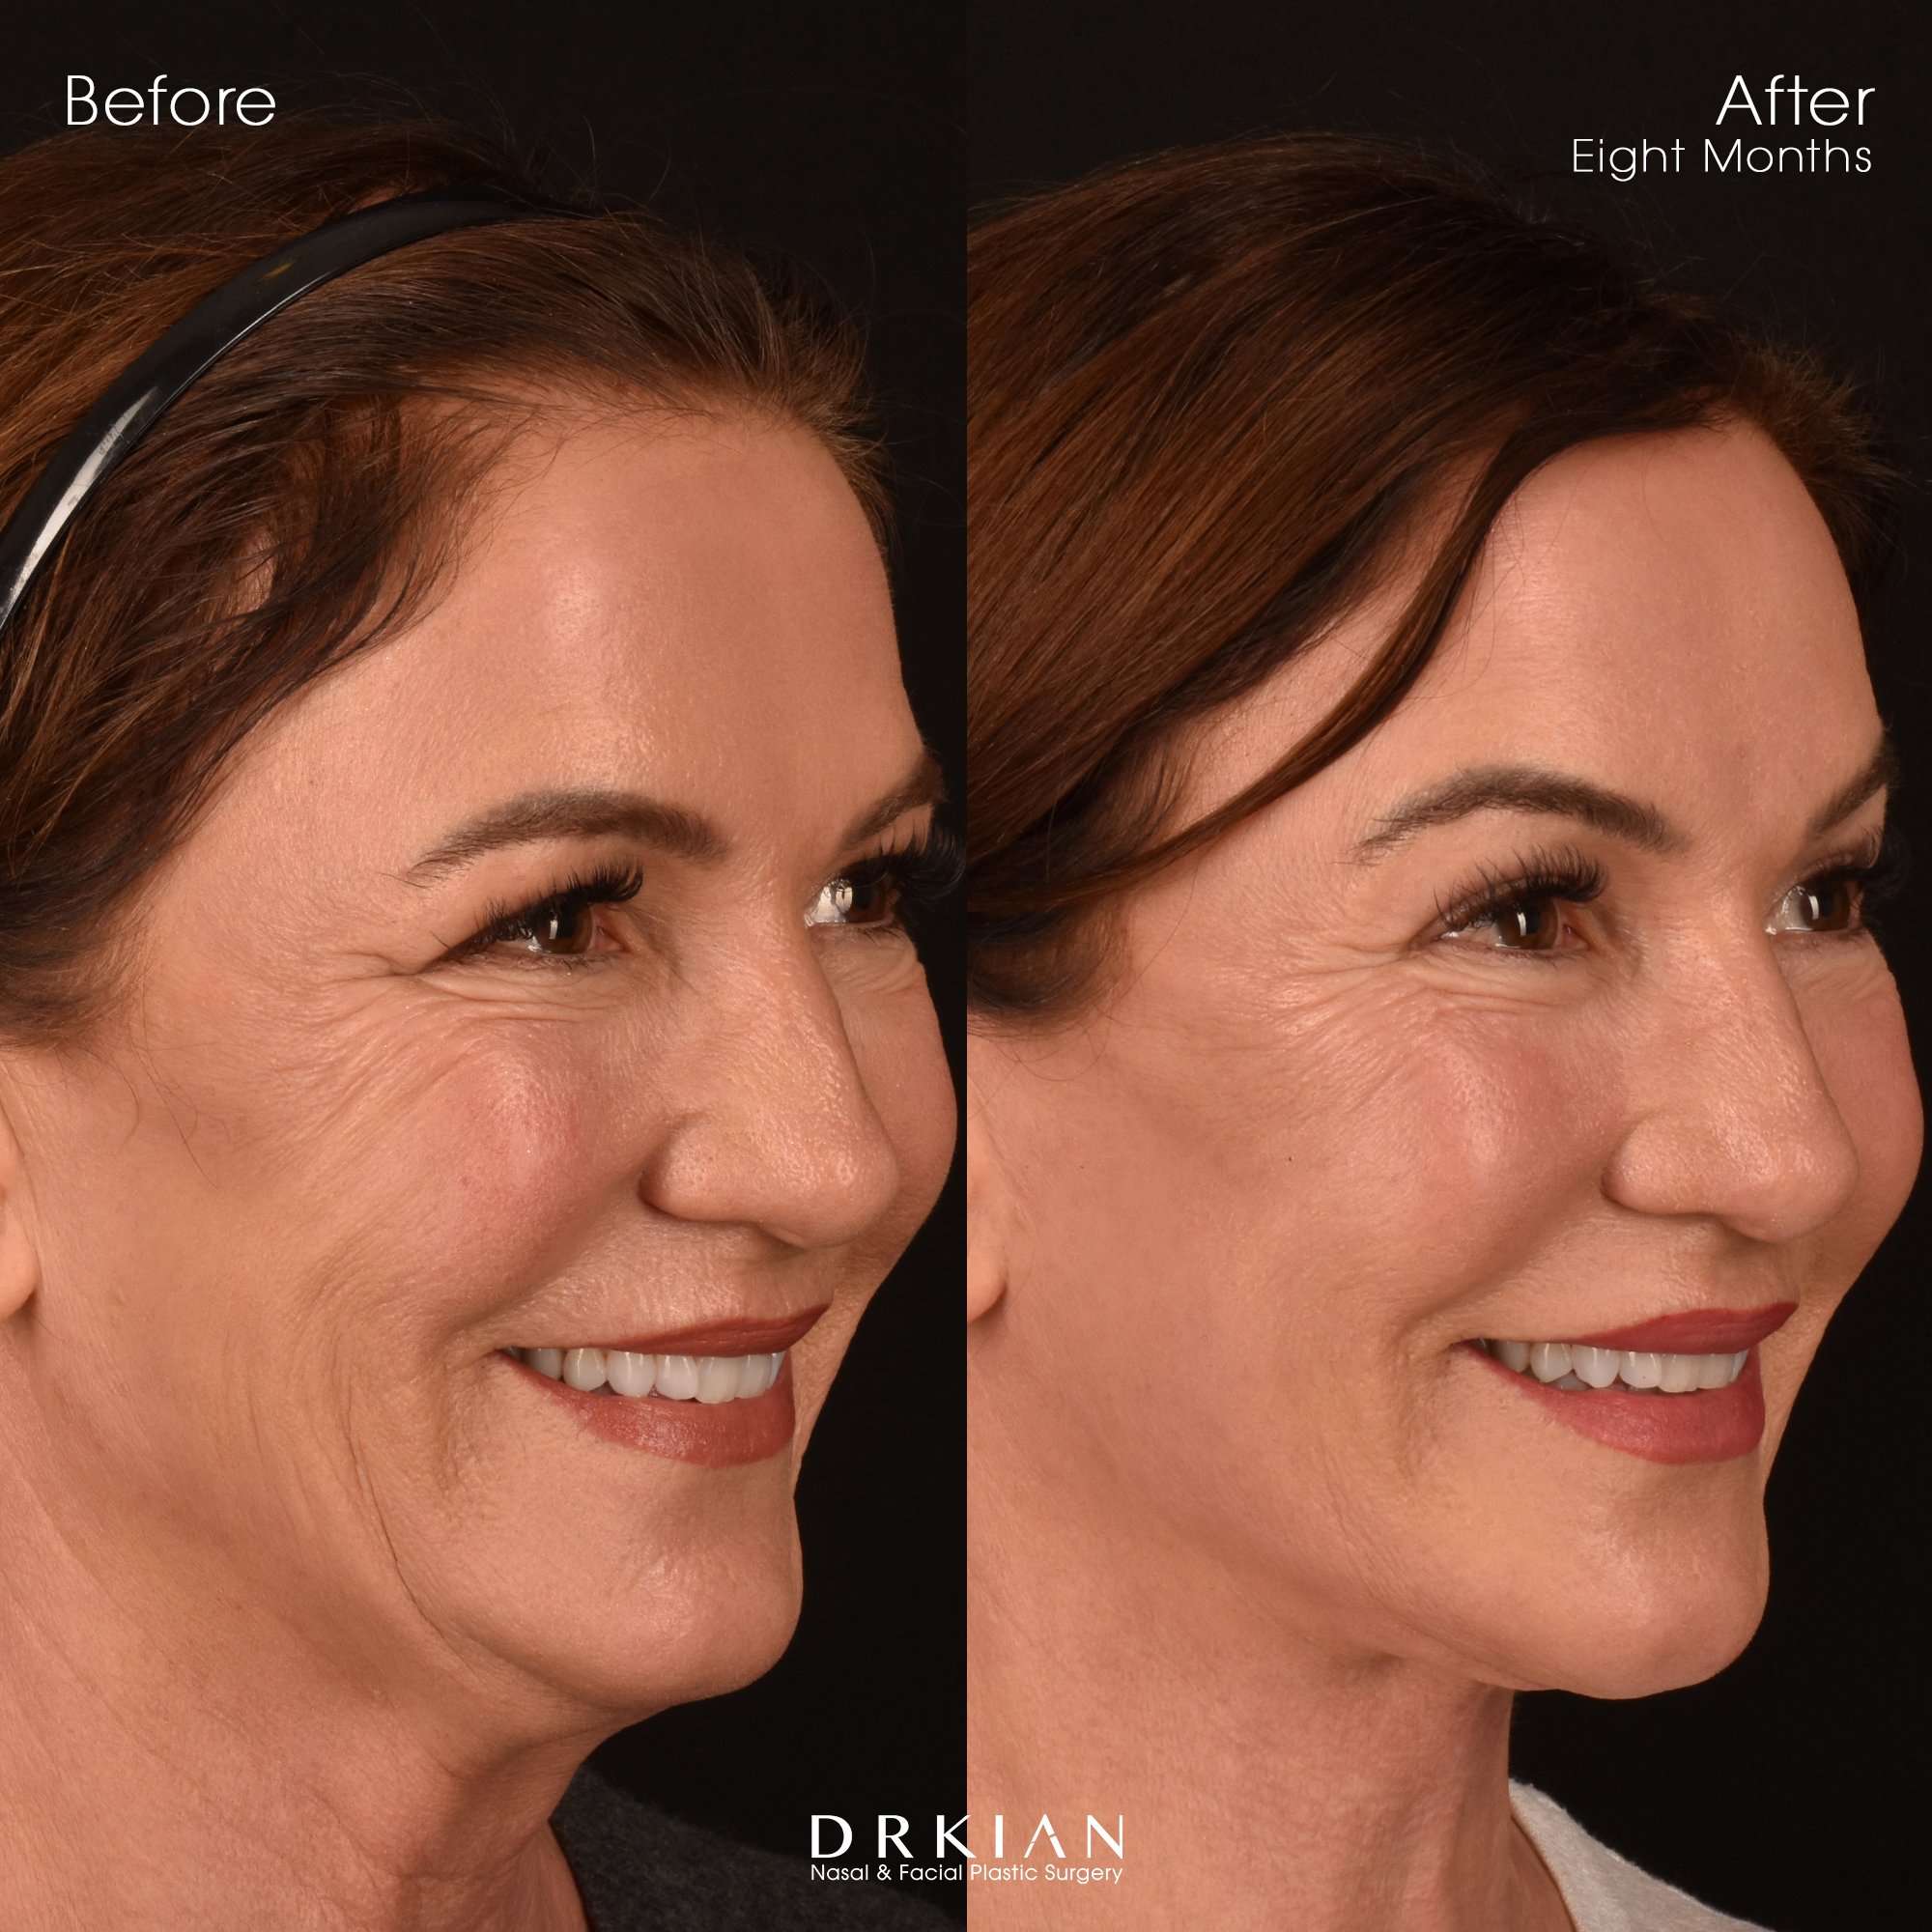
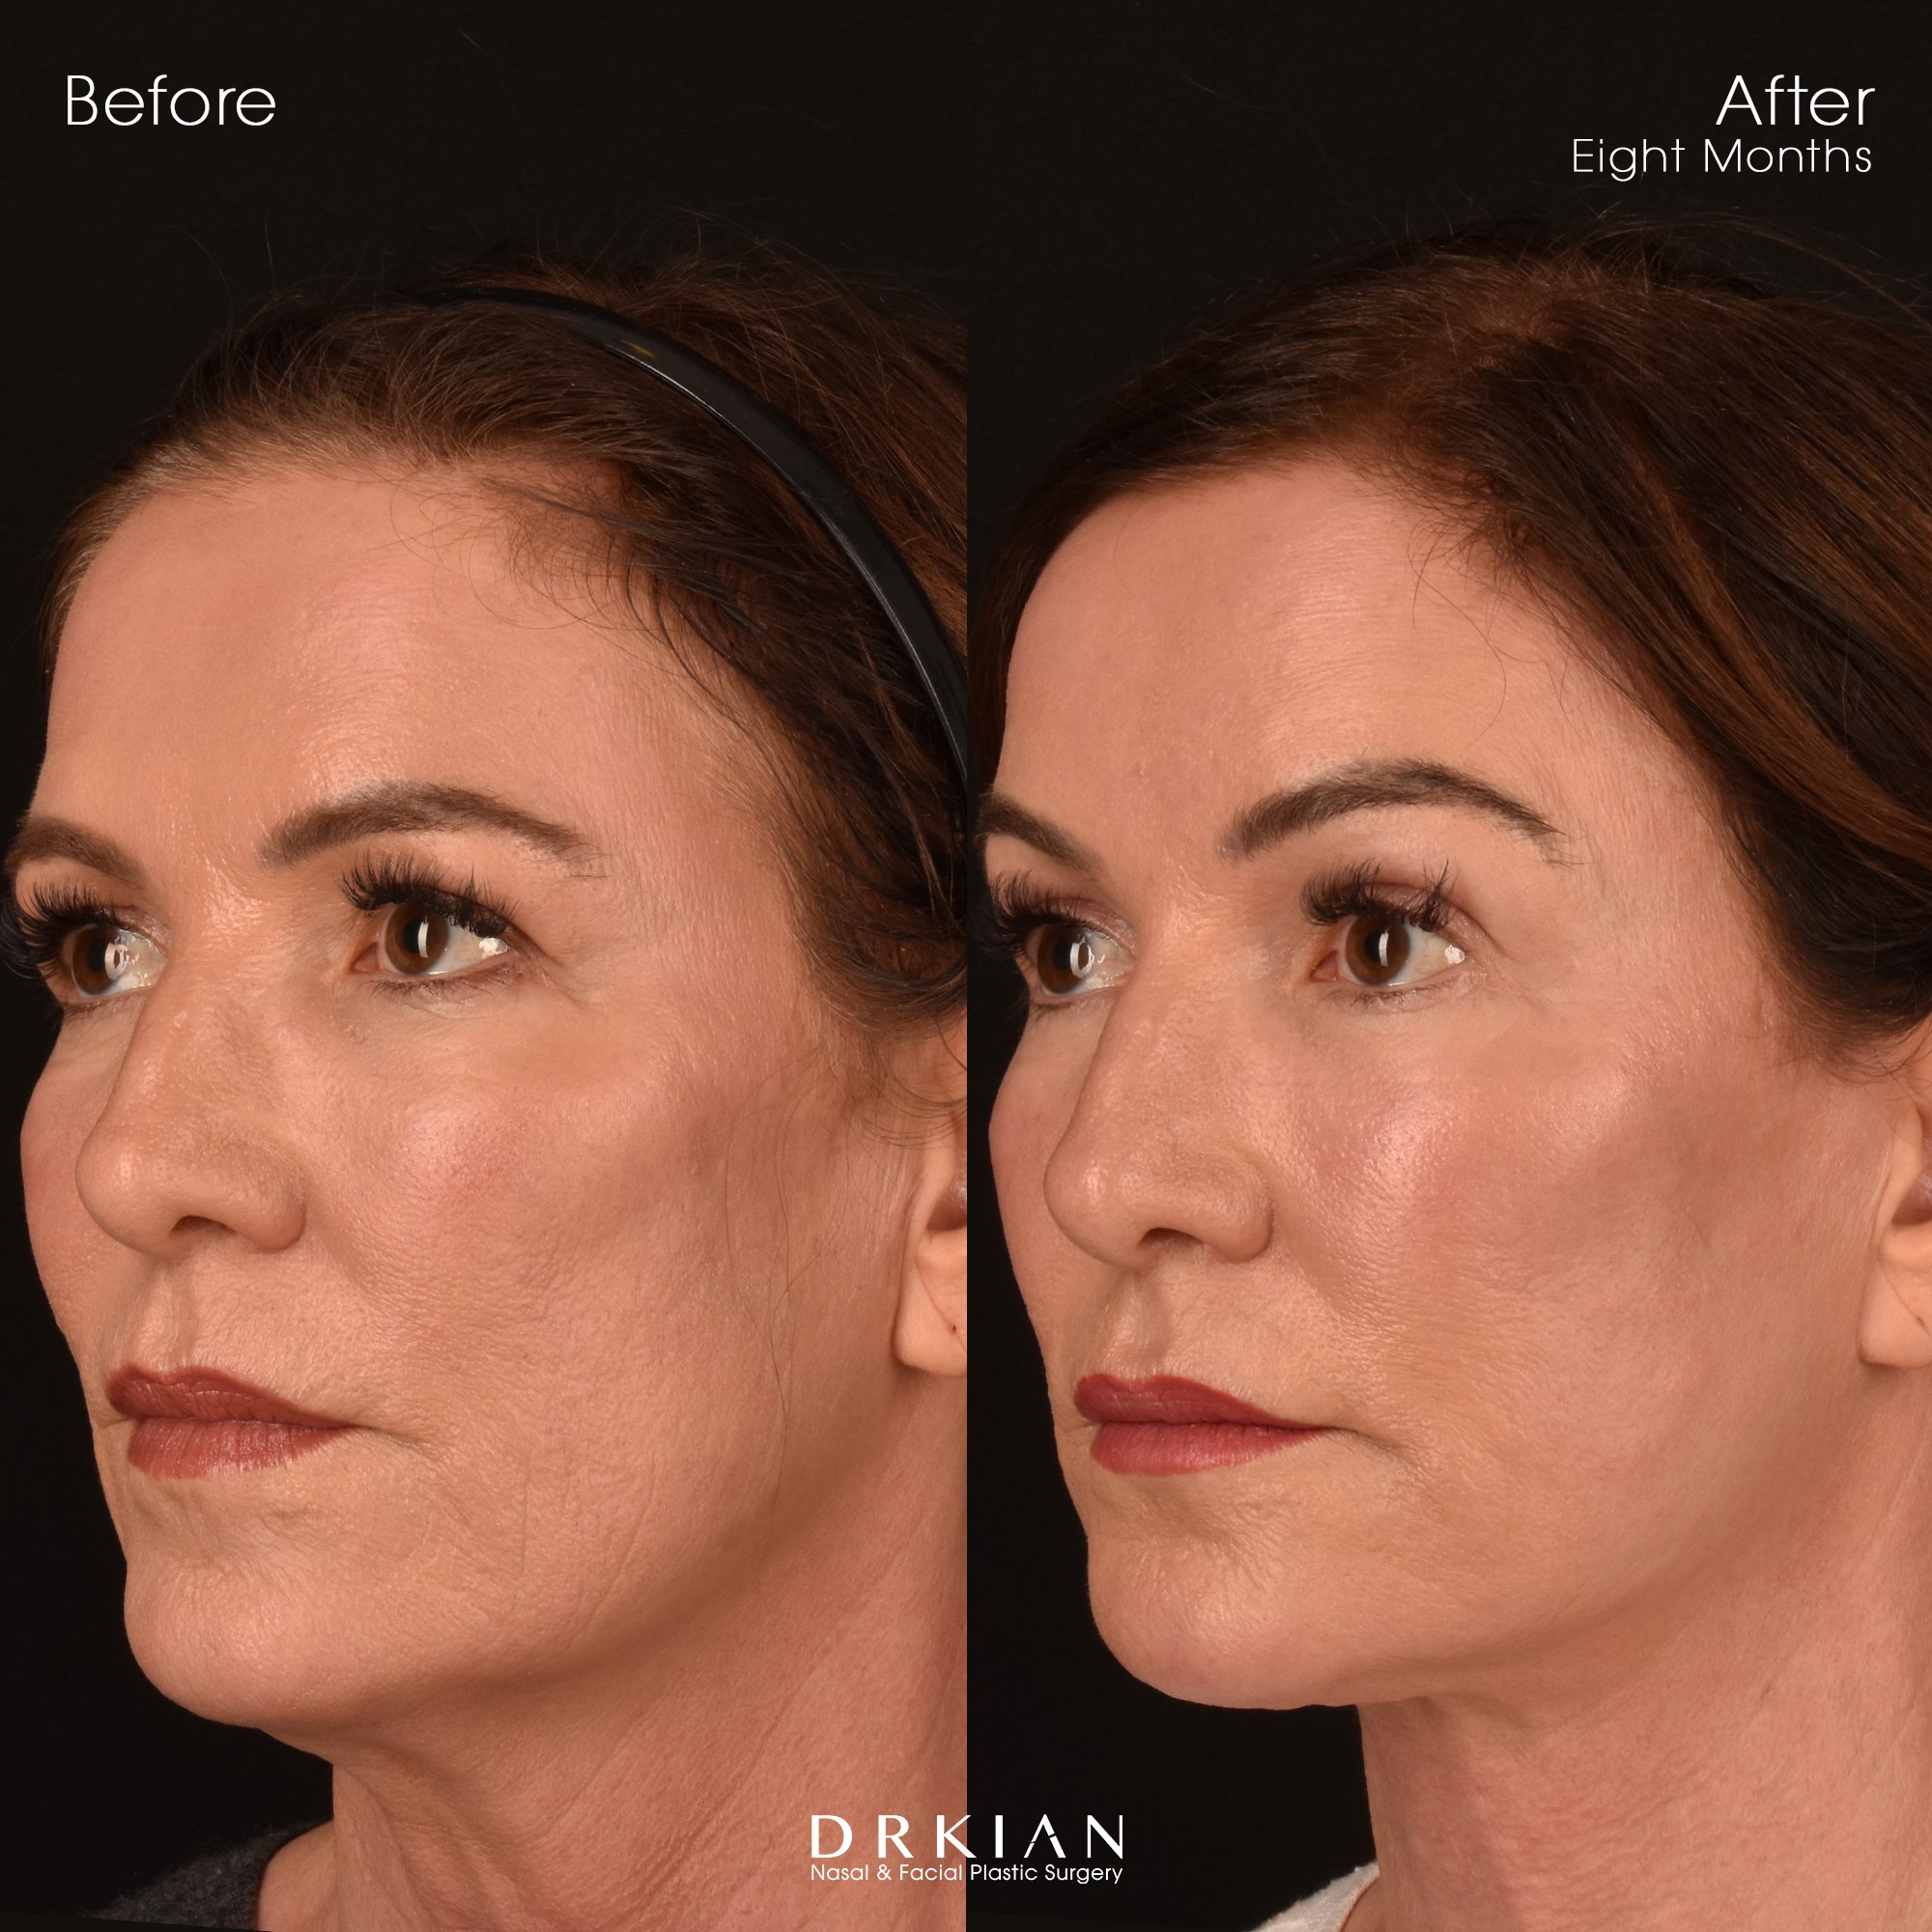
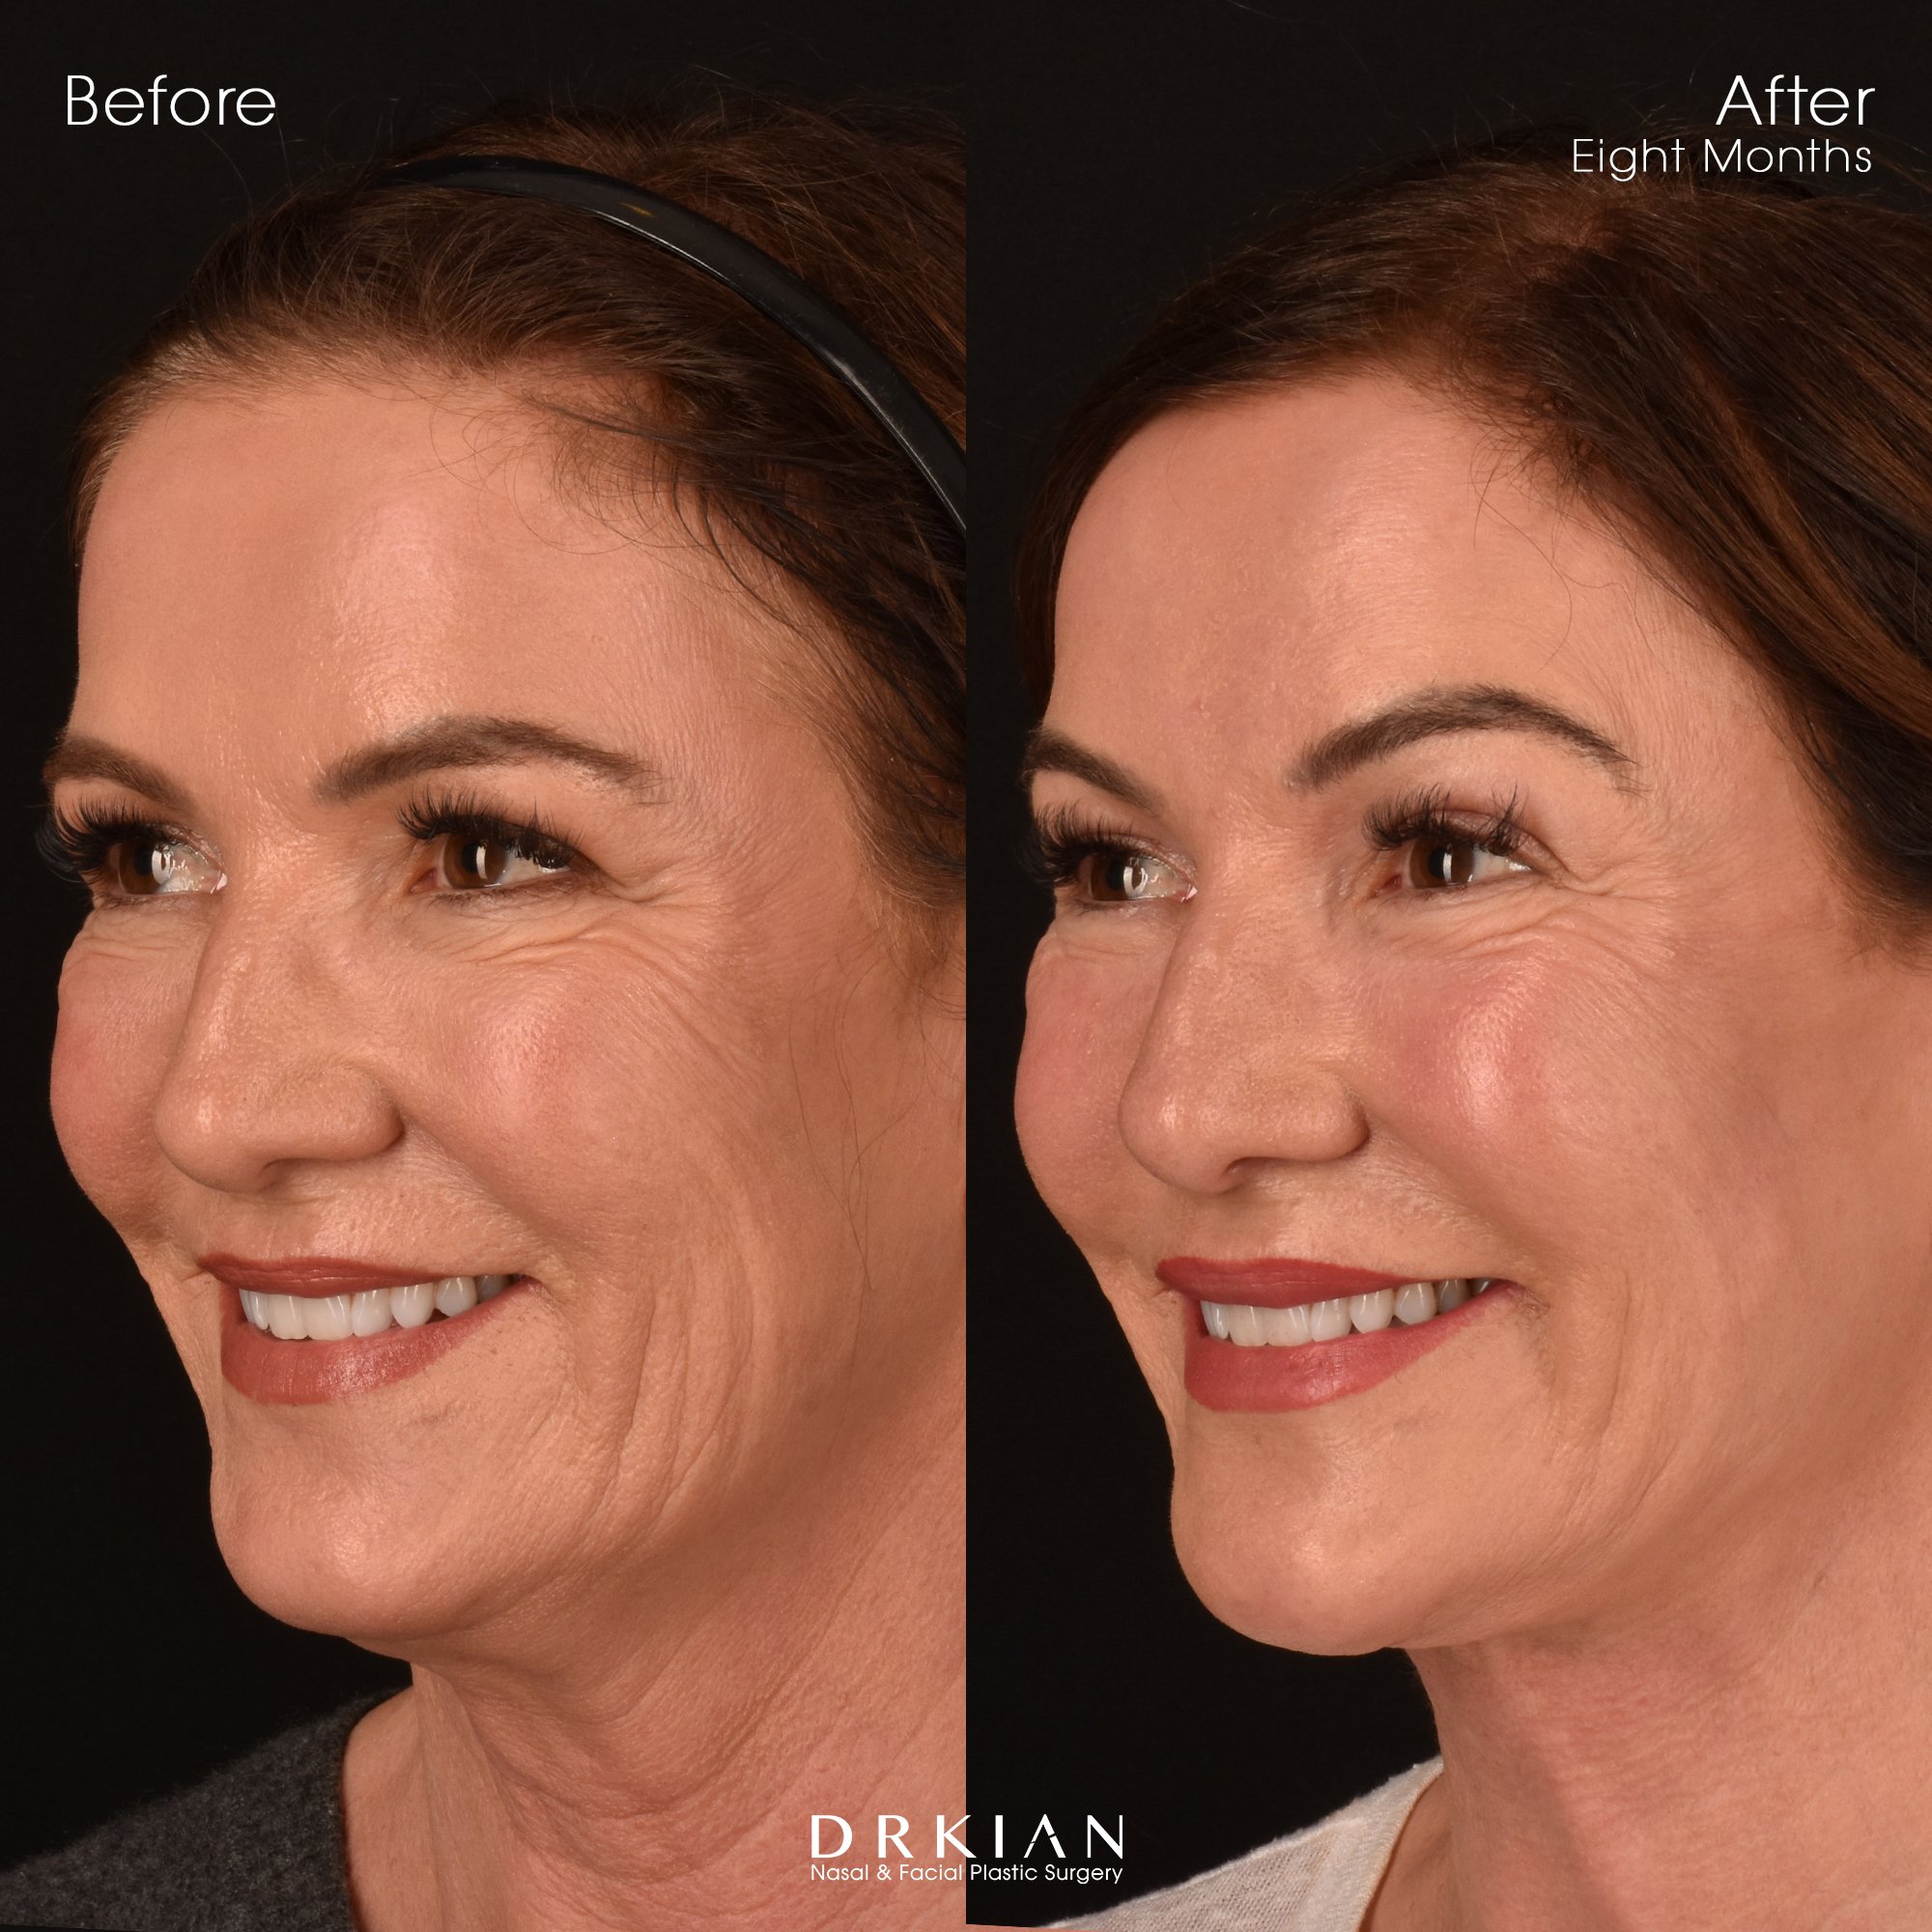
Deep Plane Lower Face & Neck Lift: Before & After Eight Months

Deep Plane Lower Face & Neck Lift: Before & After Eight Months
Deep Plane Lower Face & Neck Lift: Before & After Eight Months
Deep Plane Lower Face & Neck Lift: Before & After Eight Months
Deep Plane Lower Face & Neck Lift: Before & After Eight Months
Deep Plane Lower Face & Neck Lift: Before & After Eight Months
Deep Plane Lower Face & Neck Lift: Before & After Eight Months
Deep Plane Lower Face & Neck Lift: Before & After Eight Months

Deep Plane Lower Face & Neck Lift: Before & After Eight Months
Deep Plane Lower Face & Neck Lift: Before & After Eight Months

Deep Plane Lower Face & Neck Lift: Before & After Eight Months

Deep Plane Lower Face & Neck Lift: Before & After Eight Months
Deep Plane Lower Face & Neck Lift: Before & After Eight Months
Deep Plane Lower Face & Neck Lift: Before & After Eight Months
Deep Plane Lower Face & Neck Lift: Before & After Eight Months
Deep Plane Lower Face & Neck Lift: Before & After Eight Months
Deep Plane Lower Face & Neck Lift: Before & After Eight Months
Deep Plane Lower Face & Neck Lift: Before & After Eight Months
Deep Plane Lower Face & Neck Lift: Before & After Eight Months
Deep Plane Lower Face & Neck Lift: Before & After Eight Months
Deep Plane Lower Face & Neck Lift: Before & After Eight Months
Deep Plane Lower Face & Neck Lift: Before & After Eight Months
Deep Plane Lower Face & Neck Lift: Before & After Eight Months
Deep Plane Lower Face & Neck Lift with Full-Face Fat Transfer (Forehead, Bi-Layer Temples, Supraorbital + Infraorbital Hollows, Chin and Hands): Before & After Three Months
Deep Plane Lower Face & Neck Lift with Full-Face Fat Transfer (Forehead, Bi-Layer Temples, Supraorbital + Infraorbital Hollows, Chin and Hands): Before & After Three Months

Deep Plane Lower Face & Neck Lift with Full-Face Fat Transfer (Forehead, Bi-Layer Temples, Supraorbital + Infraorbital Hollows, Chin and Hands): Before & After Three Months
Deep Plane Lower Face & Neck Lift with Full-Face Fat Transfer (Forehead, Bi-Layer Temples, Supraorbital + Infraorbital Hollows, Chin and Hands): Before & After Three Months
Deep Plane Lower Face & Neck Lift with Full-Face Fat Transfer (Forehead, Bi-Layer Temples, Supraorbital + Infraorbital Hollows, Chin and Hands): Before & After Three Months

Deep Plane Lower Face & Neck Lift with Full-Face Fat Transfer (Forehead, Bi-Layer Temples, Supraorbital + Infraorbital Hollows, Chin and Hands): Before & After Three Months

Deep Plane Lower Face & Neck Lift with Full-Face Fat Transfer (Forehead, Bi-Layer Temples, Supraorbital + Infraorbital Hollows, Chin and Hands): Before & After Three Months
Deep Plane Lower Face & Neck Lift with Full-Face Fat Transfer (Forehead, Bi-Layer Temples, Supraorbital + Infraorbital Hollows, Chin and Hands): Before & After Three Months

Deep Plane Lower Face & Neck Lift with Full-Face Fat Transfer (Forehead, Bi-Layer Temples, Supraorbital + Infraorbital Hollows, Chin and Hands): Before & After Three Months
Deep Plane Lower Face & Neck Lift with Full-Face Fat Transfer (Forehead, Bi-Layer Temples, Supraorbital + Infraorbital Hollows, Chin and Hands): Before & After Three Months
Deep Plane Lower Face & Neck Lift with Full-Face Fat Transfer (Forehead, Bi-Layer Temples, Supraorbital + Infraorbital Hollows, Chin and Hands): Before & After Three Months
Deep Plane Lower Face & Neck Lift with Full-Face Fat Transfer (Forehead, Bi-Layer Temples, Supraorbital + Infraorbital Hollows, Chin and Hands): Before & After Three Months

Deep Plane Lower Face & Neck Lift with Full-Face Fat Transfer (Forehead, Bi-Layer Temples, Supraorbital + Infraorbital Hollows, Chin and Hands): Before & After Three Months
Deep Plane Lower Face & Neck Lift with Full-Face Fat Transfer (Forehead, Bi-Layer Temples, Supraorbital + Infraorbital Hollows, Chin and Hands): Before & After Three Months

Deep Plane Lower Face & Neck Lift with Full-Face Fat Transfer (Forehead, Bi-Layer Temples, Supraorbital + Infraorbital Hollows, Chin and Hands): Before & After Three Months

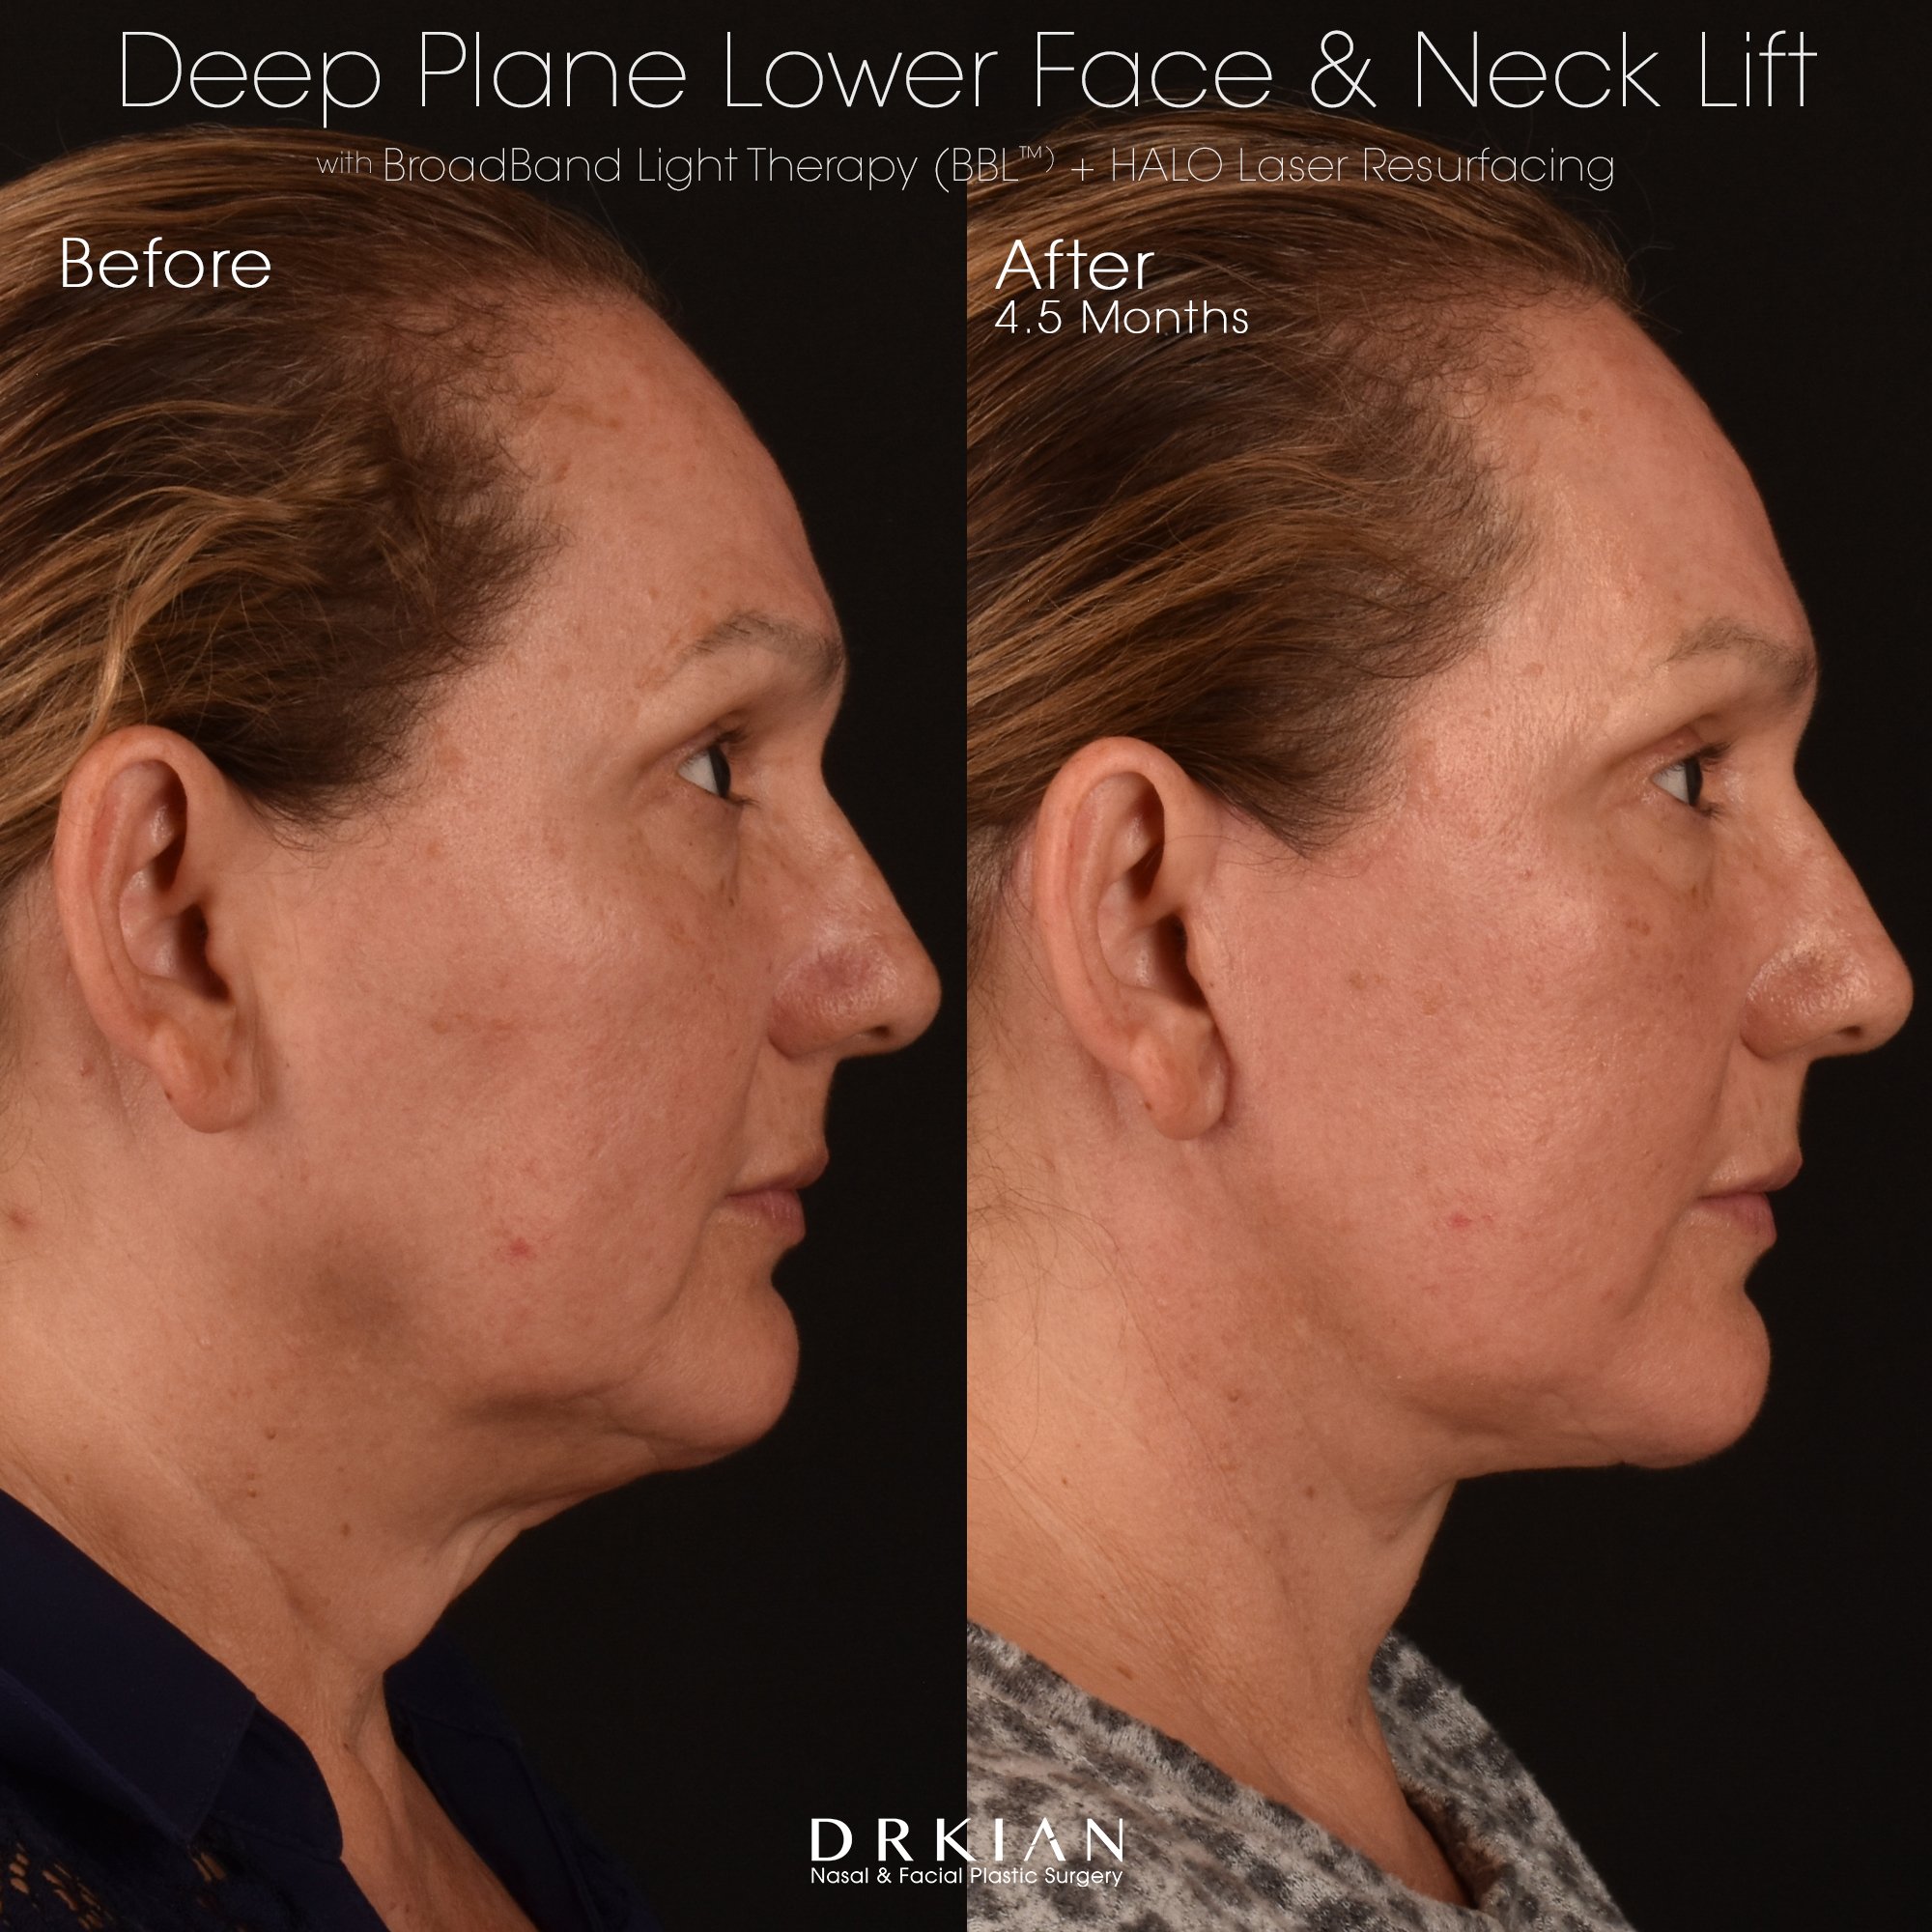
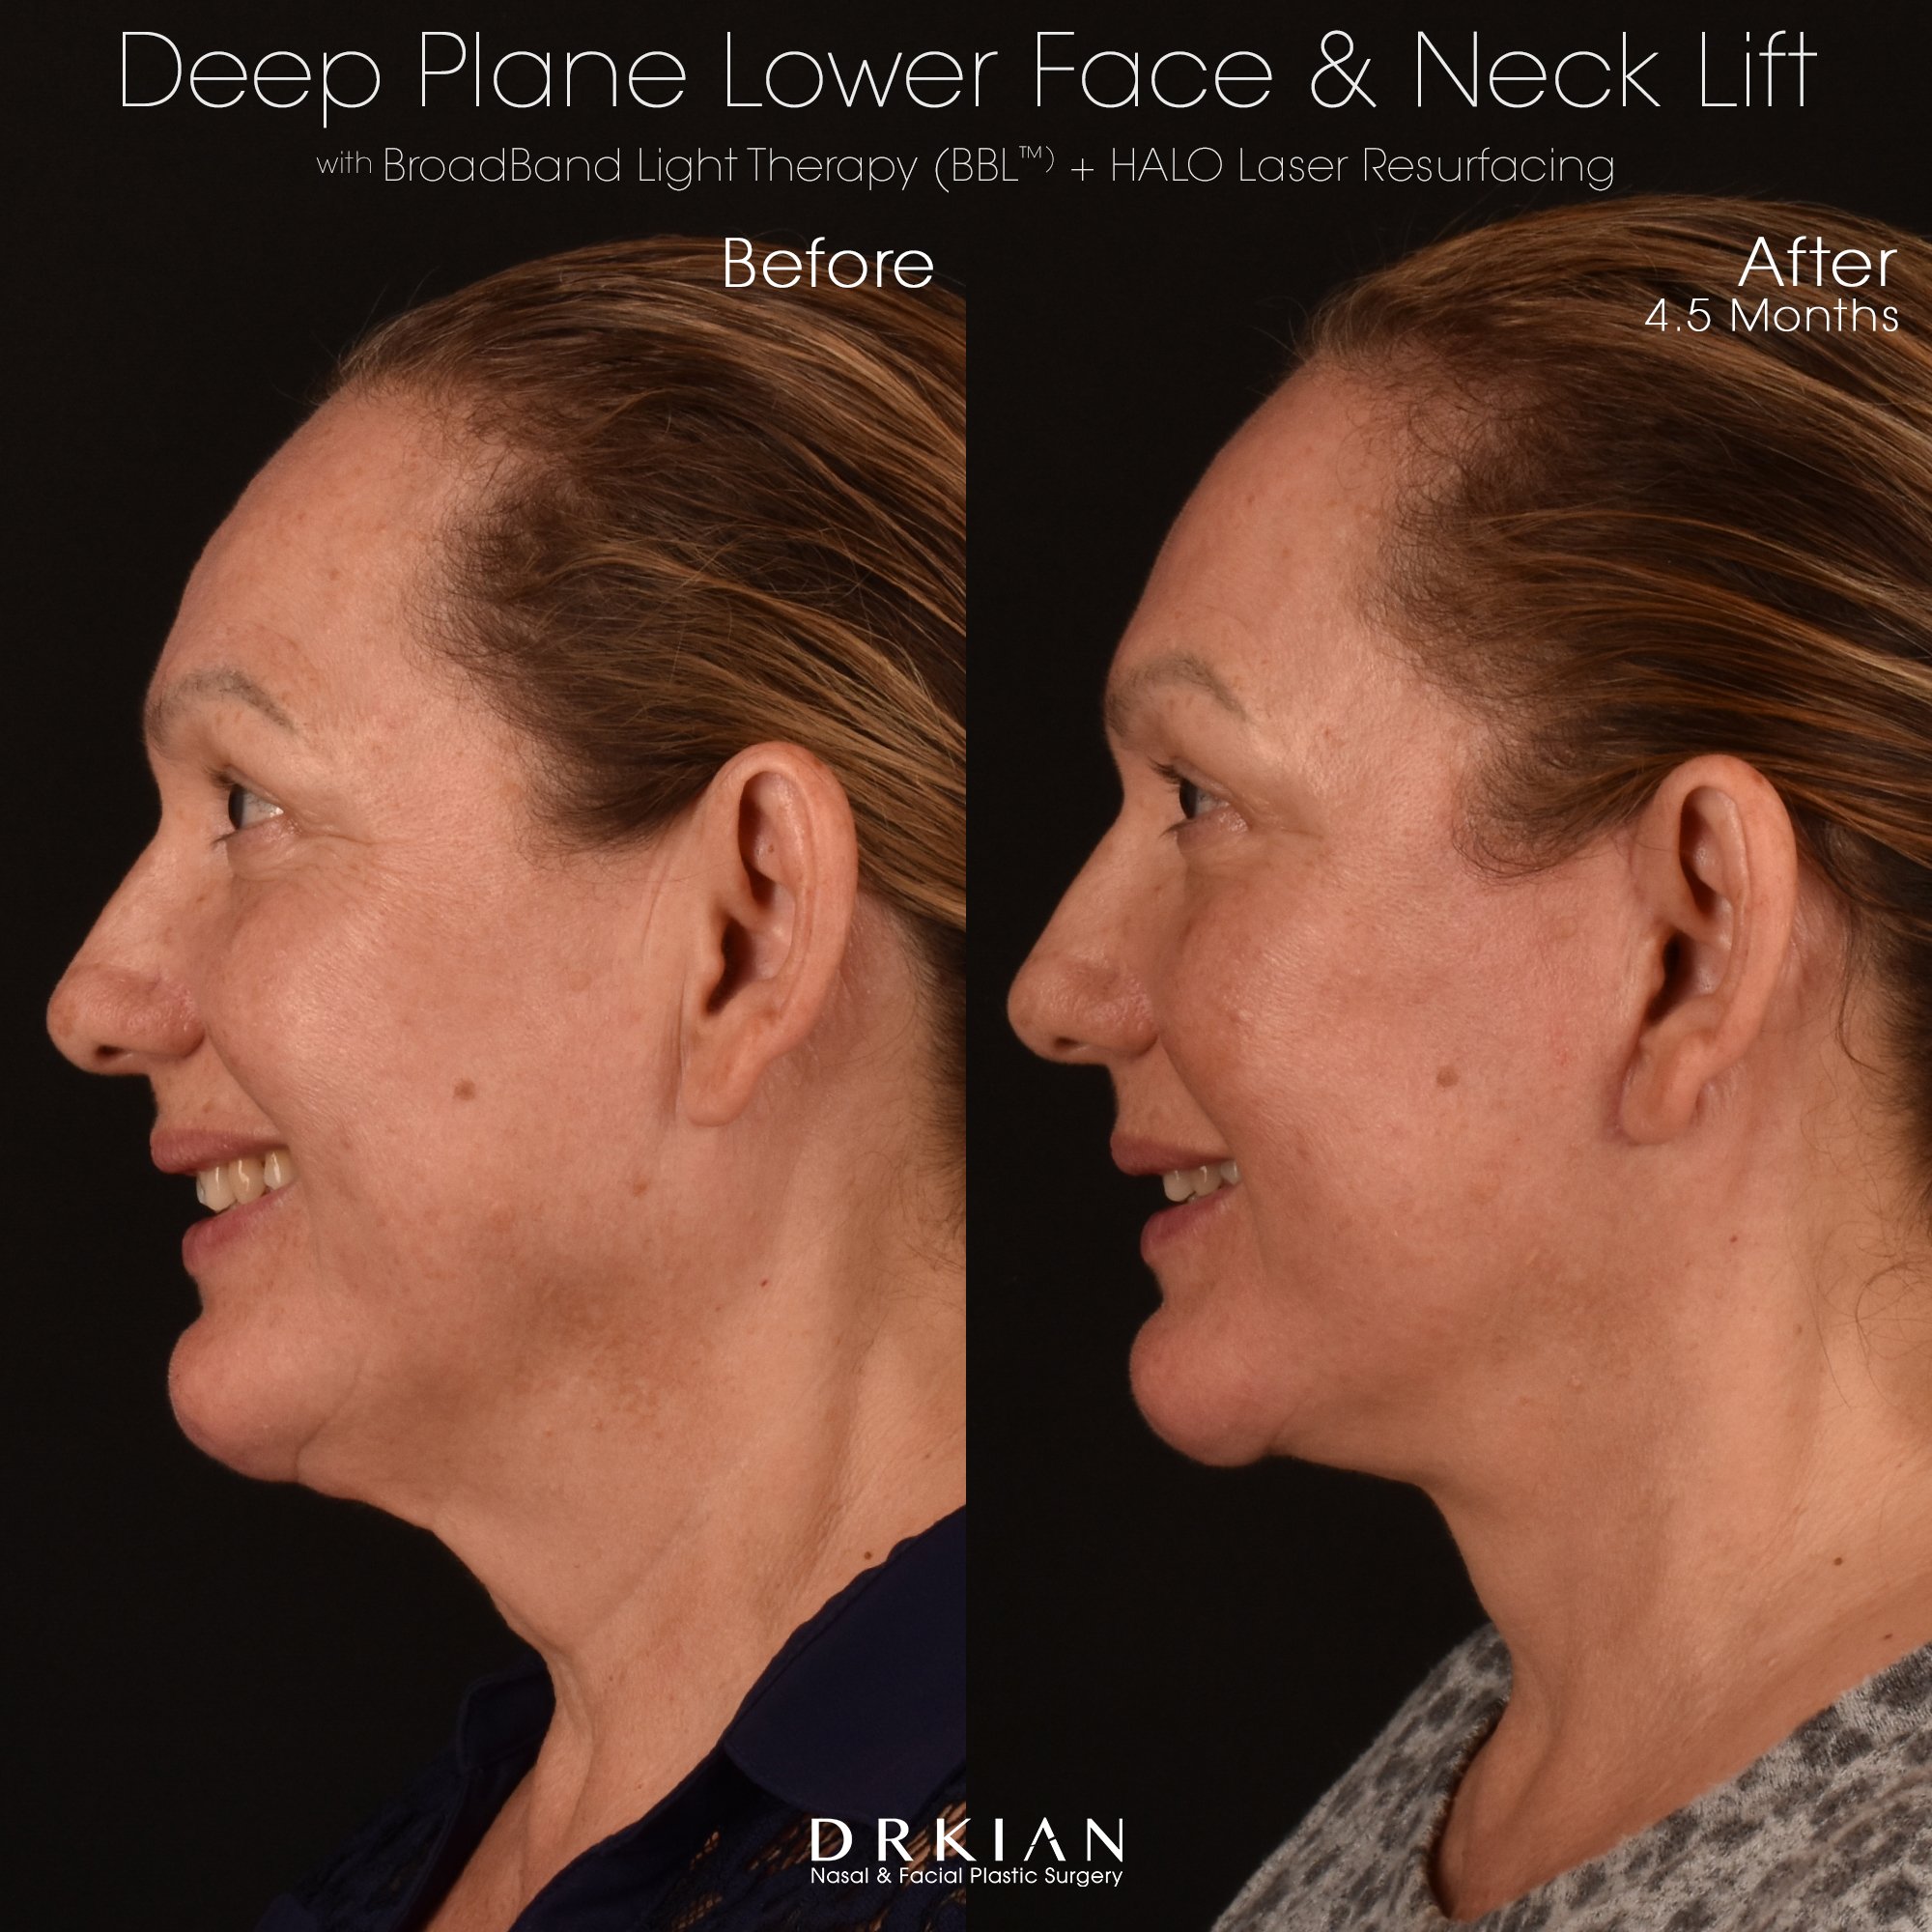
Deep Plane Lower Face & Neck Lift, HALO + BroadBand Light Therapy (BBL) Laser Skin Rejuvenation: Before & Four & A Half Months After

Deep Plane Lower Face & Neck Lift, HALO + BroadBand Light Therapy (BBL) Laser Skin Rejuvenation: Before & Four & A Half Months After

Deep Plane Lower Face & Neck Lift, HALO + BroadBand Light Therapy (BBL) Laser Skin Rejuvenation: Before & Four & A Half Months After

Deep Plane Lower Face & Neck Lift, HALO + BroadBand Light Therapy (BBL) Laser Skin Rejuvenation: Before & Four & A Half Months After
Deep Plane Lower Face & Neck Lift, HALO + BroadBand Light Therapy (BBL) Laser Skin Rejuvenation: Before & Four & A Half Months After

Deep Plane Lower Face & Neck Lift, HALO + BroadBand Light Therapy (BBL) Laser Skin Rejuvenation: Before & Four & A Half Months After

Deep Plane Lower Face & Neck Lift, HALO + BroadBand Light Therapy (BBL) Laser Skin Rejuvenation: Before & Four & A Half Months After

Deep Plane Lower Face & Neck Lift, HALO + BroadBand Light Therapy (BBL) Laser Skin Rejuvenation: Before & Four & A Half Months After

Deep Plane Lower Face & Neck Lift, HALO + BroadBand Light Therapy (BBL) Laser Skin Rejuvenation: Before & Four & A Half Months After
Deep Plane Lower Face & Neck Lift, HALO + BroadBand Light Therapy (BBL) Laser Skin Rejuvenation: Before & Four & A Half Months After

Deep Plane Lower Face & Neck Lift, HALO + BroadBand Light Therapy (BBL) Laser Skin Rejuvenation: Before & Four & A Half Months After

Deep Plane Lower Face & Neck Lift, HALO + BroadBand Light Therapy (BBL) Laser Skin Rejuvenation: Before & Four & A Half Months After

Deep Plane Lower Face & Neck Lift, HALO + BroadBand Light Therapy (BBL) Laser Skin Rejuvenation: Before & Four & A Half Months After

Deep Plane Lower Face & Neck Lift, HALO + BroadBand Light Therapy (BBL) Laser Skin Rejuvenation: Before & Four & A Half Months After

Deep Plane Lower Face & Neck Lift, HALO + BroadBand Light Therapy (BBL) Laser Skin Rejuvenation: Before & Four & A Half Months After

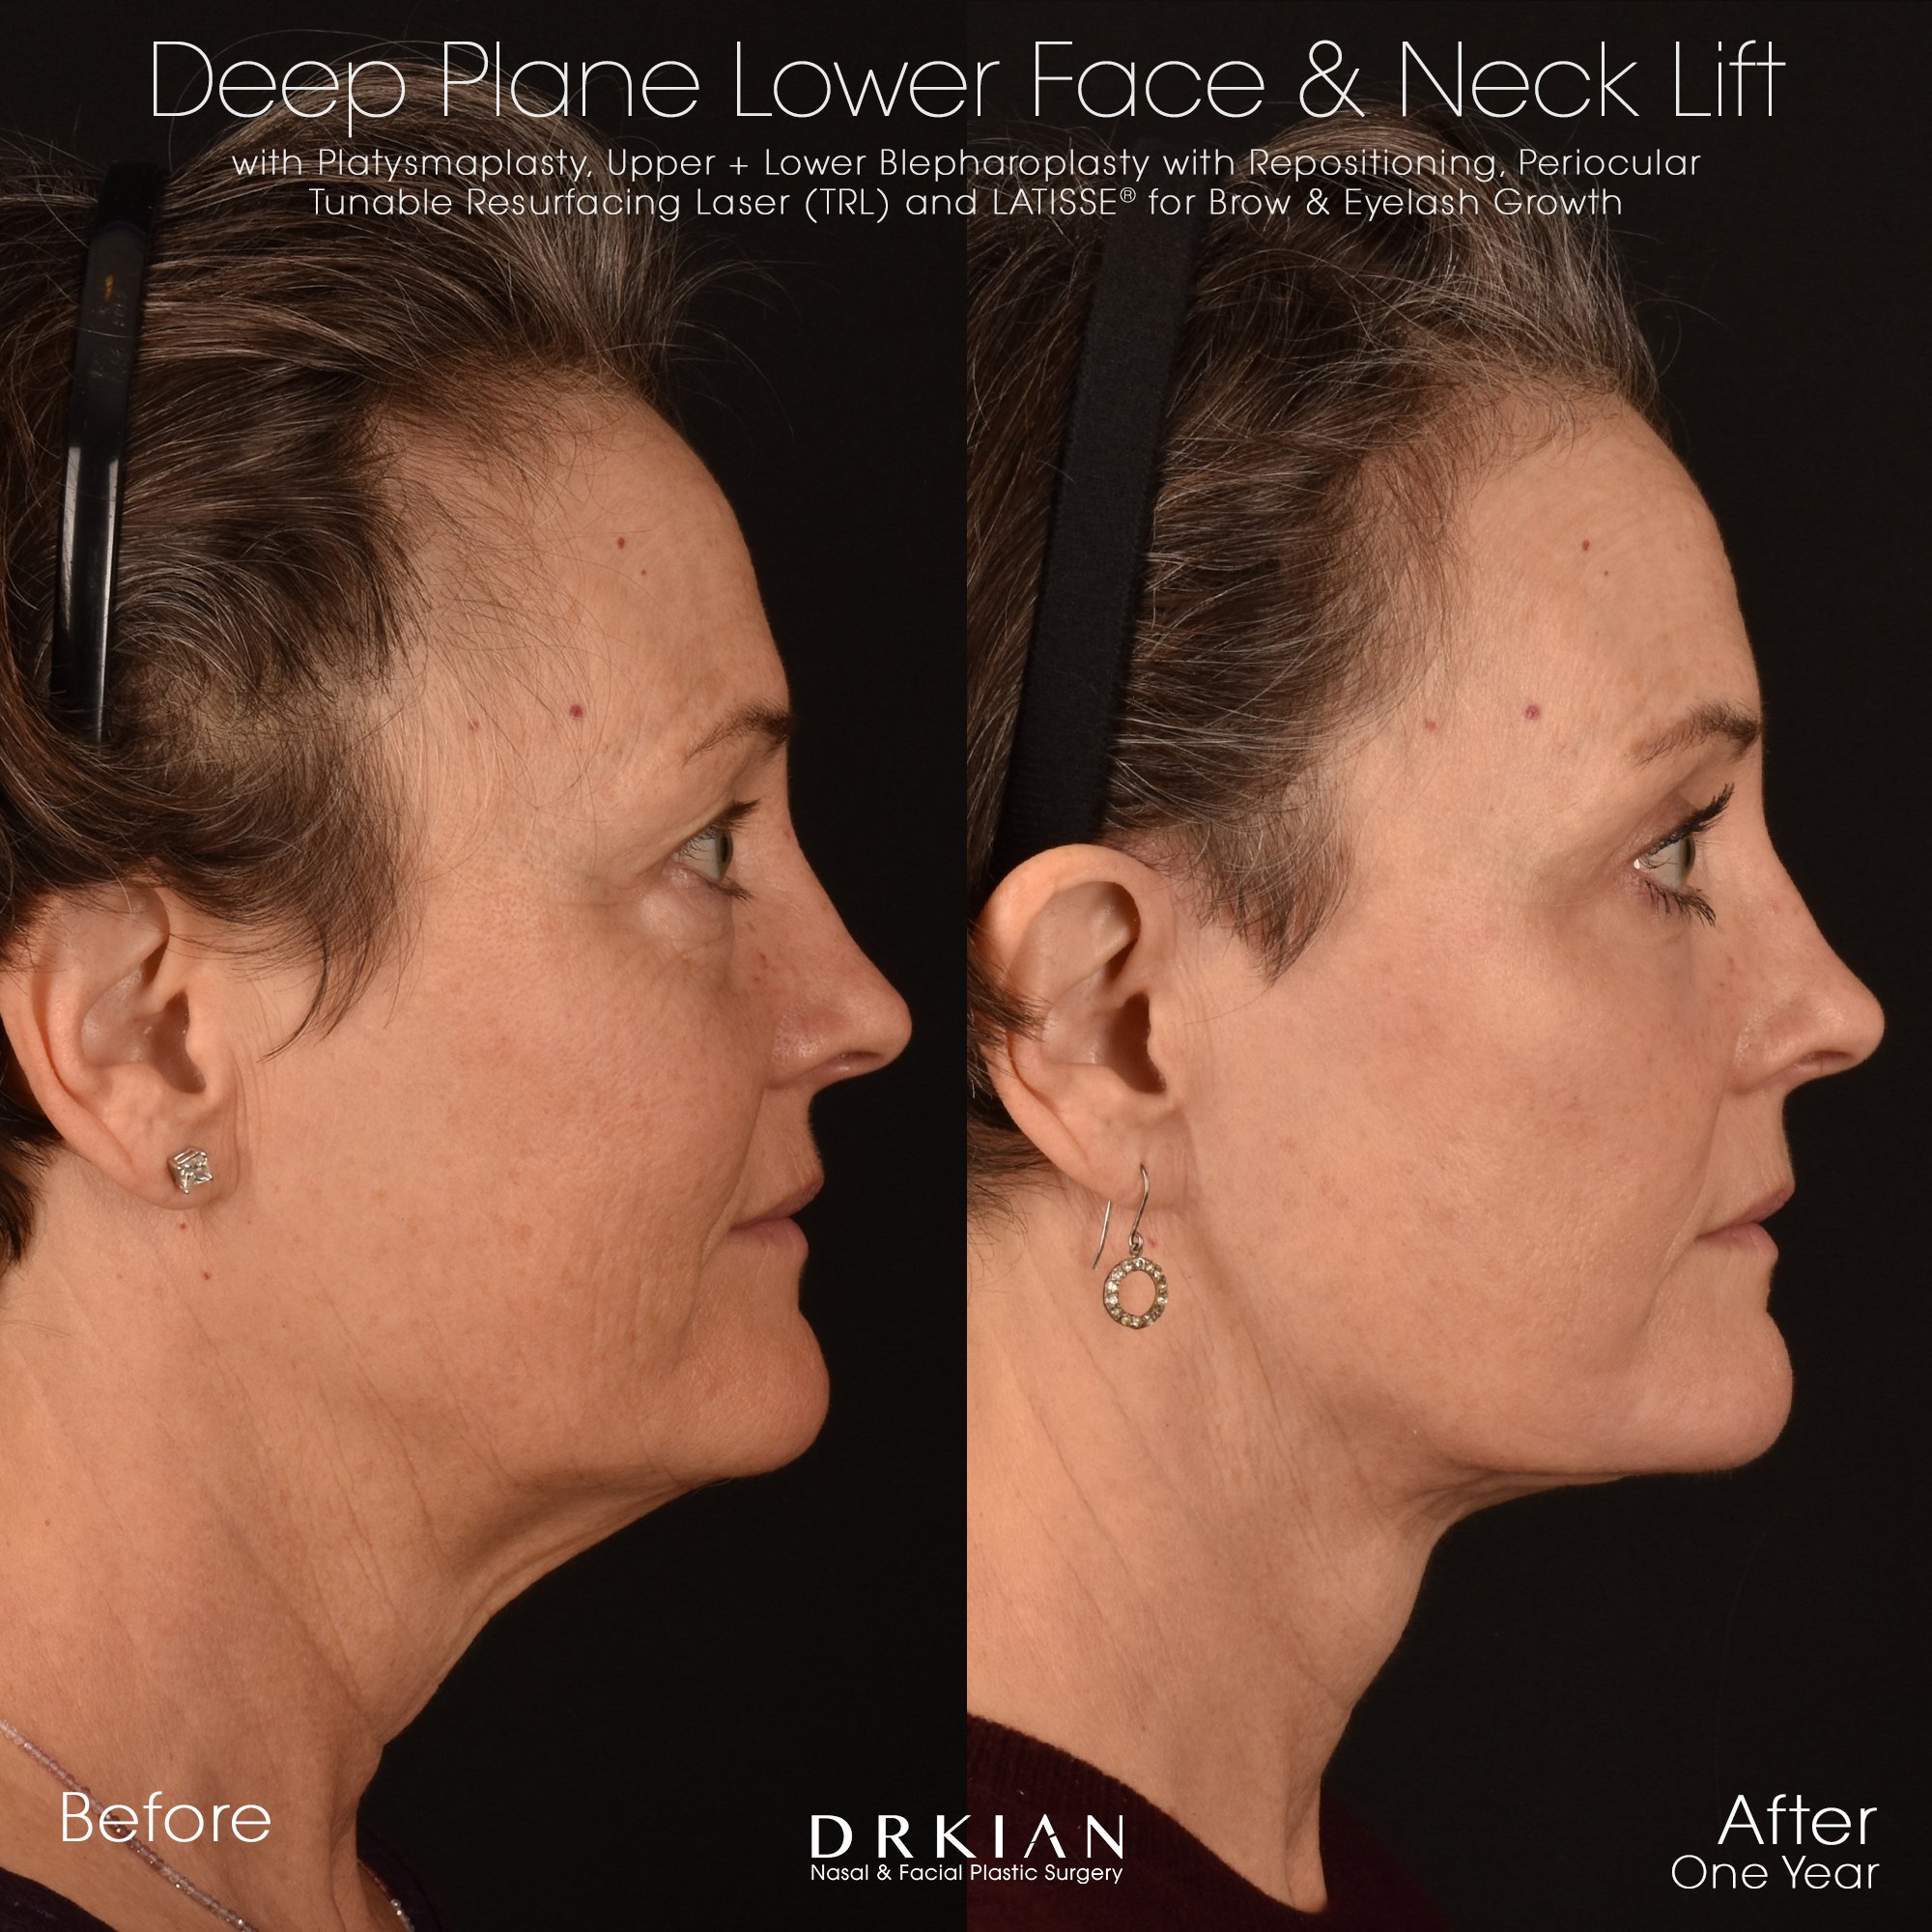
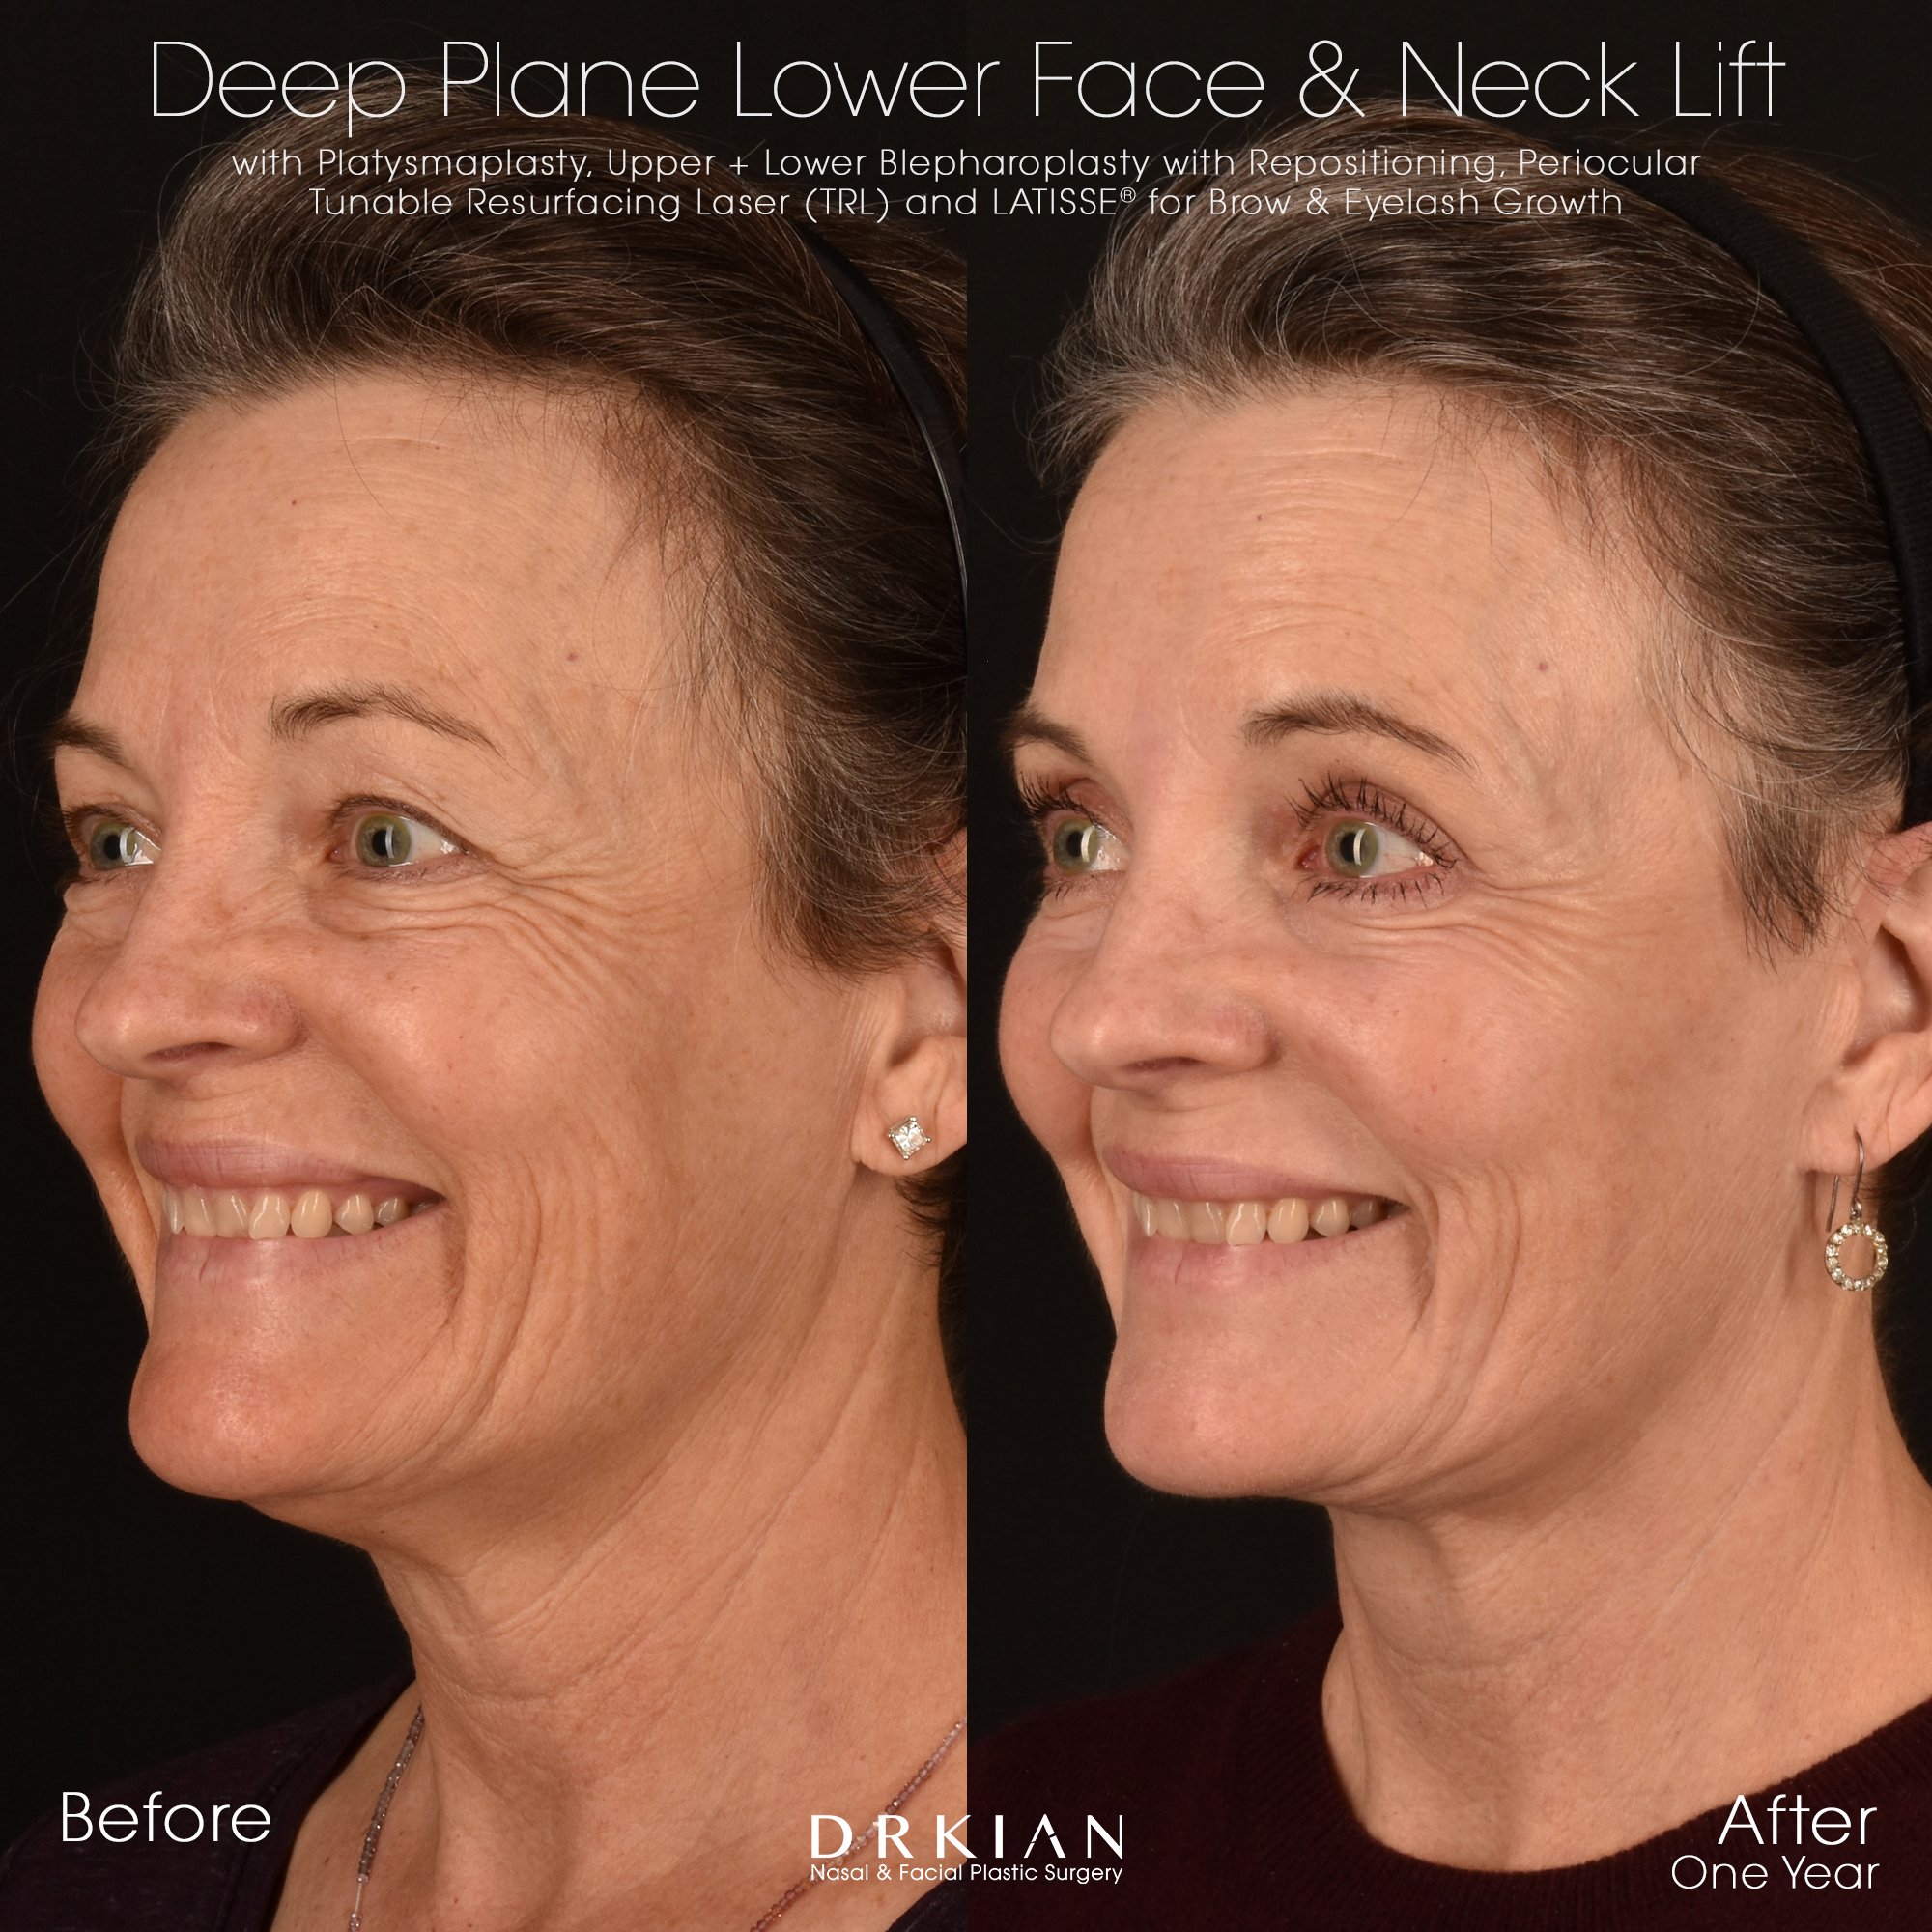
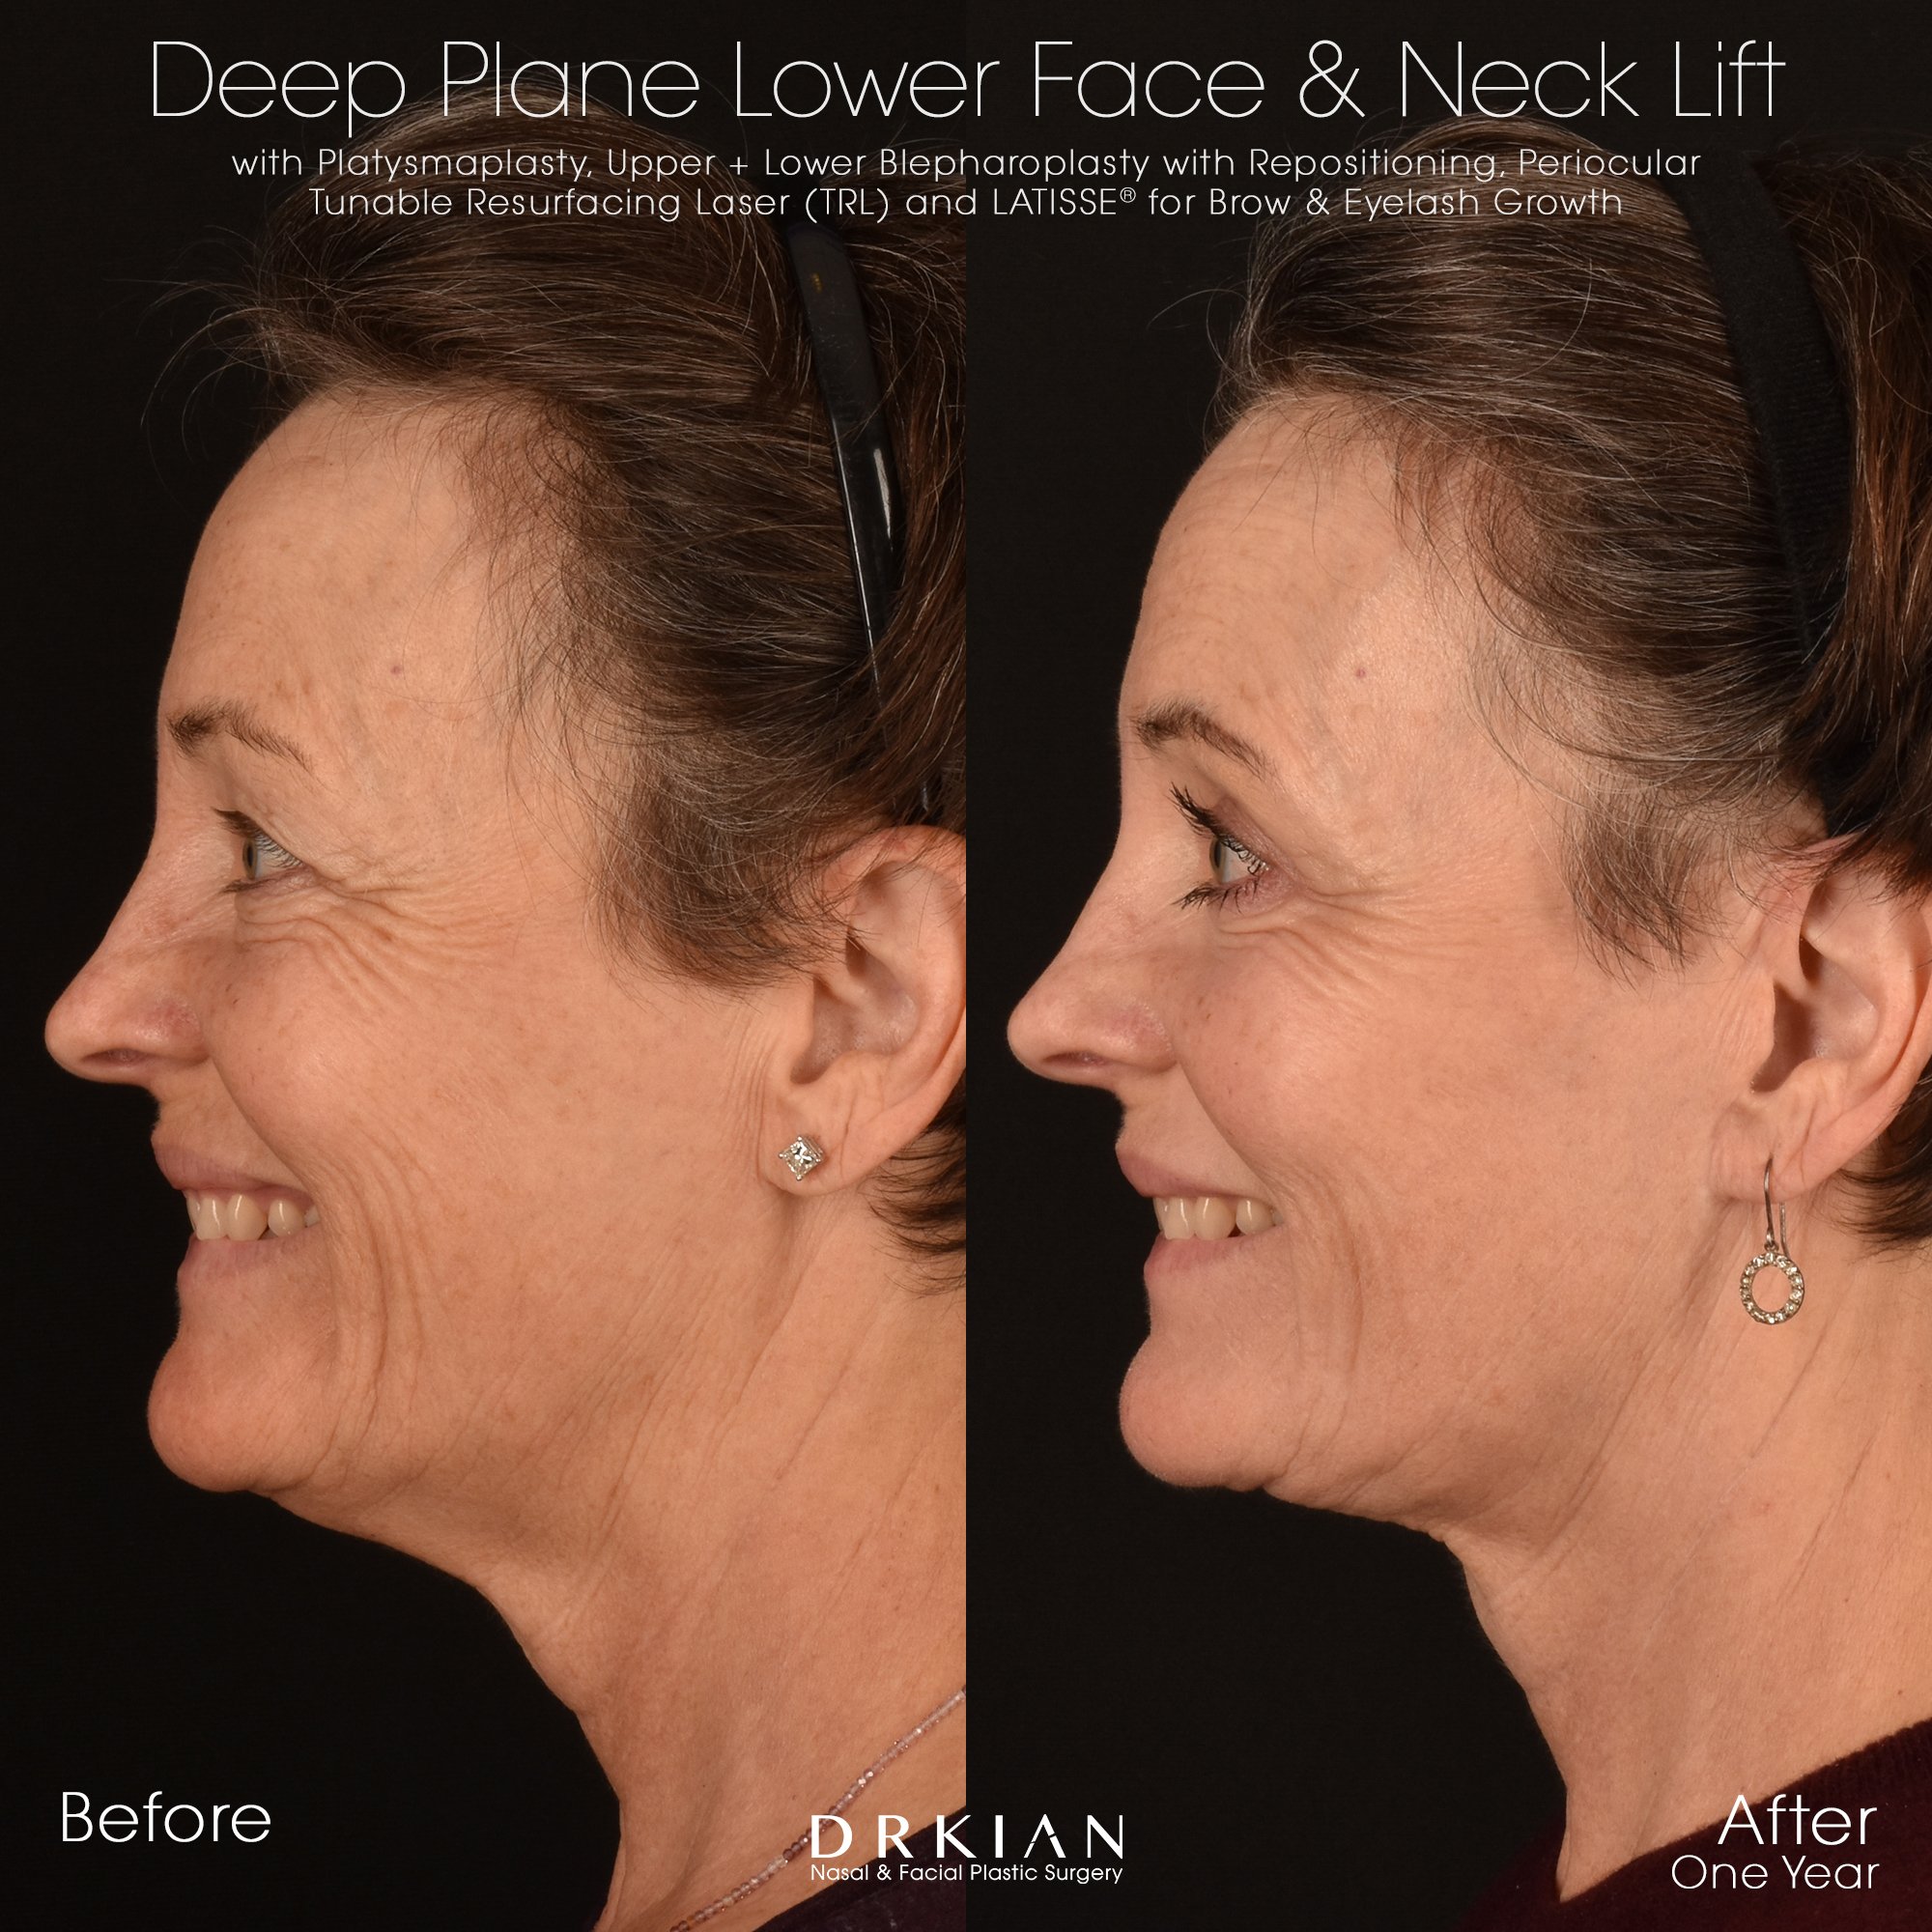
Deep Plane Lower Face & Neck Lift with Platysmaplasty, Upper Blepharoplasty + Lower Blepharoplasty with Repositioning, Periocular Tunable Resurfacing Laser (TRL) and LATISSE® for Brow & Eyelash Growth - Before & After One Year
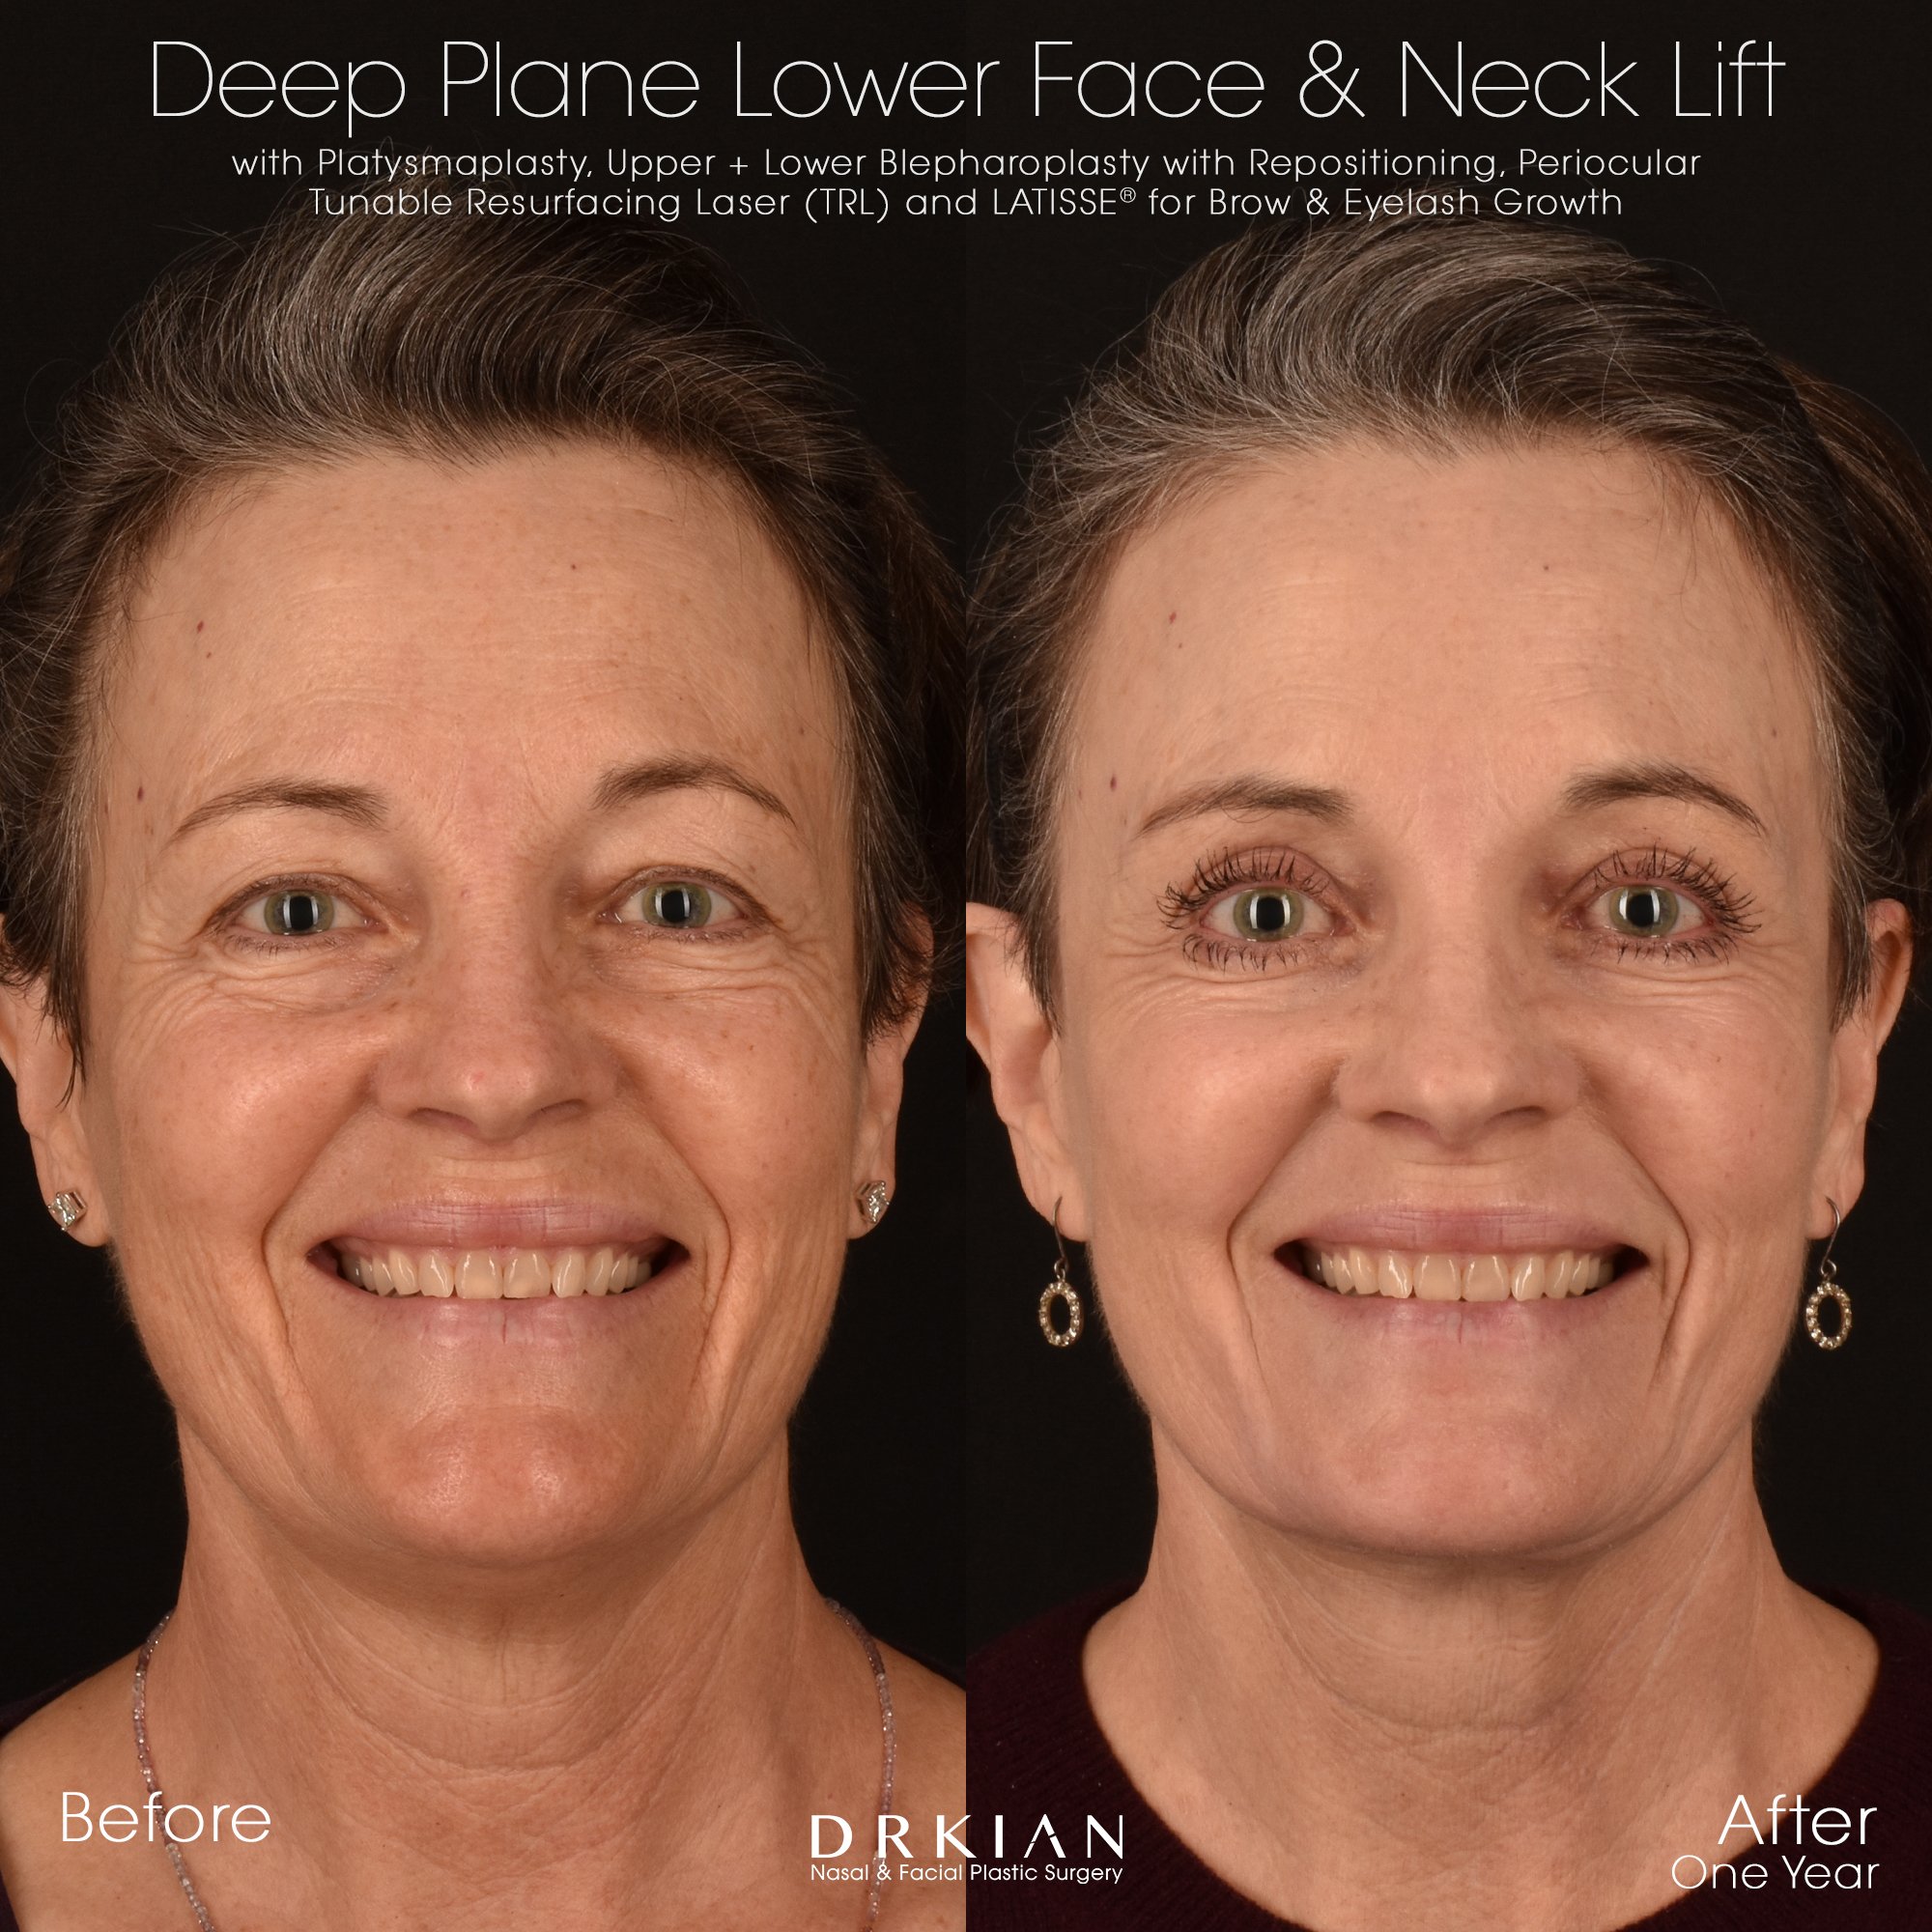
Deep Plane Lower Face & Neck Lift with Platysmaplasty, Upper Blepharoplasty + Lower Blepharoplasty with Repositioning, Periocular Tunable Resurfacing Laser (TRL) and LATISSE® for Brow & Eyelash Growth - Before & After One Year
Deep Plane Lower Face & Neck Lift with Platysmaplasty, Upper Blepharoplasty + Lower Blepharoplasty with Repositioning, Periocular Tunable Resurfacing Laser (TRL) and LATISSE® for Brow & Eyelash Growth - Before & After One Year
Deep Plane Lower Face & Neck Lift with Platysmaplasty, Upper Blepharoplasty + Lower Blepharoplasty with Repositioning, Periocular Tunable Resurfacing Laser (TRL) and LATISSE® for Brow & Eyelash Growth - Before & After One Year
Deep Plane Lower Face & Neck Lift with Platysmaplasty, Upper Blepharoplasty + Lower Blepharoplasty with Repositioning, Periocular Tunable Resurfacing Laser (TRL) and LATISSE® for Brow & Eyelash Growth - Before & After One Year

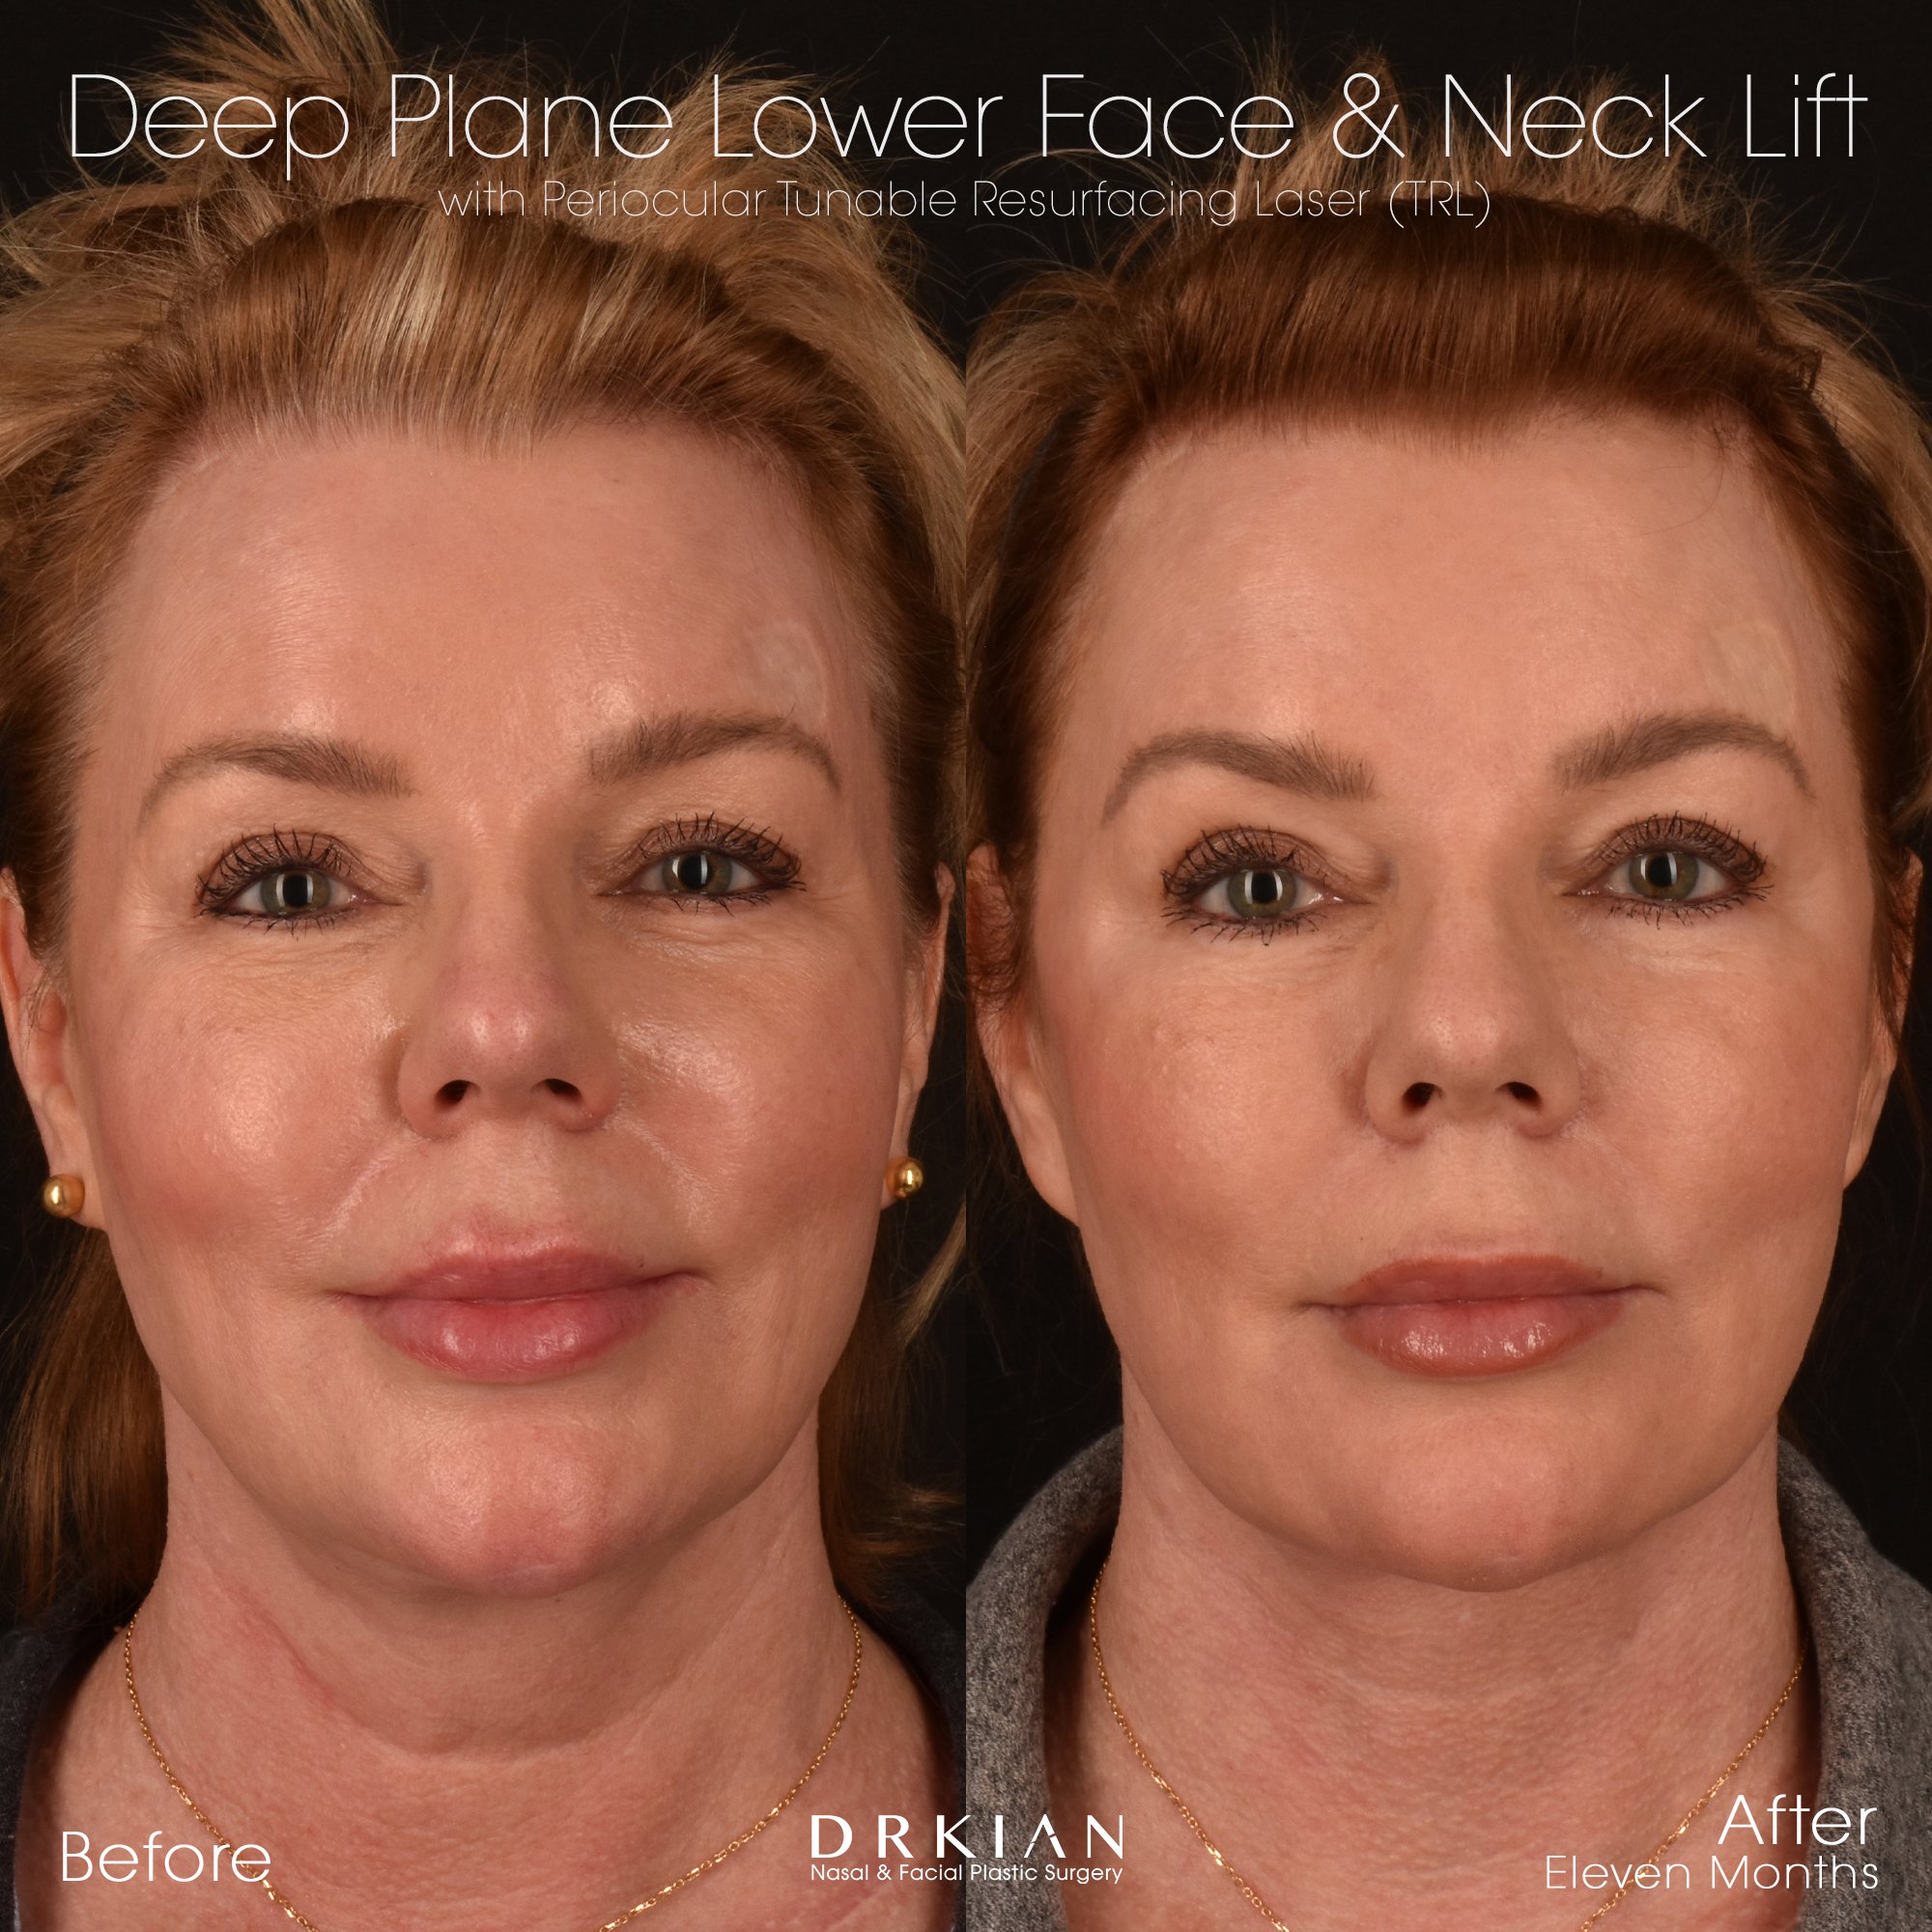
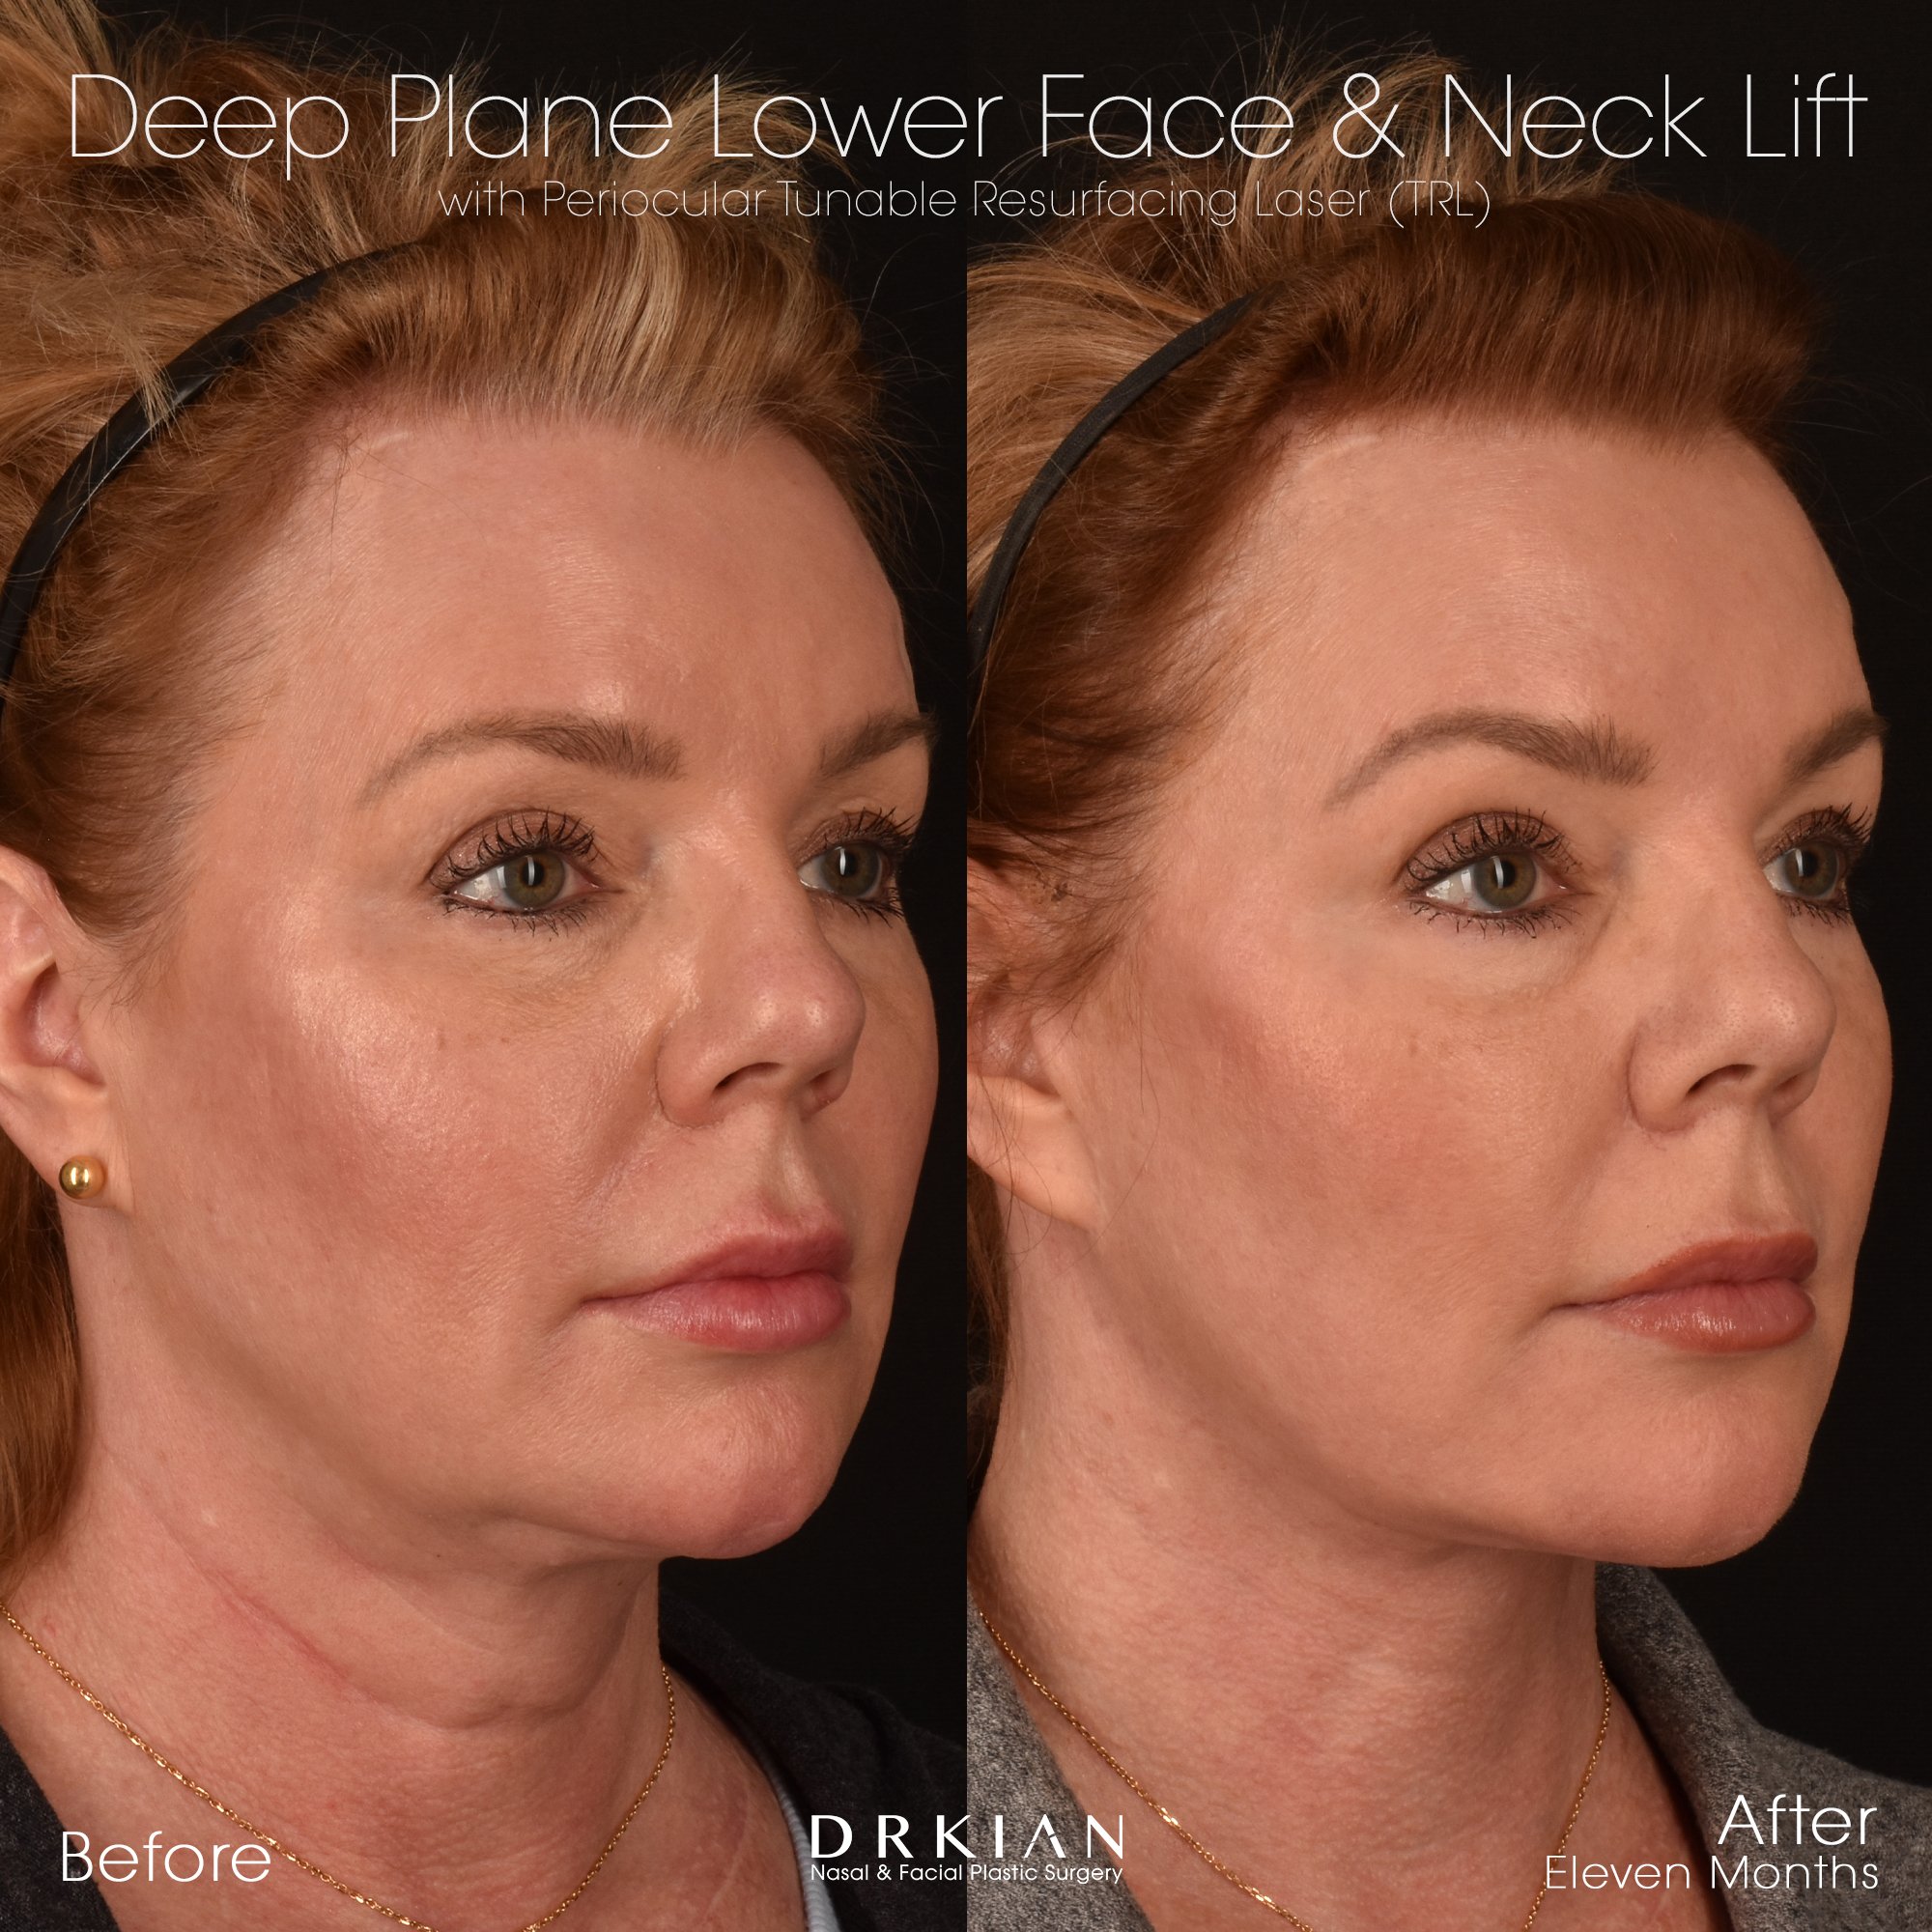
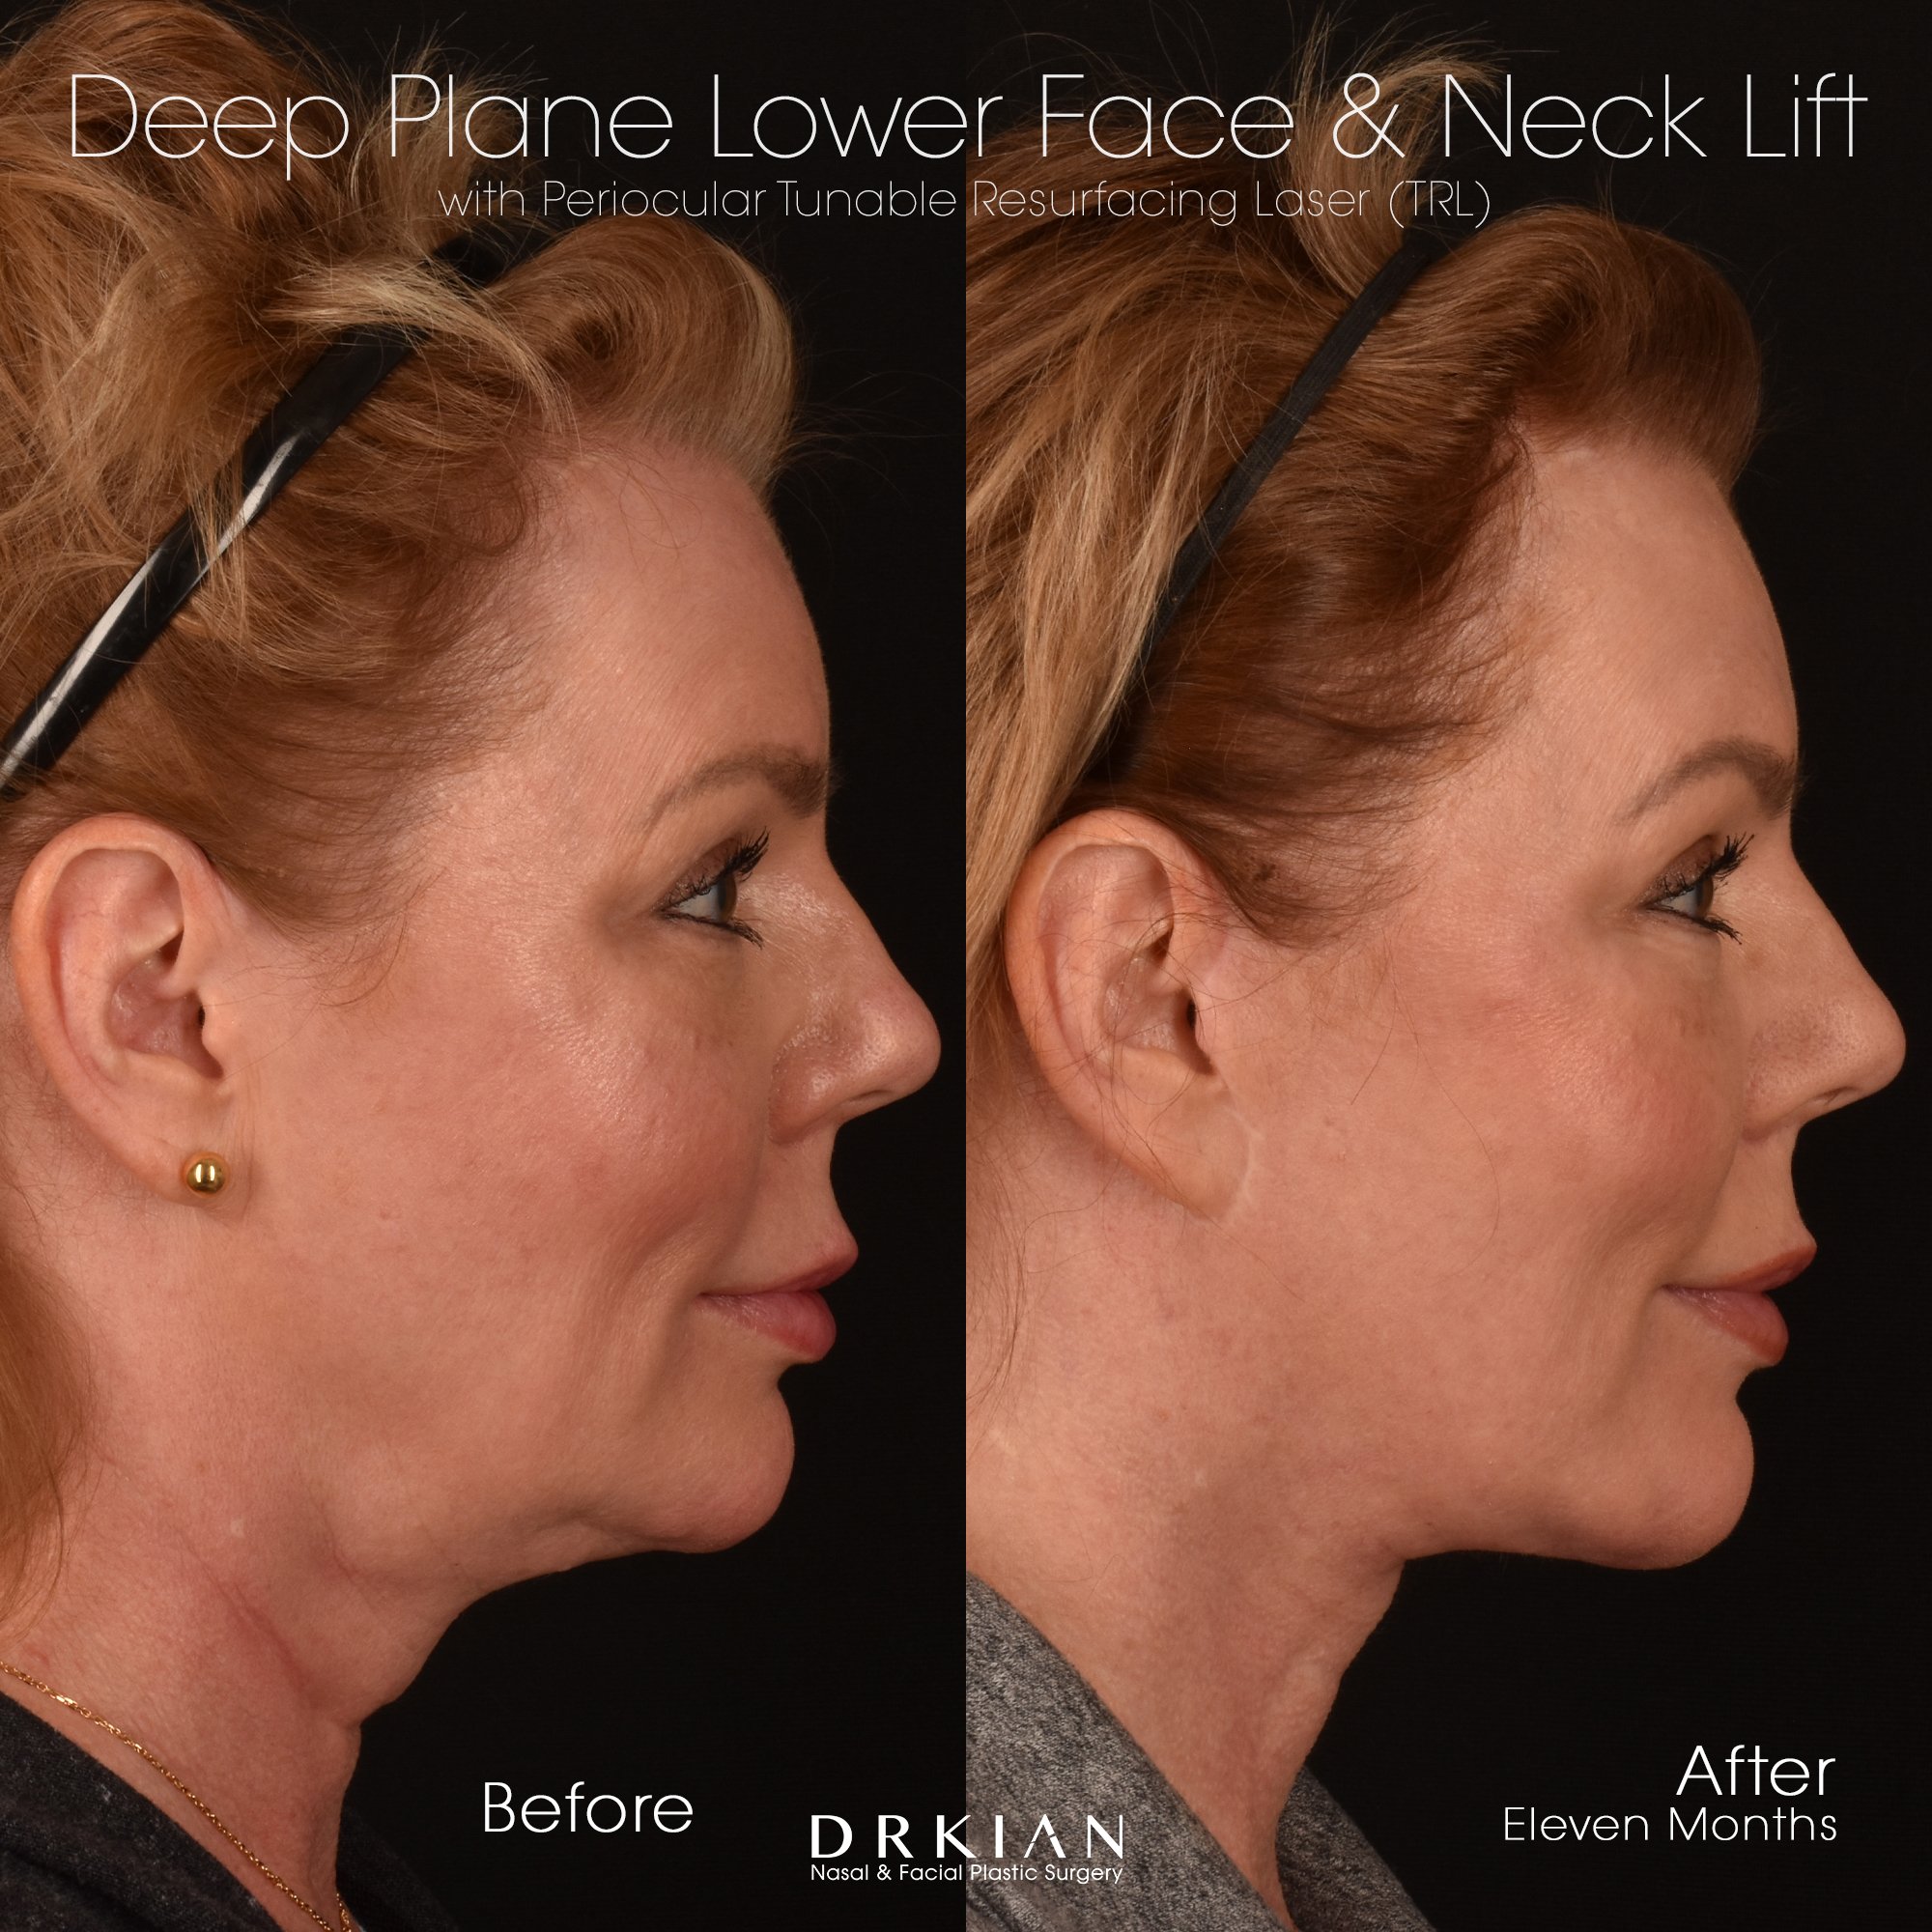
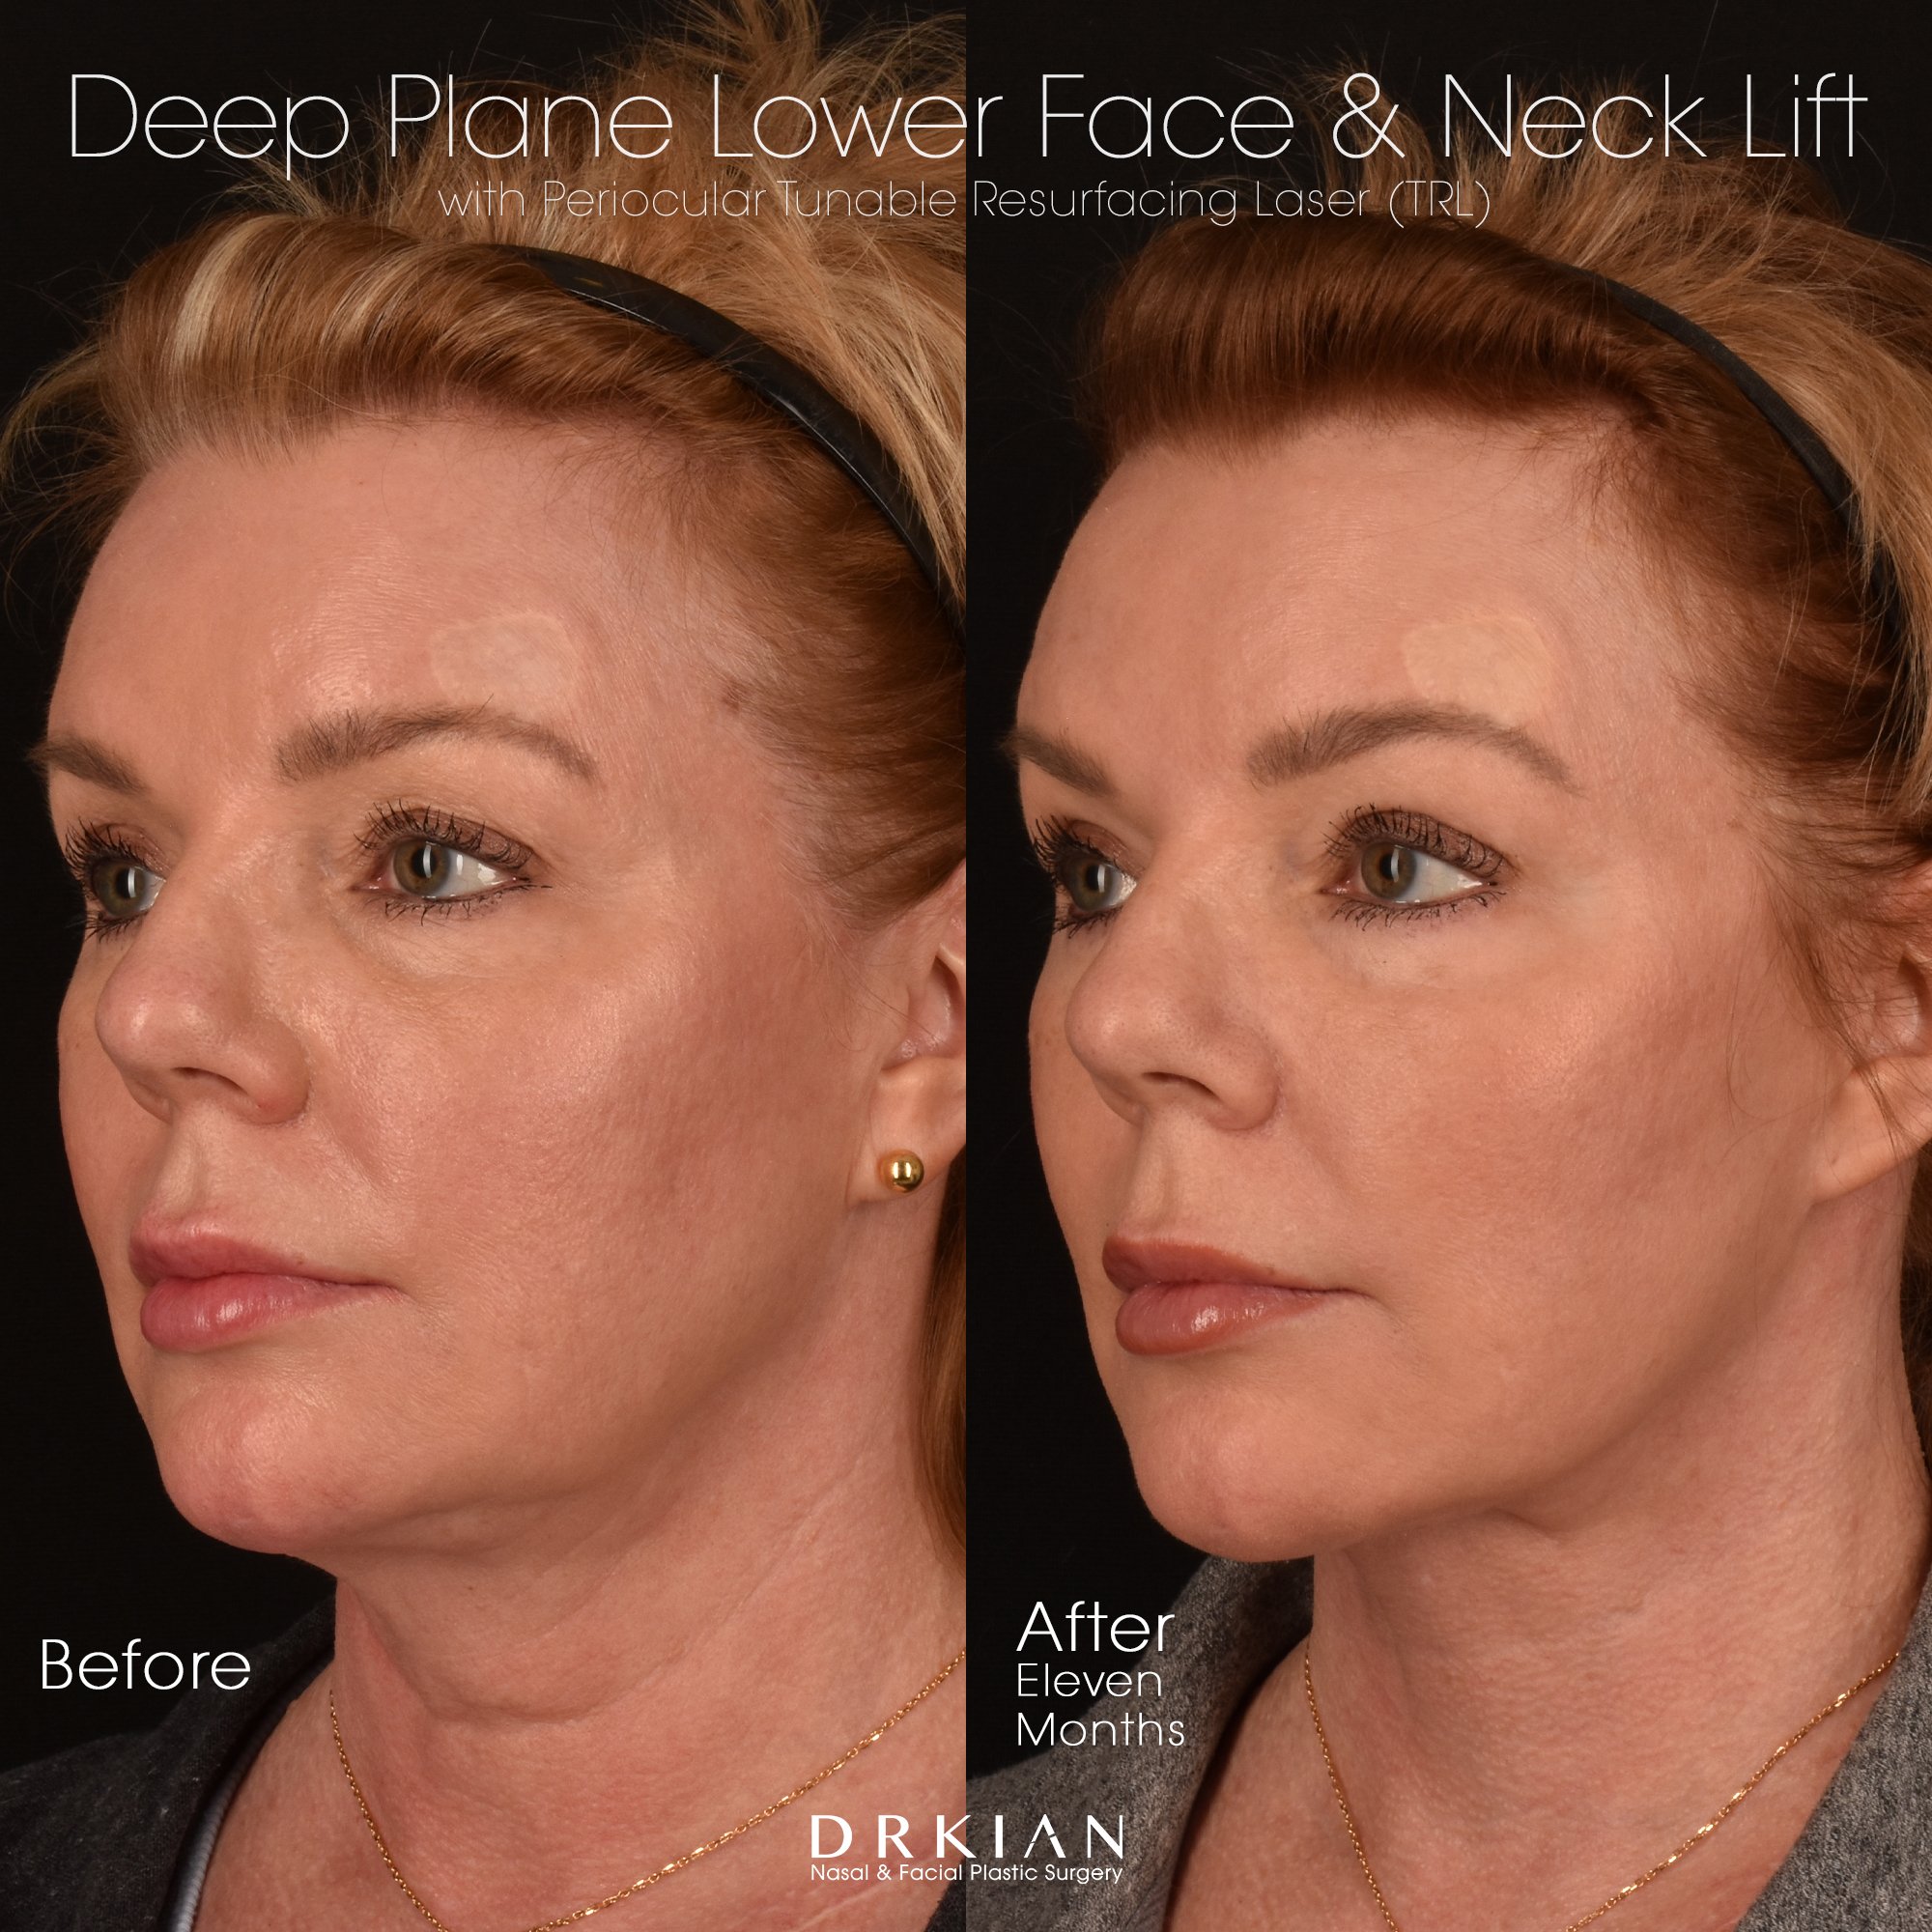
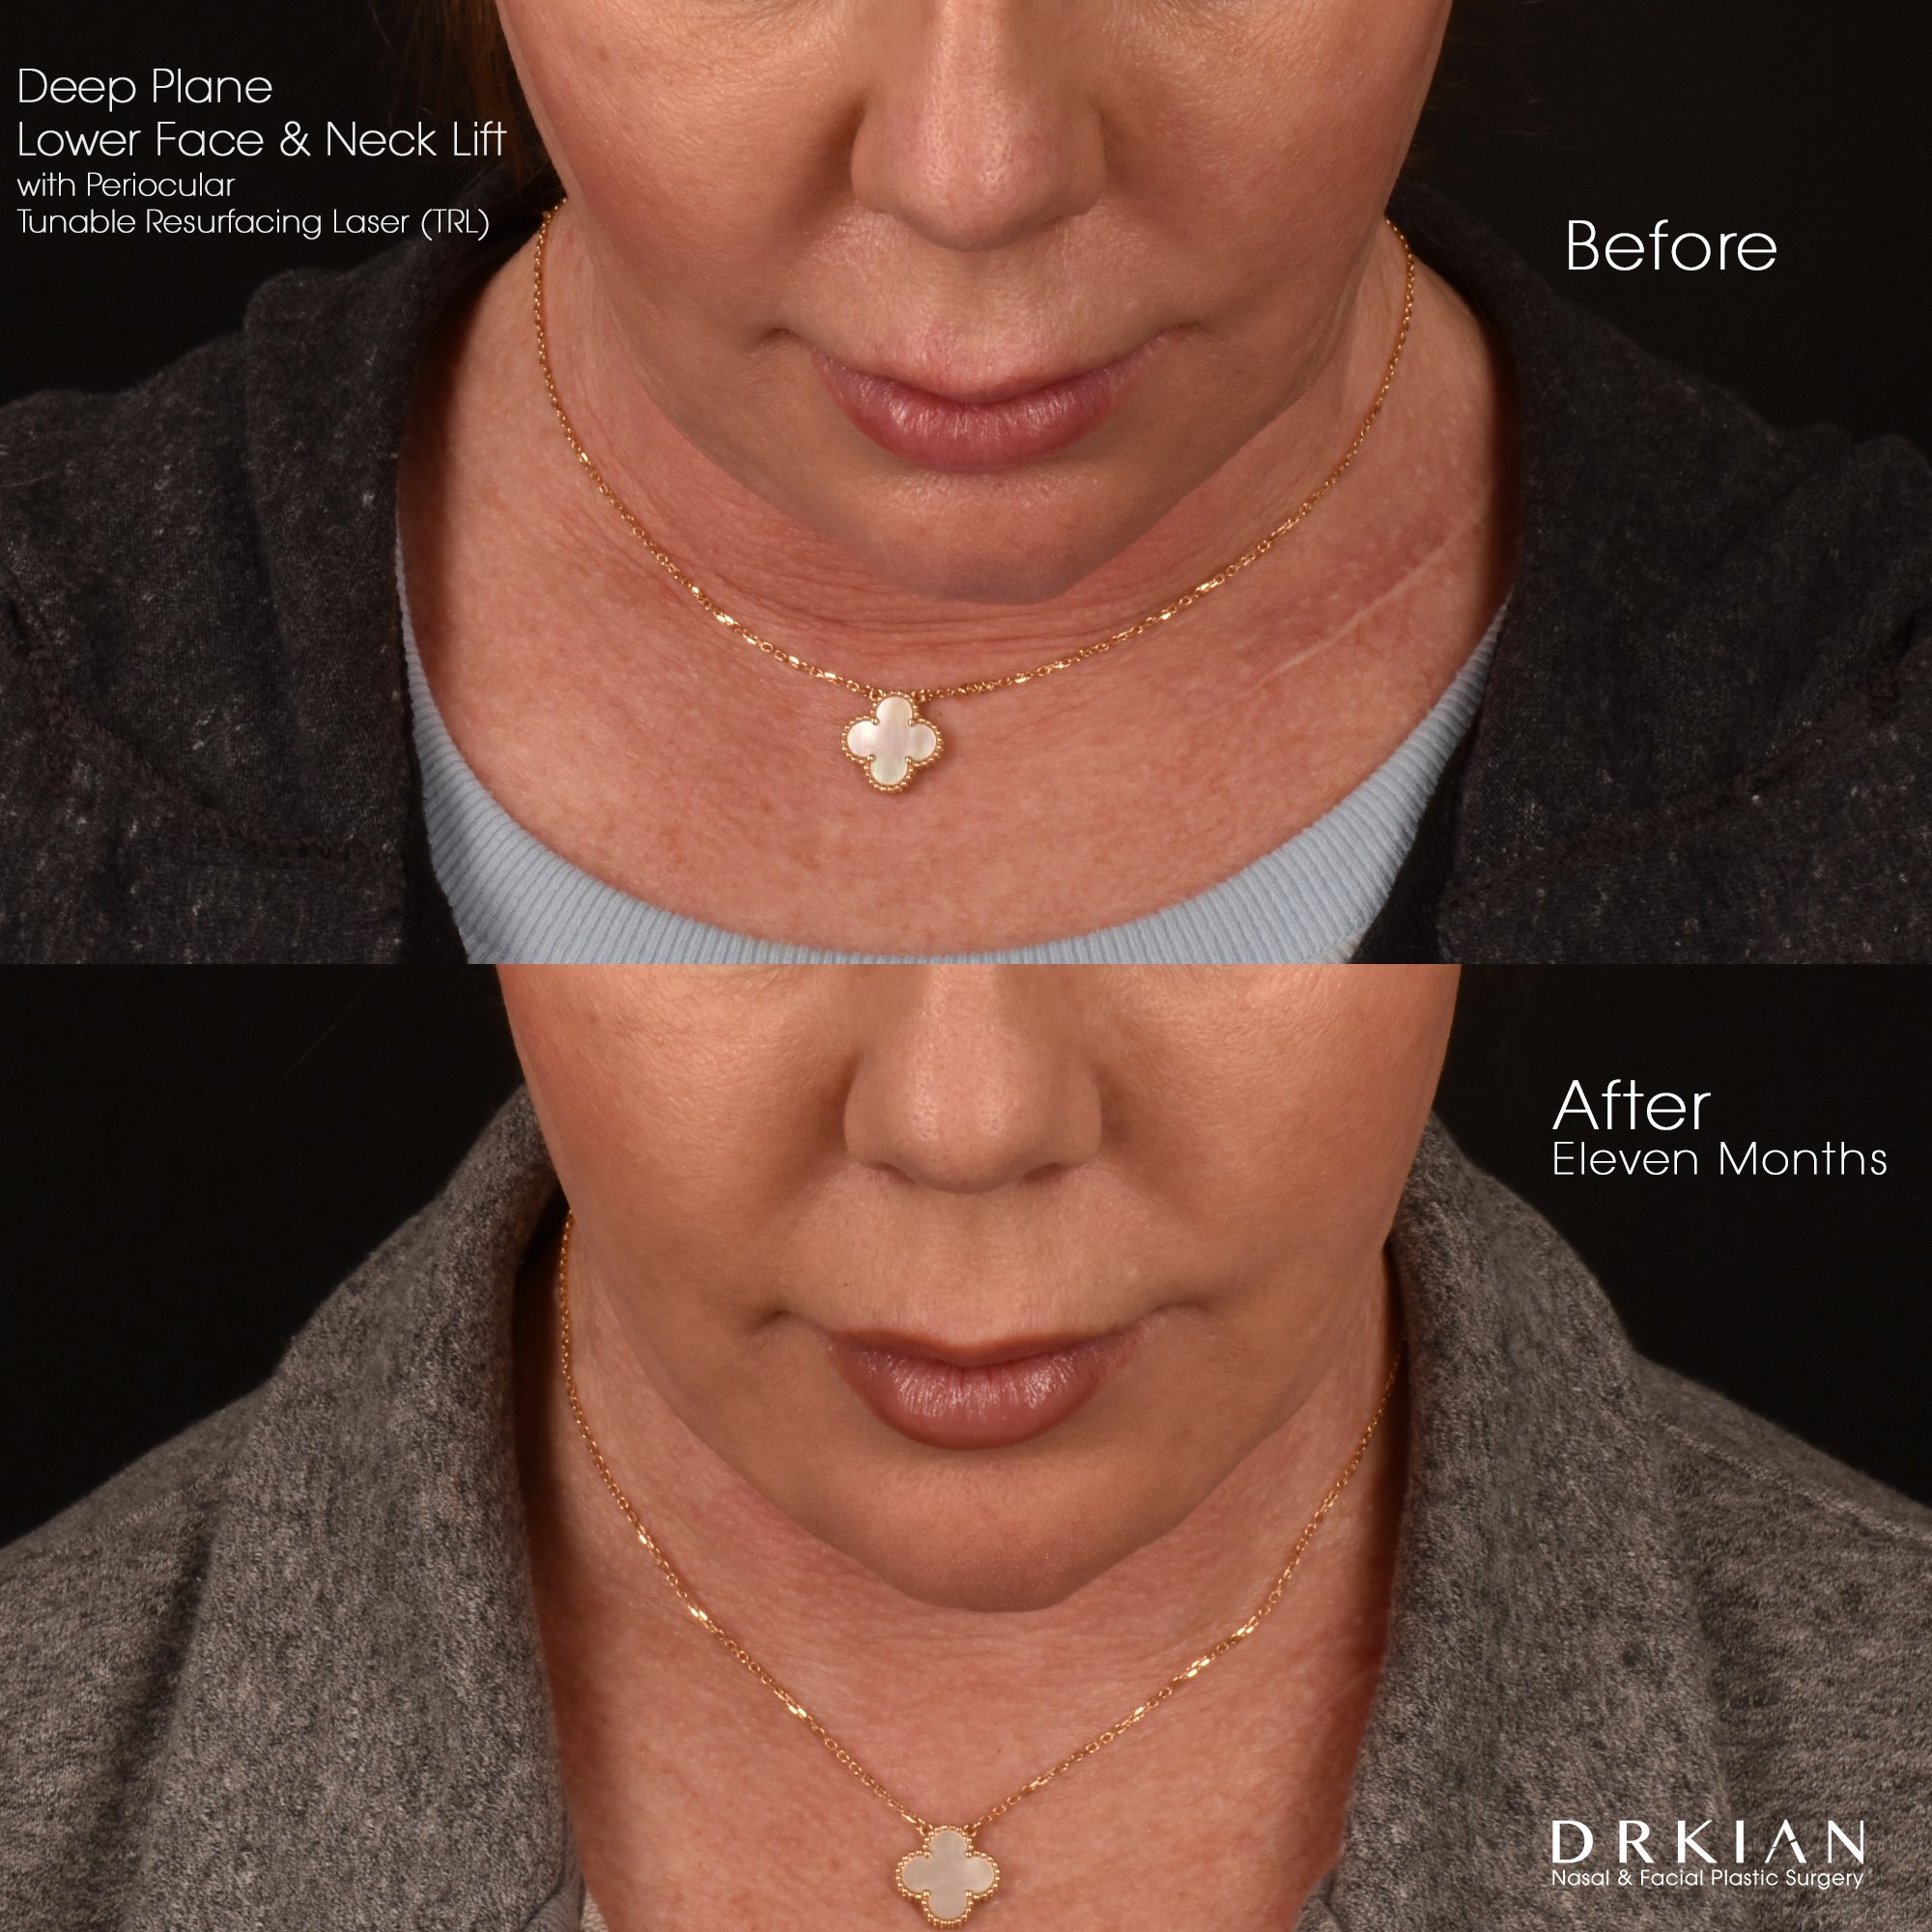
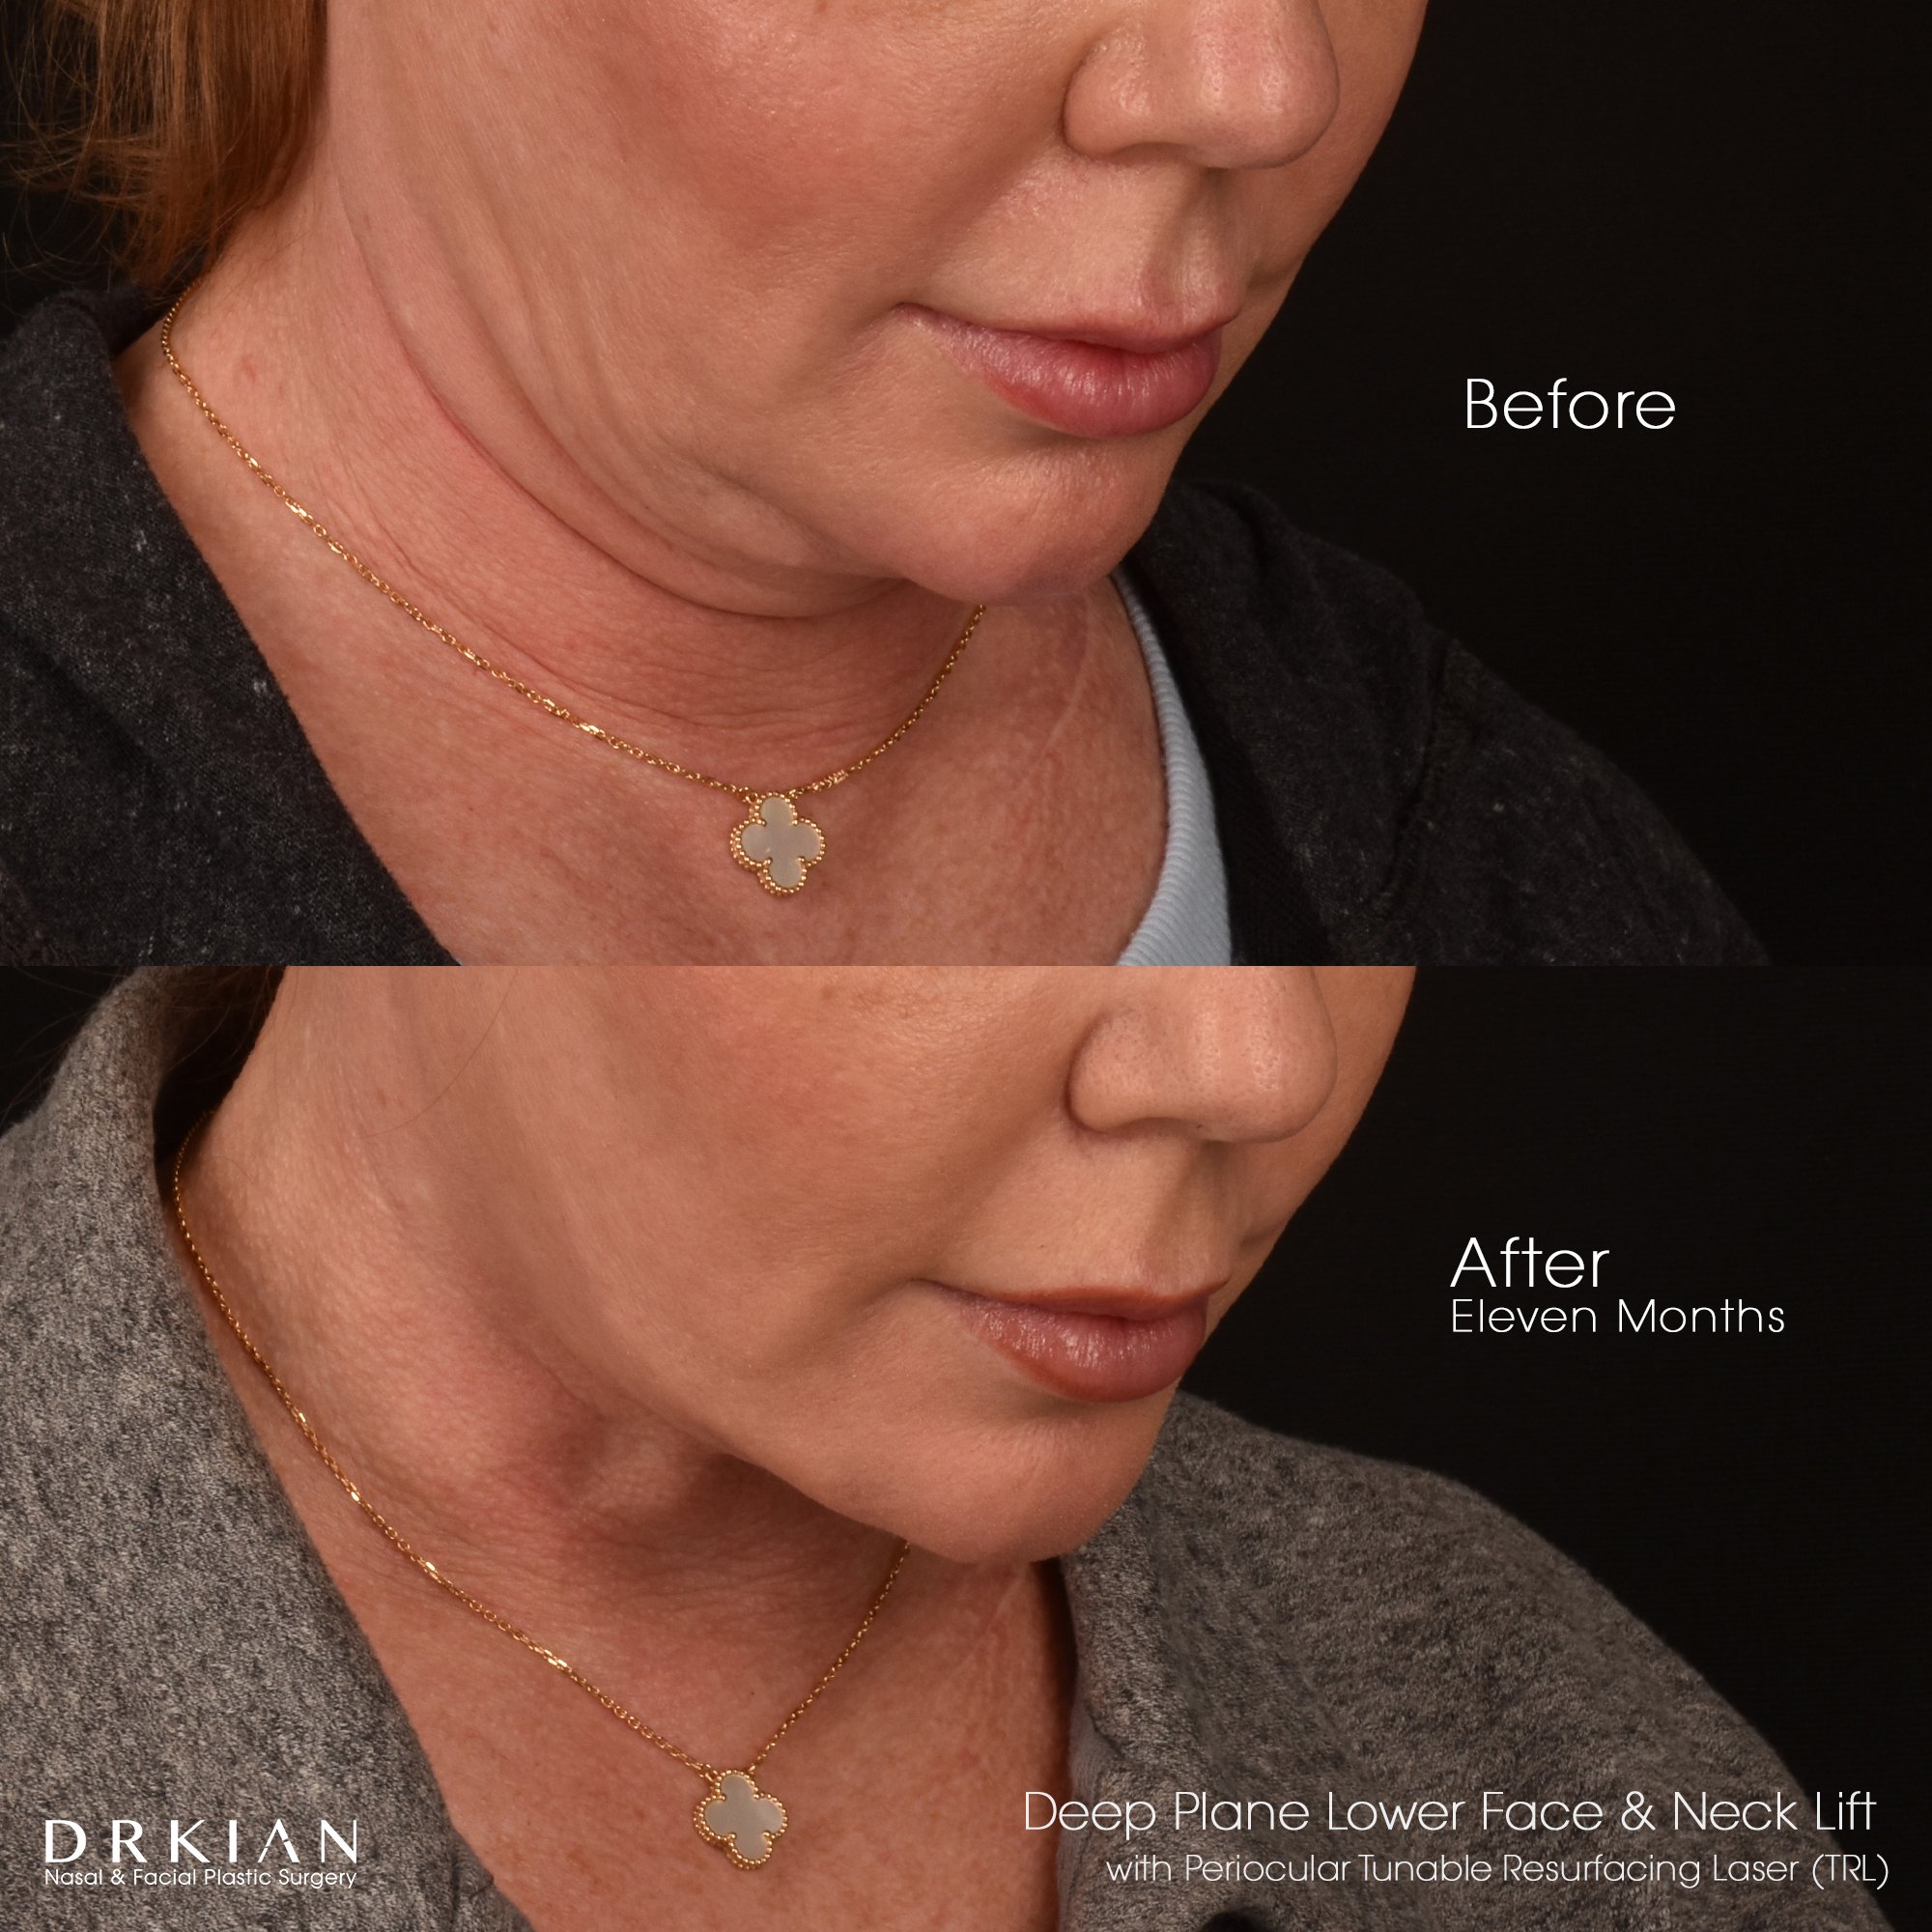
Deep Plane Lower Face & Neck Lift with Periocular Tunable Resurfacing Laser (TRL): Before & After Eleven Months
Deep Plane Lower Face & Neck Lift with Periocular Tunable Resurfacing Laser (TRL): Before & After Eleven Months
Deep Plane Lower Face & Neck Lift with Periocular Tunable Resurfacing Laser (TRL): Before & After Eleven Months

Deep Plane Lower Face & Neck Lift with Periocular Tunable Resurfacing Laser (TRL): Before & After Eleven Months

Deep Plane Lower Face & Neck Lift with Periocular Tunable Resurfacing Laser (TRL): Before & After Eleven Months
Deep Plane Lower Face & Neck Lift with Periocular Tunable Resurfacing Laser (TRL): Before & After Eleven Months
Deep Plane Lower Face & Neck Lift with Periocular Tunable Resurfacing Laser (TRL): Before & After Eleven Months

Deep Plane Lower Face & Neck Lift with Periocular Tunable Resurfacing Laser (TRL): Before & After Eleven Months

Deep Plane Lower Face & Neck Lift with Periocular Tunable Resurfacing Laser (TRL): Before & After Eleven Months

Deep Plane Lower Face & Neck Lift with Periocular Tunable Resurfacing Laser (TRL): Before & After Eleven Months
Deep Plane Lower Face & Neck Lift with Periocular Tunable Resurfacing Laser (TRL): Before & After Eleven Months
Deep Plane Lower Face & Neck Lift with Periocular Tunable Resurfacing Laser (TRL): Before & After Eleven Months

Deep Plane Lower Face & Neck Lift with Periocular Tunable Resurfacing Laser (TRL): Before & After Eleven Months

Deep Plane Lower Face & Neck Lift with Periocular Tunable Resurfacing Laser (TRL): Before & After Eleven Months
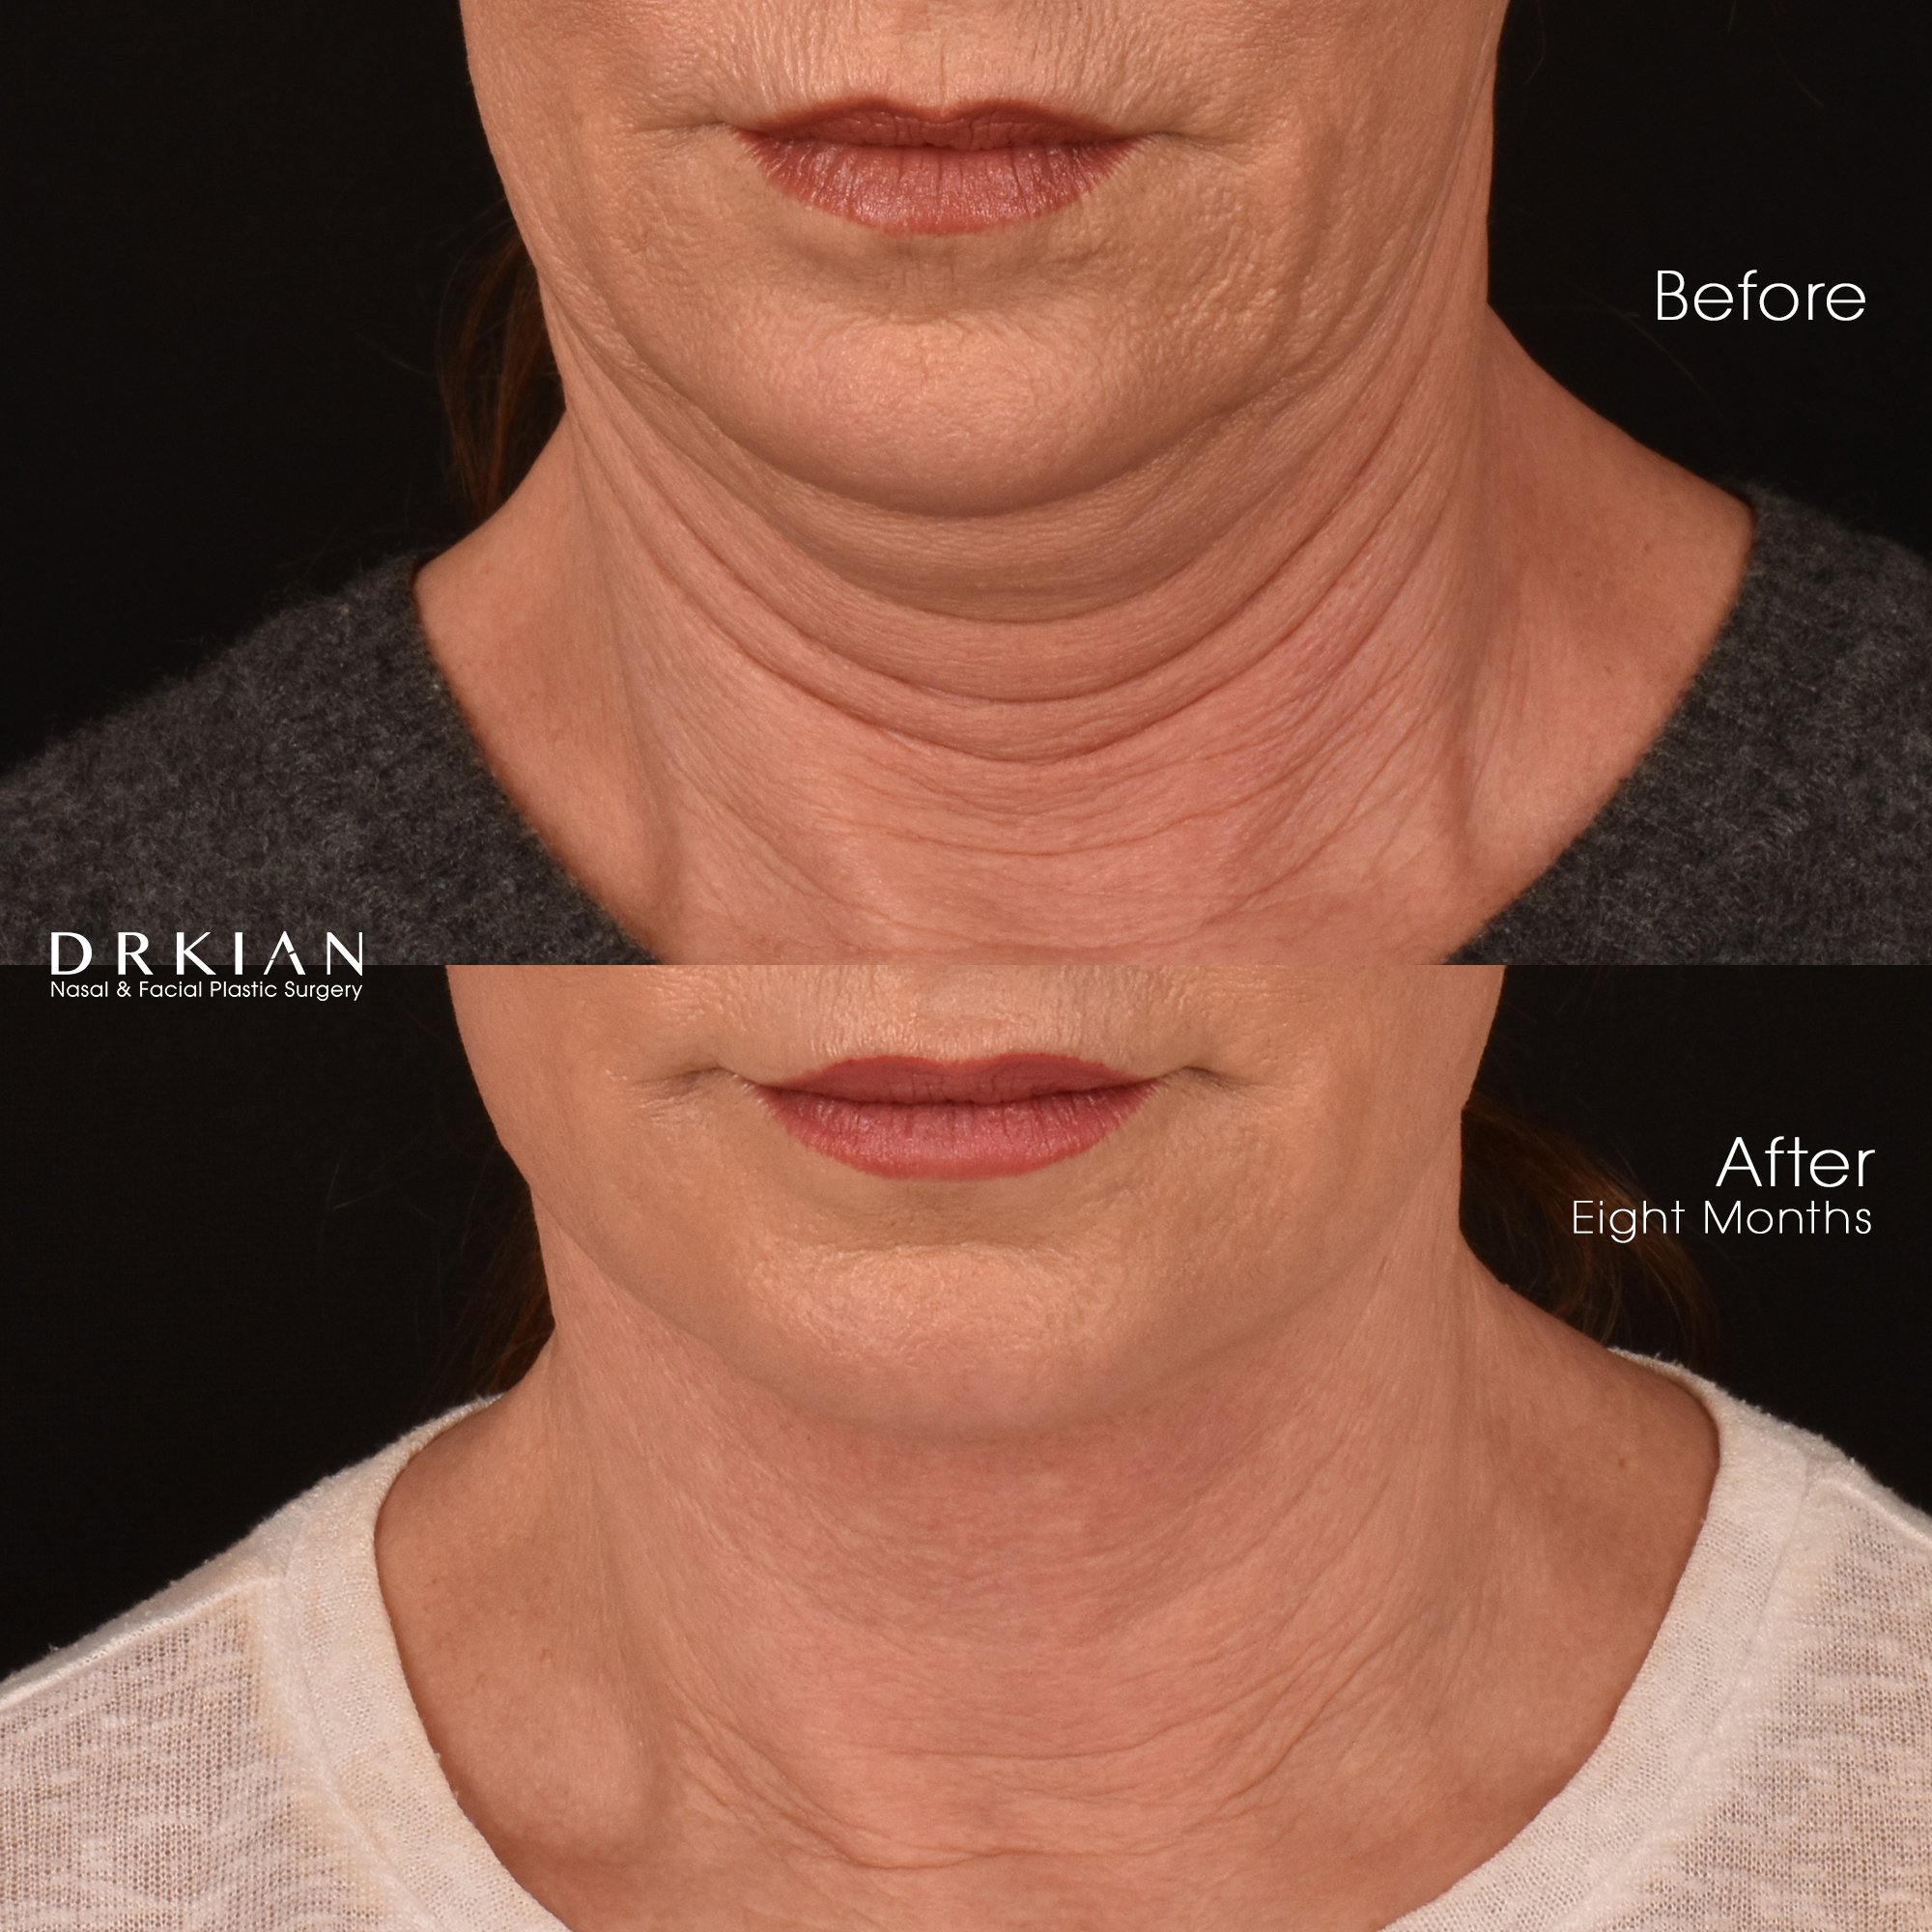
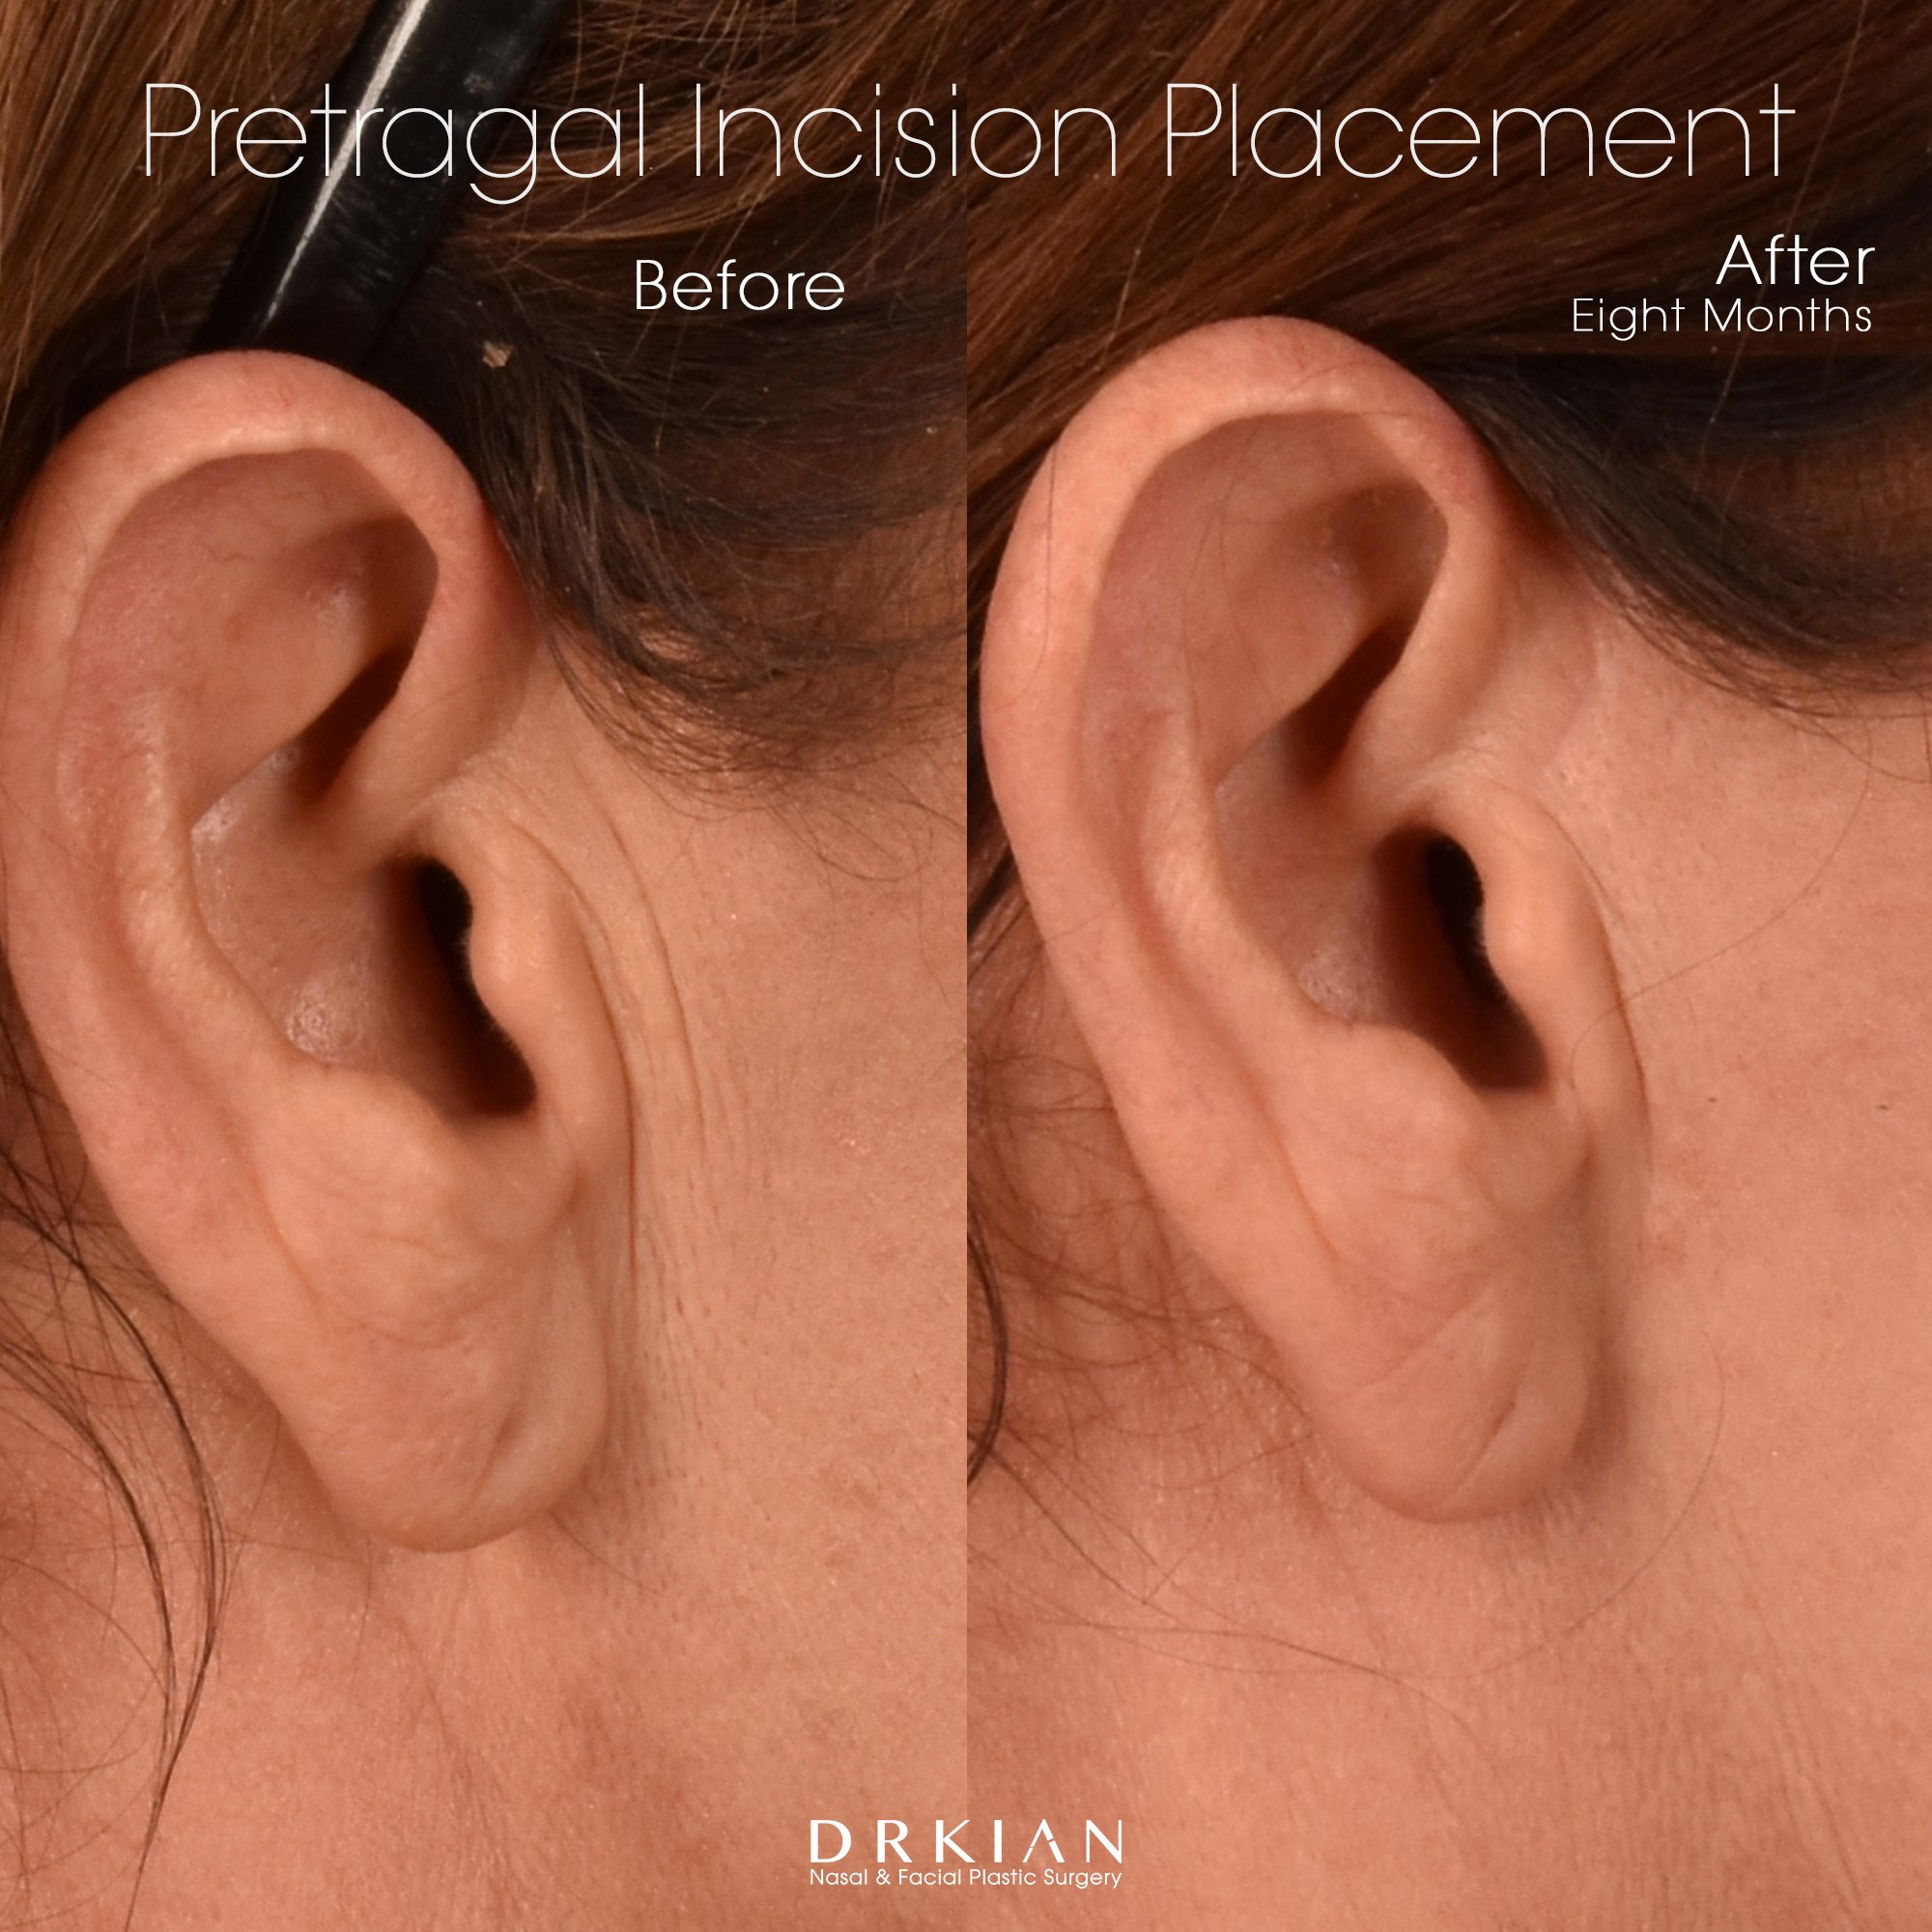
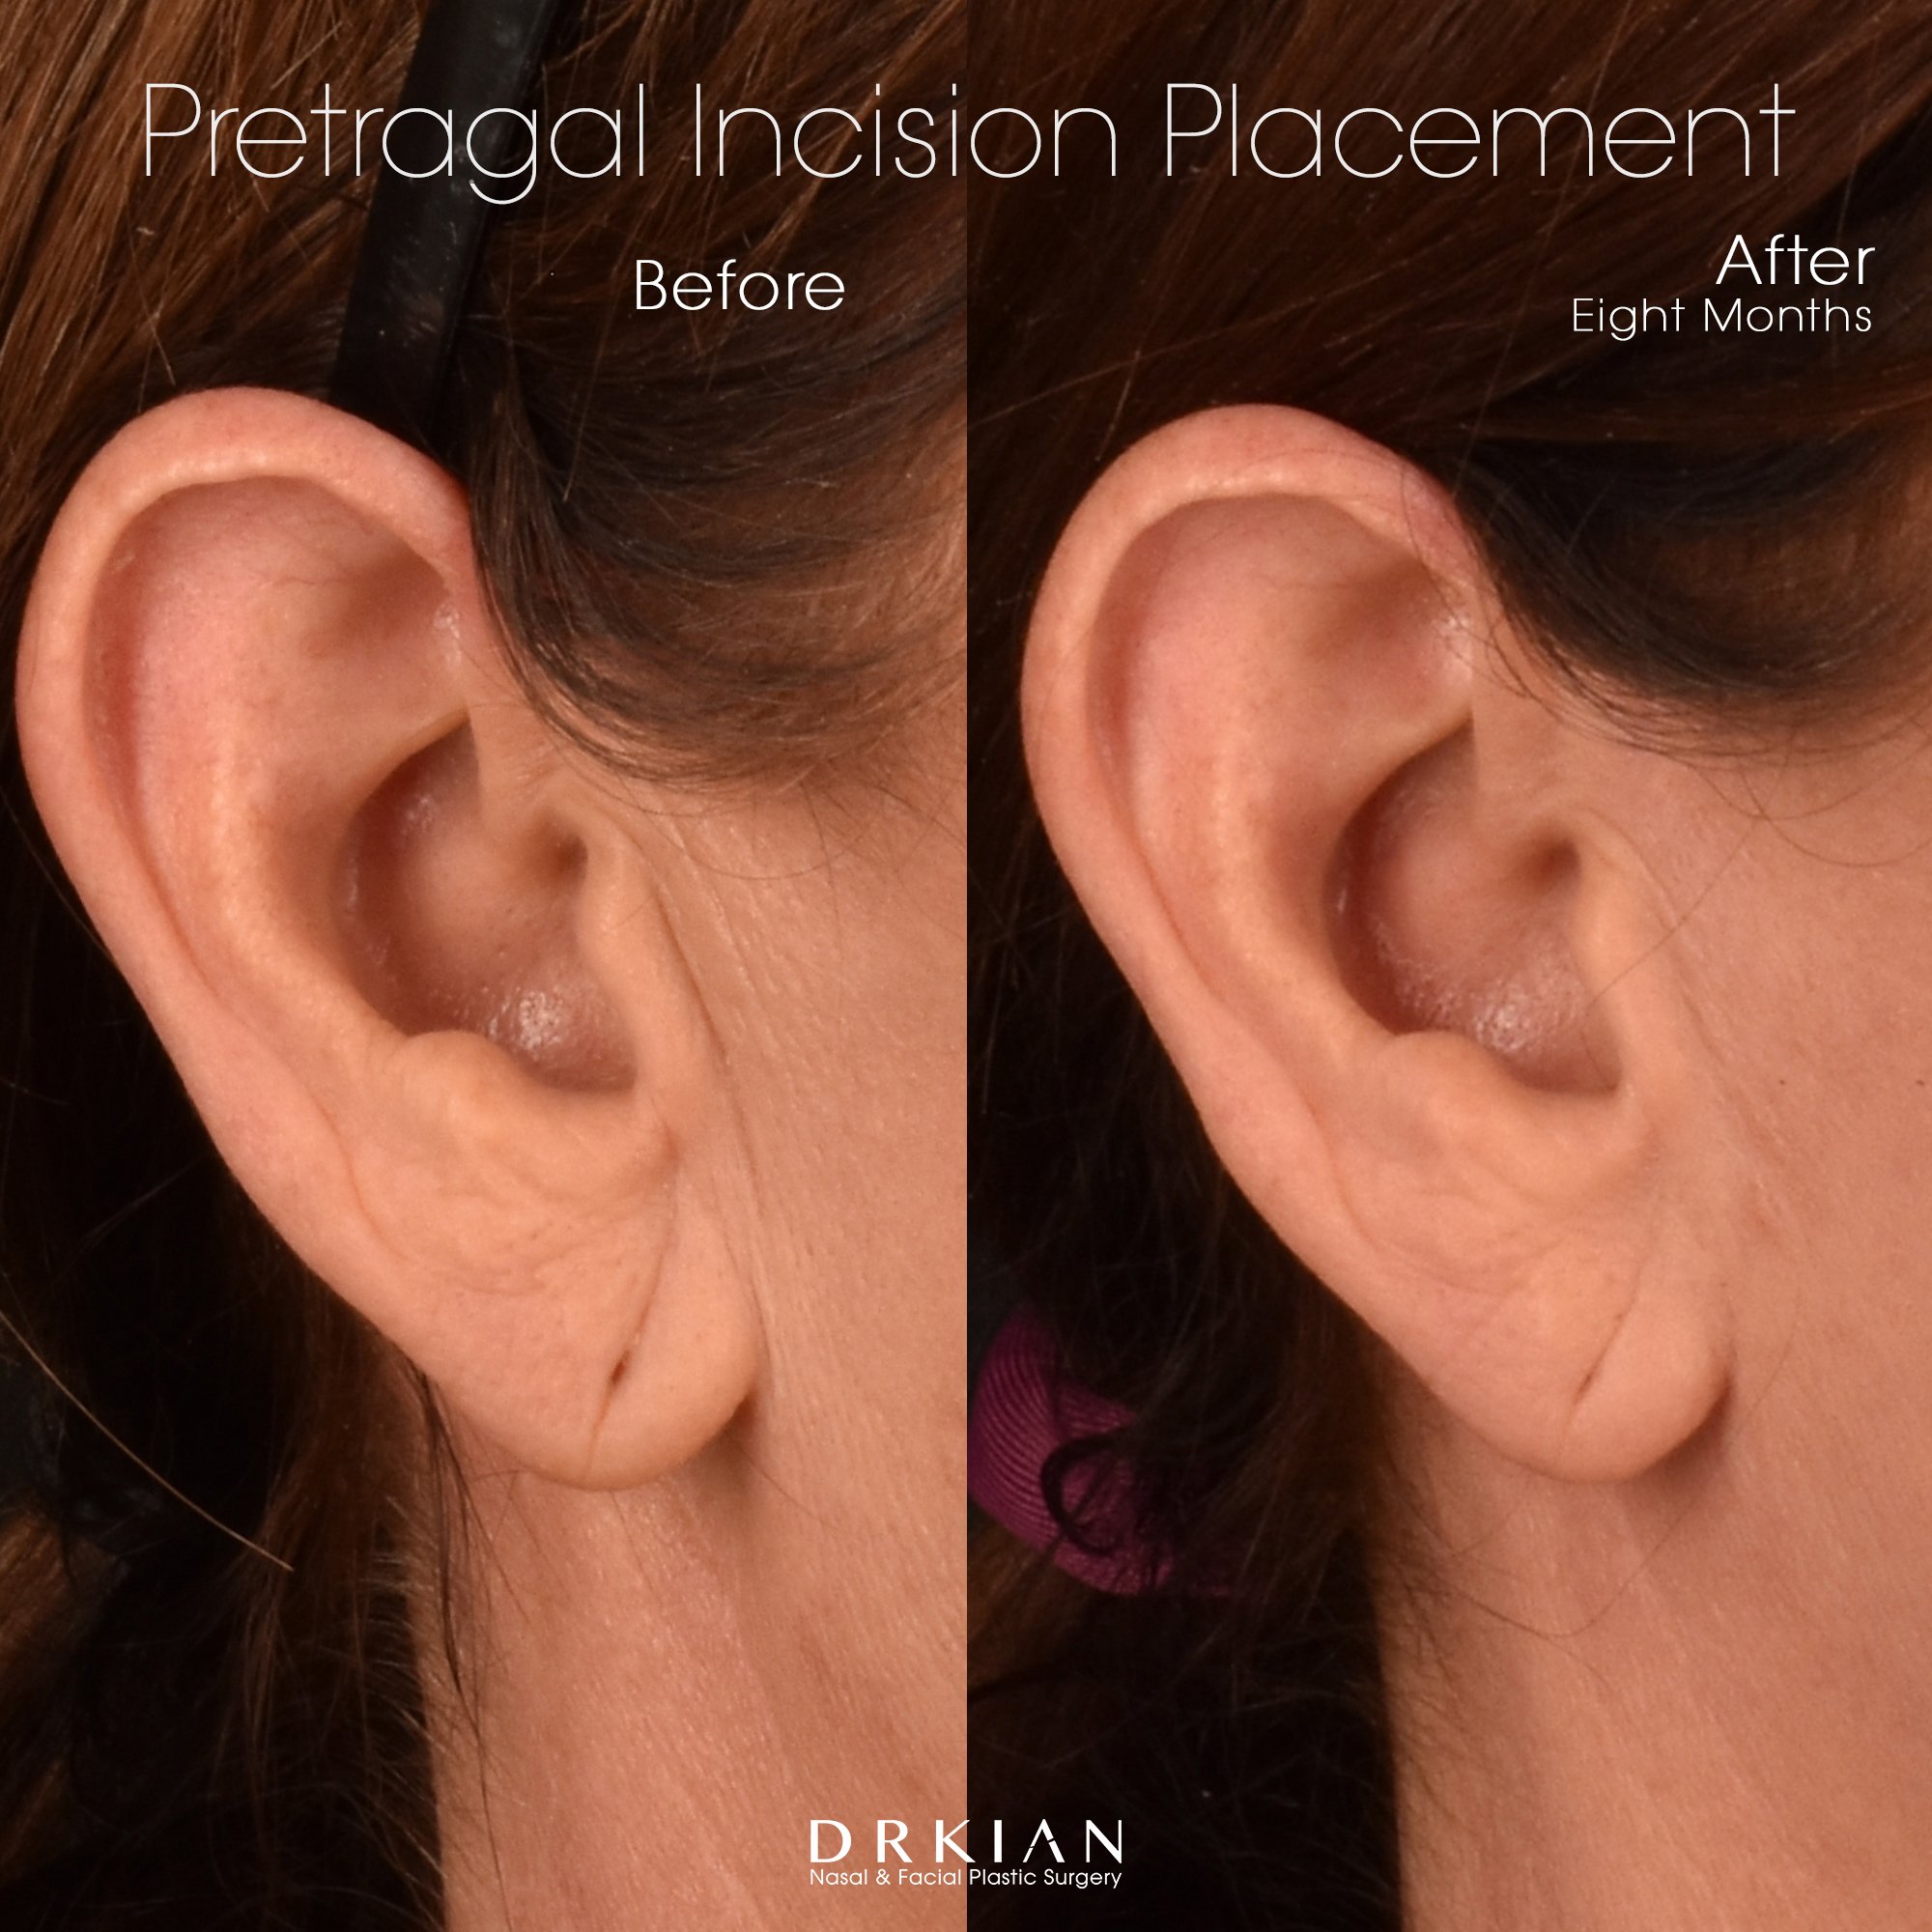
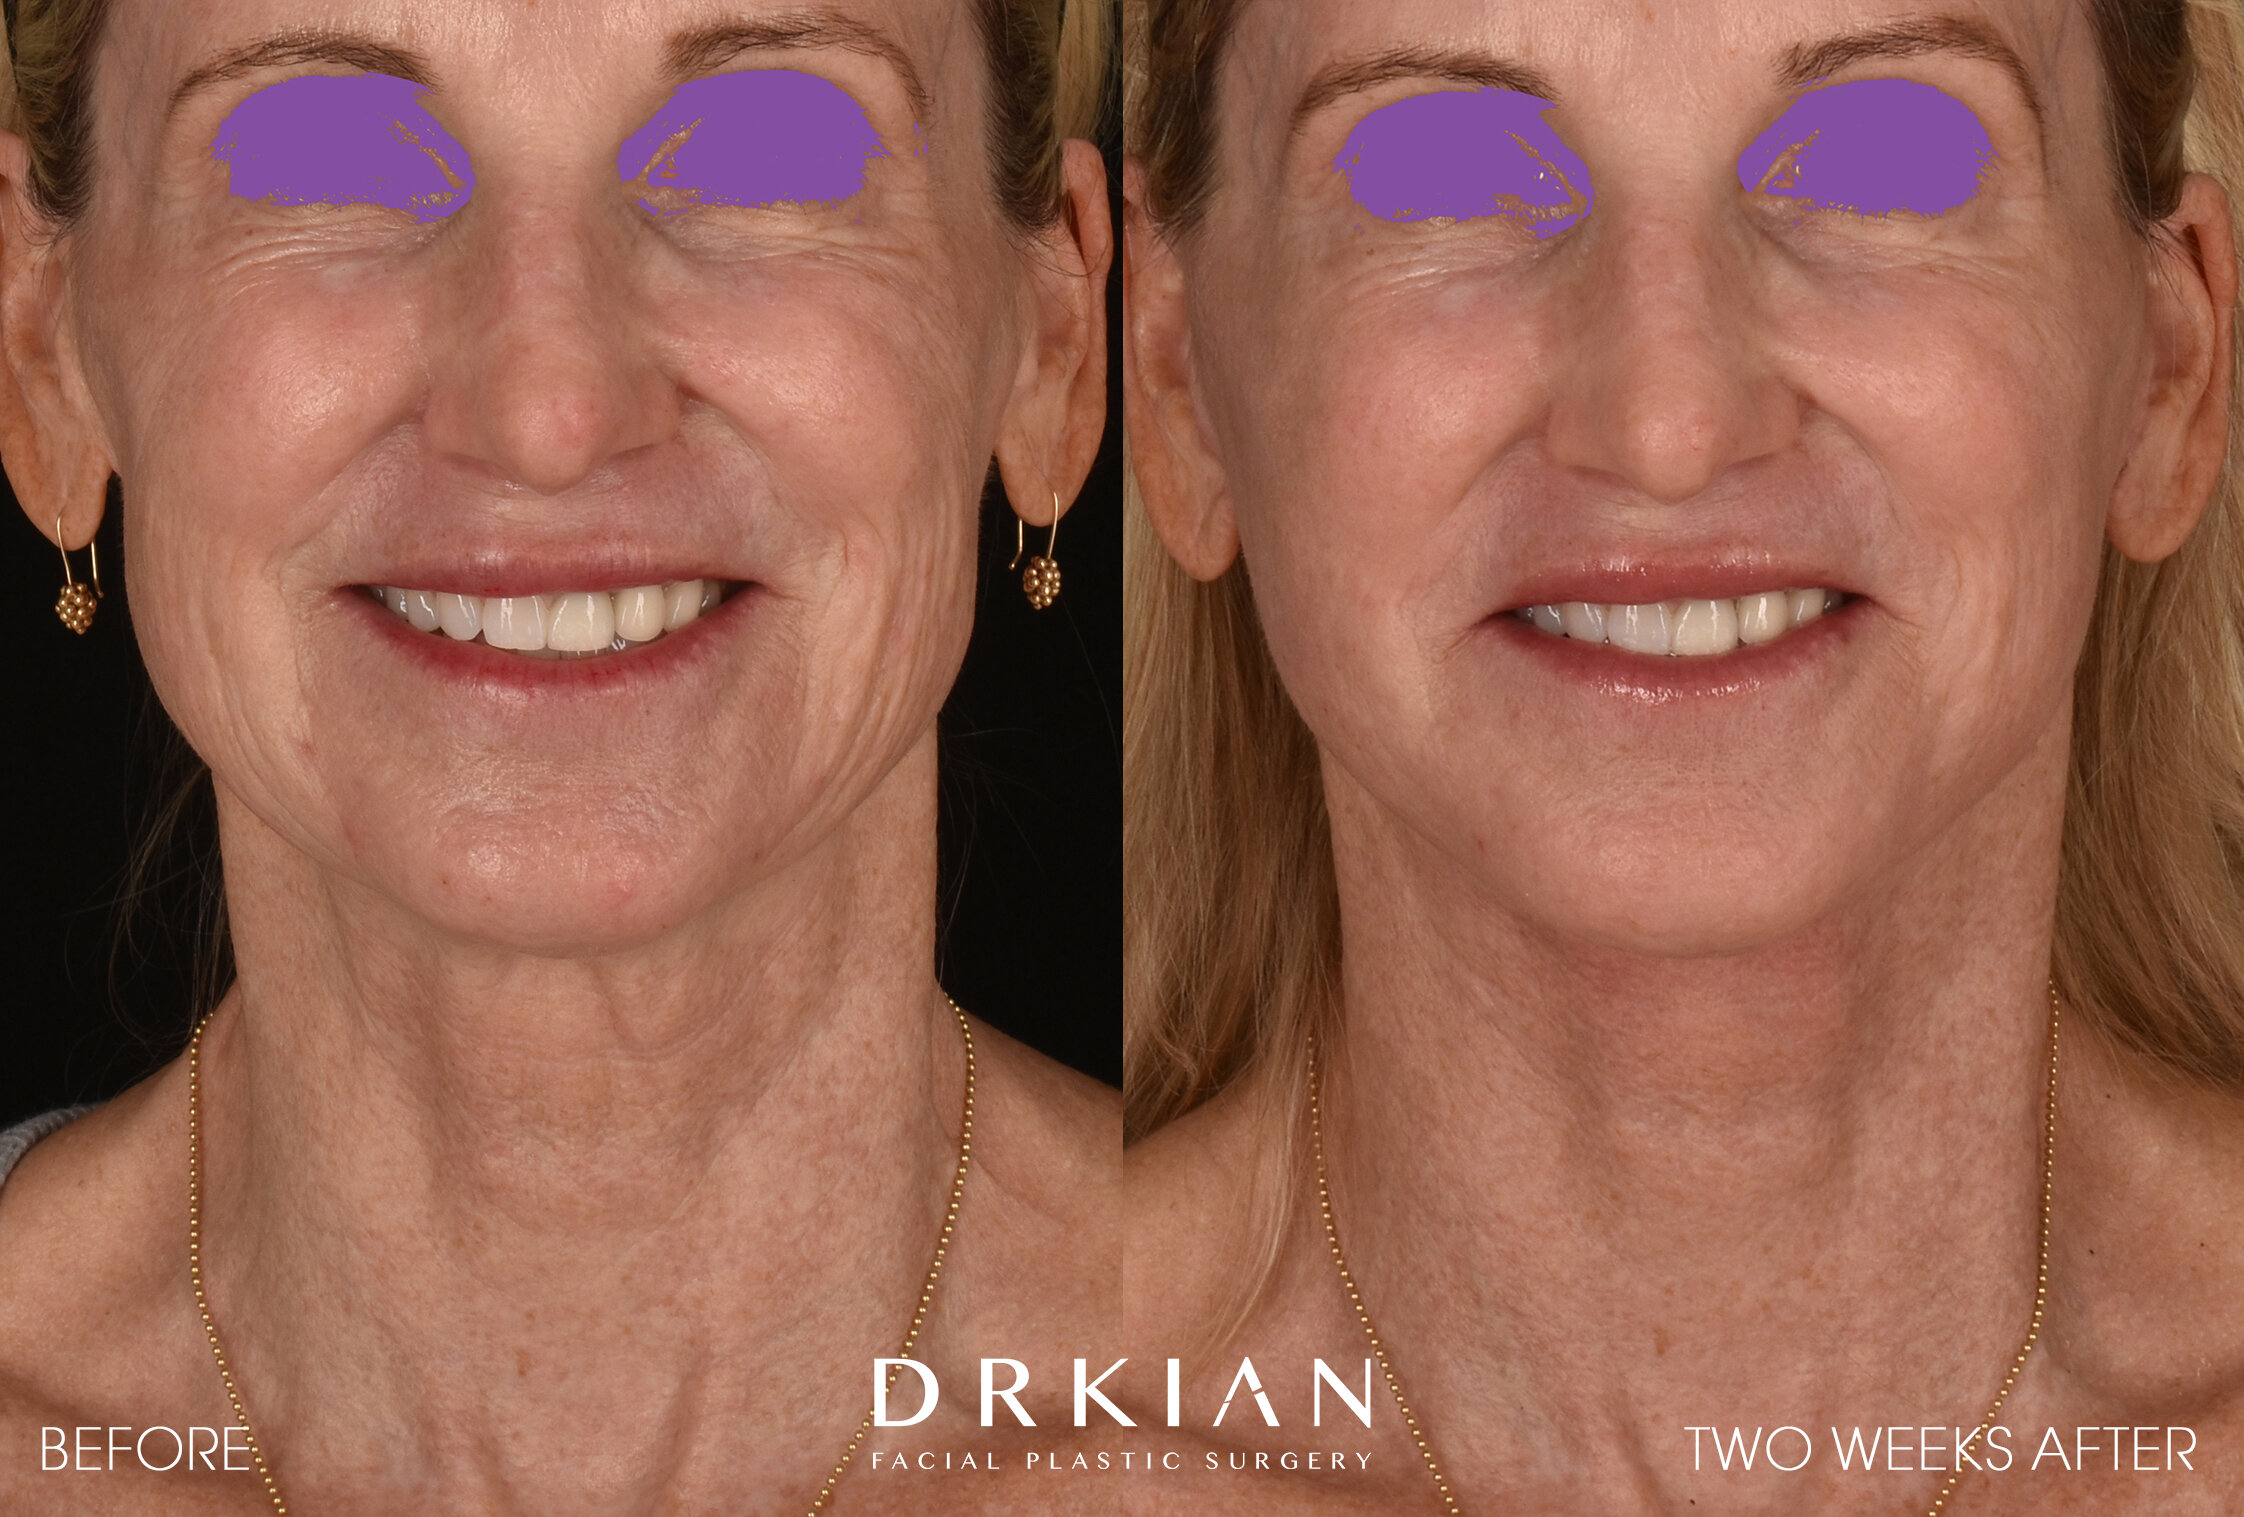
Lower Face & Neck Lift with Pretragal Incision, Endoscopic Brow Lift, TRL/BBL (Full Face), HALO/BBL (Neck & Chest) - Before & After Eight Months
Lower Face & Neck Lift with Pretragal Incision, Endoscopic Brow Lift, TRL/BBL (Full Face), HALO/BBL (Neck & Chest) - Before & After Eight Months
Lower Face & Neck Lift with Pretragal Incision, Endoscopic Brow Lift, TRL/BBL (Full Face), HALO/BBL (Neck & Chest) - Before & After Eight Months
Lower Face & Neck Lift with Pretragal Incision, Endoscopic Brow Lift, TRL/BBL (Full Face), HALO/BBL (Neck & Chest) - Before & After Eight Months

Lower Face & Neck Lift with Pretragal Incision, Endoscopic Brow Lift, TRL/BBL (Full Face), HALO/BBL (Neck & Chest) - Before & After Eight Months
Lower Face & Neck Lift with Pretragal Incision, Endoscopic Brow Lift, TRL/BBL (Full Face), HALO/BBL (Neck & Chest) - Before & After Eight Months
Lower Face & Neck Lift with Pretragal Incision, Endoscopic Brow Lift, TRL/BBL (Full Face), HALO/BBL (Neck & Chest) - Before & After Eight Months

Lower Face & Neck Lift with Pretragal Incision, Endoscopic Brow Lift, TRL/BBL (Full Face), HALO/BBL (Neck & Chest) - Before & After Eight Months
Lower Face & Neck Lift with Pretragal Incision, Endoscopic Brow Lift, TRL/BBL (Full Face), HALO/BBL (Neck & Chest) - Before & After Eight Months

Lower Face & Neck Lift with Pretragal Incision, Endoscopic Brow Lift, TRL/BBL (Full Face), HALO/BBL (Neck & Chest) - Before & After Eight Months

Lower Face & Neck Lift with Pretragal Incision, Endoscopic Brow Lift, TRL/BBL (Full Face), HALO/BBL (Neck & Chest) - Before & After Eight Months

Lower Face & Neck Lift with Pretragal Incision, Endoscopic Brow Lift, TRL/BBL (Full Face), HALO/BBL (Neck & Chest) - Before & After Eight Months
Lower Face & Neck Lift with Pretragal Incision, Endoscopic Brow Lift, TRL/BBL (Full Face), HALO/BBL (Neck & Chest) - Before & After Eight Months
Lower Face & Neck Lift with Pretragal Incision, Endoscopic Brow Lift, TRL/BBL (Full Face), HALO/BBL (Neck & Chest) - Before & After Eight Months

Lower Face & Neck Lift Before & After Eight Weeks

Lower Face & Neck Lift Before & After Eight Weeks

Lower Face & Neck Lift Before & After Eight Weeks

Lower Face & Neck Lift Before & After Eight Weeks

Lower Face & Neck Lift Before & After Eight Weeks

Lower Face & Neck Lift Before & After Eight Weeks

Lower Face & Neck Lift Before & After Eight Weeks

Lower Face & Neck Lift Before & After Eight Weeks

Lower Face & Neck Lift Before & After Eight Weeks

Lower Face & Neck Lift Before & After Eight Weeks

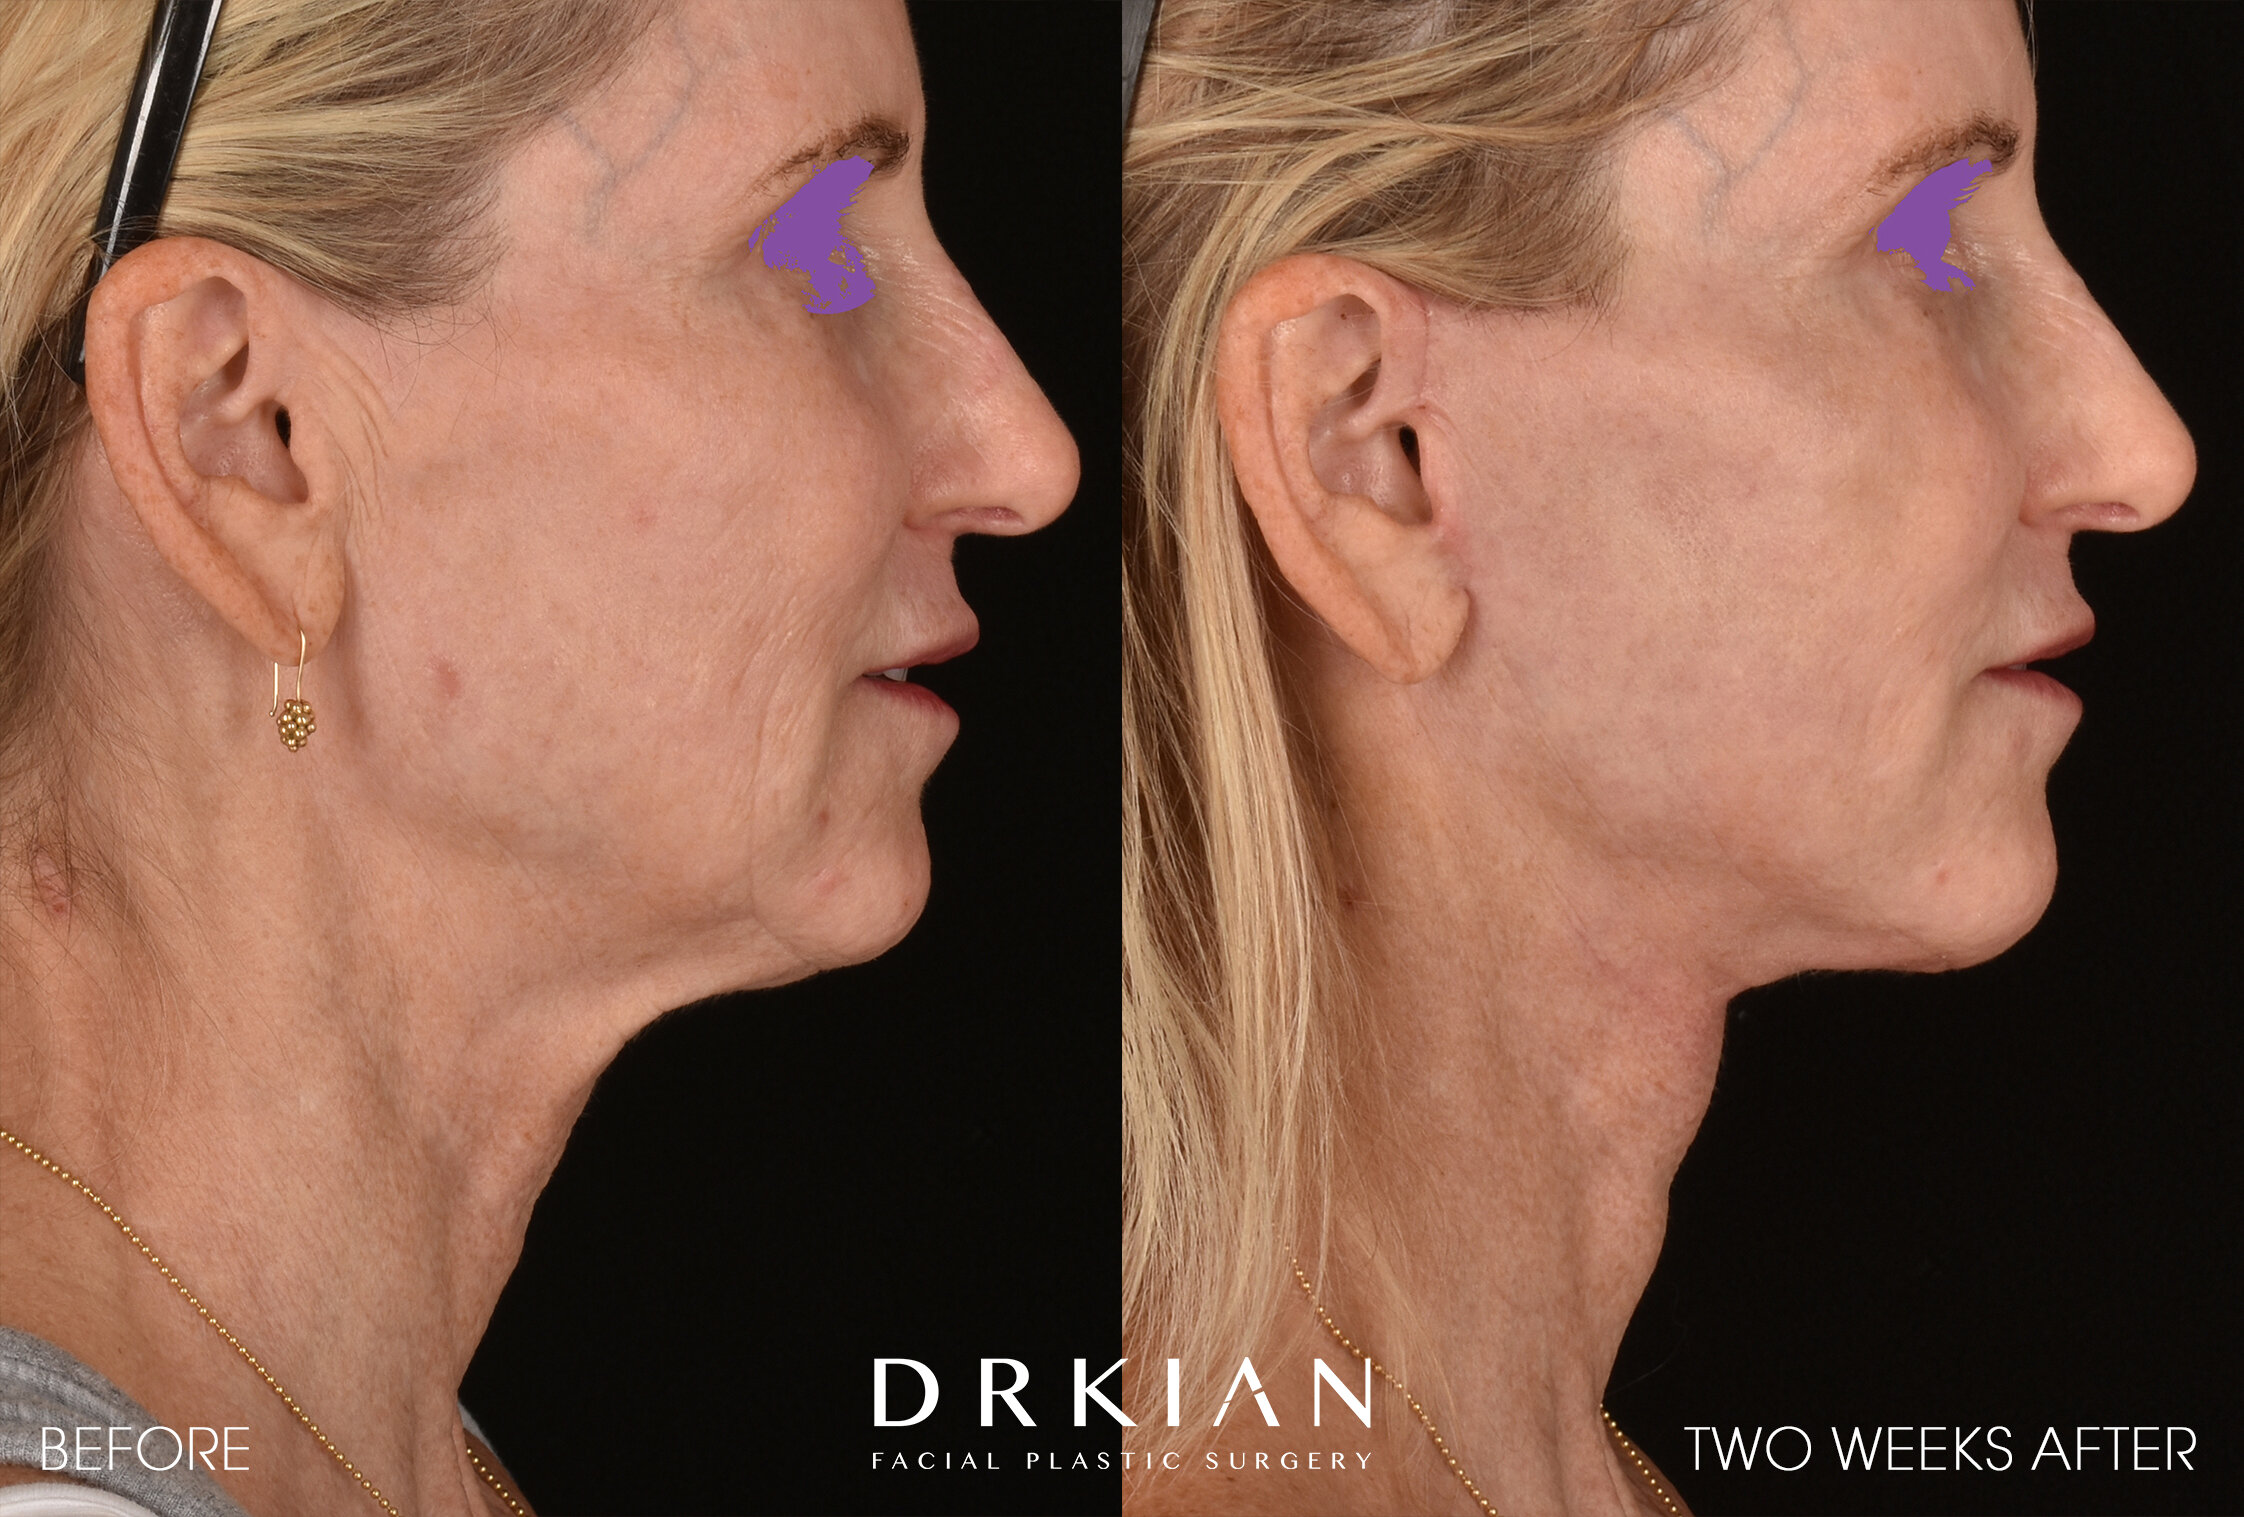
Lower Face & Neck Lift Before & After 2 Weeks

Lower Face & Neck Lift Before & After 2 Weeks
Lower Face & Neck Lift Before & After 2 Weeks

Lower Face & Neck Lift Before & After 2 Weeks

Lower Face & Neck Lift Before & After 2 Weeks
Lower Face & Neck Lift Before & After 2 Weeks

Lower Face & Neck Lift Before & After 2 Weeks

Lower Face & Neck Lift Before & After 2 Weeks

Lower Face & Neck Lift Before & After 4 Weeks

Lower Face & Neck Lift Before & After 4 Weeks

Lower Face & Neck Lift Before & After 4 Weeks

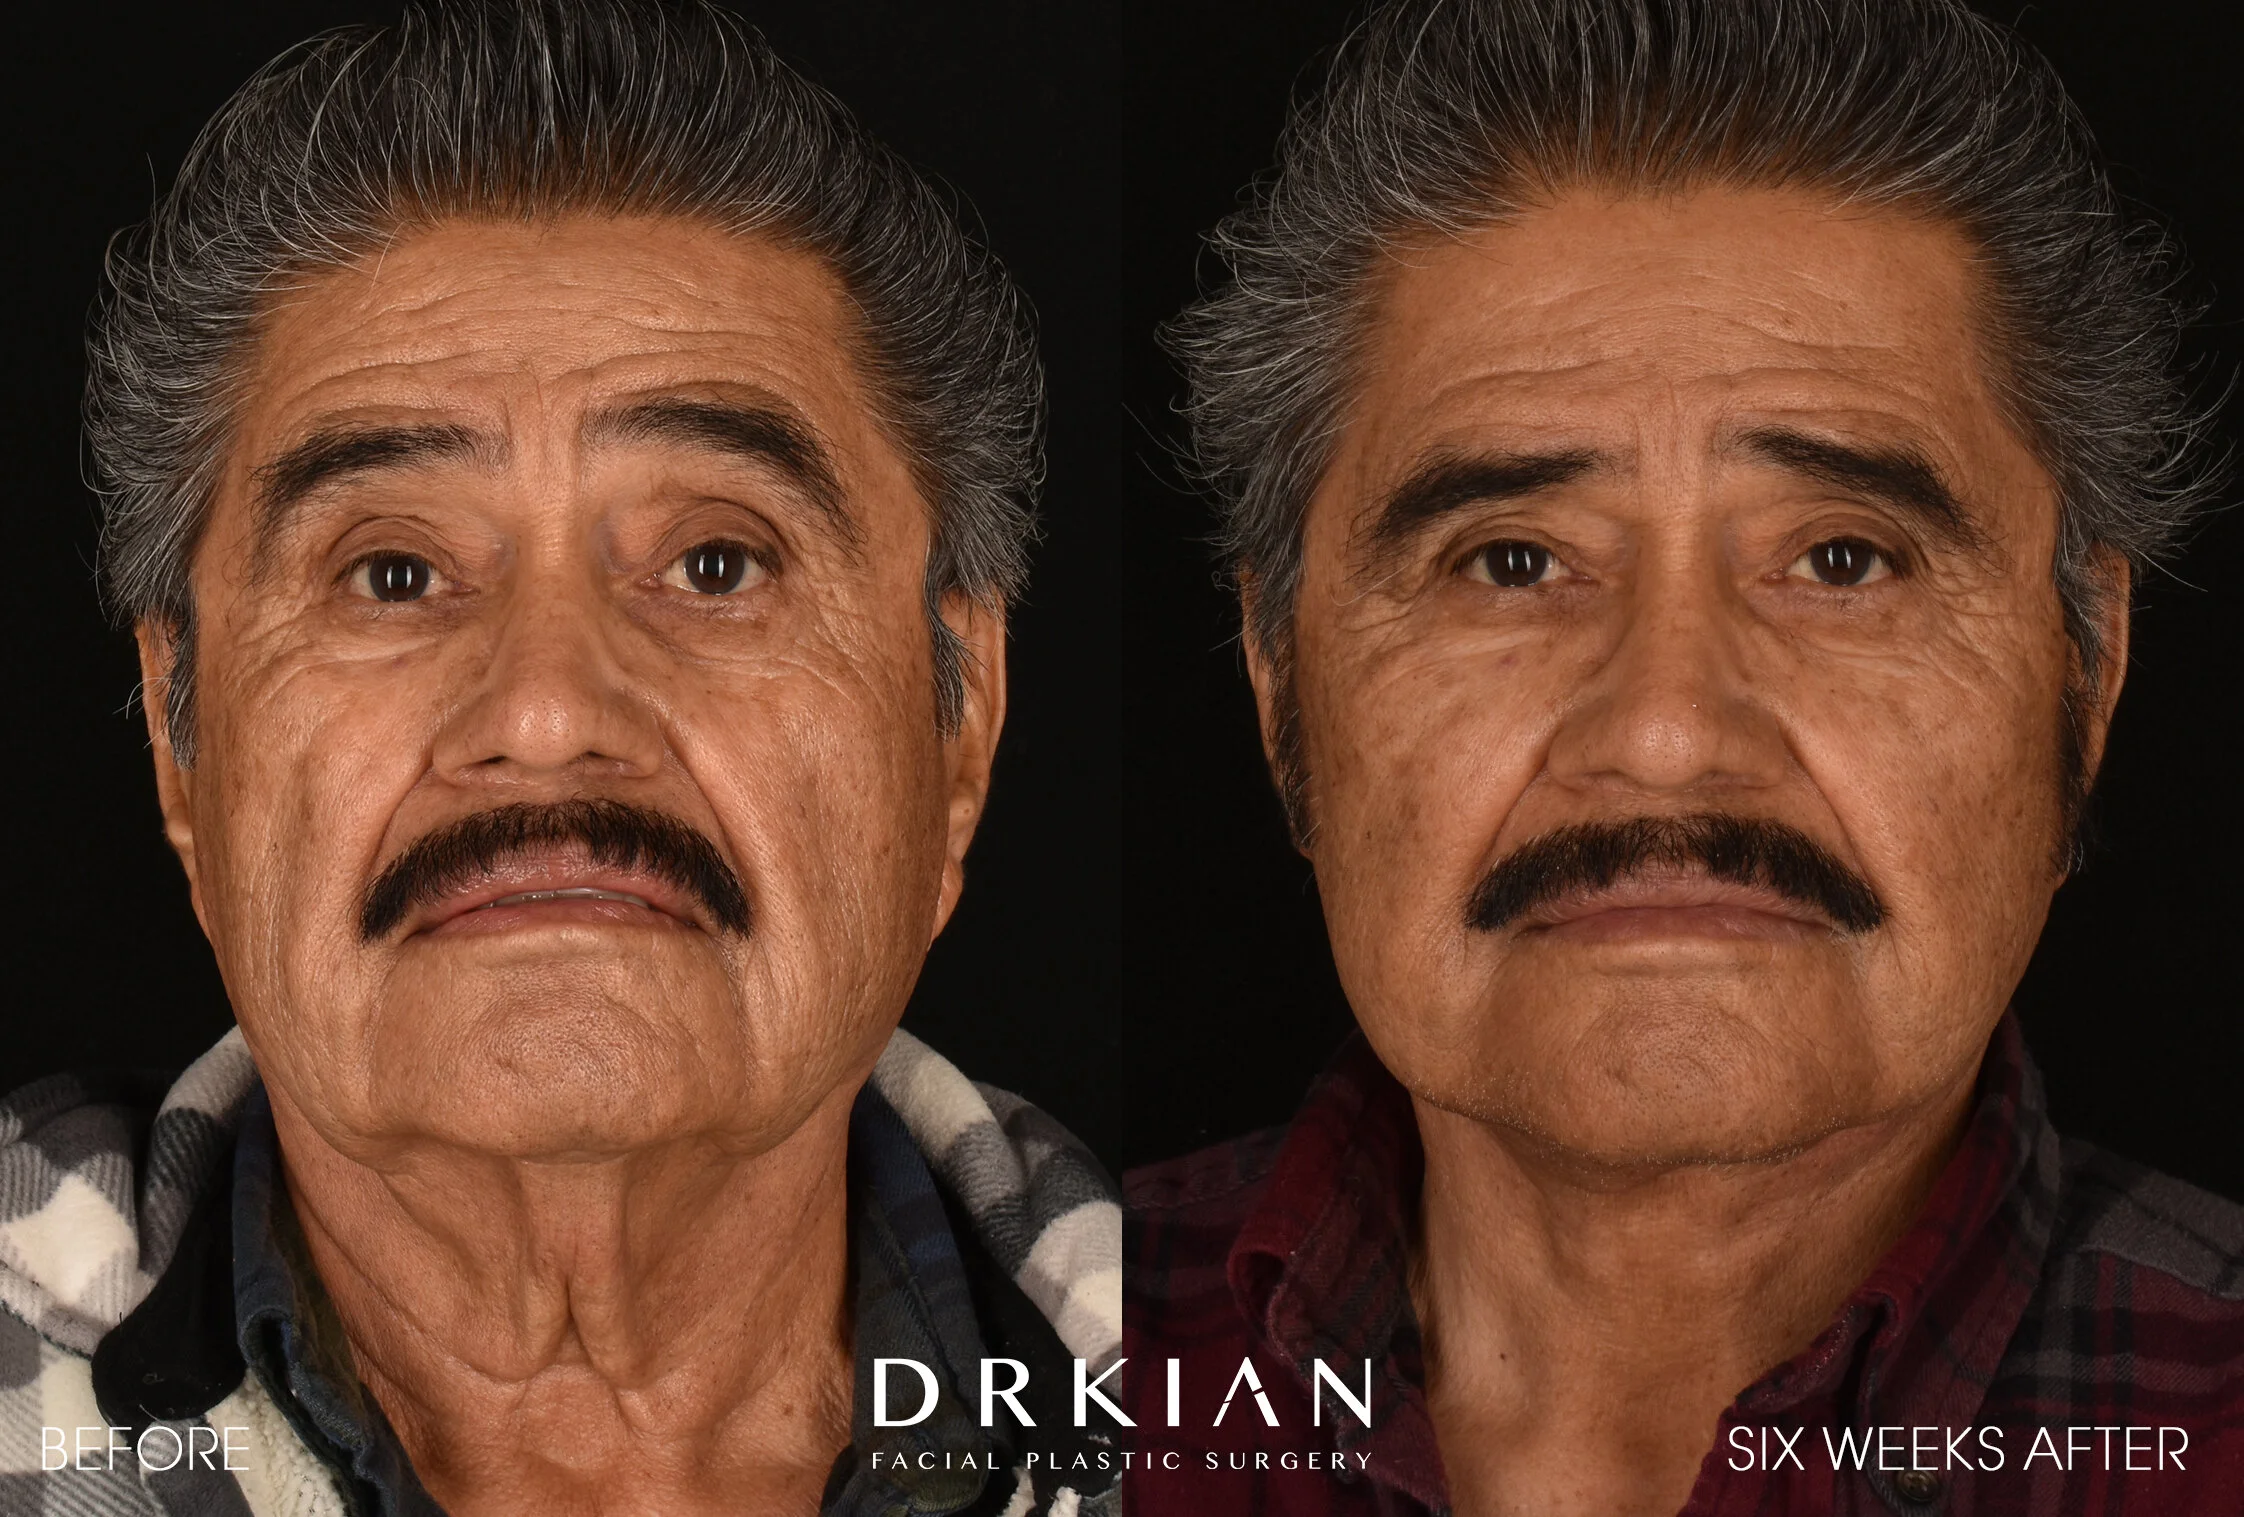
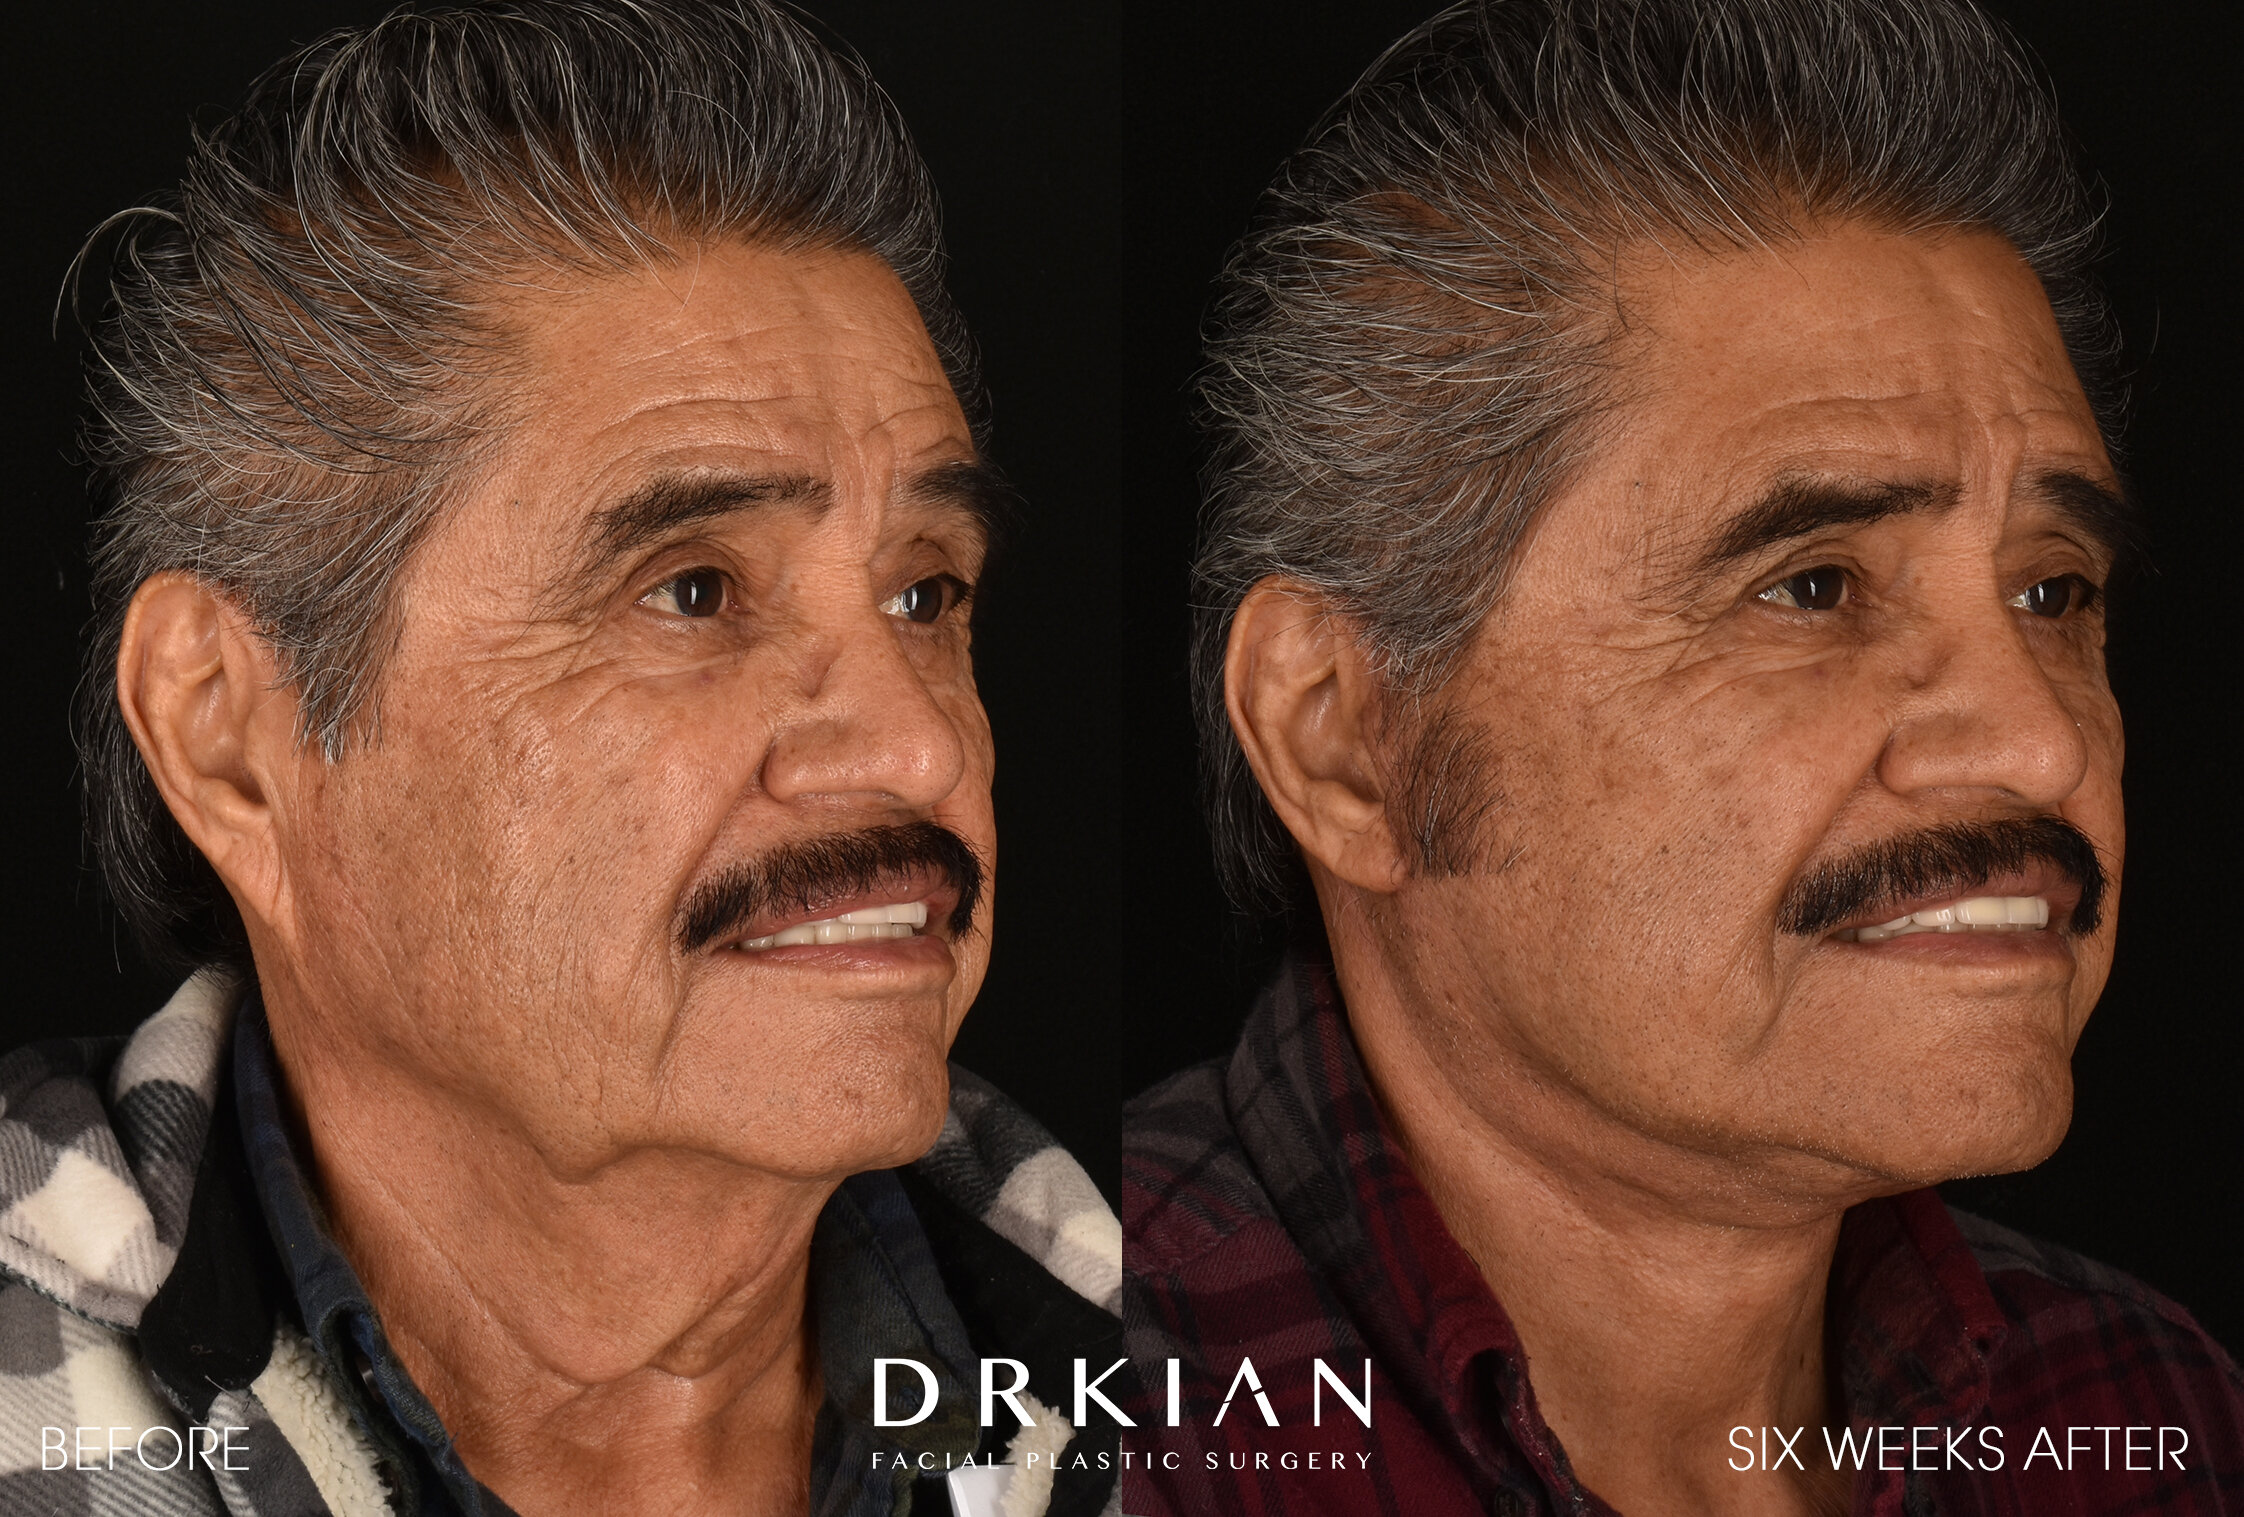
Lower Face & Neck Lift & Sculptra Biostimulatory Injections Before & After 6 Weeks
Lower Face & Neck Lift & Sculptra Biostimulatory Injections Before & After 6 Weeks


Lower Face & Neck Lift & Sculptra Biostimulatory Injections Before & After 6 Weeks

Lower Face & Neck Lift & Sculptra Biostimulatory Injections Before & After 6 Weeks
Lower Face & Neck Lift & Sculptra Biostimulatory Injections Before & After 6 Weeks
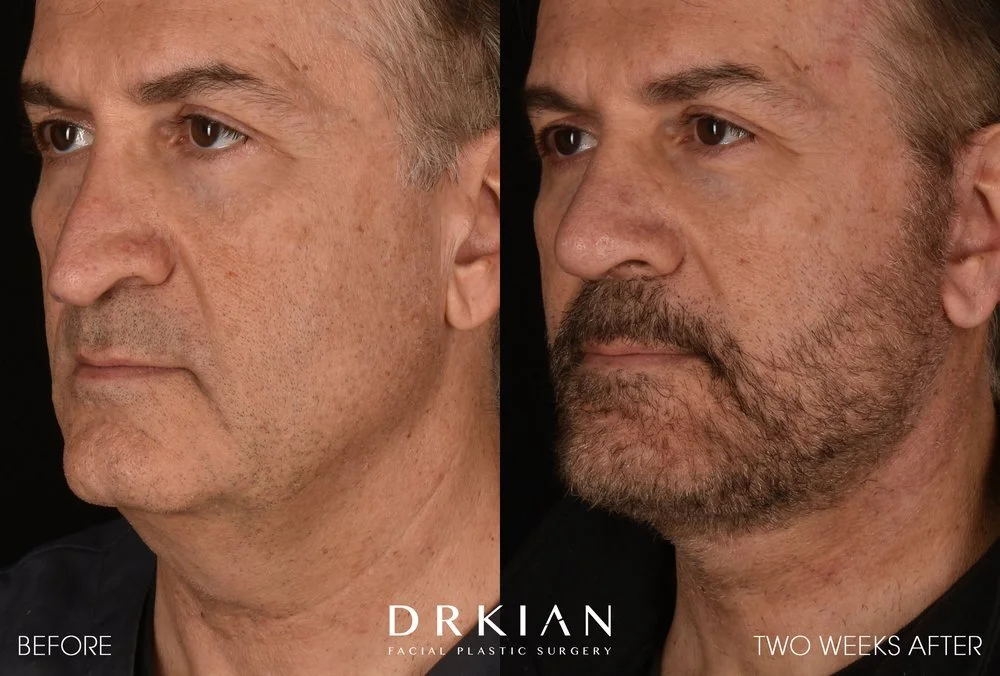
Lower Face & Neck Lift & Revision Rhinoplasty Before & After 2 Weeks

Lower Face & Neck Lift & Revision Rhinoplasty Before & After 2 Weeks

Lower Face & Neck Lift & Revision Rhinoplasty Before & After 2 Weeks

Lower Face & Neck Lift & Revision Rhinoplasty Before & After 2 Weeks

Lower Face & Neck Lift & Revision Rhinoplasty Before & After 2 Weeks

Lower Face & Neck Lift & Revision Rhinoplasty Before & After 2 Weeks

Lower Face & Neck Lift & Revision Rhinoplasty Before & After 2 Weeks

Lower Face & Neck Lift & Revision Rhinoplasty Before & After 2 Weeks

Lower Face & Neck Lift & Revision Rhinoplasty Before & After 2 Weeks

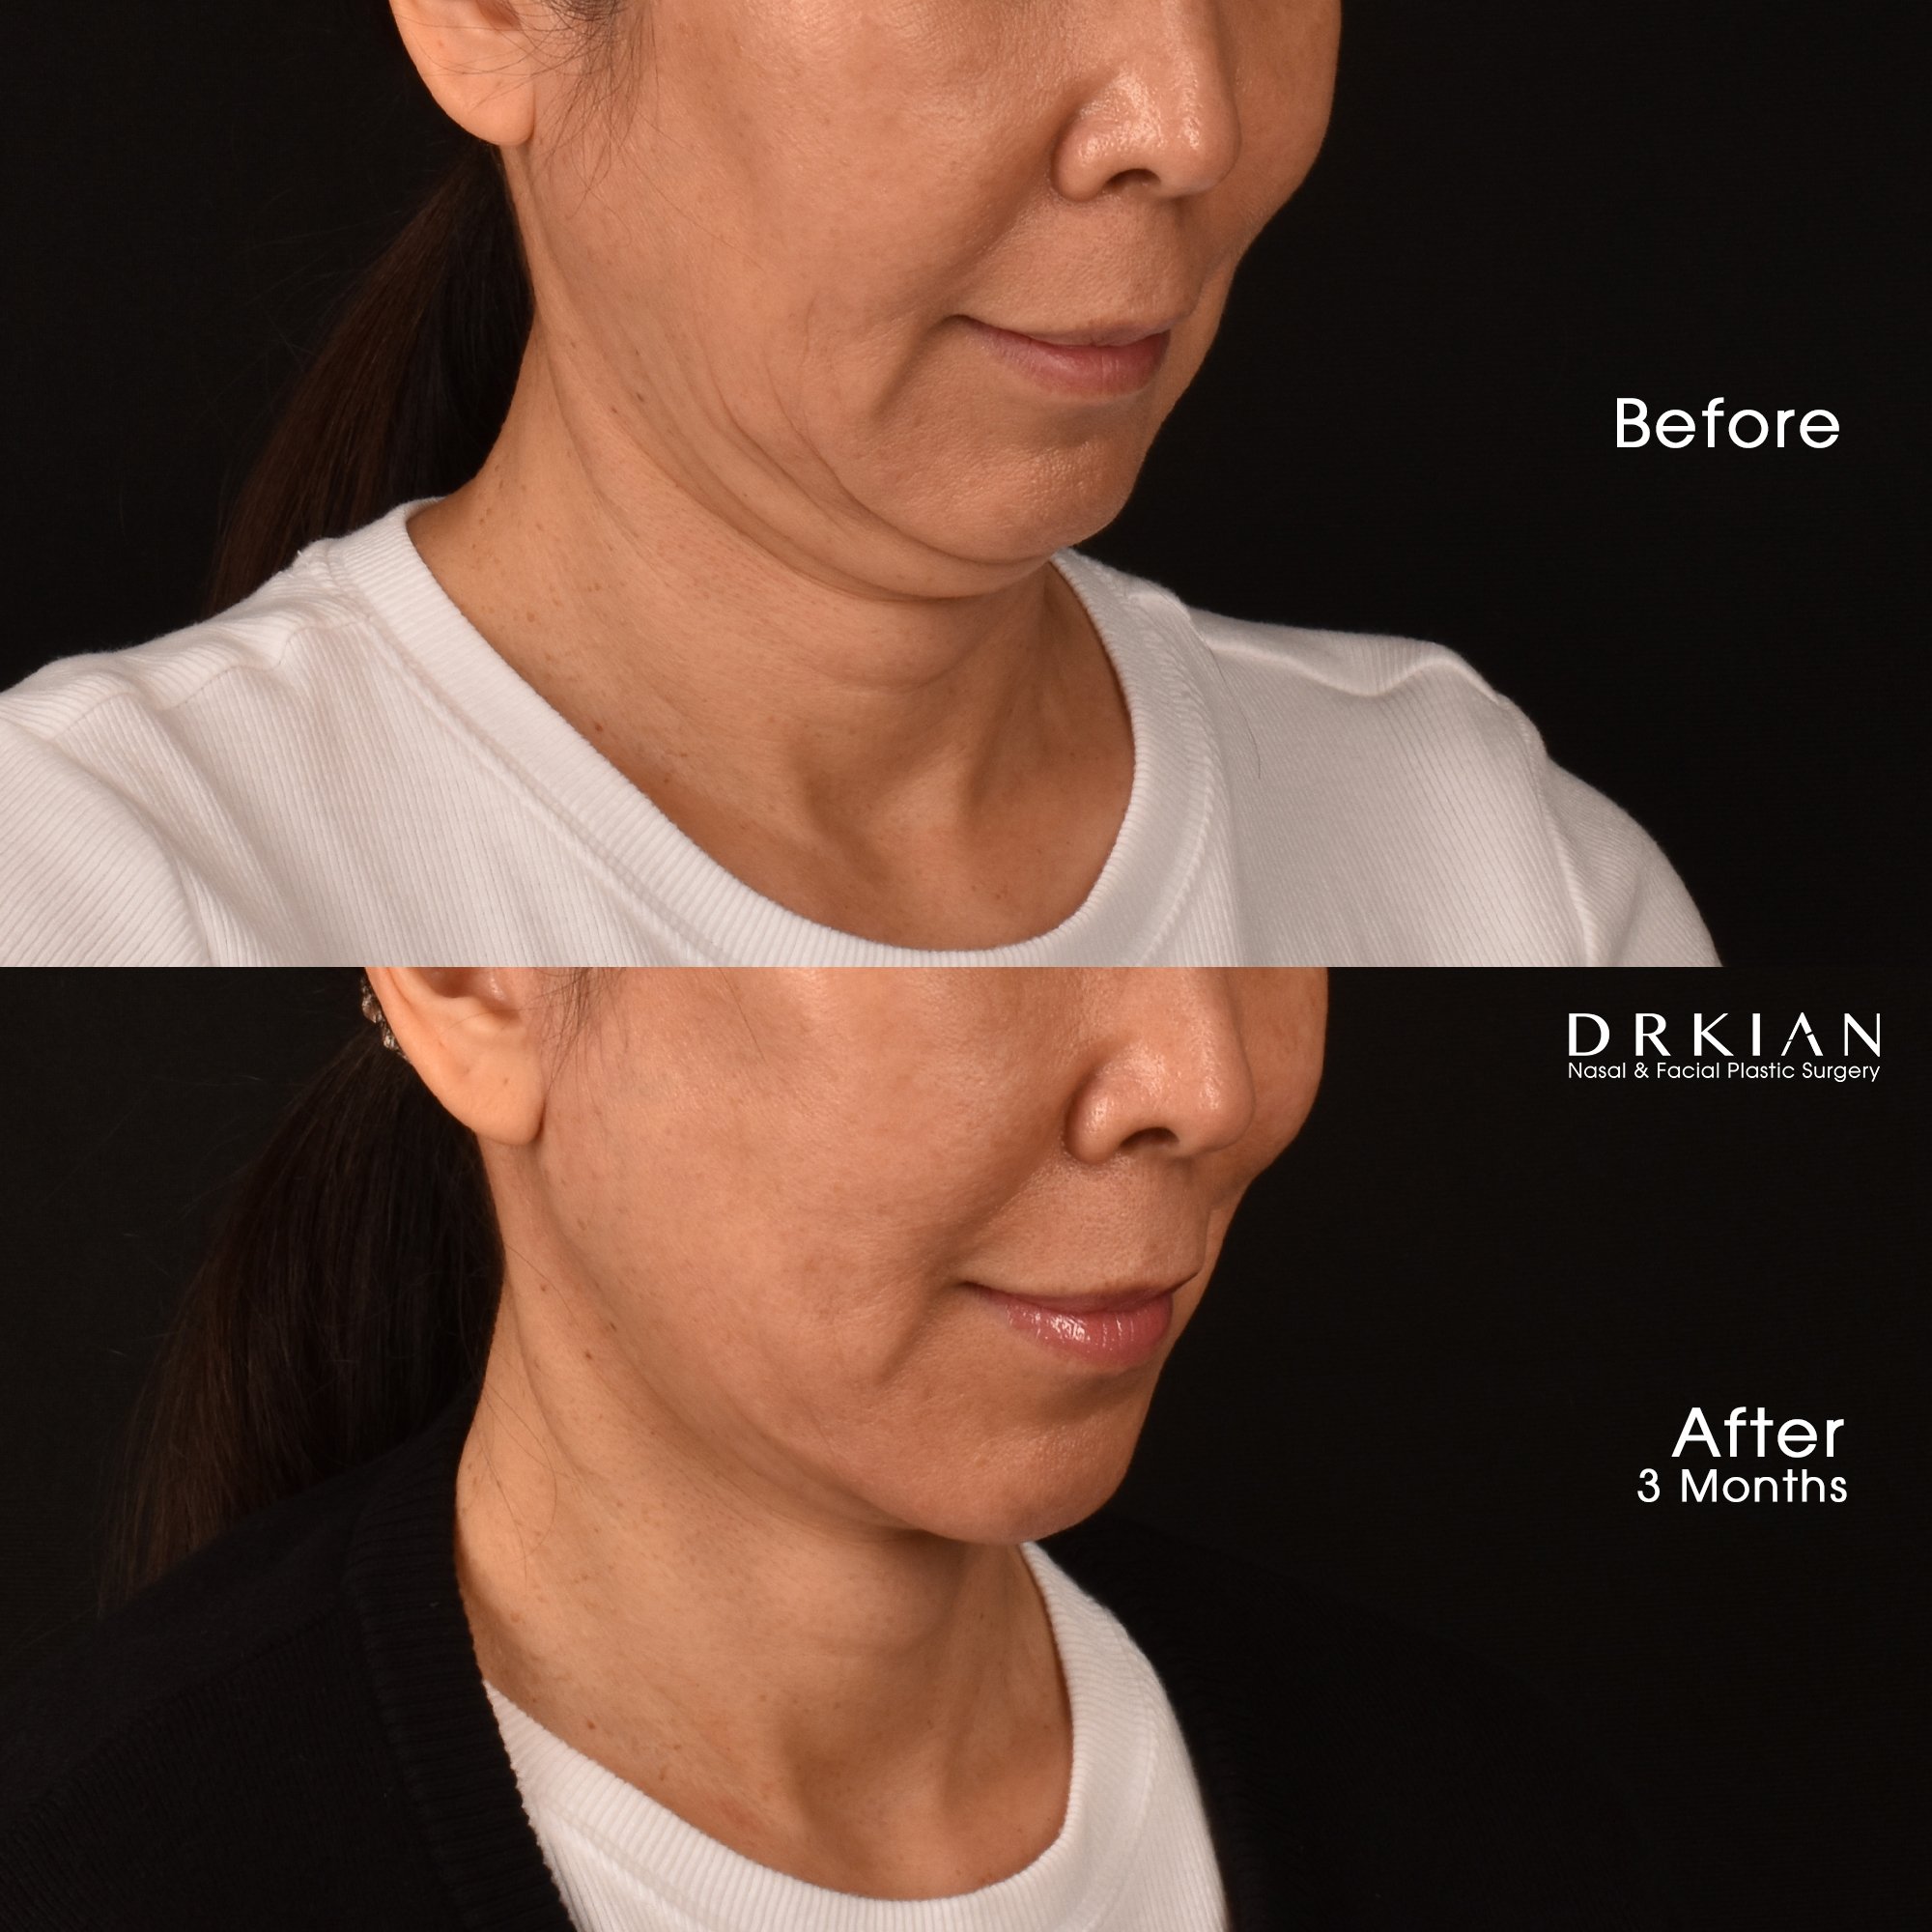
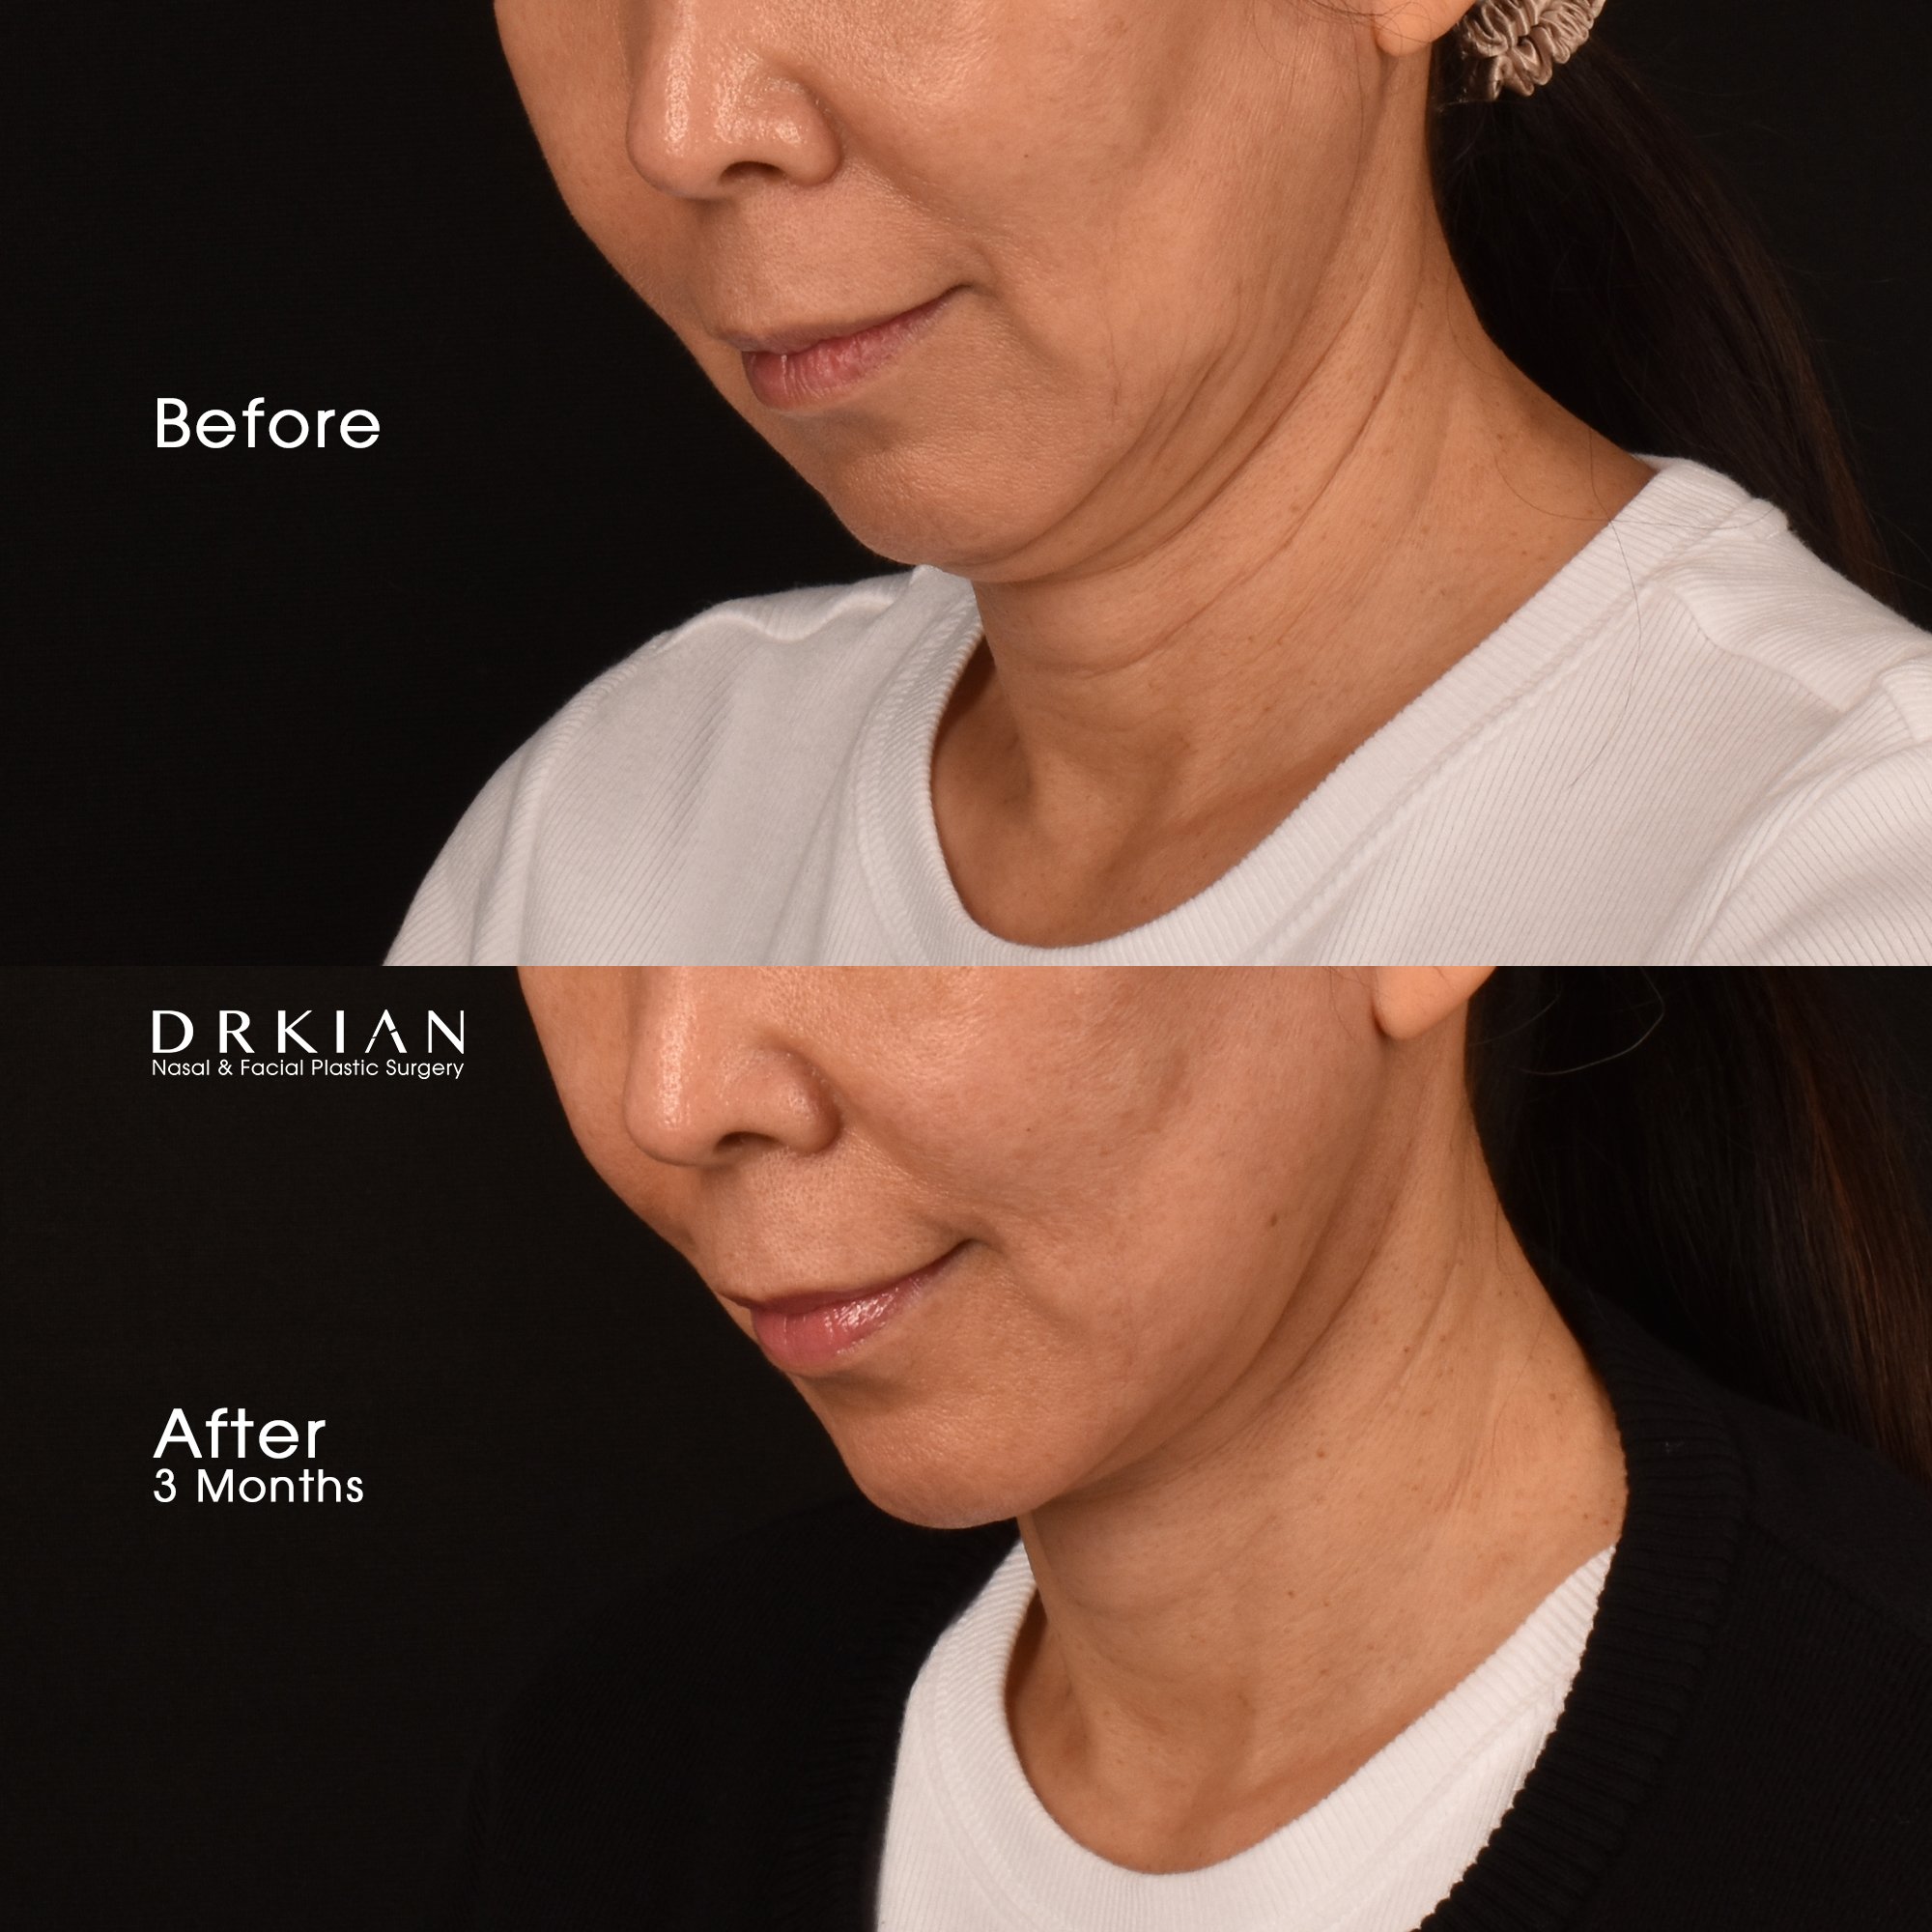
Deep Plane Face & Neck Lift Before & After 3 Months

Deep Plane Face & Neck Lift Before & After 3 Months

Deep Plane Face & Neck Lift Before & After 3 Months

Deep Plane Face & Neck Lift Before & After 3 Months
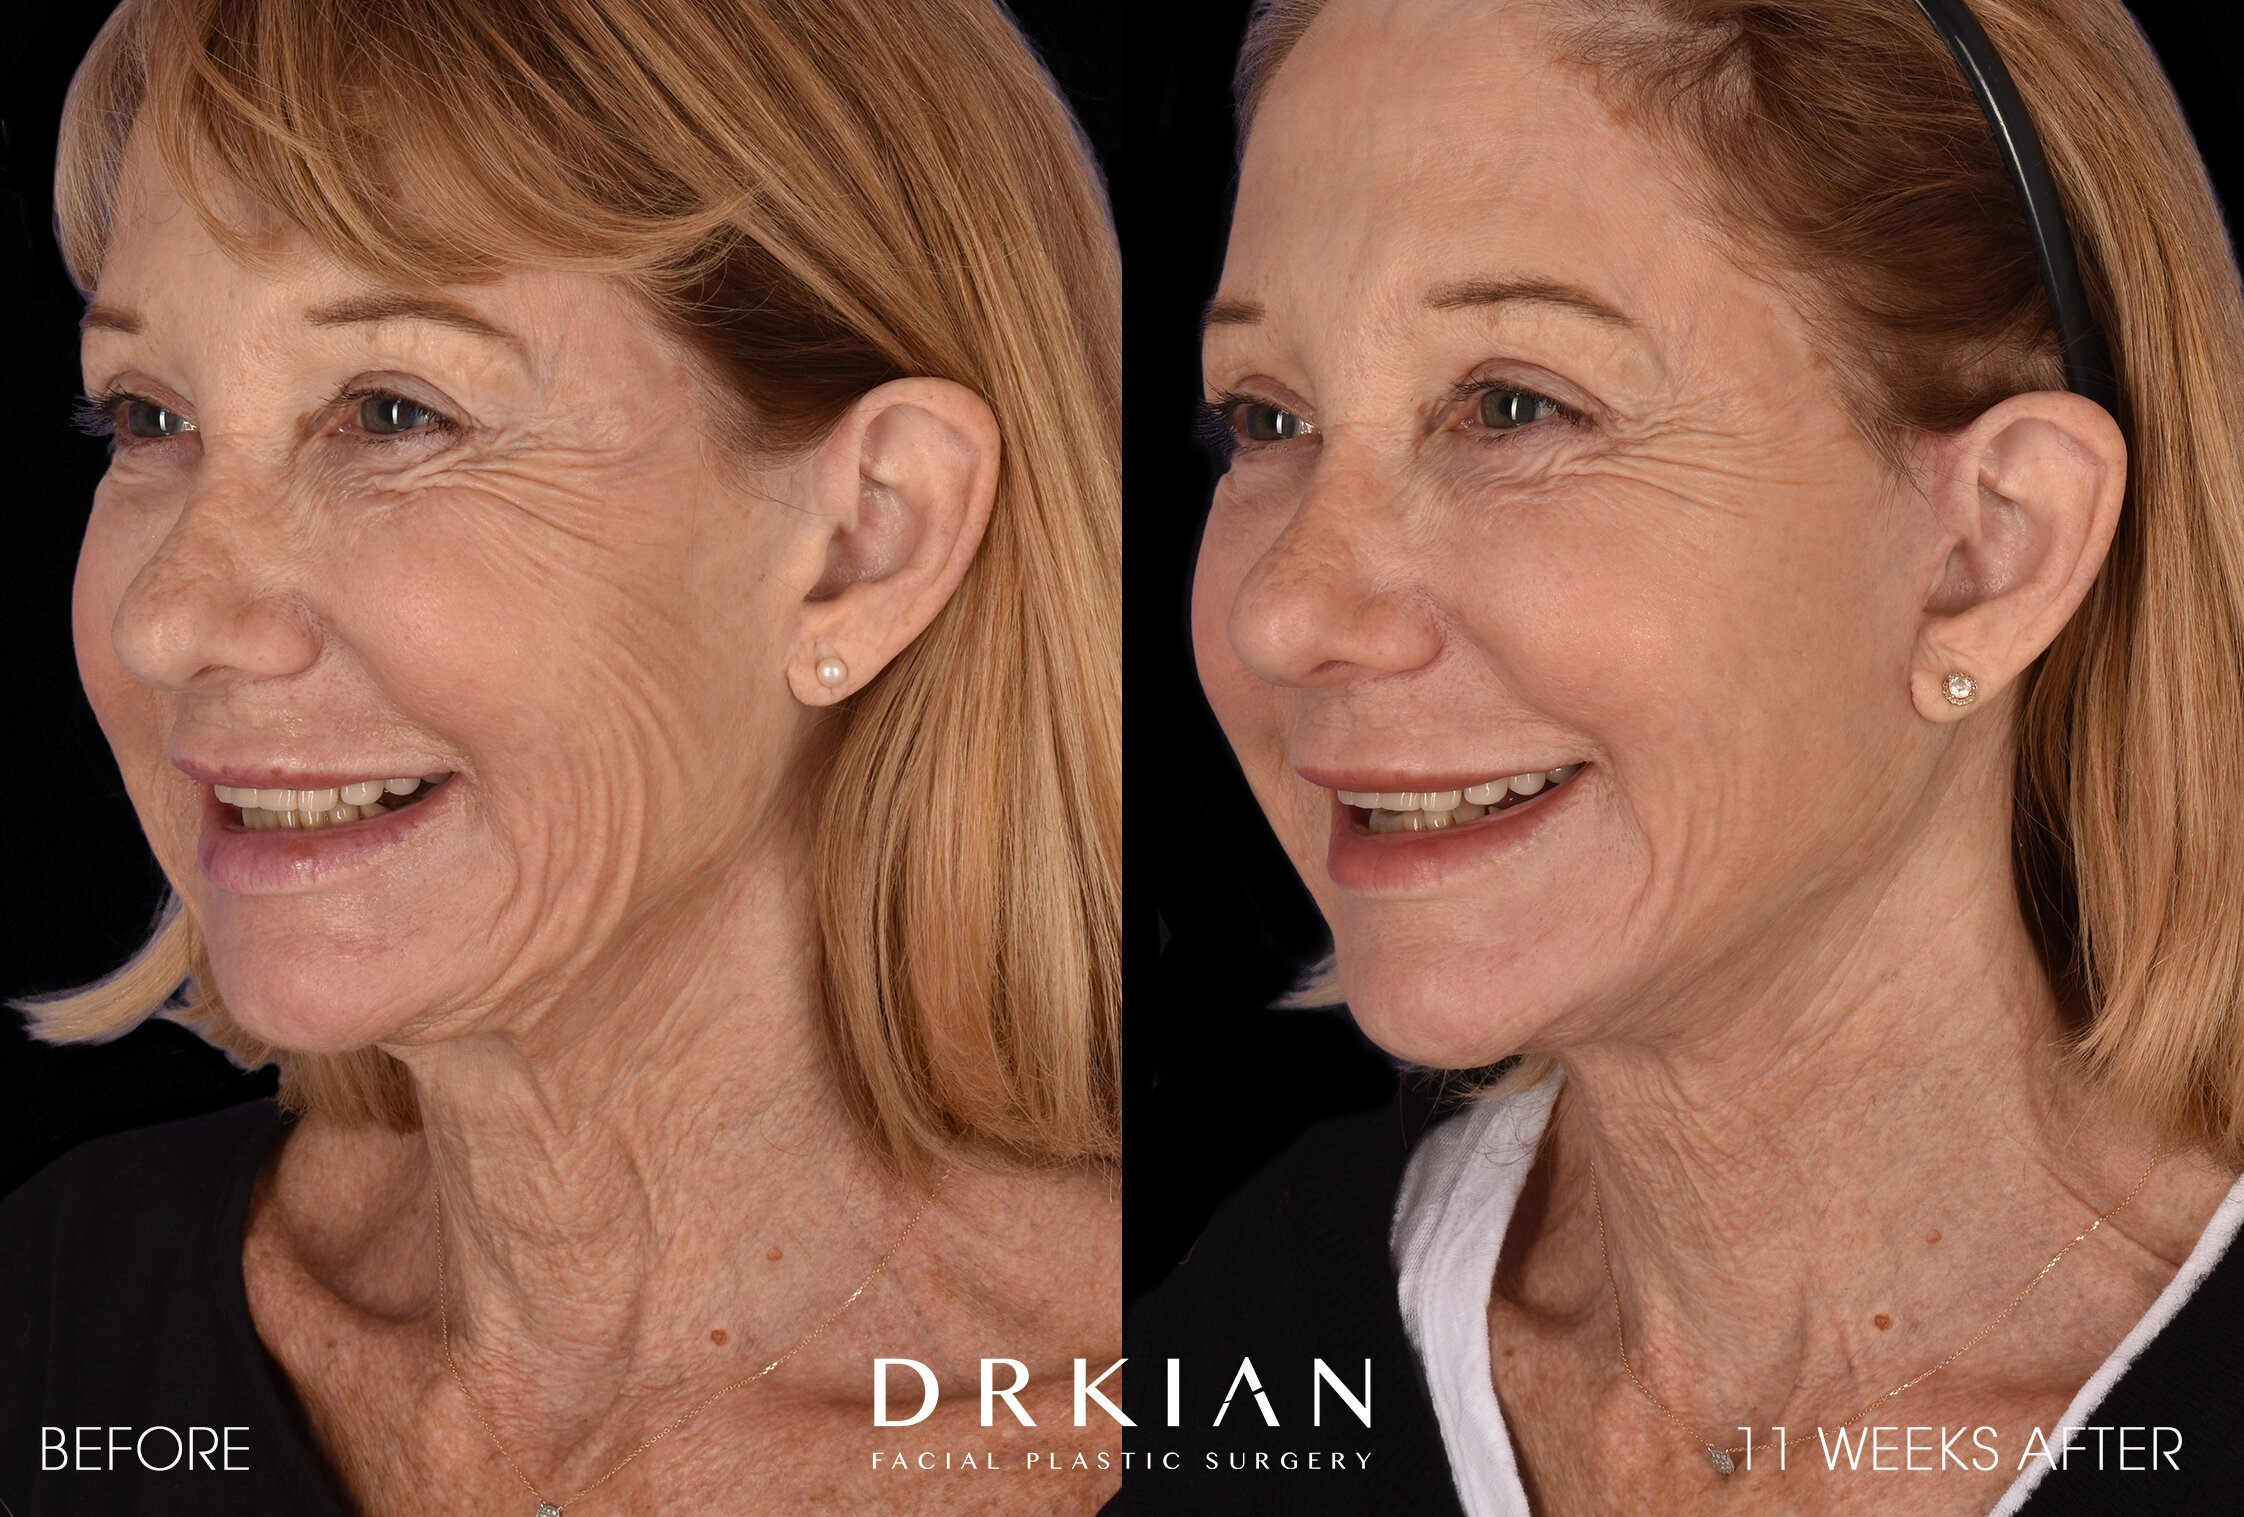
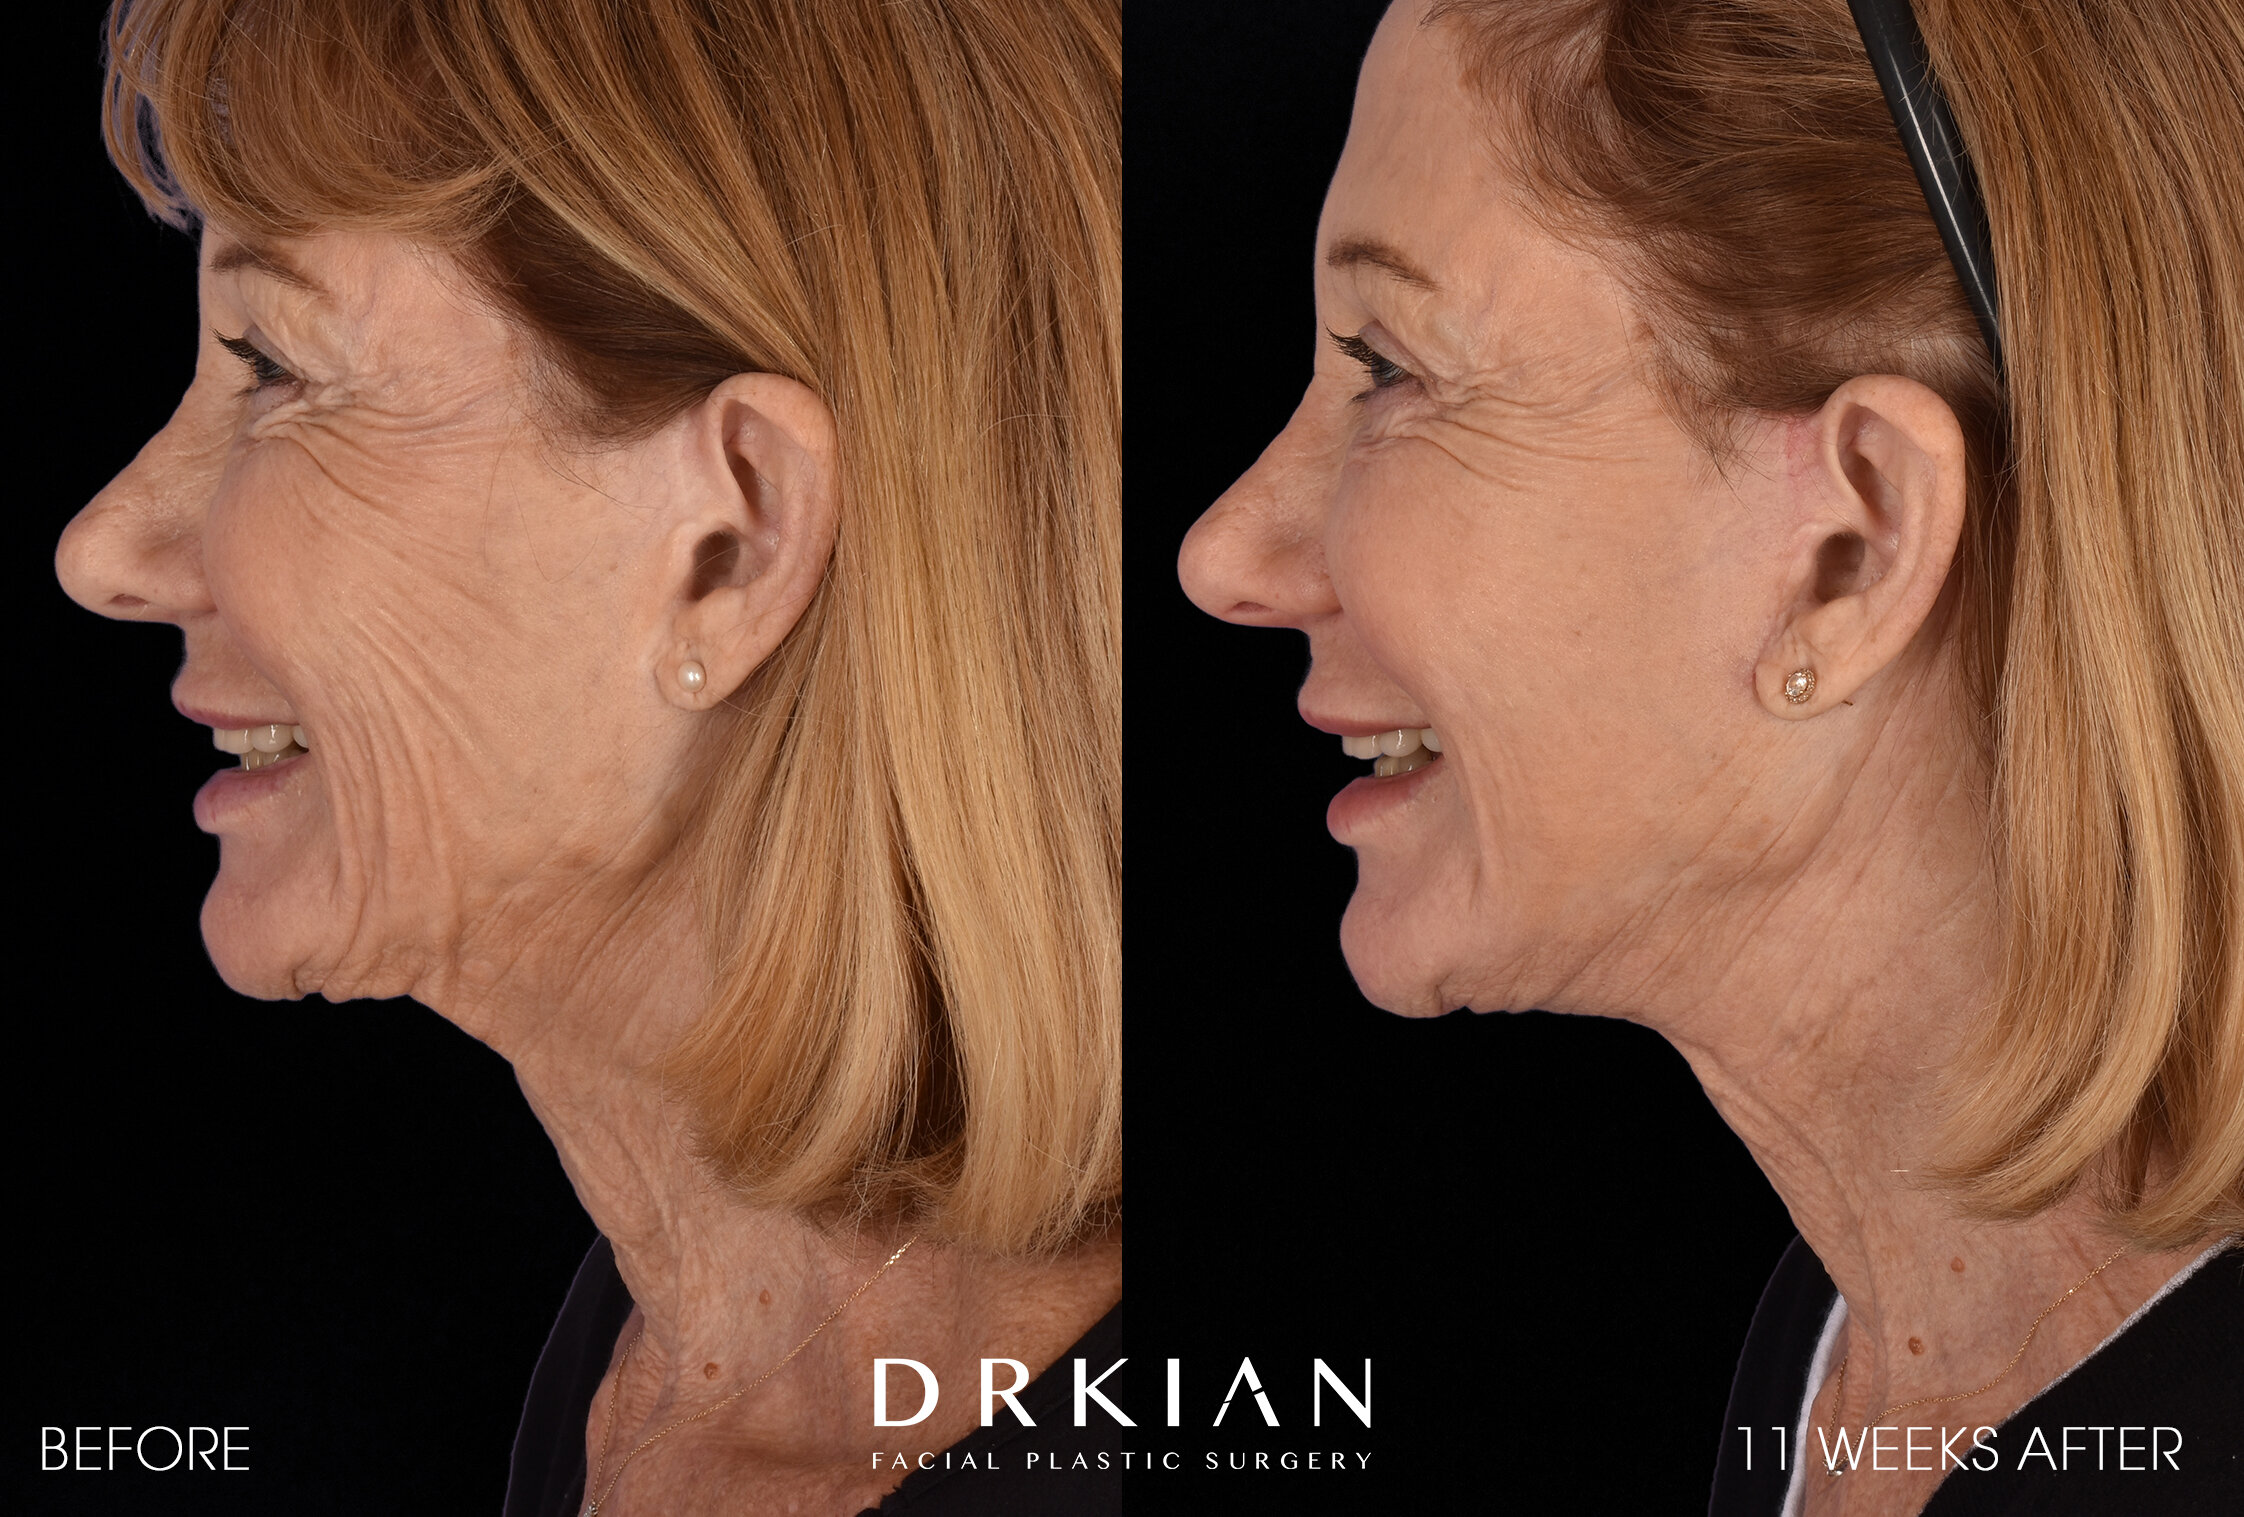
Lower Face Lift & Micro Neck Lift with Upper & Lower Blepharoplasty Before & After 11 Weeks

Lower Face Lift & Micro Neck Lift with Upper & Lower Blepharoplasty Before & After 11 Weeks

Lower Face Lift & Micro Neck Lift with Upper & Lower Blepharoplasty Before & After 11 Weeks

Lower Face Lift & Micro Neck Lift with Upper & Lower Blepharoplasty Before & After 11 Weeks

Lower Face Lift & Micro Neck Lift with Upper & Lower Blepharoplasty Before & After 11 Weeks
Lower Face Lift & Micro Neck Lift with Upper & Lower Blepharoplasty Before & After 11 Weeks