Blepharoplasty
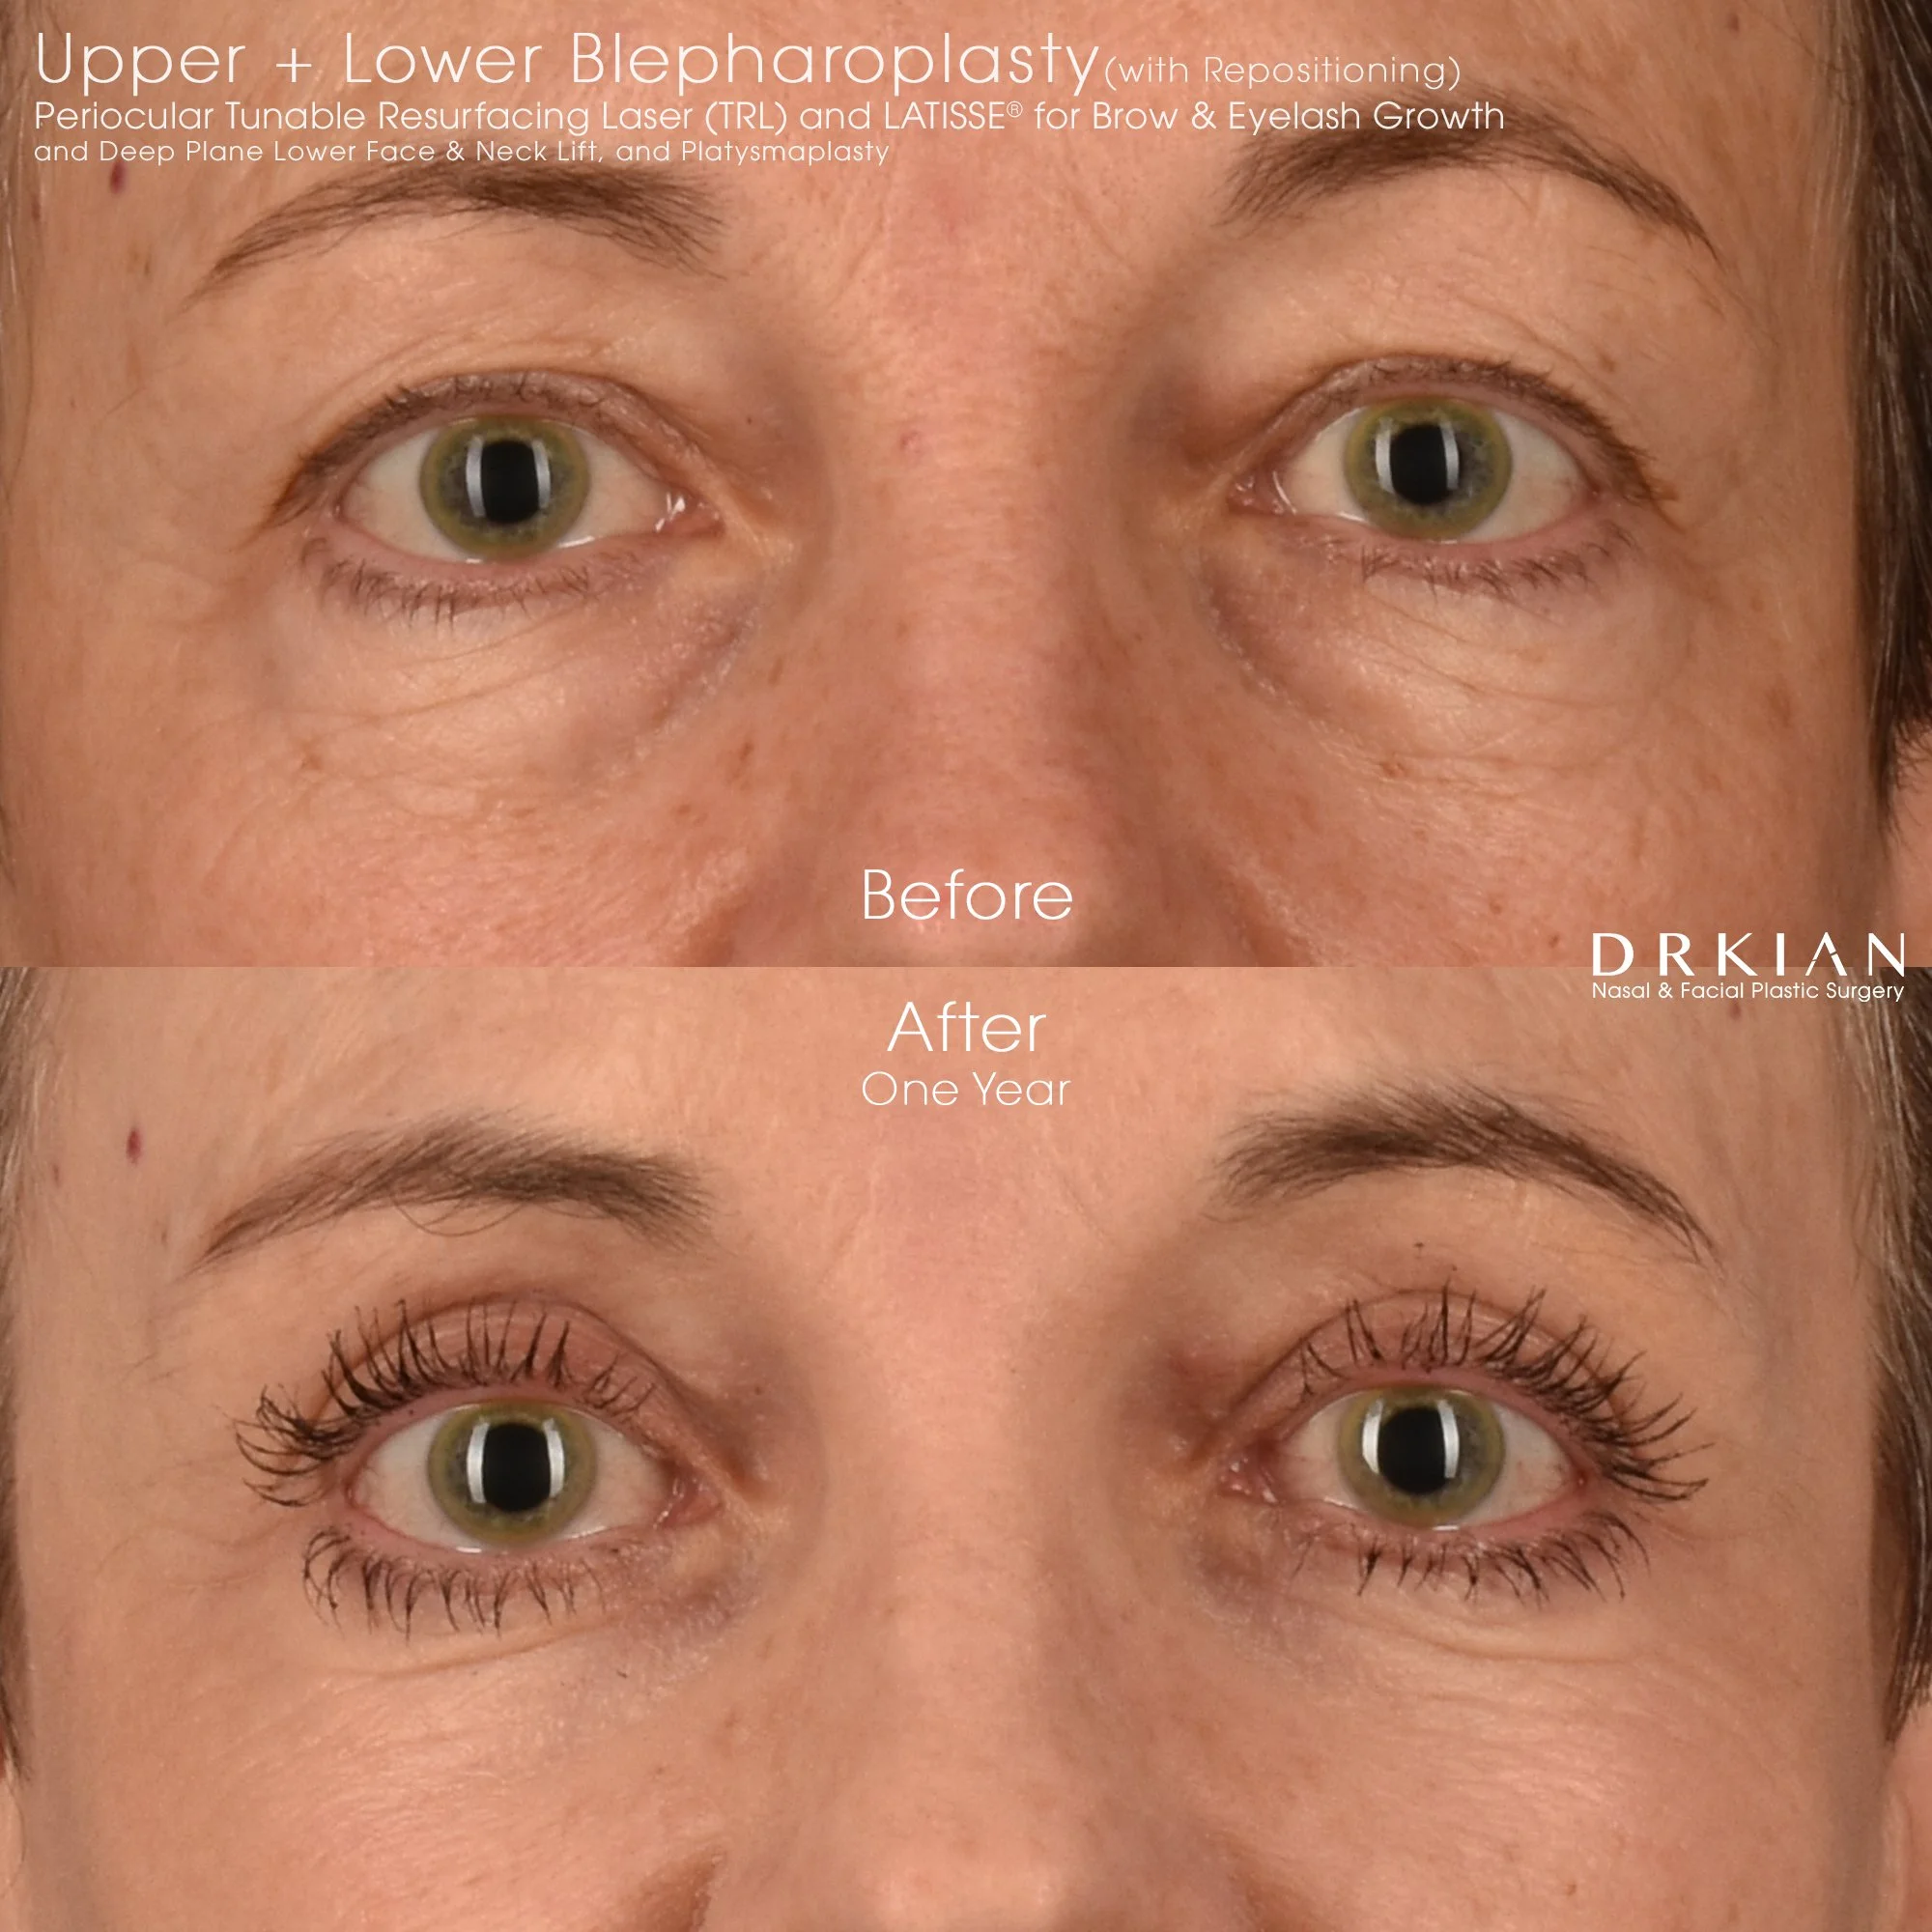
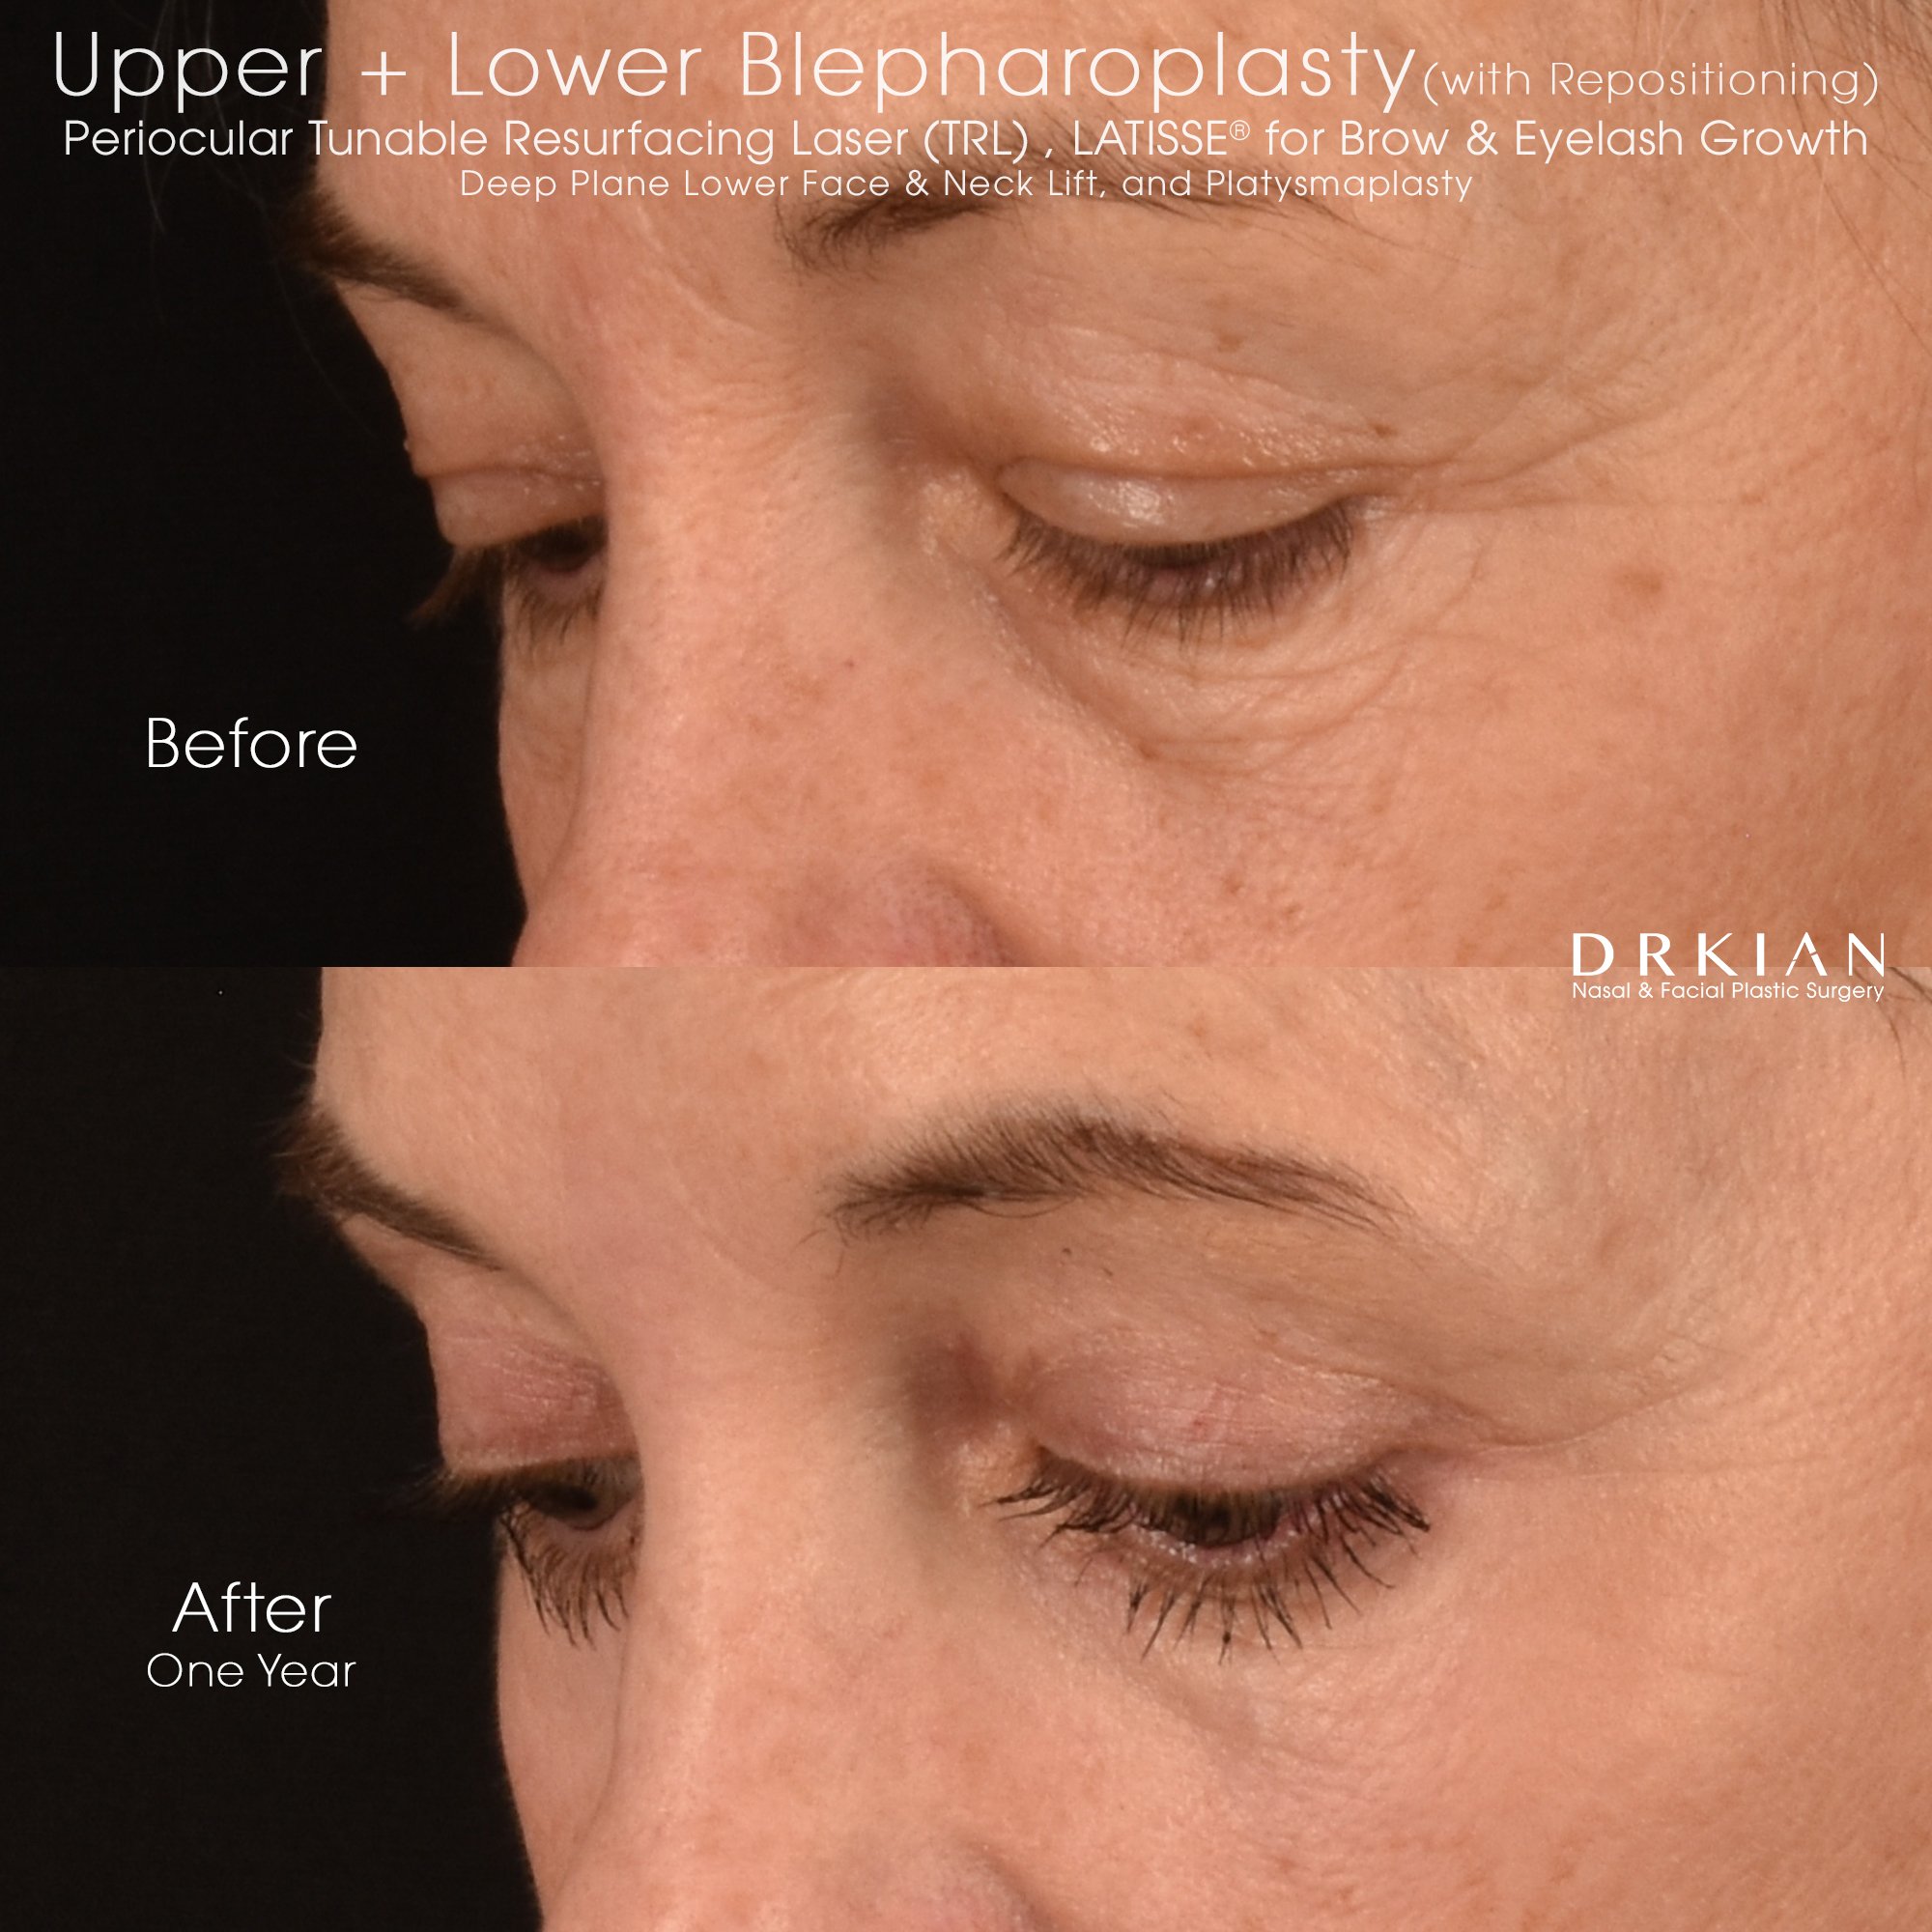
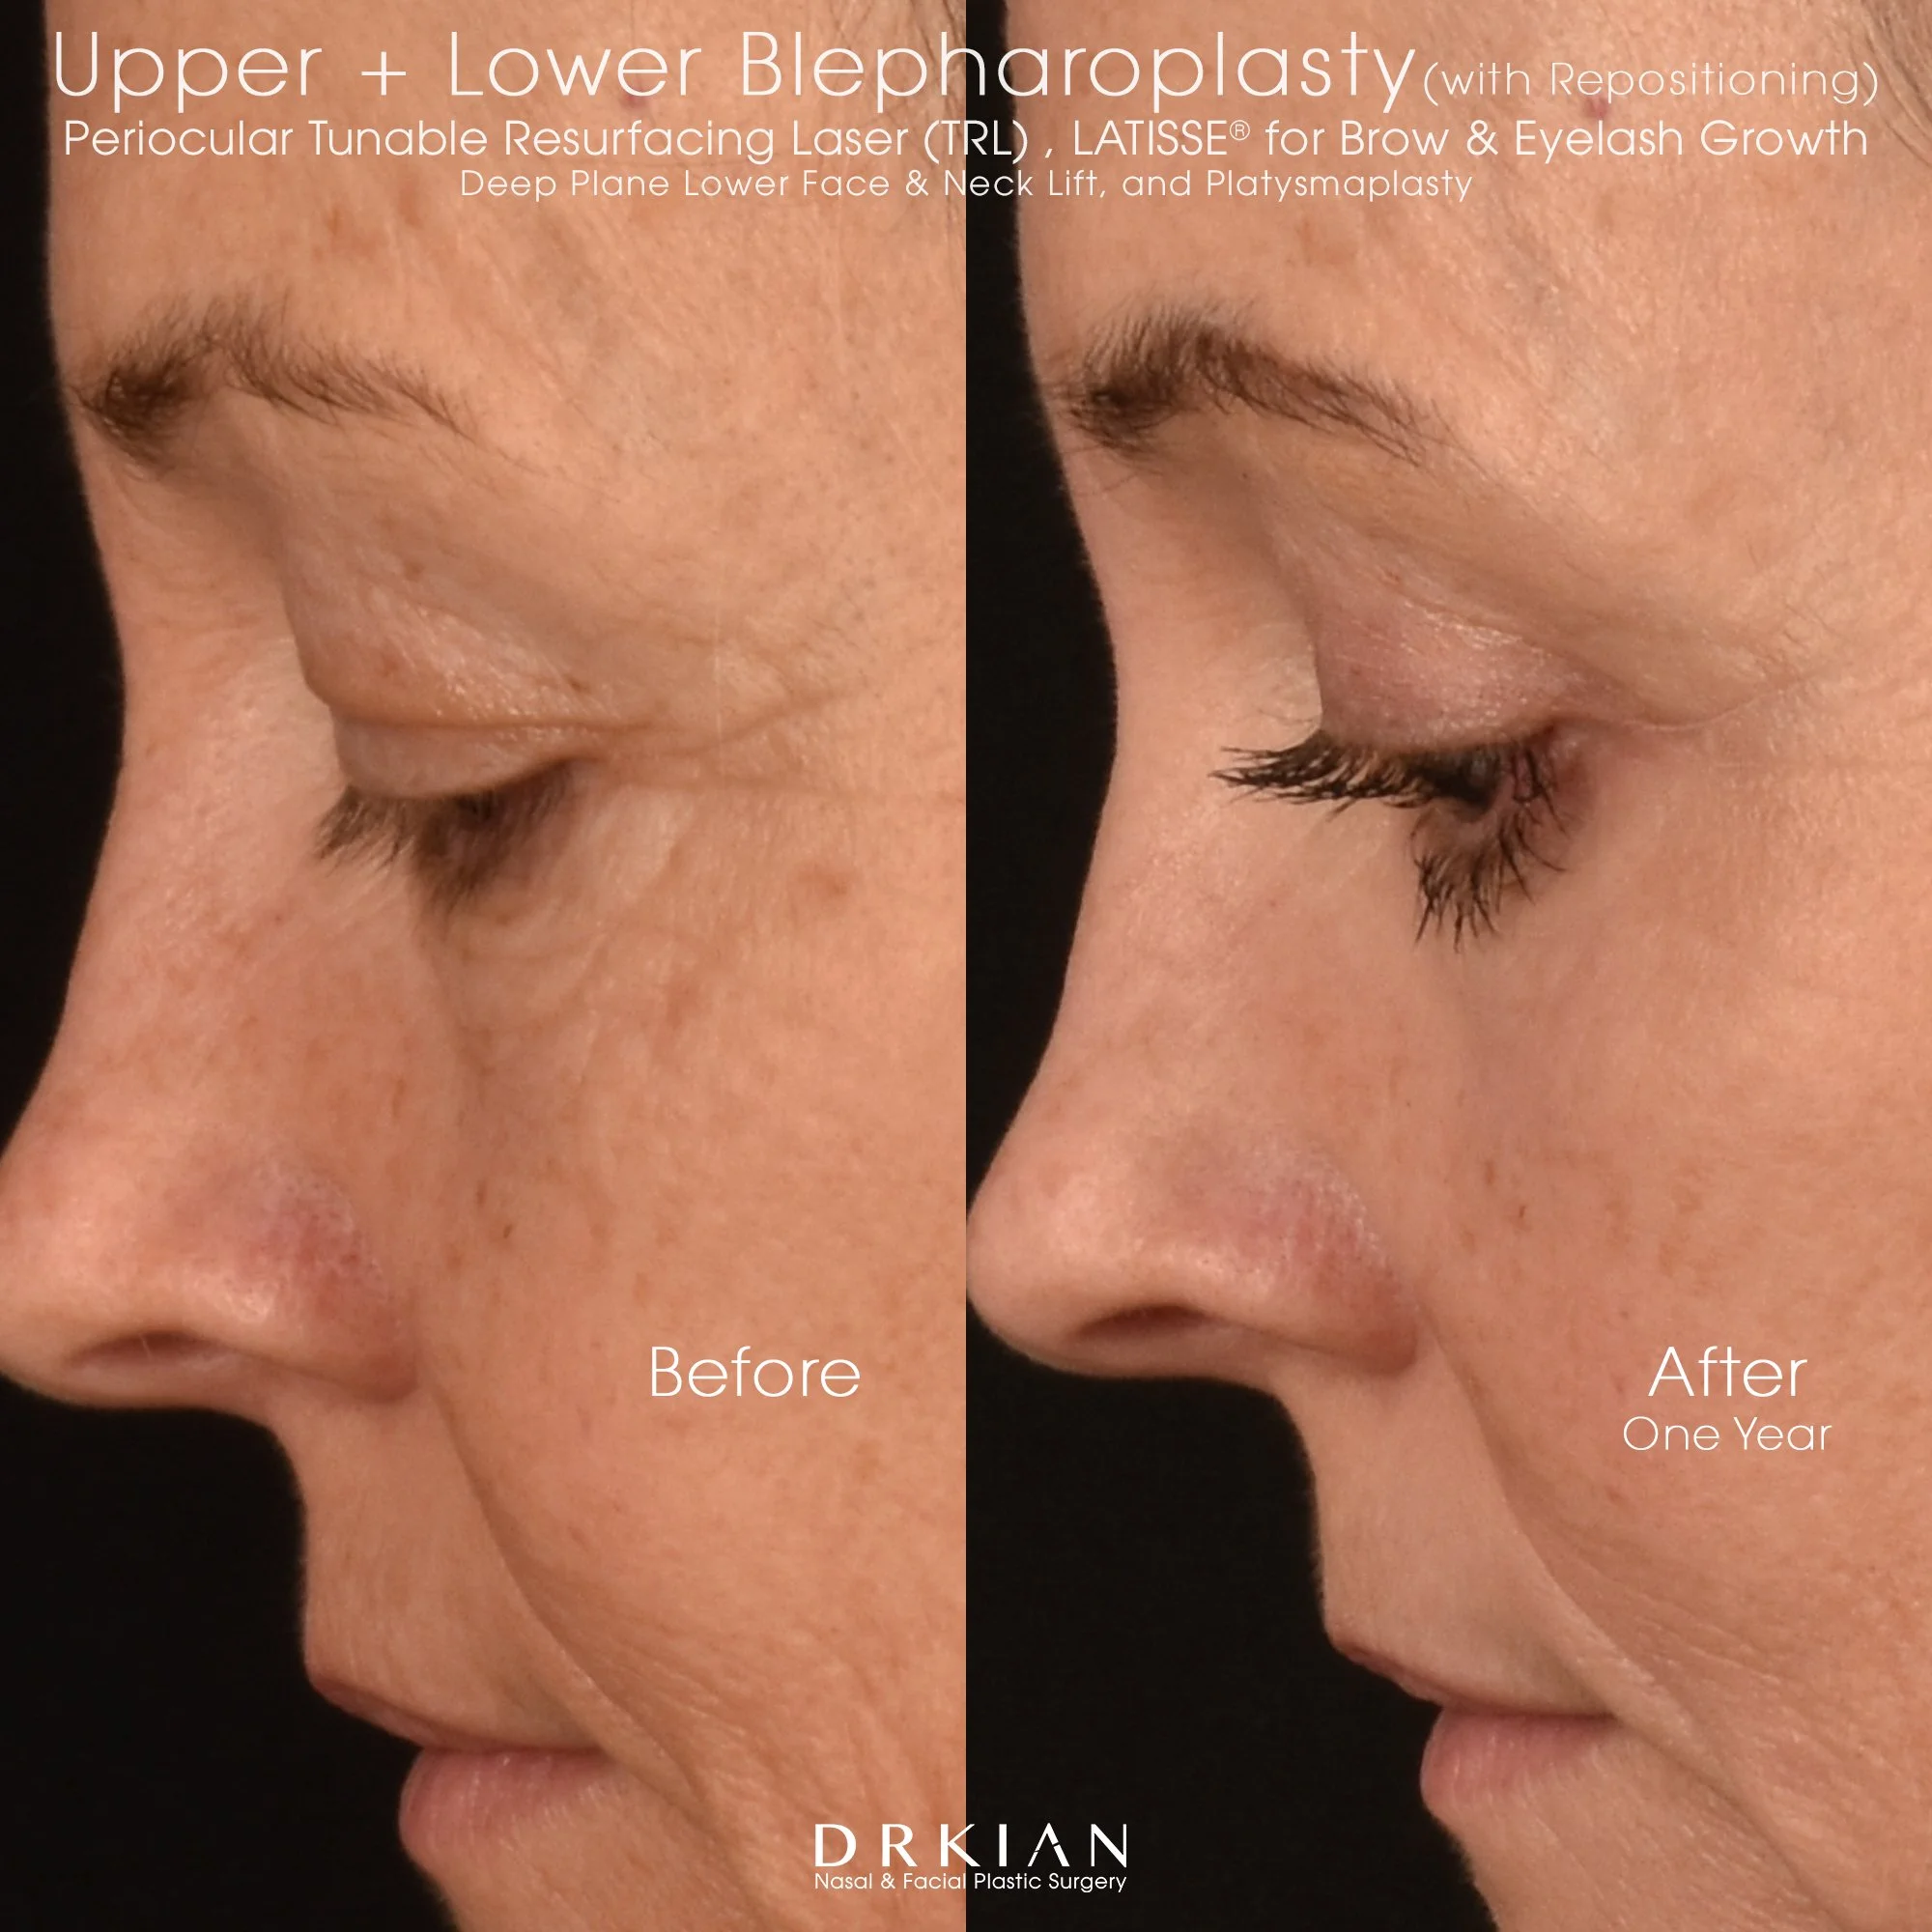
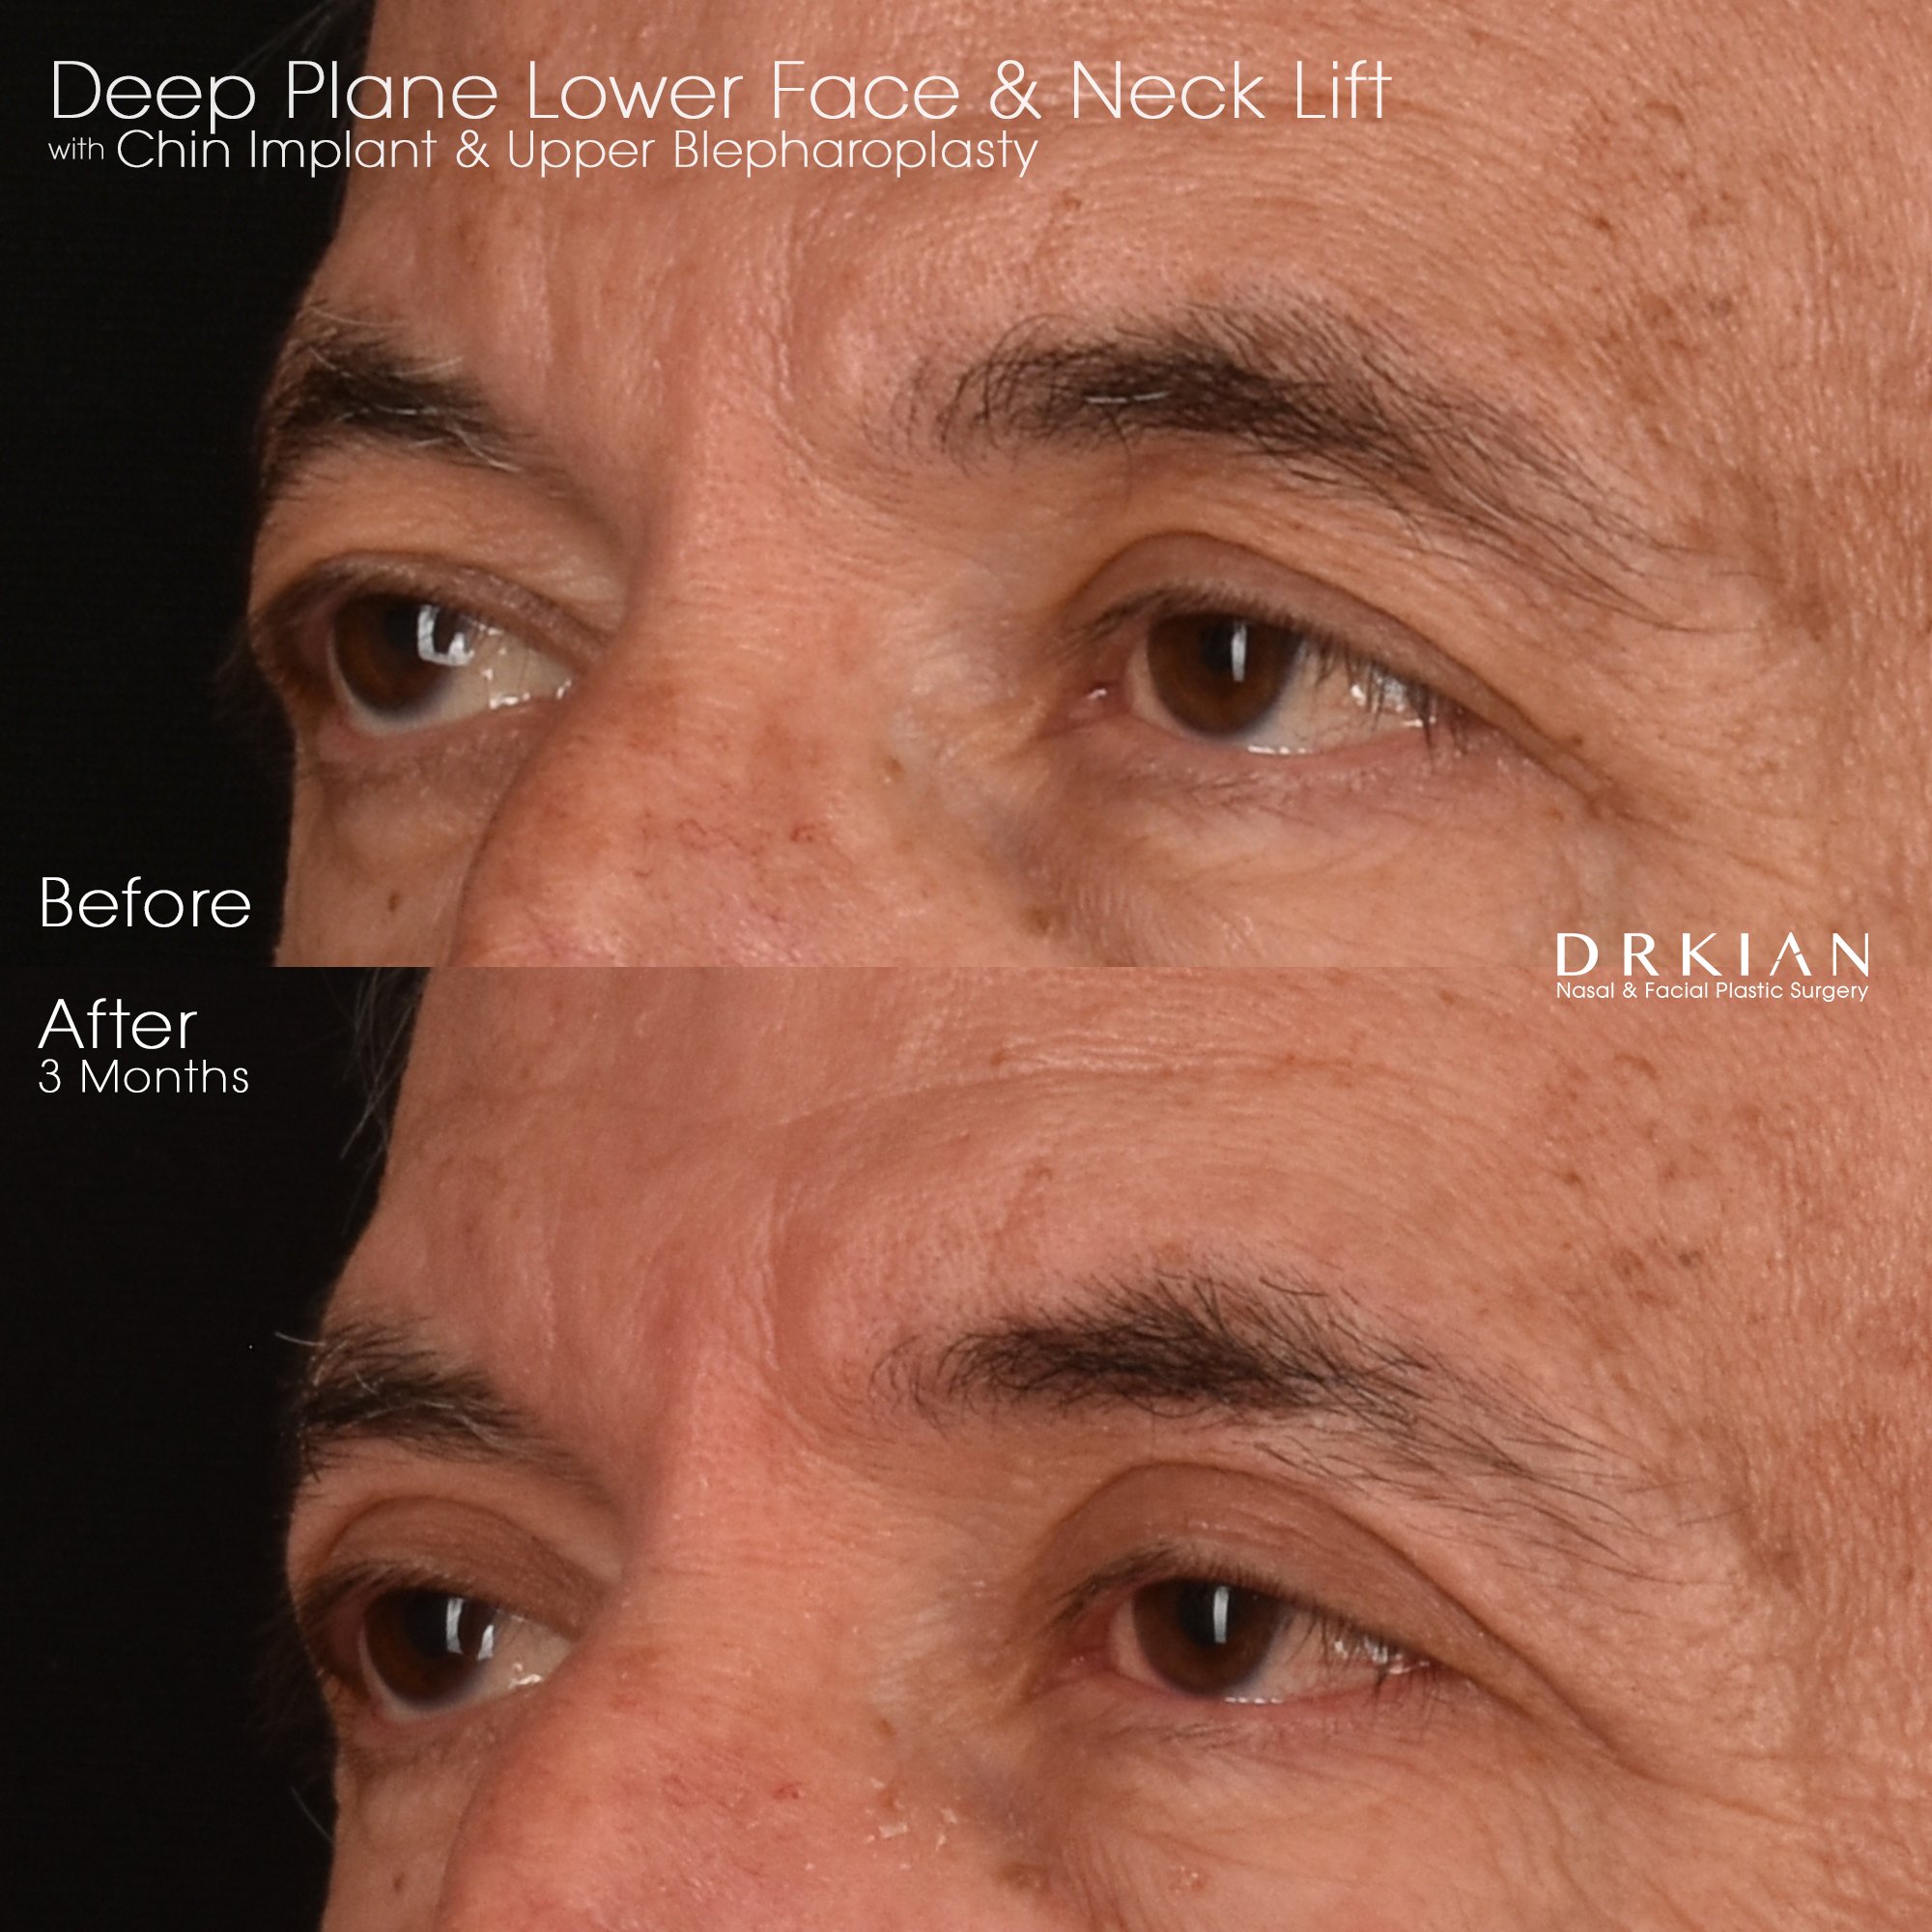
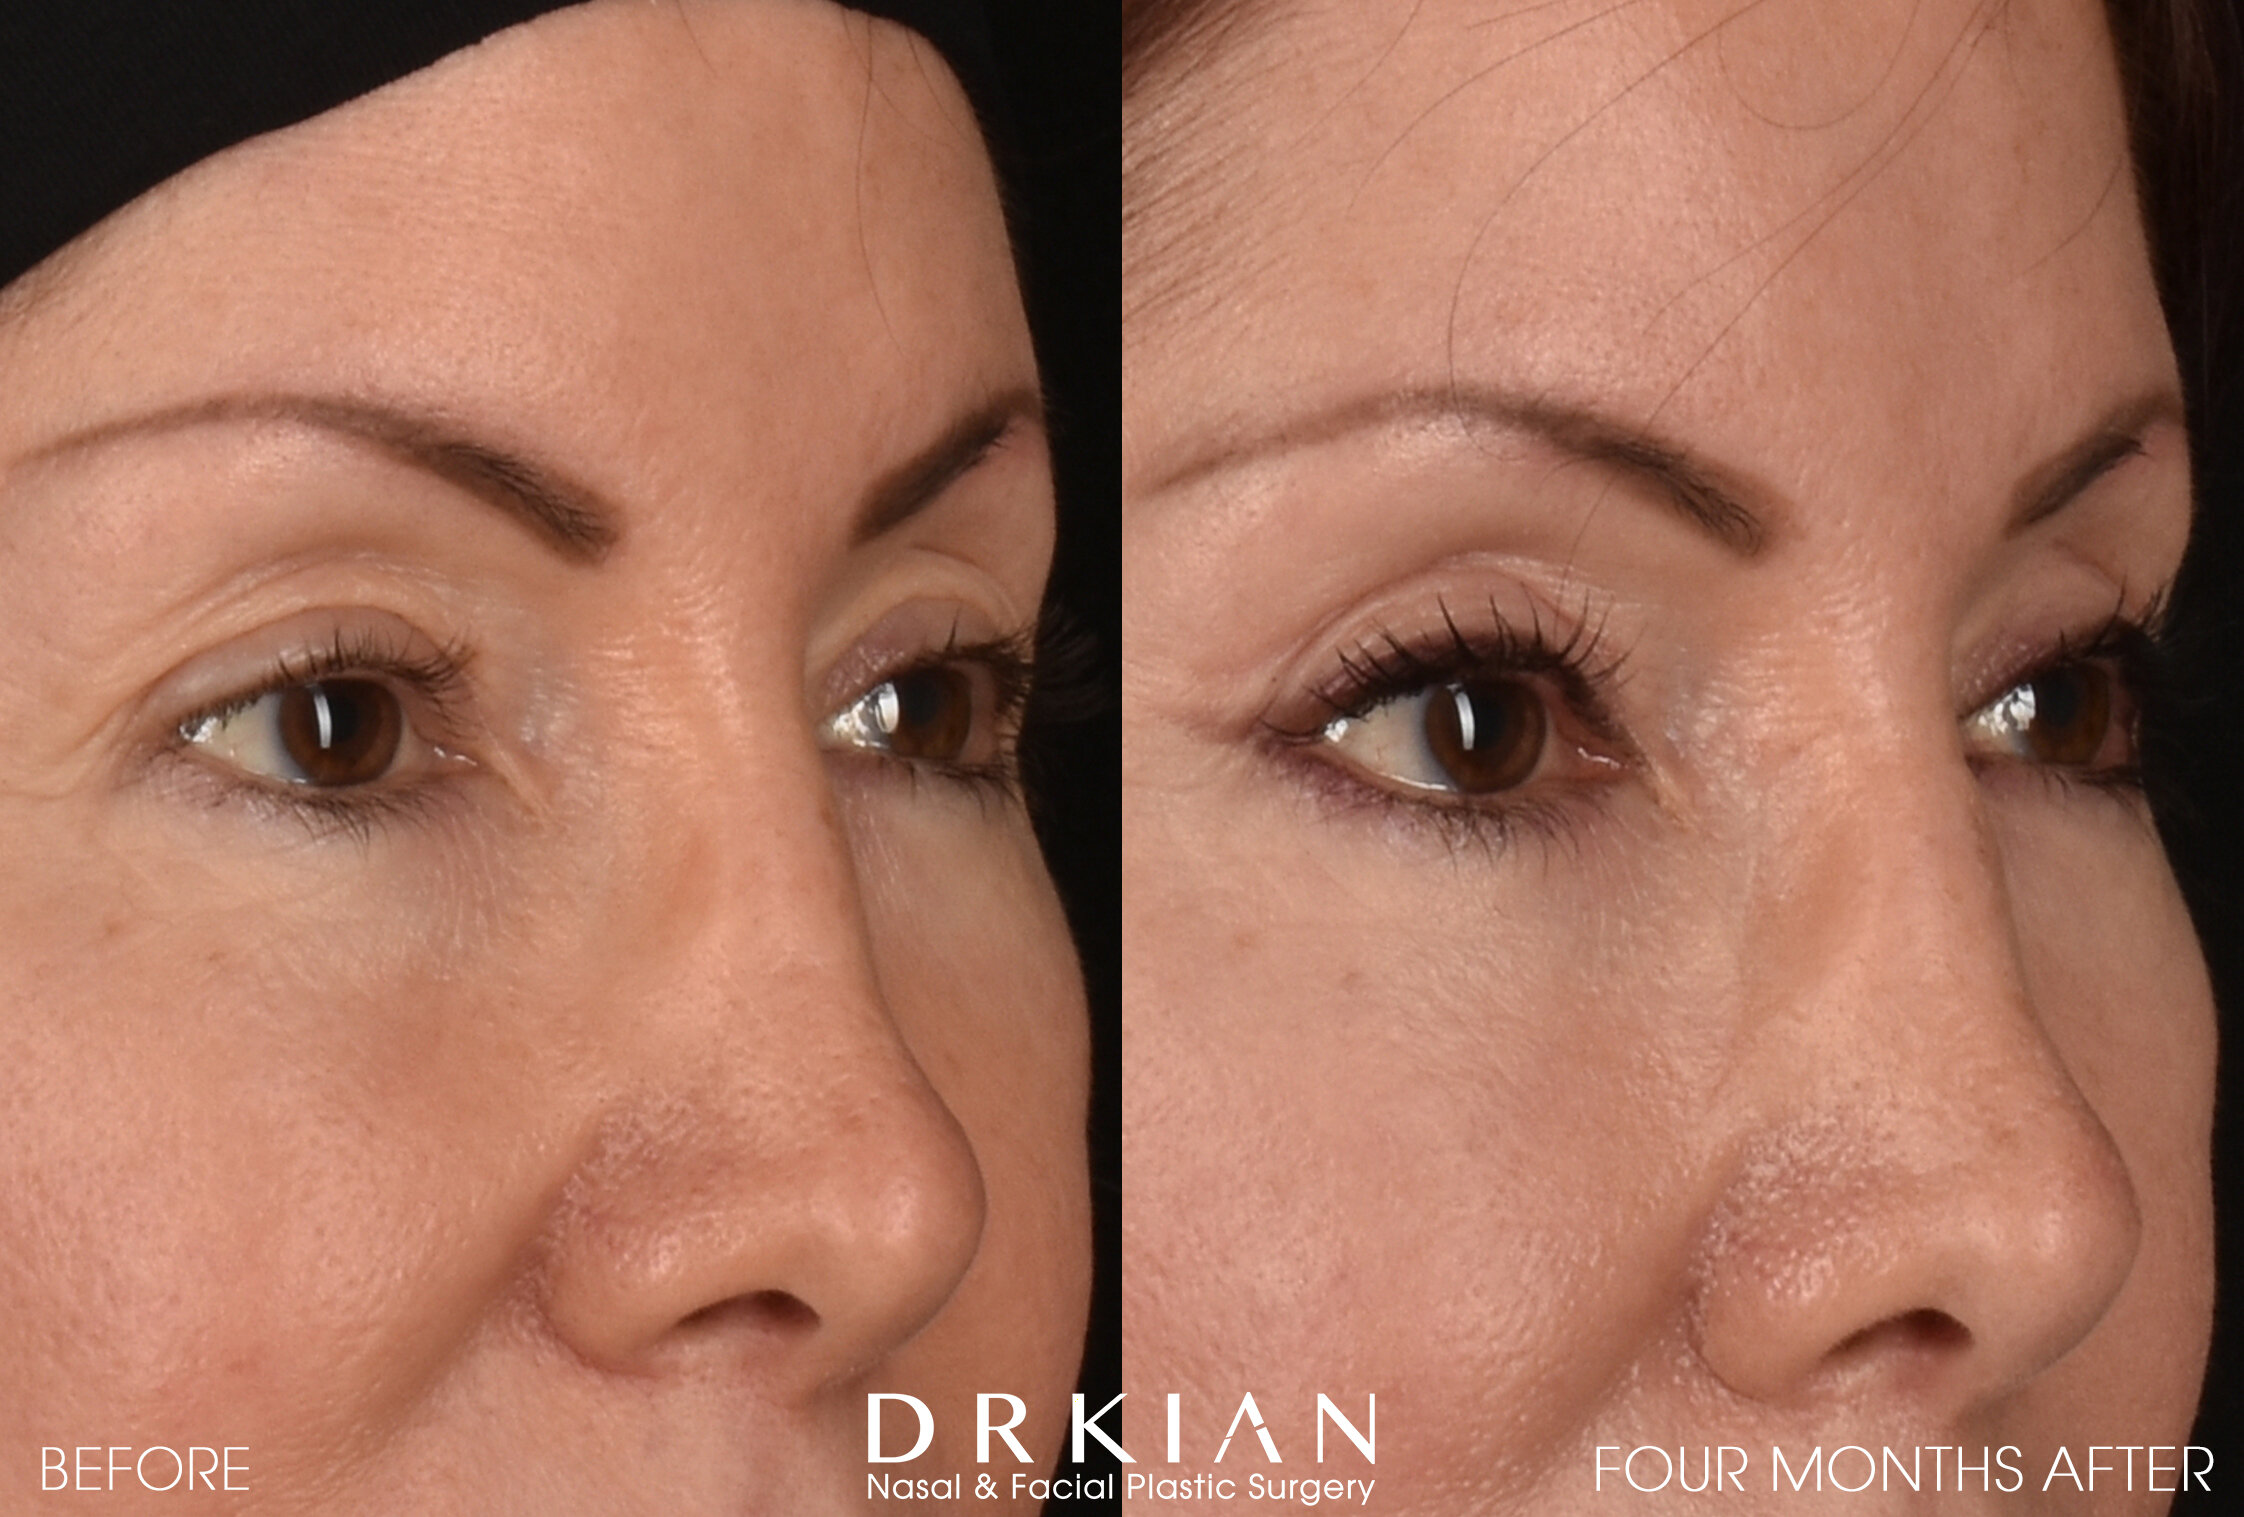
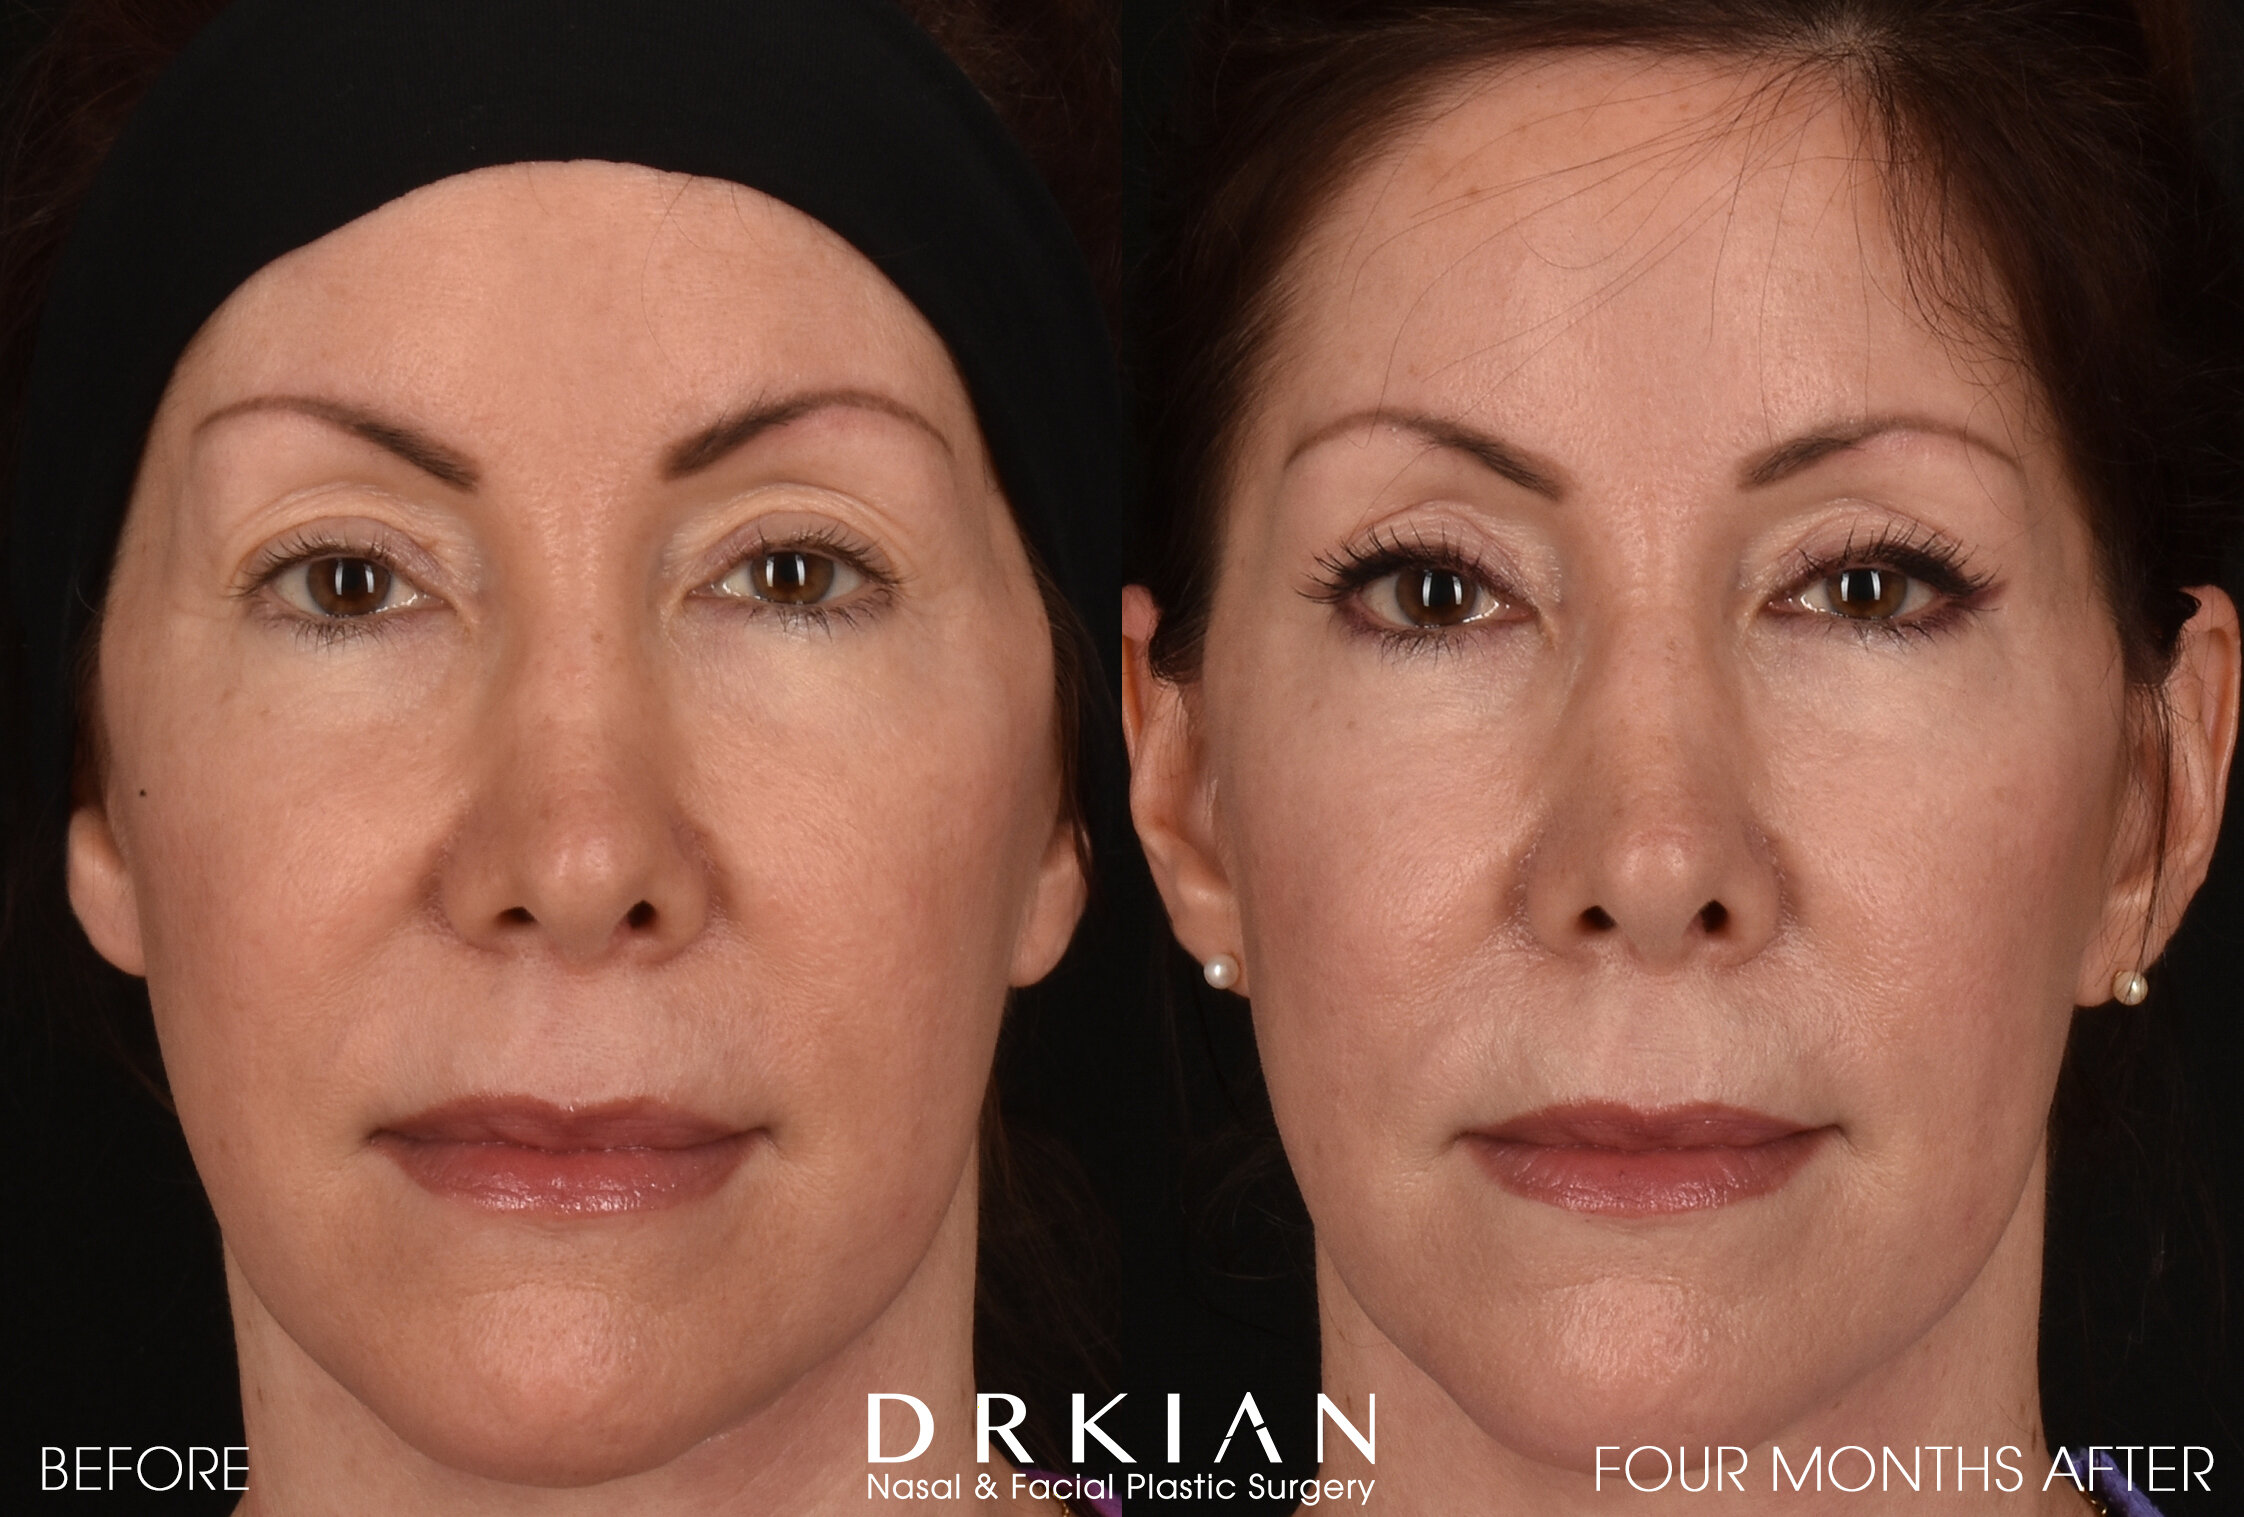
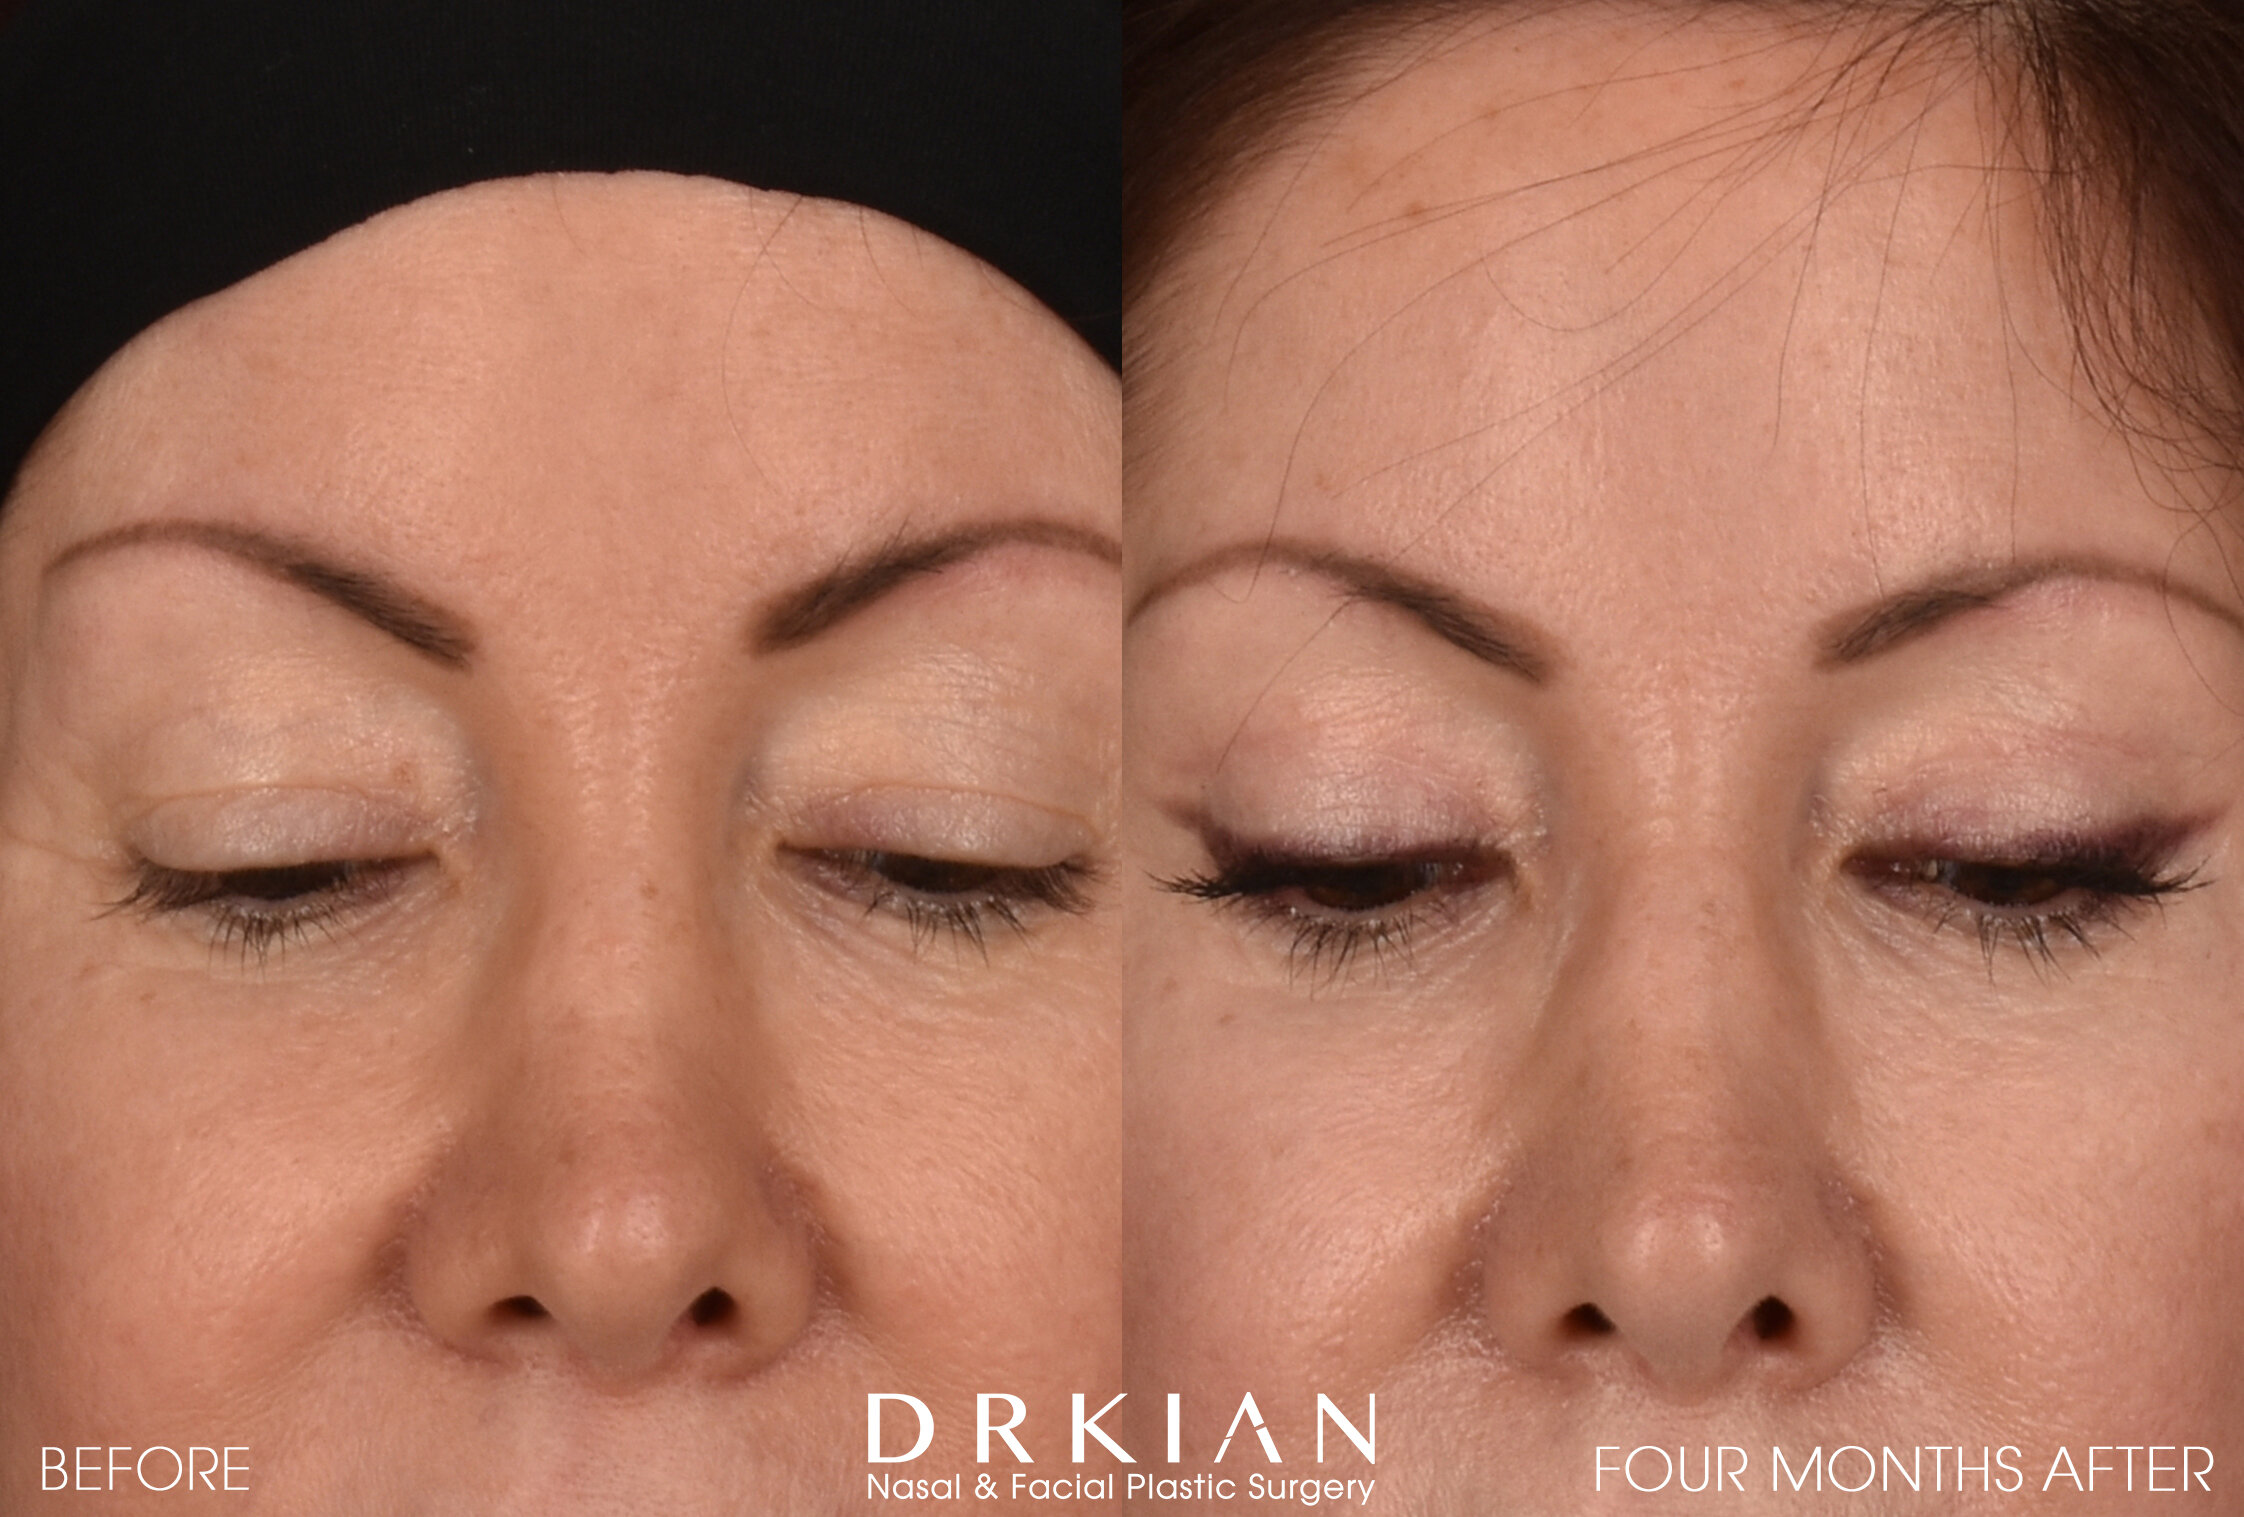
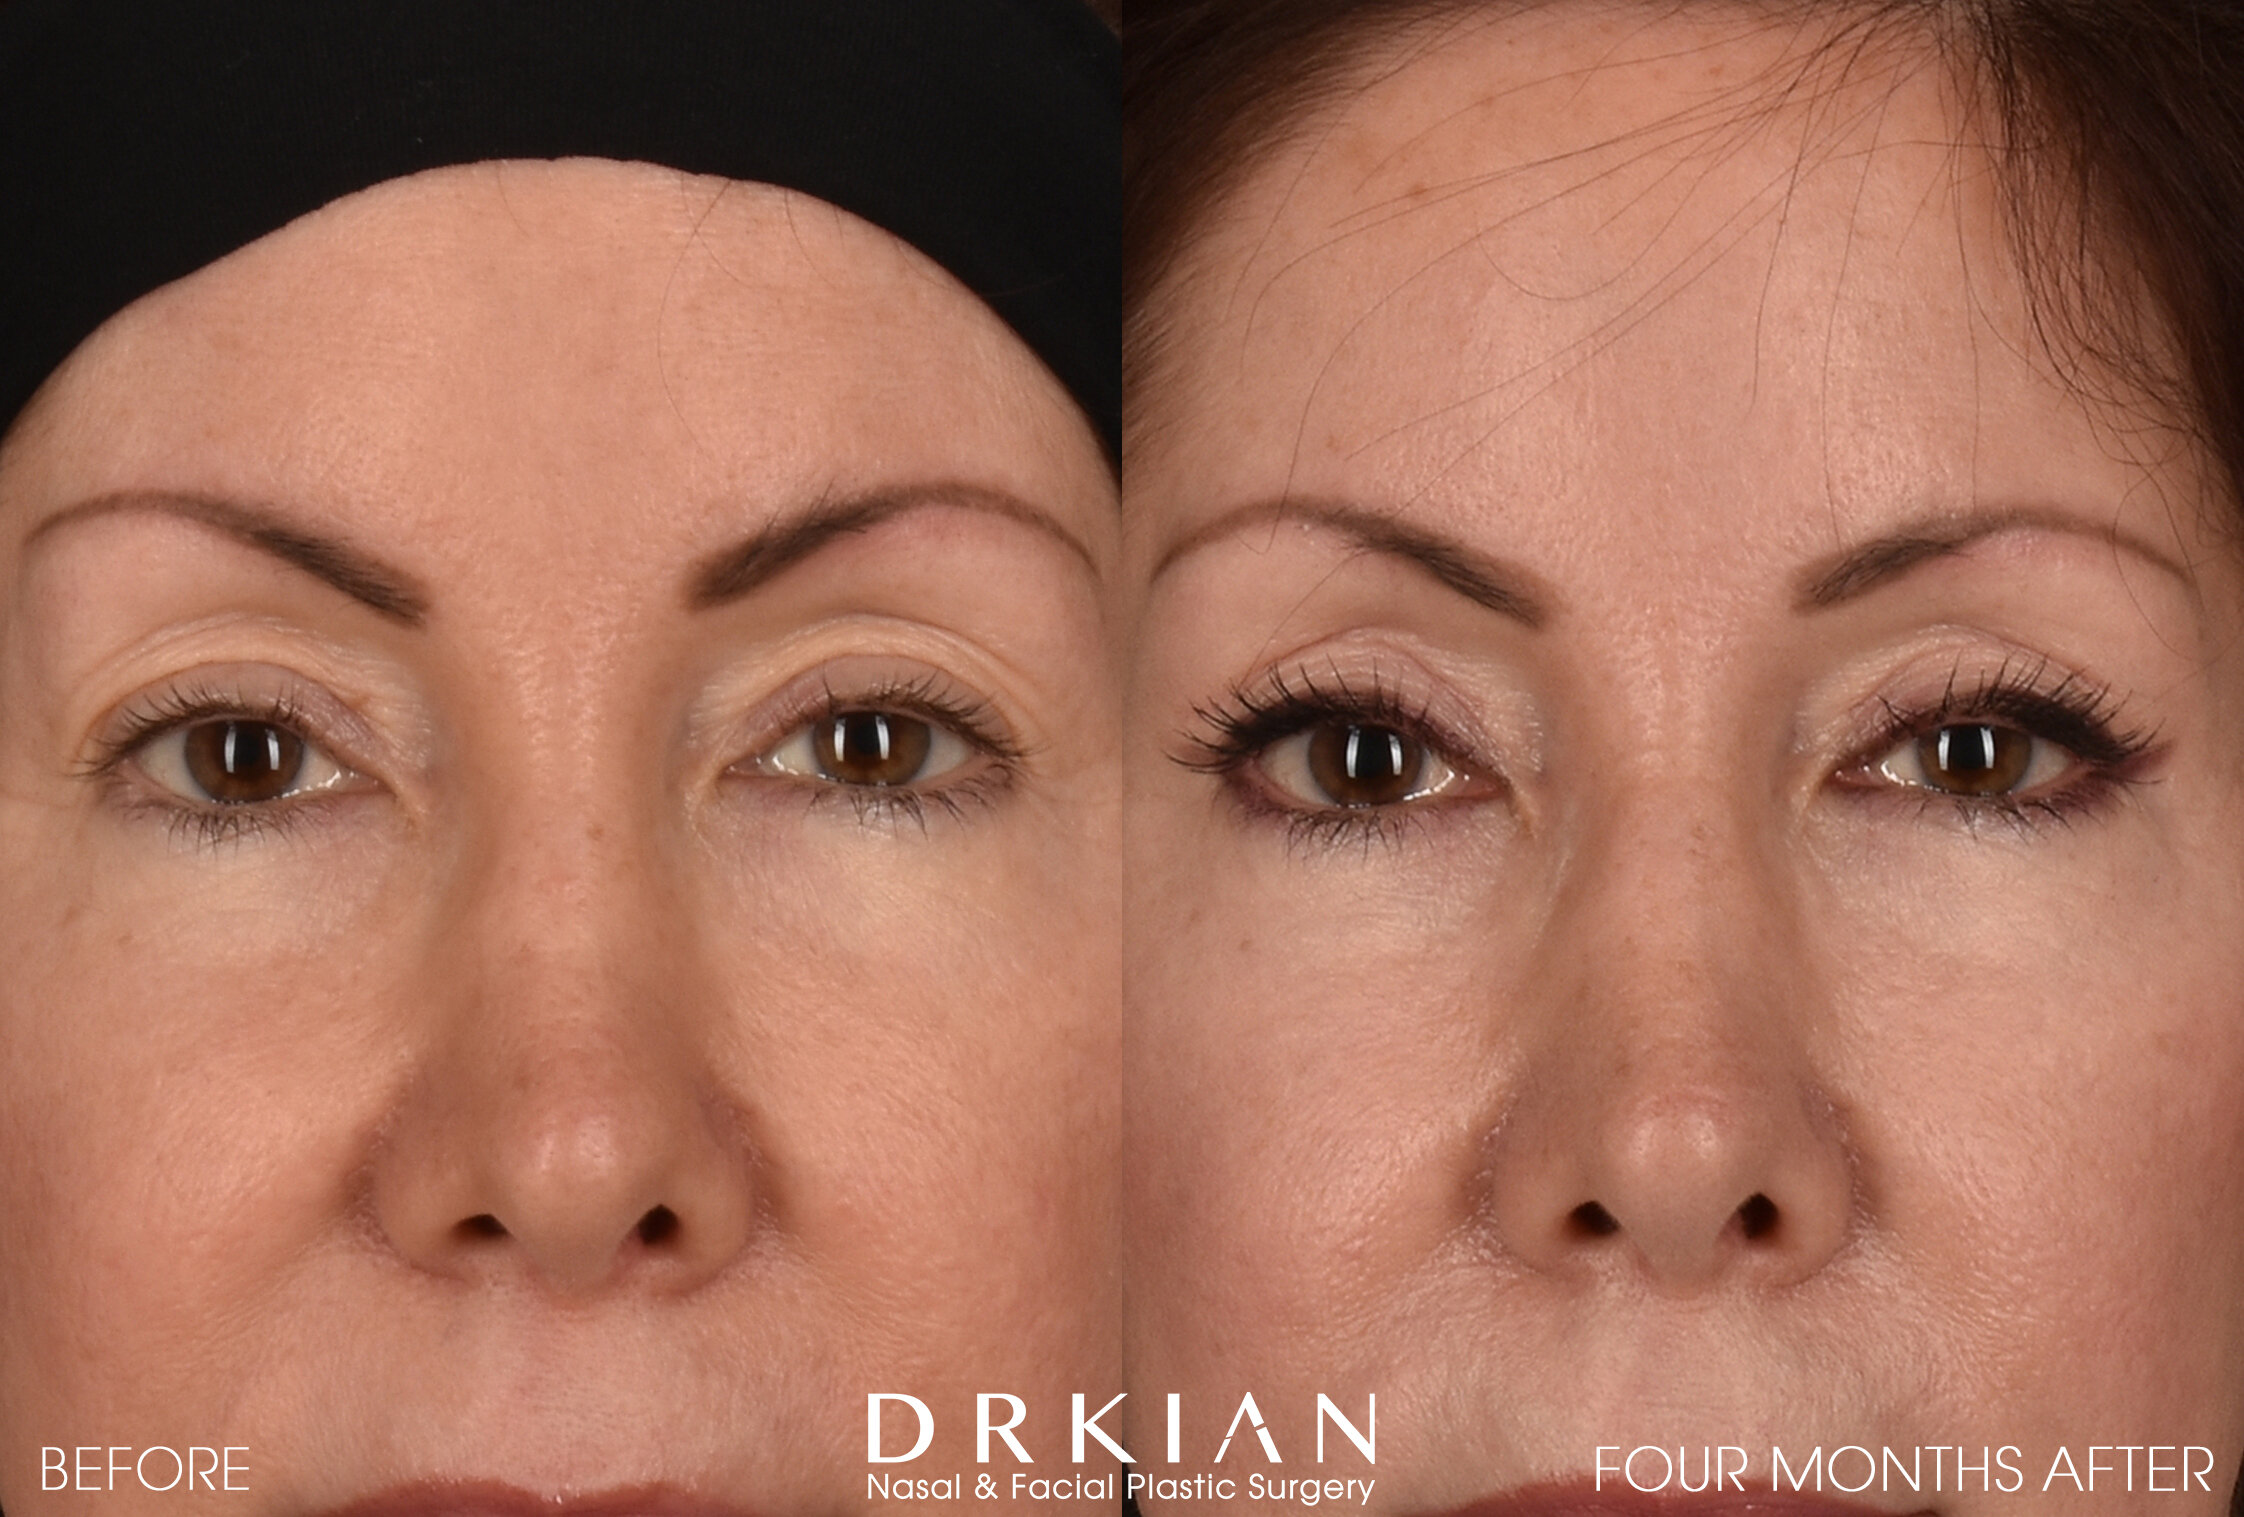
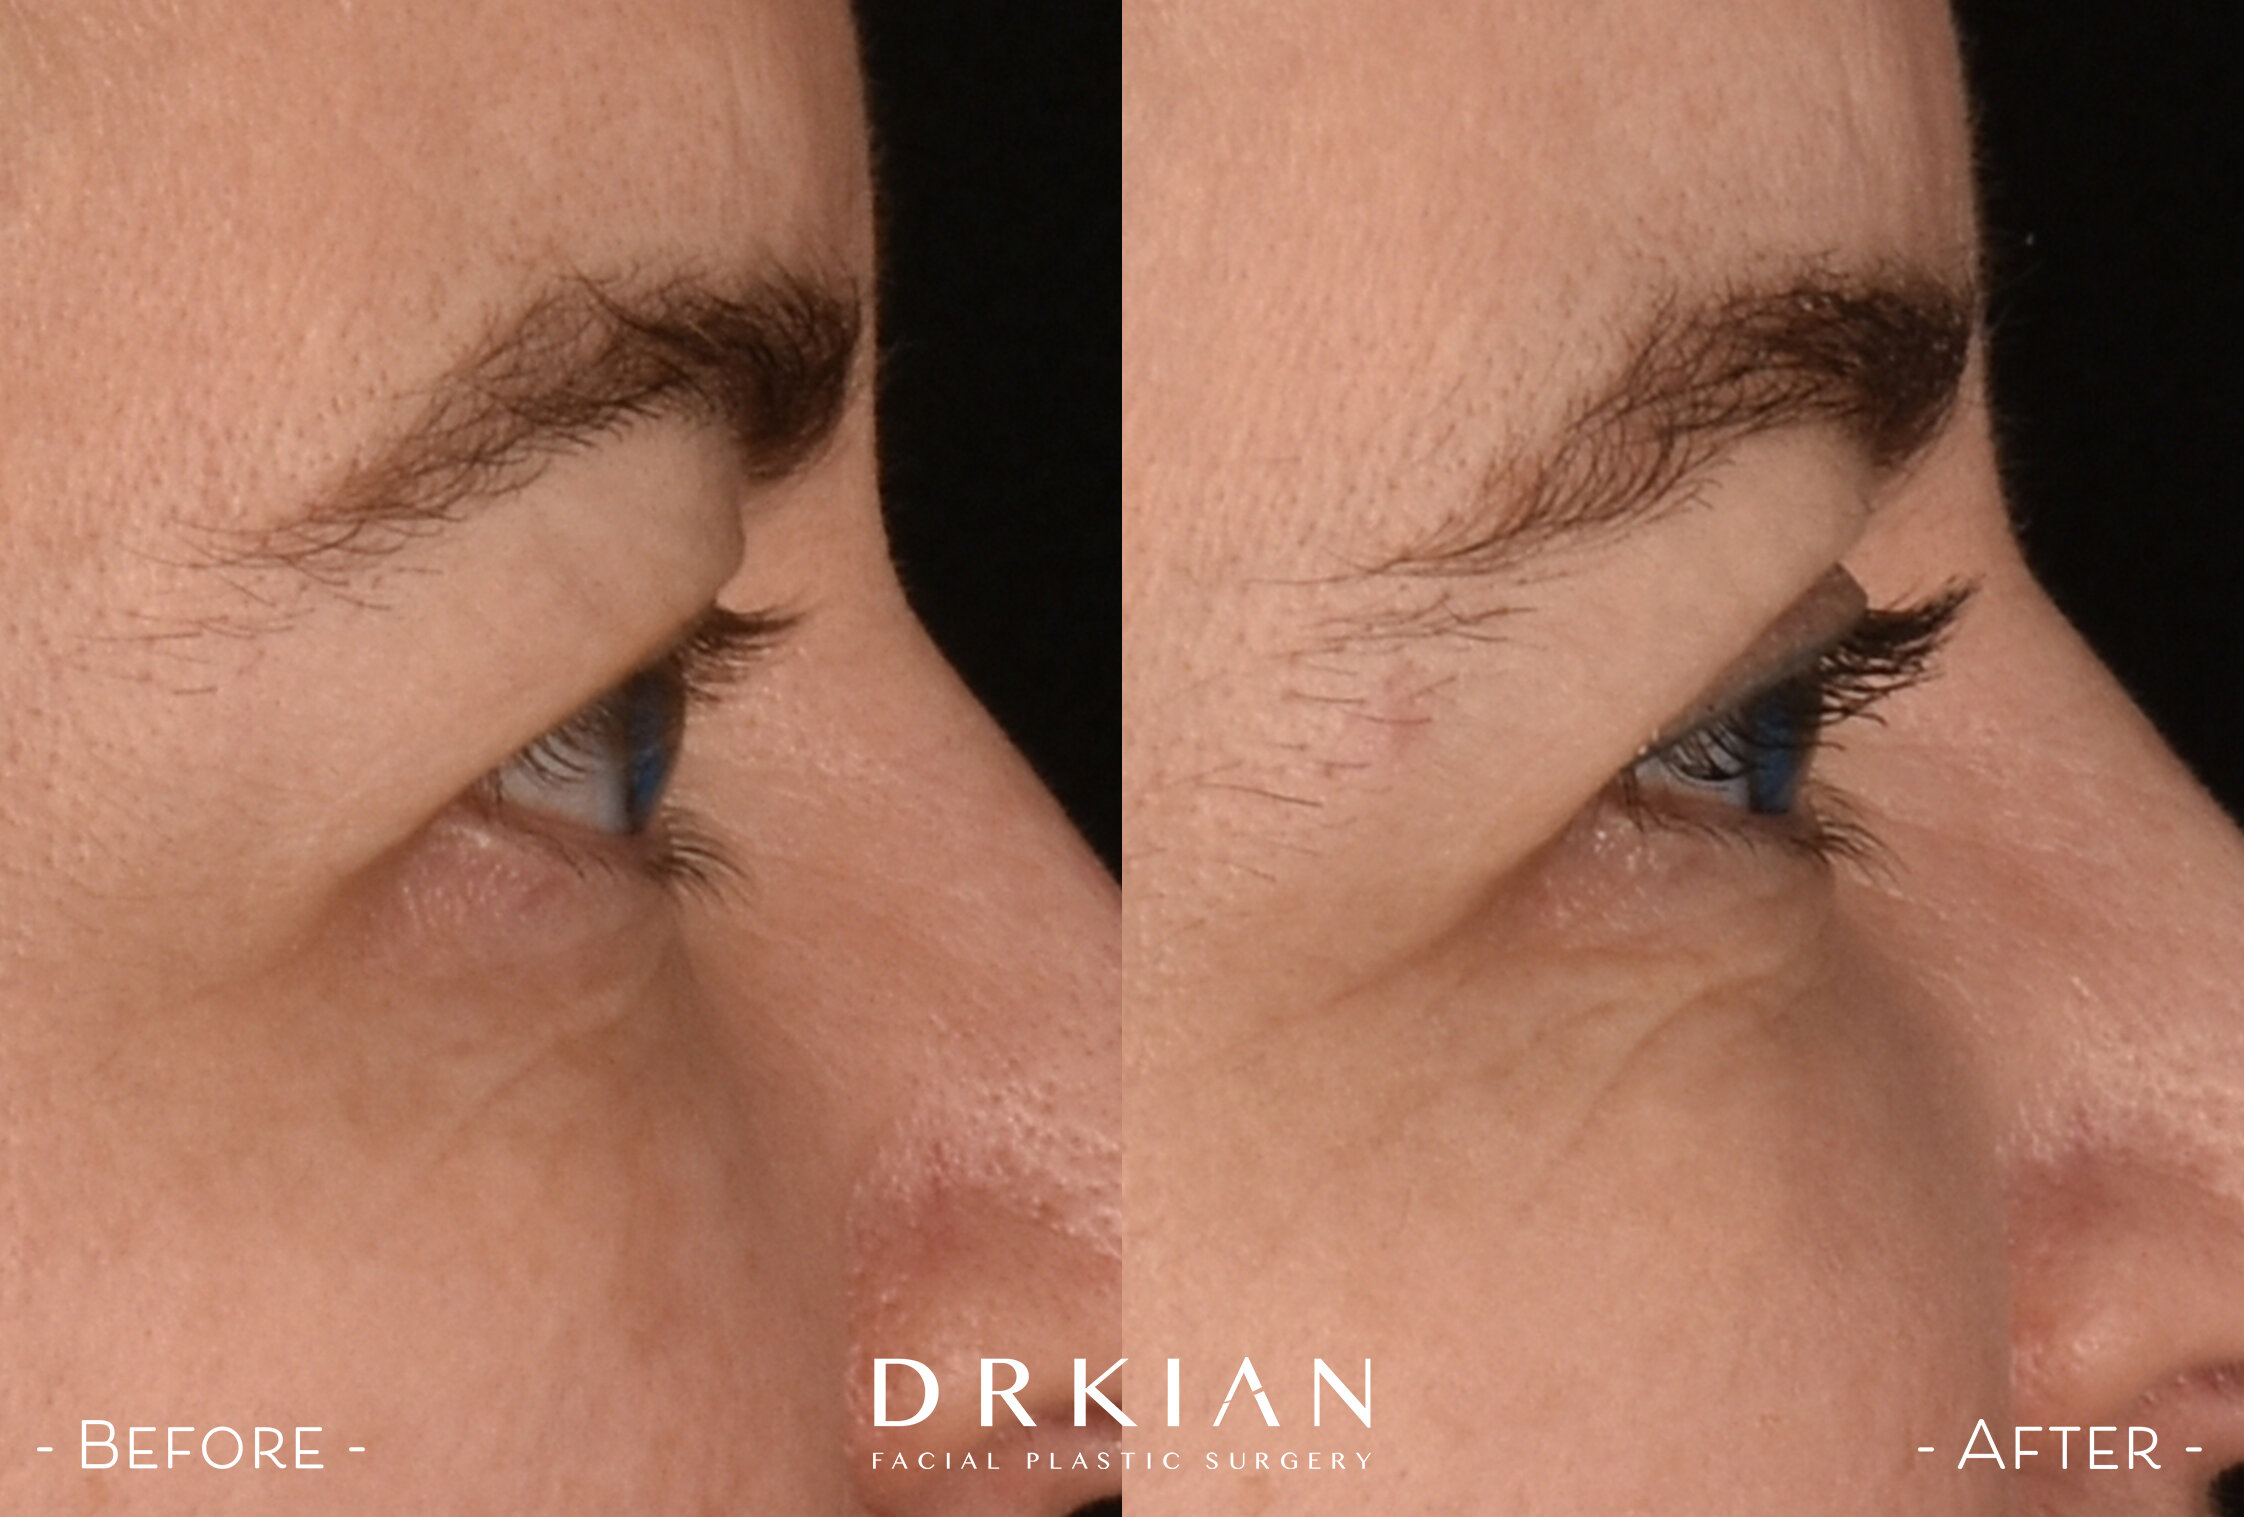
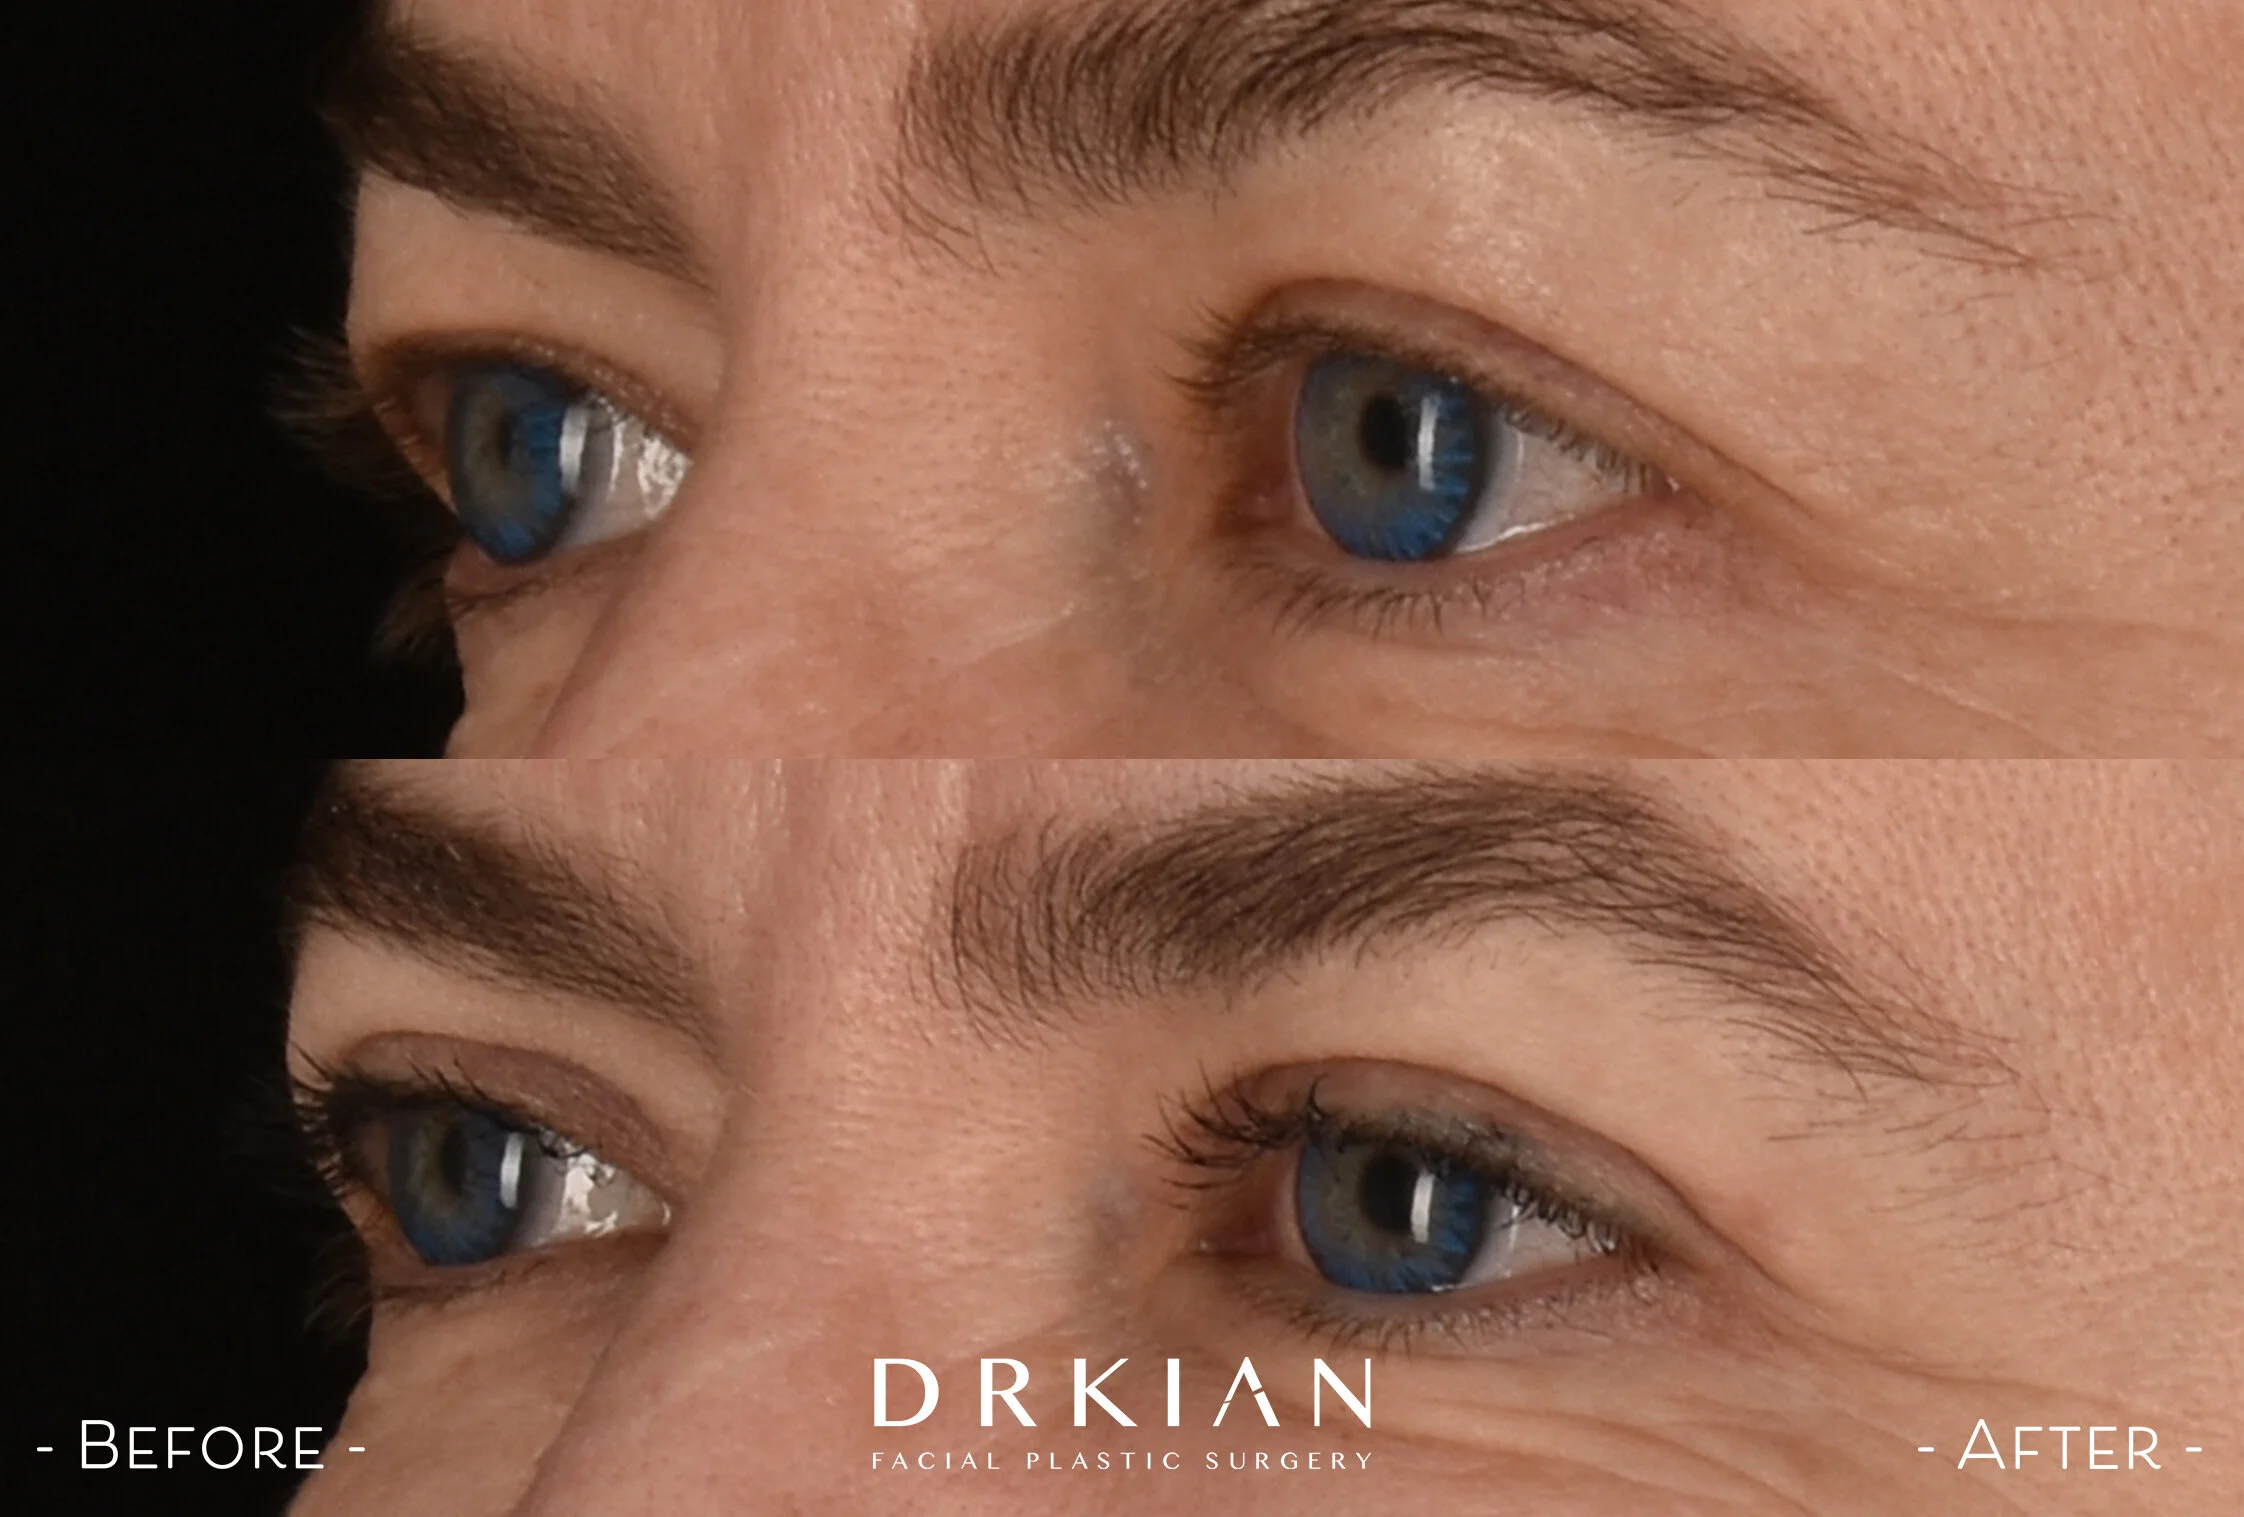
Deep Plane Lower Face & Neck Lift with Platysmaplasty, Upper Blepharoplasty + Lower Blepharoplasty with Repositioning, Periocular Tunable Resurfacing Laser (TRL) and LATISSE® for Brow & Eyelash Growth: Before & After One Year
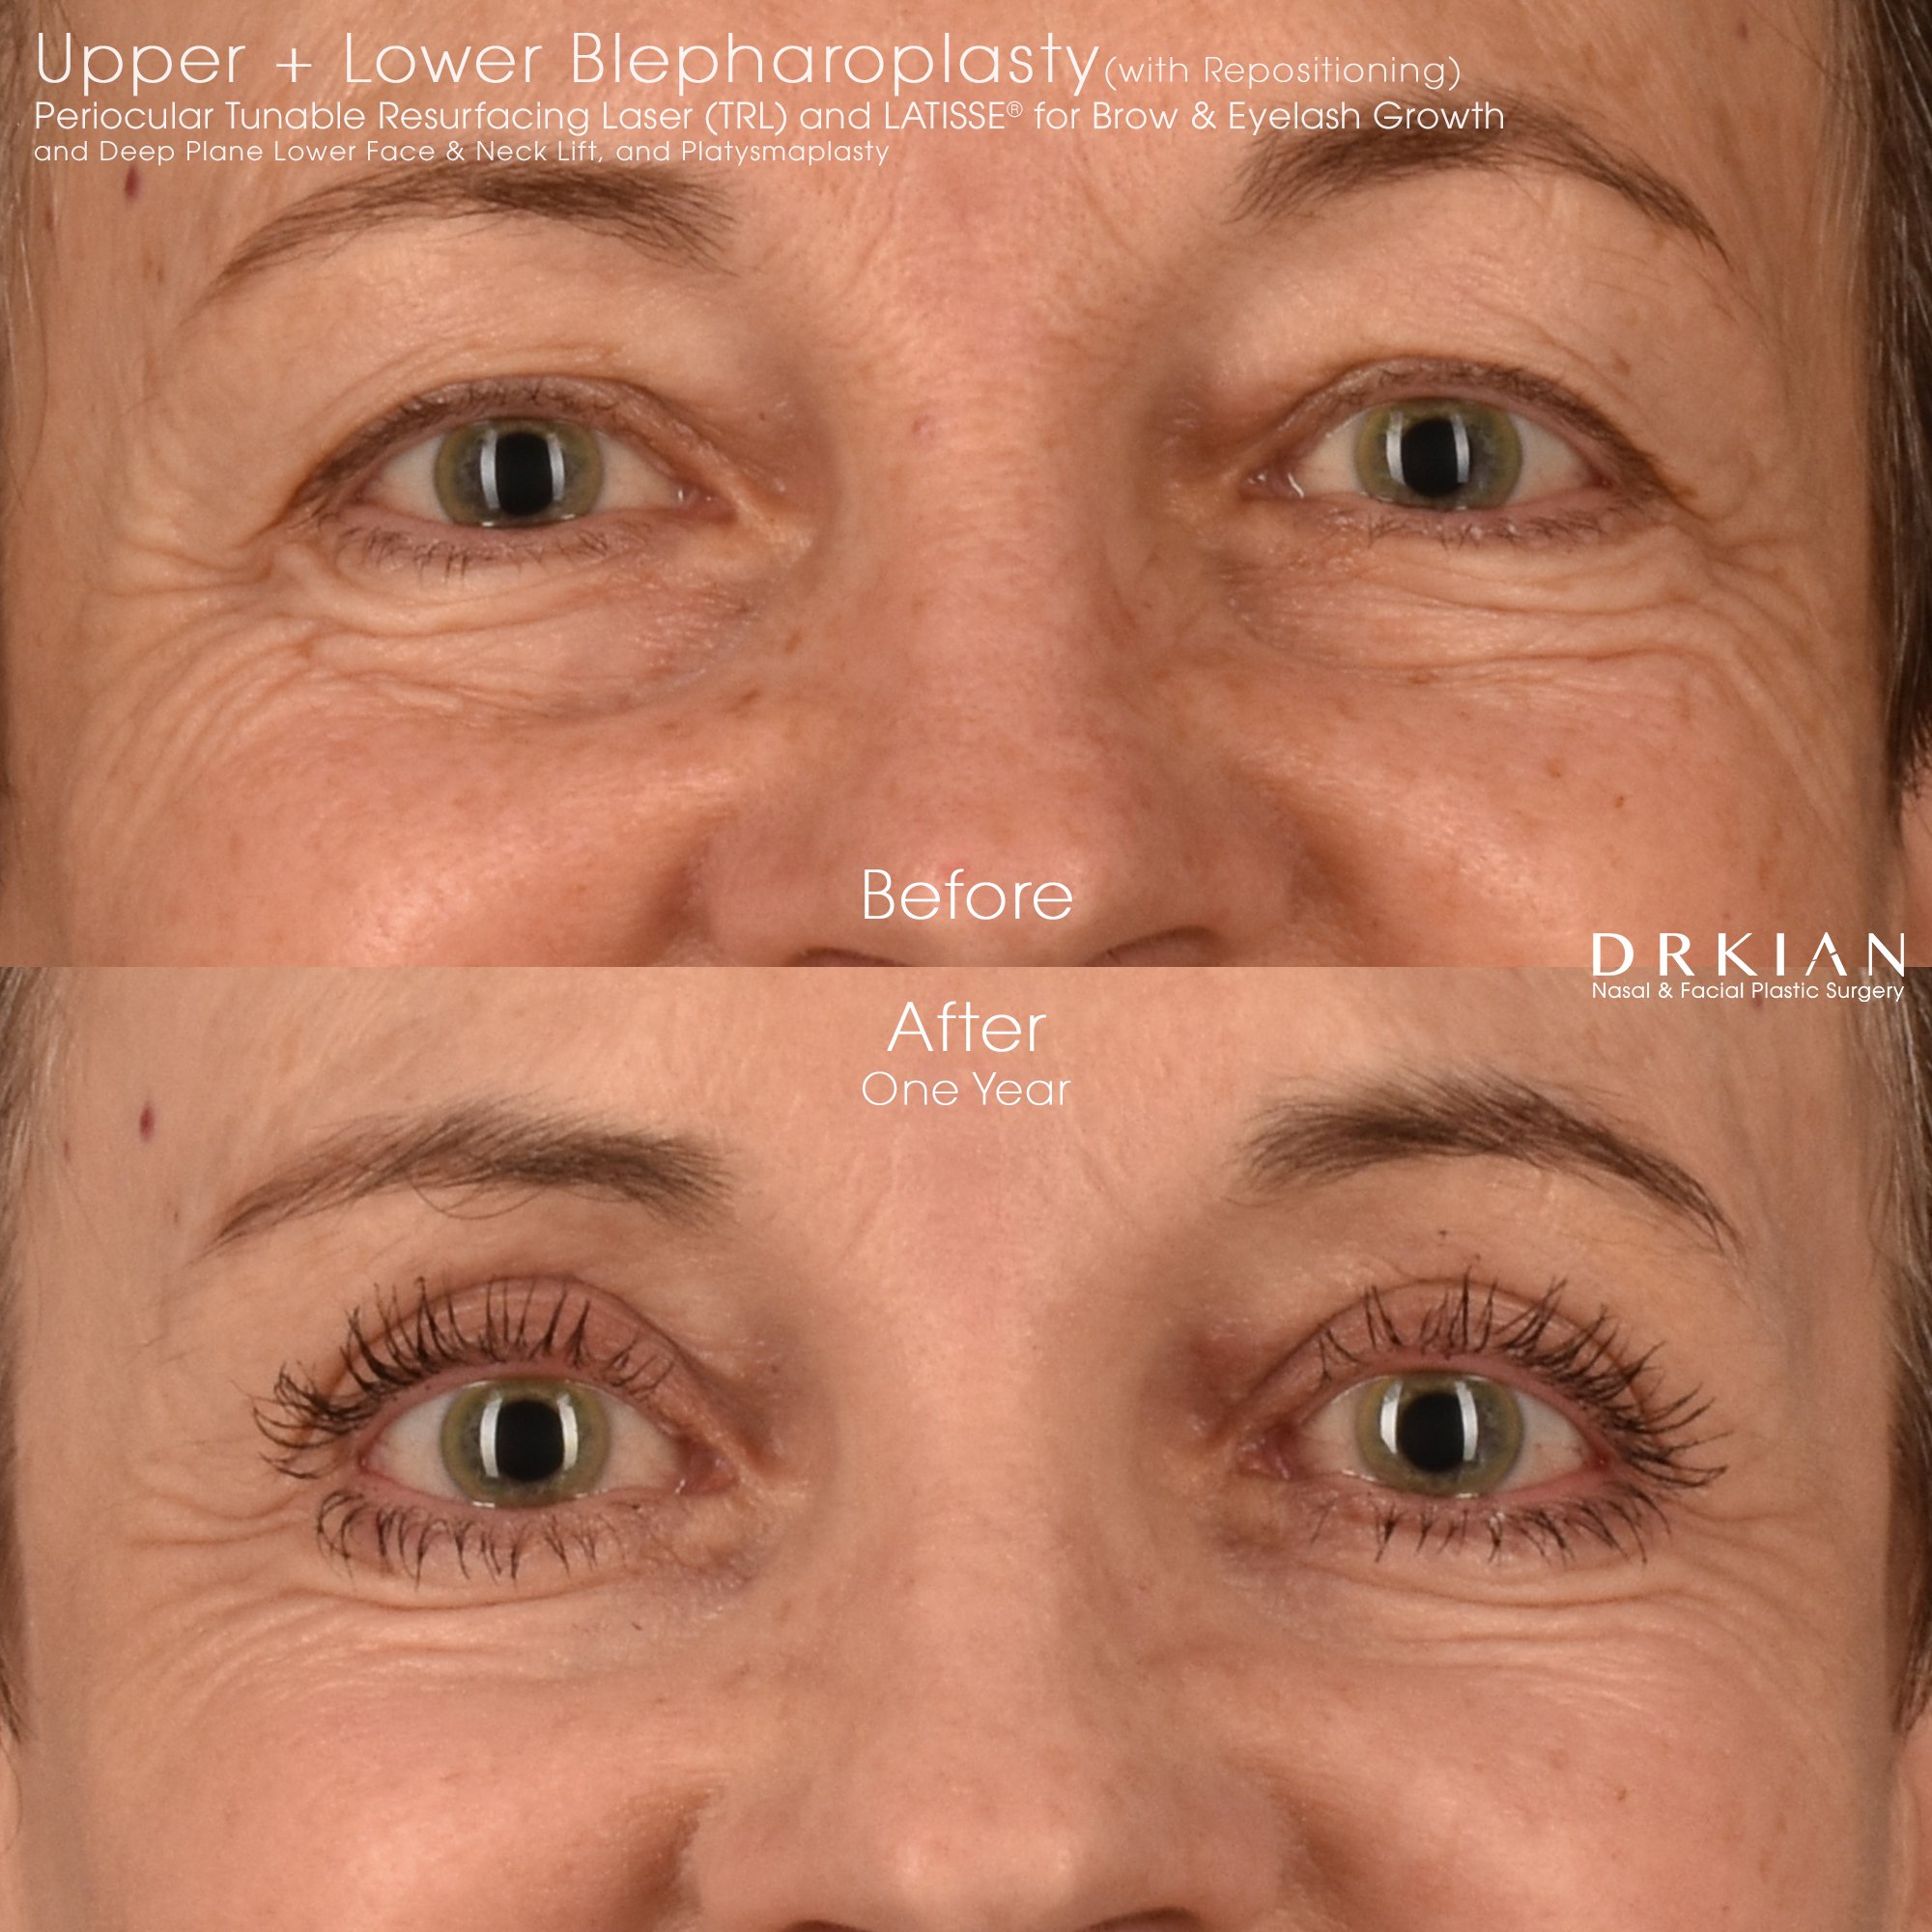
Deep Plane Lower Face & Neck Lift with Platysmaplasty, Upper Blepharoplasty + Lower Blepharoplasty with Repositioning, Periocular Tunable Resurfacing Laser (TRL) and LATISSE® for Brow & Eyelash Growth: Before & After One Year

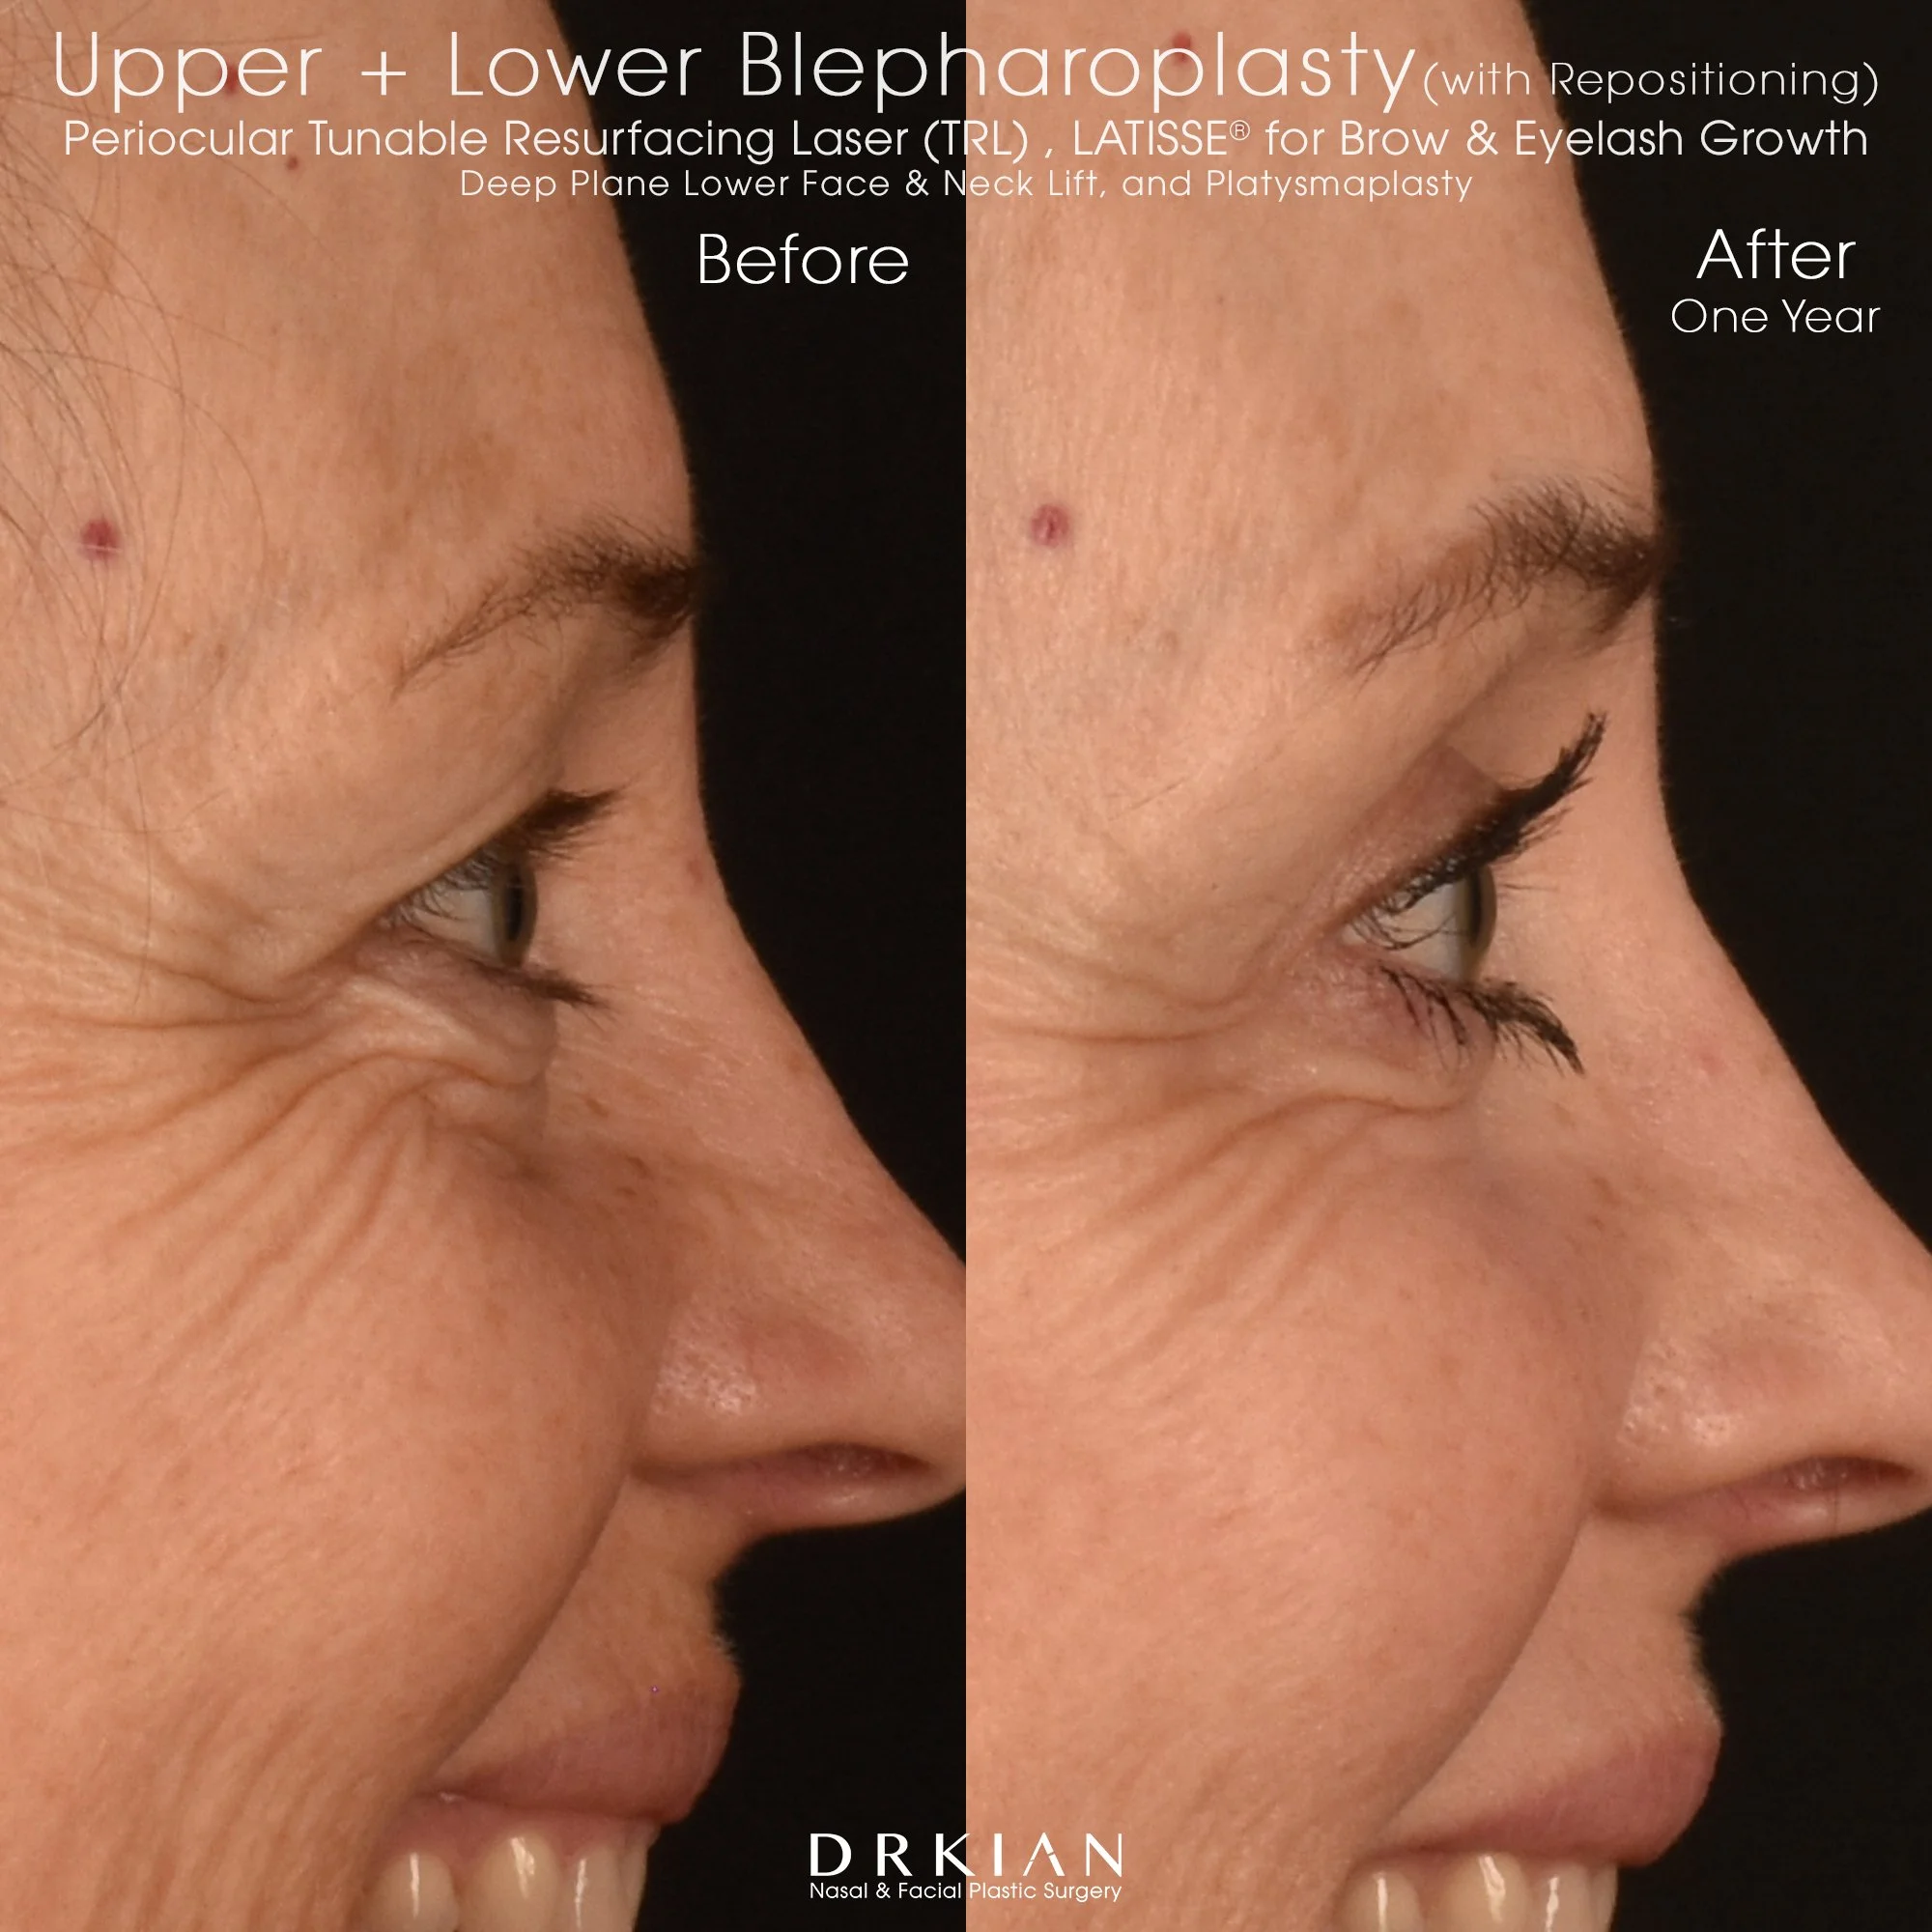
Deep Plane Lower Face & Neck Lift with Platysmaplasty, Upper Blepharoplasty + Lower Blepharoplasty with Repositioning, Periocular Tunable Resurfacing Laser (TRL) and LATISSE® for Brow & Eyelash Growth: Before & After One Year

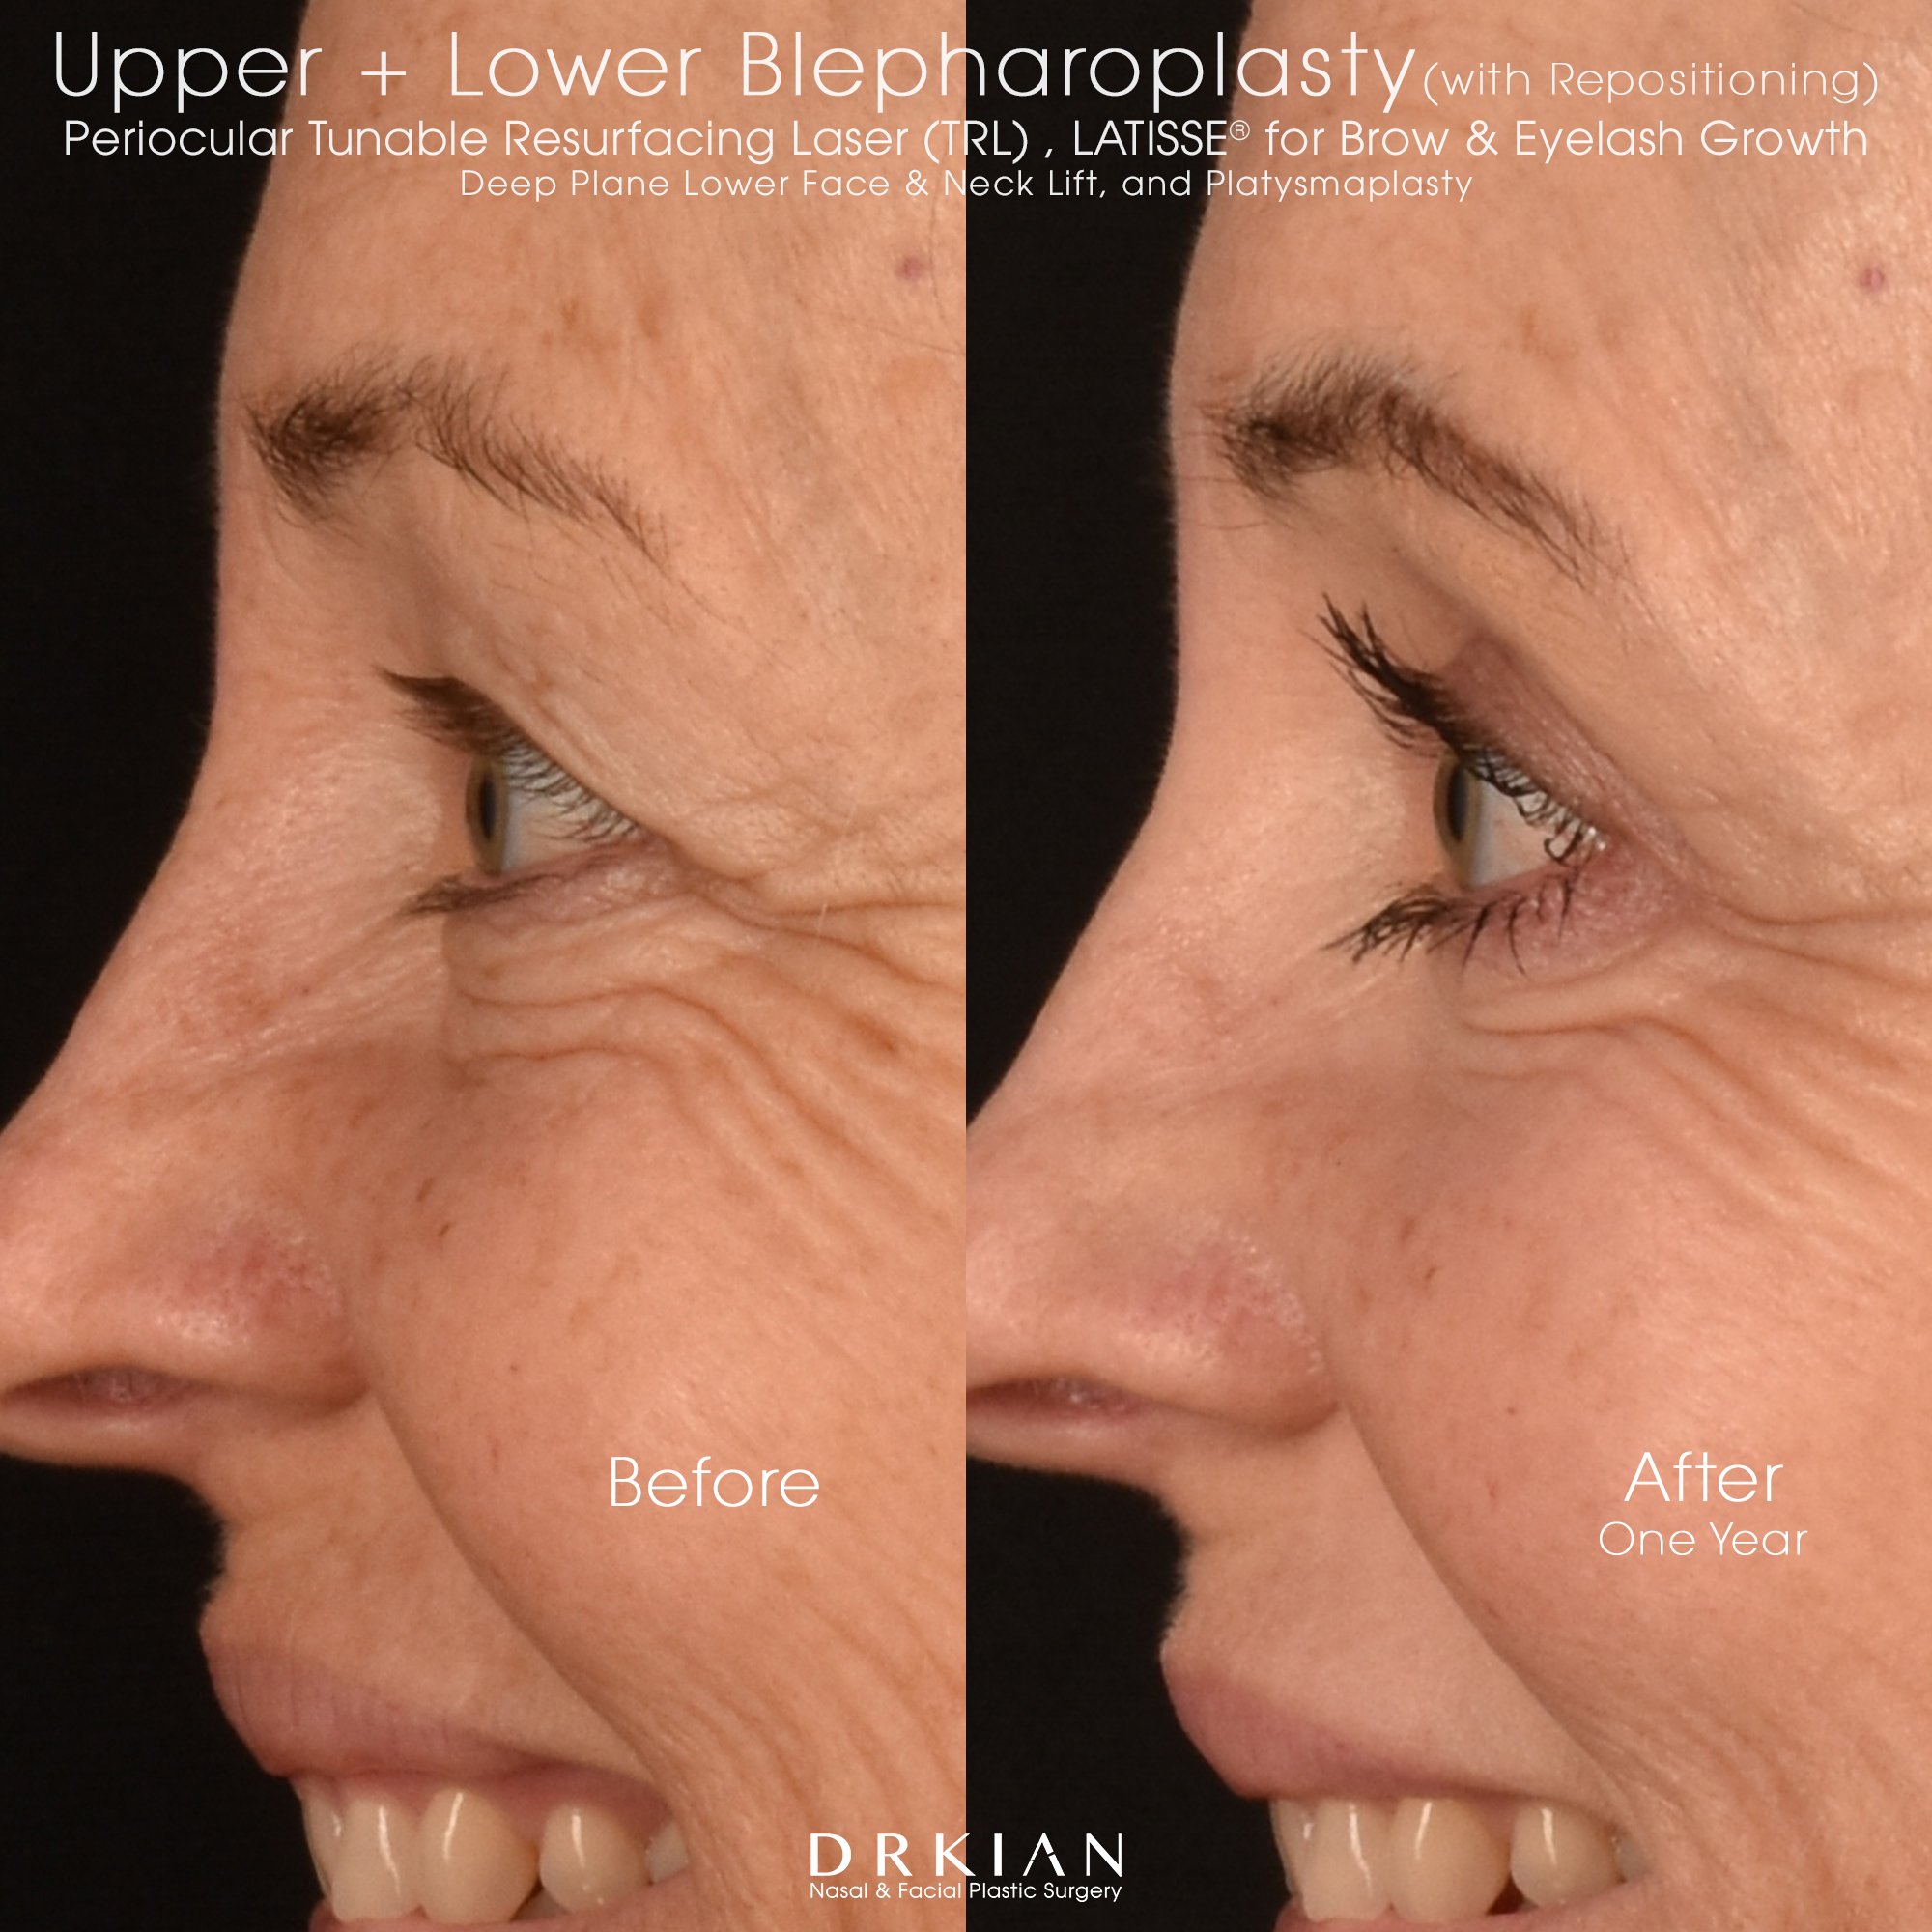
Deep Plane Lower Face & Neck Lift with Platysmaplasty, Upper Blepharoplasty + Lower Blepharoplasty with Repositioning, Periocular Tunable Resurfacing Laser (TRL) and LATISSE® for Brow & Eyelash Growth: Before & After One Year

Deep Plane Lower Face & Neck Lift with Platysmaplasty, Upper Blepharoplasty + Lower Blepharoplasty with Repositioning, Periocular Tunable Resurfacing Laser (TRL) and LATISSE® for Brow & Eyelash Growth: Before & After One Year
Deep Plane Lower Face & Neck Lift with Platysmaplasty, Upper Blepharoplasty + Lower Blepharoplasty with Repositioning, Periocular Tunable Resurfacing Laser (TRL) and LATISSE® for Brow & Eyelash Growth: Before & After One Year

Deep Plane Lower Face & Neck Lift with Platysmaplasty, Upper Blepharoplasty + Lower Blepharoplasty with Repositioning, Periocular Tunable Resurfacing Laser (TRL) and LATISSE® for Brow & Eyelash Growth: Before & After One Year

Deep Plane Lower Face & Neck Lift with Platysmaplasty, Upper Blepharoplasty + Lower Blepharoplasty with Repositioning, Periocular Tunable Resurfacing Laser (TRL) and LATISSE® for Brow & Eyelash Growth: Before & After One Year

Deep Plane Lower Face & Neck Lift with Platysmaplasty, Upper Blepharoplasty + Lower Blepharoplasty with Repositioning, Periocular Tunable Resurfacing Laser (TRL) and LATISSE® for Brow & Eyelash Growth: Before & After One Year
Deep Plane Lower Face & Neck Lift with Platysmaplasty, Upper Blepharoplasty + Lower Blepharoplasty with Repositioning, Periocular Tunable Resurfacing Laser (TRL) and LATISSE® for Brow & Eyelash Growth: Before & After One Year

Deep Plane Lower Face & Neck Lift with Platysmaplasty, Upper Blepharoplasty + Lower Blepharoplasty with Repositioning, Periocular Tunable Resurfacing Laser (TRL) and LATISSE® for Brow & Eyelash Growth: Before & After One Year

Deep Plane Lower Face & Neck Lift with Platysmaplasty, Upper Blepharoplasty + Lower Blepharoplasty with Repositioning, Periocular Tunable Resurfacing Laser (TRL) and LATISSE® for Brow & Eyelash Growth: Before & After One Year

Deep Plane Lower Face & Neck Lift with Platysmaplasty, Upper Blepharoplasty + Lower Blepharoplasty with Repositioning, Periocular Tunable Resurfacing Laser (TRL) and LATISSE® for Brow & Eyelash Growth: Before & After One Year
Deep Plane Lower Face & Neck Lift with Platysmaplasty, Upper Blepharoplasty + Lower Blepharoplasty with Repositioning, Periocular Tunable Resurfacing Laser (TRL) and LATISSE® for Brow & Eyelash Growth: Before & After One Year
Deep Plane Lower Face & Neck Lift with Platysmaplasty, Upper Blepharoplasty + Lower Blepharoplasty with Repositioning, Periocular Tunable Resurfacing Laser (TRL) and LATISSE® for Brow & Eyelash Growth: Before & After One Year
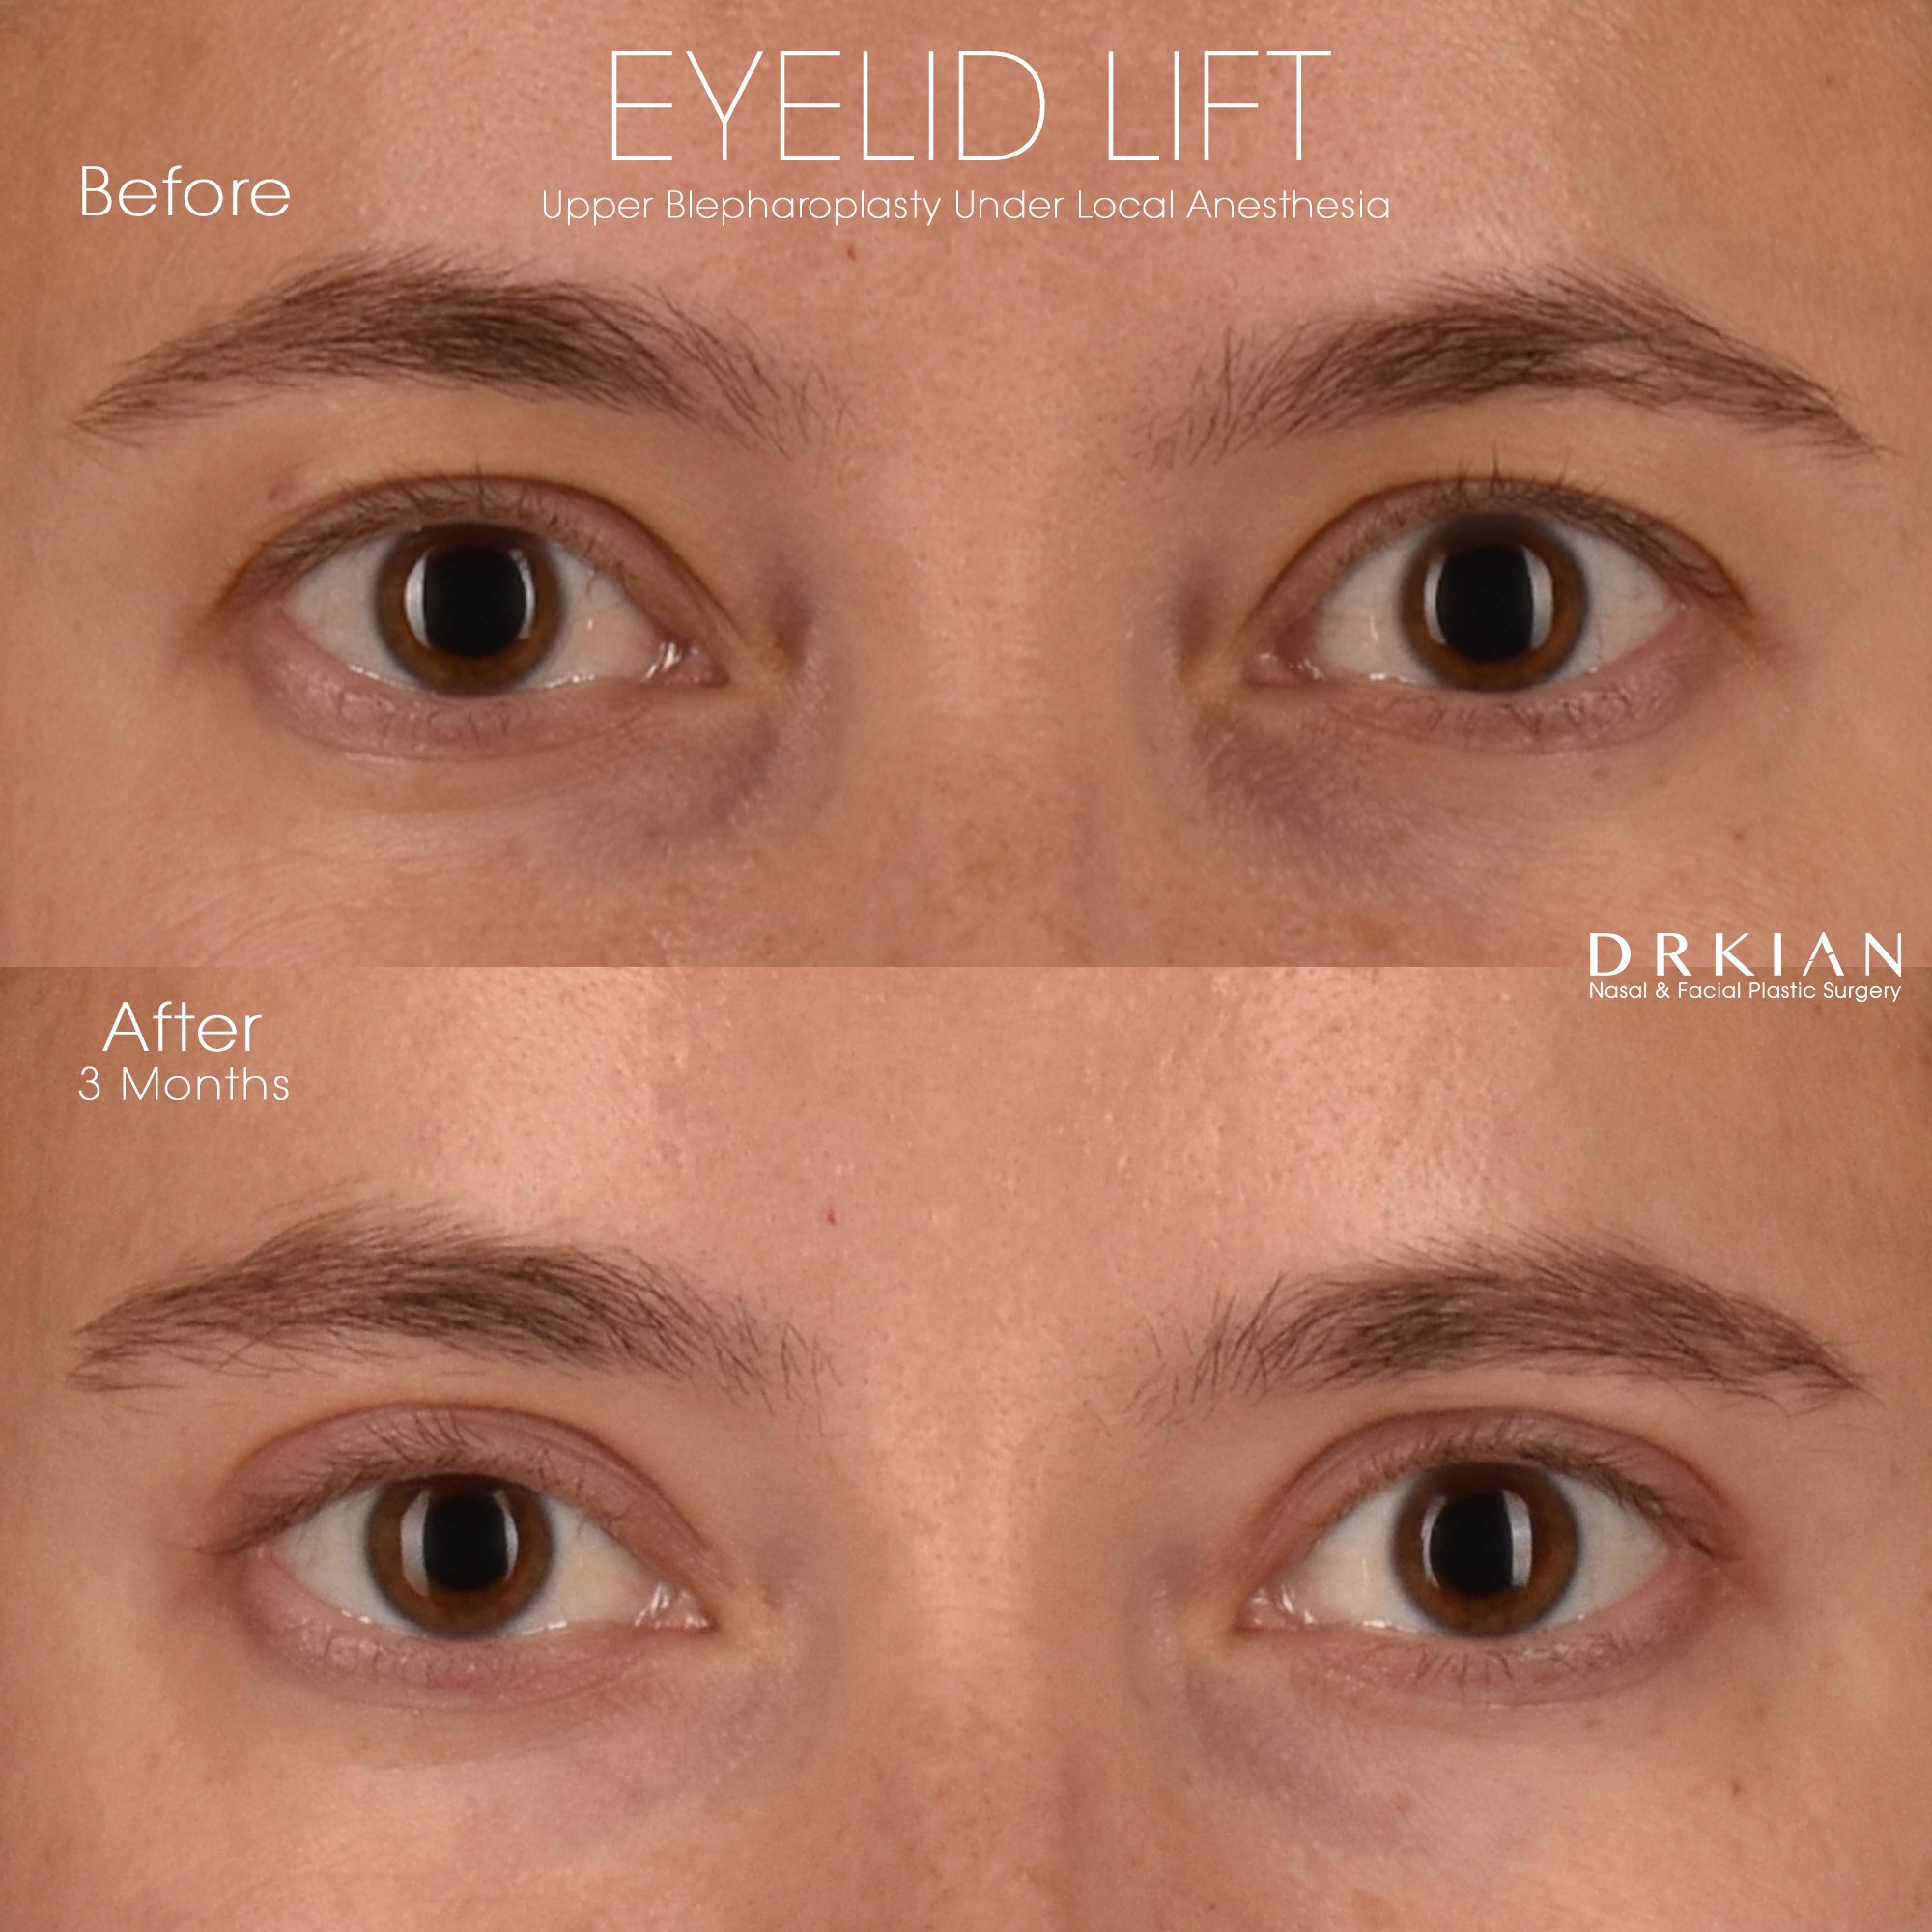
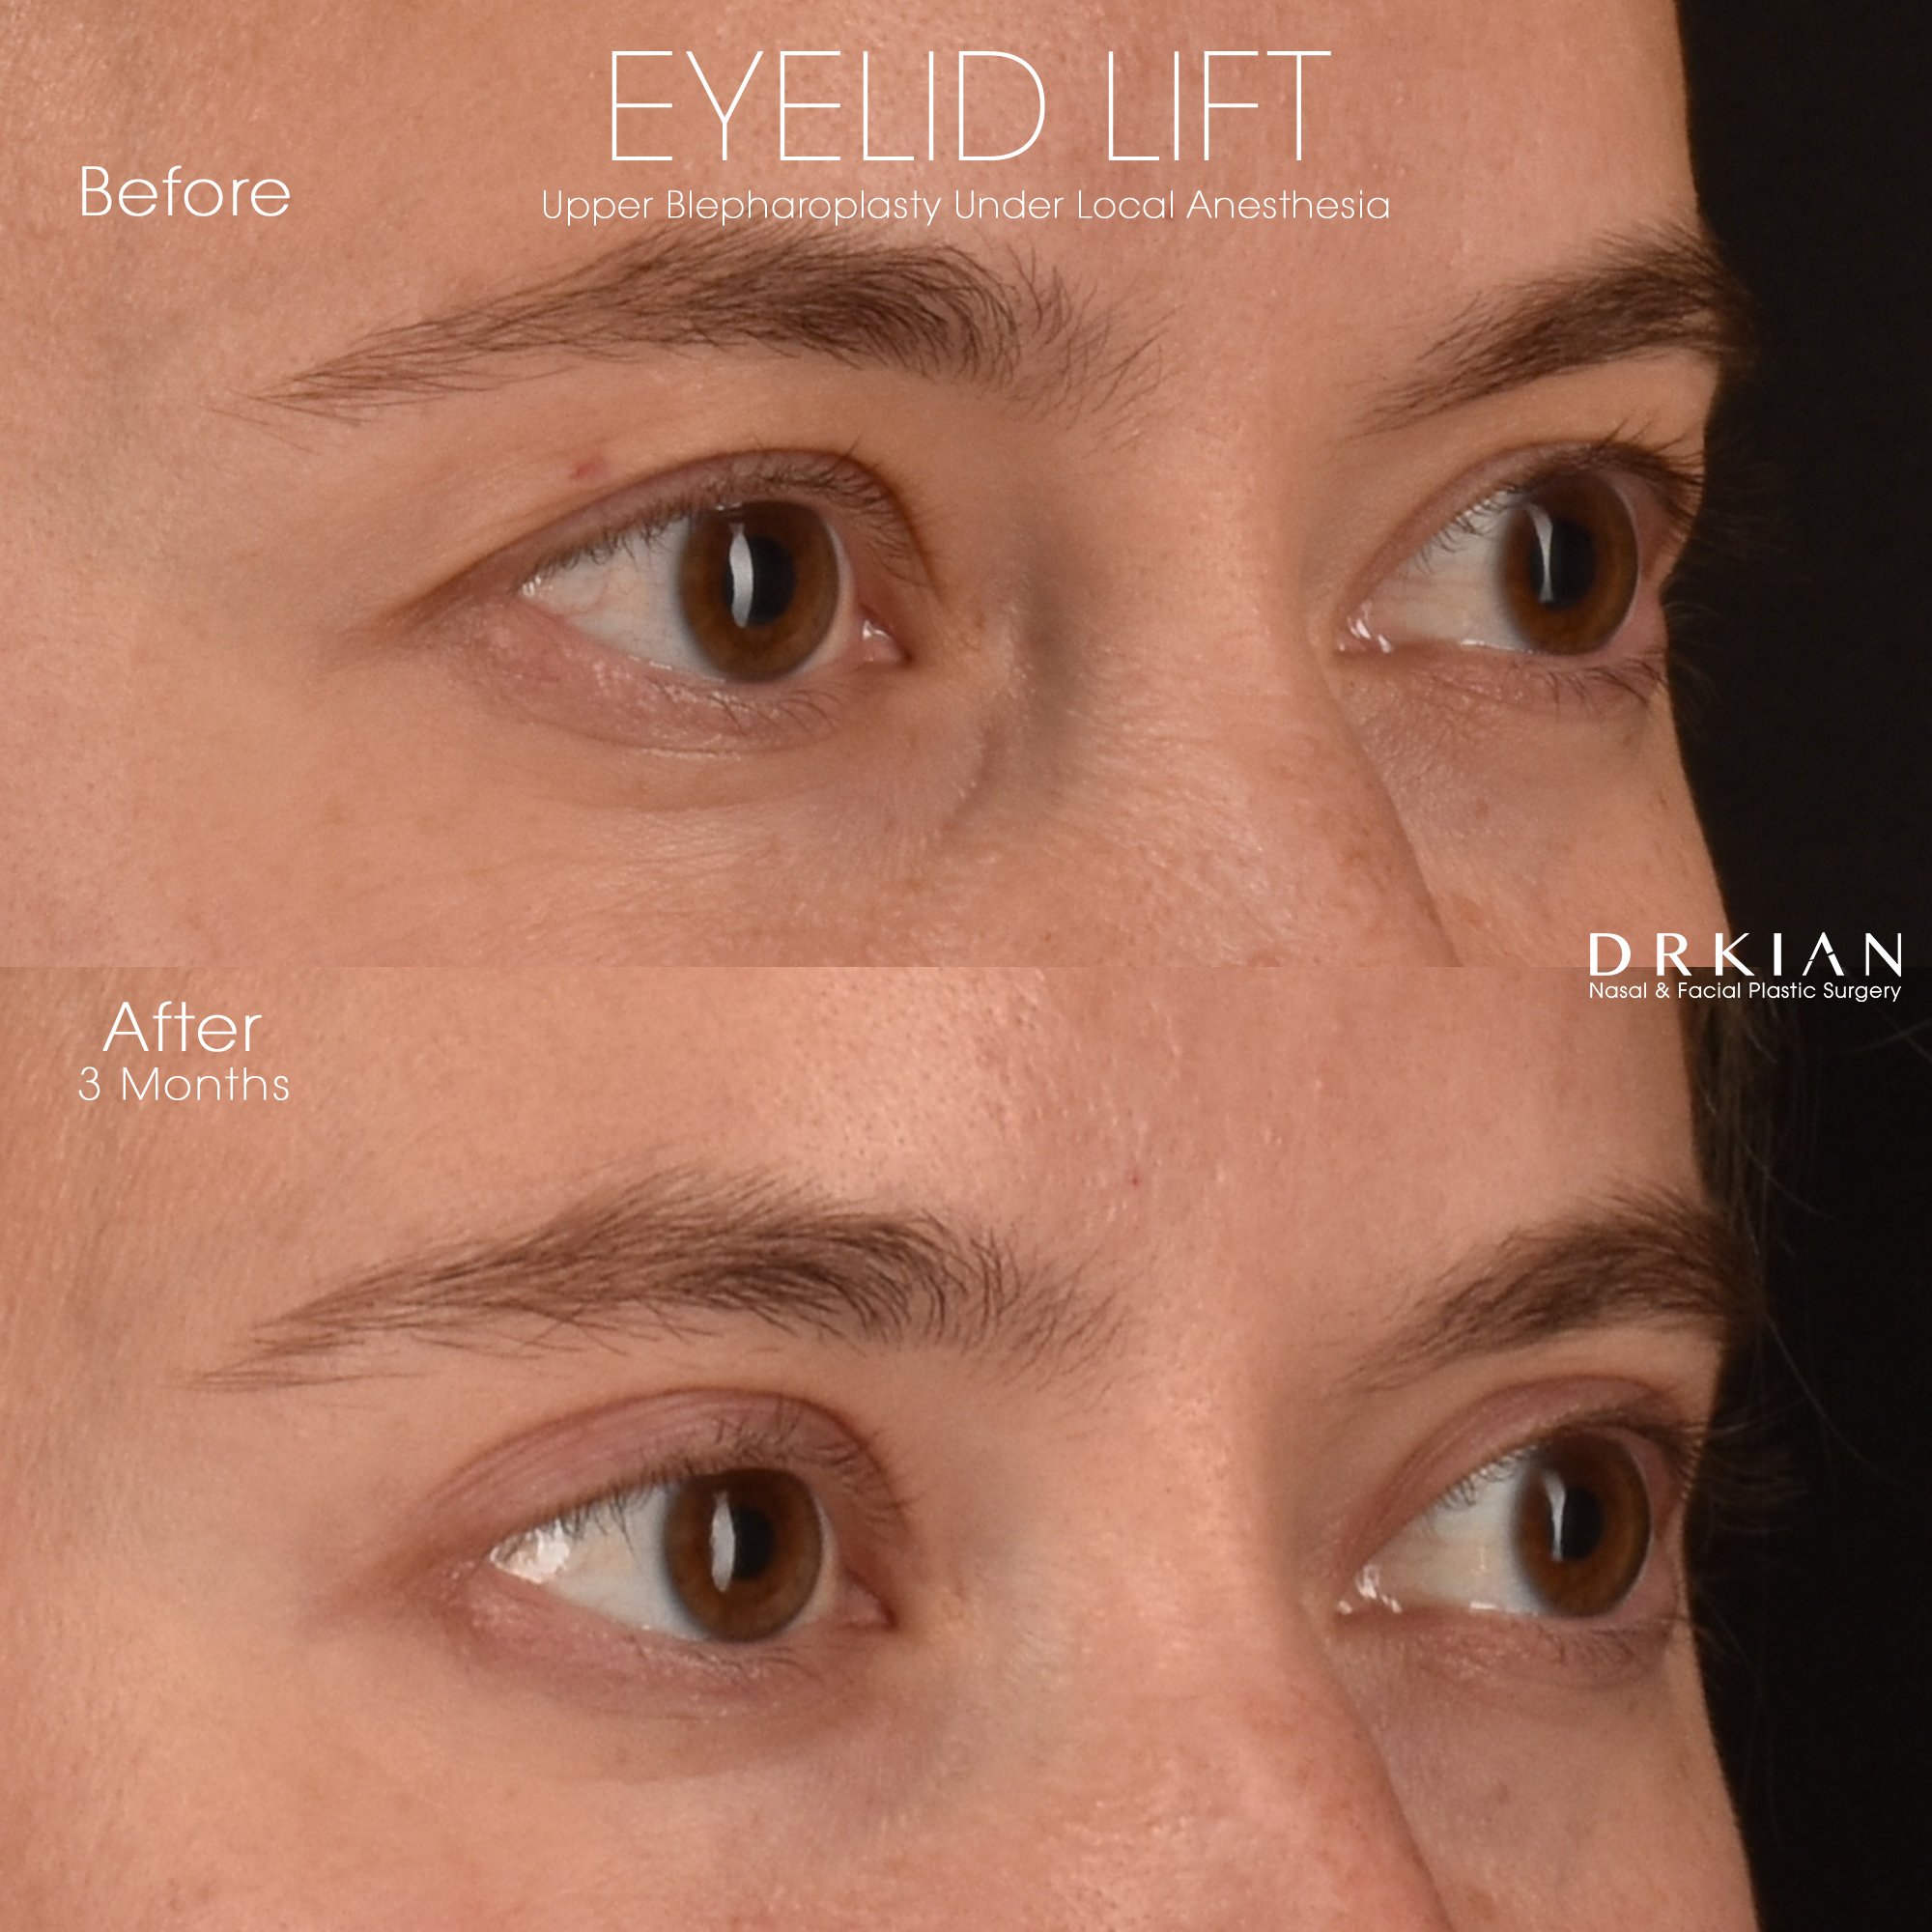
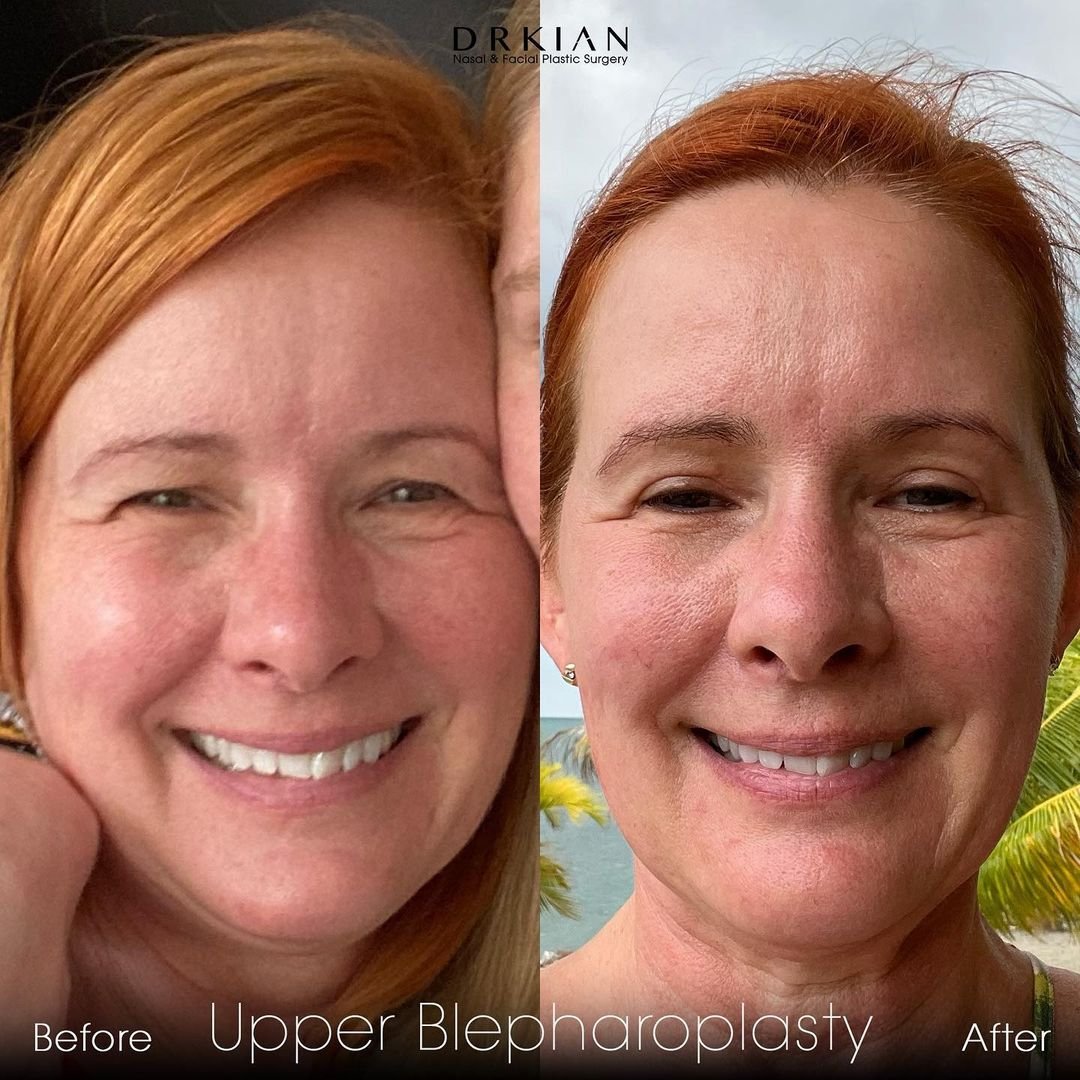
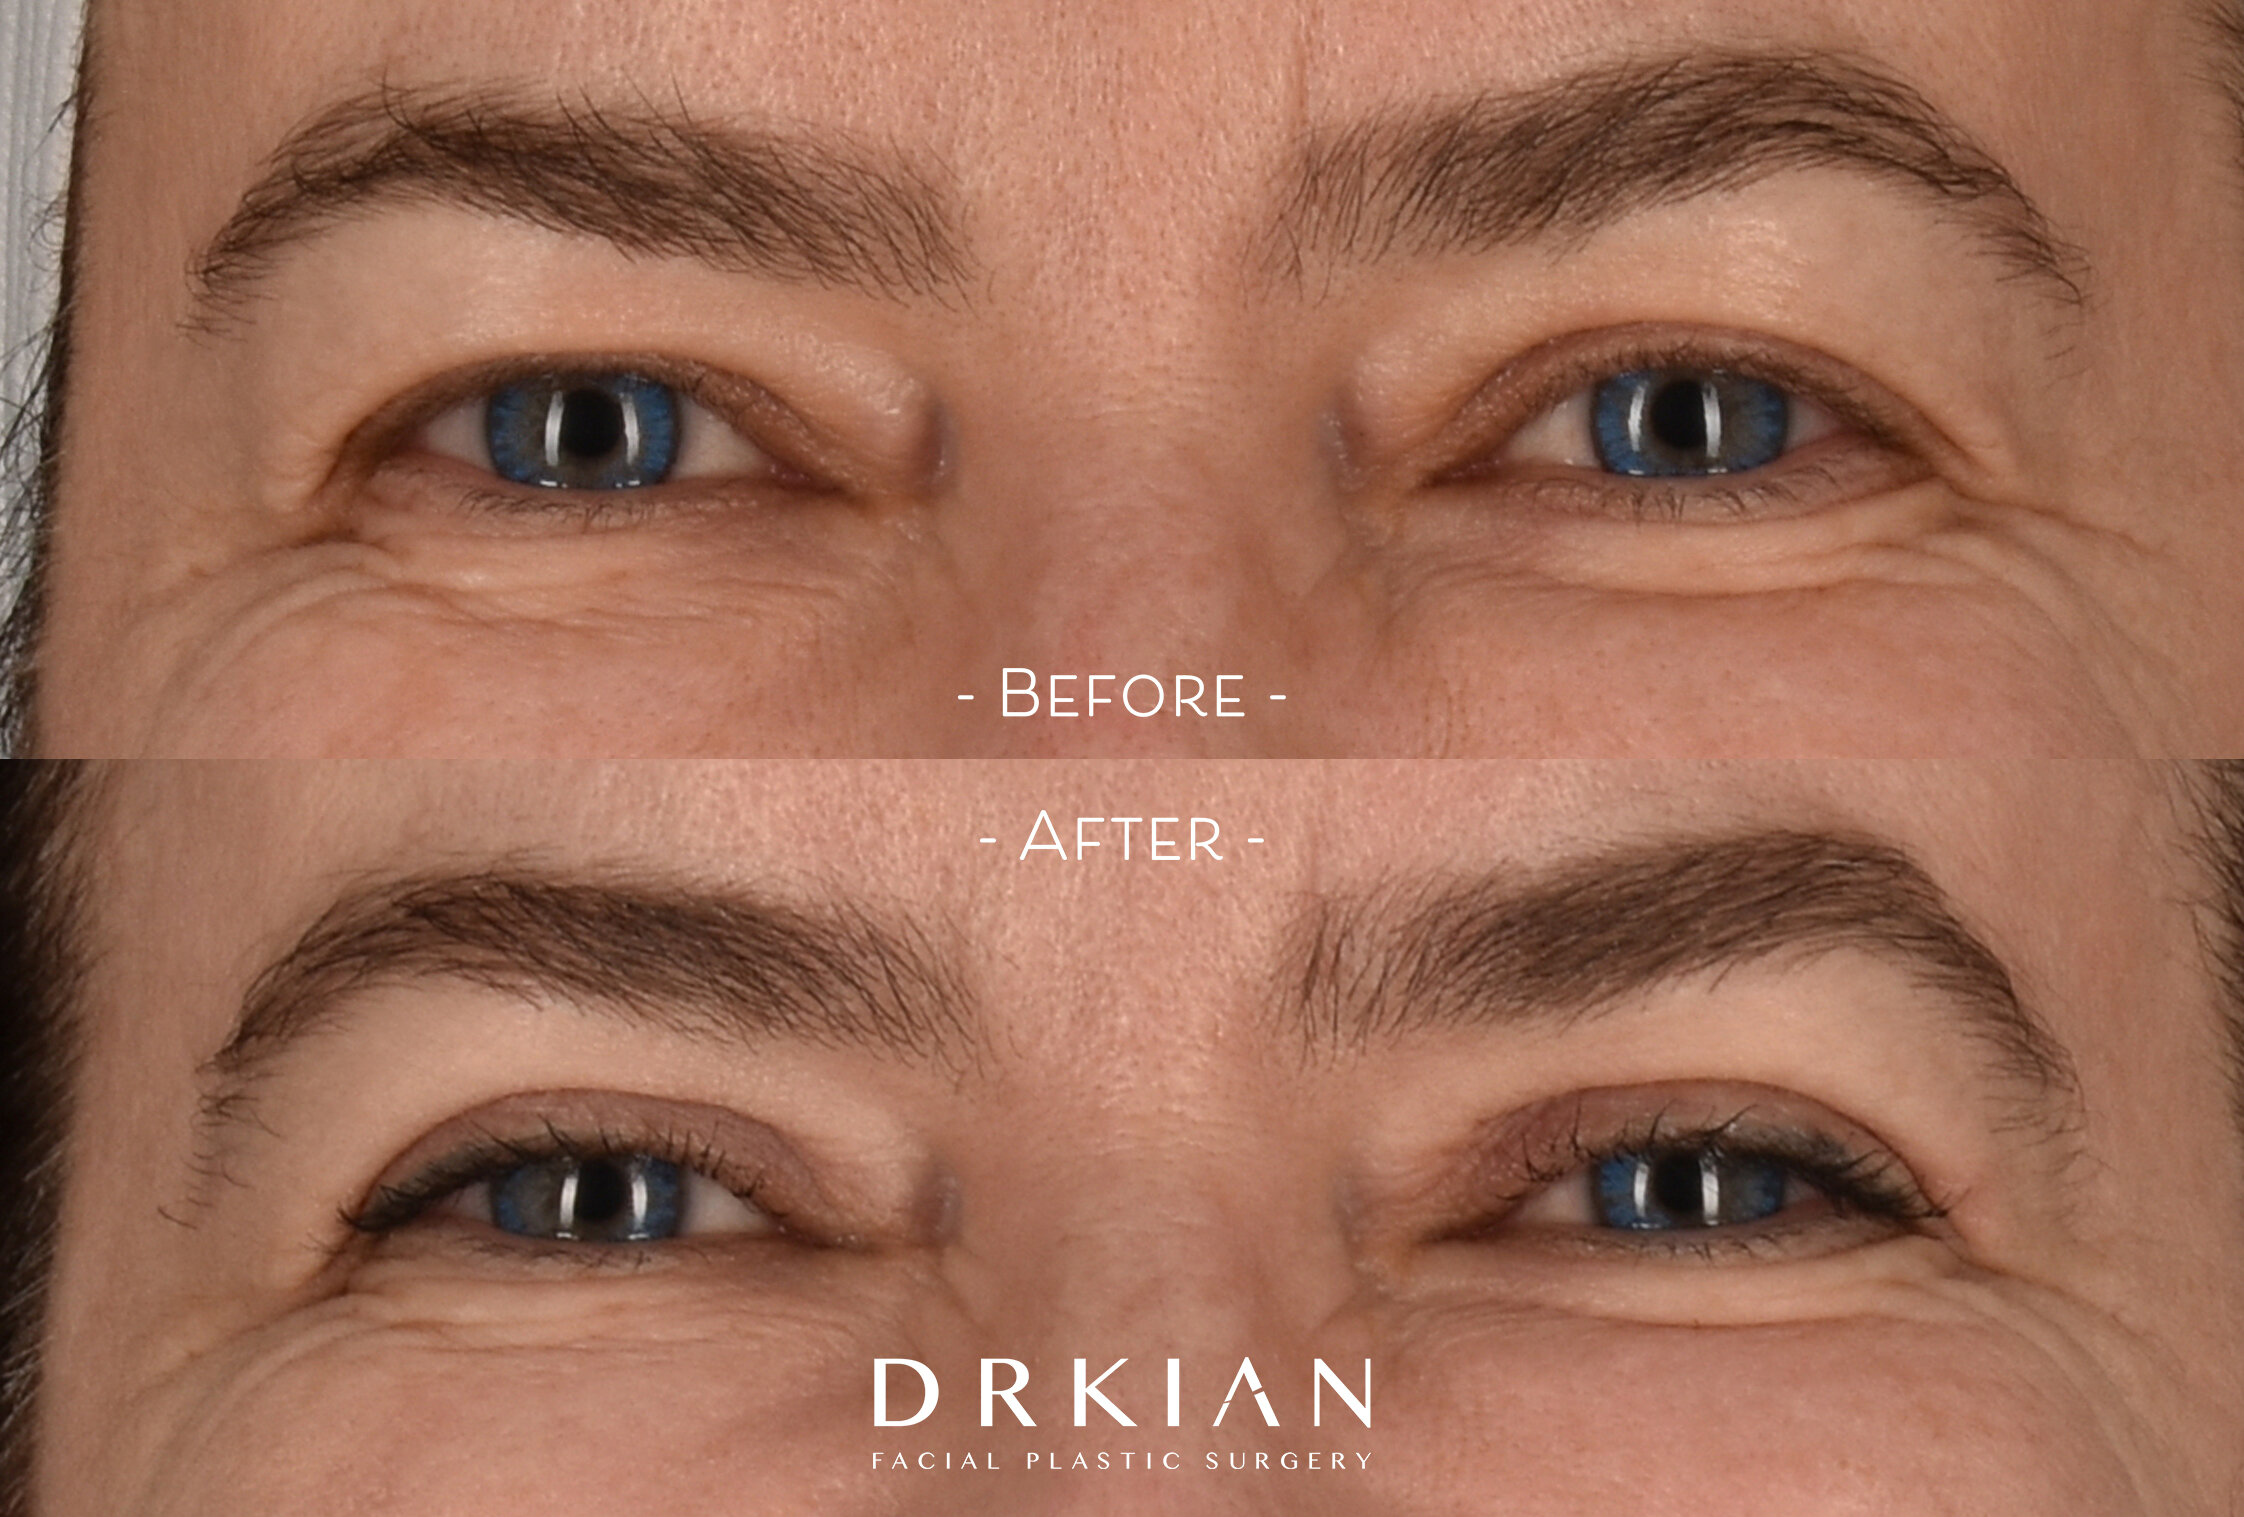
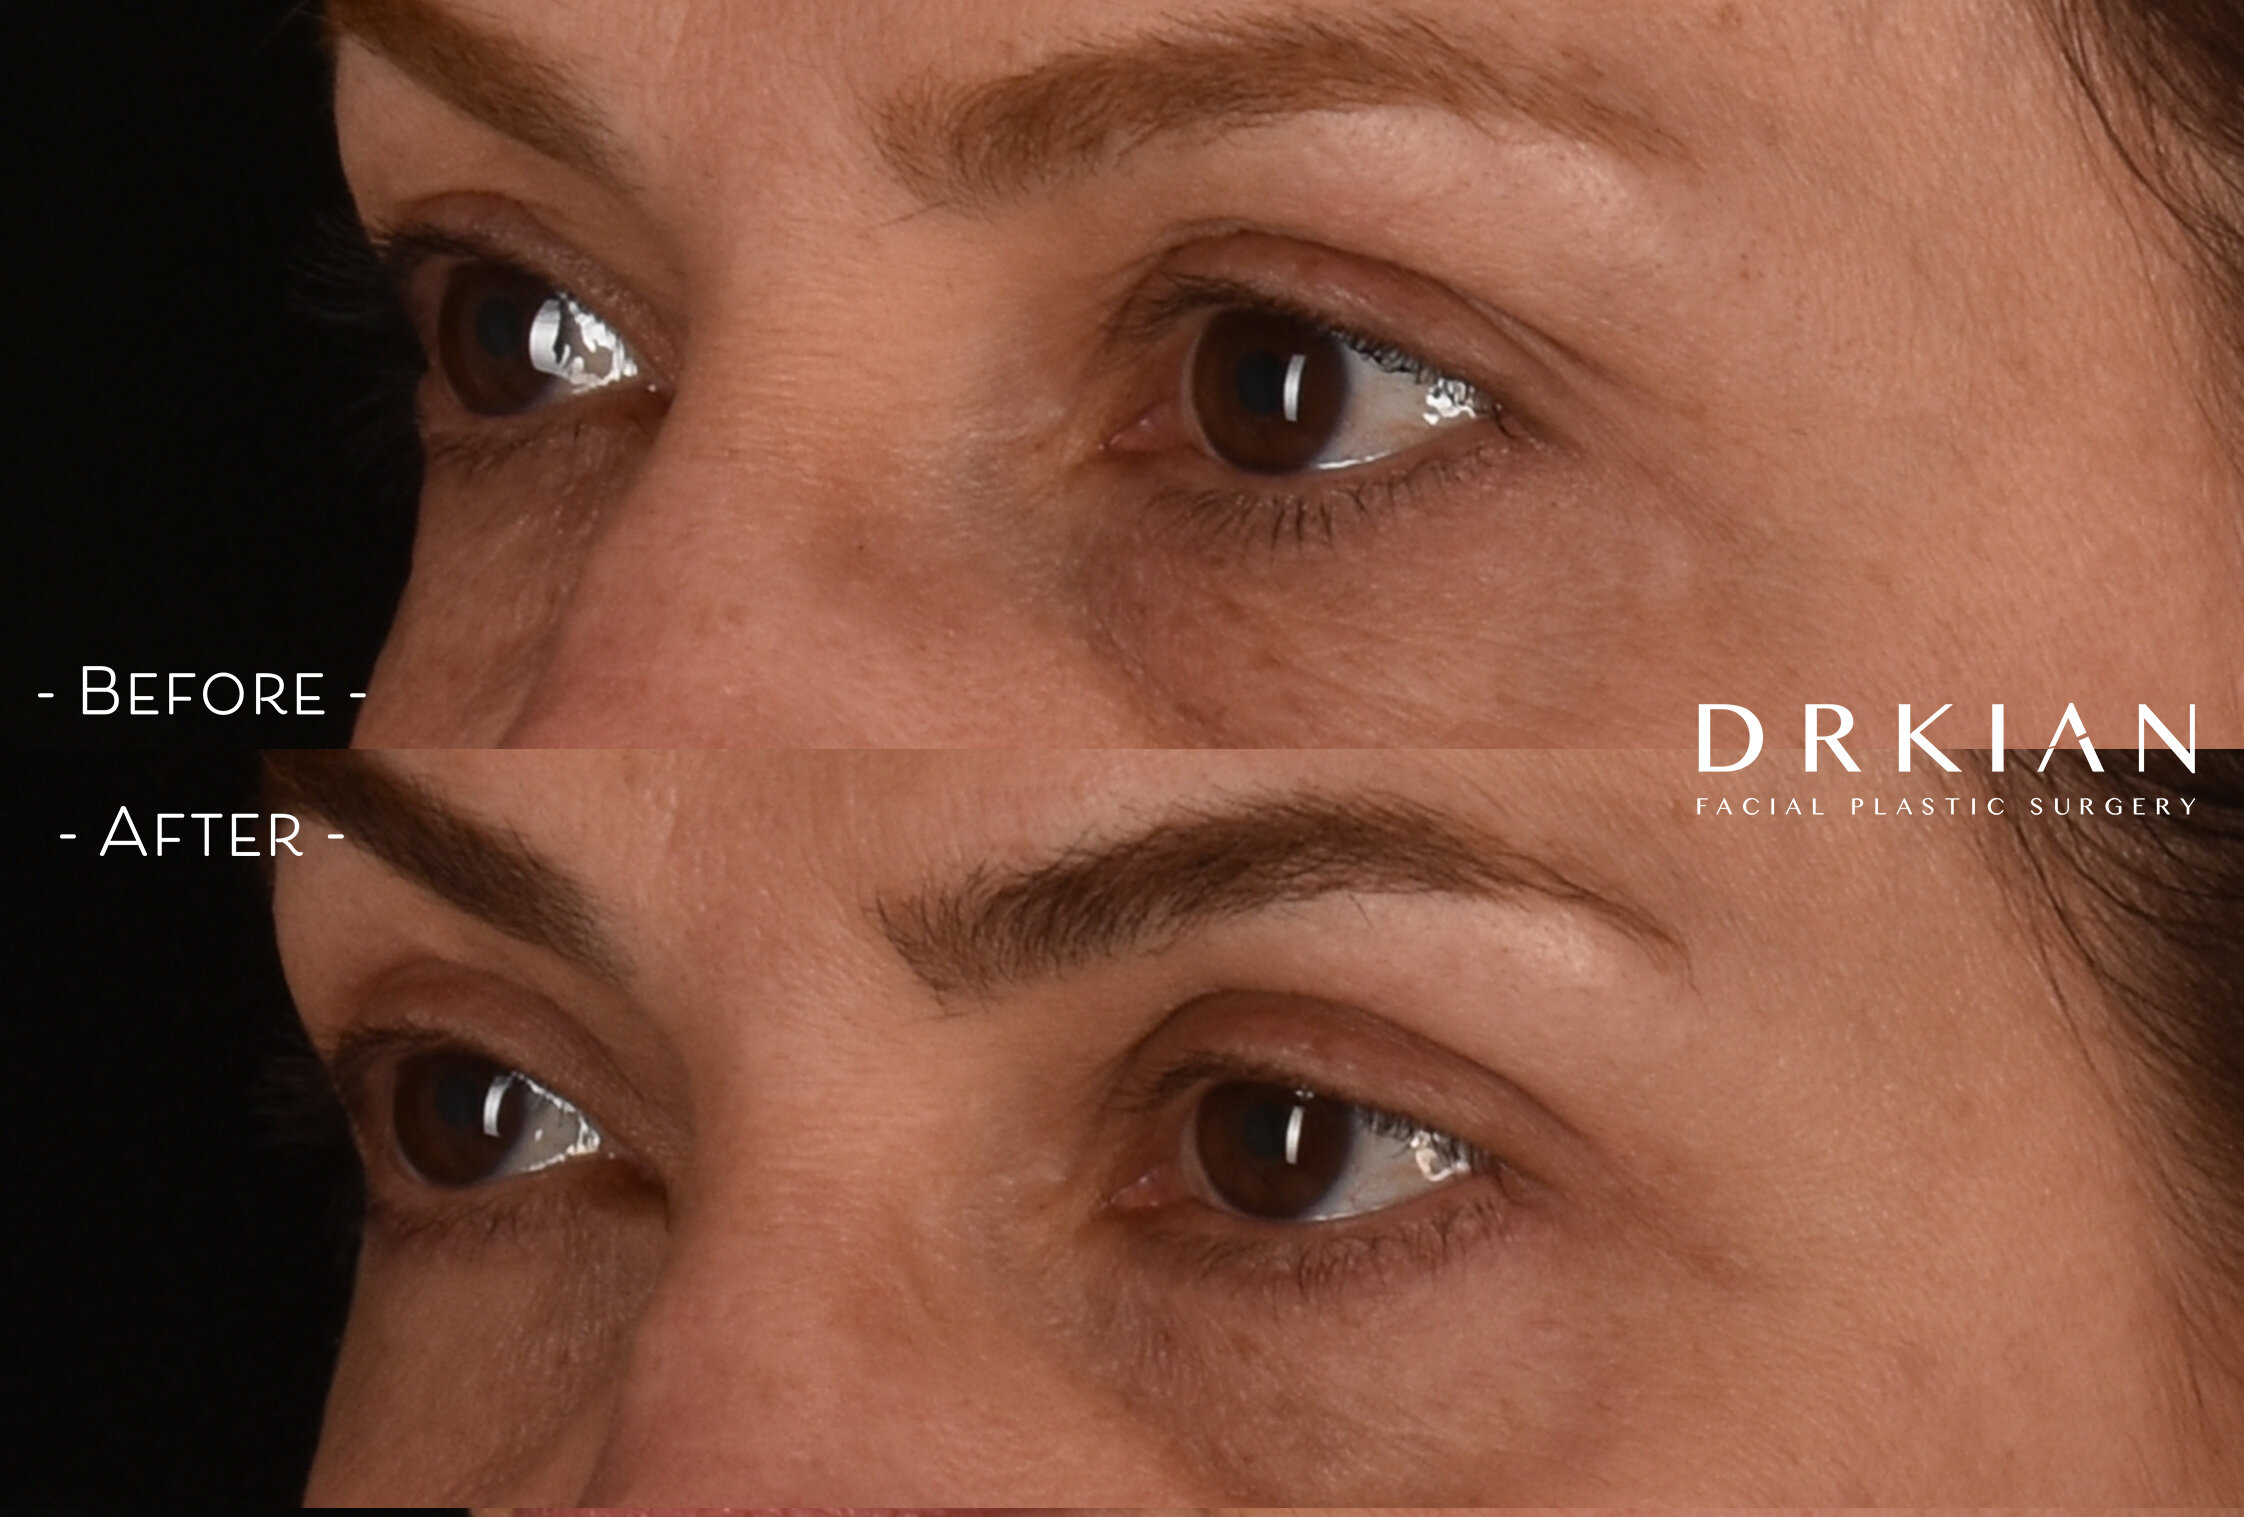
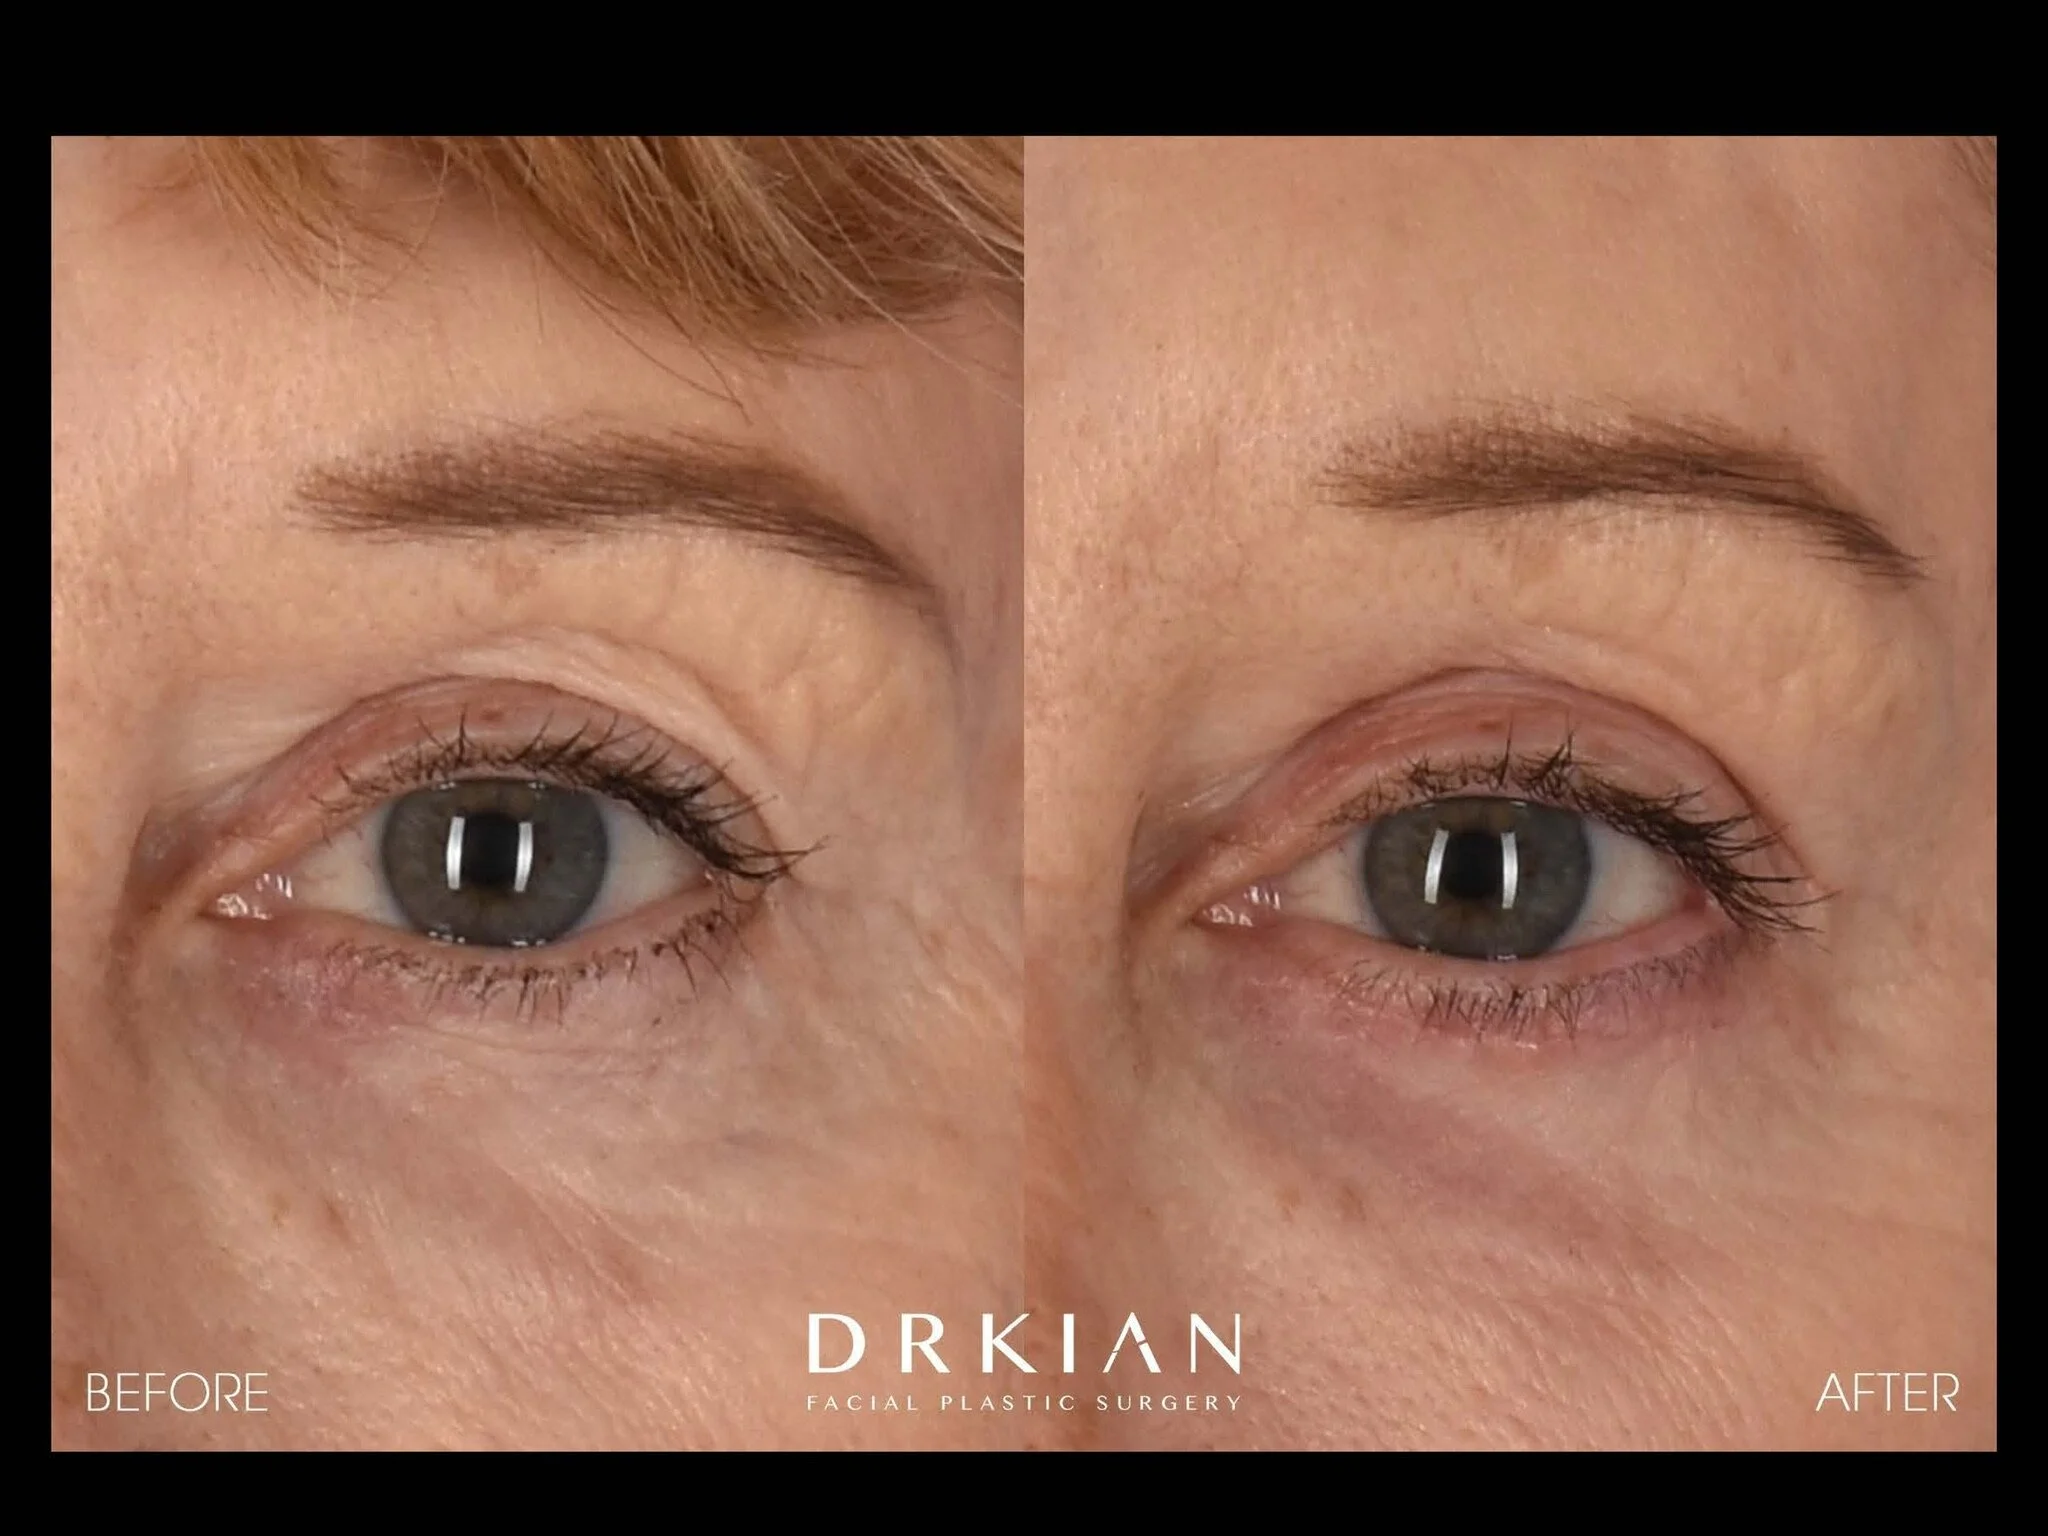
Upper Blepharoplasty (Under Local Anesthesia): Before & After Three Months
Upper Blepharoplasty (Under Local Anesthesia): Before & After Three Months

Upper Blepharoplasty (Under Local Anesthesia): Before & After Three Months
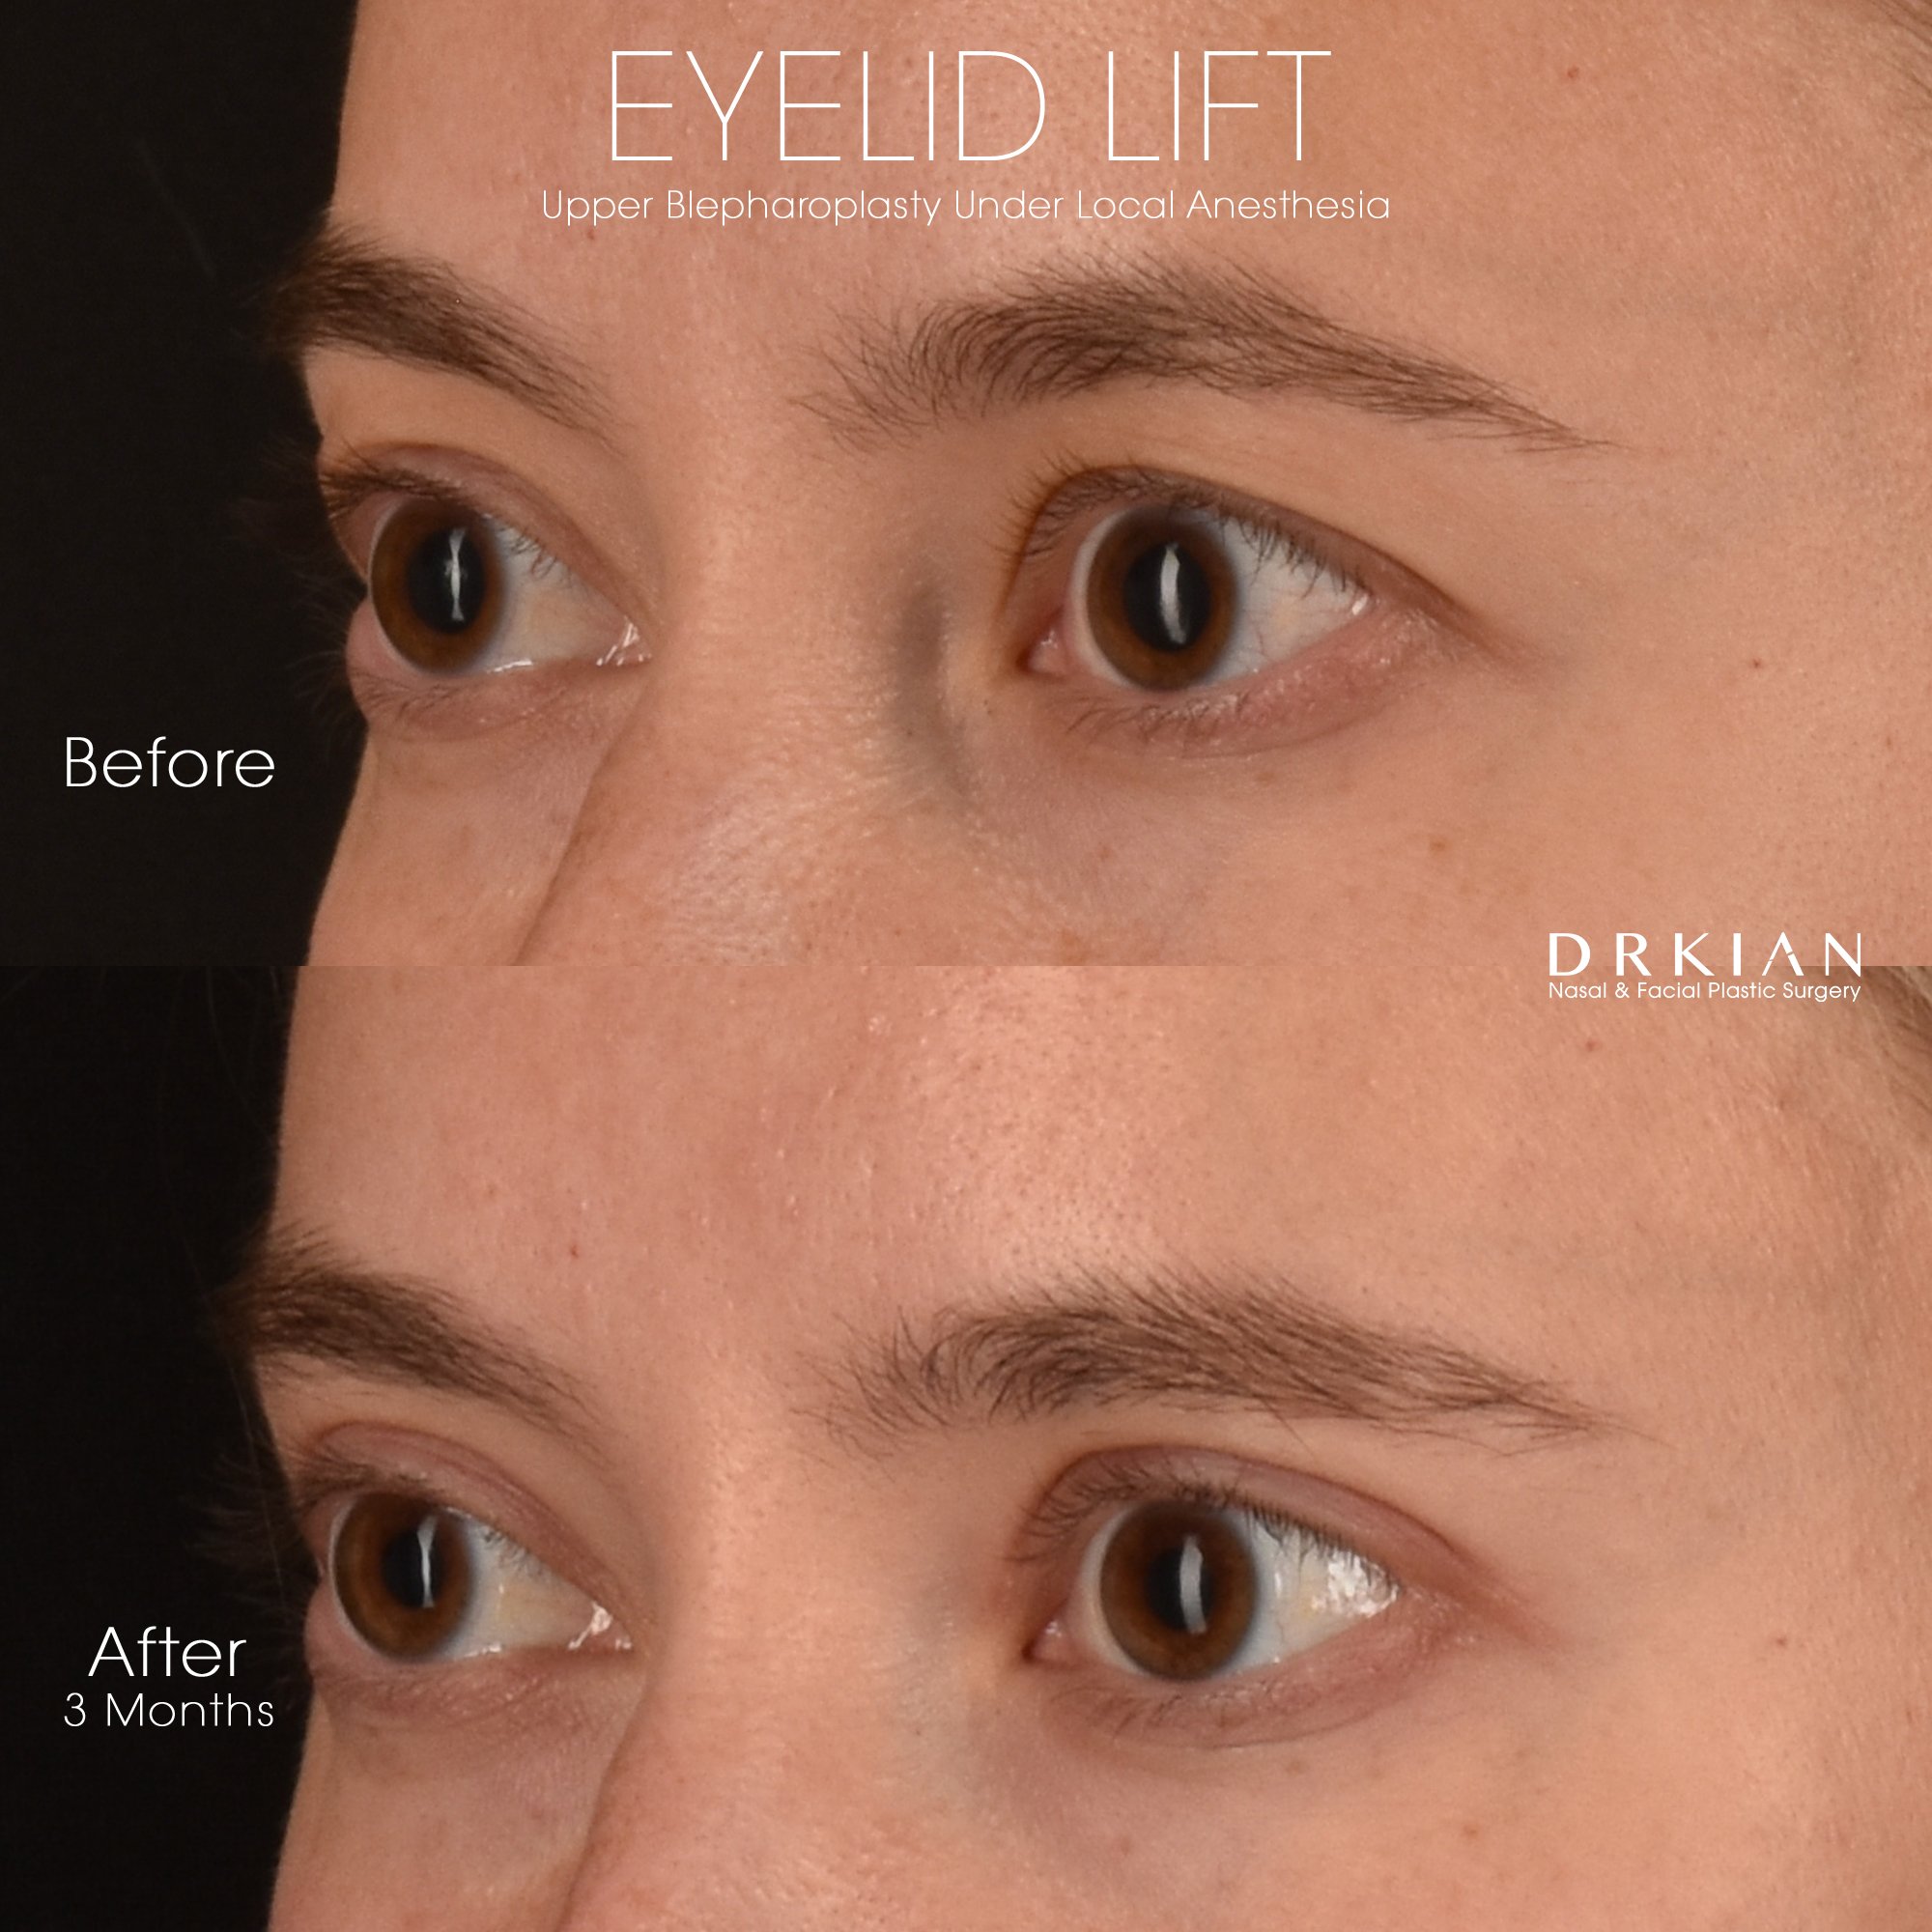
Upper Blepharoplasty (Under Local Anesthesia): Before & After Three Months
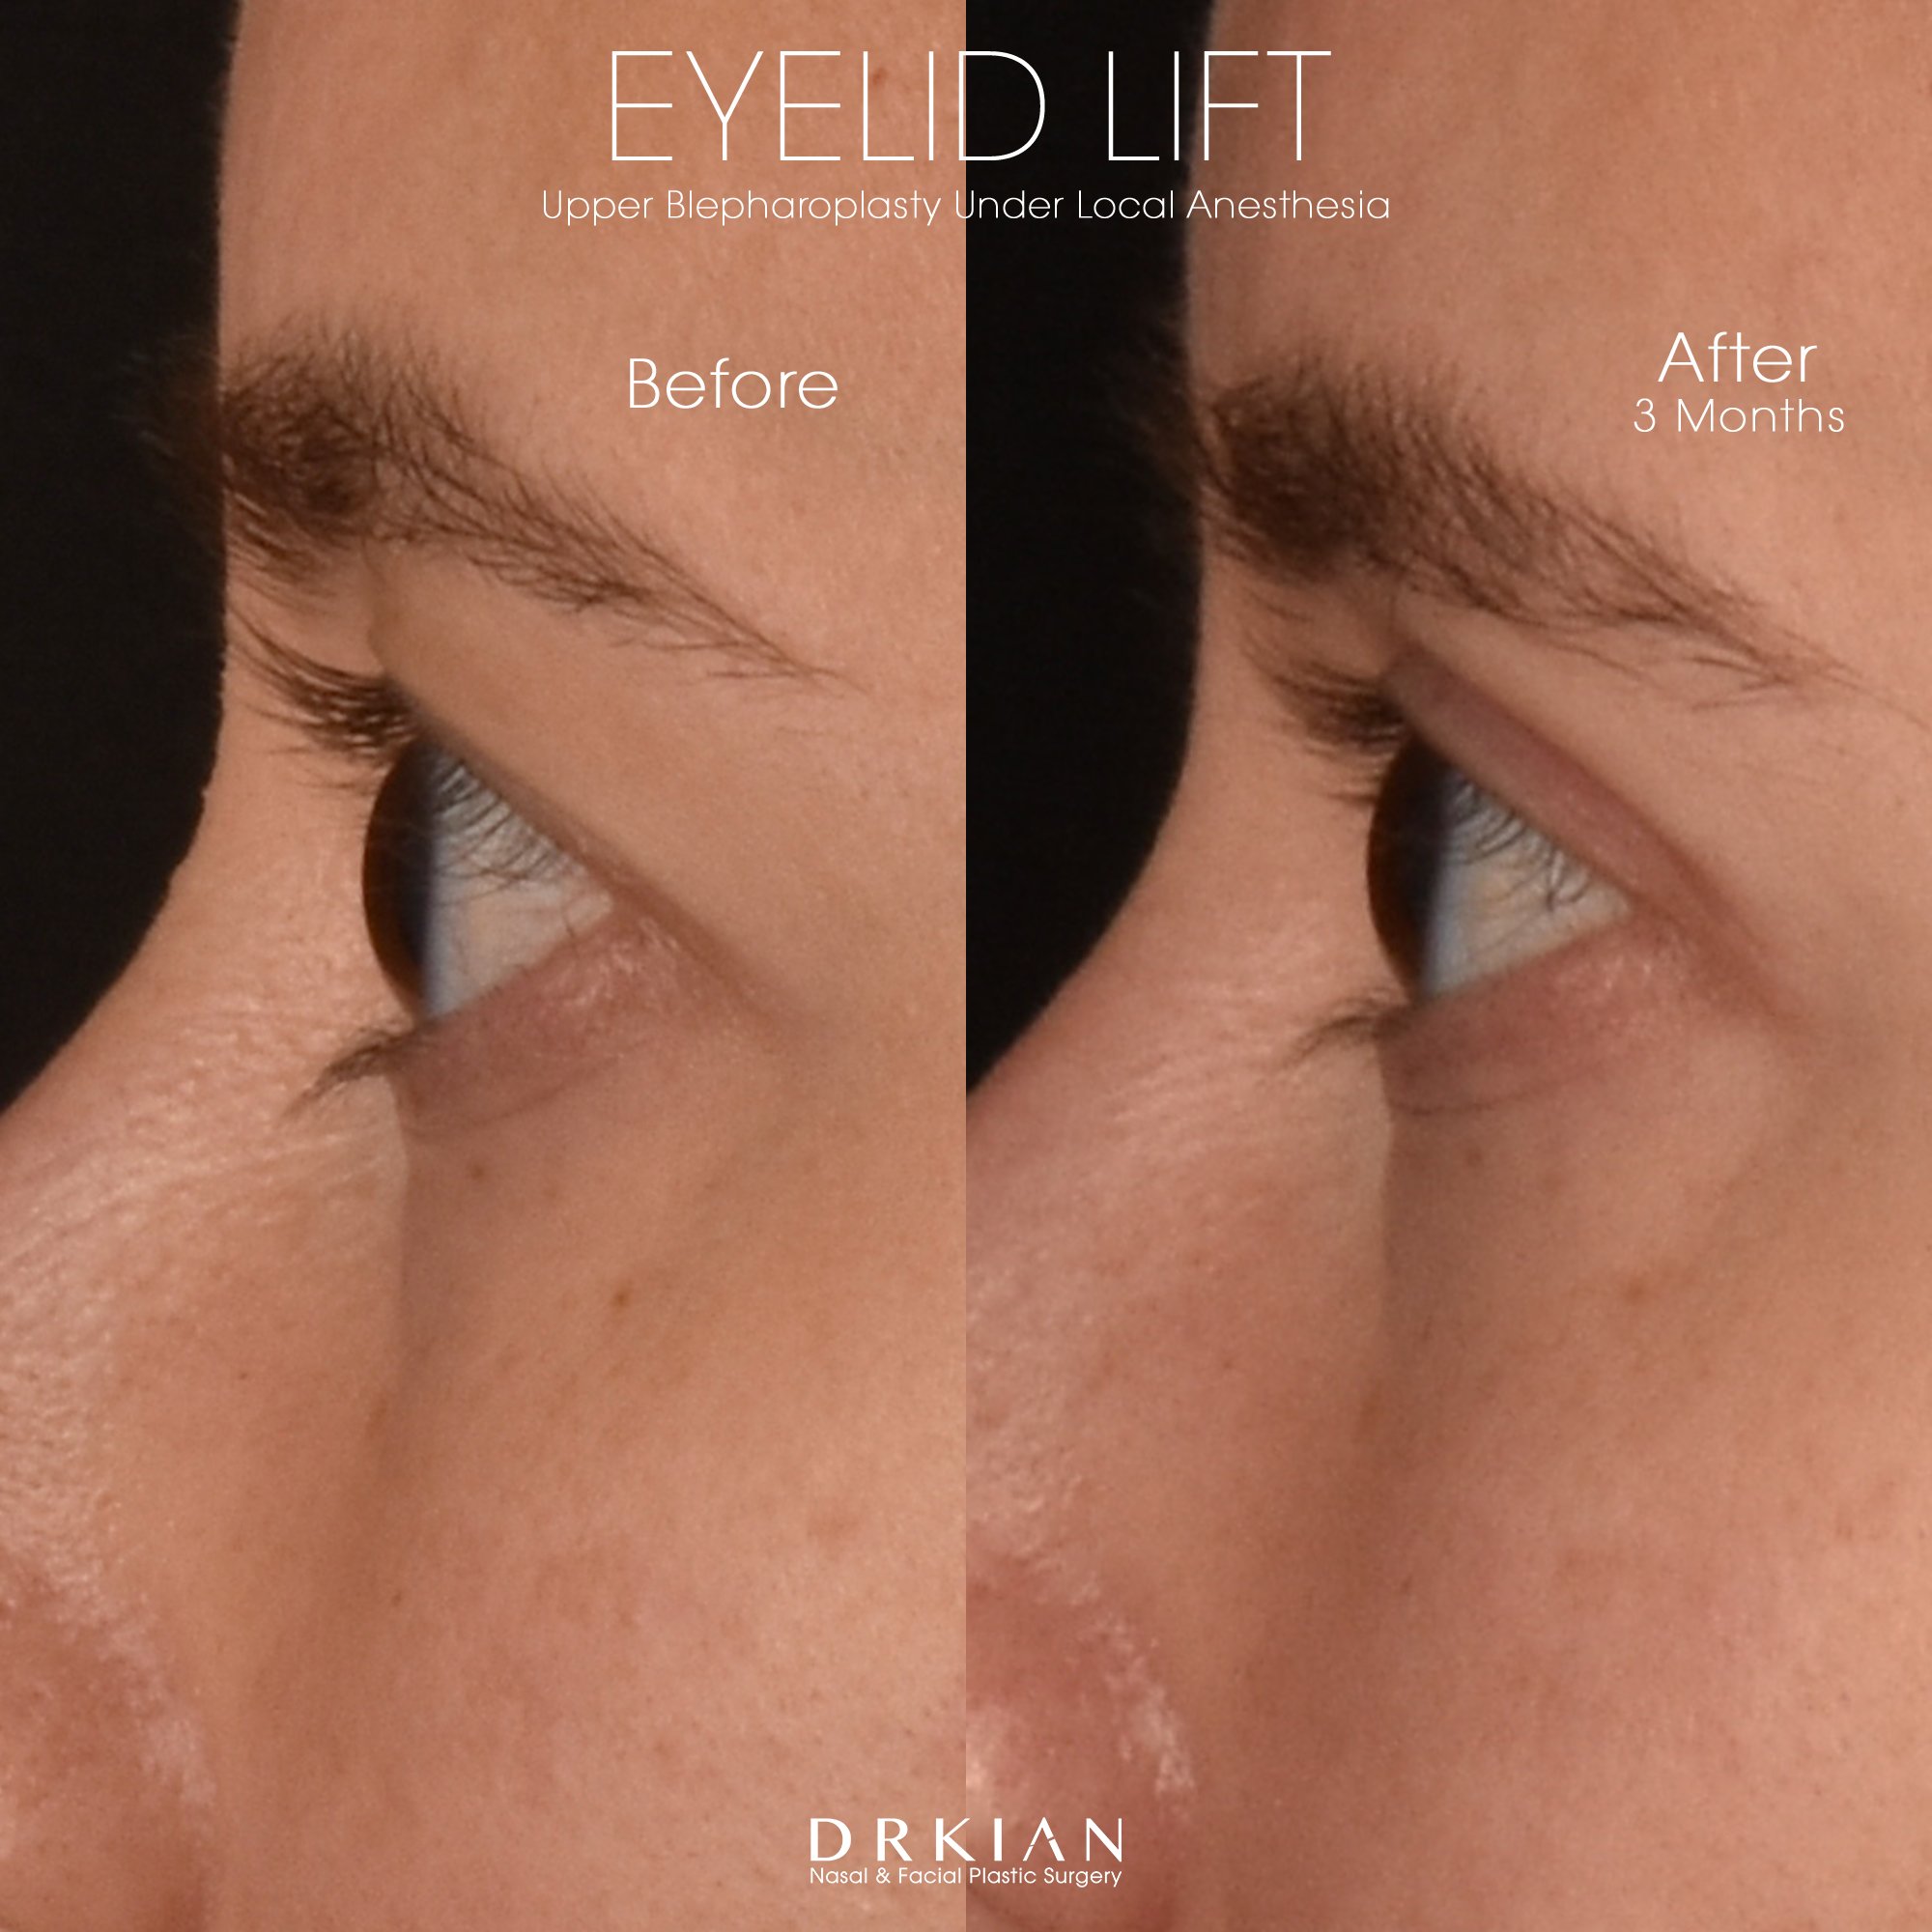
Upper Blepharoplasty (Under Local Anesthesia): Before & After Three Months

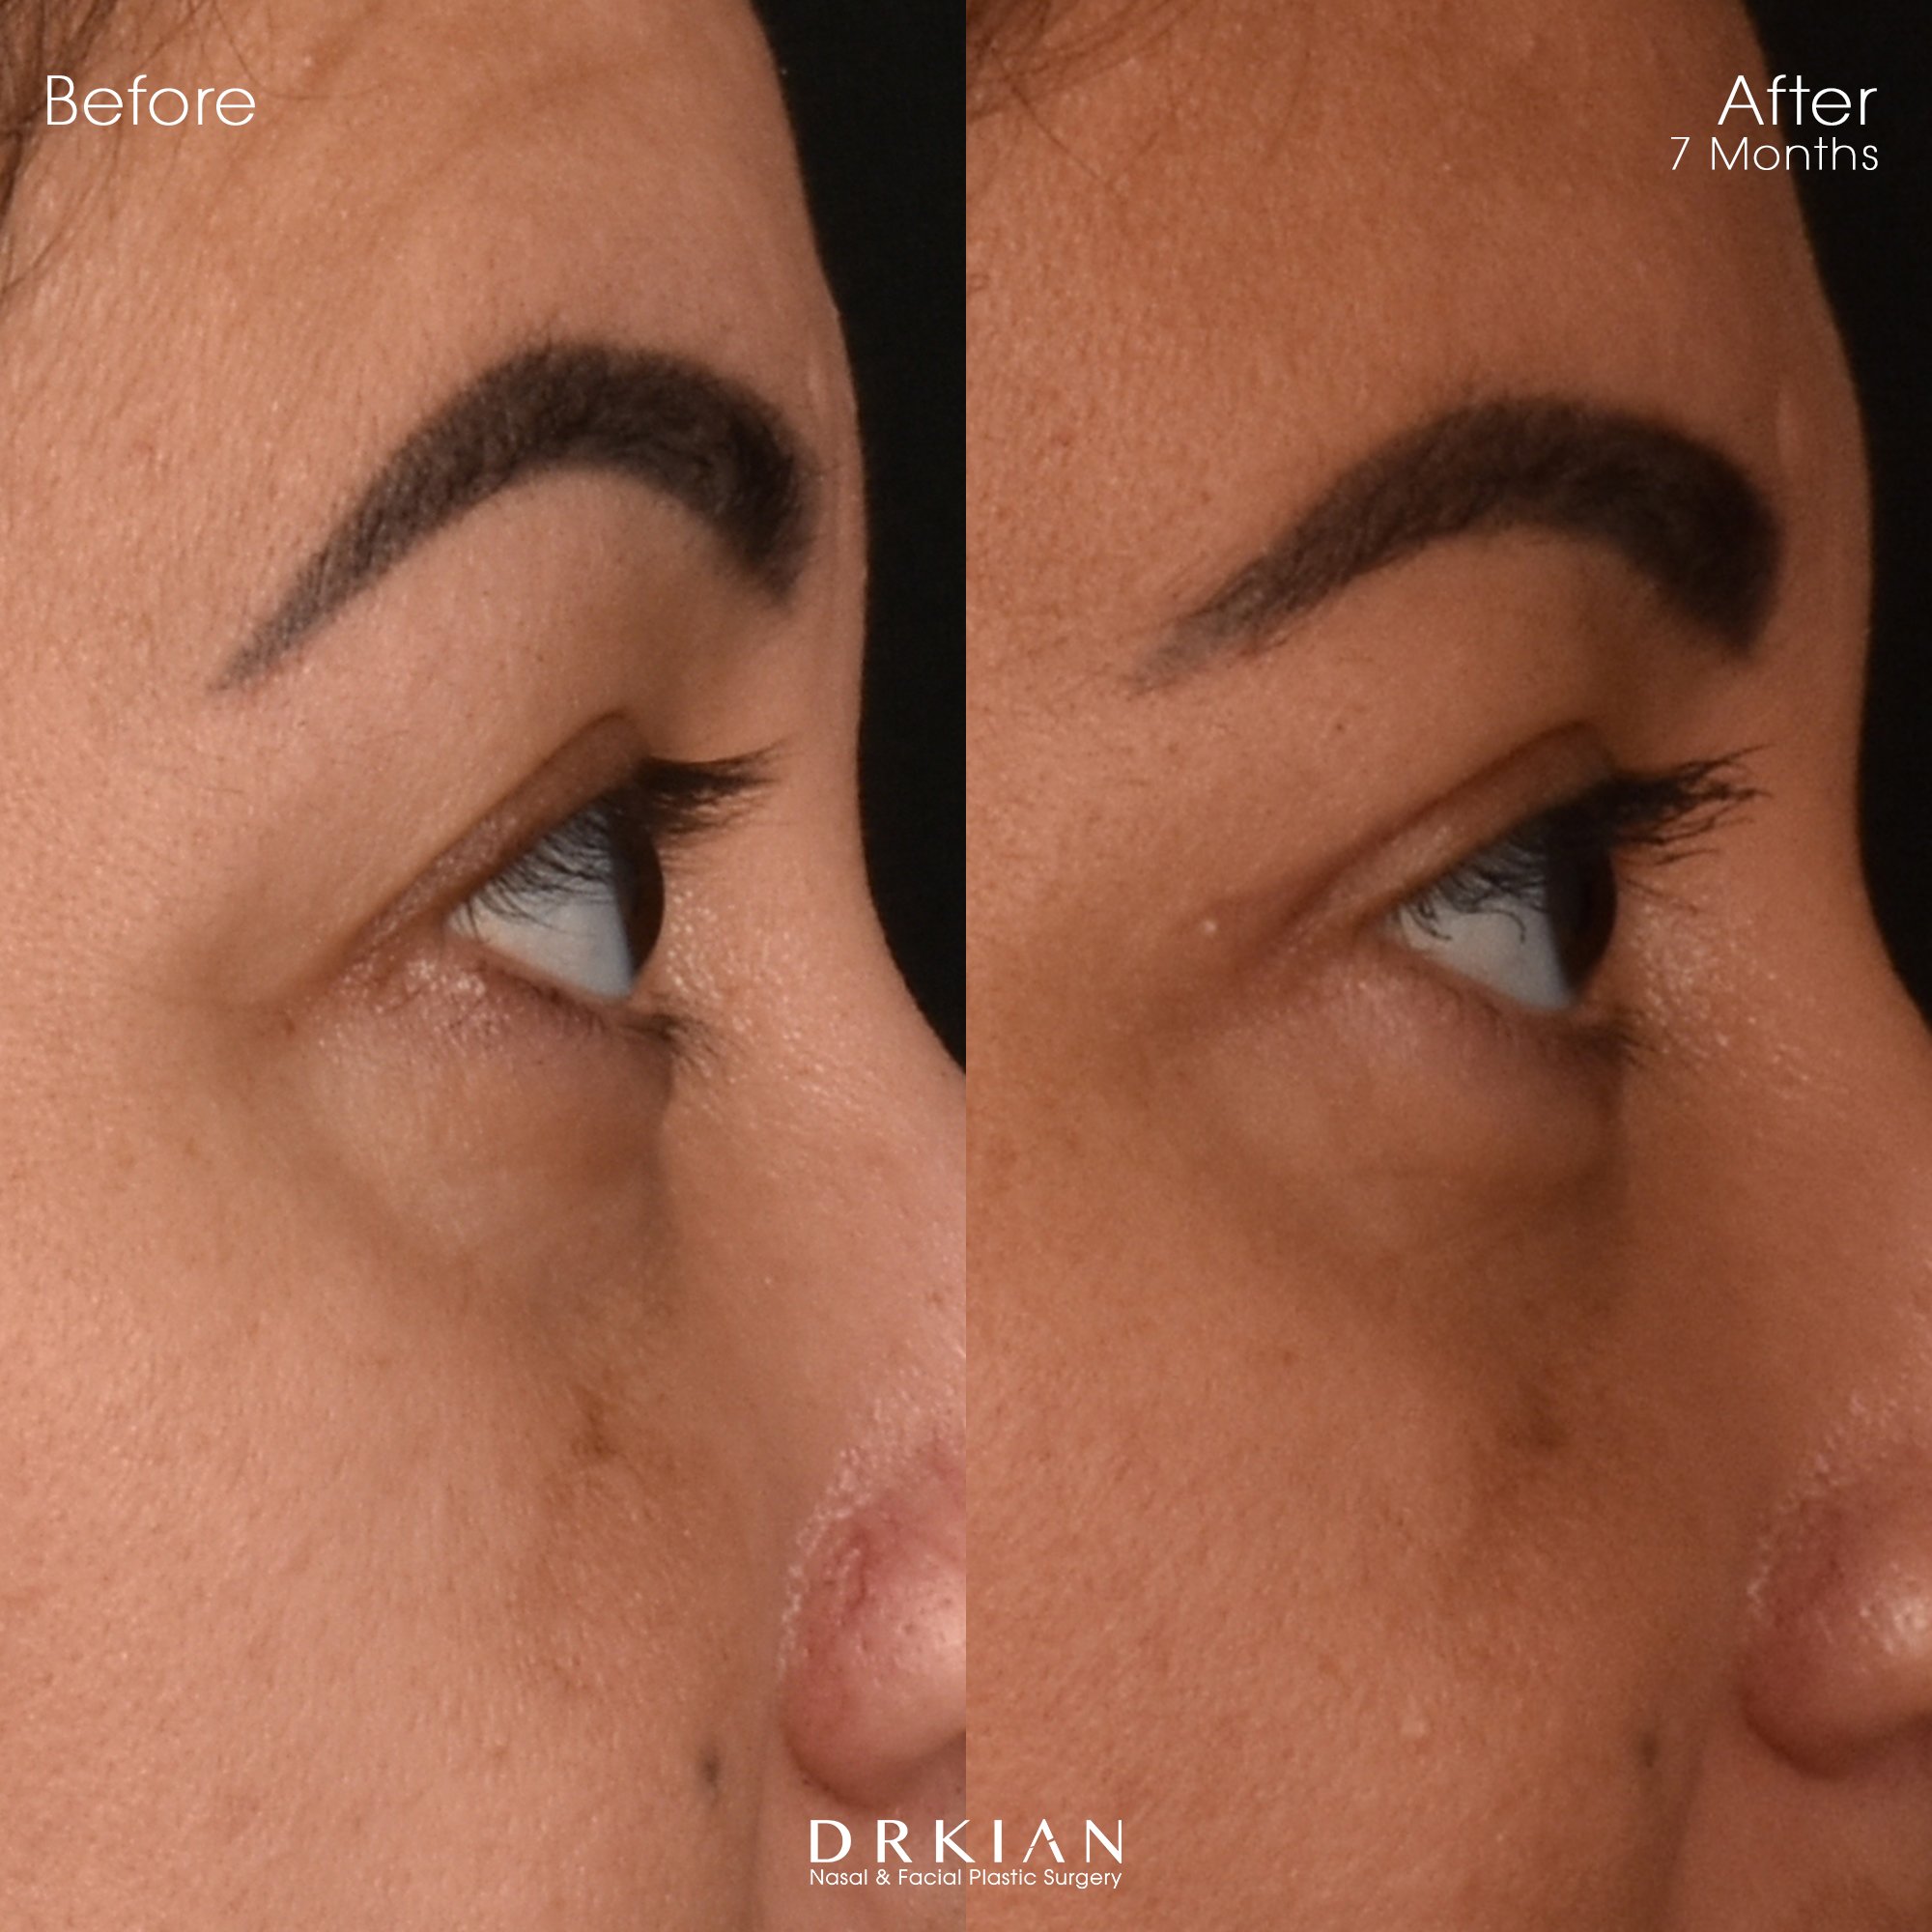
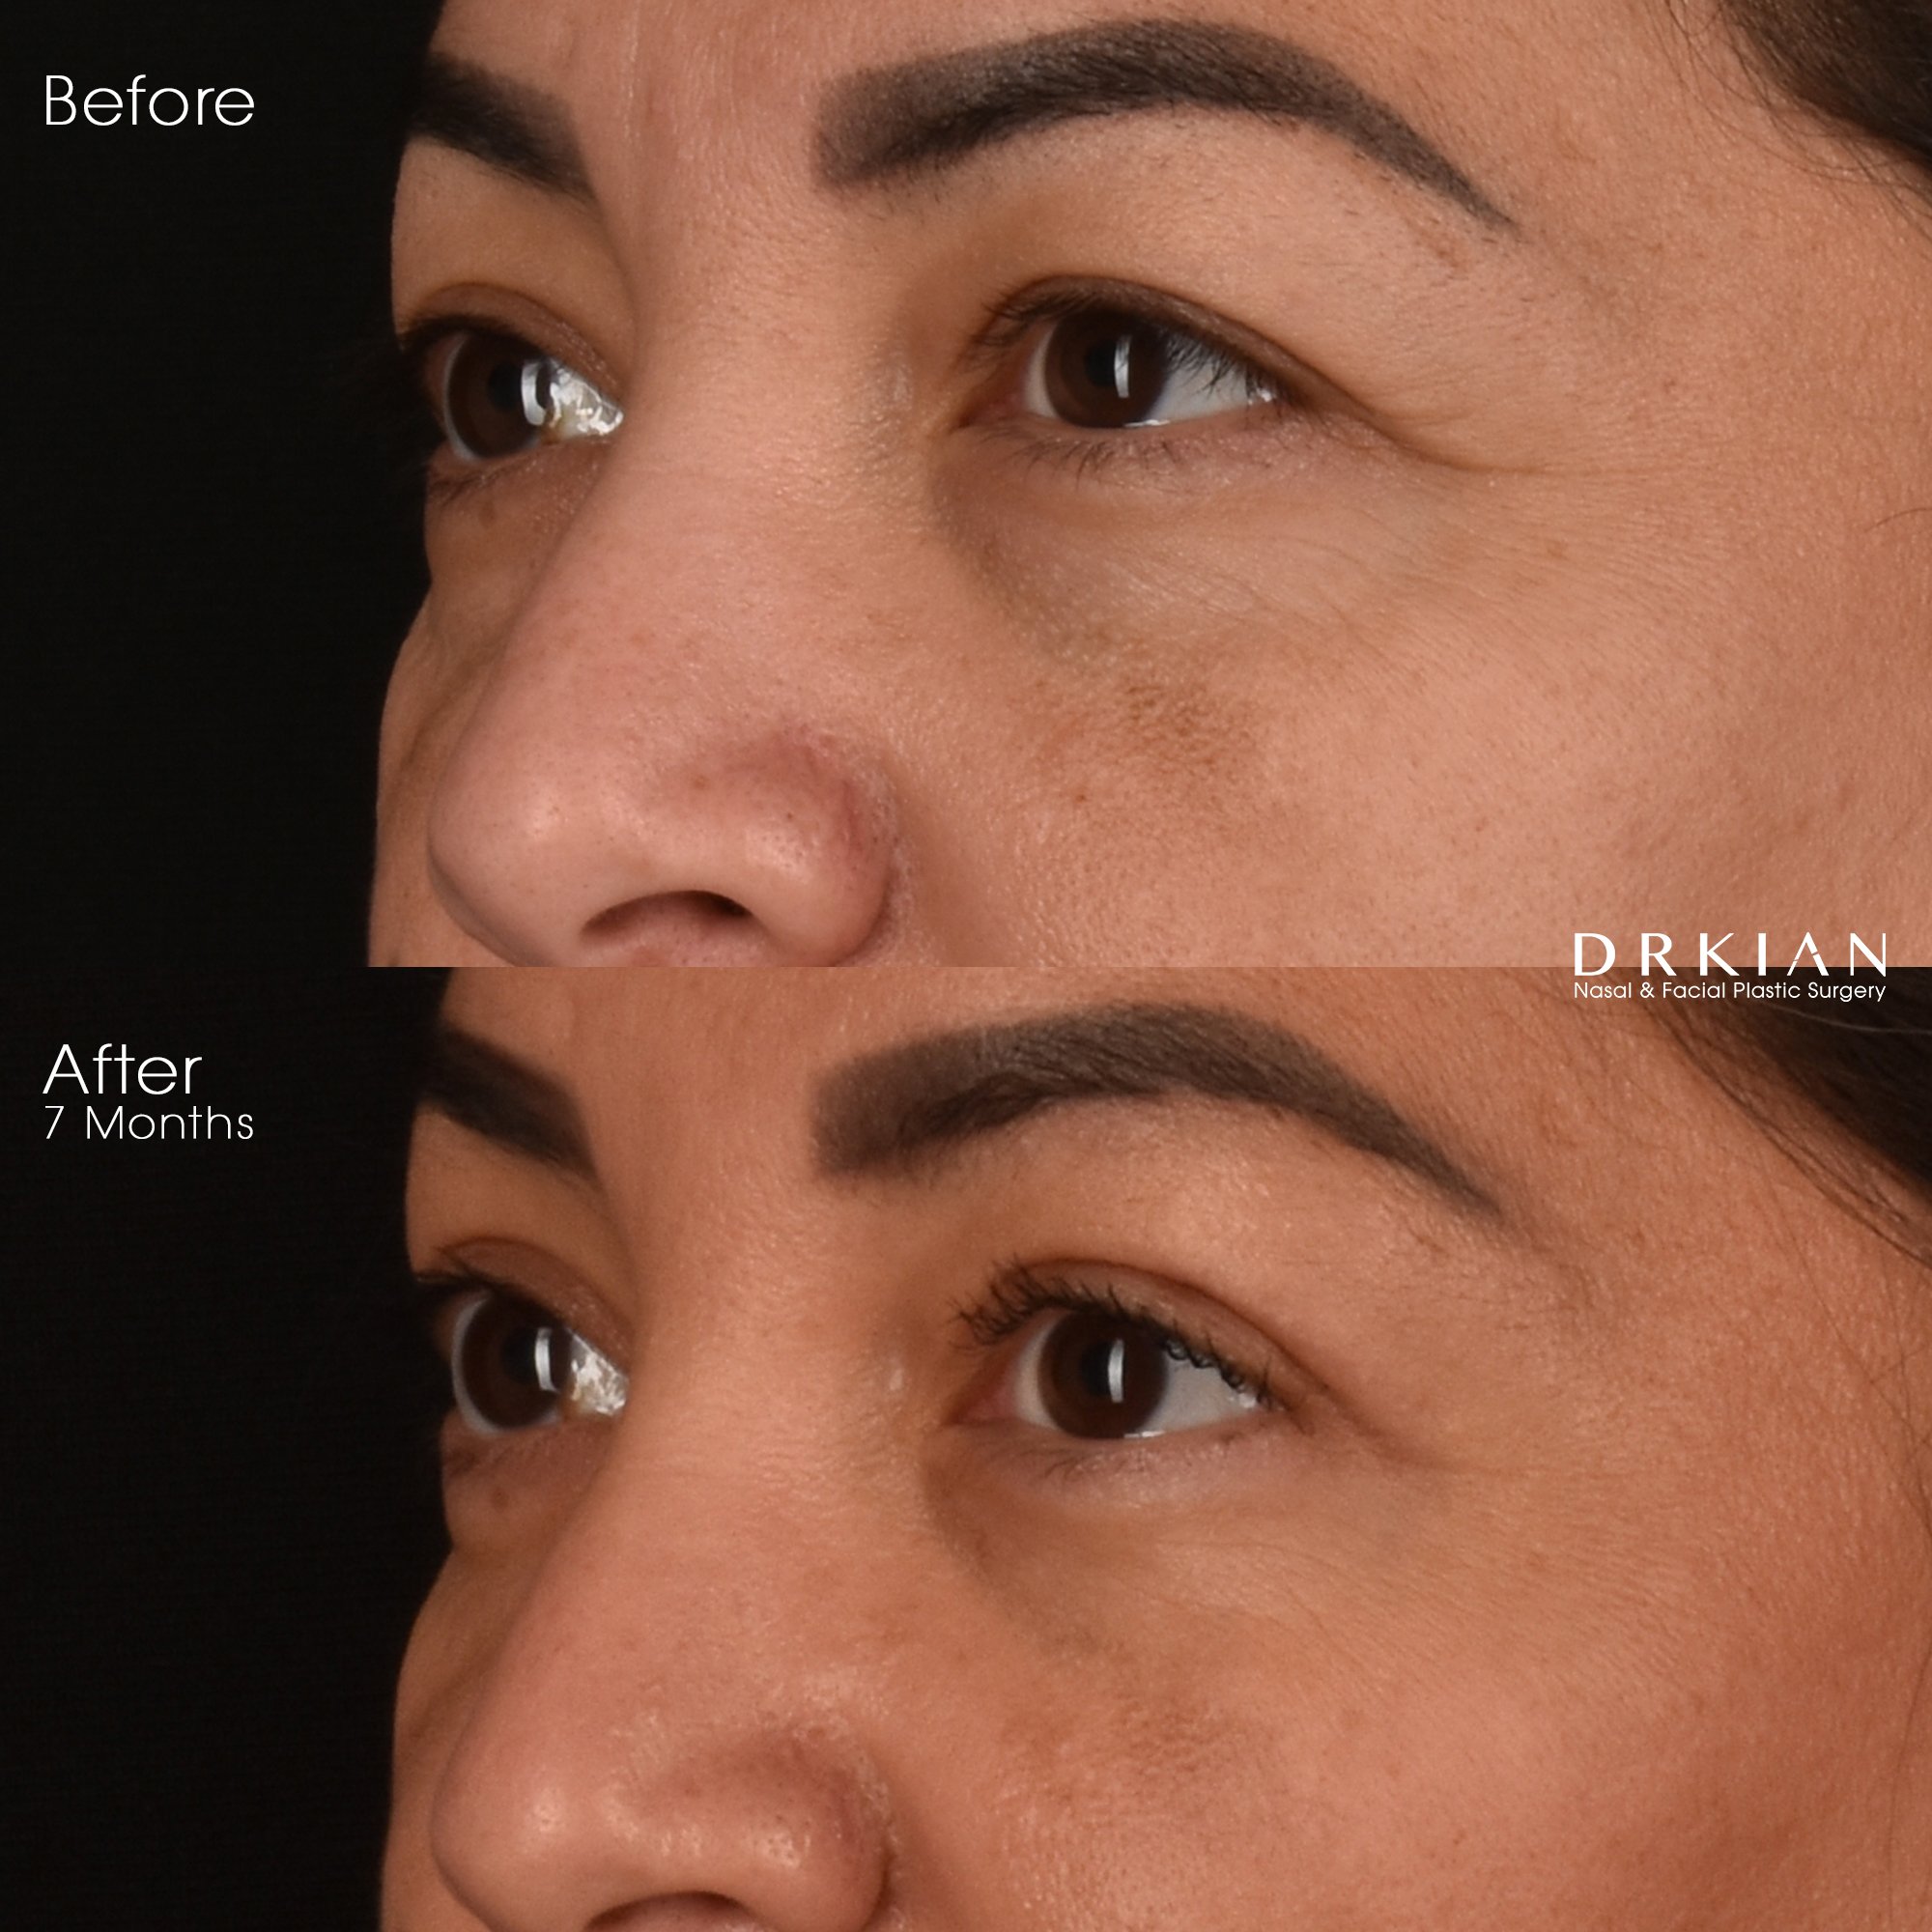
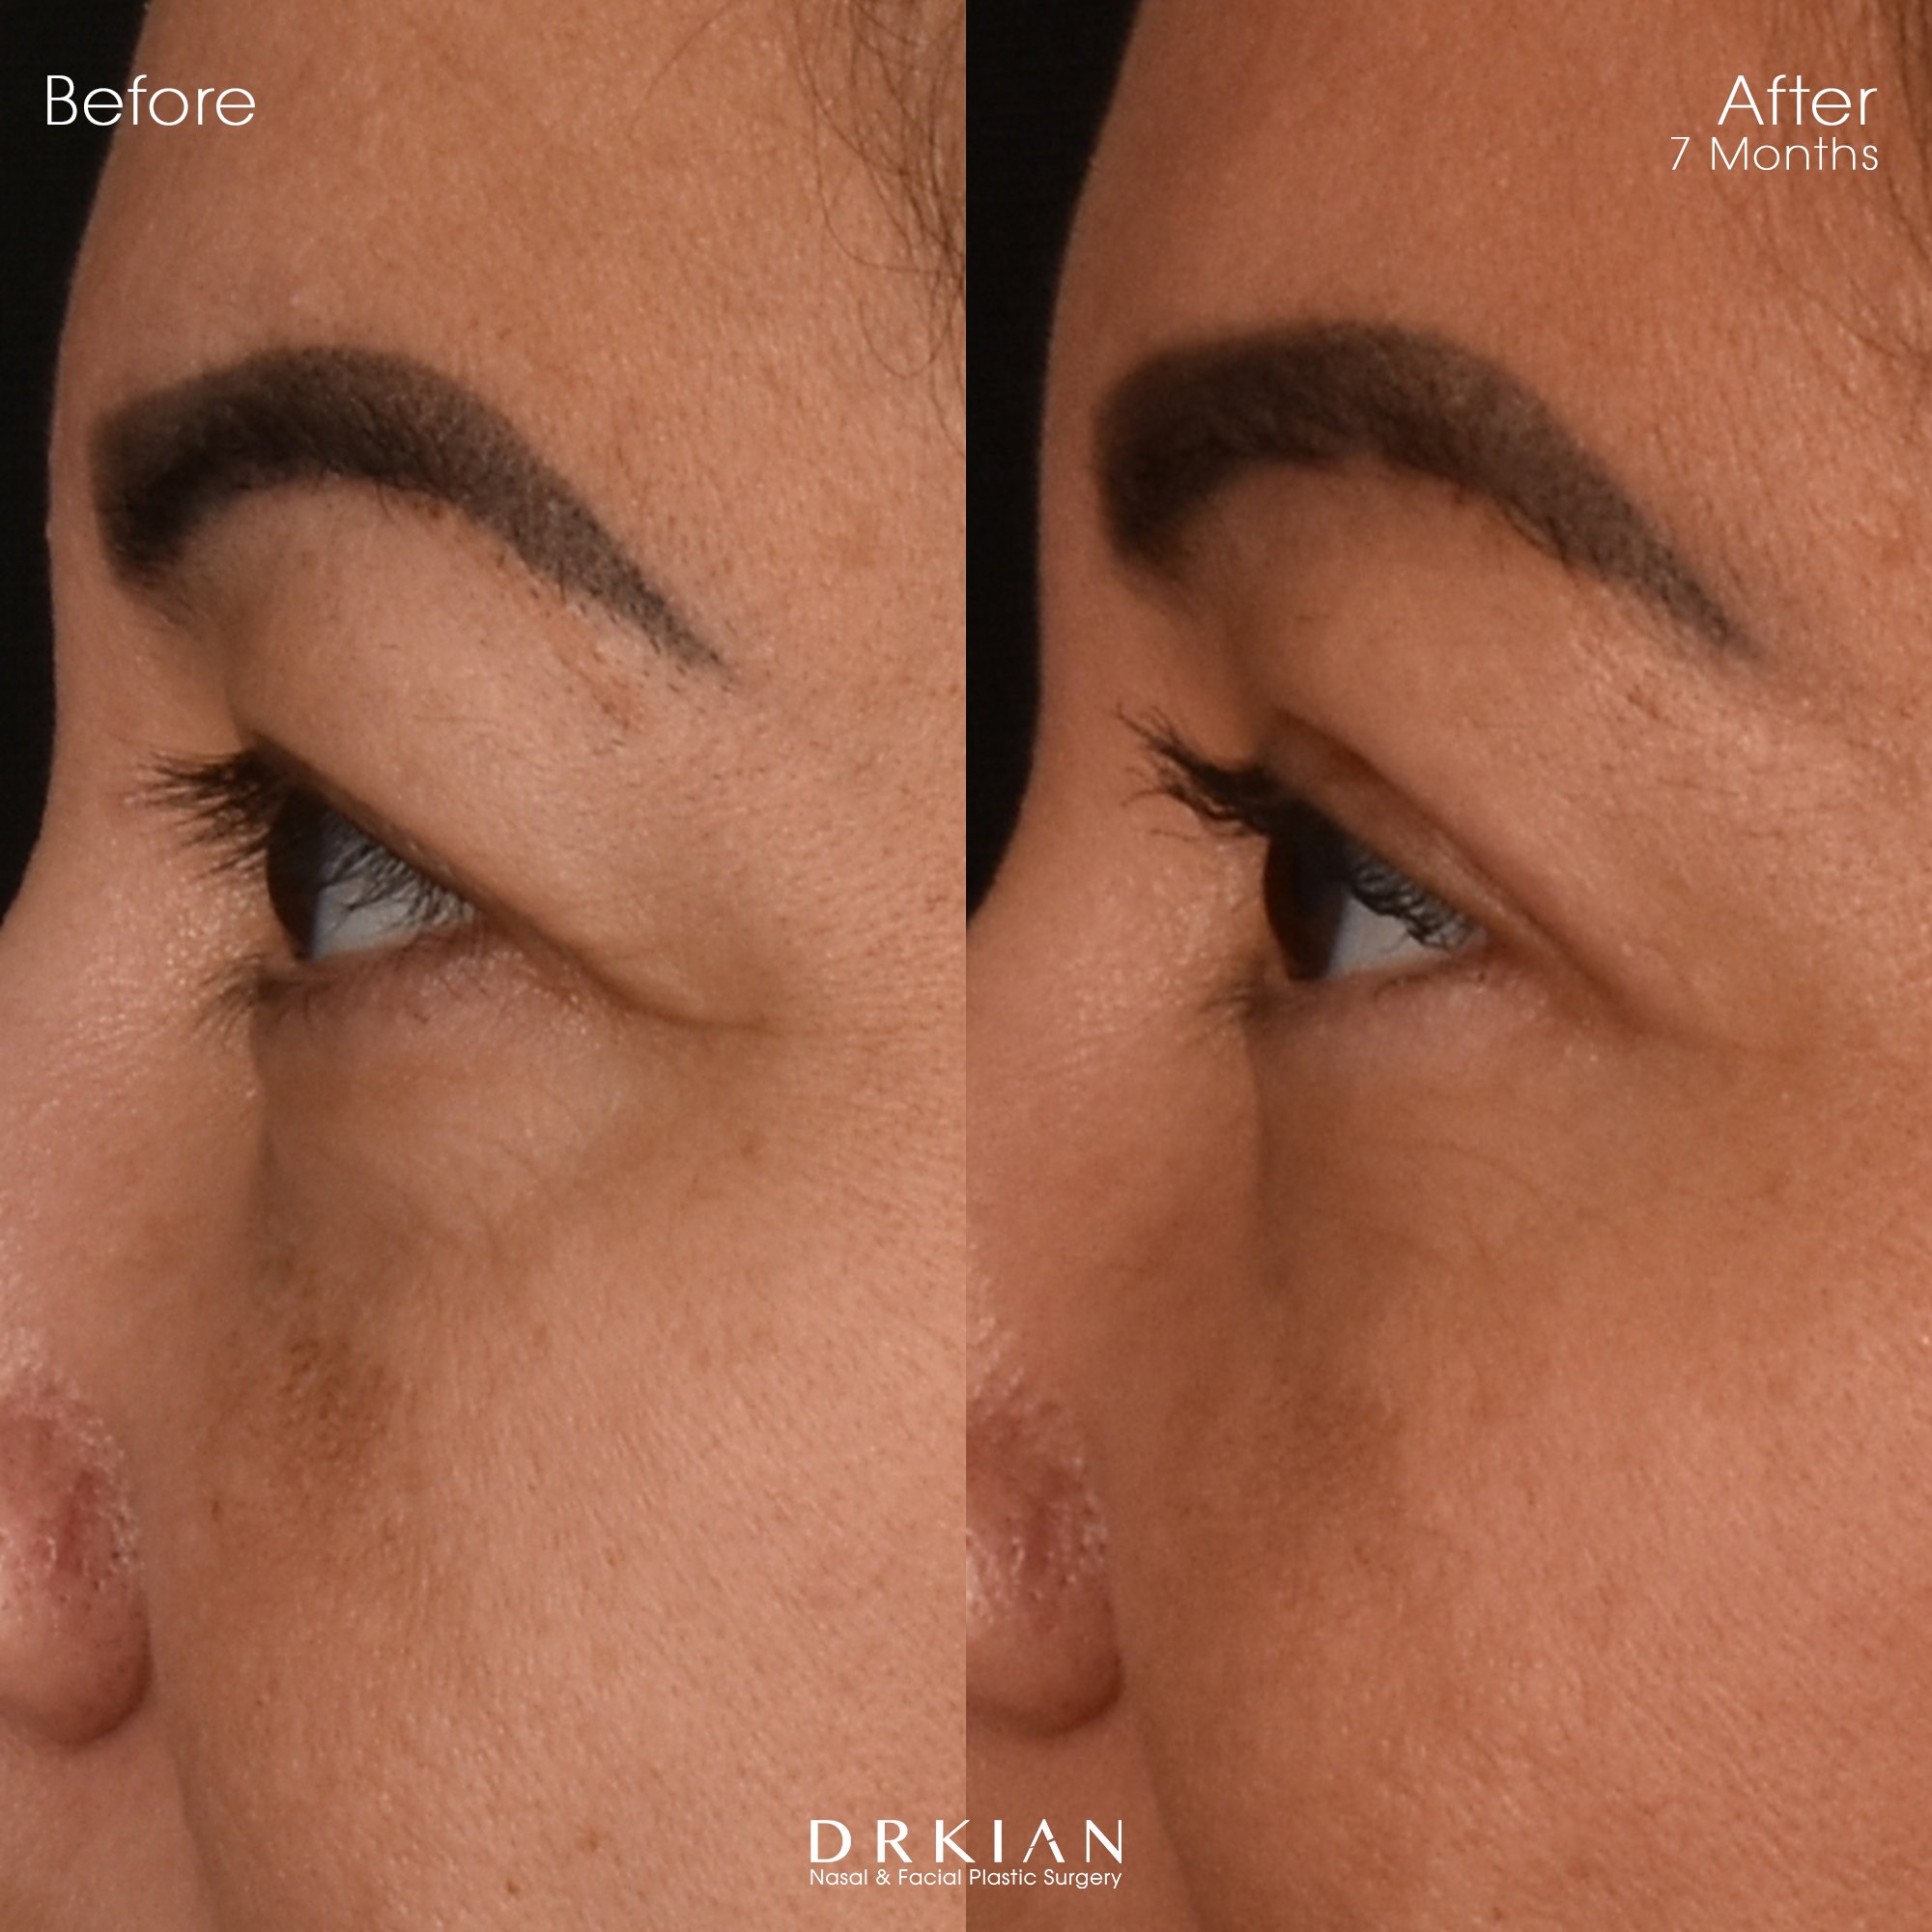
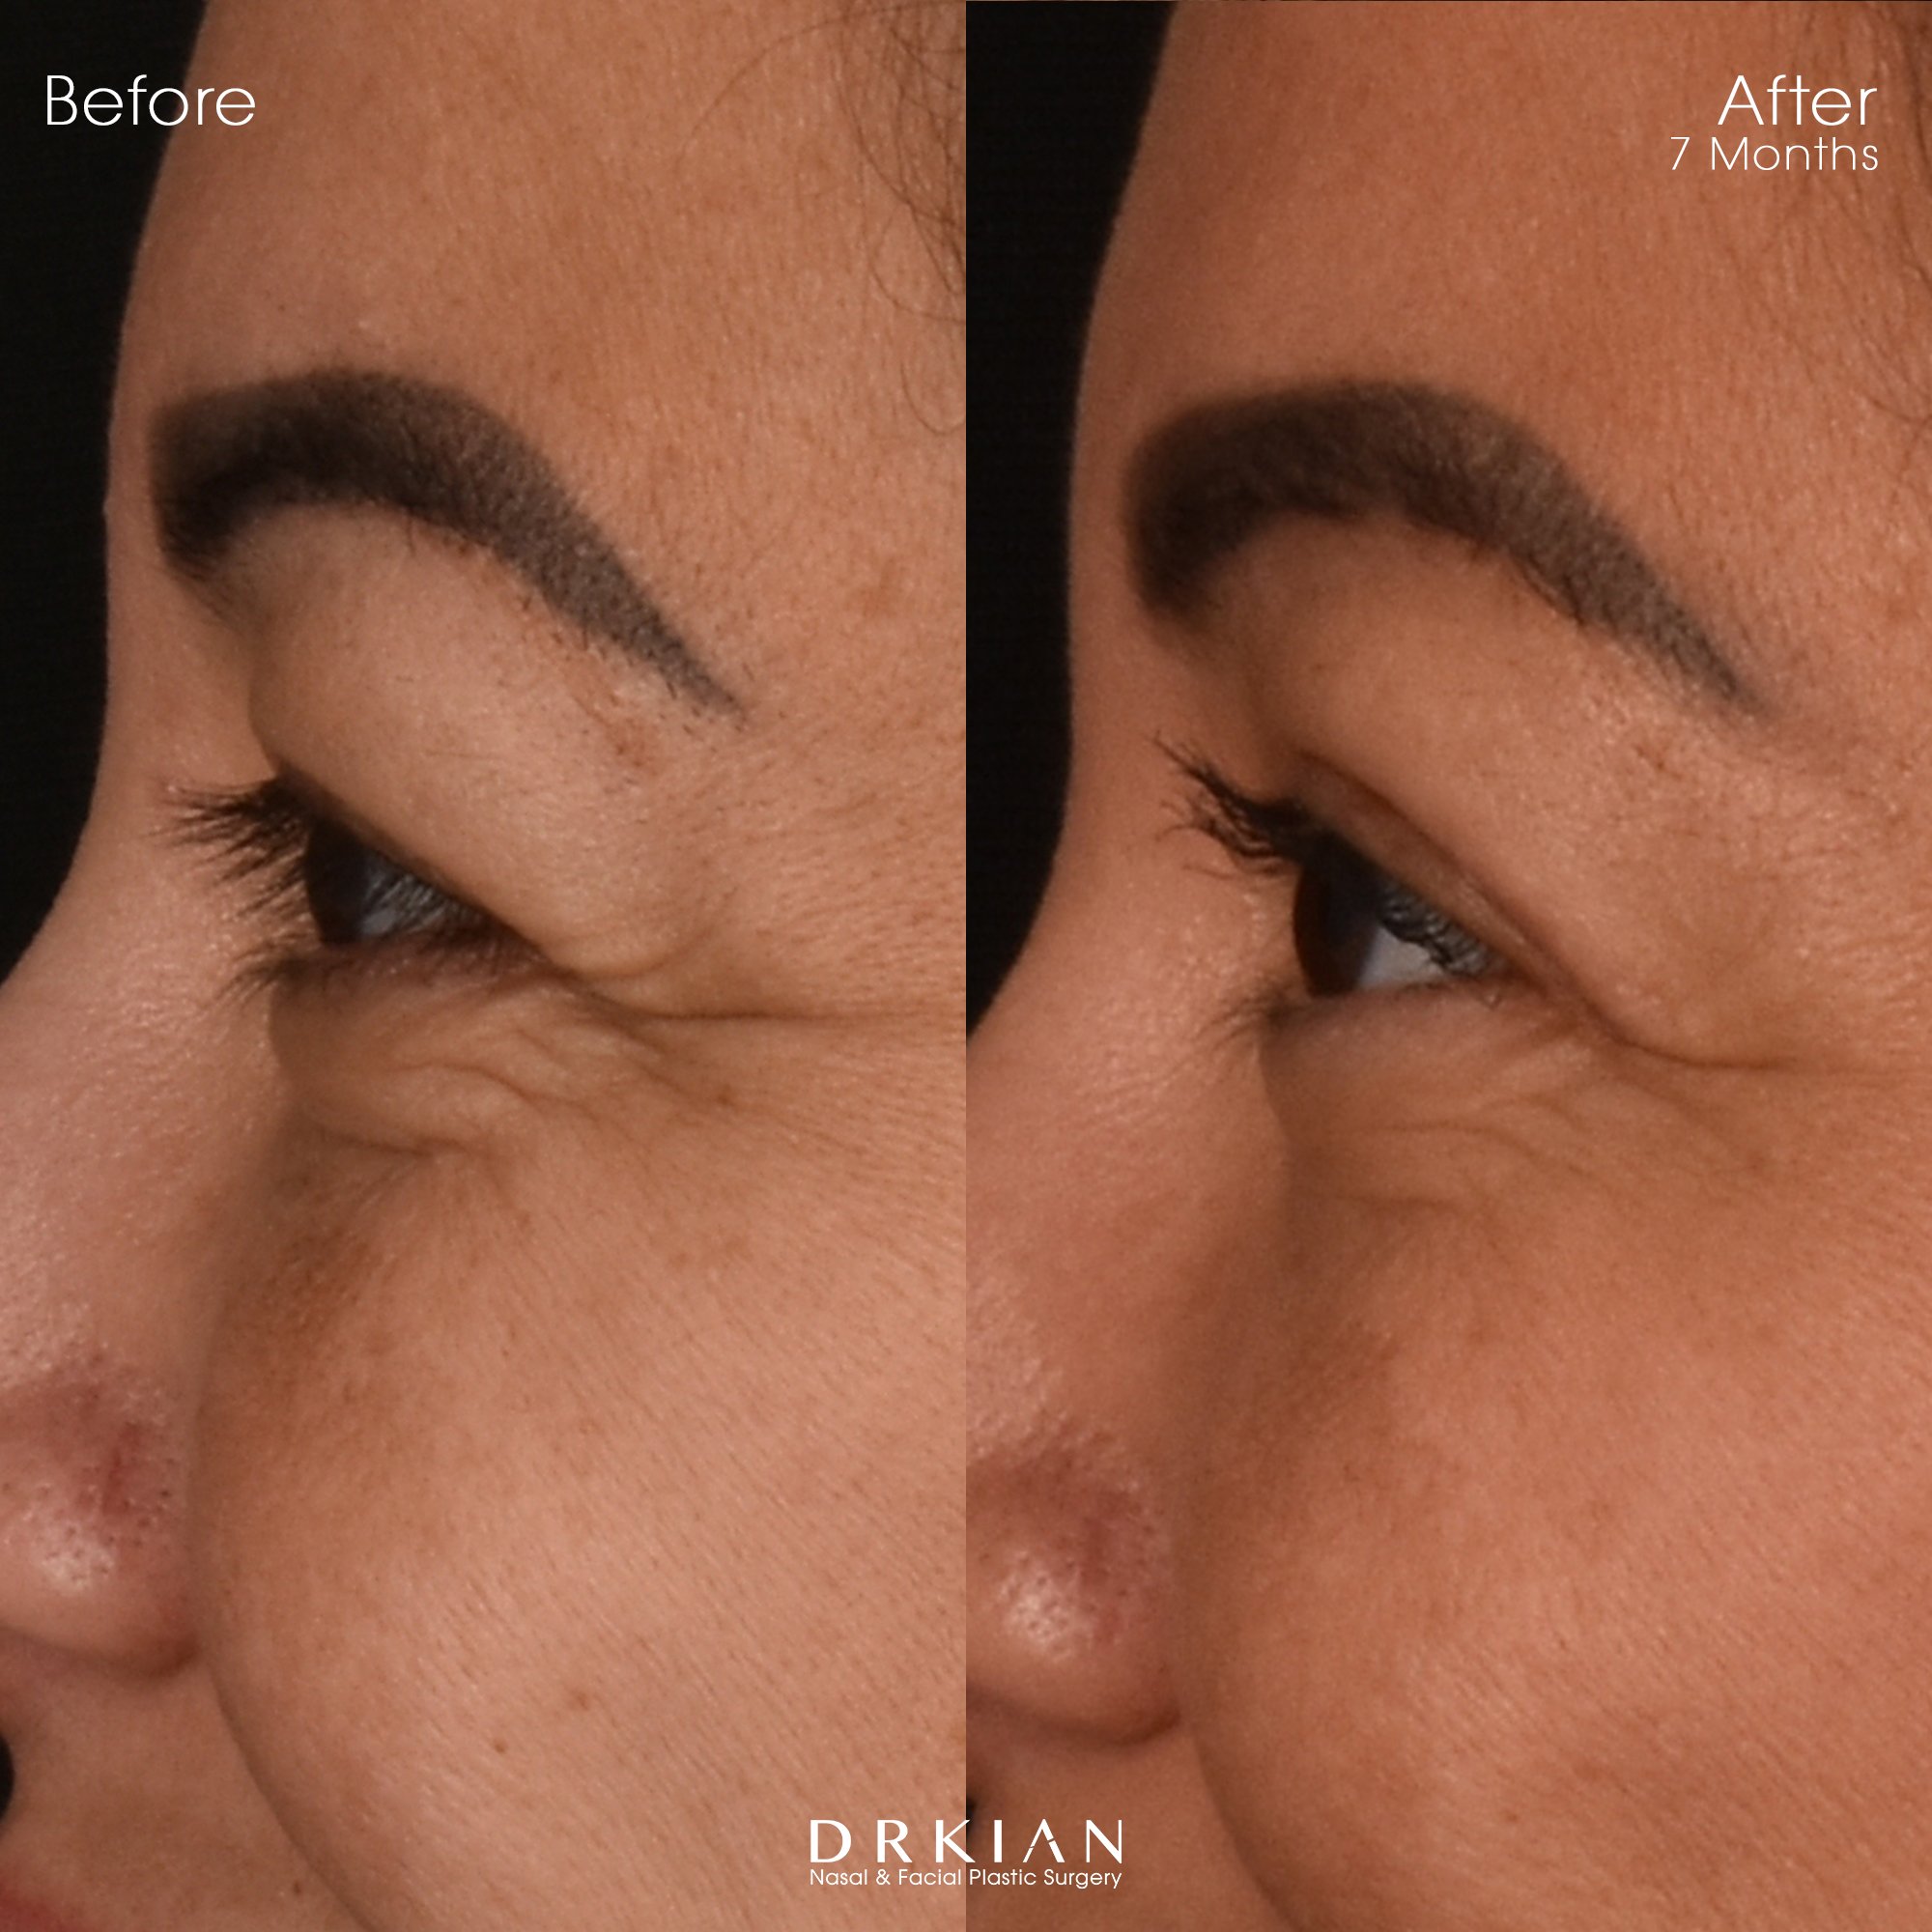
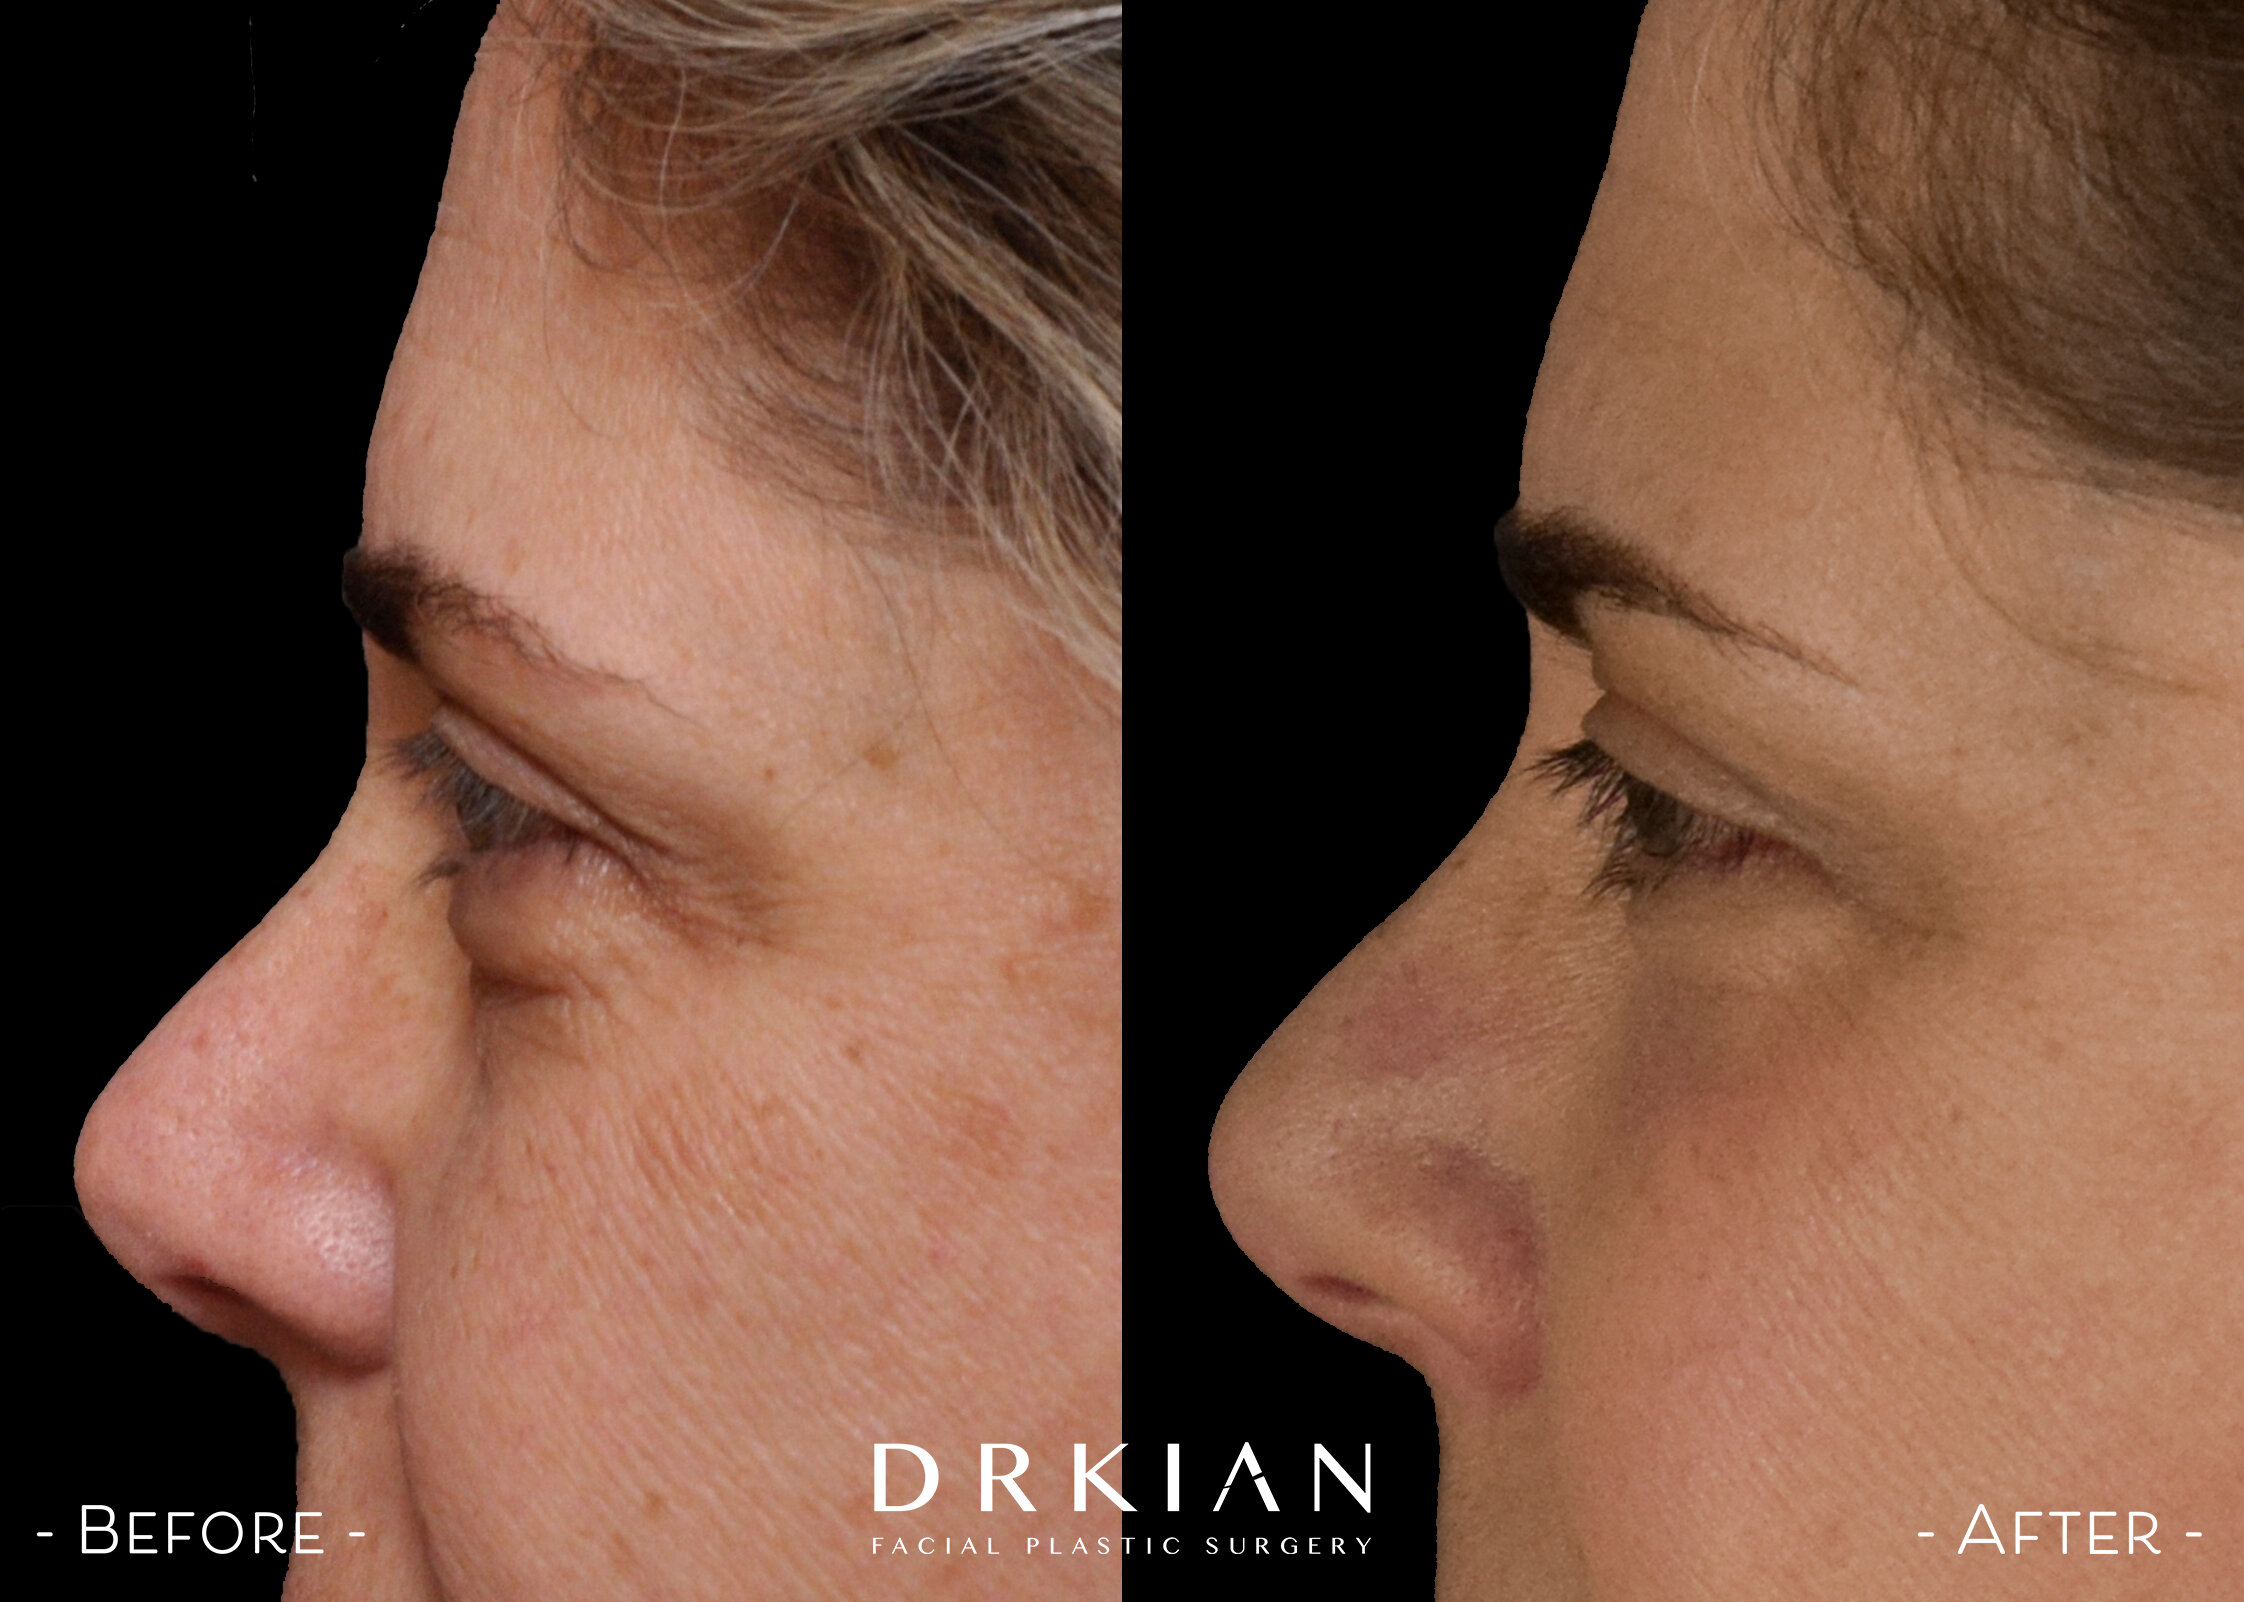
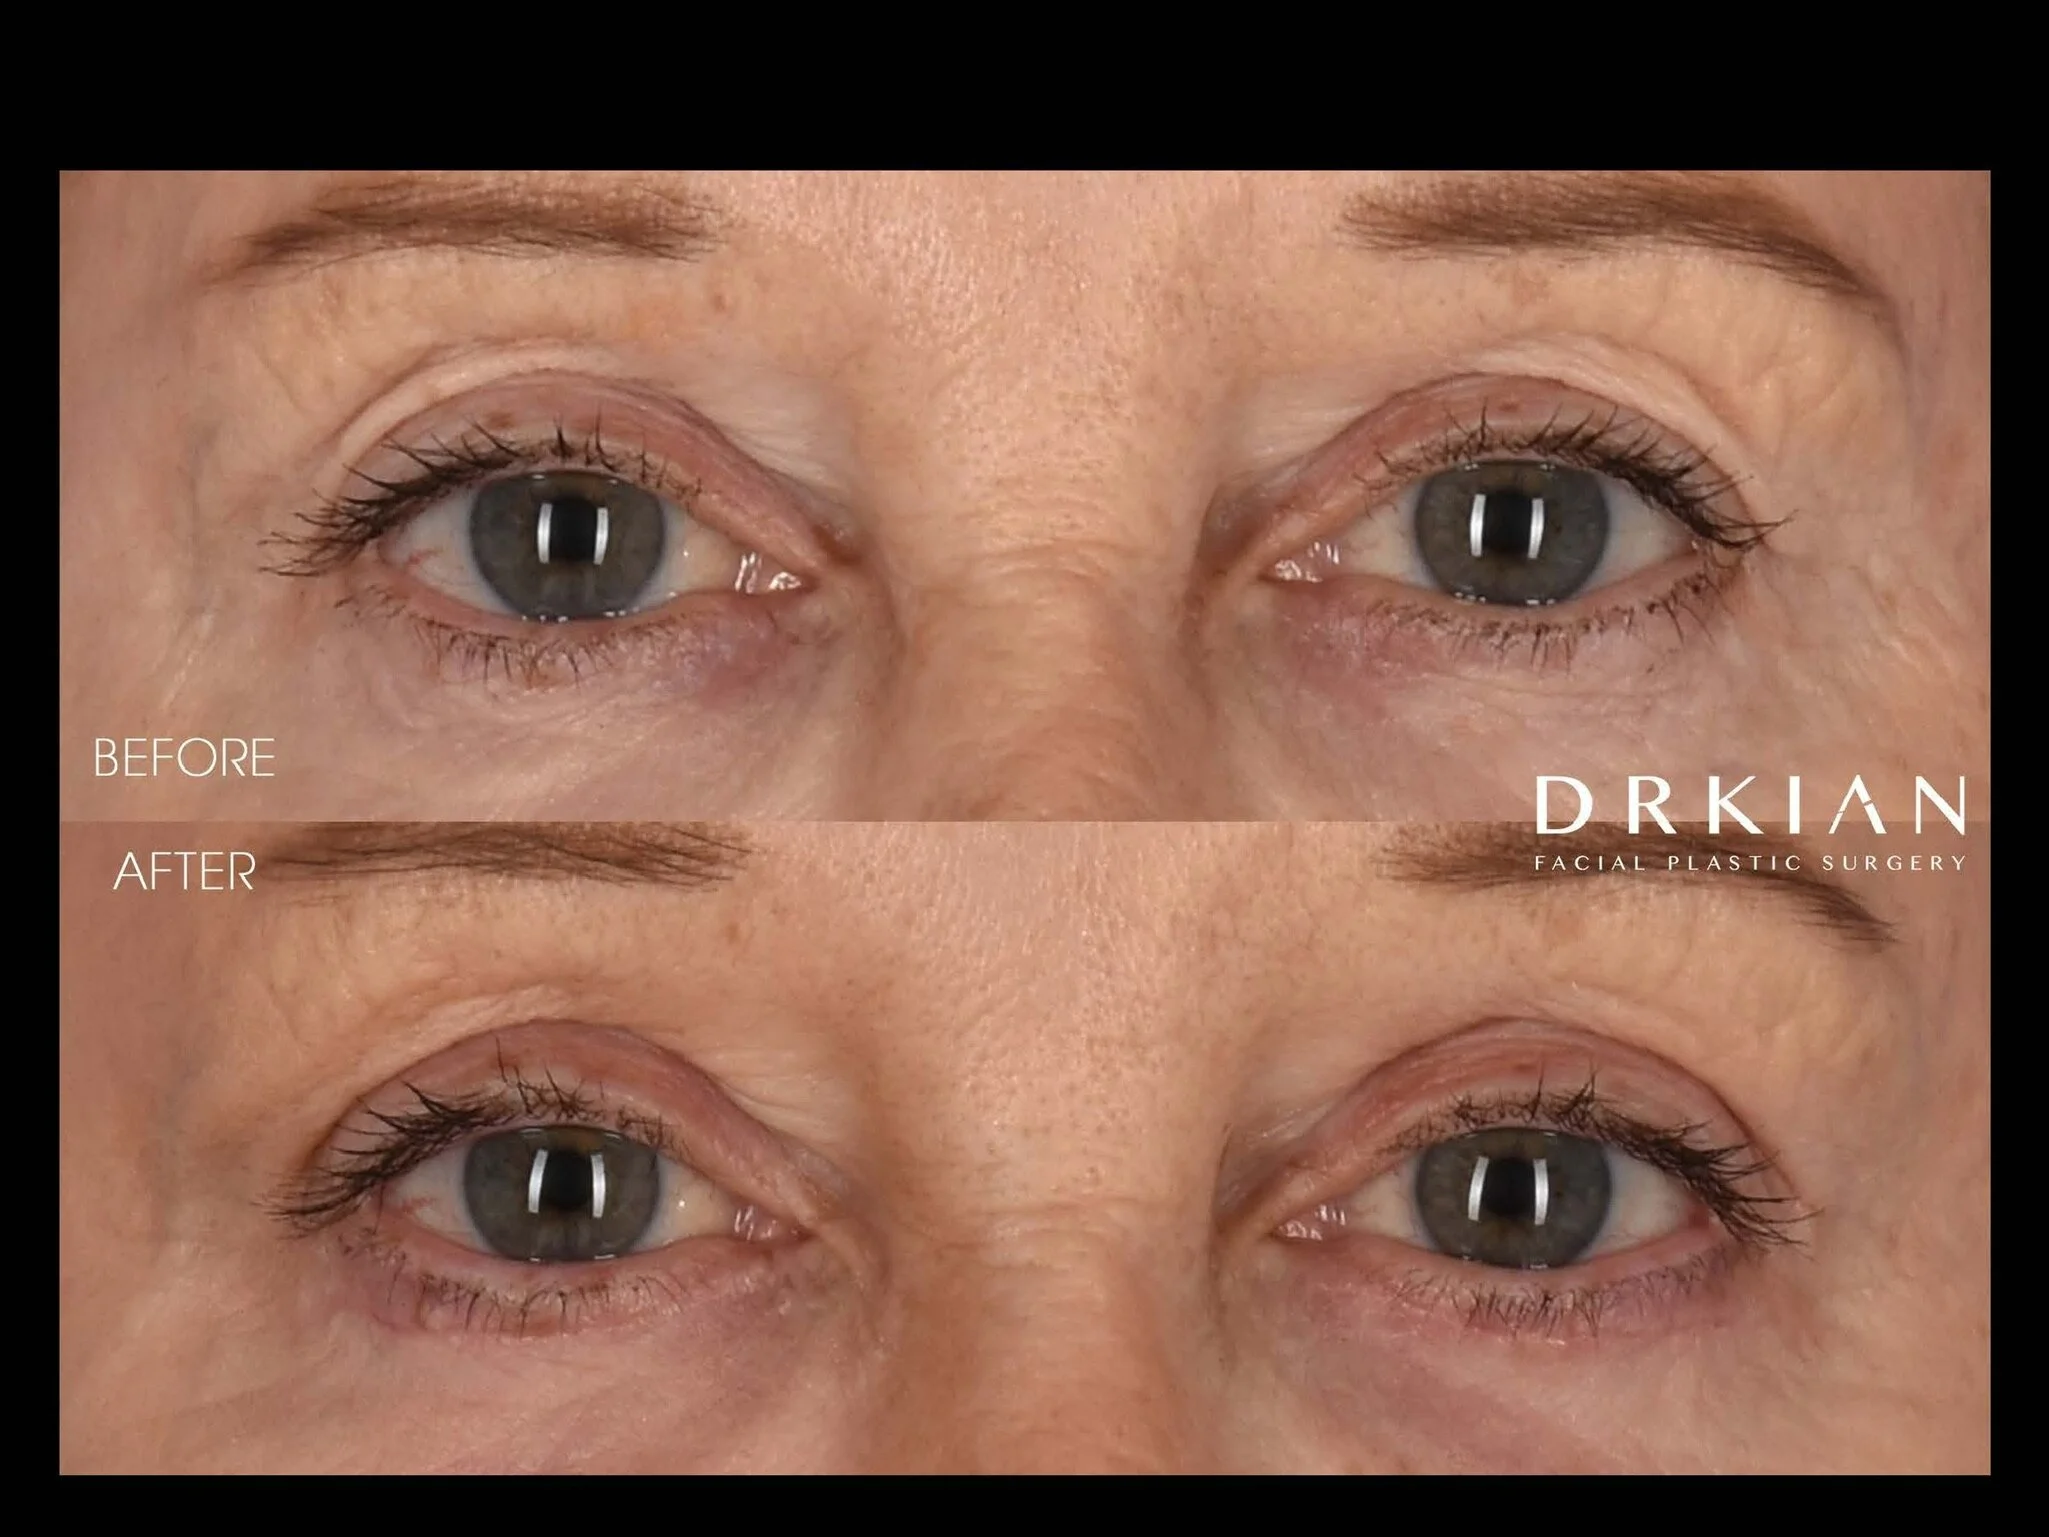
Upper Blepharoplasty, Under Local Anesthesia - Before & After Seven Months
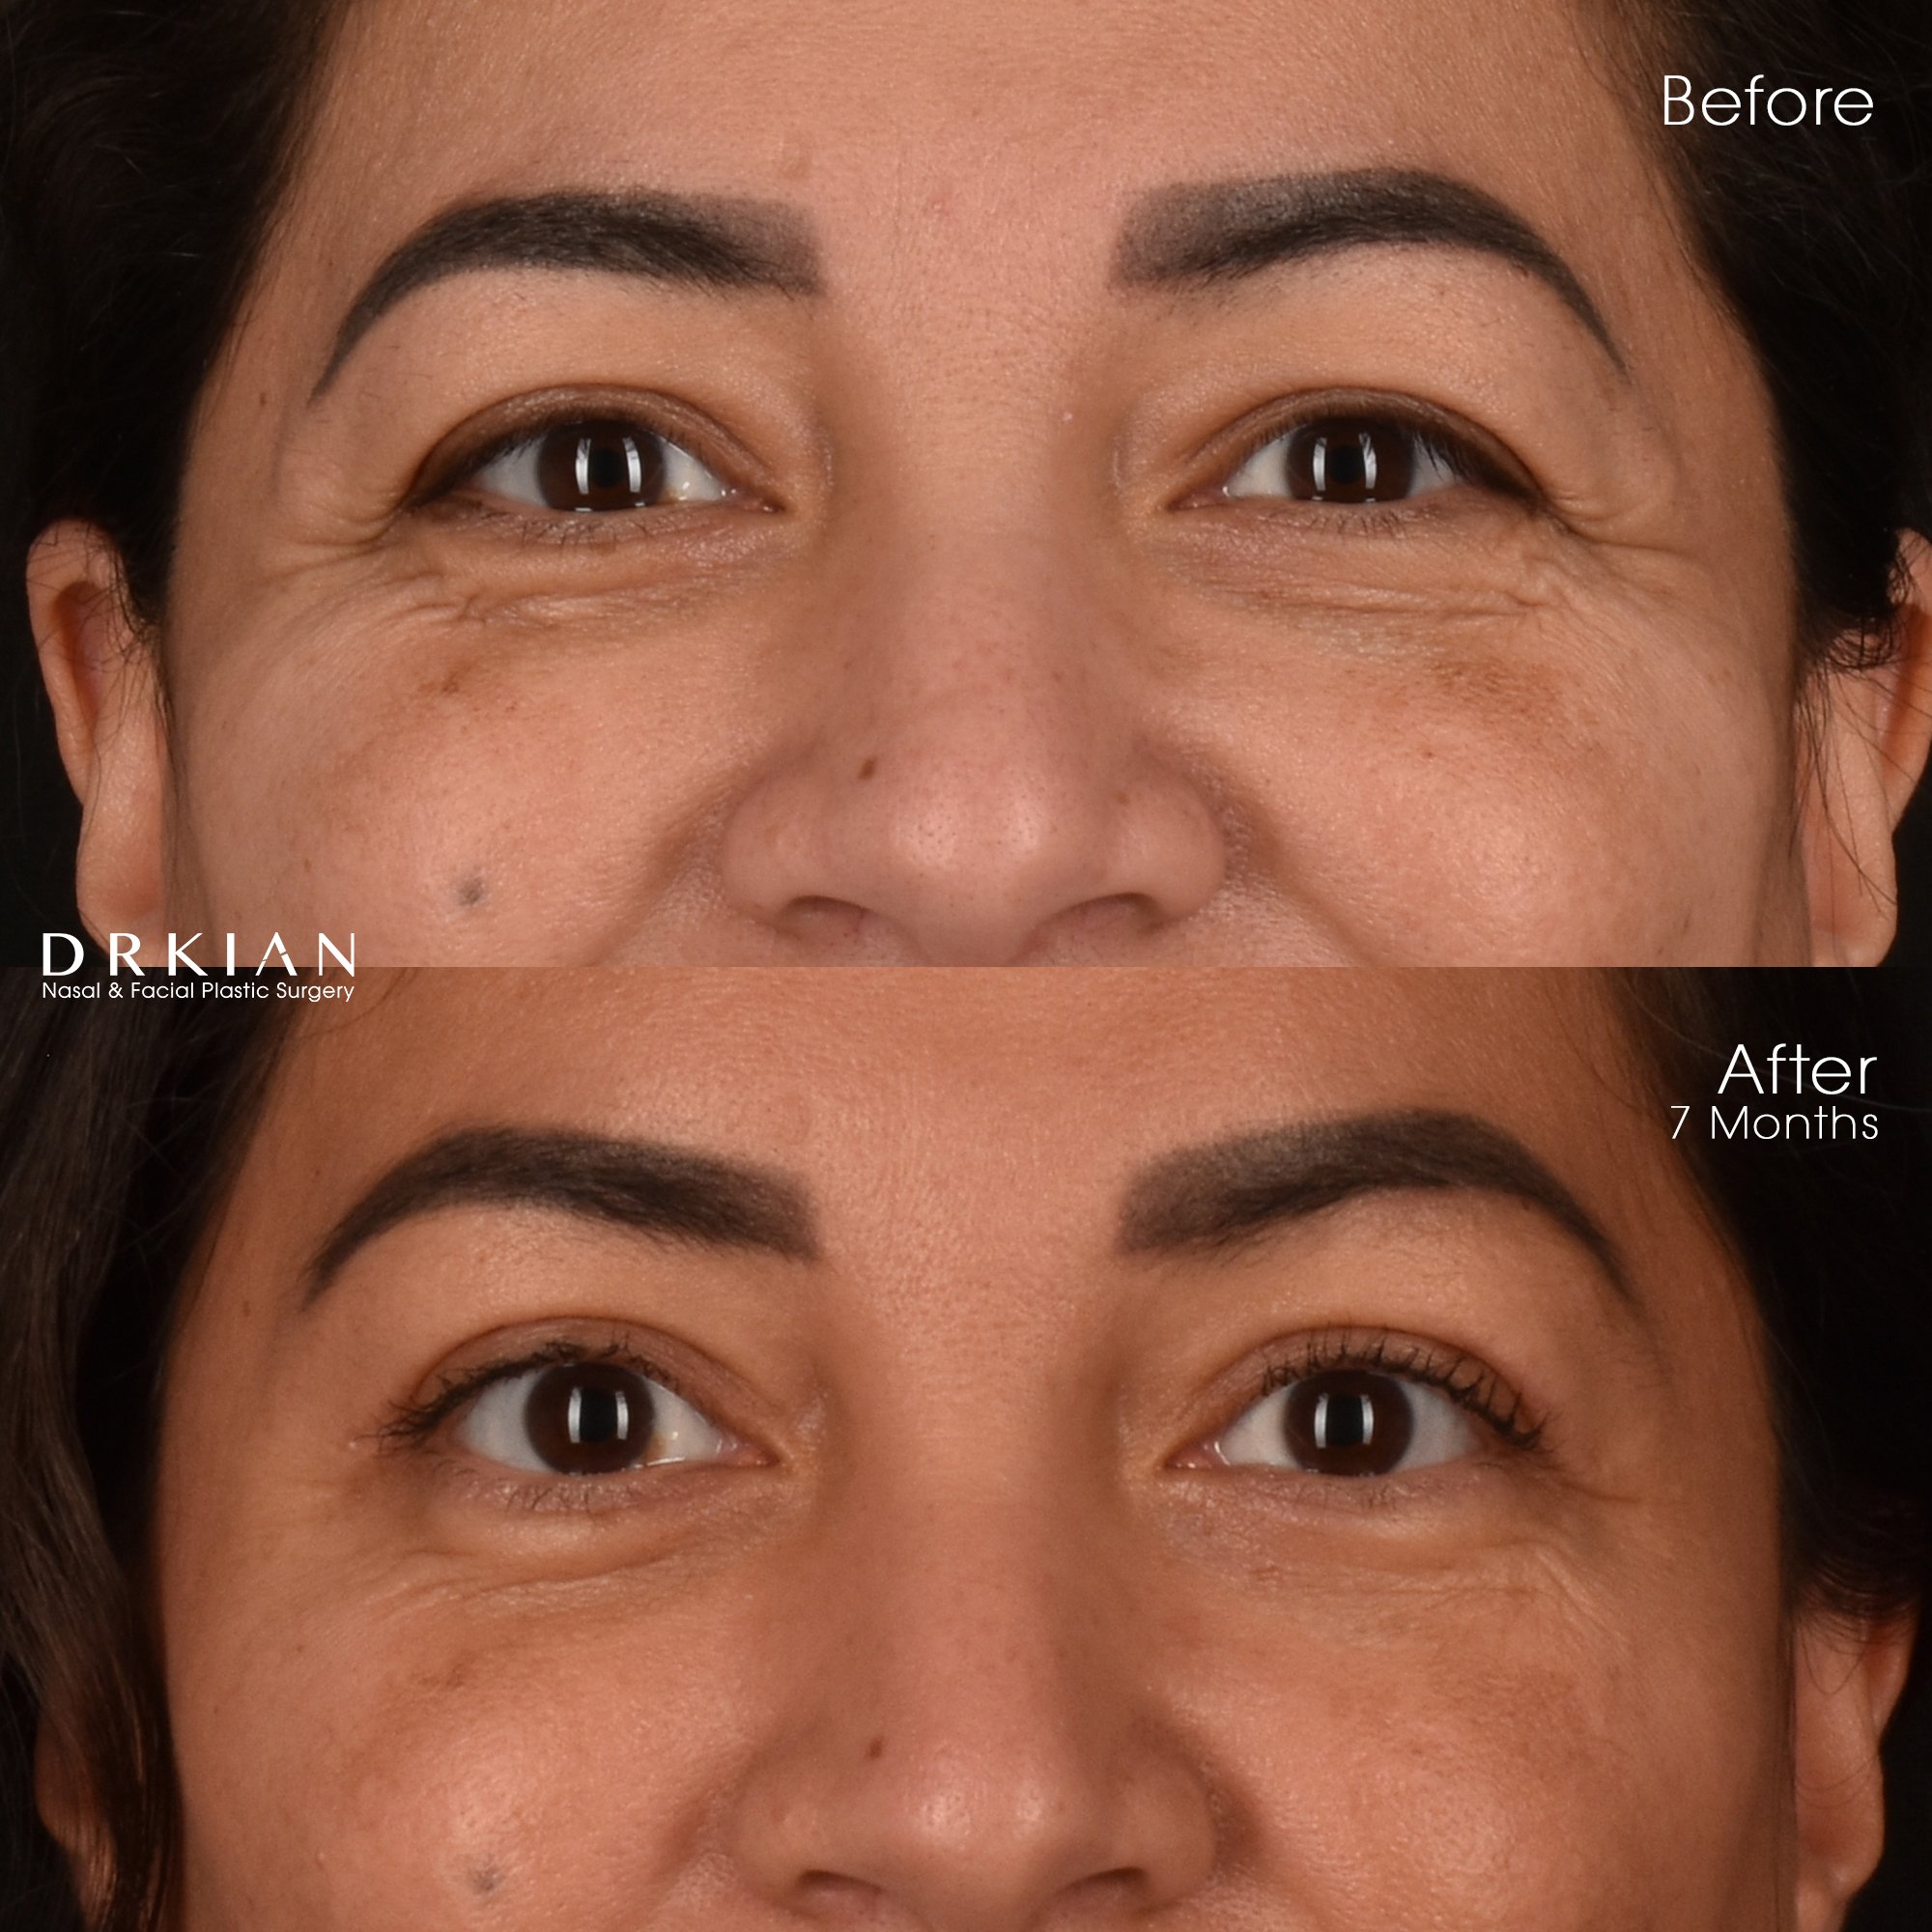
Upper Blepharoplasty, Under Local Anesthesia - Before & After Seven Months

Upper Blepharoplasty, Under Local Anesthesia - Before & After Seven Months
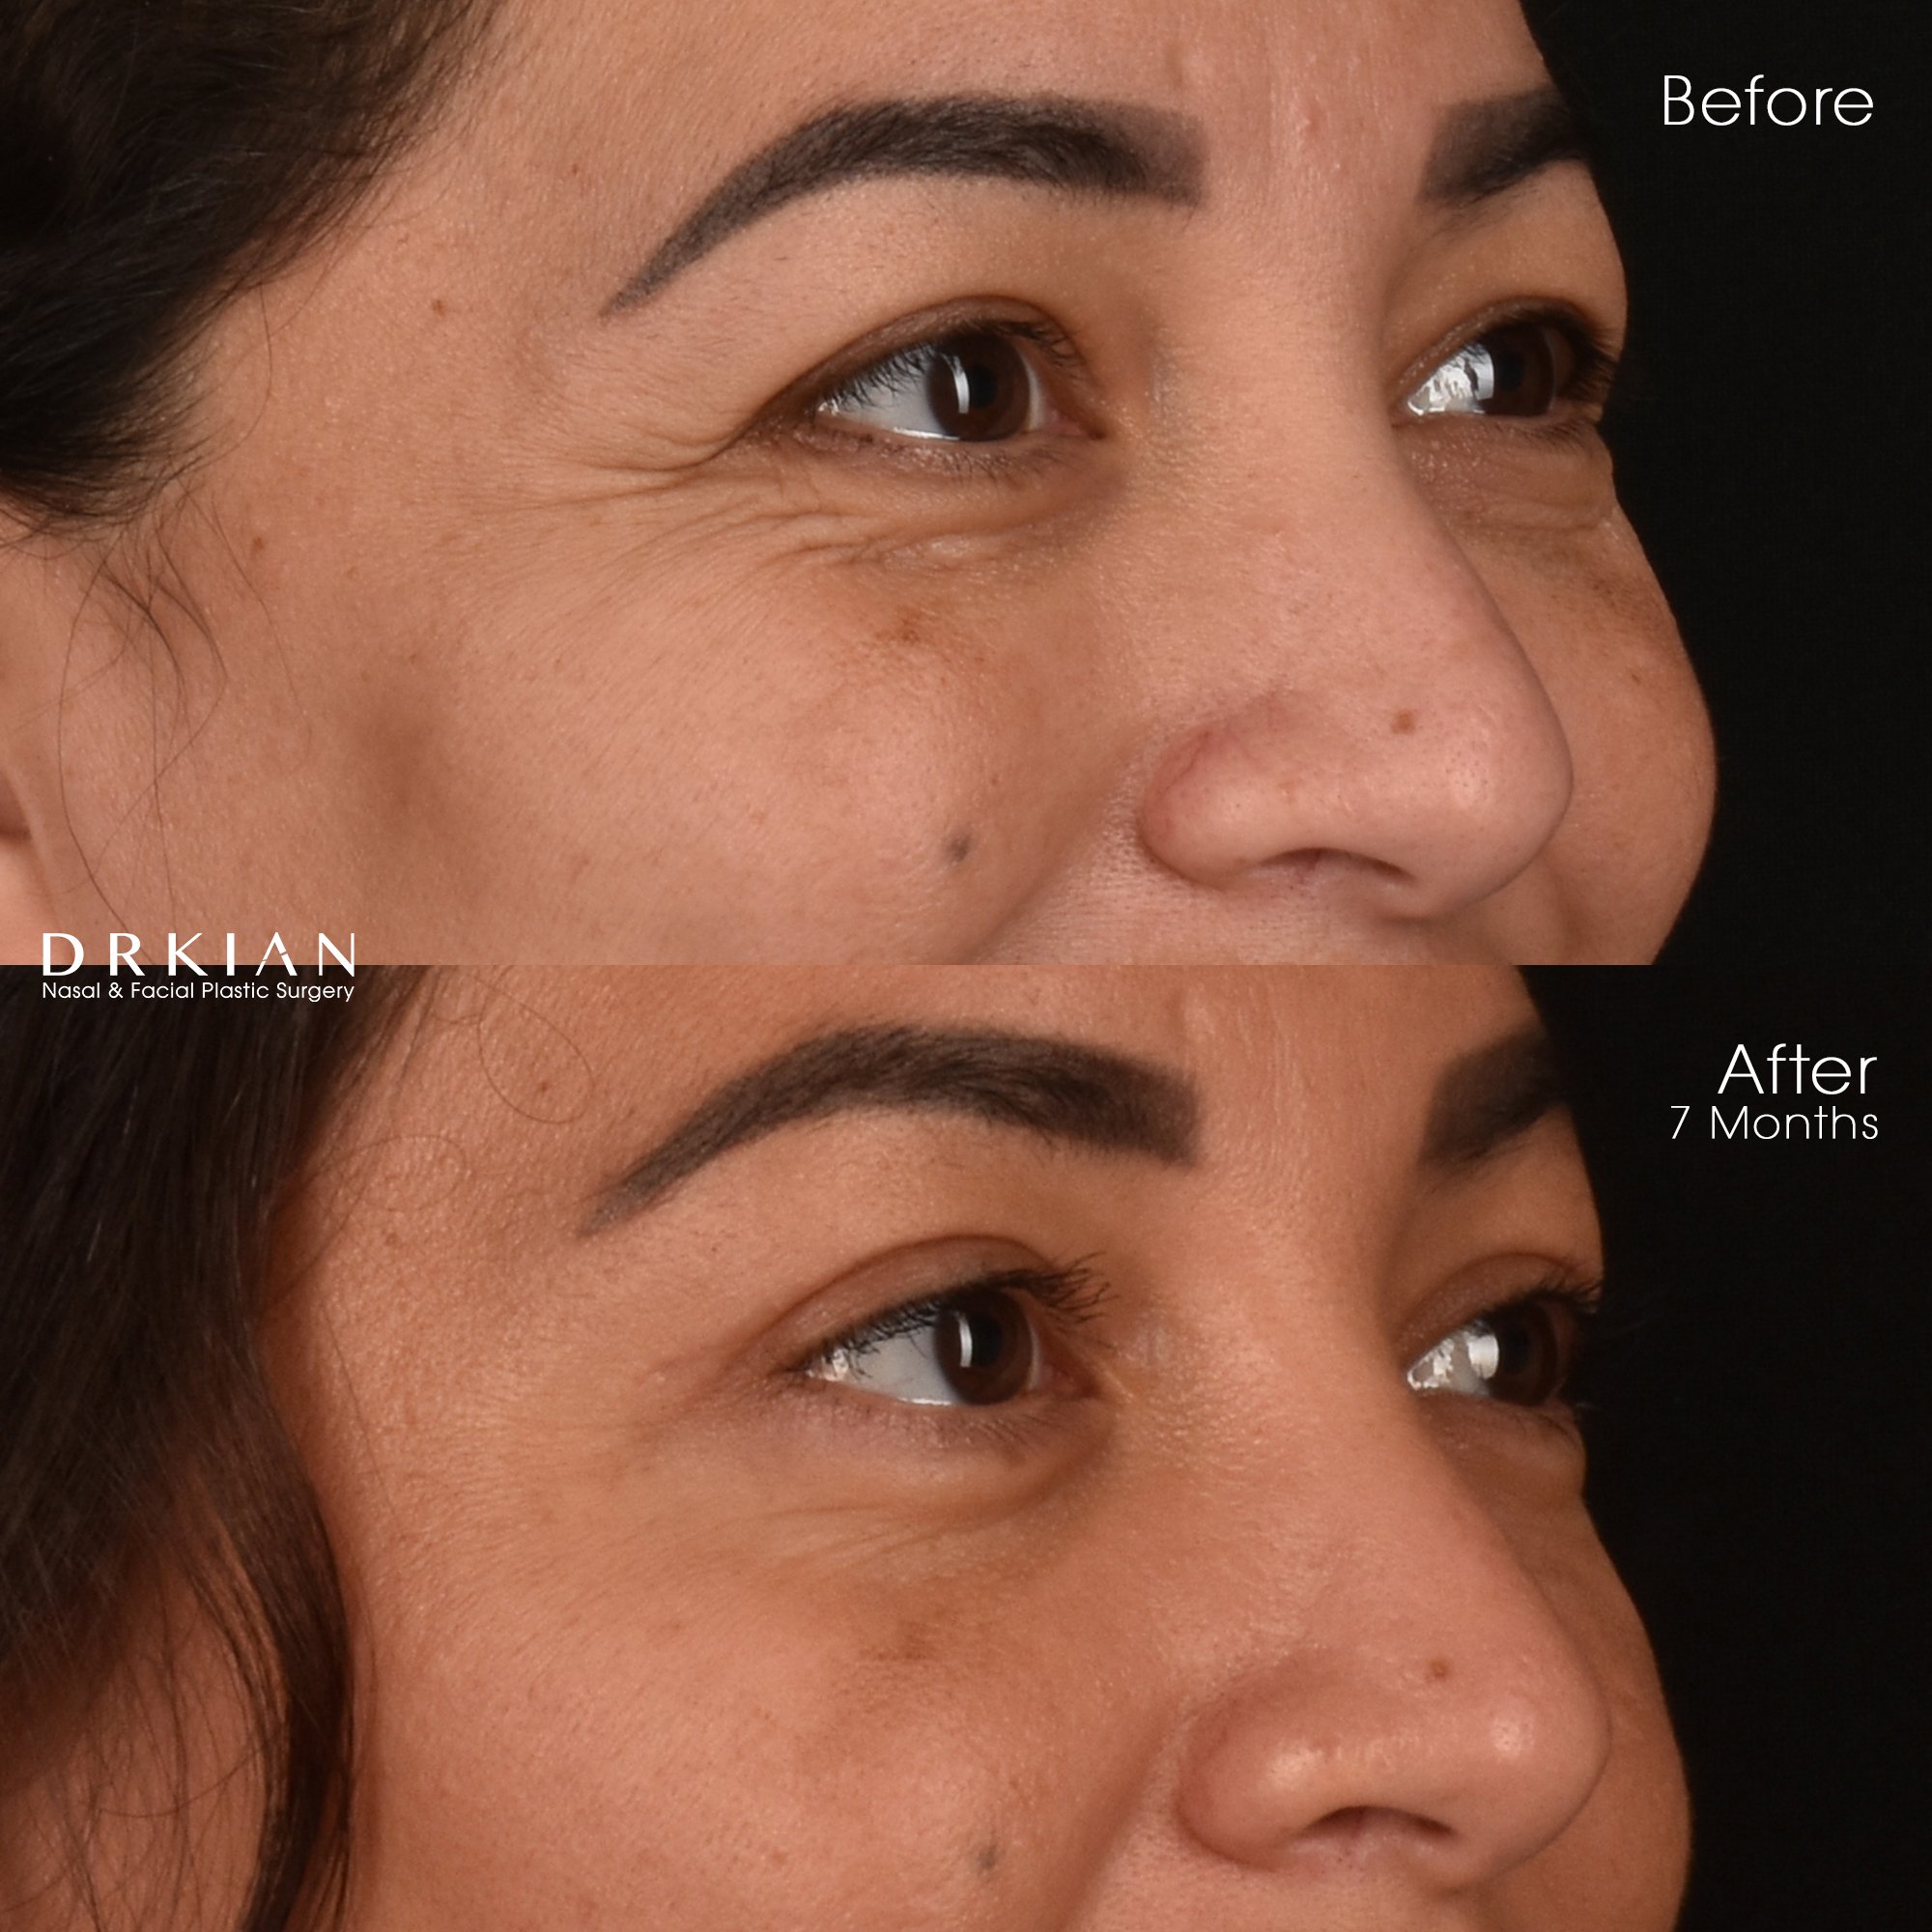
Upper Blepharoplasty, Under Local Anesthesia - Before & After Seven Months
Upper Blepharoplasty, Under Local Anesthesia - Before & After Seven Months

Upper Blepharoplasty, Under Local Anesthesia - Before & After Seven Months
Upper Blepharoplasty, Under Local Anesthesia - Before & After Seven Months

Upper Blepharoplasty, Under Local Anesthesia - Before & After Seven Months
Upper Blepharoplasty, Under Local Anesthesia - Before & After Seven Months
Upper Blepharoplasty, Under Local Anesthesia - Before & After Seven Months

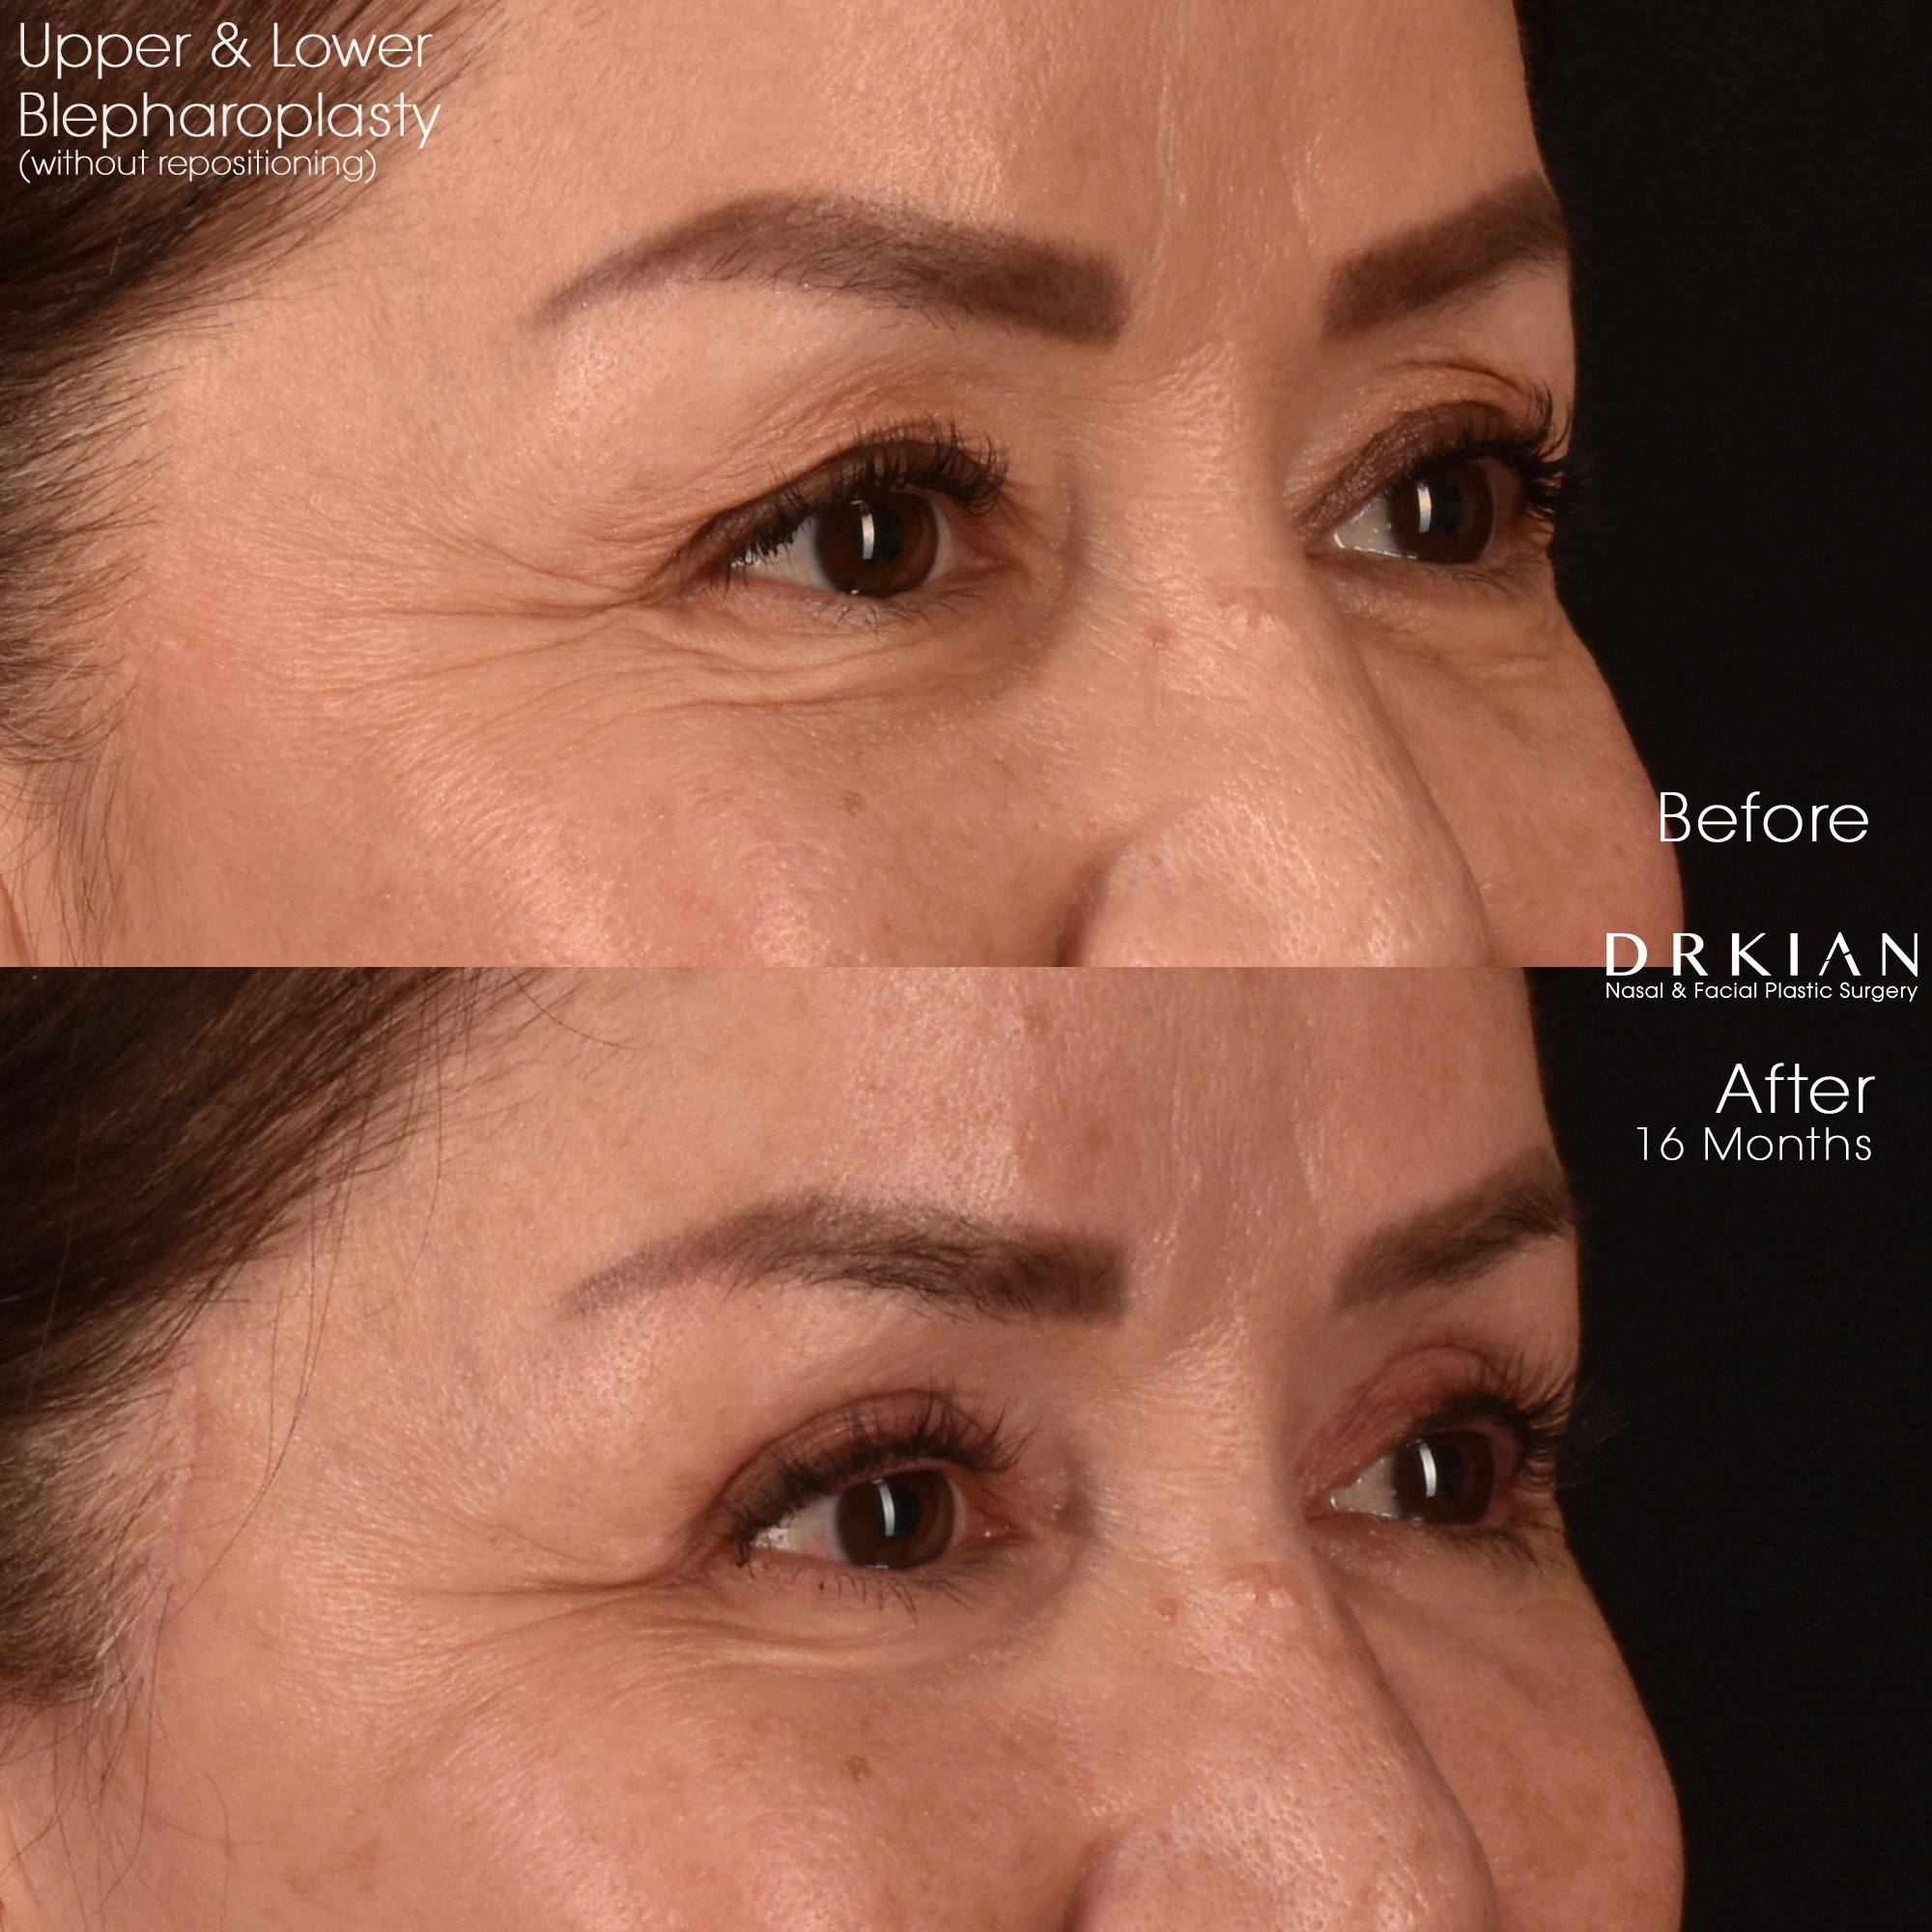
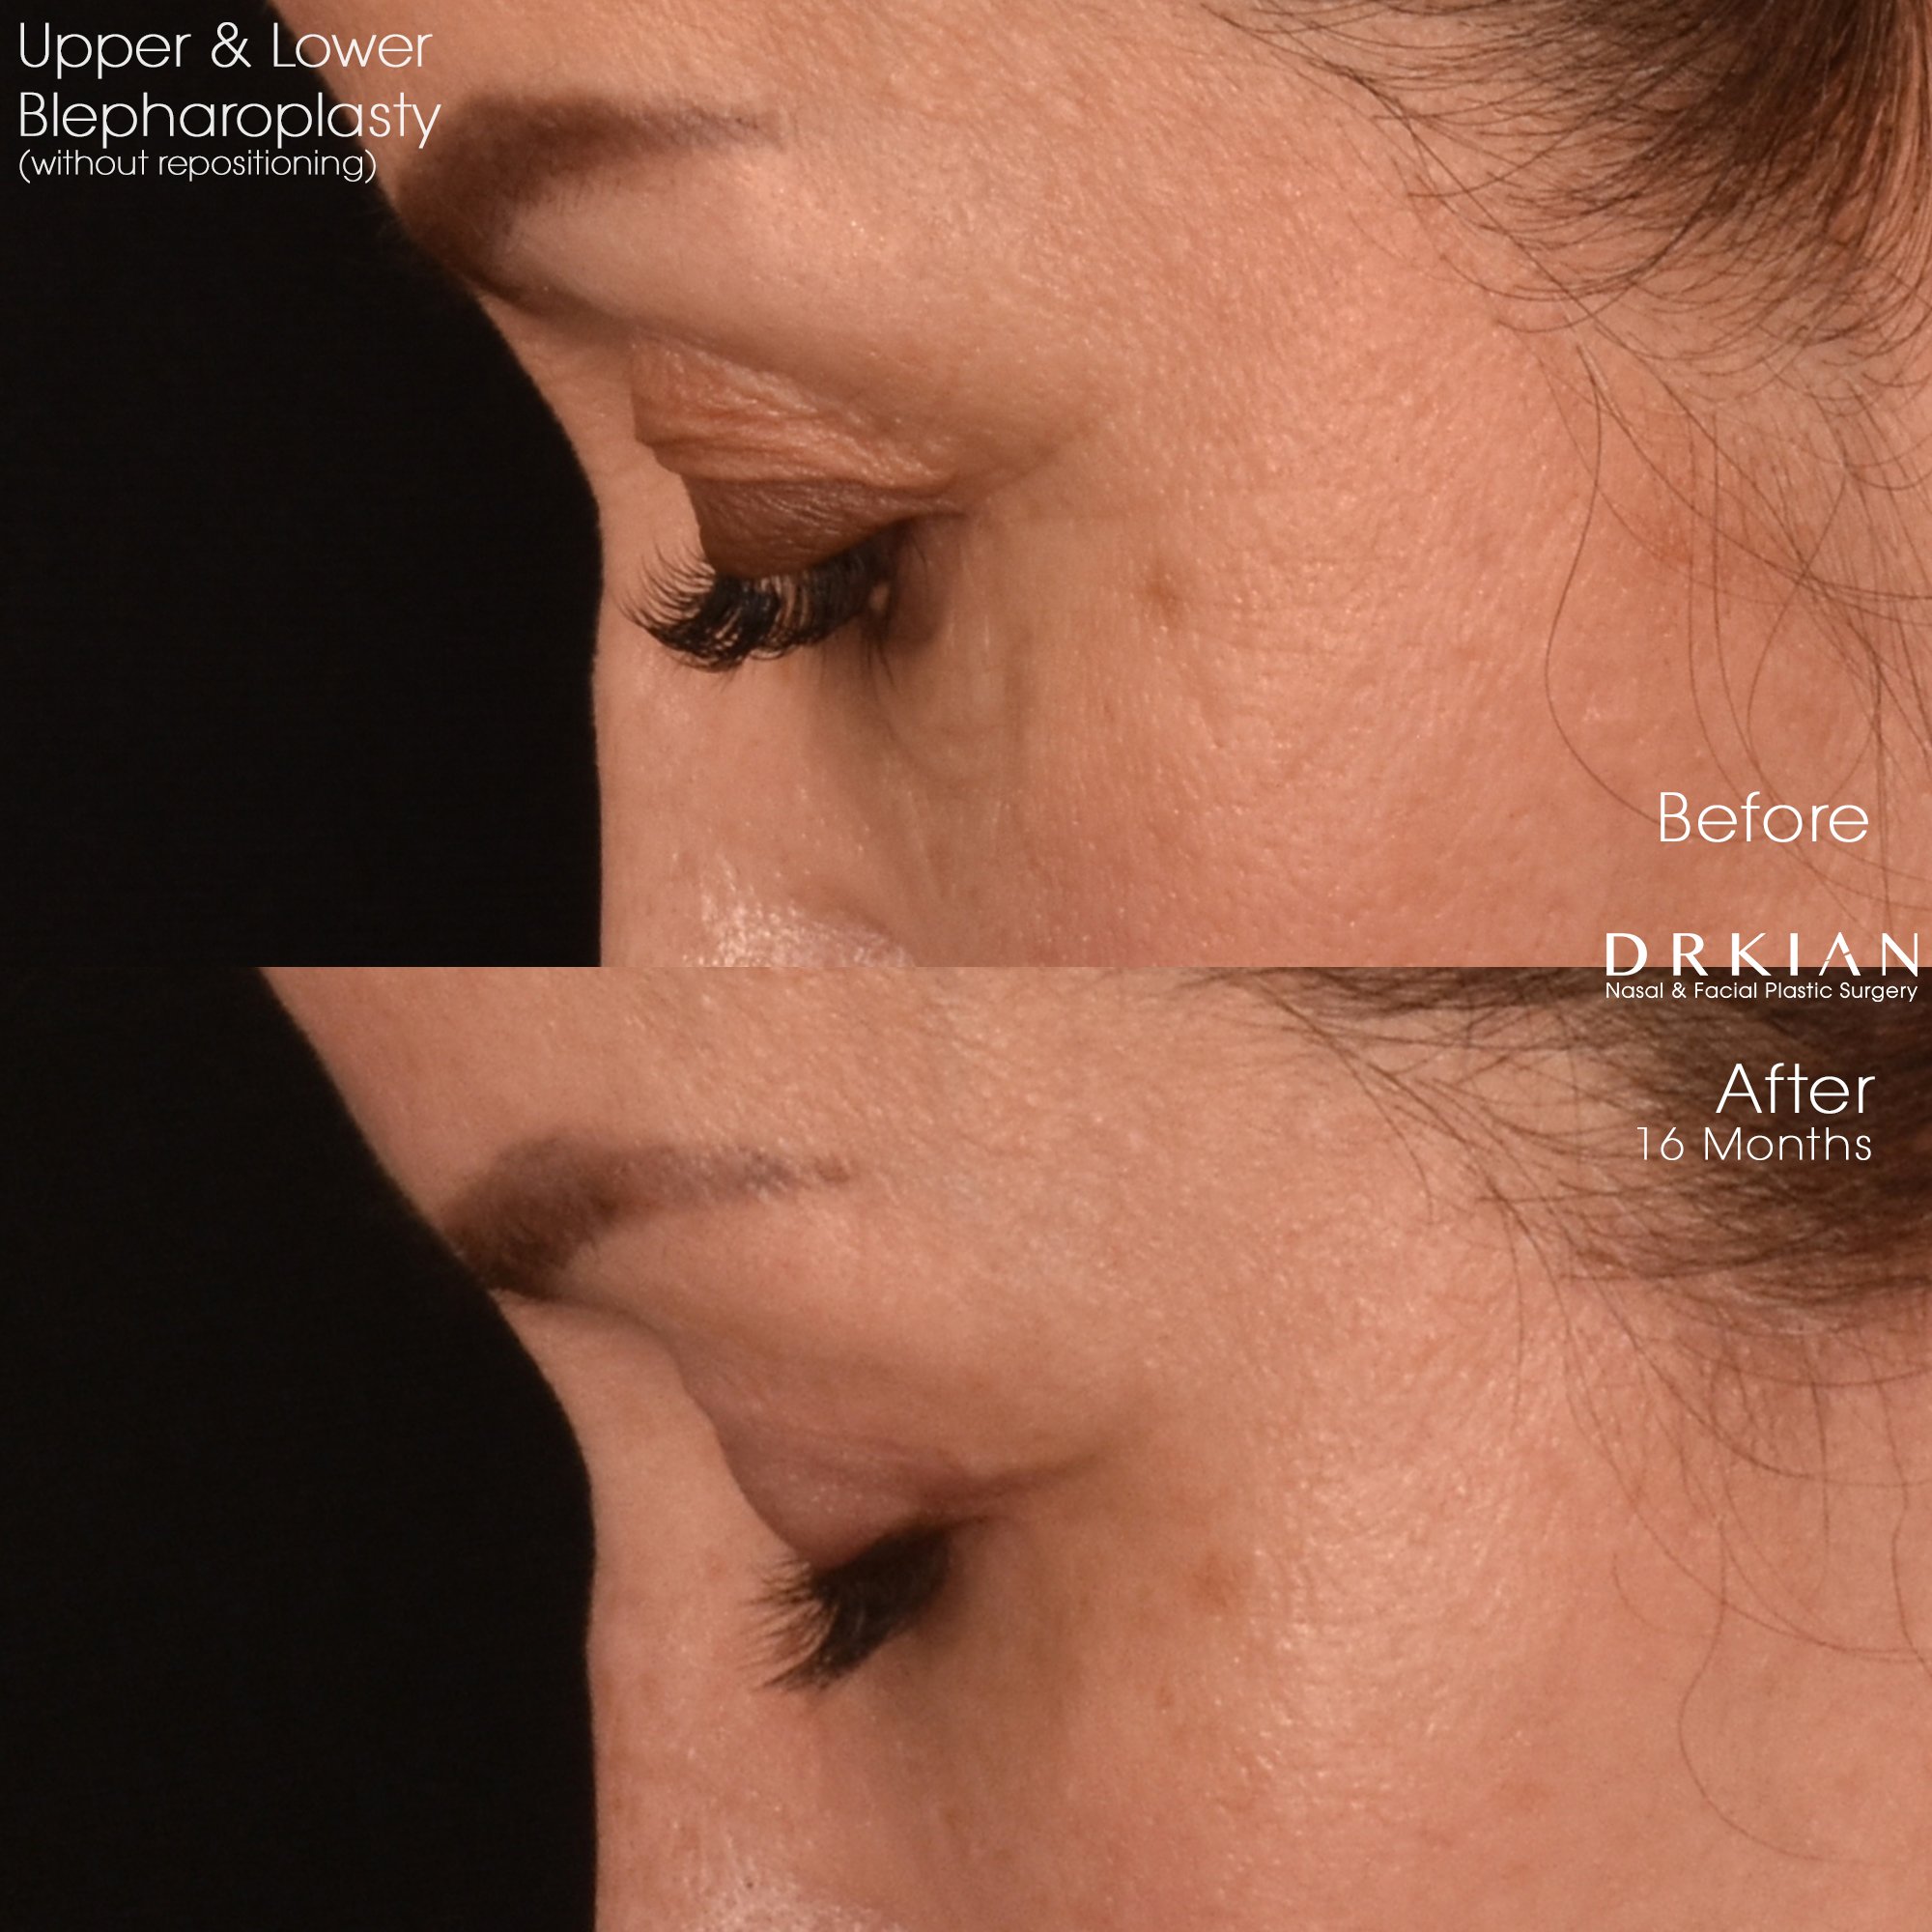
Upper & Lower Blepharoplasty (without Repositioning) with Deep Plane Lower Face & Neck Lift with Buccal Fat Reduction, and Fat Transfer to Forehead, Temples, Mid-Face and Chin: Before & After 16 Months

Upper & Lower Blepharoplasty (without Repositioning) with Deep Plane Lower Face & Neck Lift with Buccal Fat Reduction, and Fat Transfer to Forehead, Temples, Mid-Face and Chin: Before & After 16 Months

Upper & Lower Blepharoplasty (without Repositioning) with Deep Plane Lower Face & Neck Lift with Buccal Fat Reduction, and Fat Transfer to Forehead, Temples, Mid-Face and Chin: Before & After 16 Months

Upper & Lower Blepharoplasty (without Repositioning) with Deep Plane Lower Face & Neck Lift with Buccal Fat Reduction, and Fat Transfer to Forehead, Temples, Mid-Face and Chin: Before & After 16 Months
Upper & Lower Blepharoplasty (without Repositioning) with Deep Plane Lower Face & Neck Lift with Buccal Fat Reduction, and Fat Transfer to Forehead, Temples, Mid-Face and Chin: Before & After 16 Months

Upper & Lower Blepharoplasty (without Repositioning) with Deep Plane Lower Face & Neck Lift with Buccal Fat Reduction, and Fat Transfer to Forehead, Temples, Mid-Face and Chin: Before & After 16 Months

Upper & Lower Blepharoplasty (without Repositioning) with Deep Plane Lower Face & Neck Lift with Buccal Fat Reduction, and Fat Transfer to Forehead, Temples, Mid-Face and Chin: Before & After 16 Months

Upper & Lower Blepharoplasty (without Repositioning) with Deep Plane Lower Face & Neck Lift with Buccal Fat Reduction, and Fat Transfer to Forehead, Temples, Mid-Face and Chin: Before & After 16 Months

Upper & Lower Blepharoplasty (without Repositioning) with Deep Plane Lower Face & Neck Lift with Buccal Fat Reduction, and Fat Transfer to Forehead, Temples, Mid-Face and Chin: Before & After 16 Months

Upper & Lower Blepharoplasty (without Repositioning) with Deep Plane Lower Face & Neck Lift with Buccal Fat Reduction, and Fat Transfer to Forehead, Temples, Mid-Face and Chin: Before & After 16 Months

Upper & Lower Blepharoplasty (without Repositioning) with Deep Plane Lower Face & Neck Lift with Buccal Fat Reduction, and Fat Transfer to Forehead, Temples, Mid-Face and Chin: Before & After 16 Months
Upper & Lower Blepharoplasty (without Repositioning) with Deep Plane Lower Face & Neck Lift with Buccal Fat Reduction, and Fat Transfer to Forehead, Temples, Mid-Face and Chin: Before & After 16 Months

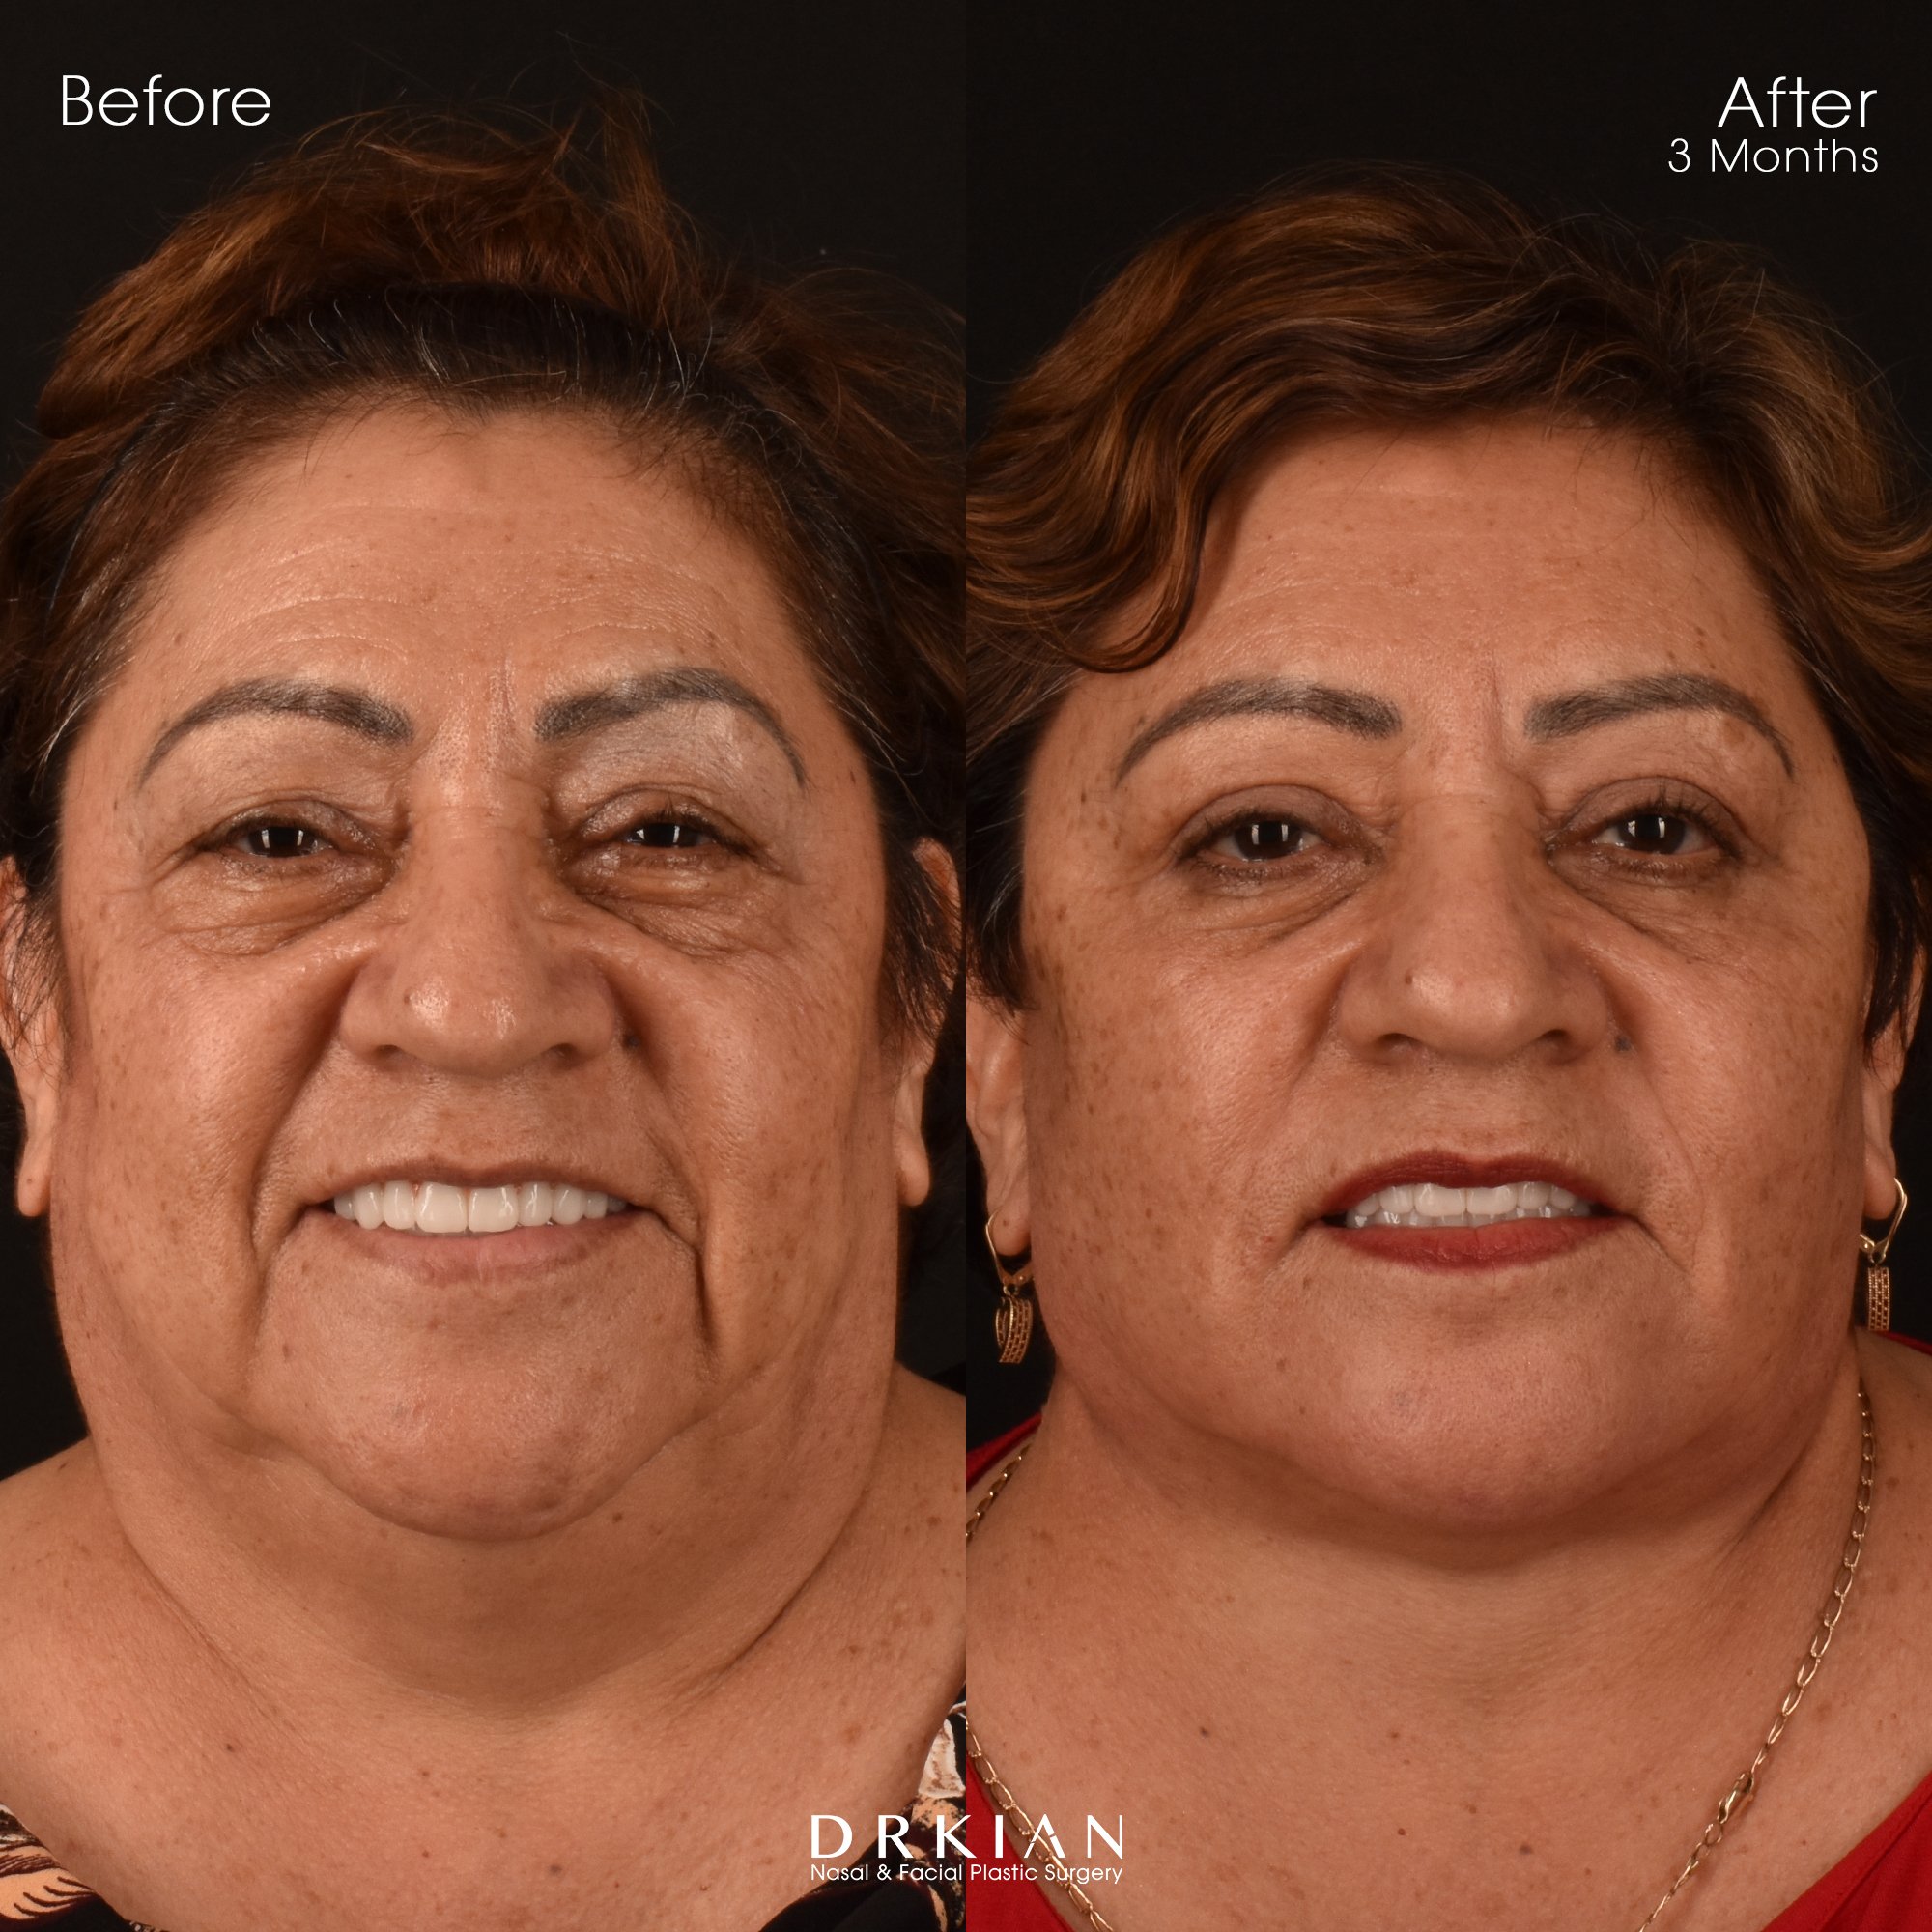
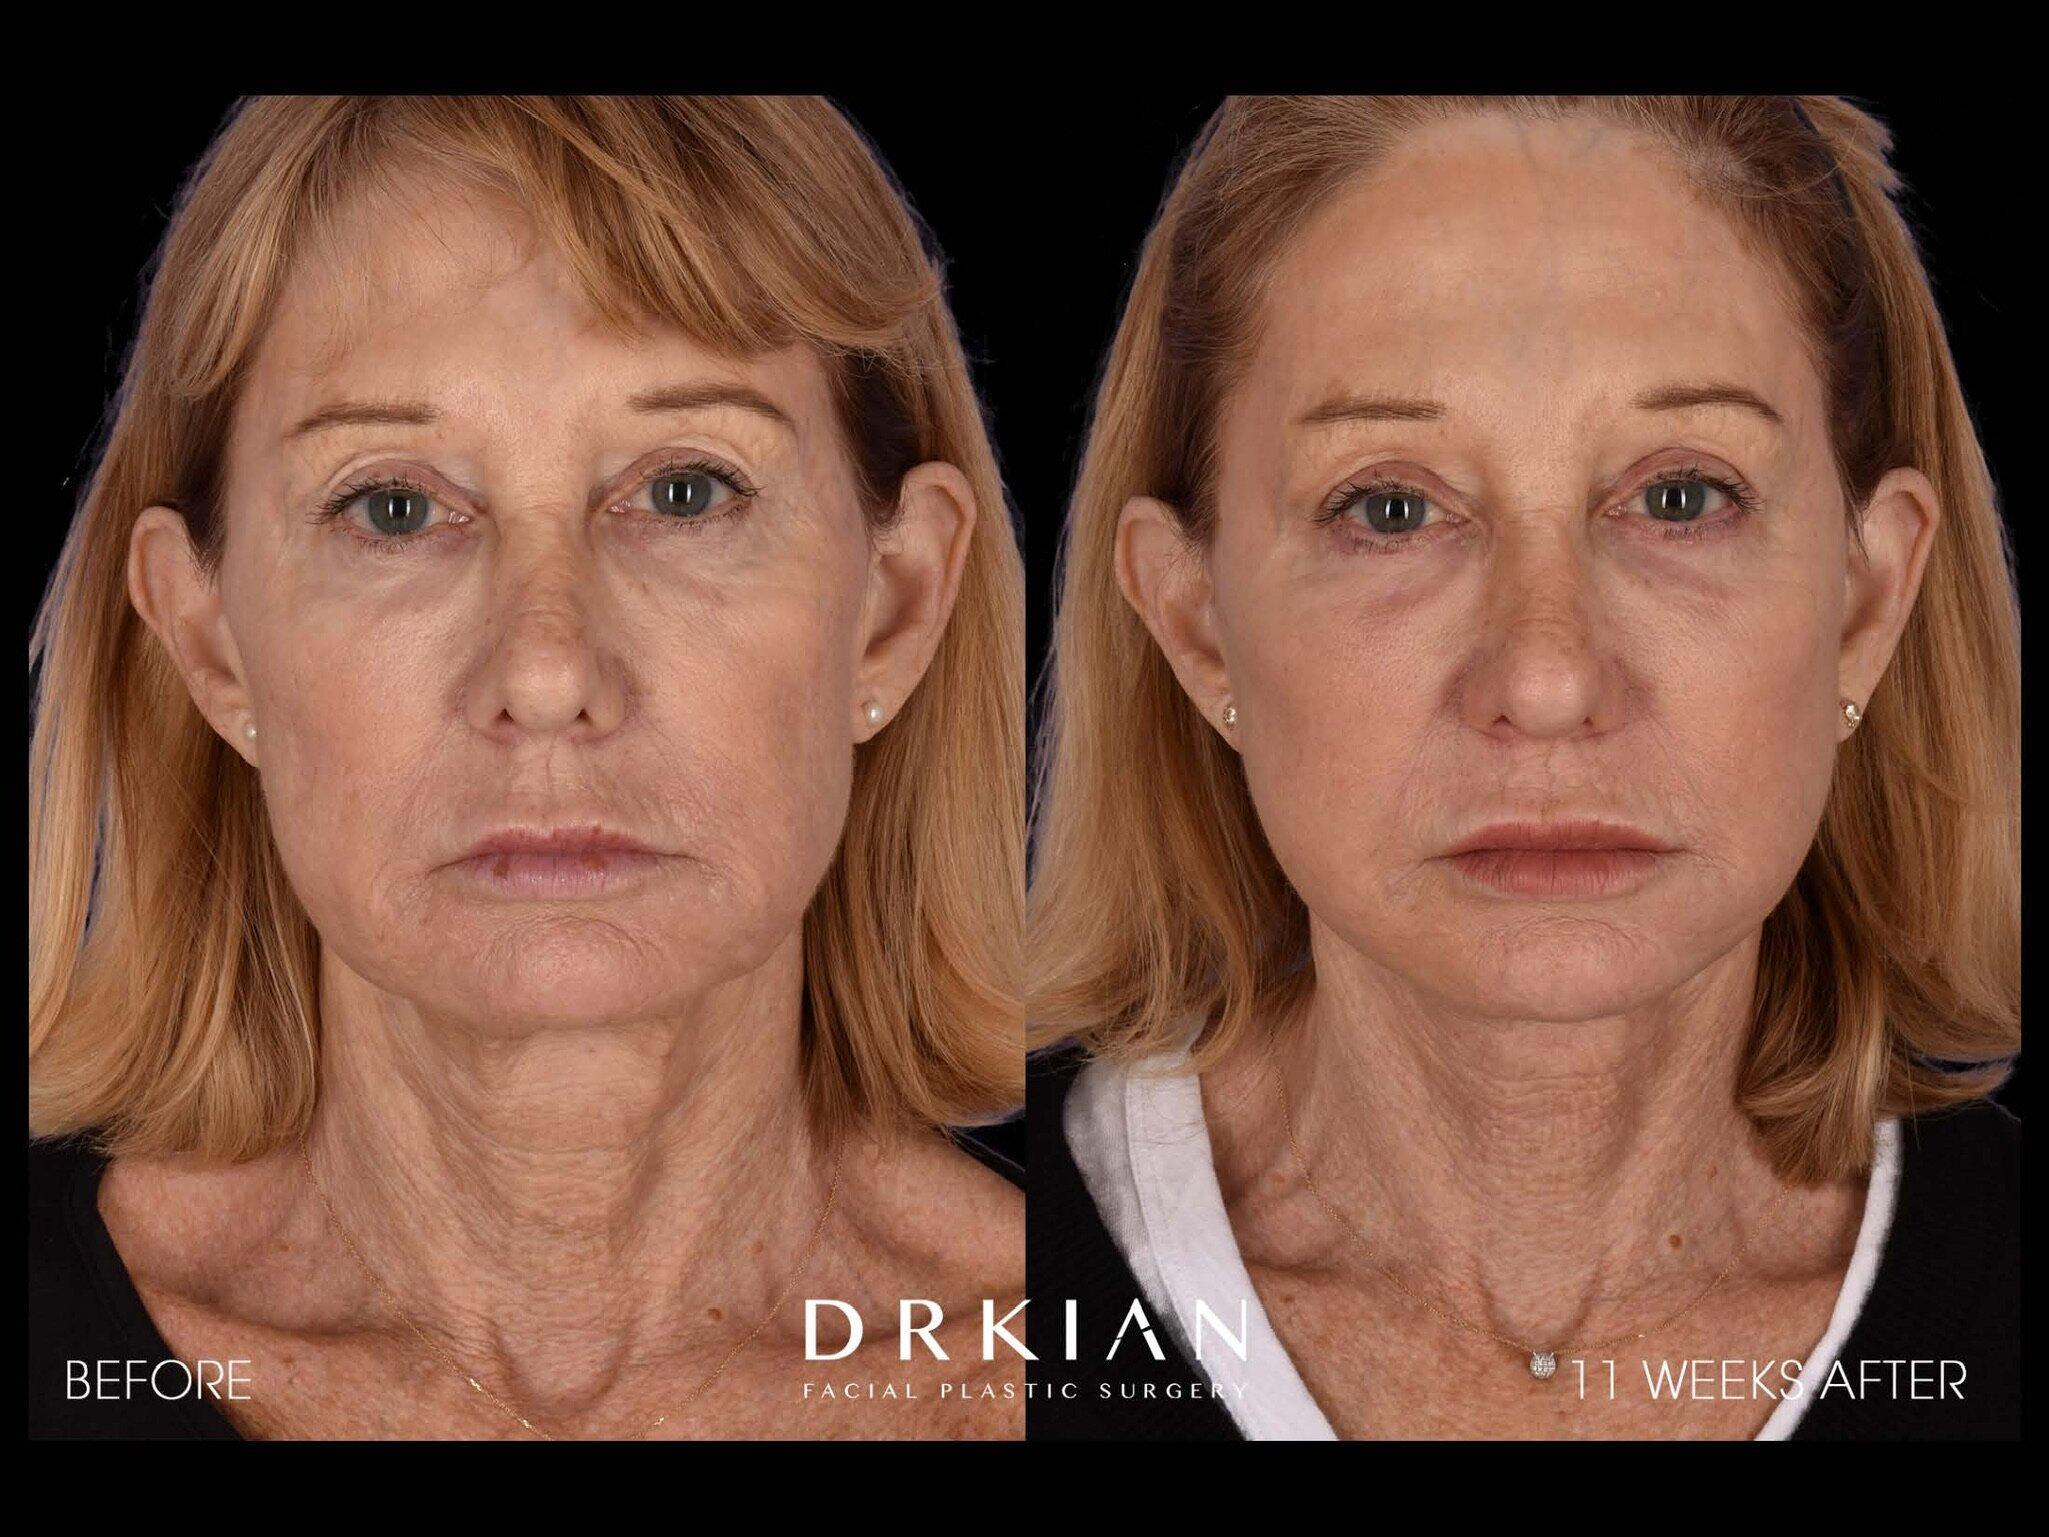
Deep Plane Lower Face & Neck Lift, Upper & Lower Blepharoplasty (without Repositioning), Full-Face Fat Transfer: Before & After Three Months
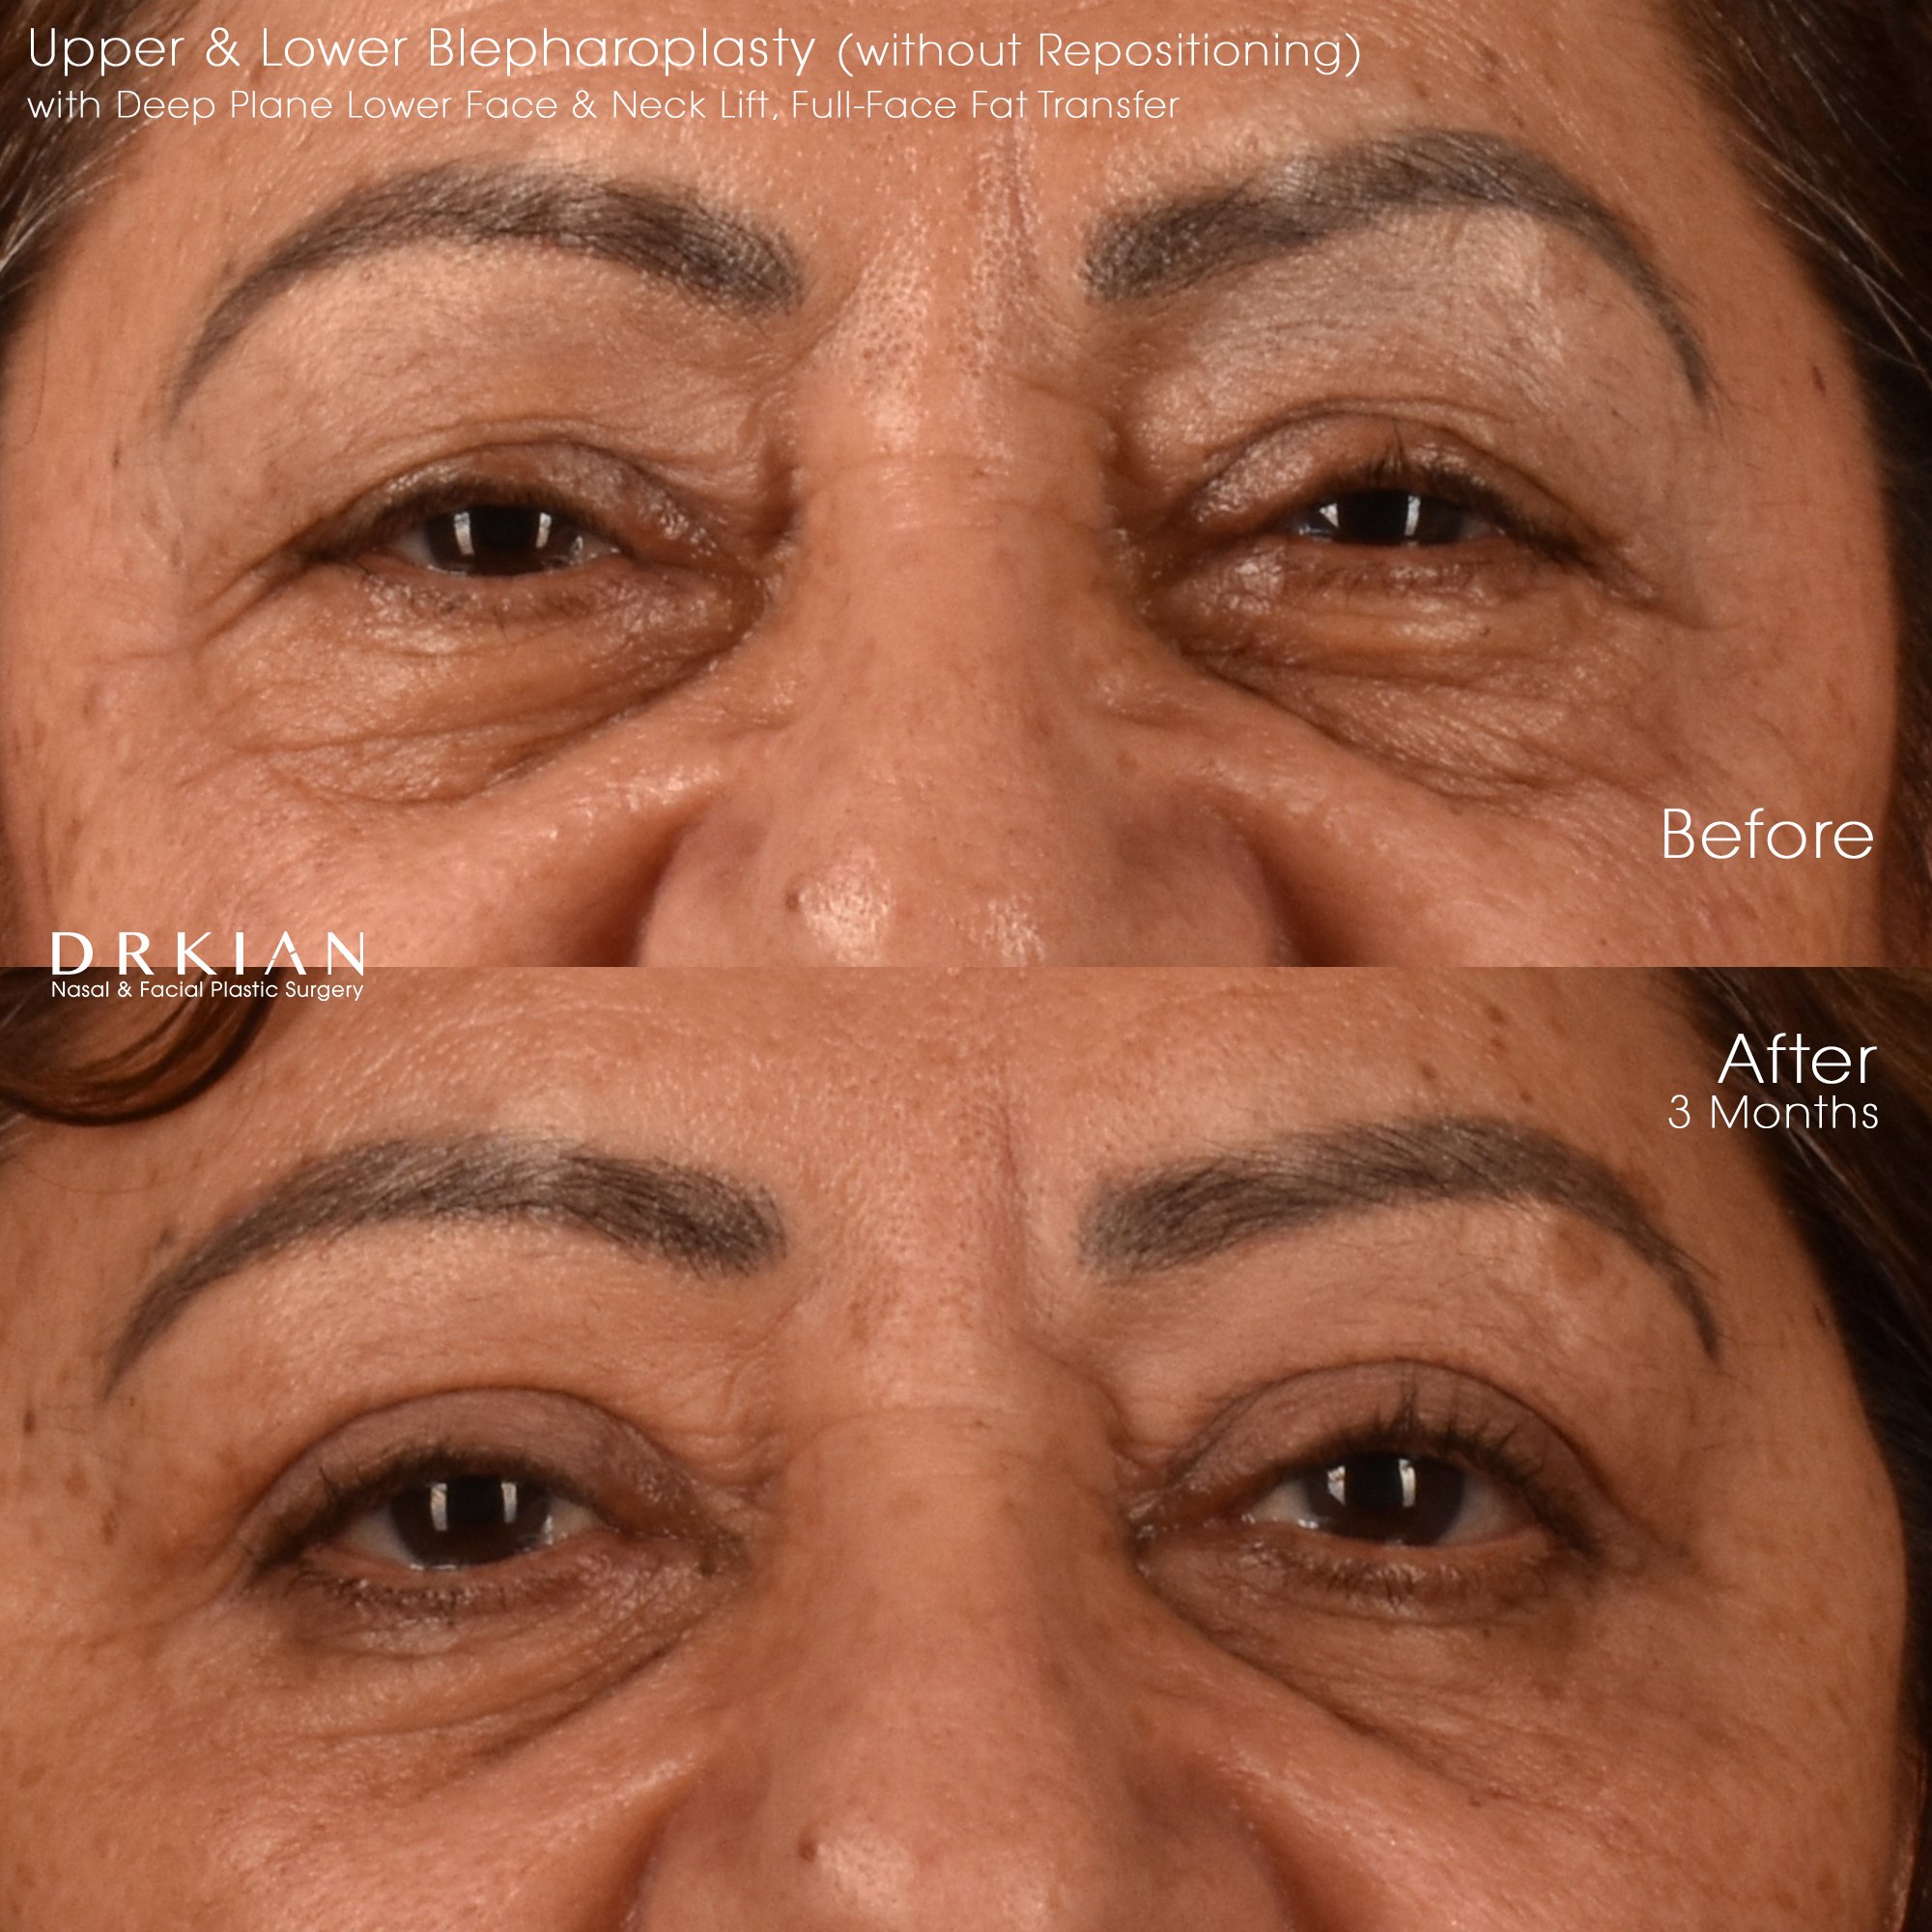
Deep Plane Lower Face & Neck Lift, Upper & Lower Blepharoplasty (without Repositioning), Full-Face Fat Transfer: Before & After Three Months

Deep Plane Lower Face & Neck Lift, Upper & Lower Blepharoplasty (without Repositioning), Full-Face Fat Transfer: Before & After Three Months
Deep Plane Lower Face & Neck Lift, Upper & Lower Blepharoplasty (without Repositioning), Full-Face Fat Transfer: Before & After Three Months

Deep Plane Lower Face & Neck Lift, Upper & Lower Blepharoplasty (without Repositioning), Full-Face Fat Transfer: Before & After Three Months

Deep Plane Lower Face & Neck Lift, Upper & Lower Blepharoplasty (without Repositioning), Full-Face Fat Transfer: Before & After Three Months

Deep Plane Lower Face & Neck Lift, Upper & Lower Blepharoplasty (without Repositioning), Full-Face Fat Transfer: Before & After Three Months

Deep Plane Lower Face & Neck Lift, Upper & Lower Blepharoplasty (without Repositioning), Full-Face Fat Transfer: Before & After Three Months

Deep Plane Lower Face & Neck Lift, Upper & Lower Blepharoplasty (without Repositioning), Full-Face Fat Transfer: Before & After Three Months
Deep Plane Lower Face & Neck Lift, Upper & Lower Blepharoplasty (without Repositioning), Full-Face Fat Transfer: Before & After Three Months

Deep Plane Lower Face & Neck Lift, Upper & Lower Blepharoplasty (without Repositioning), Full-Face Fat Transfer: Before & After Three Months

Deep Plane Lower Face & Neck Lift, Upper & Lower Blepharoplasty (without Repositioning), Full-Face Fat Transfer: Before & After Three Months

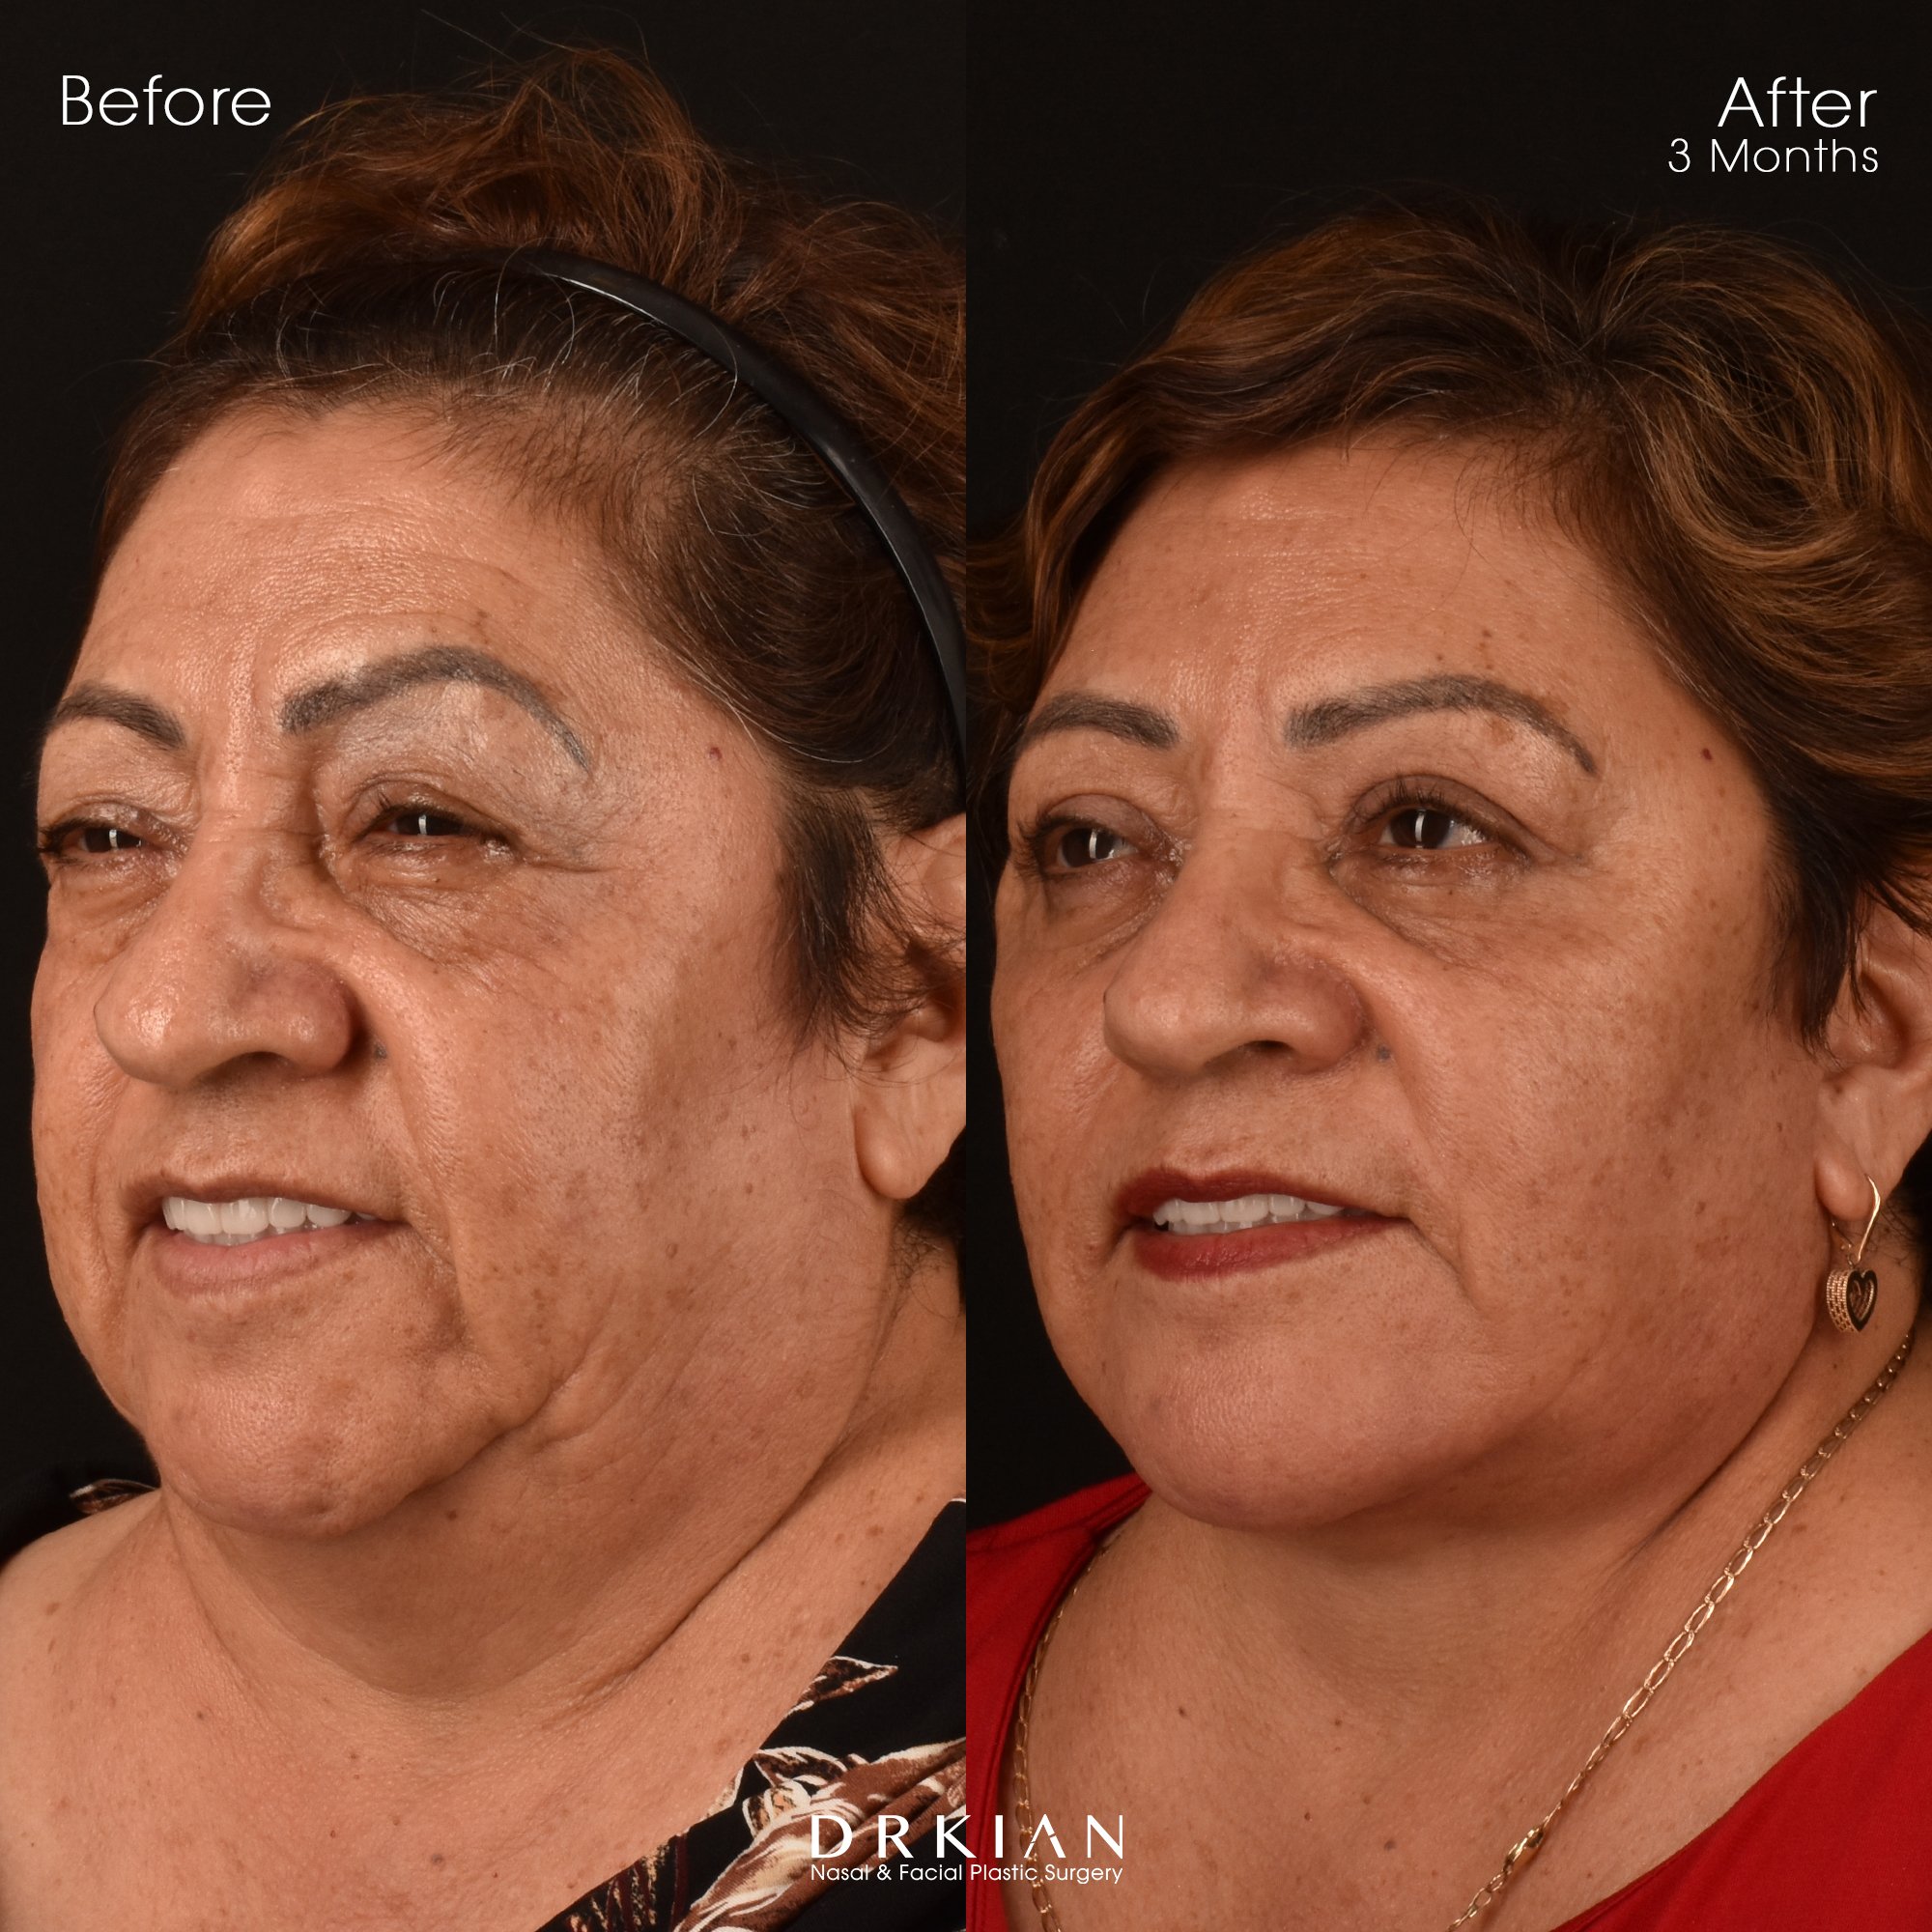
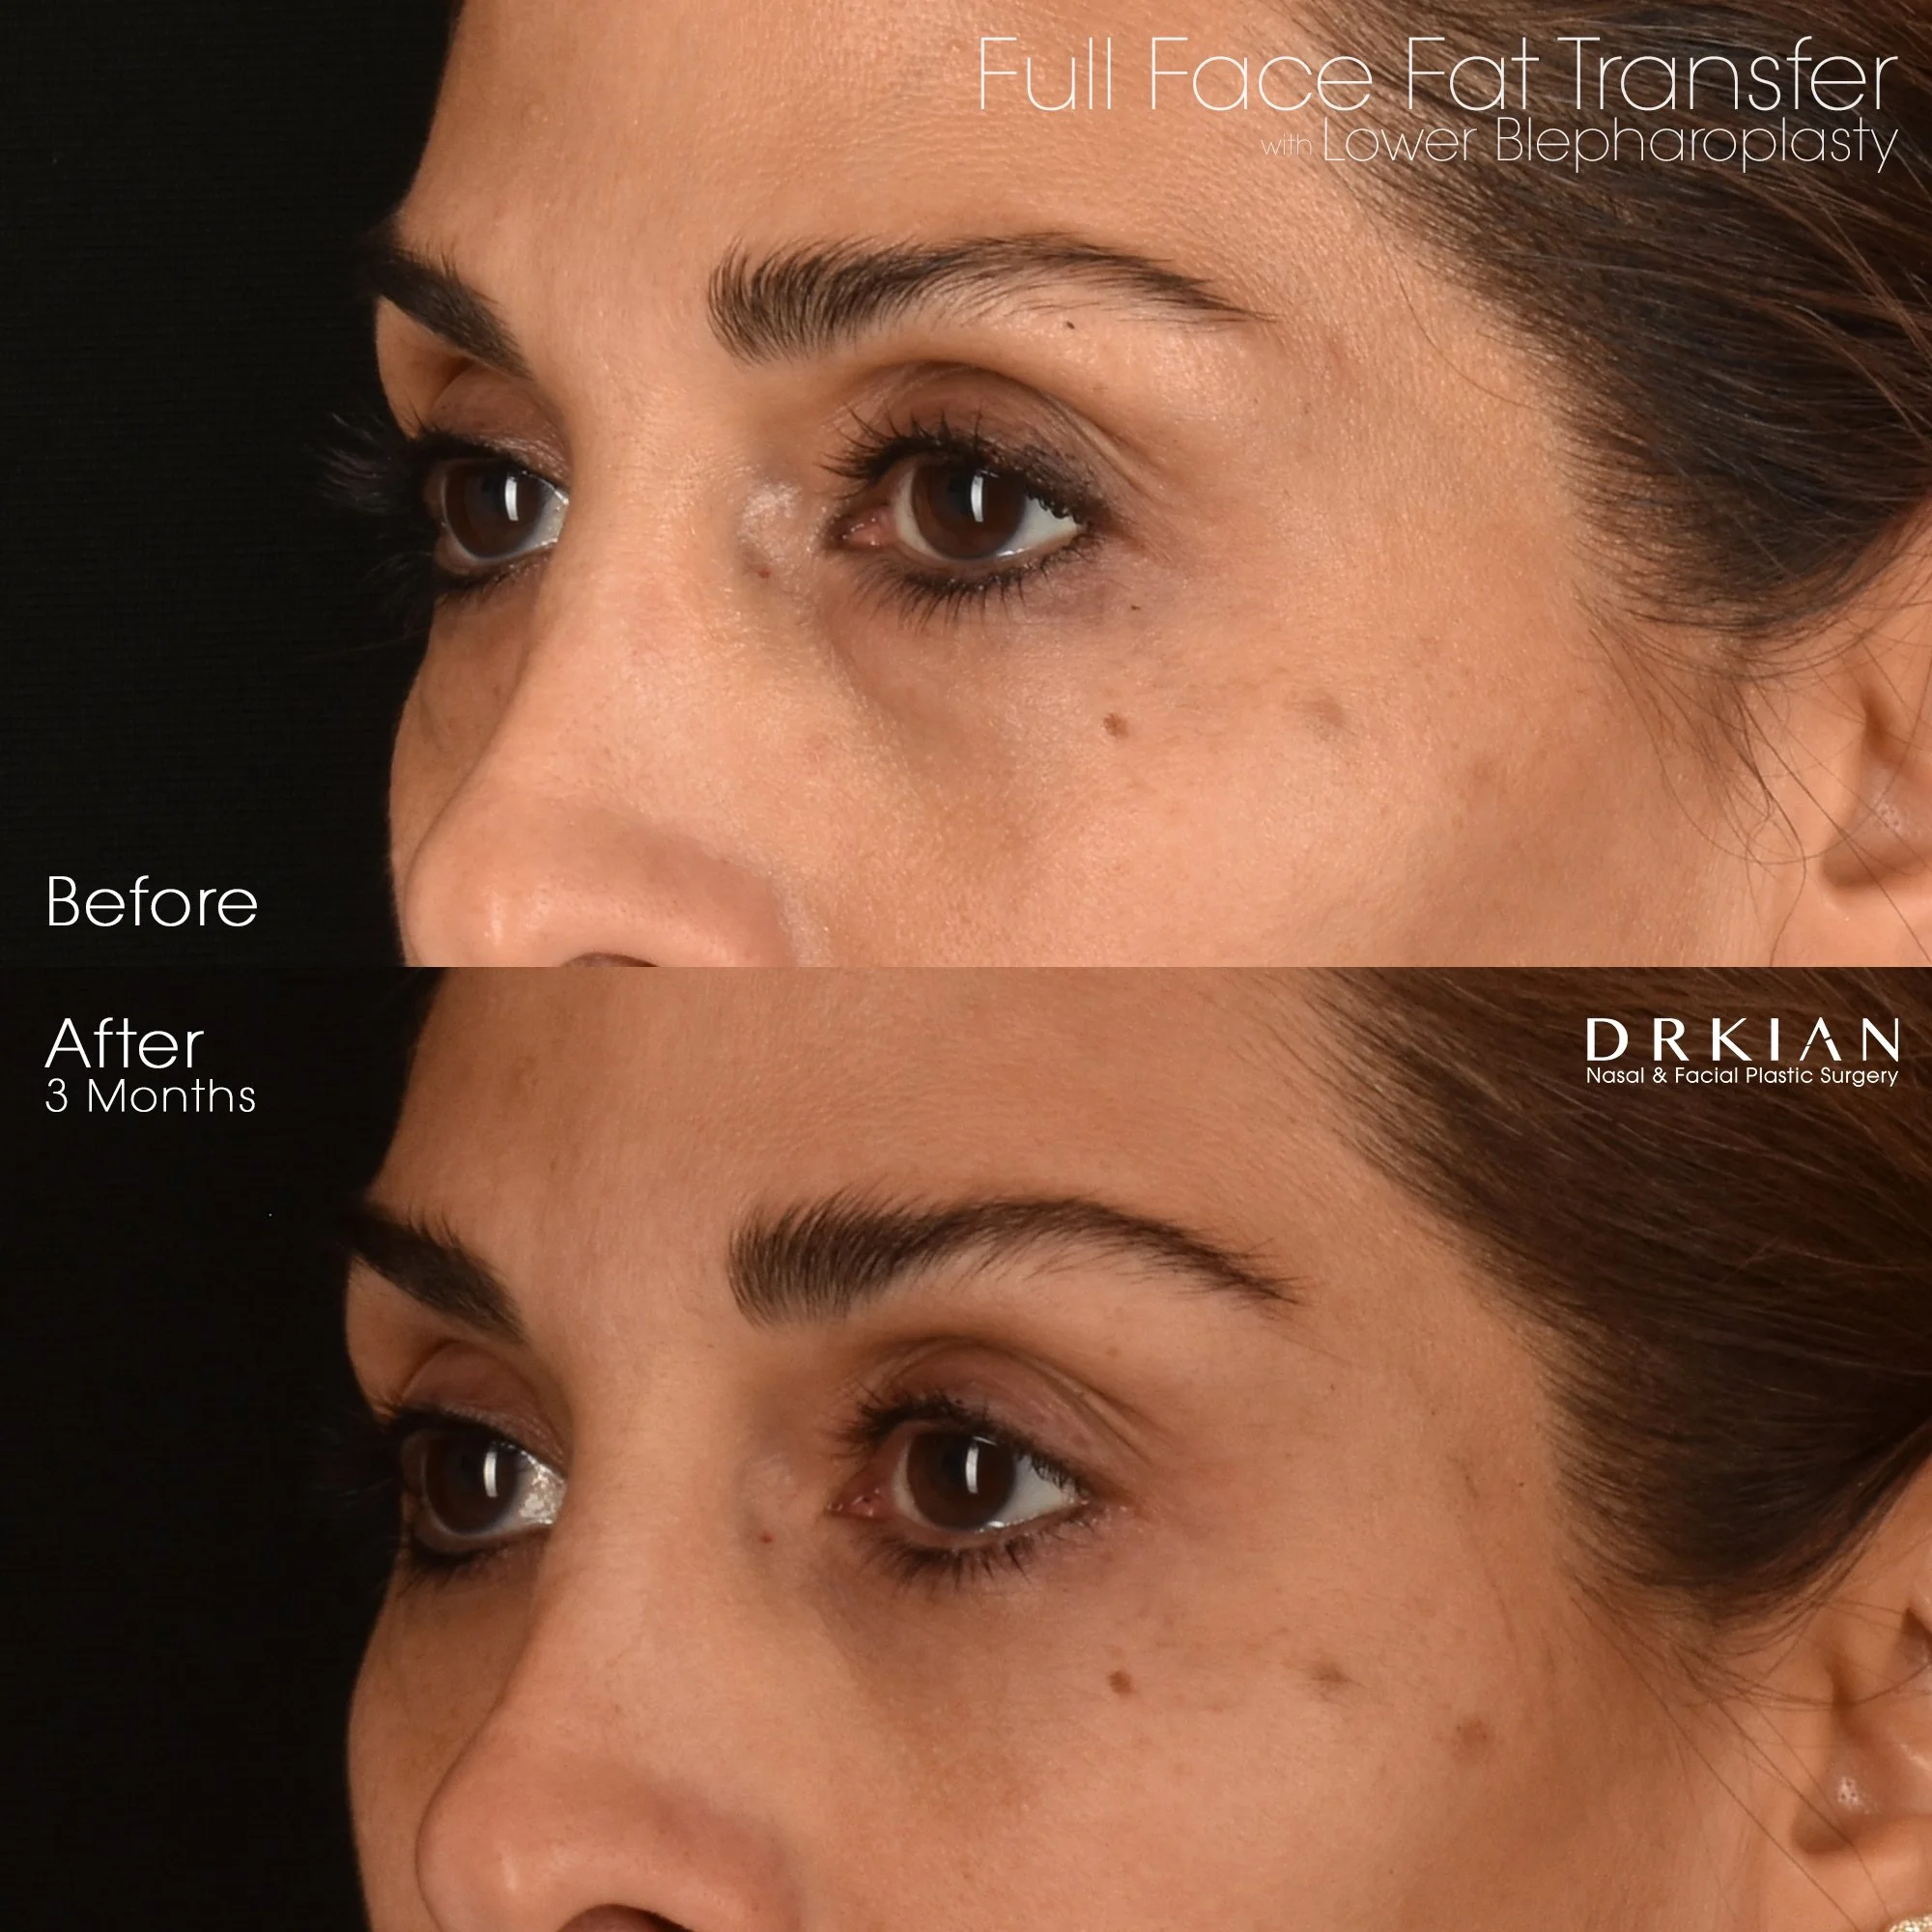
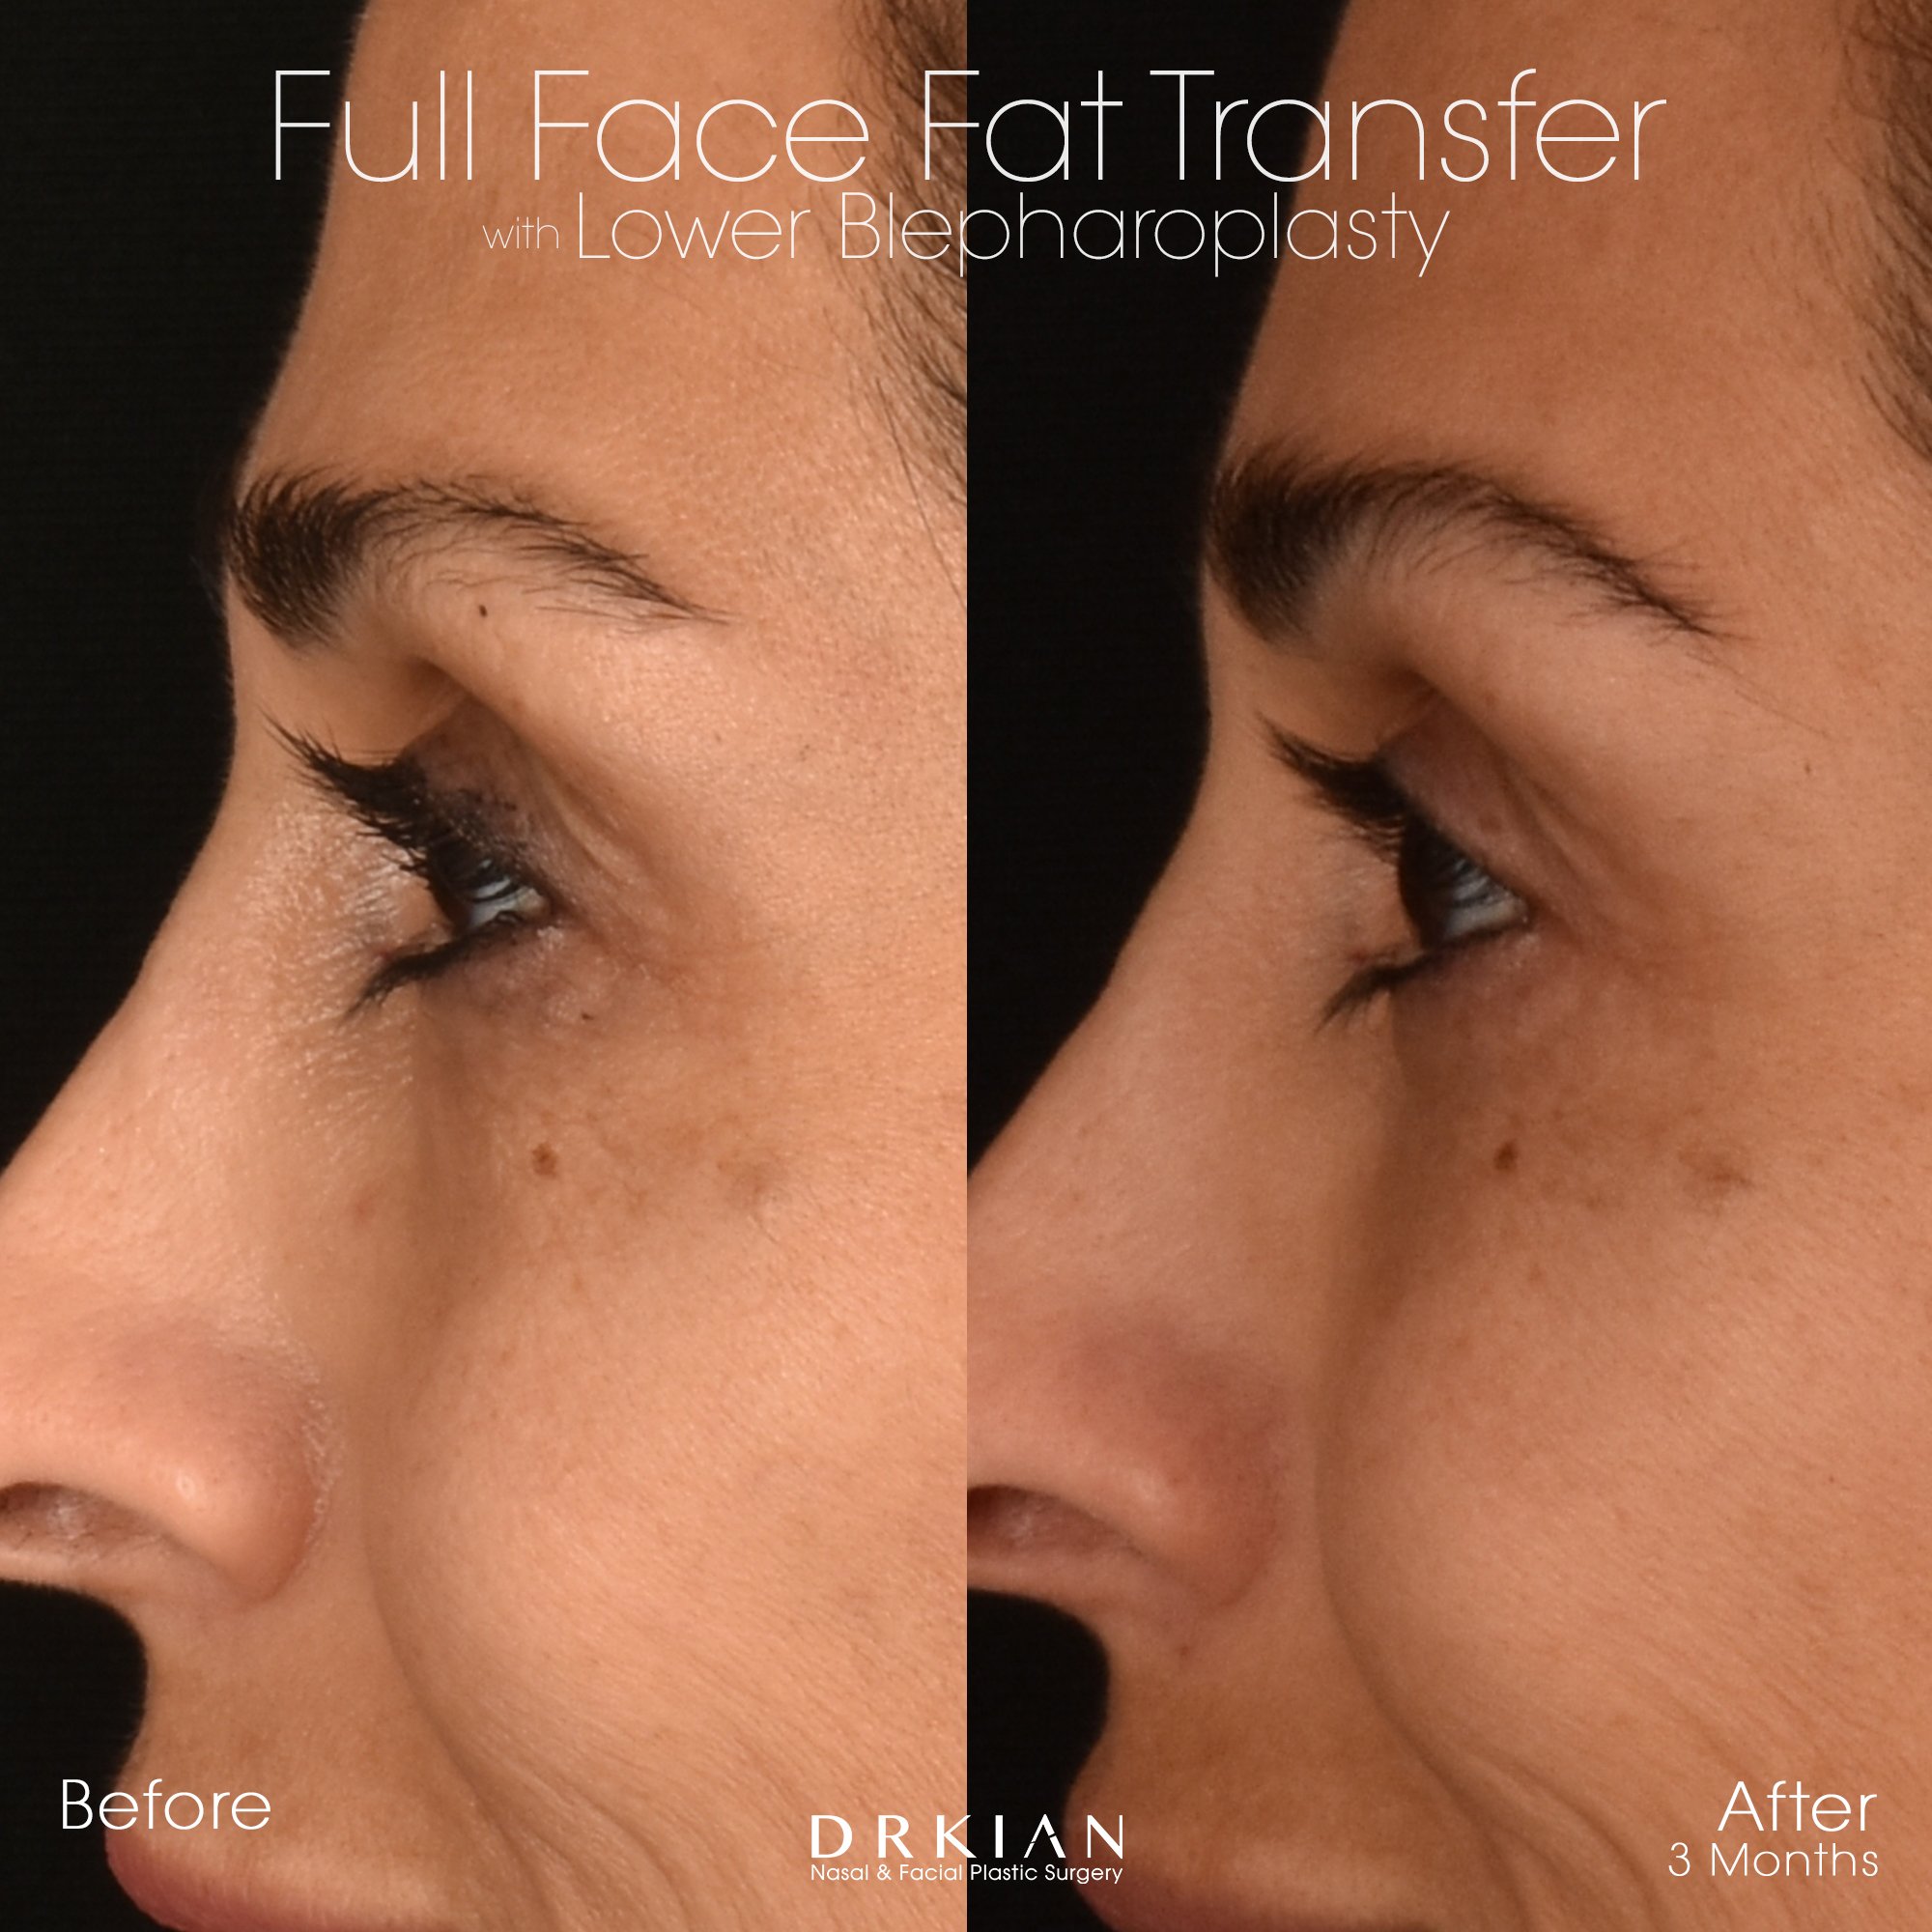
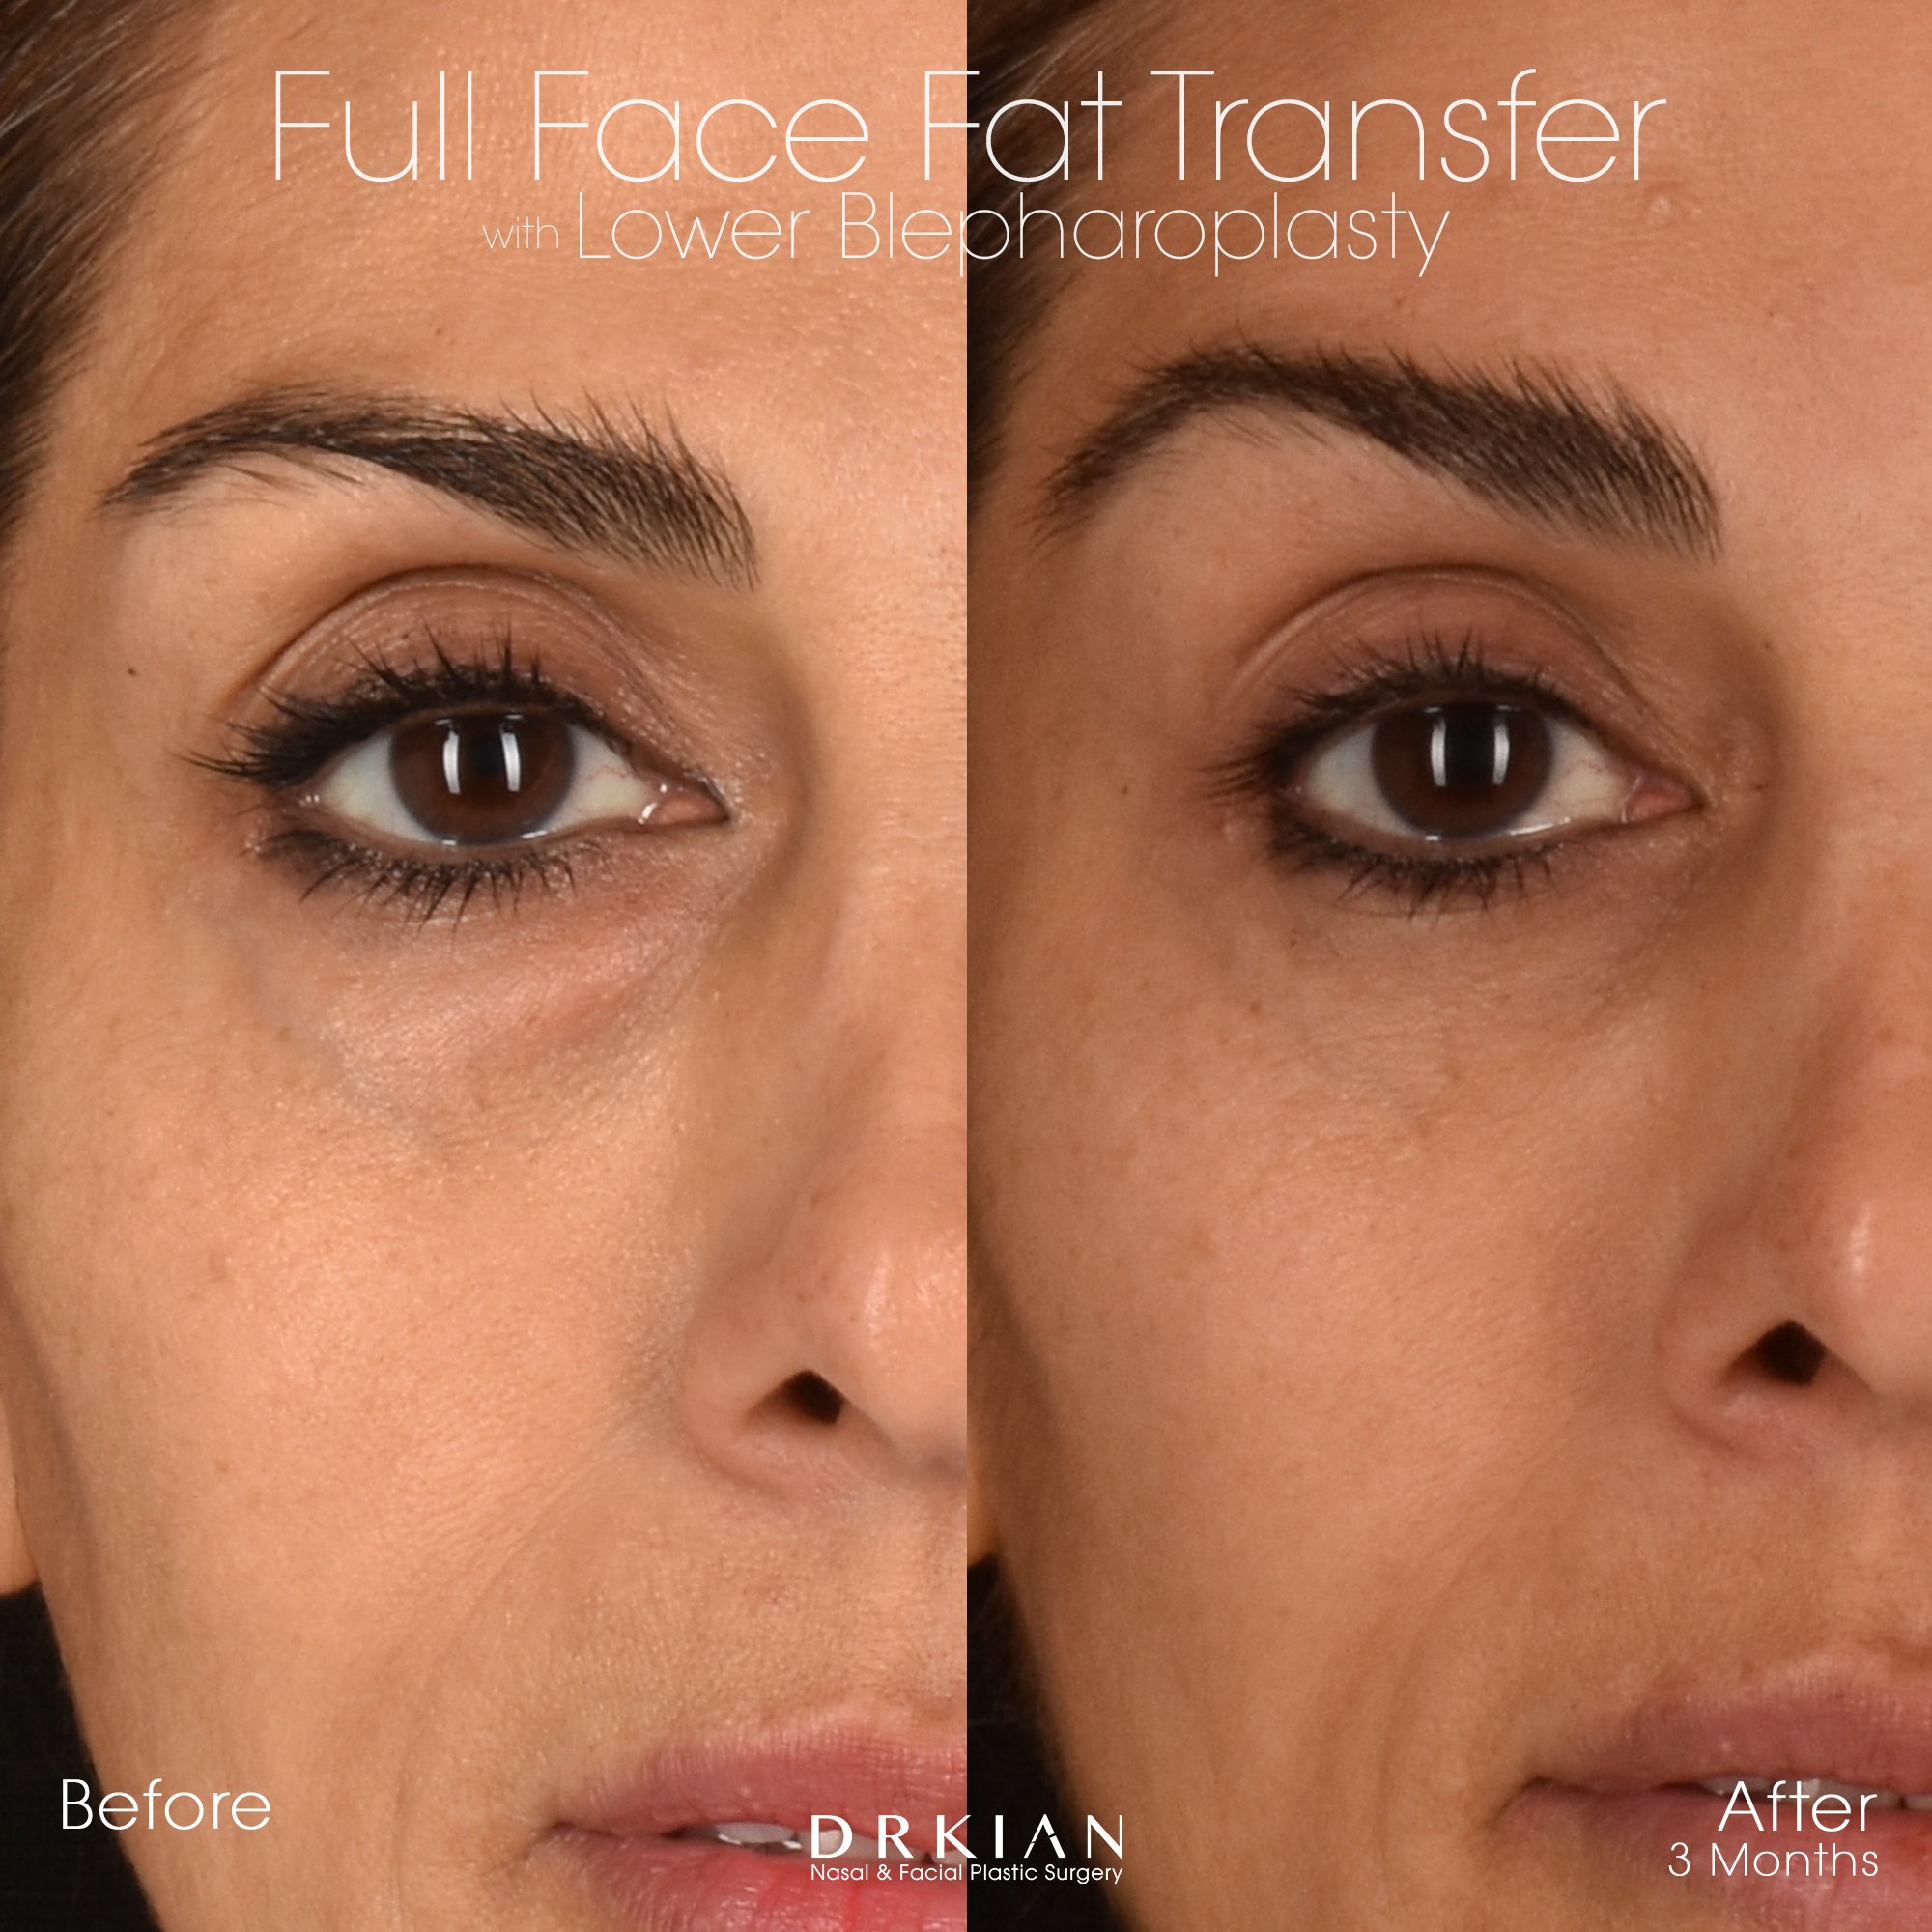
Lower Blepharoplasty with Full Face Fat Transfer (Mid-face, Temples, Forehead, Submalar, Pyriform & Chin): Before & After Three Months

Lower Blepharoplasty with Full Face Fat Transfer (Mid-face, Temples, Forehead, Submalar, Pyriform & Chin): Before & After Three Months

Lower Blepharoplasty with Full Face Fat Transfer (Mid-face, Temples, Forehead, Submalar, Pyriform & Chin): Before & After Three Months

Lower Blepharoplasty with Full Face Fat Transfer (Mid-face, Temples, Forehead, Submalar, Pyriform & Chin): Before & After Three Months

Lower Blepharoplasty with Full Face Fat Transfer (Mid-face, Temples, Forehead, Submalar, Pyriform & Chin): Before & After Three Months
Lower Blepharoplasty with Full Face Fat Transfer (Mid-face, Temples, Forehead, Submalar, Pyriform & Chin): Before & After Three Months
Lower Blepharoplasty with Full Face Fat Transfer (Mid-face, Temples, Forehead, Submalar, Pyriform & Chin): Before & After Three Months
Lower Blepharoplasty with Full Face Fat Transfer (Mid-face, Temples, Forehead, Submalar, Pyriform & Chin): Before & After Three Months

Lower Blepharoplasty with Full Face Fat Transfer (Mid-face, Temples, Forehead, Submalar, Pyriform & Chin): Before & After Three Months

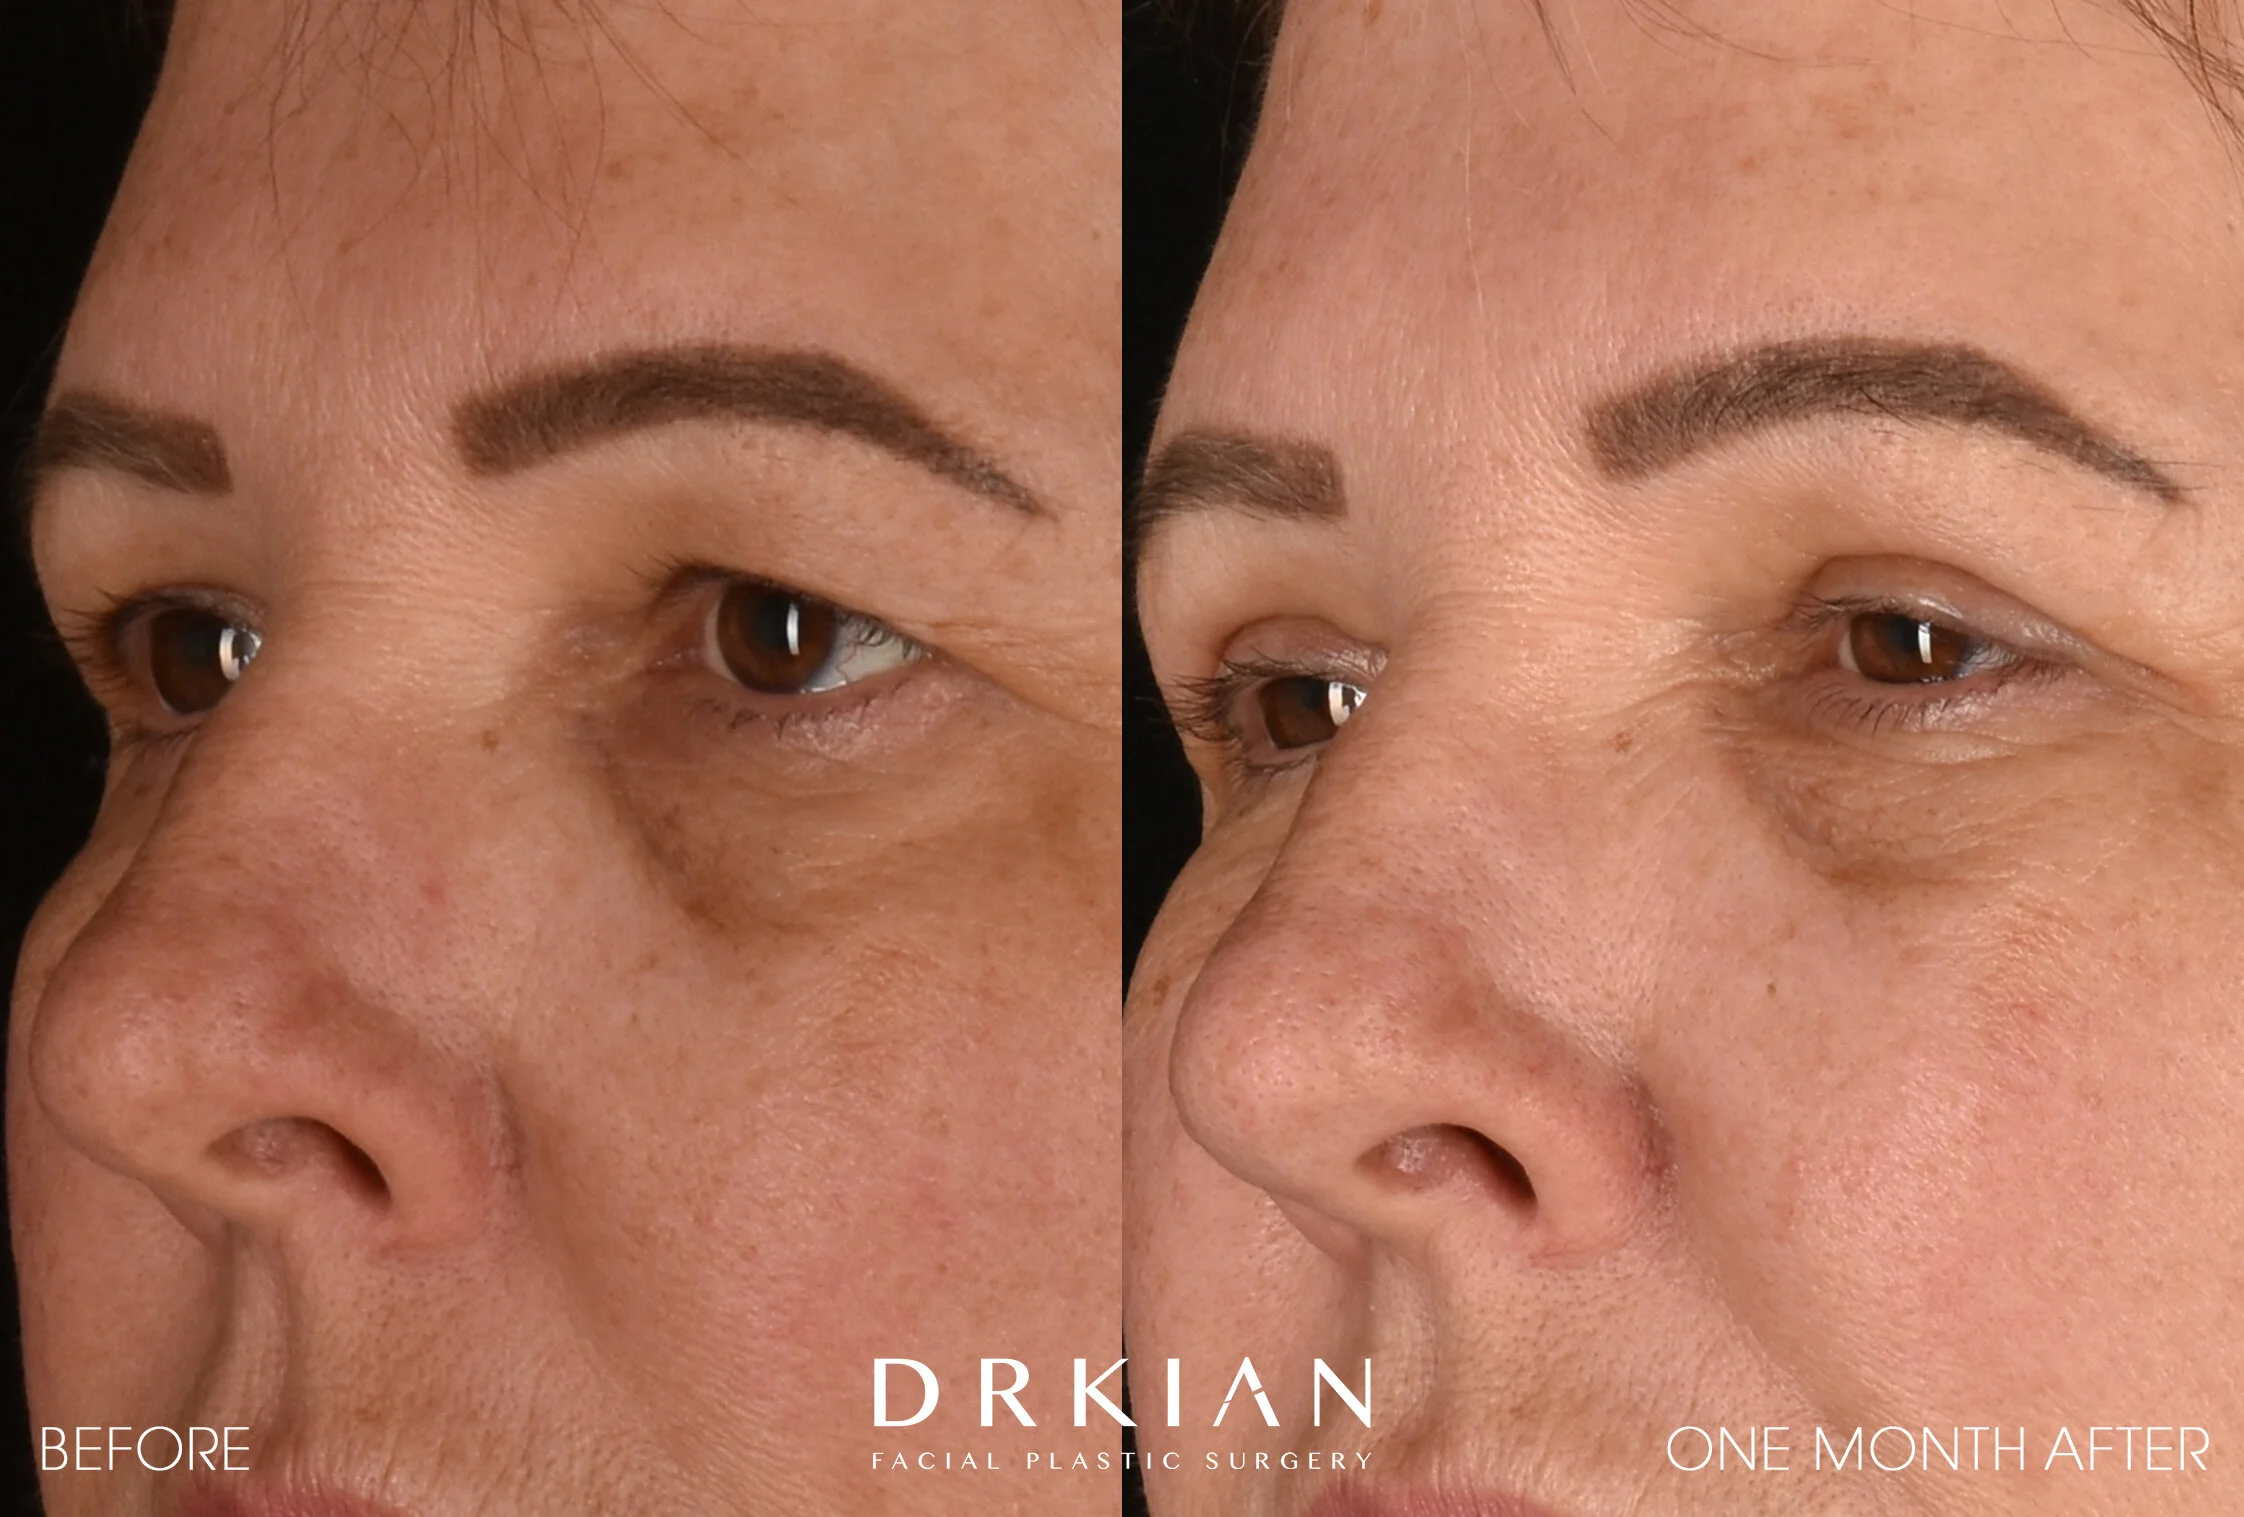
Upper Blepharoplasty (Performed In-Office Under Local Anesthesia): Before & After One Month
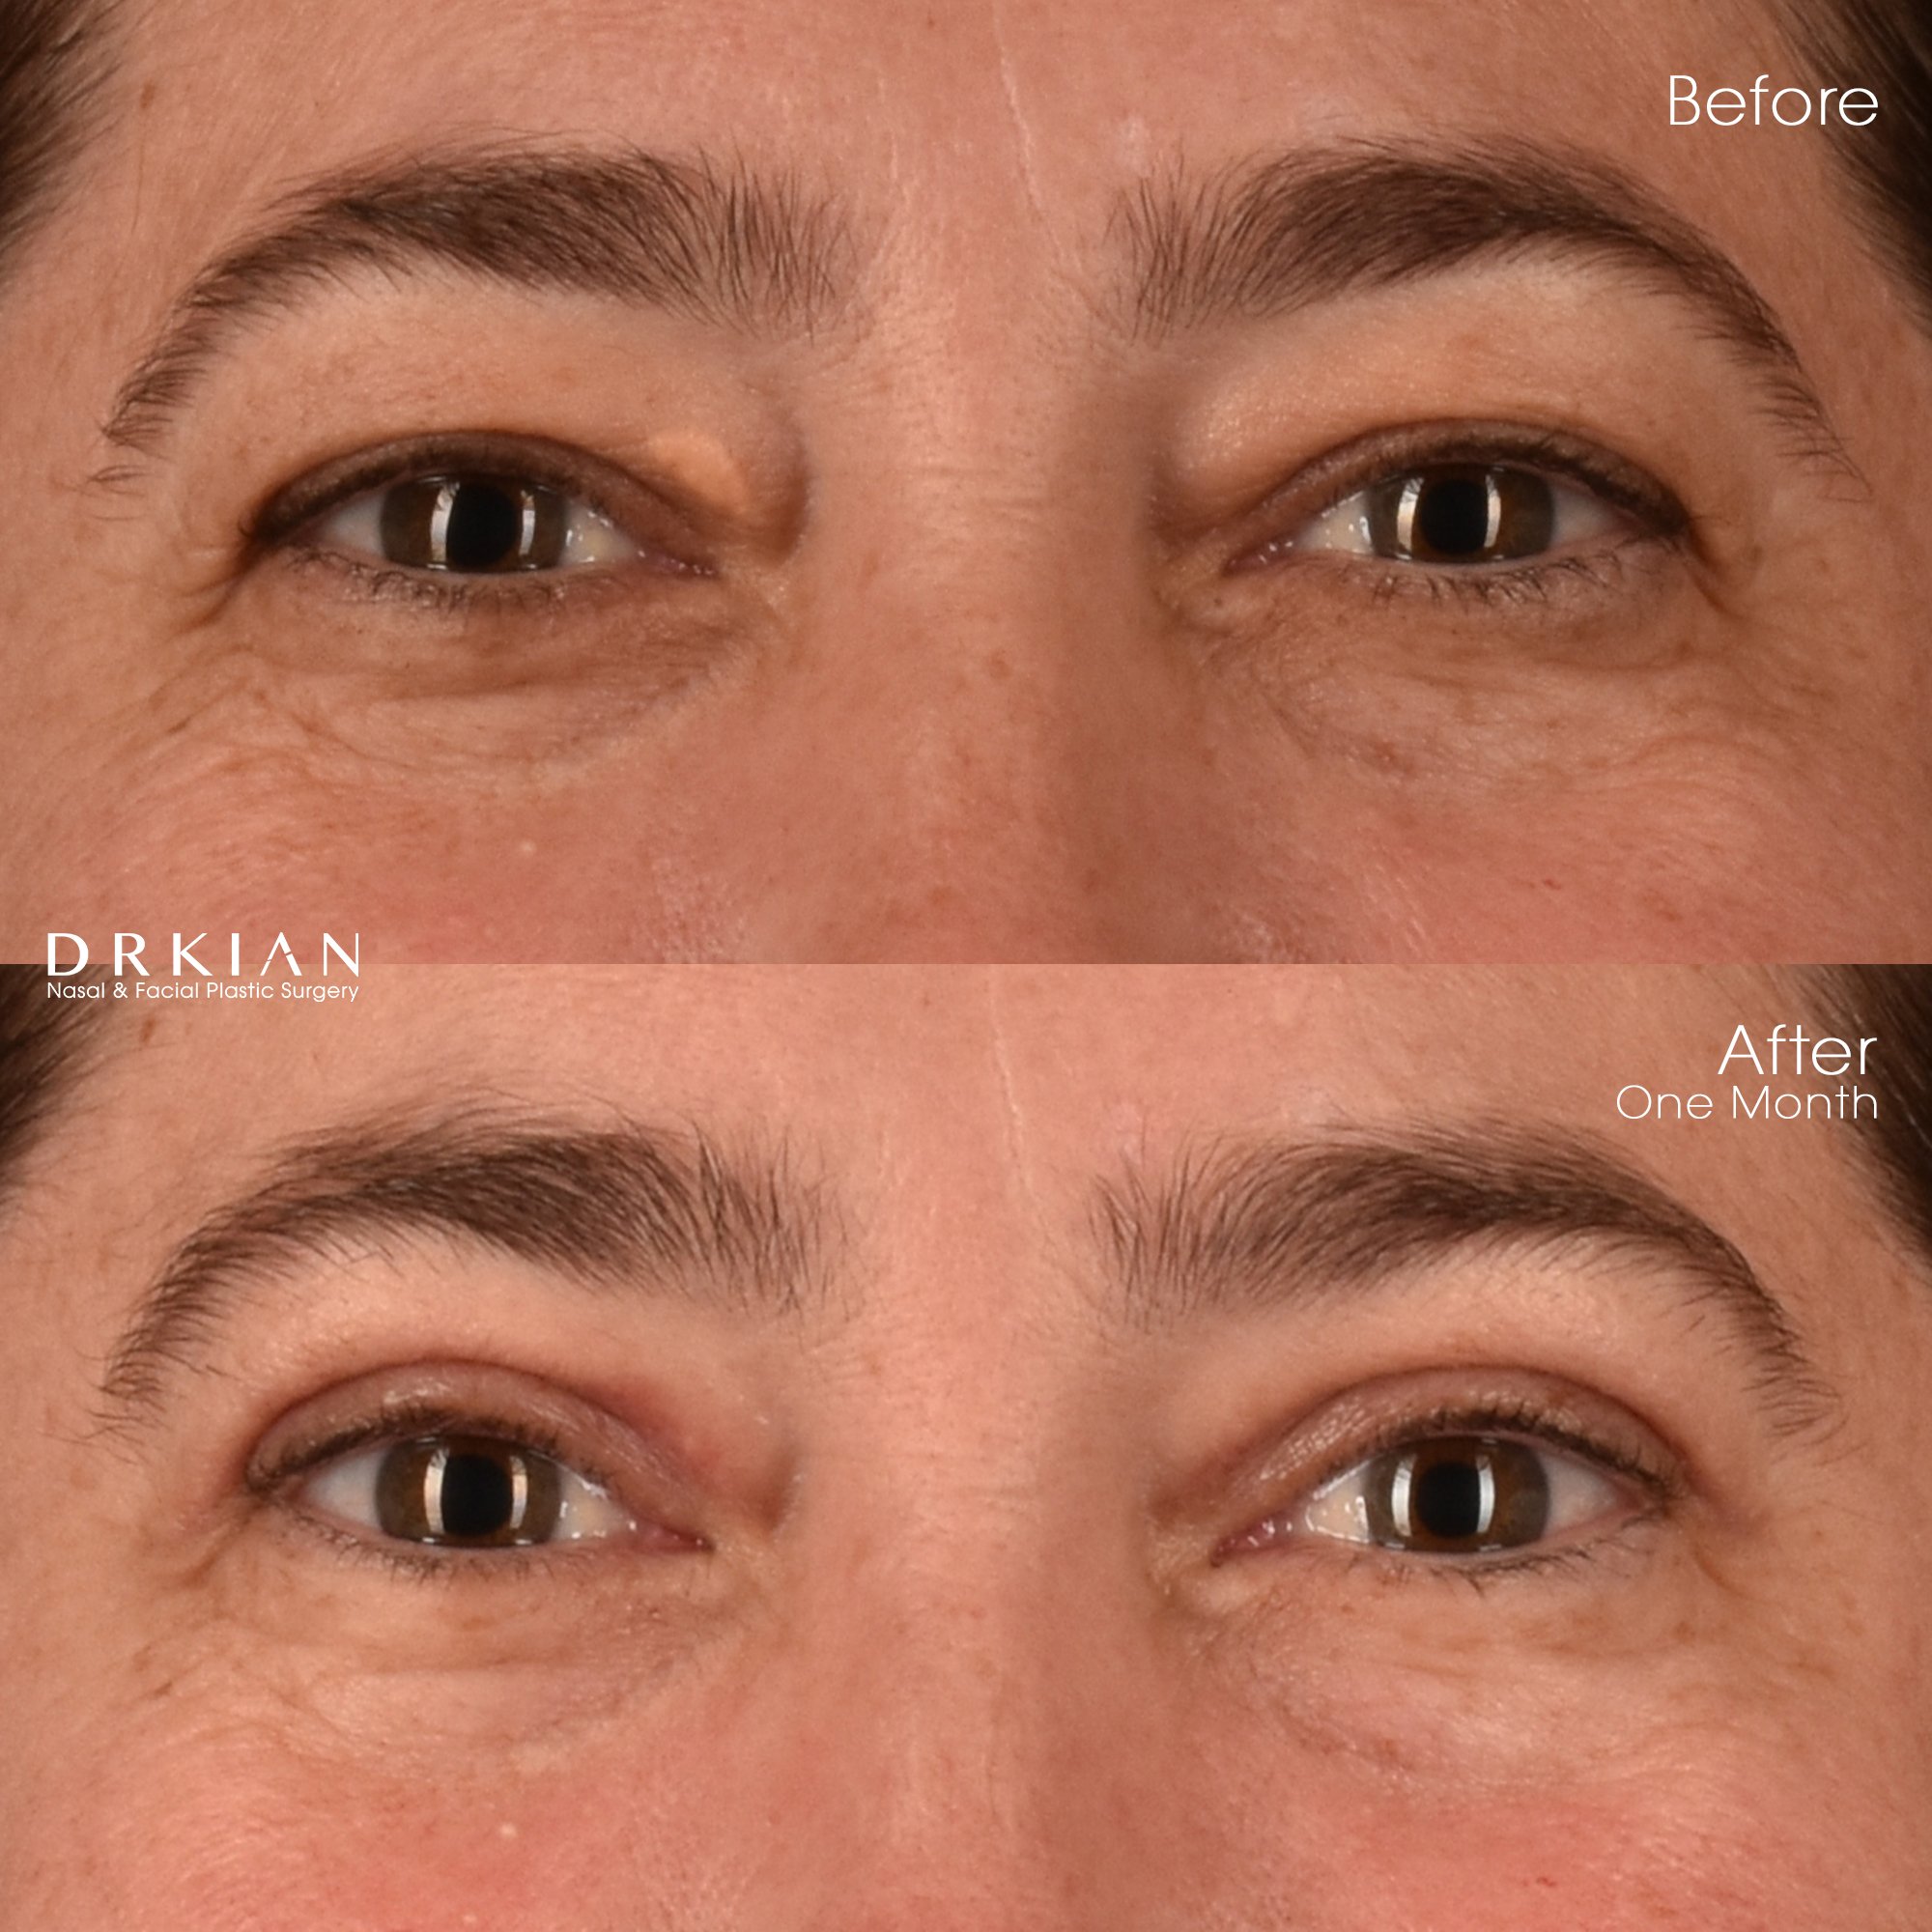
Upper Blepharoplasty (Performed In-Office Under Local Anesthesia): Before & After One Month

Upper Blepharoplasty (Performed In-Office Under Local Anesthesia): Before & After One Month

Upper Blepharoplasty (Performed In-Office Under Local Anesthesia): Before & After One Month

Upper Blepharoplasty (Performed In-Office Under Local Anesthesia): Before & After One Month

Upper Blepharoplasty (Performed In-Office Under Local Anesthesia): Before & After One Month
Upper Blepharoplasty (Under Local Anesthesia): Before & After

NoseTune® Rhinoplasty, Upper Blepharoplasty & Lower Eyelid Tunable Resurfacing Laser (TRL): Before & After Three Weeks
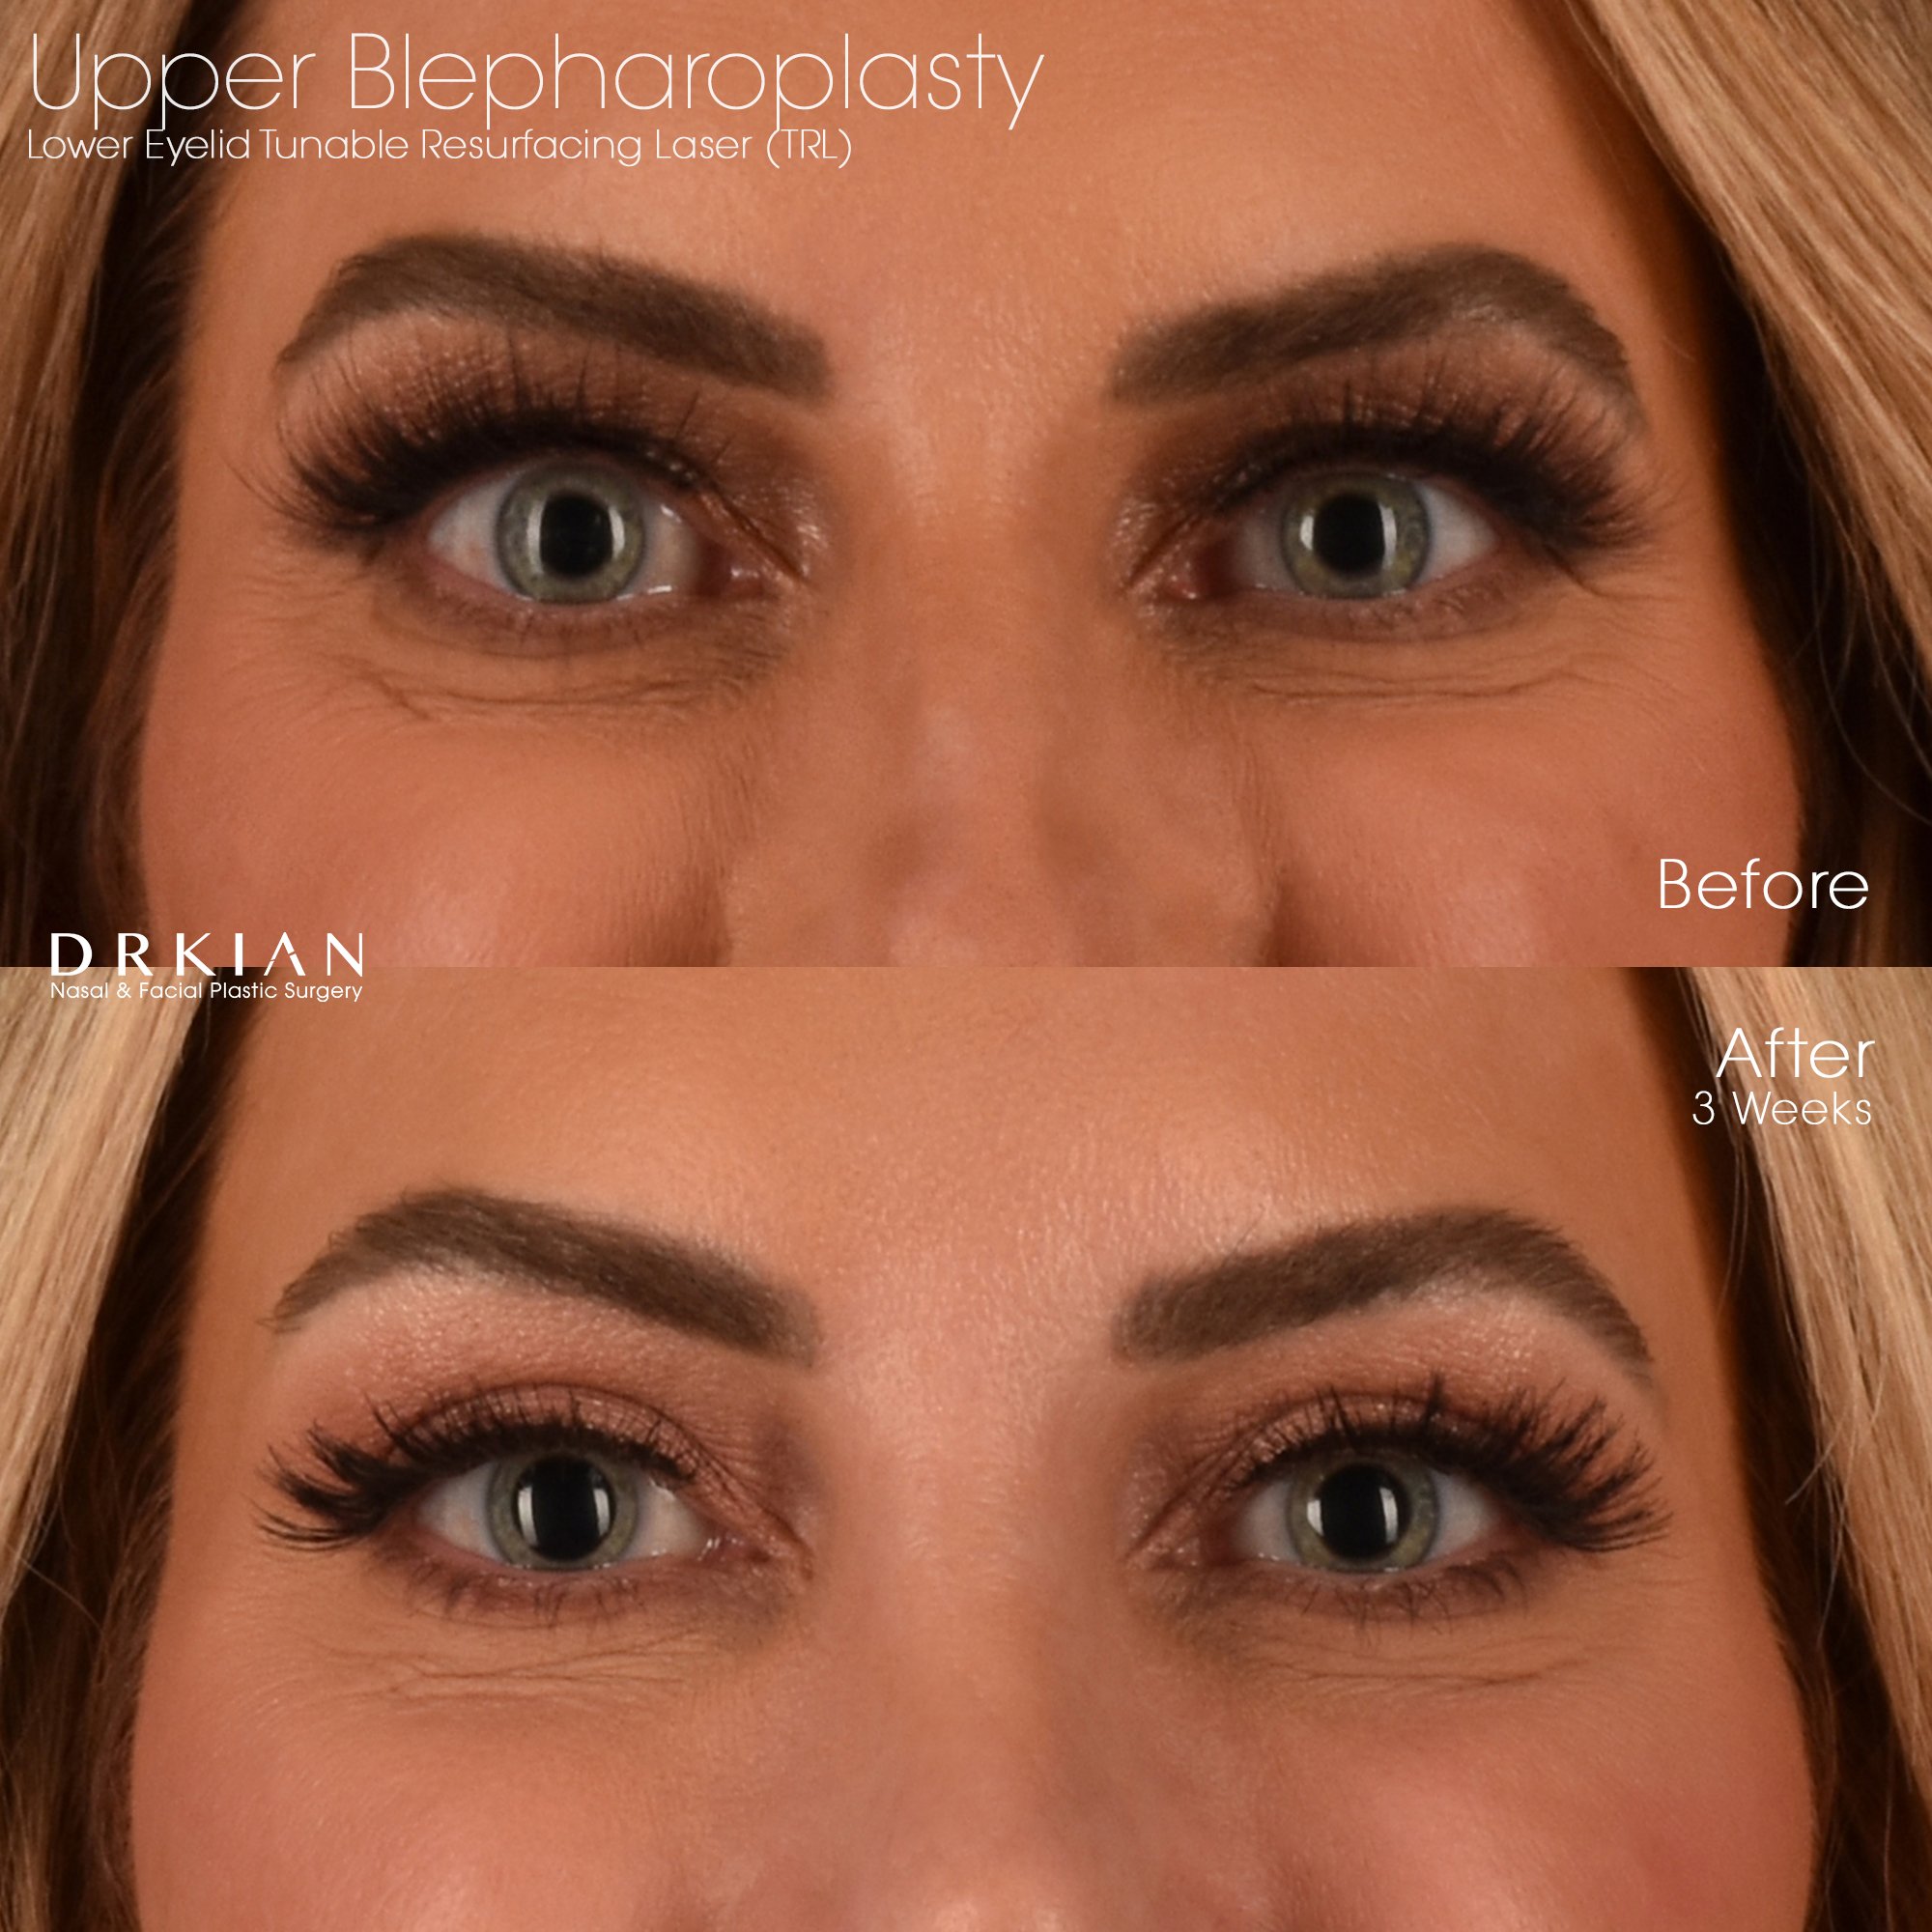
NoseTune® Rhinoplasty, Upper Blepharoplasty & Lower Eyelid Tunable Resurfacing Laser (TRL): Before & After Three Weeks

NoseTune® Rhinoplasty, Upper Blepharoplasty & Lower Eyelid Tunable Resurfacing Laser (TRL): Before & After Three Weeks

NoseTune® Rhinoplasty, Upper Blepharoplasty & Lower Eyelid Tunable Resurfacing Laser (TRL): Before & After Three Weeks

NoseTune® Rhinoplasty, Upper Blepharoplasty & Lower Eyelid Tunable Resurfacing Laser (TRL): Before & After Three Weeks

NoseTune® Rhinoplasty, Upper Blepharoplasty & Lower Eyelid Tunable Resurfacing Laser (TRL): Before & After Three Weeks

NoseTune® Rhinoplasty, Upper Blepharoplasty & Lower Eyelid Tunable Resurfacing Laser (TRL): Before & After Three Weeks
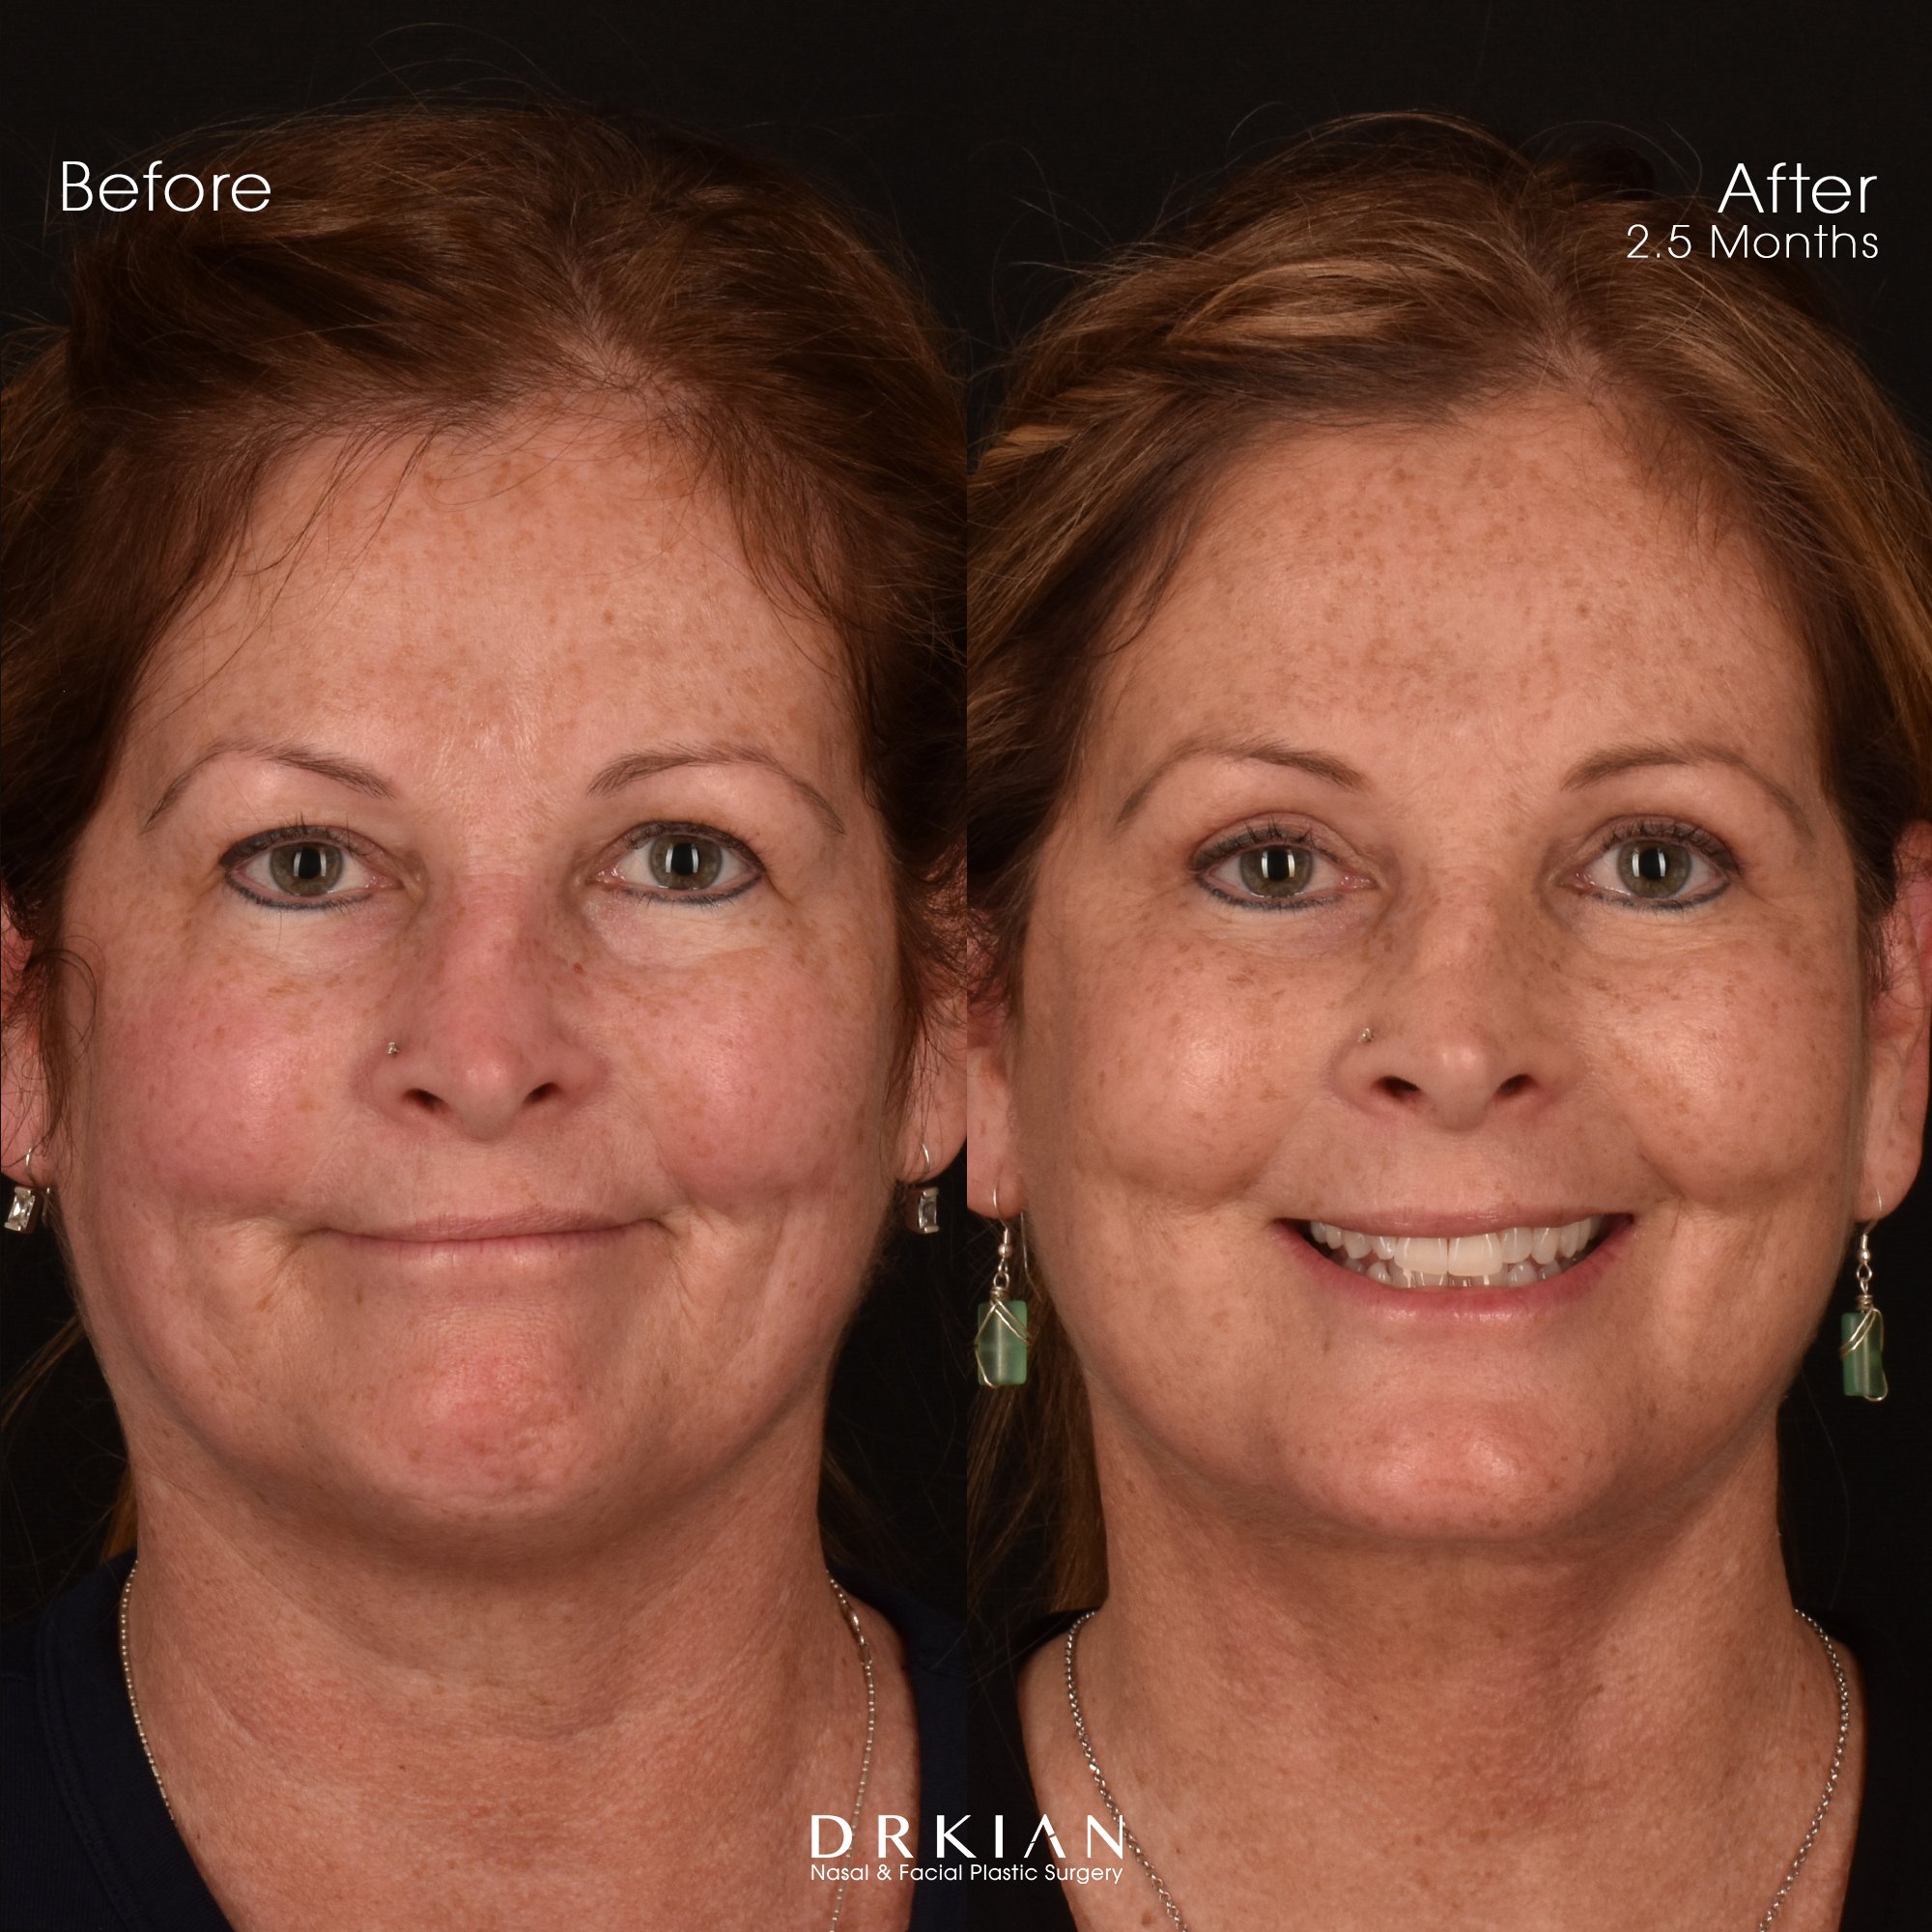
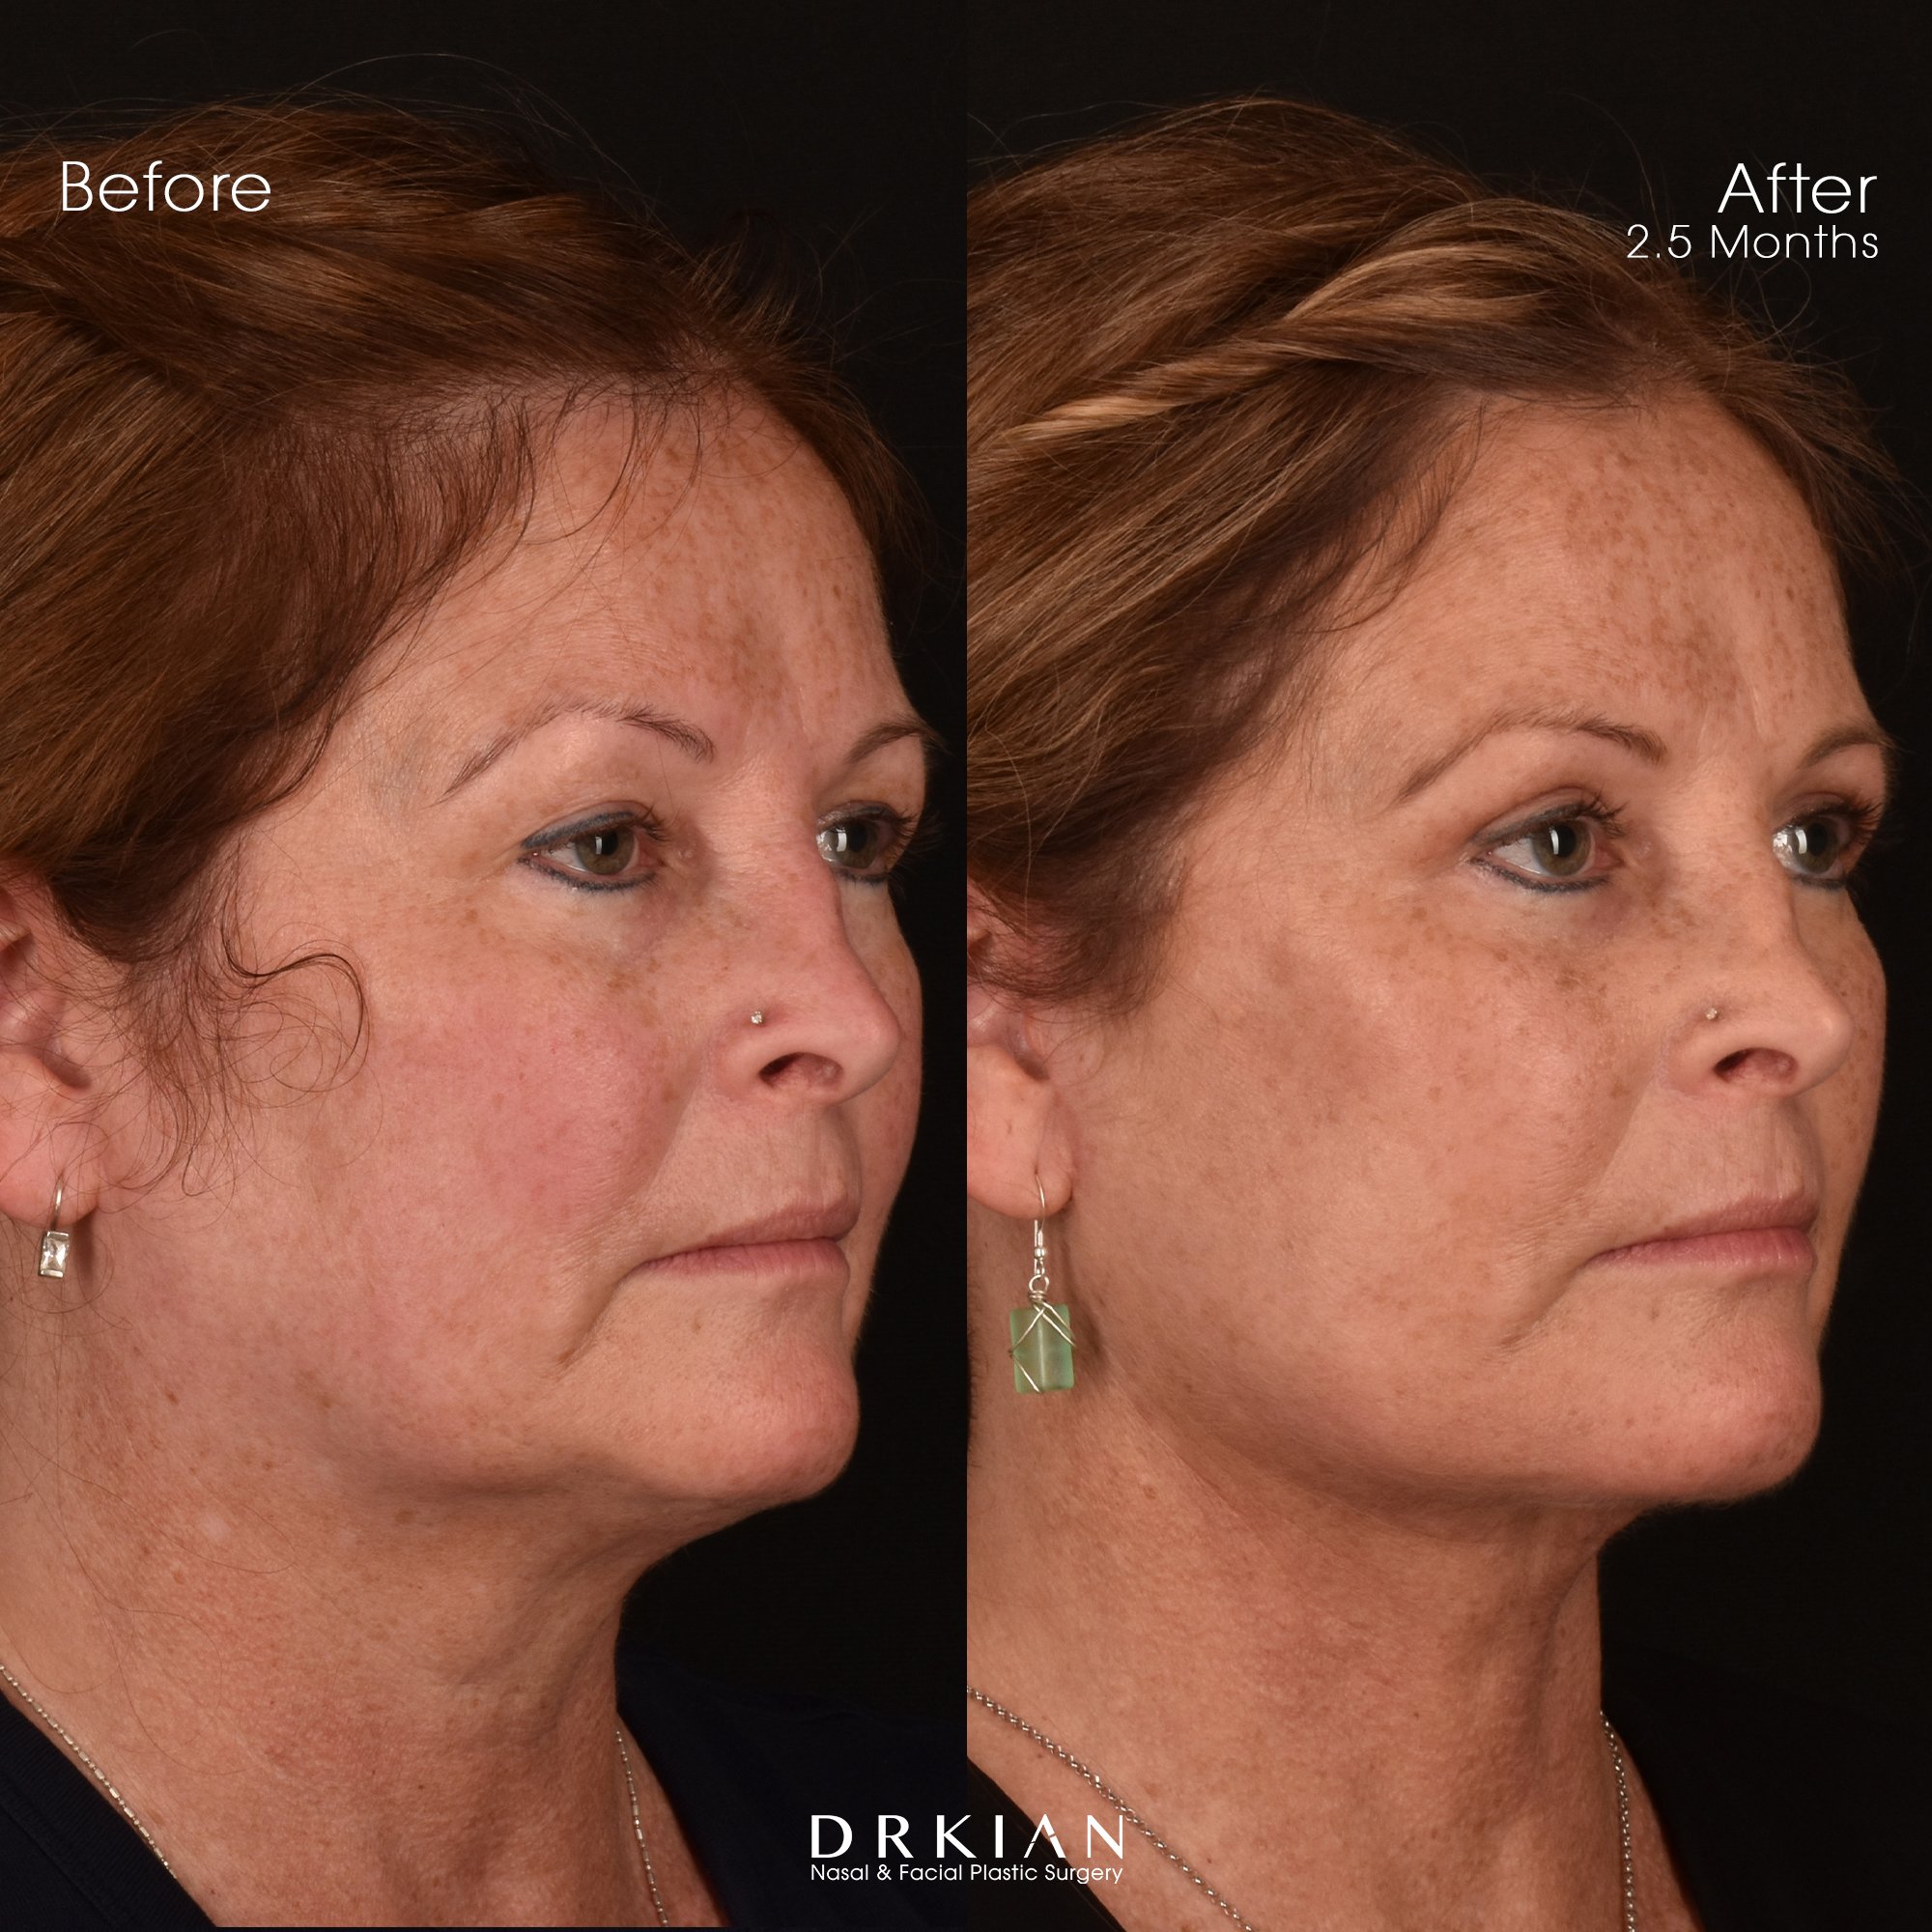
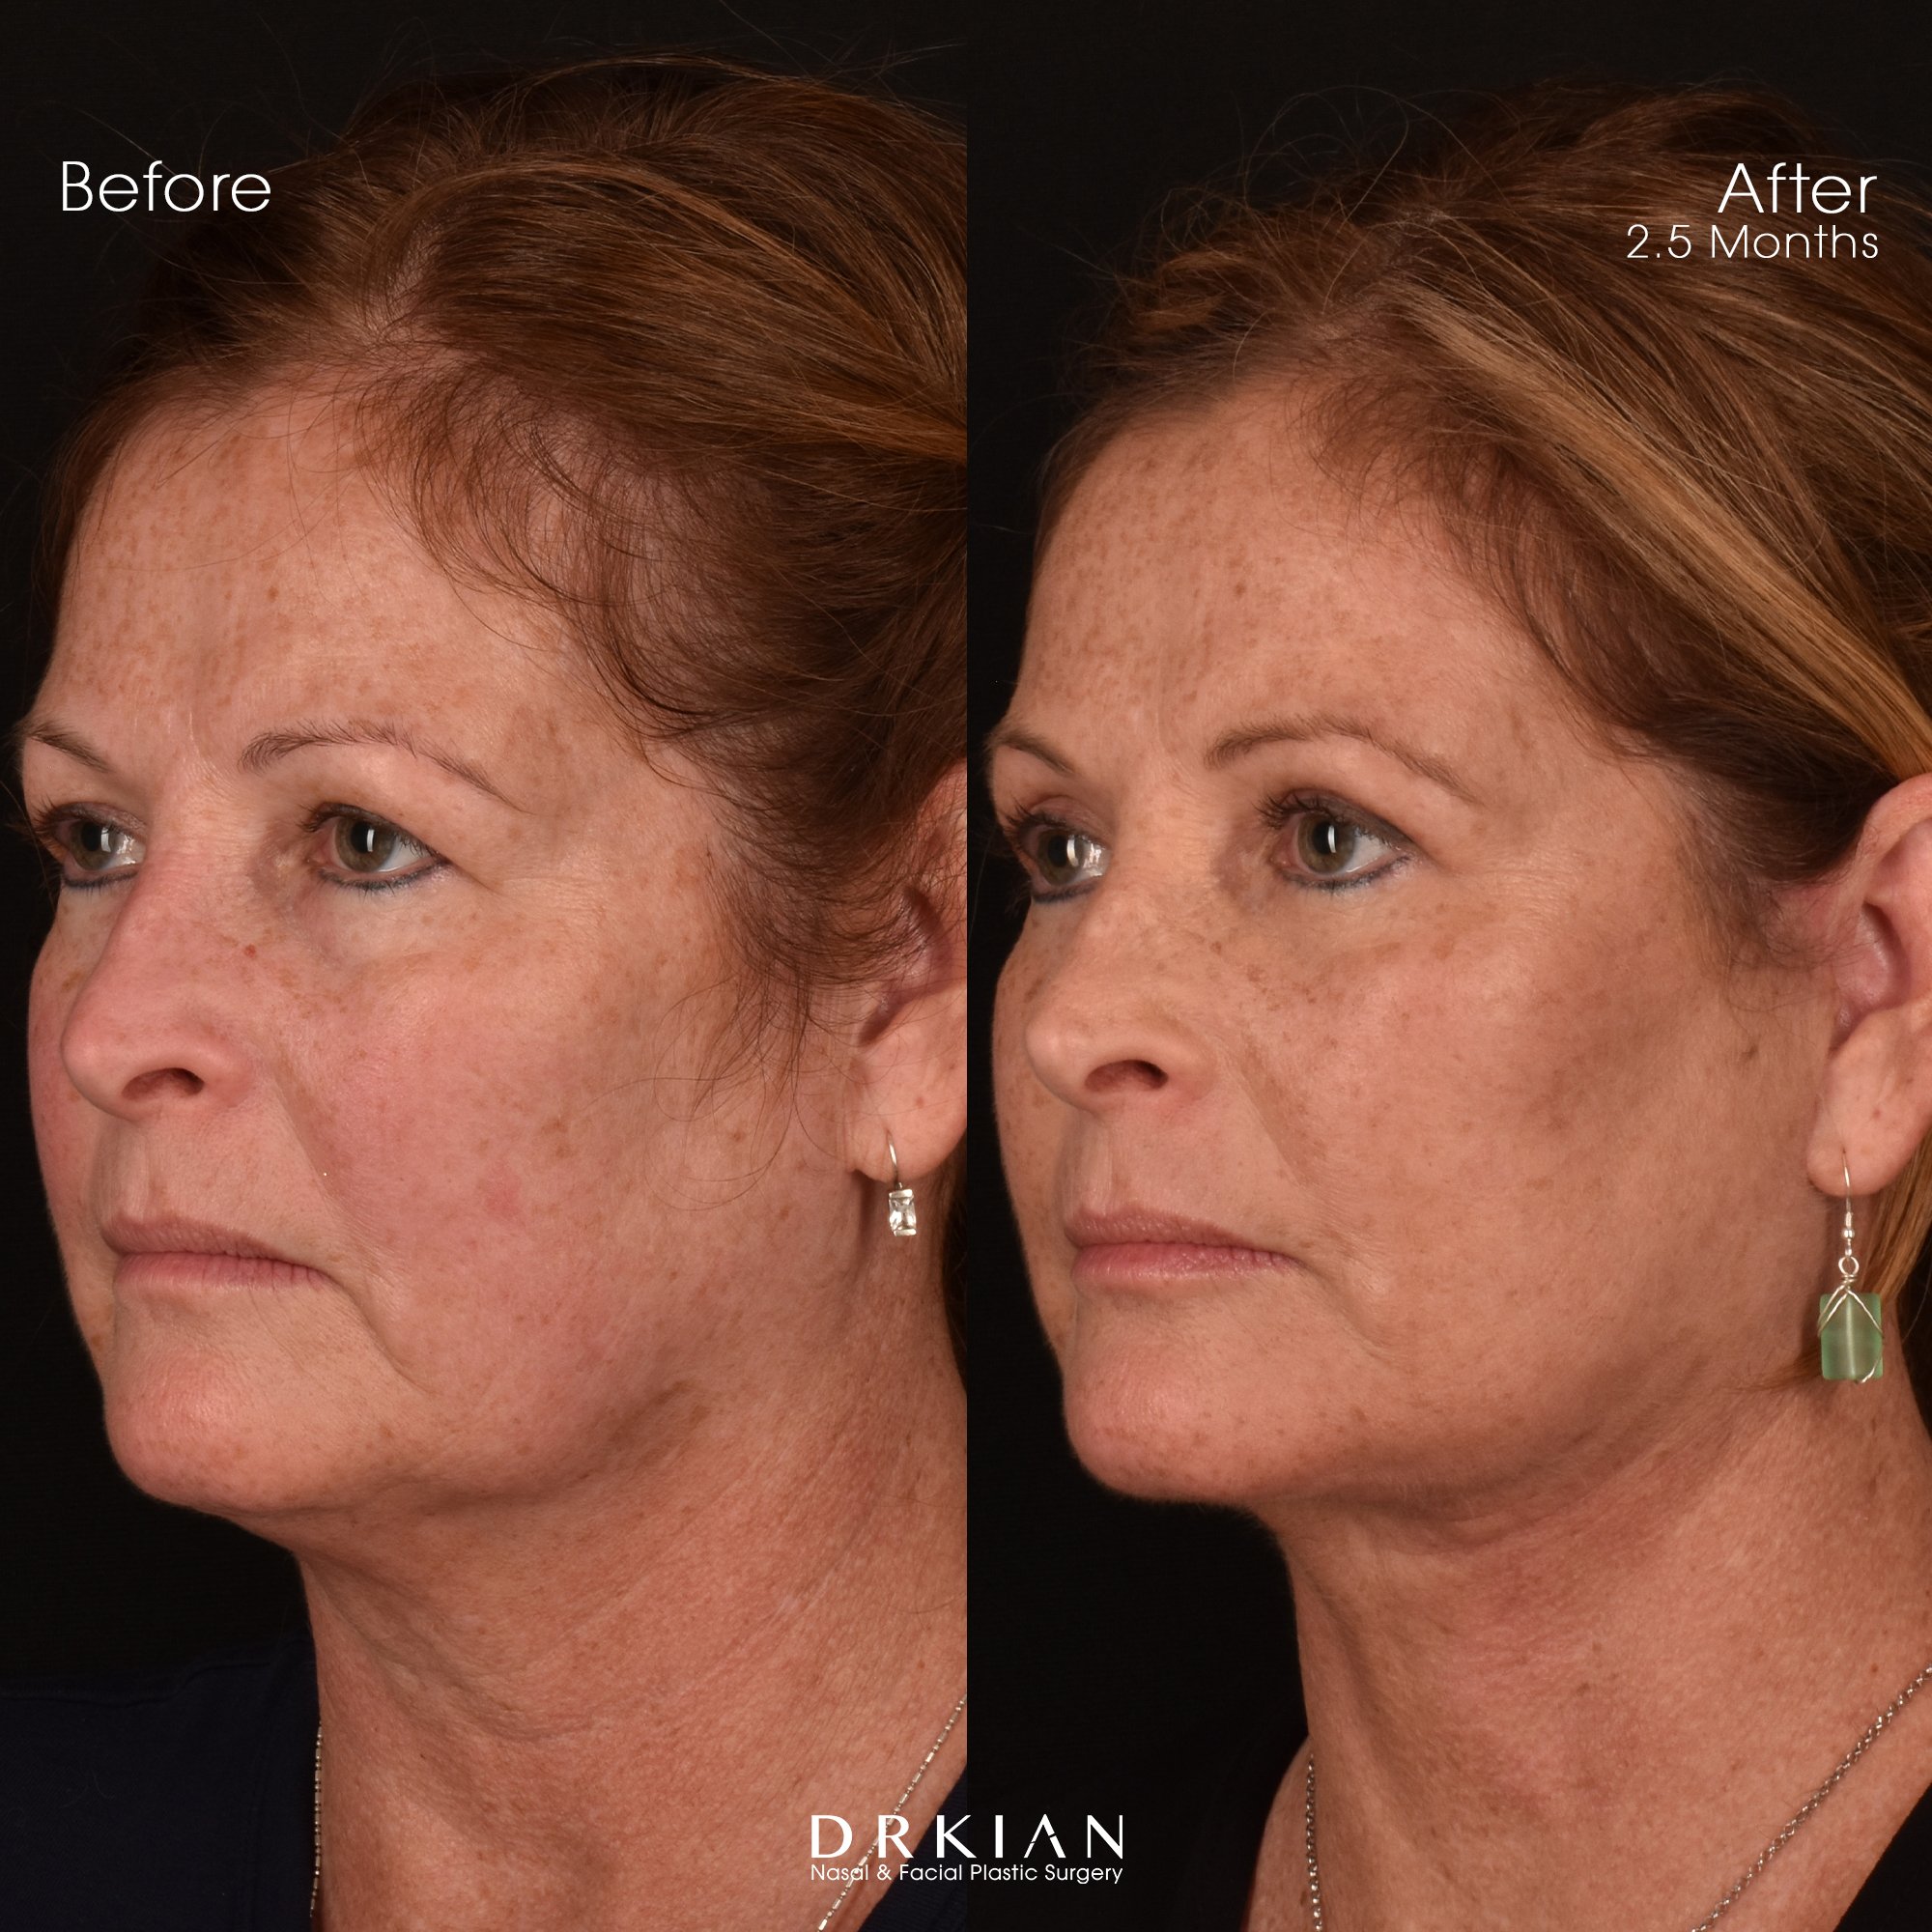
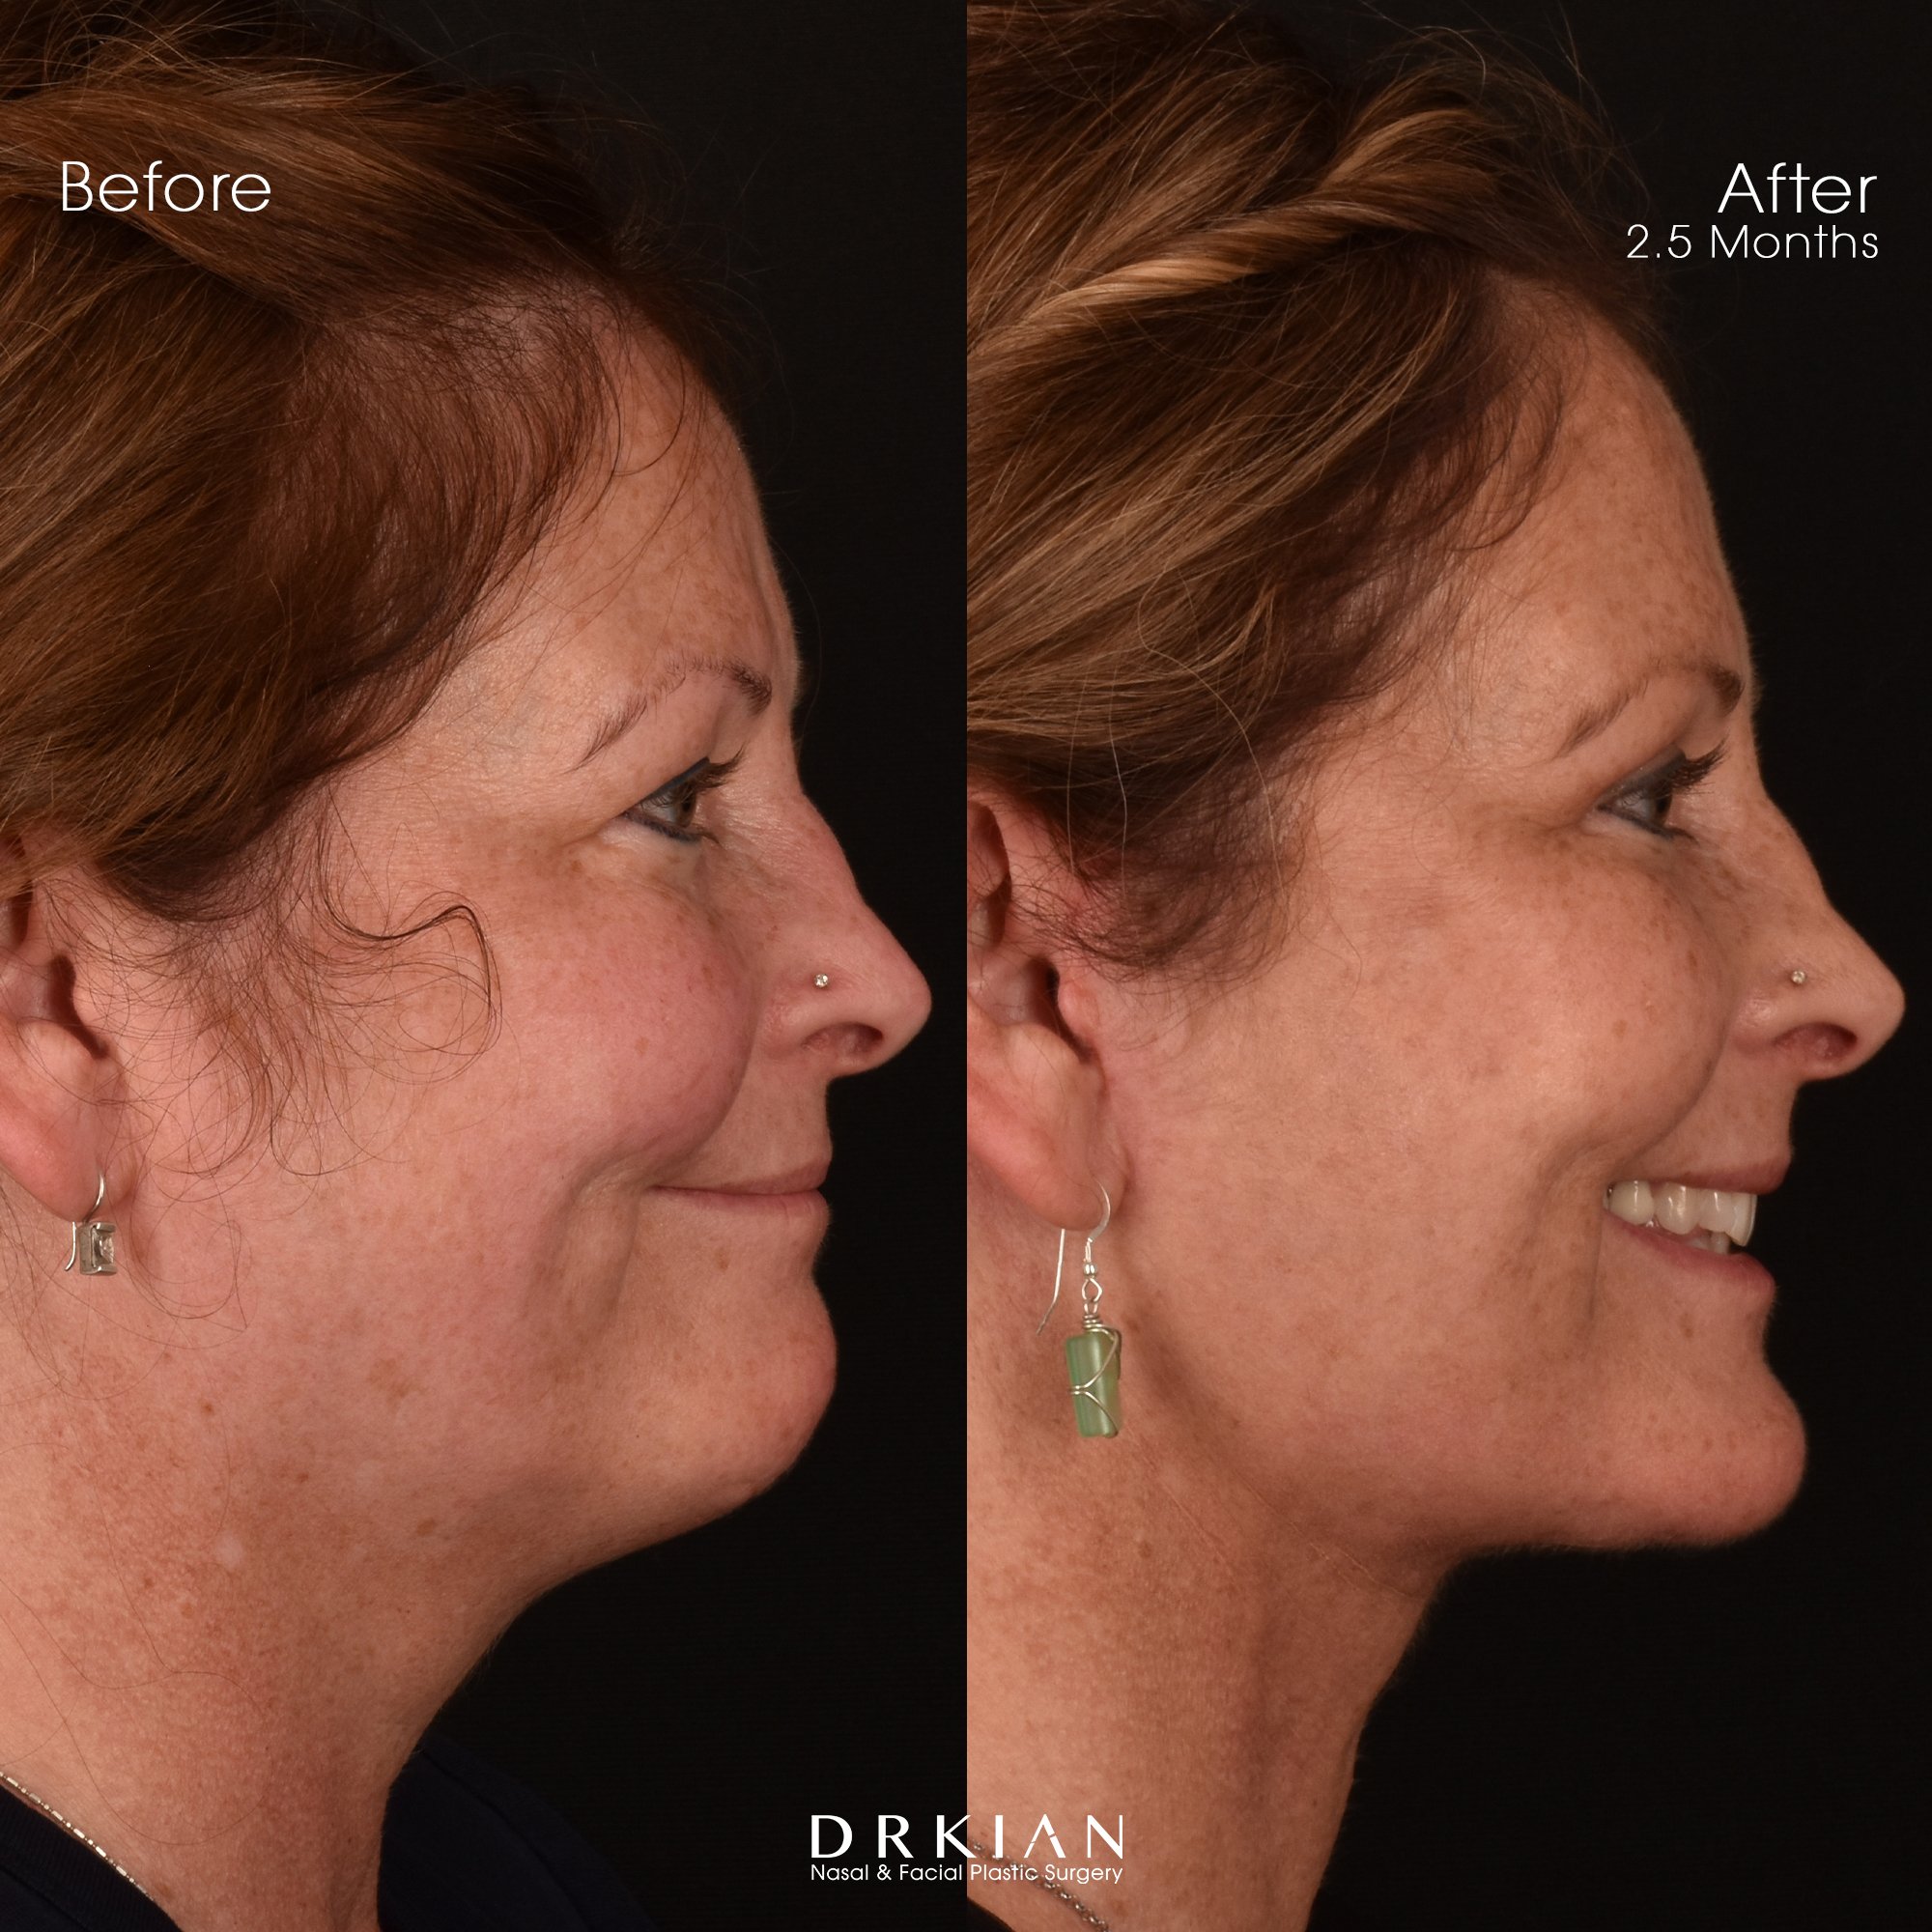
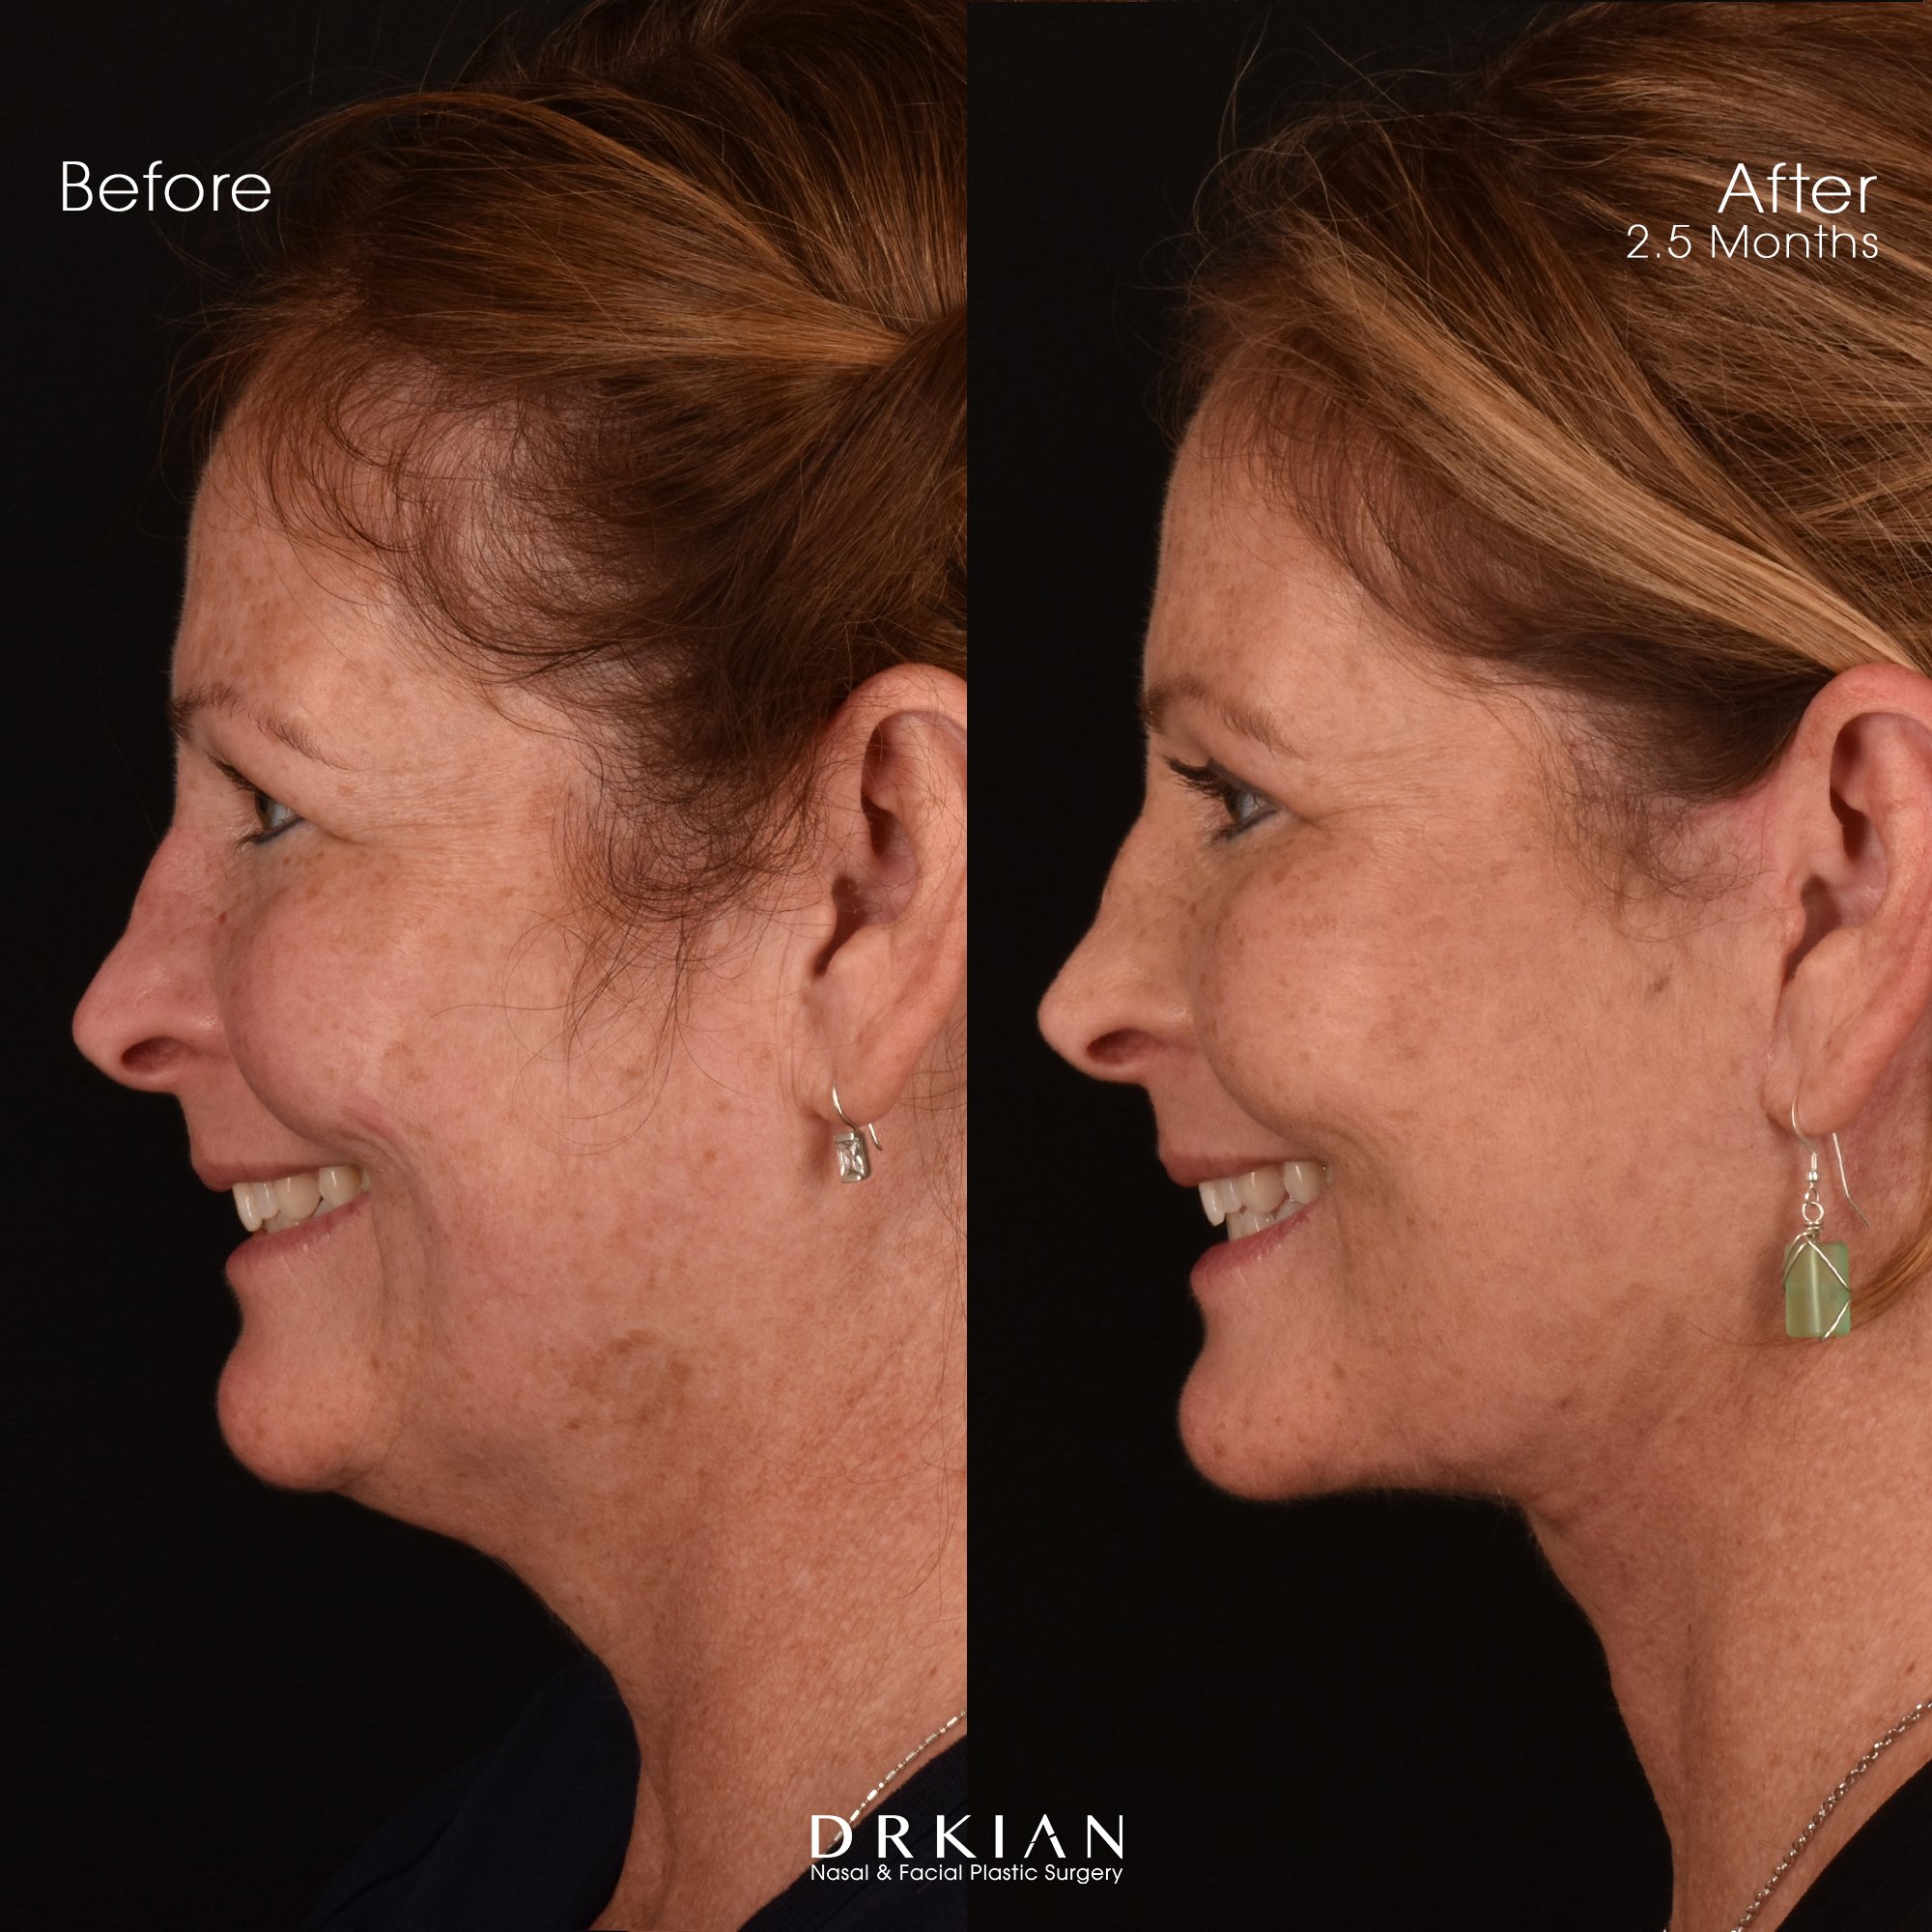
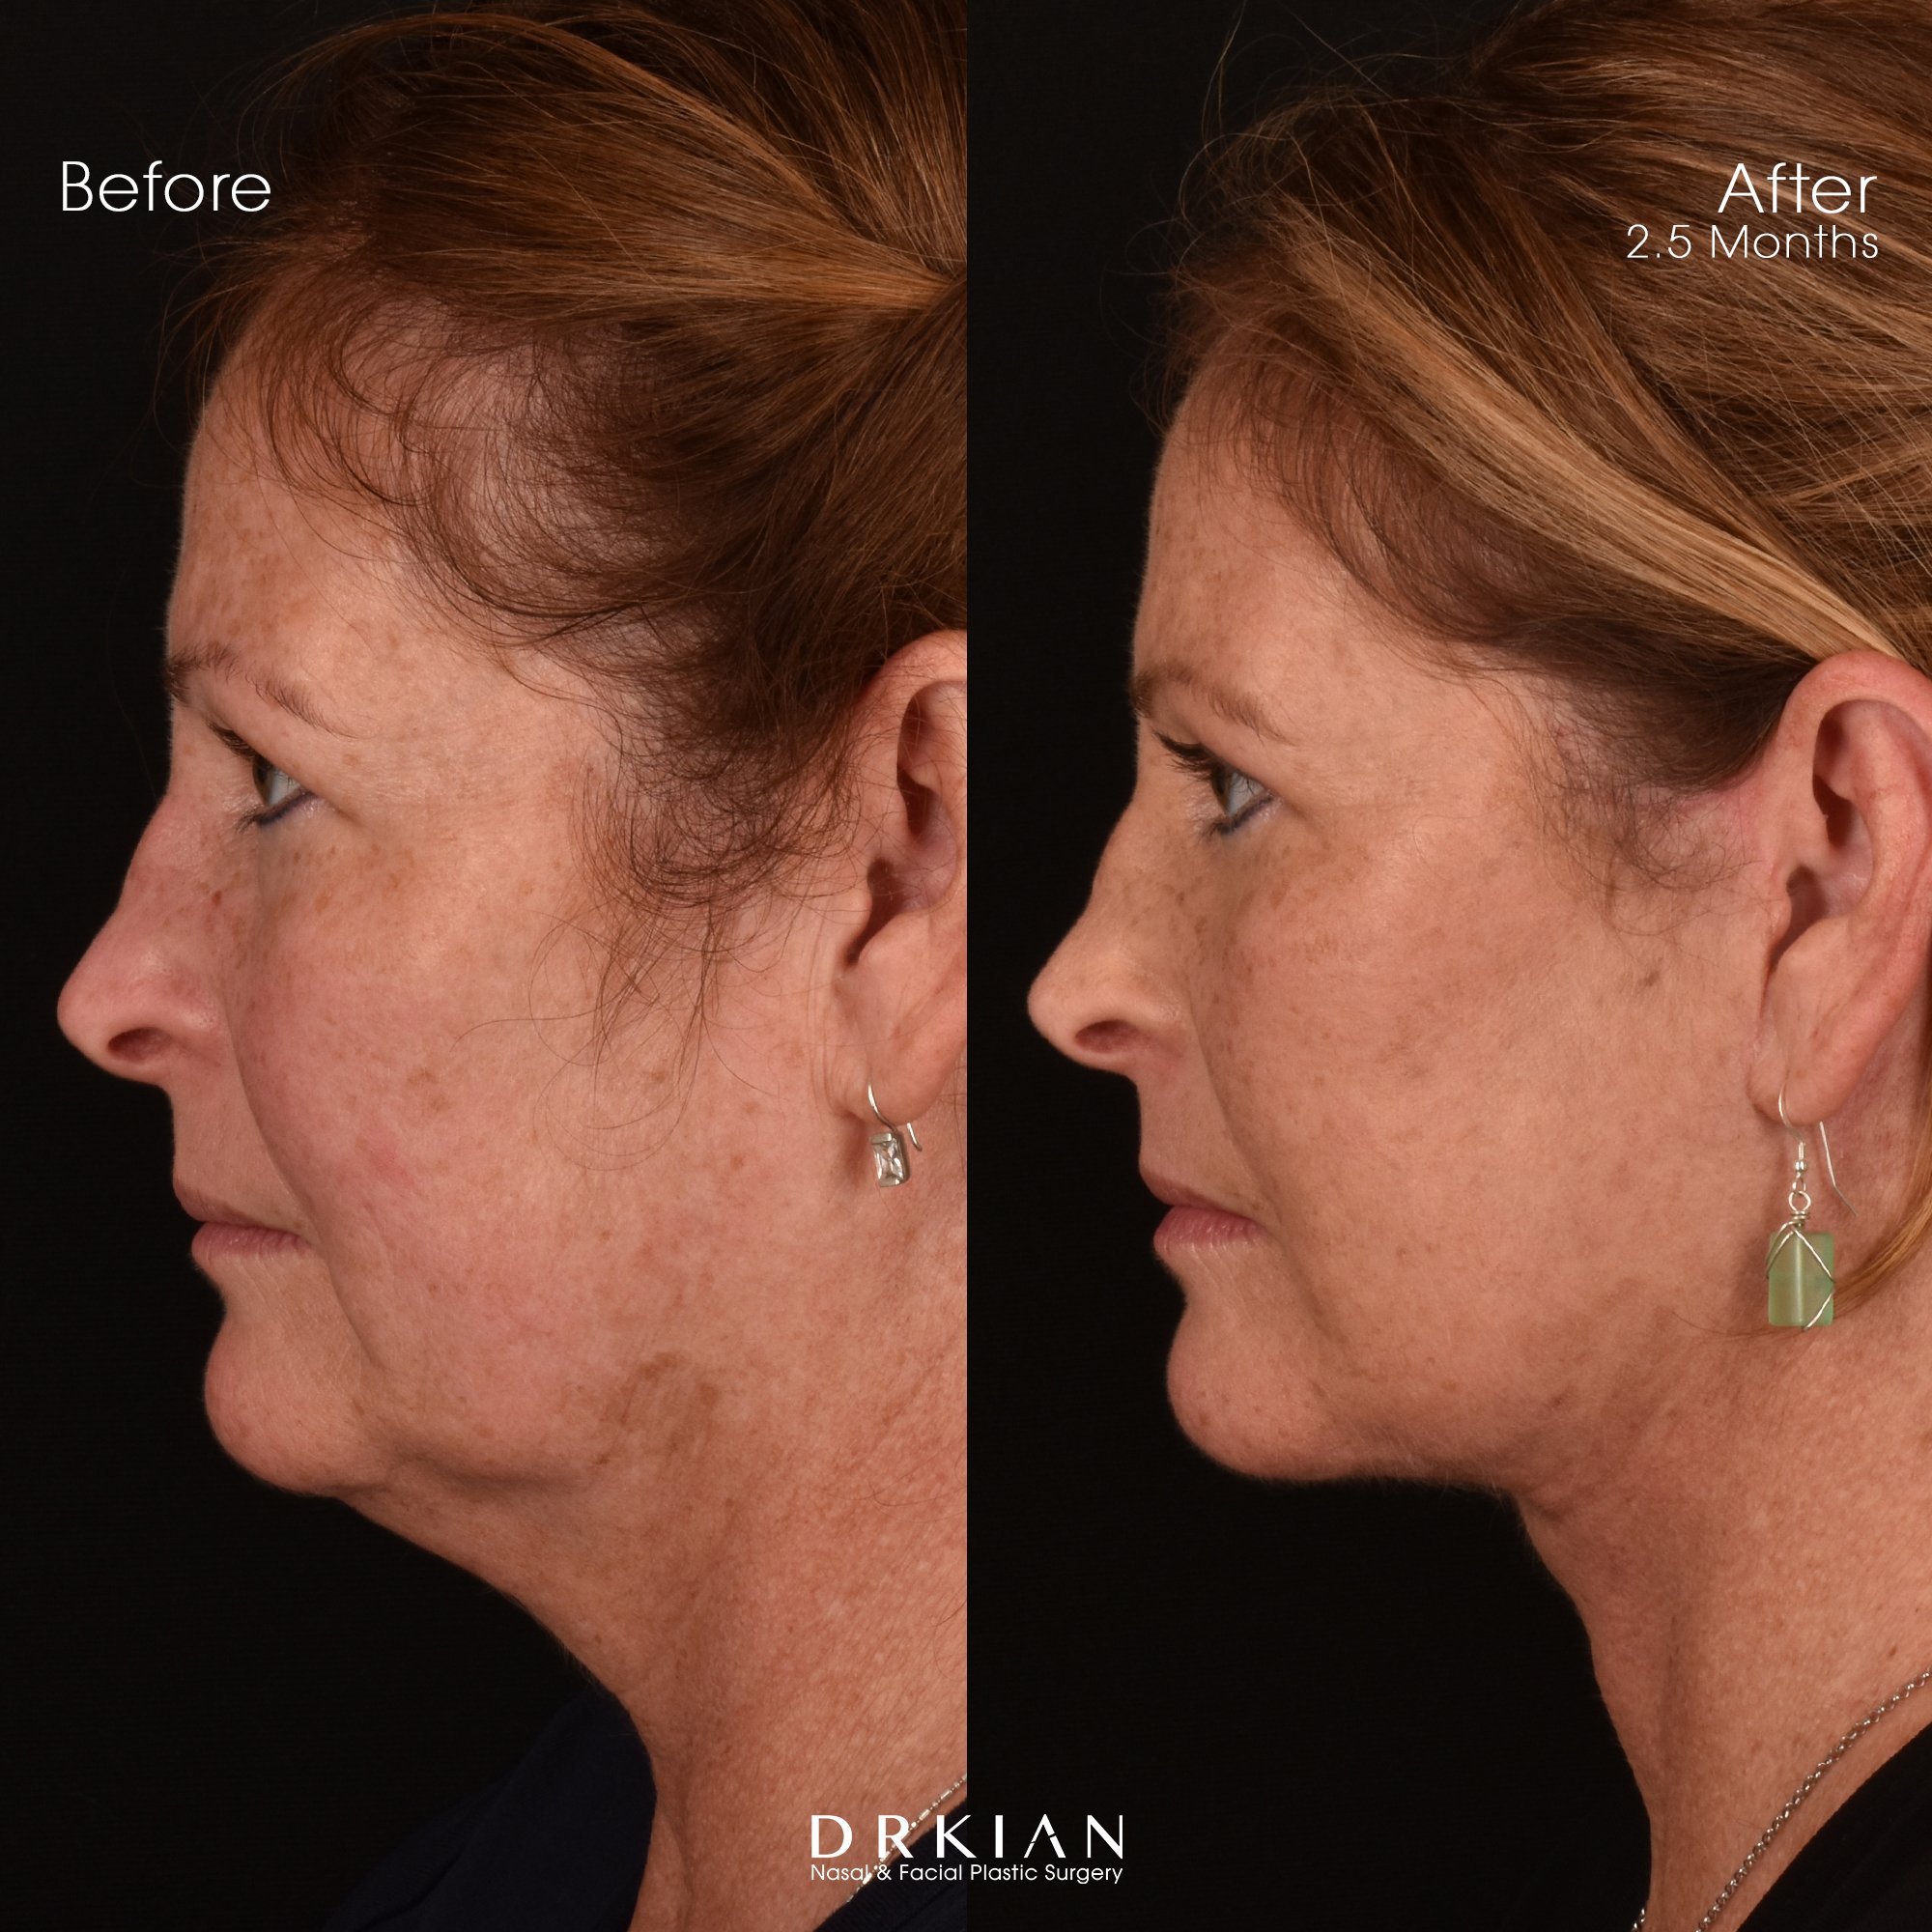
Lower Face & Neck Lift with Upper & Lower Blepharoplasty + Fat Repositioning: Before & After Two and a Half Months
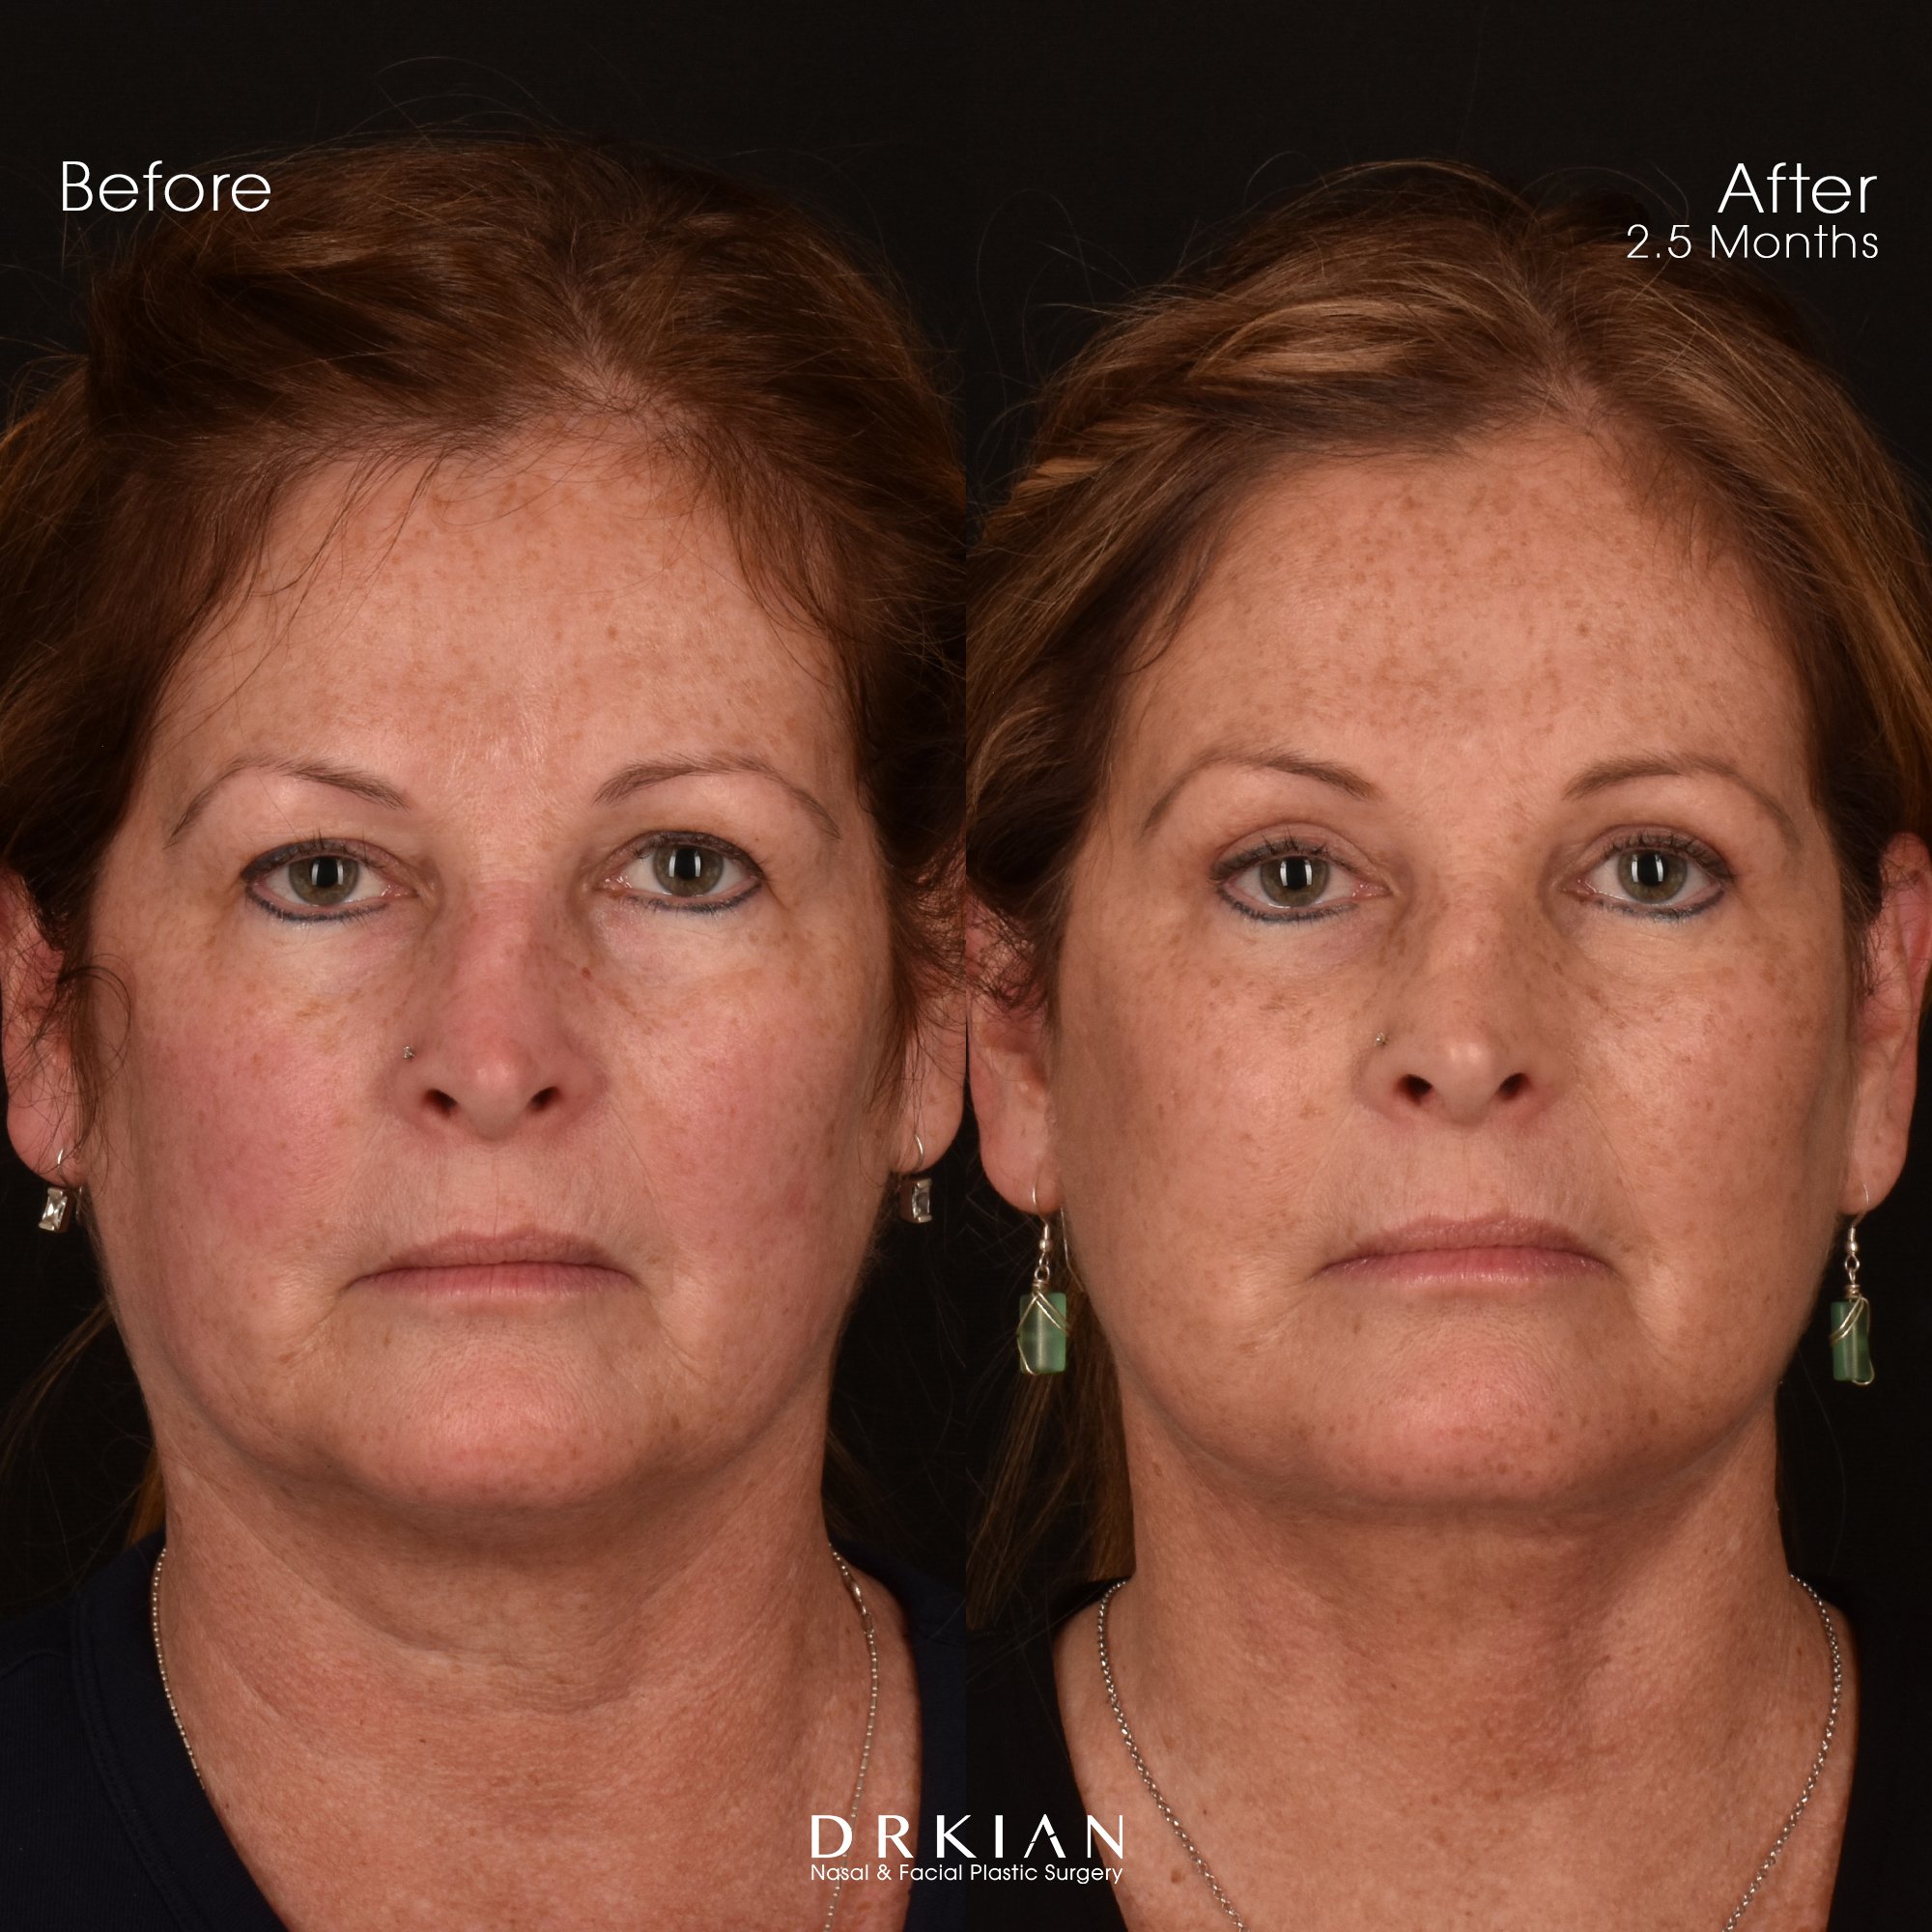
Lower Face & Neck Lift with Upper & Lower Blepharoplasty + Fat Repositioning: Before & After Two and a Half Months

Lower Face & Neck Lift with Upper & Lower Blepharoplasty + Fat Repositioning: Before & After Two and a Half Months

Lower Face & Neck Lift with Upper & Lower Blepharoplasty + Fat Repositioning: Before & After Two and a Half Months
Lower Face & Neck Lift with Upper & Lower Blepharoplasty + Fat Repositioning: Before & After Two and a Half Months
Lower Face & Neck Lift with Upper & Lower Blepharoplasty + Fat Repositioning: Before & After Two and a Half Months

Lower Face & Neck Lift with Upper & Lower Blepharoplasty + Fat Repositioning: Before & After Two and a Half Months

Lower Face & Neck Lift with Upper & Lower Blepharoplasty + Fat Repositioning: Before & After Two and a Half Months
Lower Face & Neck Lift with Upper & Lower Blepharoplasty + Fat Repositioning: Before & After Two and a Half Months
Lower Face & Neck Lift with Upper & Lower Blepharoplasty + Fat Repositioning: Before & After Two and a Half Months
Lower Face & Neck Lift with Upper & Lower Blepharoplasty + Fat Repositioning: Before & After Two and a Half Months
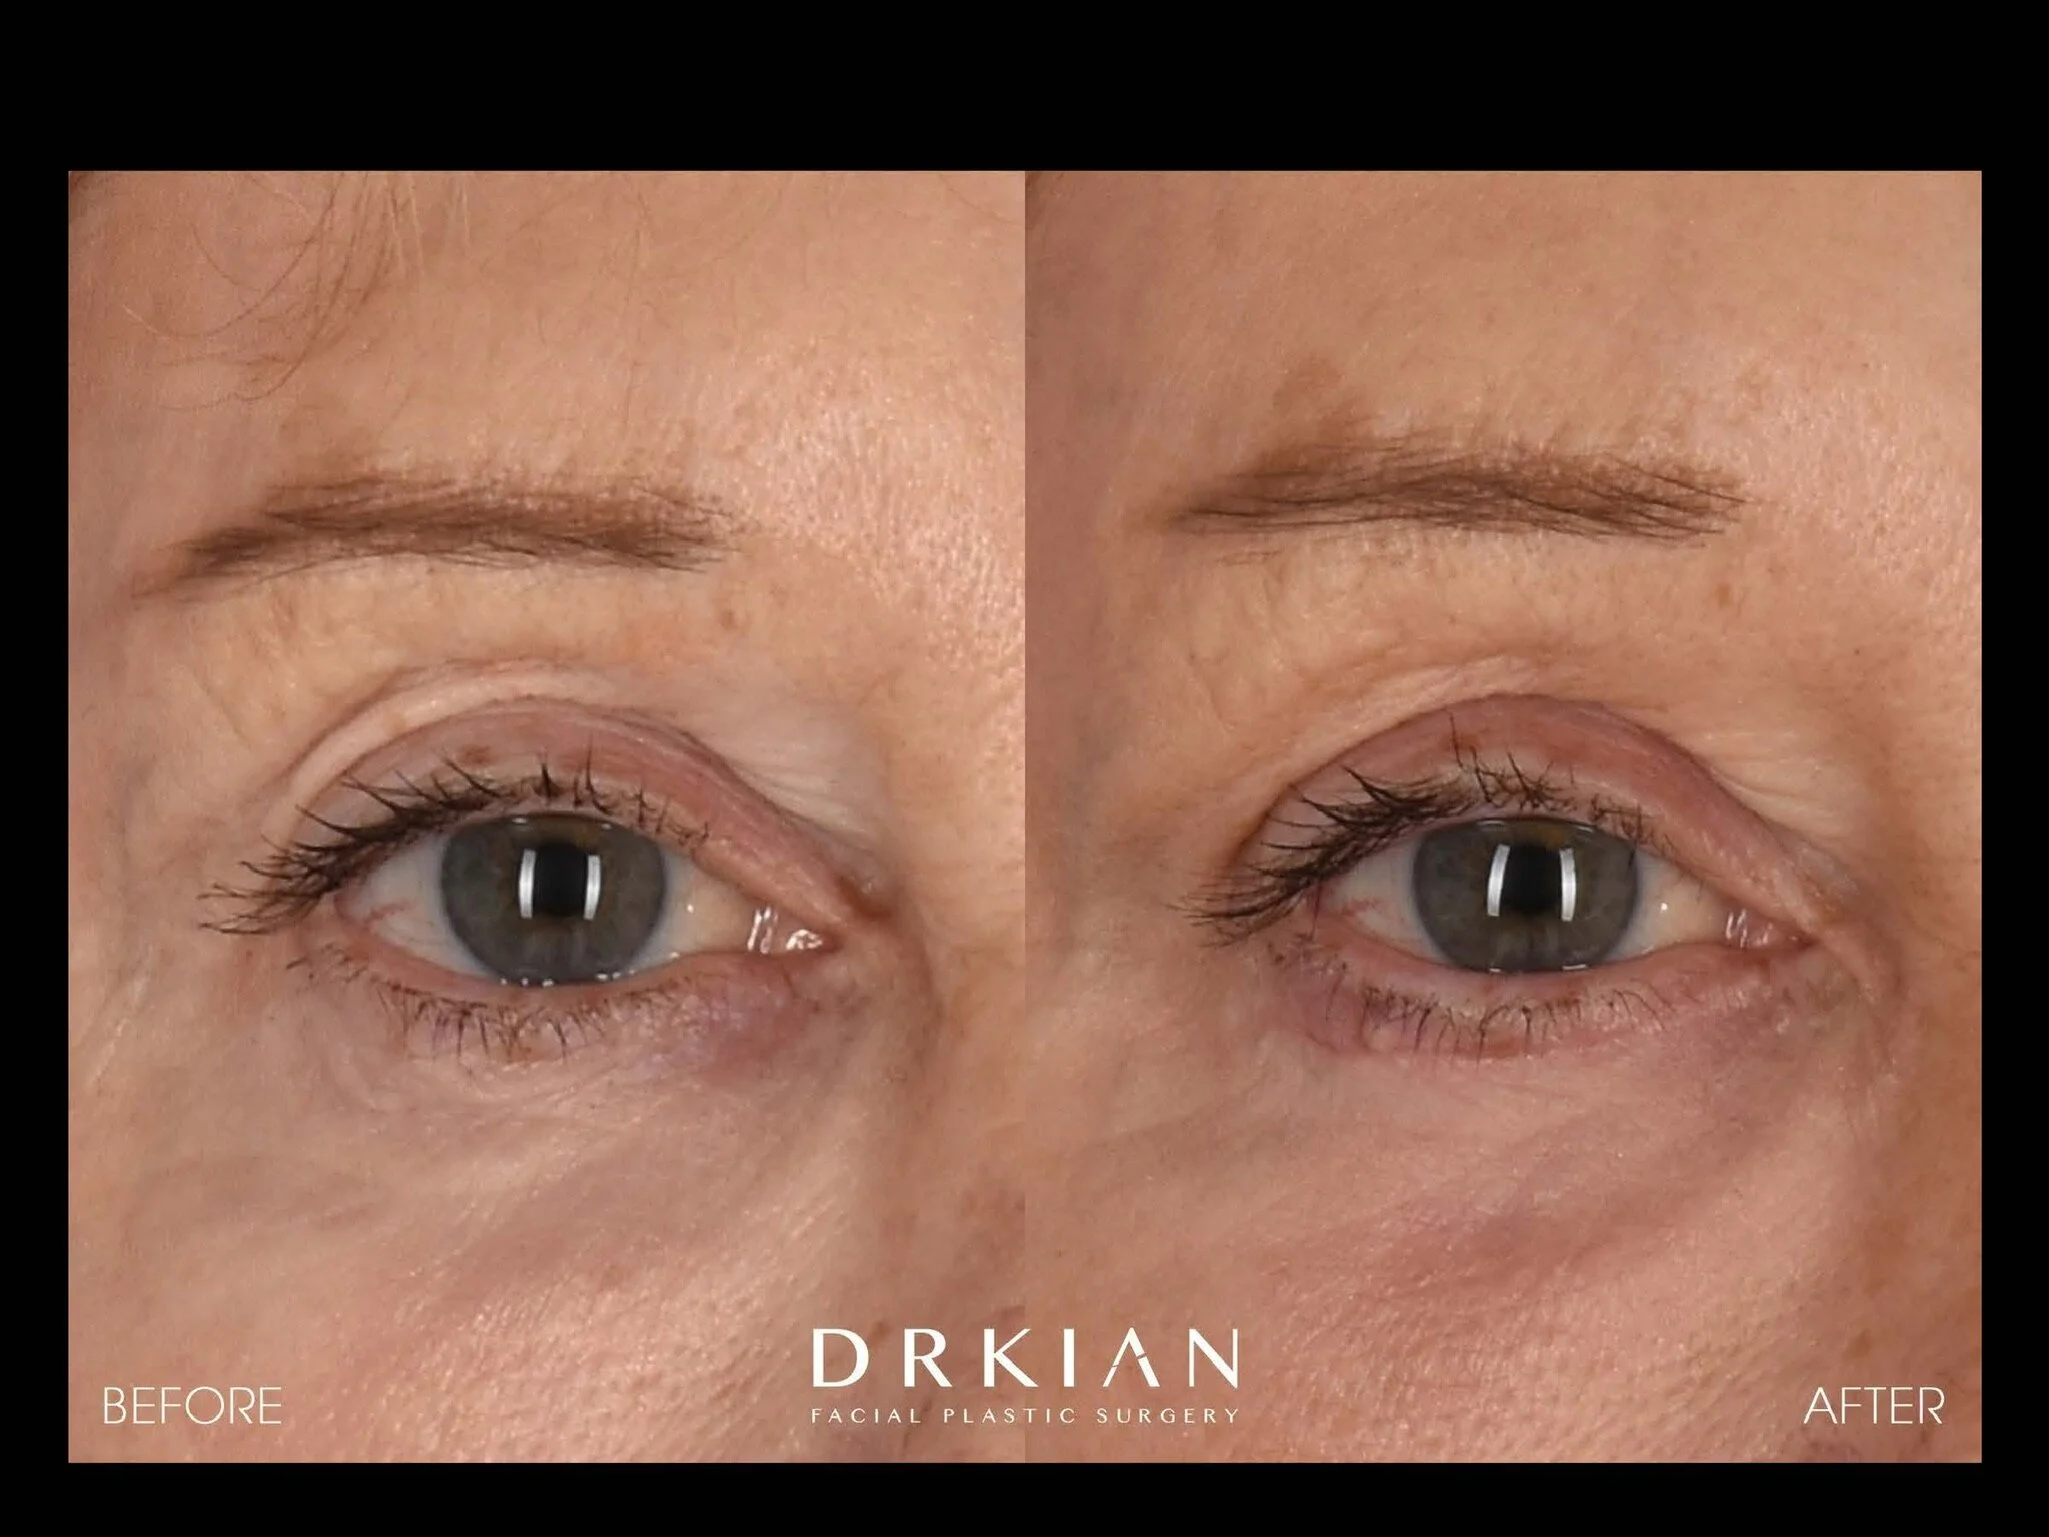
Upper Blepharoplasty (Under Local Anesthesia): Before & After Three Months

Upper Blepharoplasty (Under Local Anesthesia): Before & After Three Months

Upper Blepharoplasty (Under Local Anesthesia): Before & After Three Months
Upper Blepharoplasty (Under Local Anesthesia): Before & After Three Months
Upper Blepharoplasty (Under Local Anesthesia): Before & After Three Months

Upper Blepharoplasty (Under Local Anesthesia): Before & After Three Months
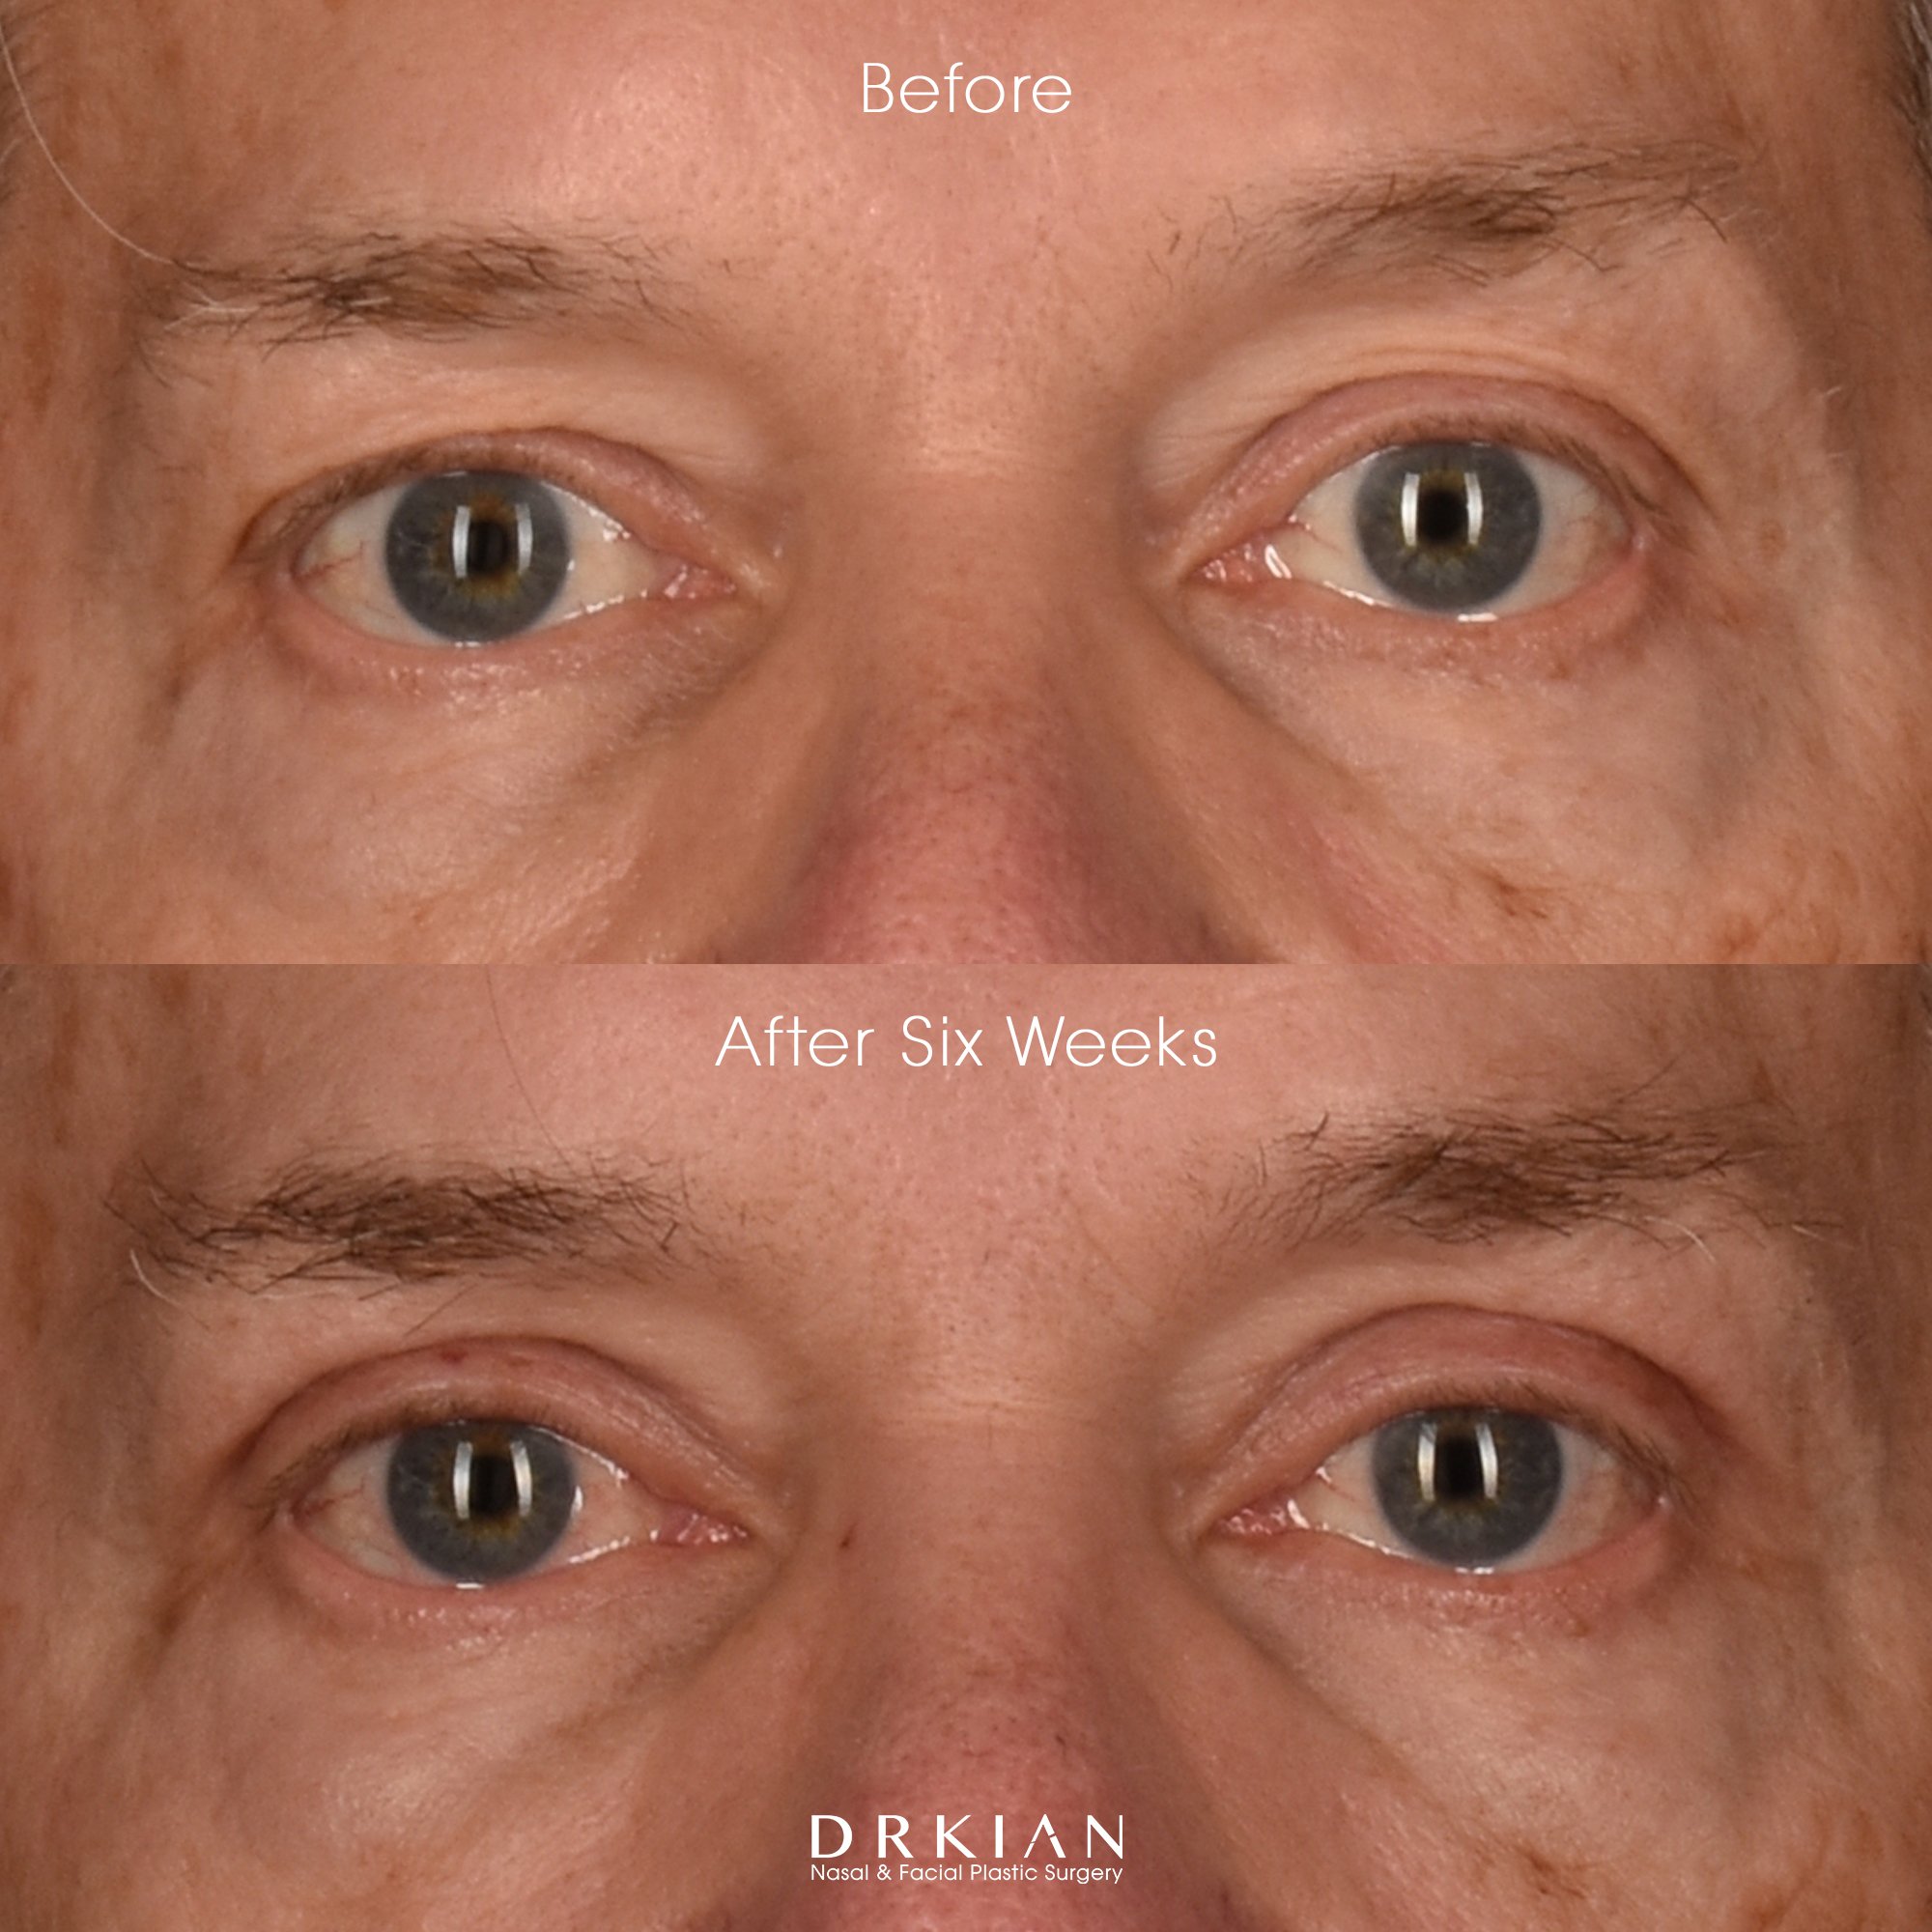
Upper Blepharoplasty (Under Local Anesthesia): Before & After Six Weeks

Upper Blepharoplasty (Under Local Anesthesia): Before & After Six Weeks

Upper Blepharoplasty (Under Local Anesthesia): Before & After Six Weeks

Upper Blepharoplasty (Under Local Anesthesia): Before & After Six Weeks

Upper Blepharoplasty (Under Local Anesthesia): Before & After Six Weeks
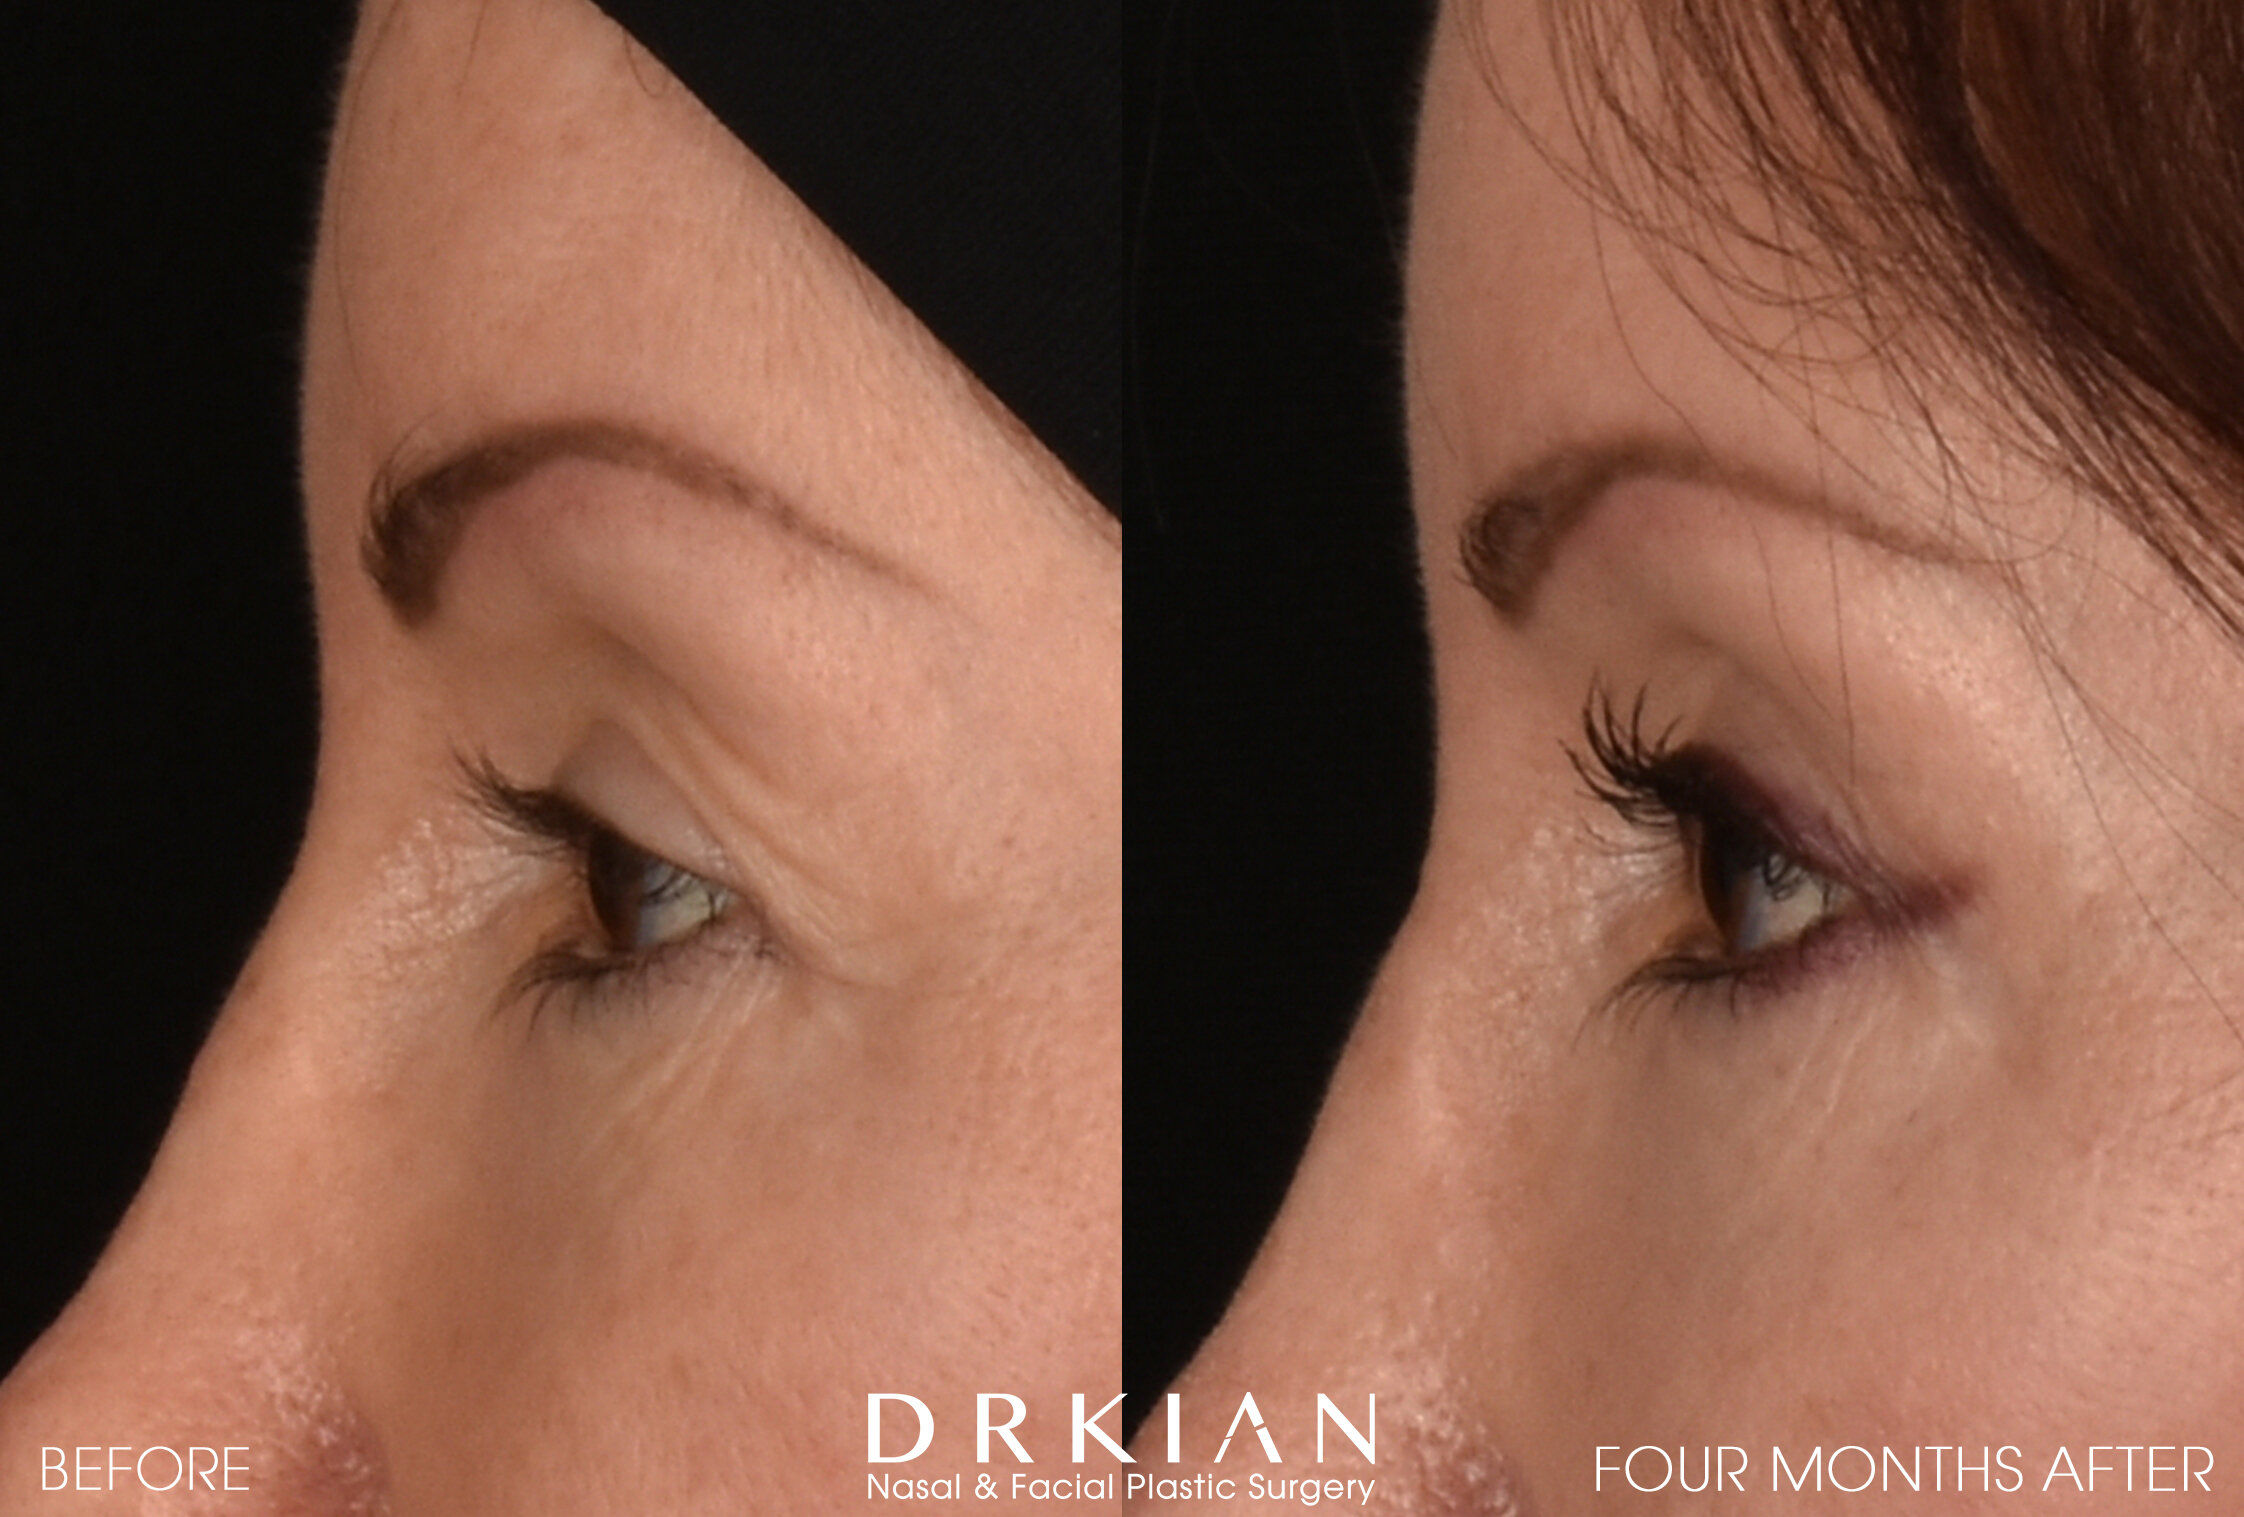
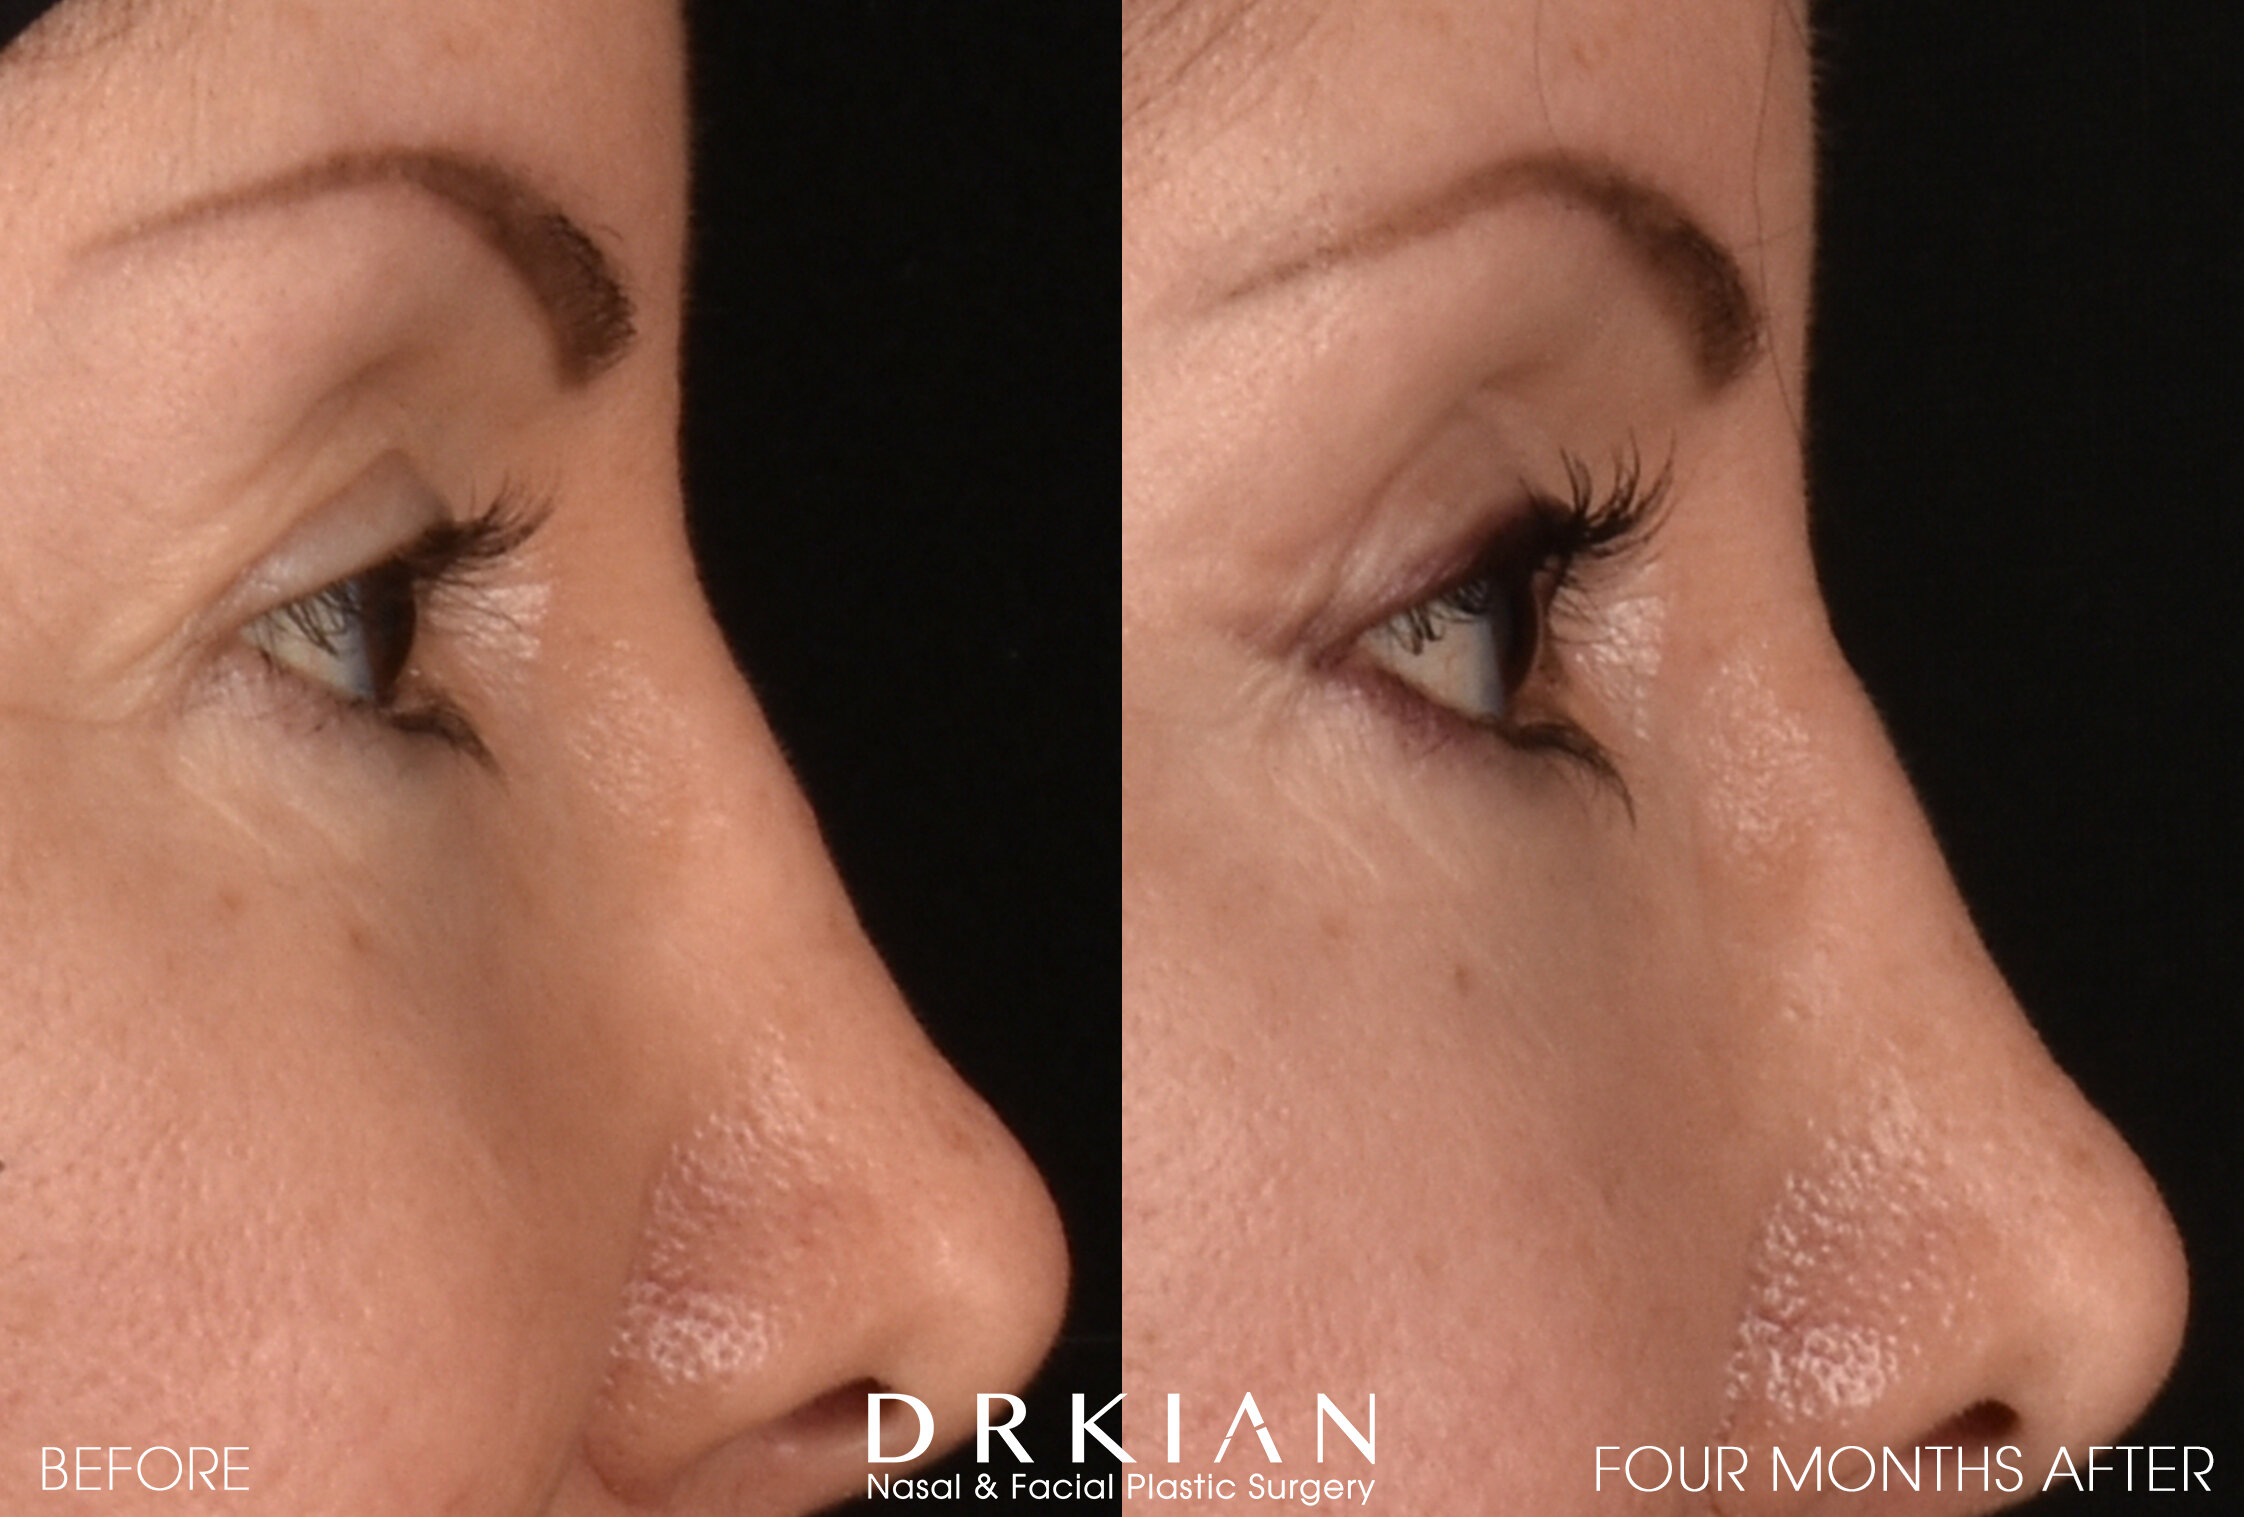
Upper Blepharoplasty Before & After Four Months

Upper Blepharoplasty Before & After Four Months
Upper Blepharoplasty Before & After Four Months
Upper Blepharoplasty Before & After Four Months
Upper Blepharoplasty Before & After Four Months
Upper Blepharoplasty Before & After Four Months
Upper Blepharoplasty Before & After Four Months

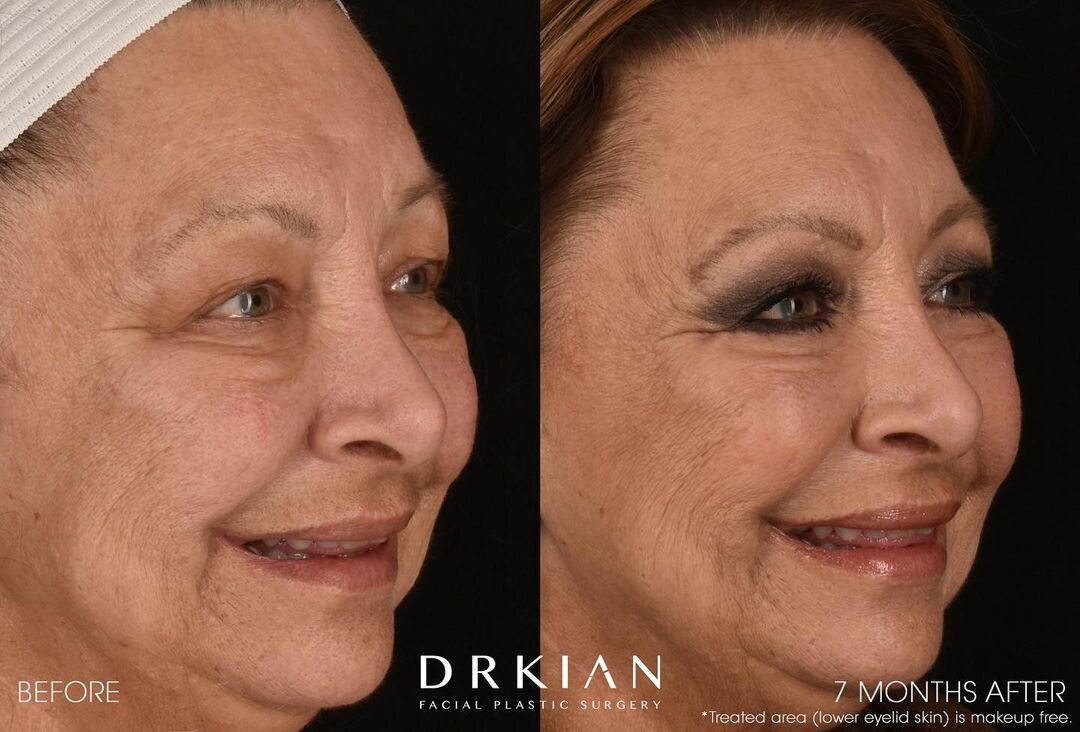
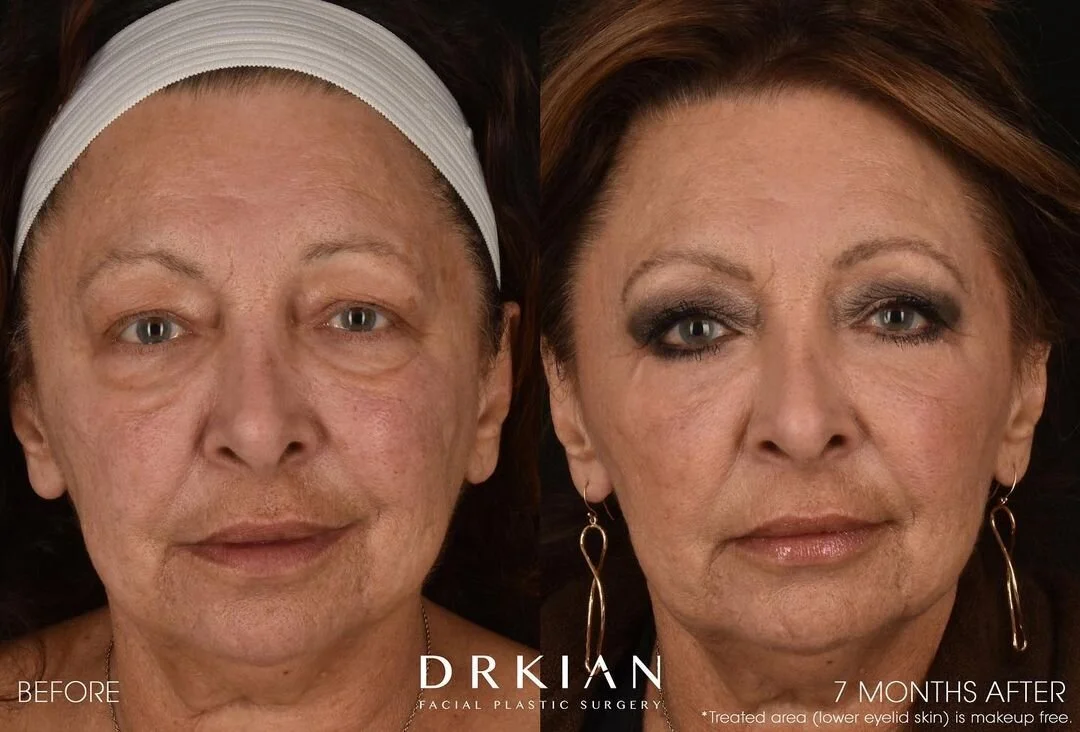
Extended Lower Eyelid Skin Pinch Before & After 7 Months

Extended Lower Eyelid Skin Pinch Before & After 7 Months
Extended Lower Eyelid Skin Pinch Before & After 7 Months

Extended Lower Eyelid Skin Pinch Before & After 7 Months

Extended Lower Eyelid Skin Pinch Before & After 7 Months
Extended Lower Eyelid Skin Pinch Before & After 7 Months

Extended Lower Eyelid Skin Pinch Before & After 7 Months


Upper Blepharoplasty Before & After 3 Months

Upper Blepharoplasty Before & After 3 Months

Upper Blepharoplasty Before & After 3 Months

Upper Blepharoplasty Before & After 3 Months

Blepharoplasty Before & After 3 Weeks
Blepharoplasty Before & After 3 Weeks

Blepharoplasty Before & After 3 Weeks
Blepharoplasty Before & After 3 Weeks
Blepharoplasty Before & After 3 Weeks

Blepharoplasty Before & After 3 Weeks


Upper Blepharoplasty Before & After 3 Months

Upper Blepharoplasty Before & After 3 Months

Upper Blepharoplasty Before & After 3 Months

Upper Blepharoplasty Before & After 3 Months
Upper Blepharoplasty Before & After 3 Months

Upper Blepharoplasty Before & After 3 Months

Upper & Lower Blepharoplasty with Lower Skin Pinch and Fat Repositioning Before & After 2 Weeks

Upper & Lower Blepharoplasty with Lower Skin Pinch and Fat Repositioning Before & After 2 Weeks

Upper & Lower Blepharoplasty with Lower Skin Pinch and Fat Repositioning Before & After 2 Weeks

Upper & Lower Blepharoplasty with Lower Skin Pinch and Fat Repositioning Before & After 2 Weeks

Upper & Lower Blepharoplasty with Lower Skin Pinch and Fat Repositioning Before & After 2 Weeks

Upper & Lower Blepharoplasty with Lower Skin Pinch and Fat Repositioning Before & After 2 Weeks

Upper Blepharoplasty Before & After 1 Month
Upper Blepharoplasty Before & After 1 Month

Upper Blepharoplasty Before & After 1 Month

Upper Blepharoplasty Before & After 1 Month

Upper Blepharoplasty Before & After 1 Month

Upper Blepharoplasty Before & After 1 Month
Upper Blepharoplasty Before & After 11 Weeks
Upper Blepharoplasty Before & After 11 Weeks
Upper Blepharoplasty & MIcro Neck Lift Before & After 11 Weeks
Upper Blepharoplasty Before & After 11 Weeks